Brookside Deep Retrofit
This retrofit was one of the first three panelized deep retrofits ever done on single-family homes in North America.
| Building Type | Single-Family Bungalow | Location | Edmonton, AB |
| Year Built | 1969 | Foundation Type | Concrete (Full Basement) |
| Structure Type | Wood-Framed | Post-Retrofit Total Floor Area | 223.8m2 |
| Climate Zone | 7a | Heating Degree Days | 5120 |
| Retrofit Status | Complete | Year Completed | 2023 |
| Retrofit Phasing | No | Geometry Changed | No |
| Annual Energy Savings | 87.5% | Operational Carbon Savings | 4.05 tCO2eq/yt |
| Retrofit Type | Envelope and Mechanical | Performance Level | Net-Zero Ready |
Project Team
- Butterwick Projects ( Builder )
Project Priorities
- Reduce Energy Consumption
- Achieve Net Zero or Net Zero Ready
- Increase Thermal Comfort
- Improve Indoor Air Quality
- Reduce GHG Emissions
- Repair and/or Renew Exterior
Upgrades
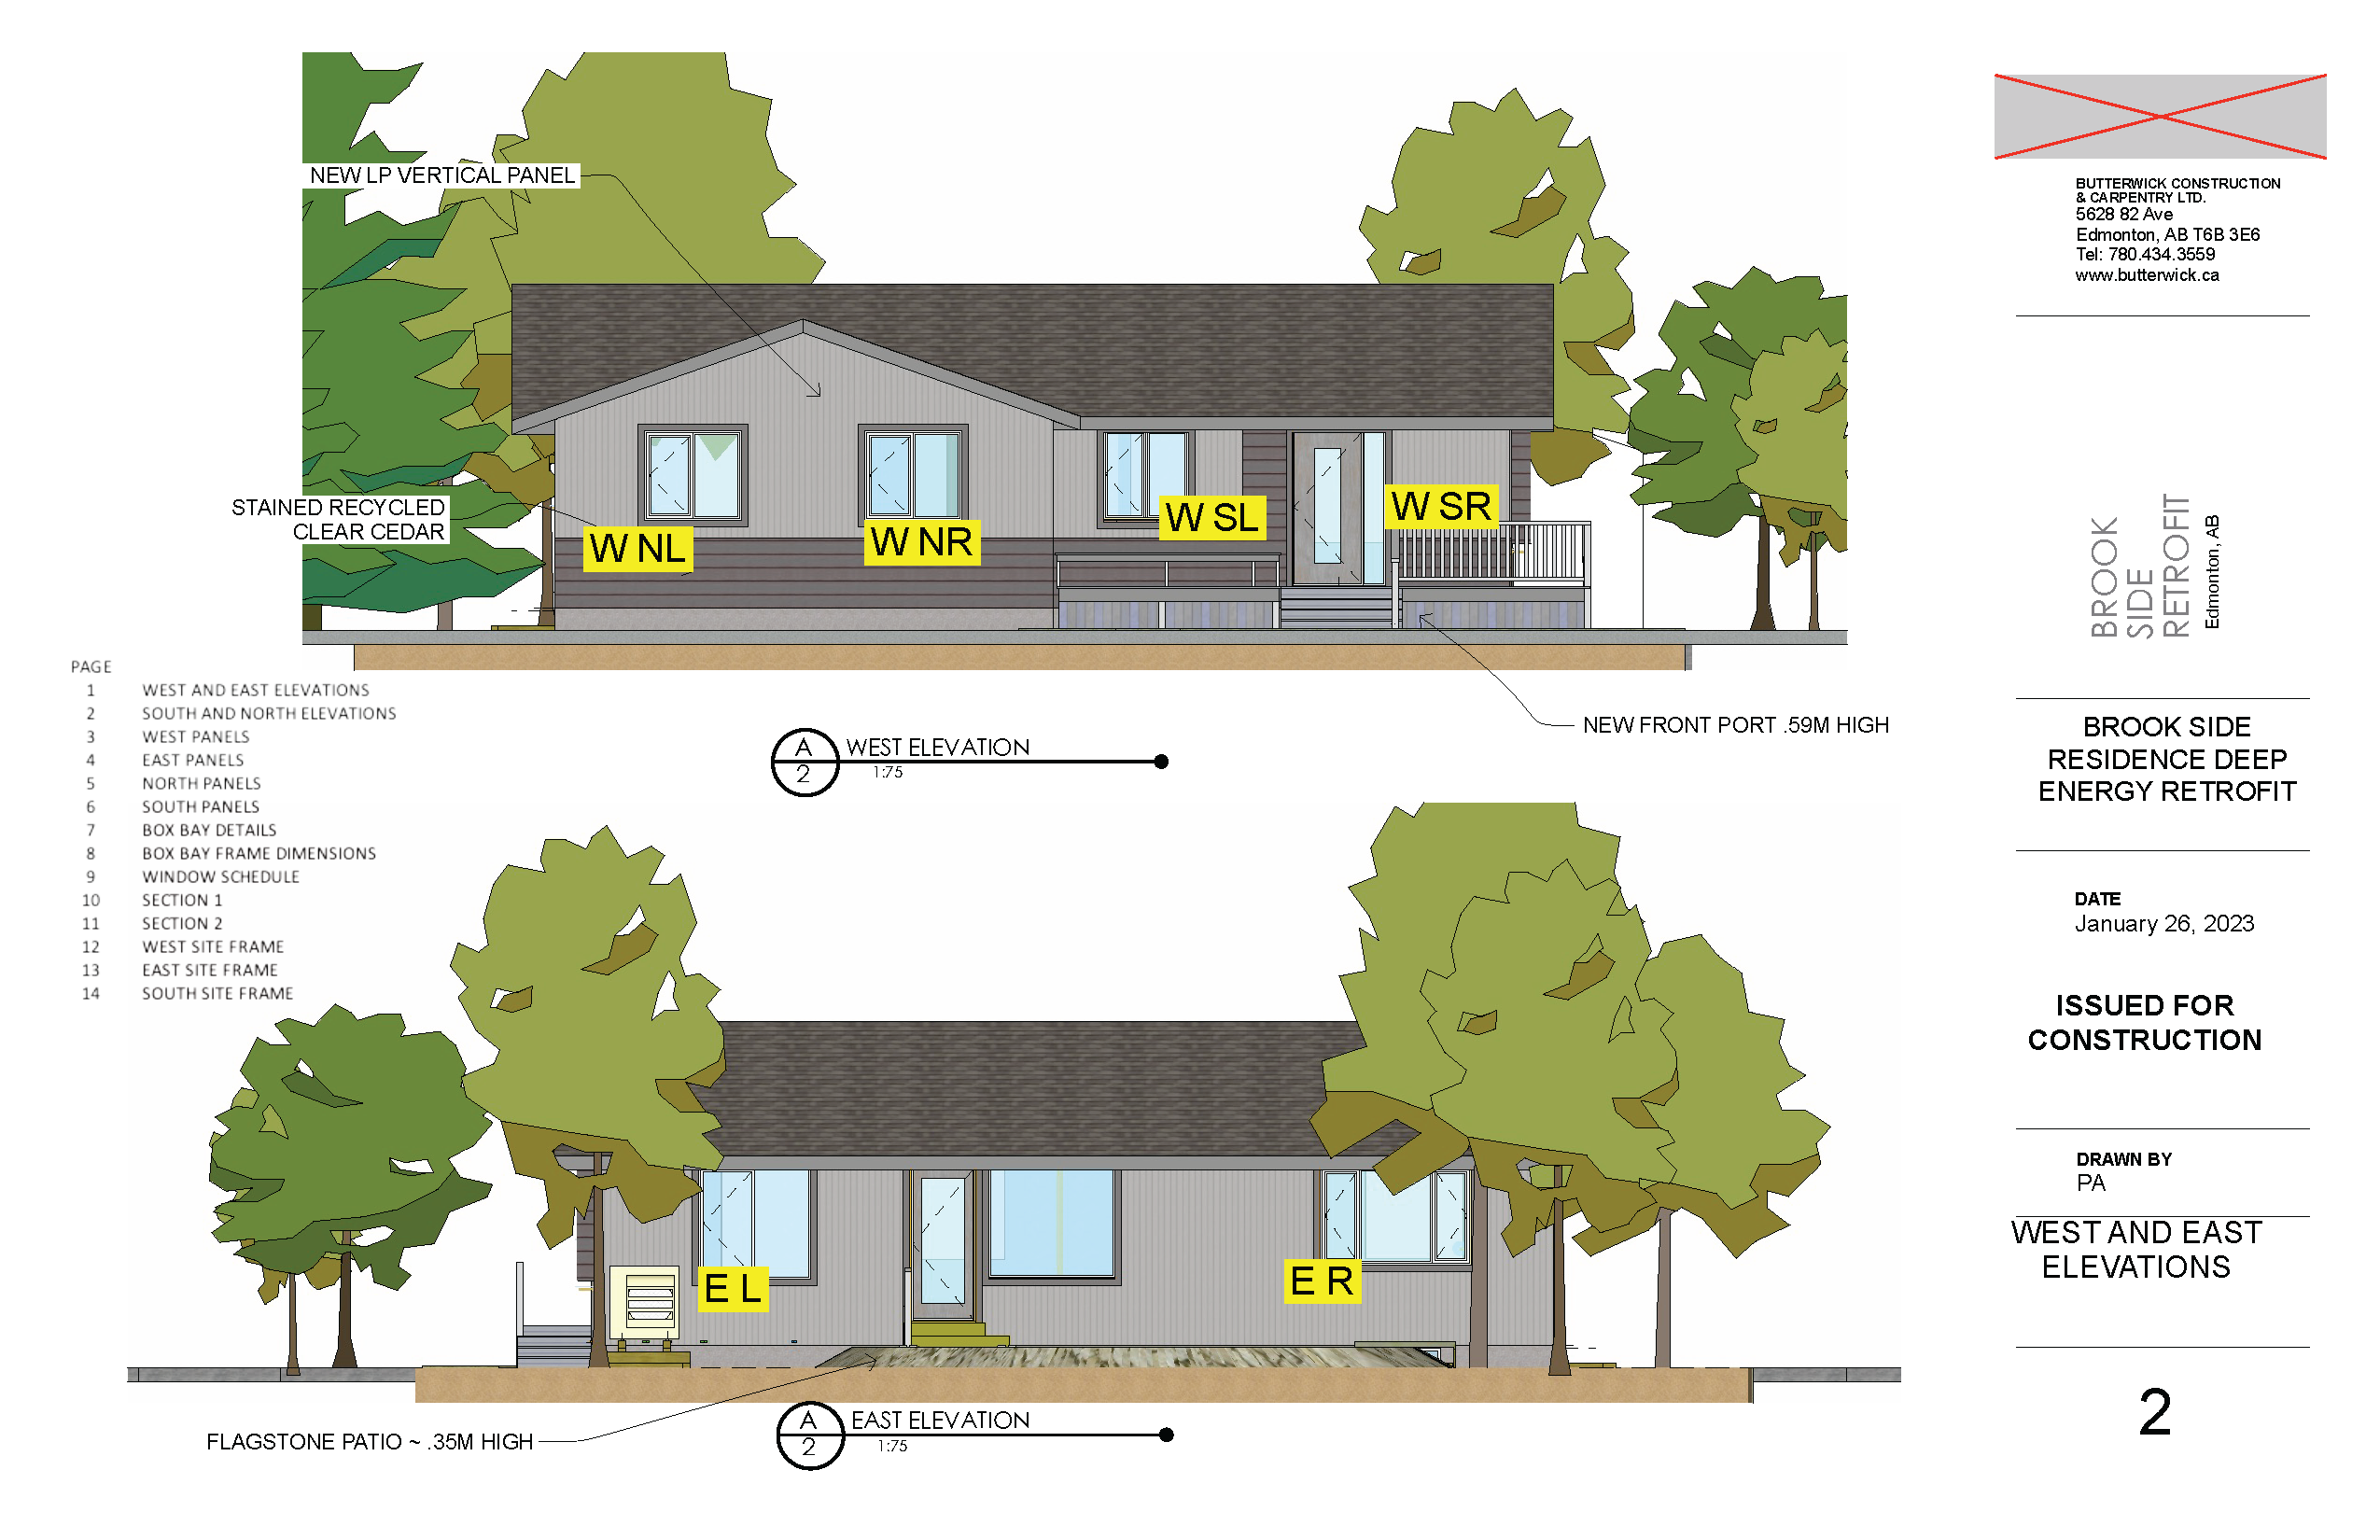
- Super insulated, airtight building envelope
- High-performing windows
- Energy Recovery Ventilator
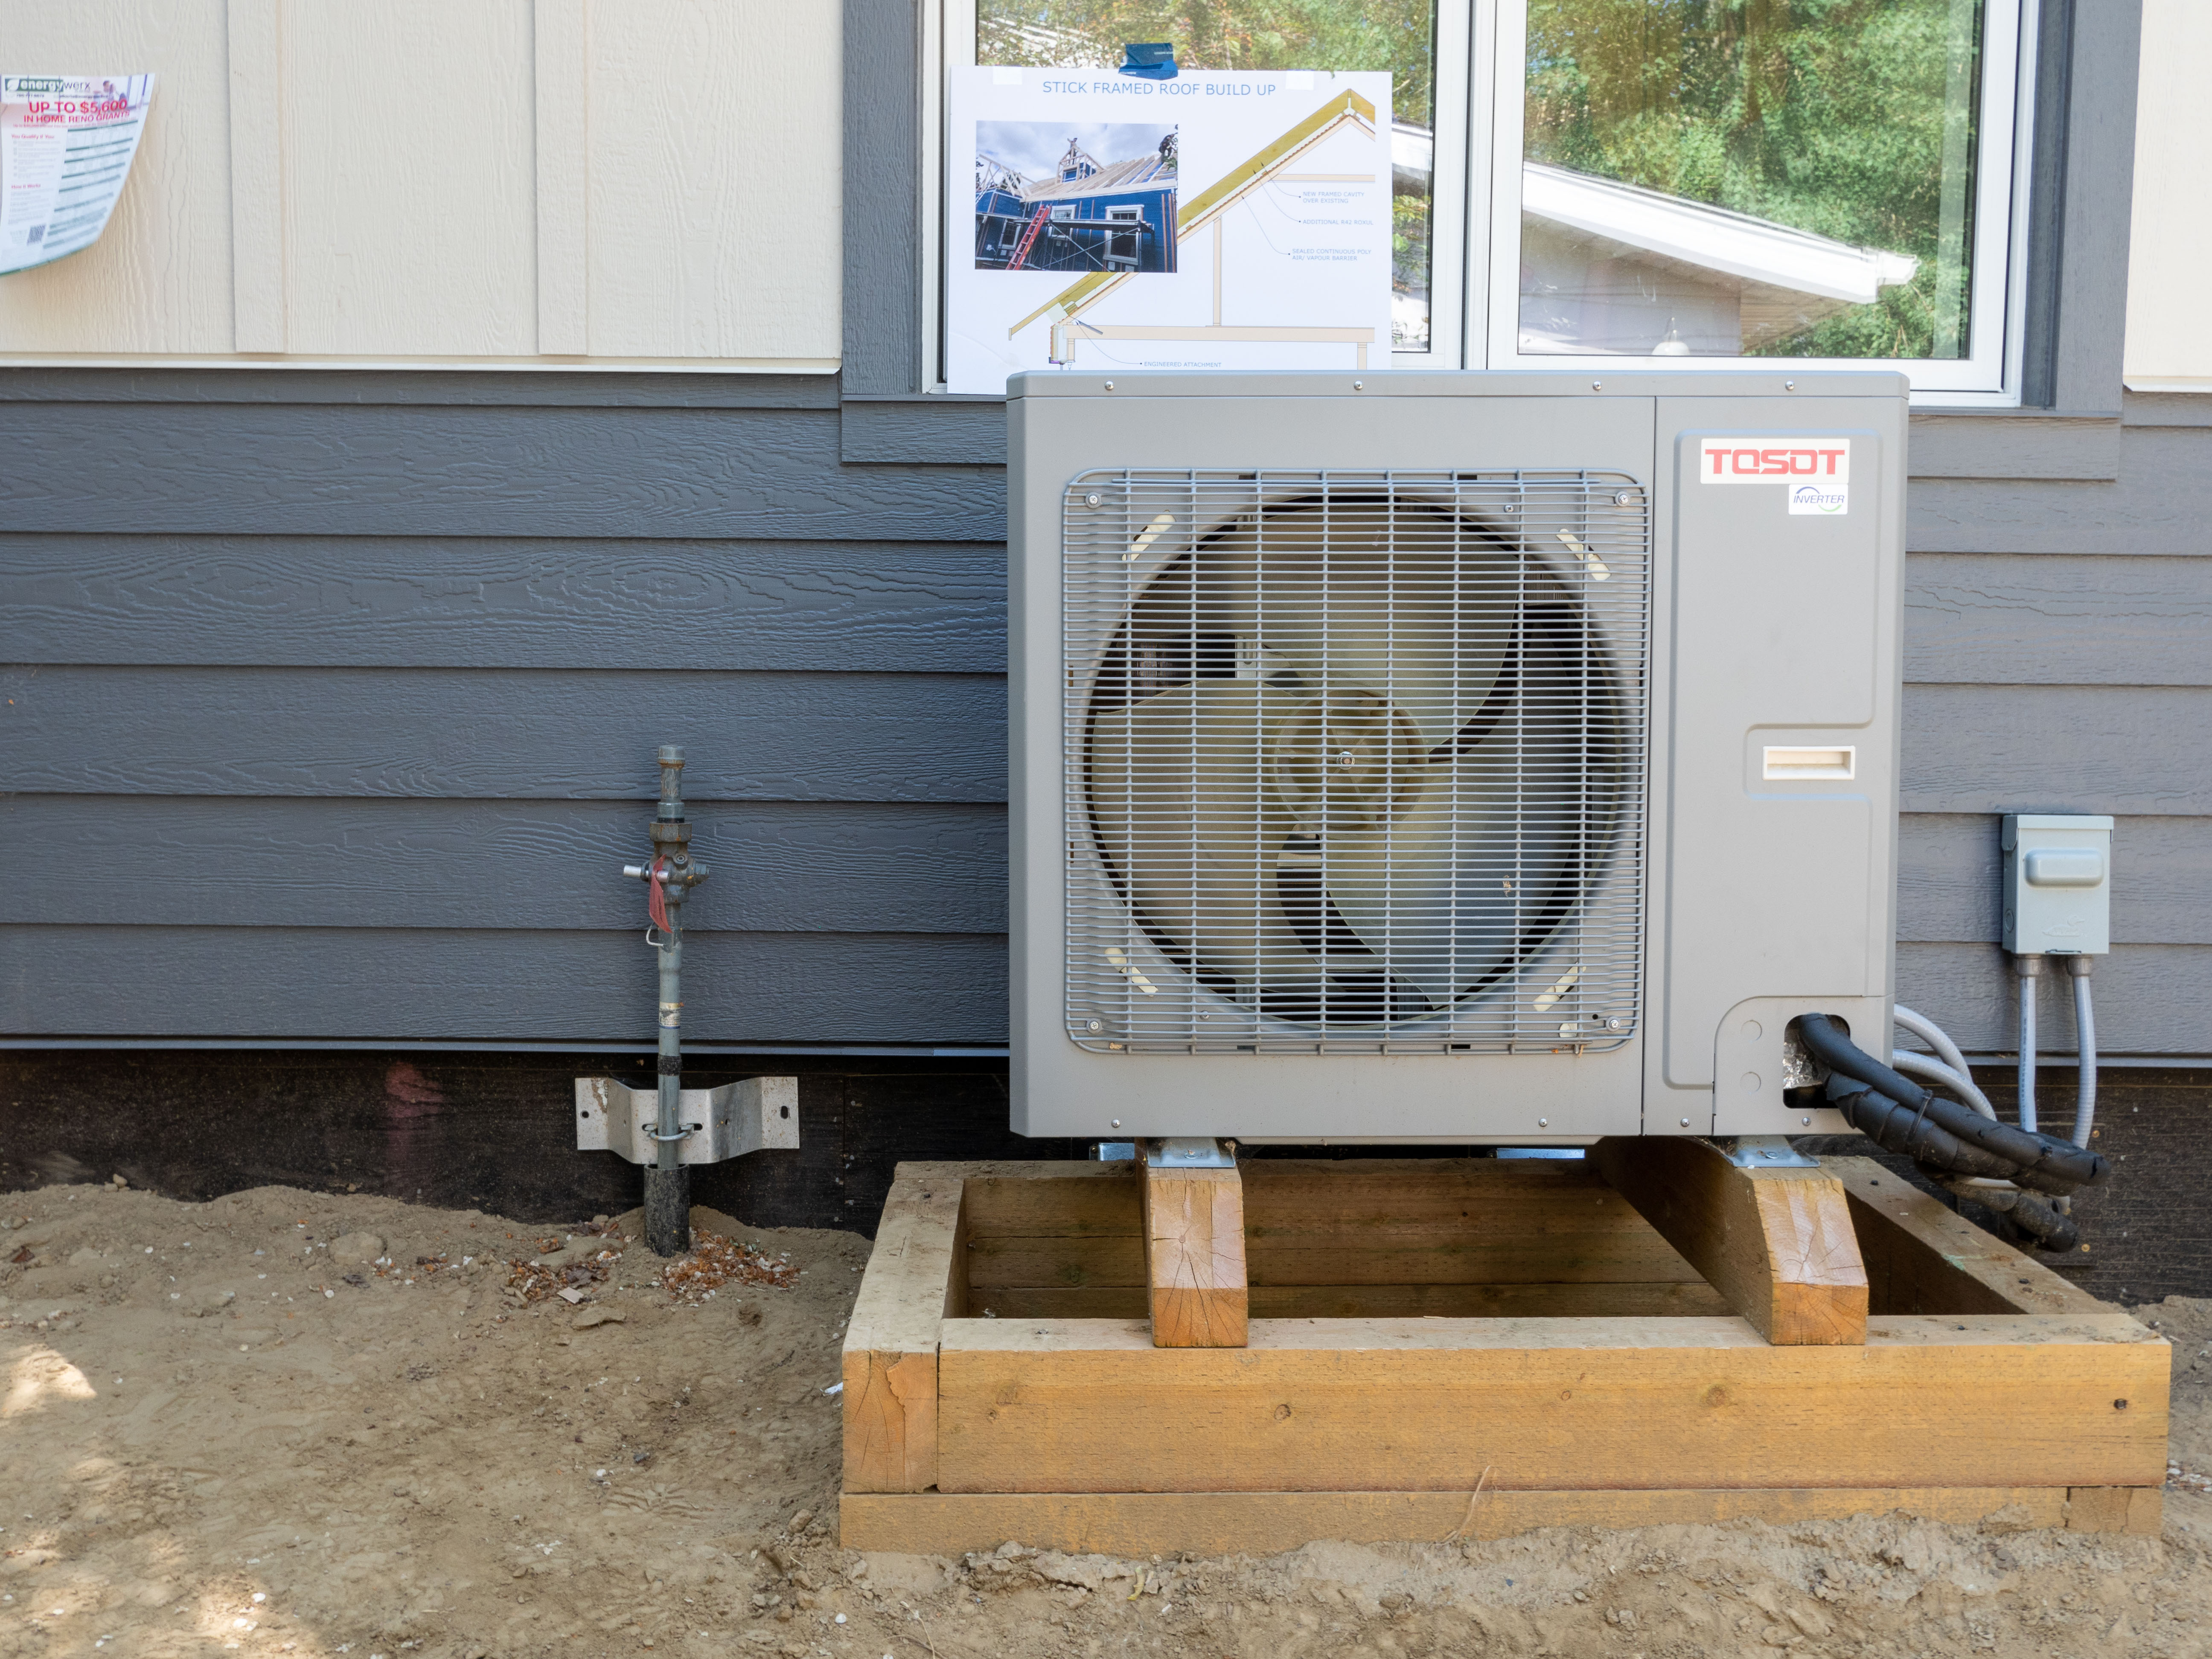
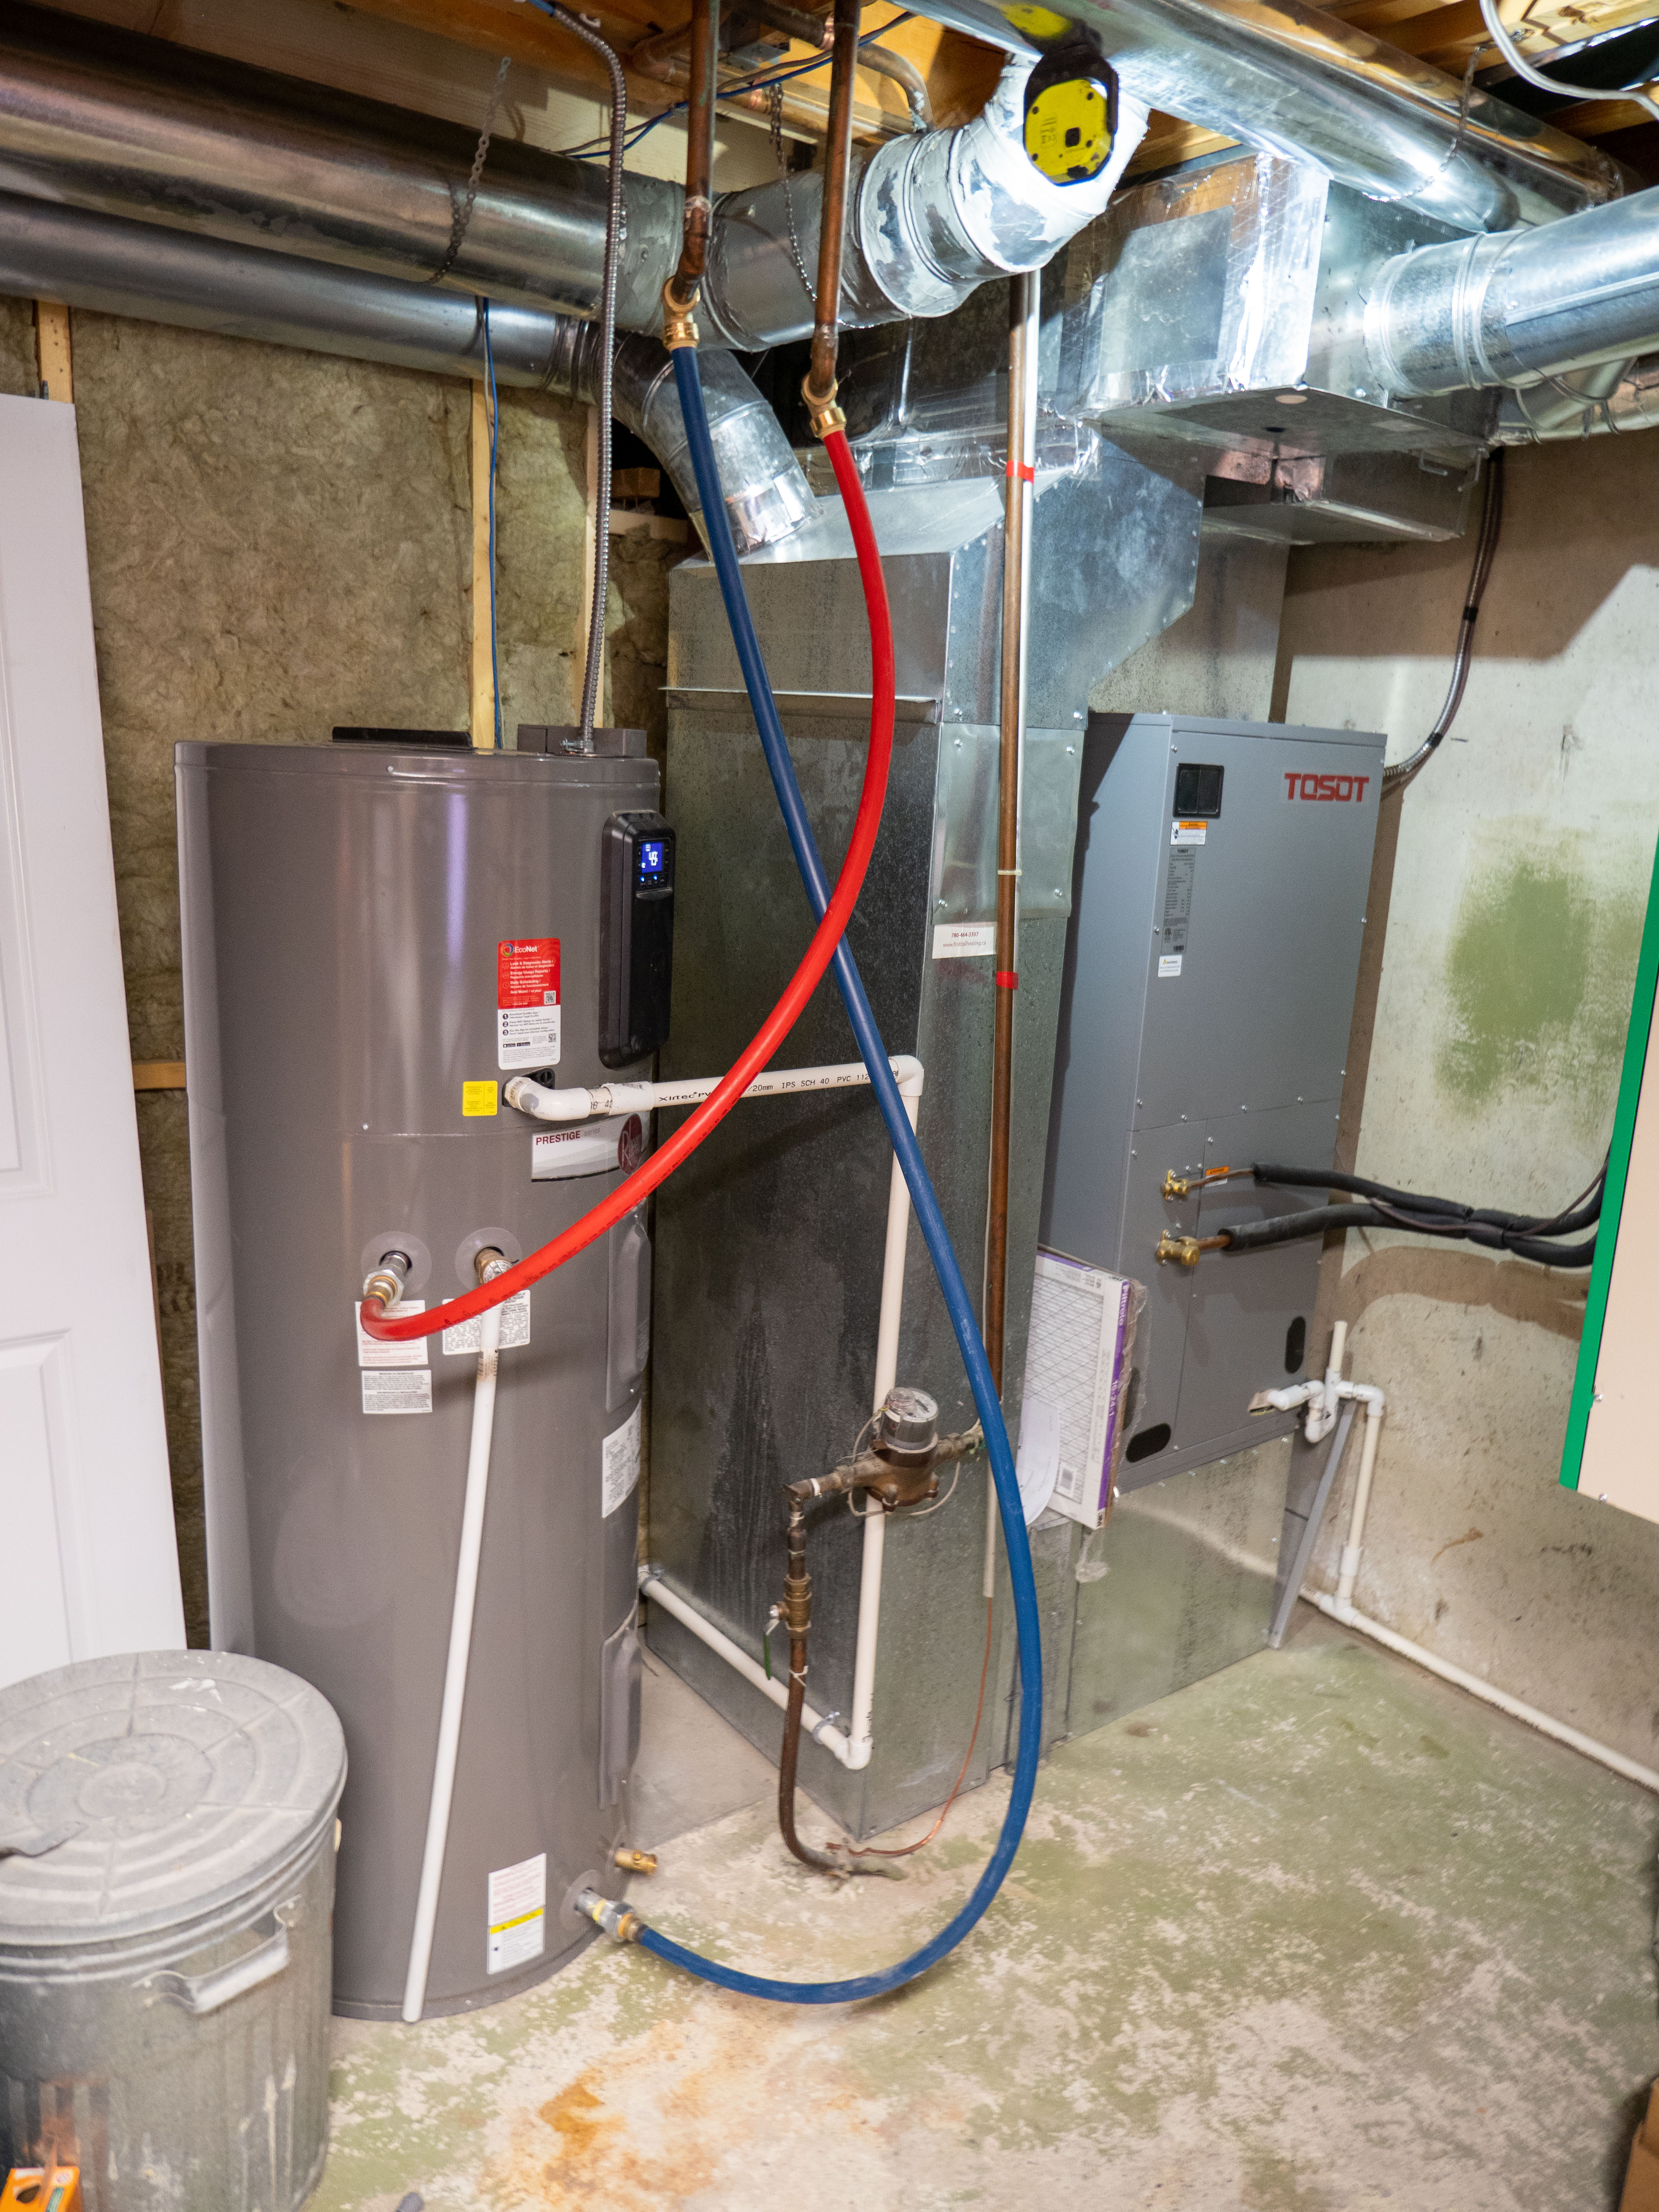
- Air Source Heat Pump for heating and cooling
- Heat Pump Hot Water
Project Description
Planning the Retrofit
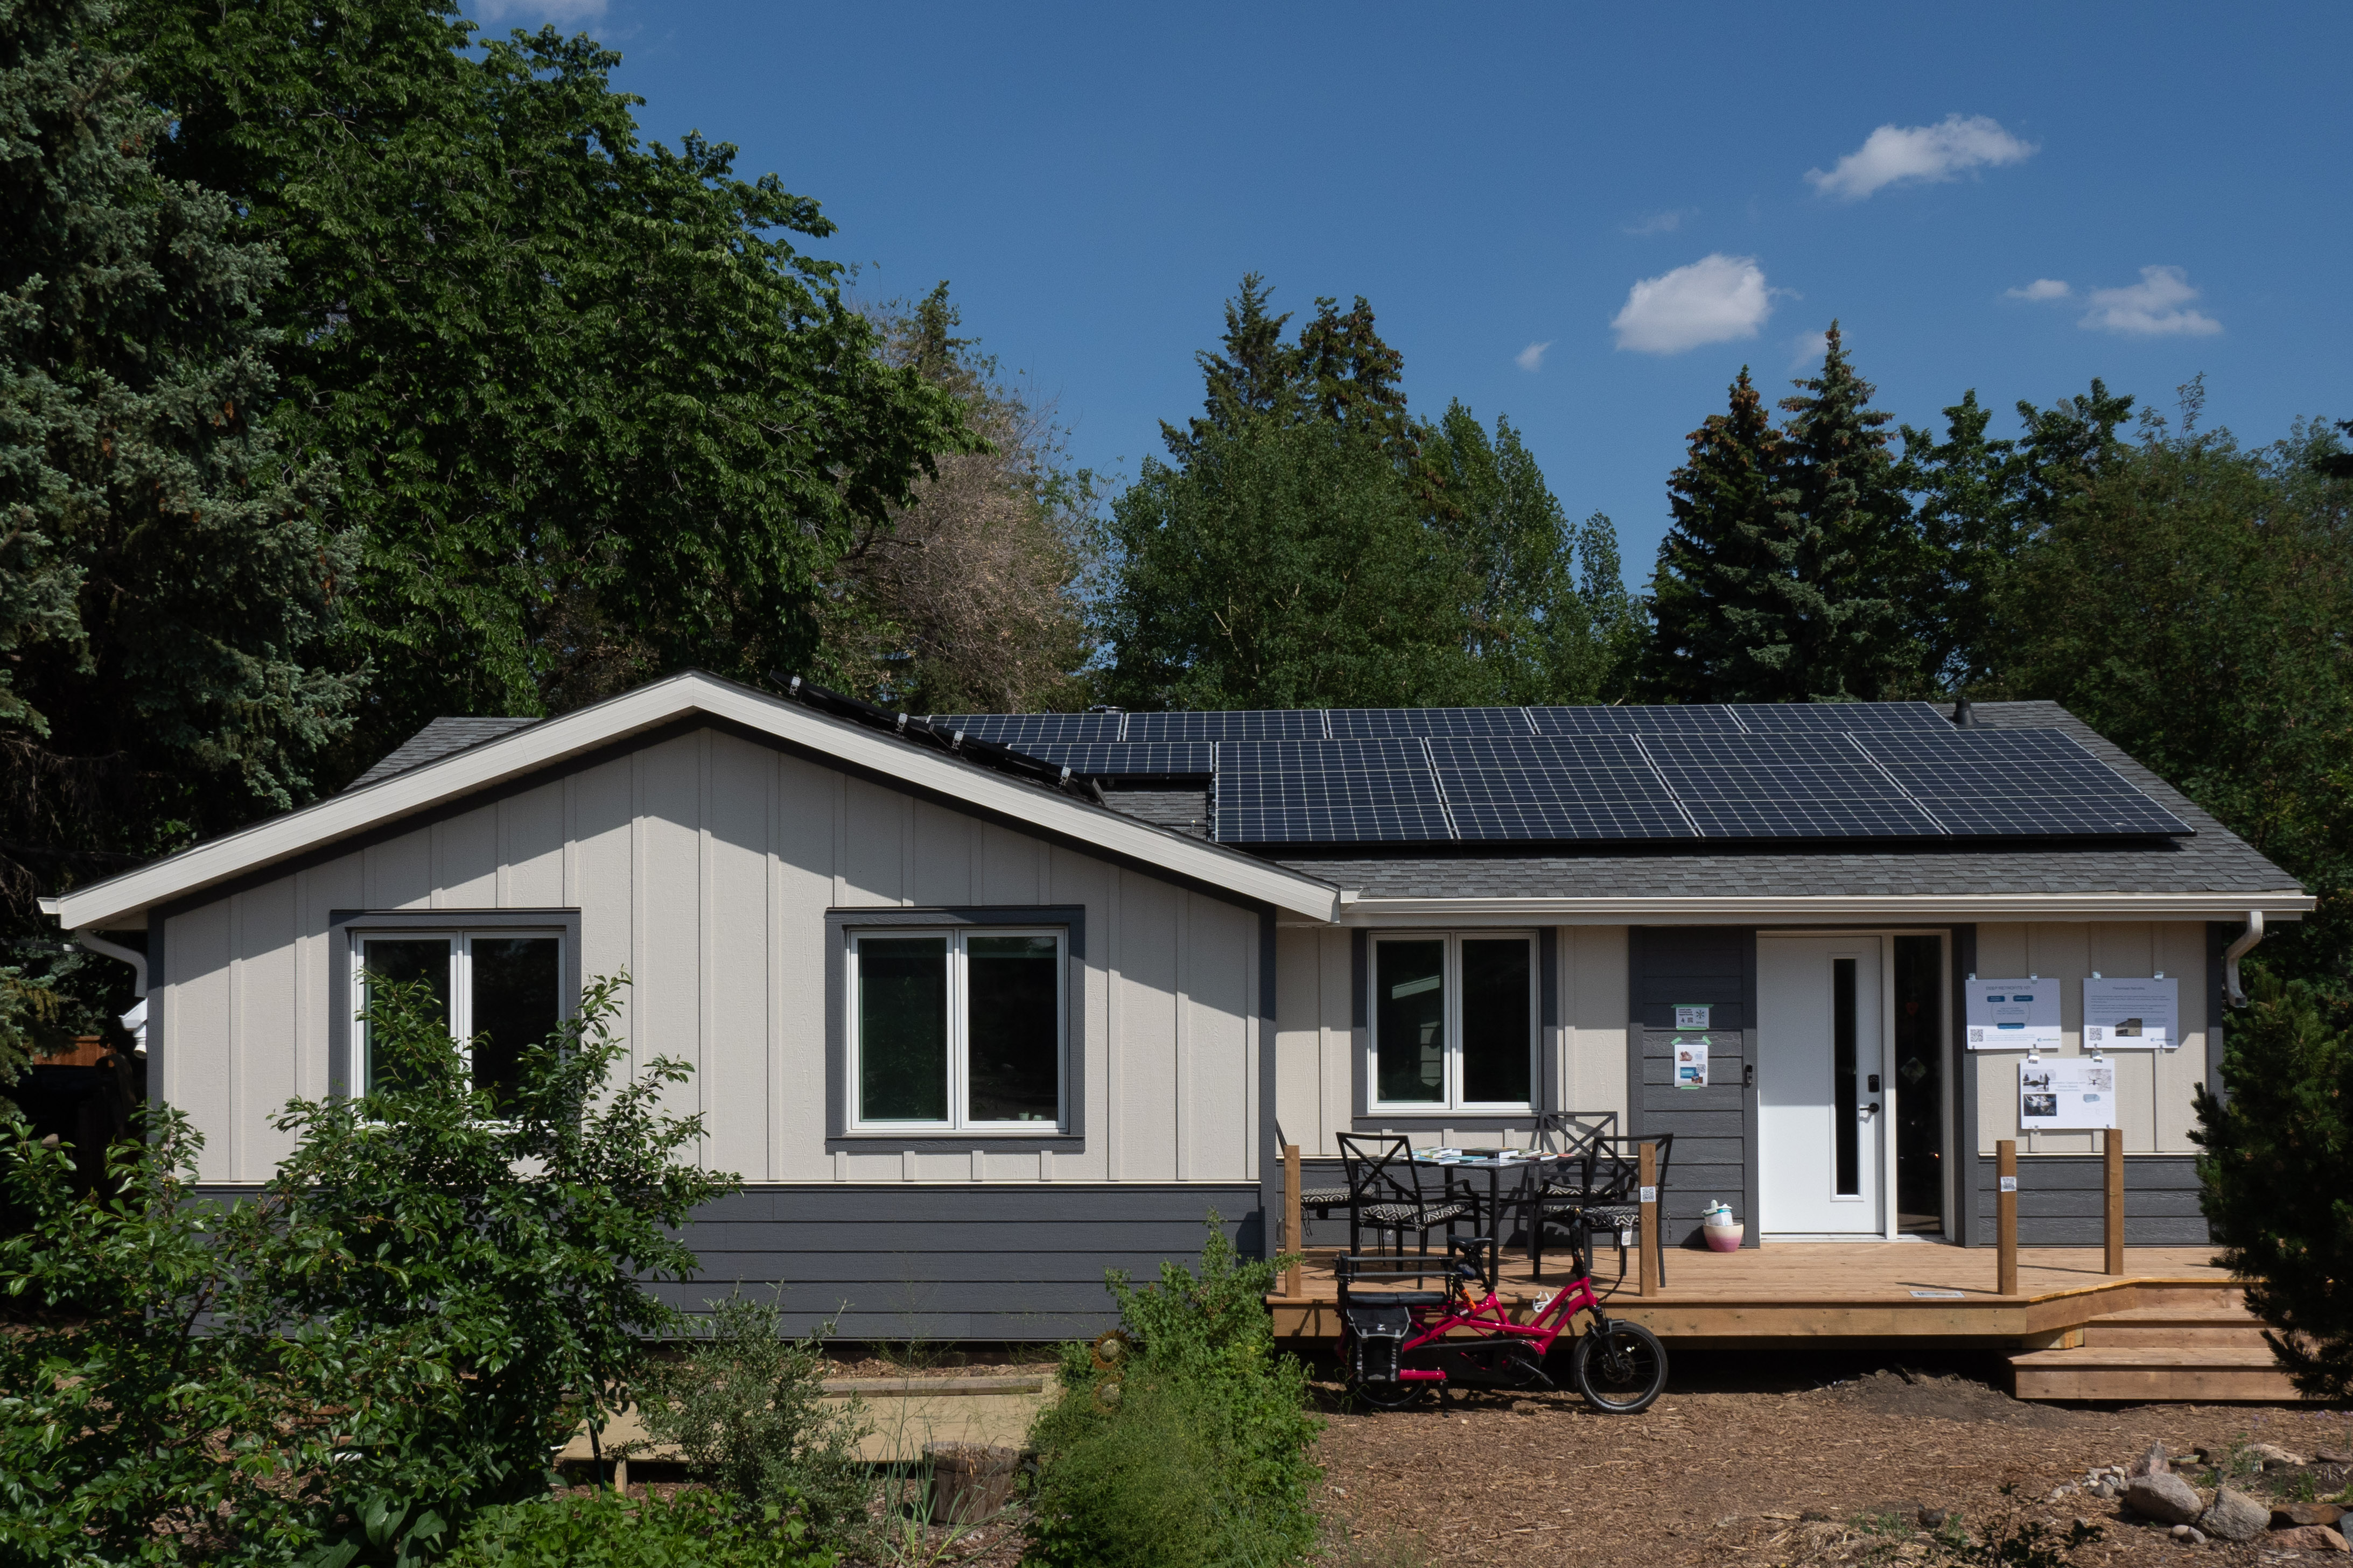
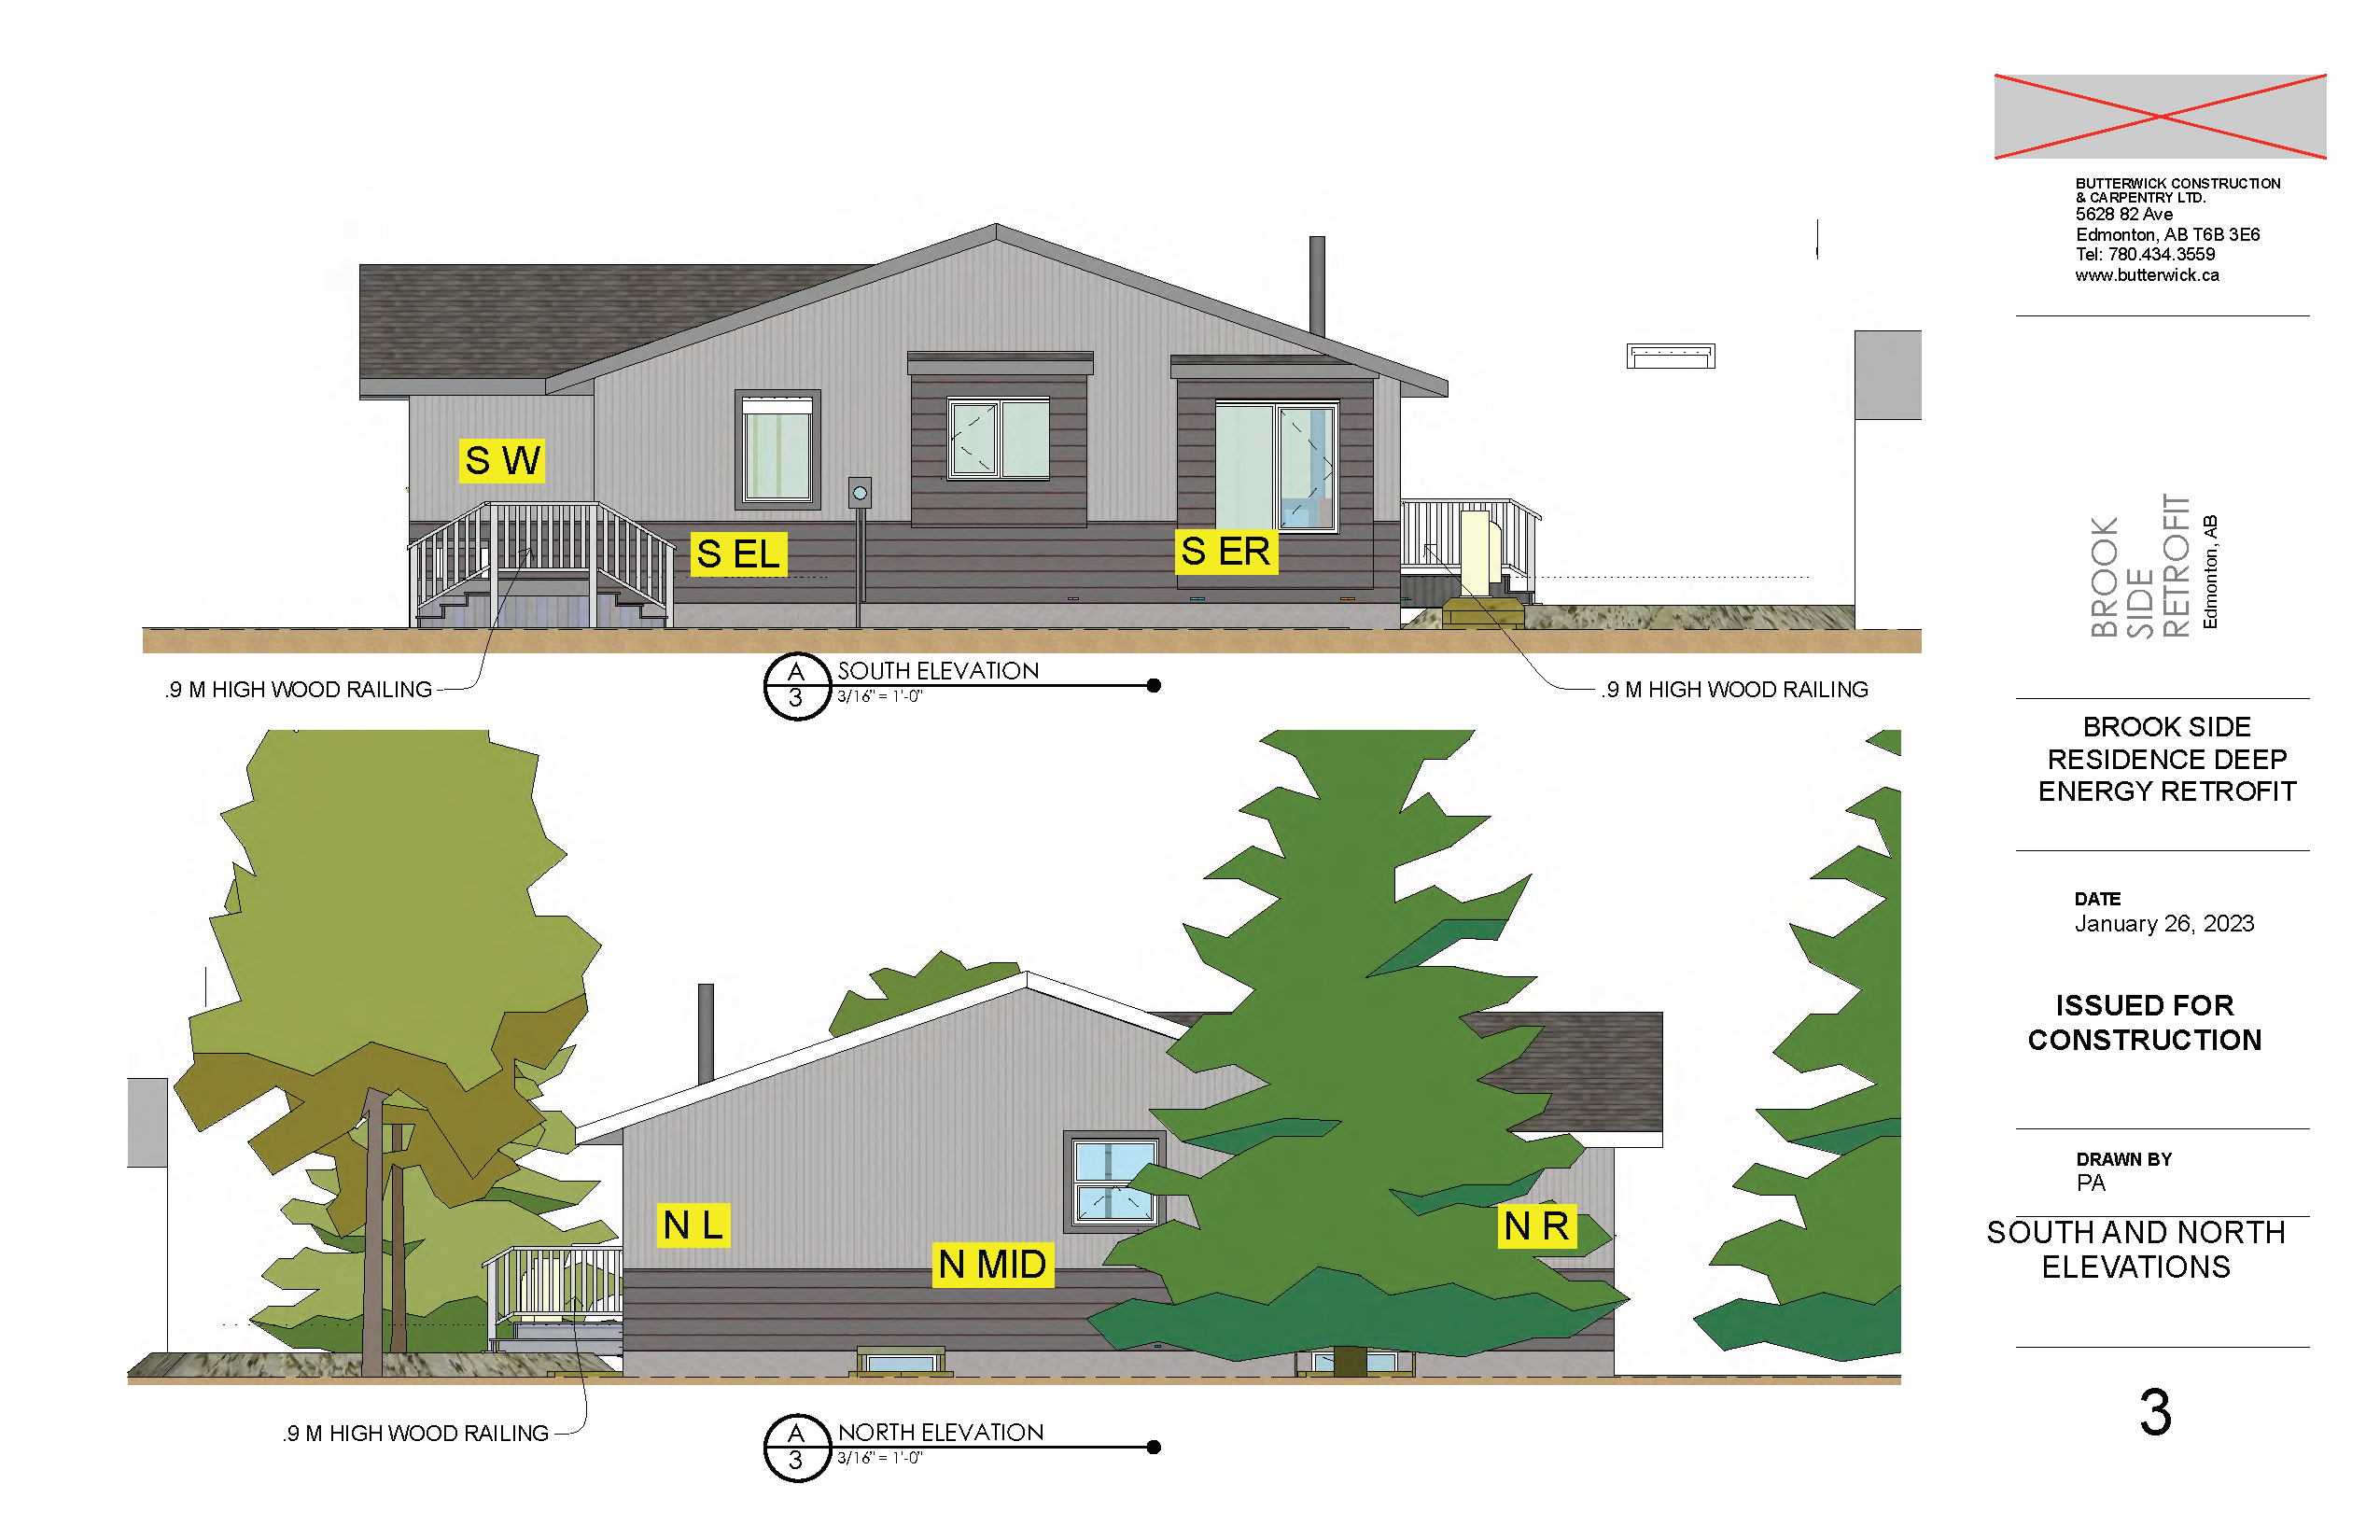
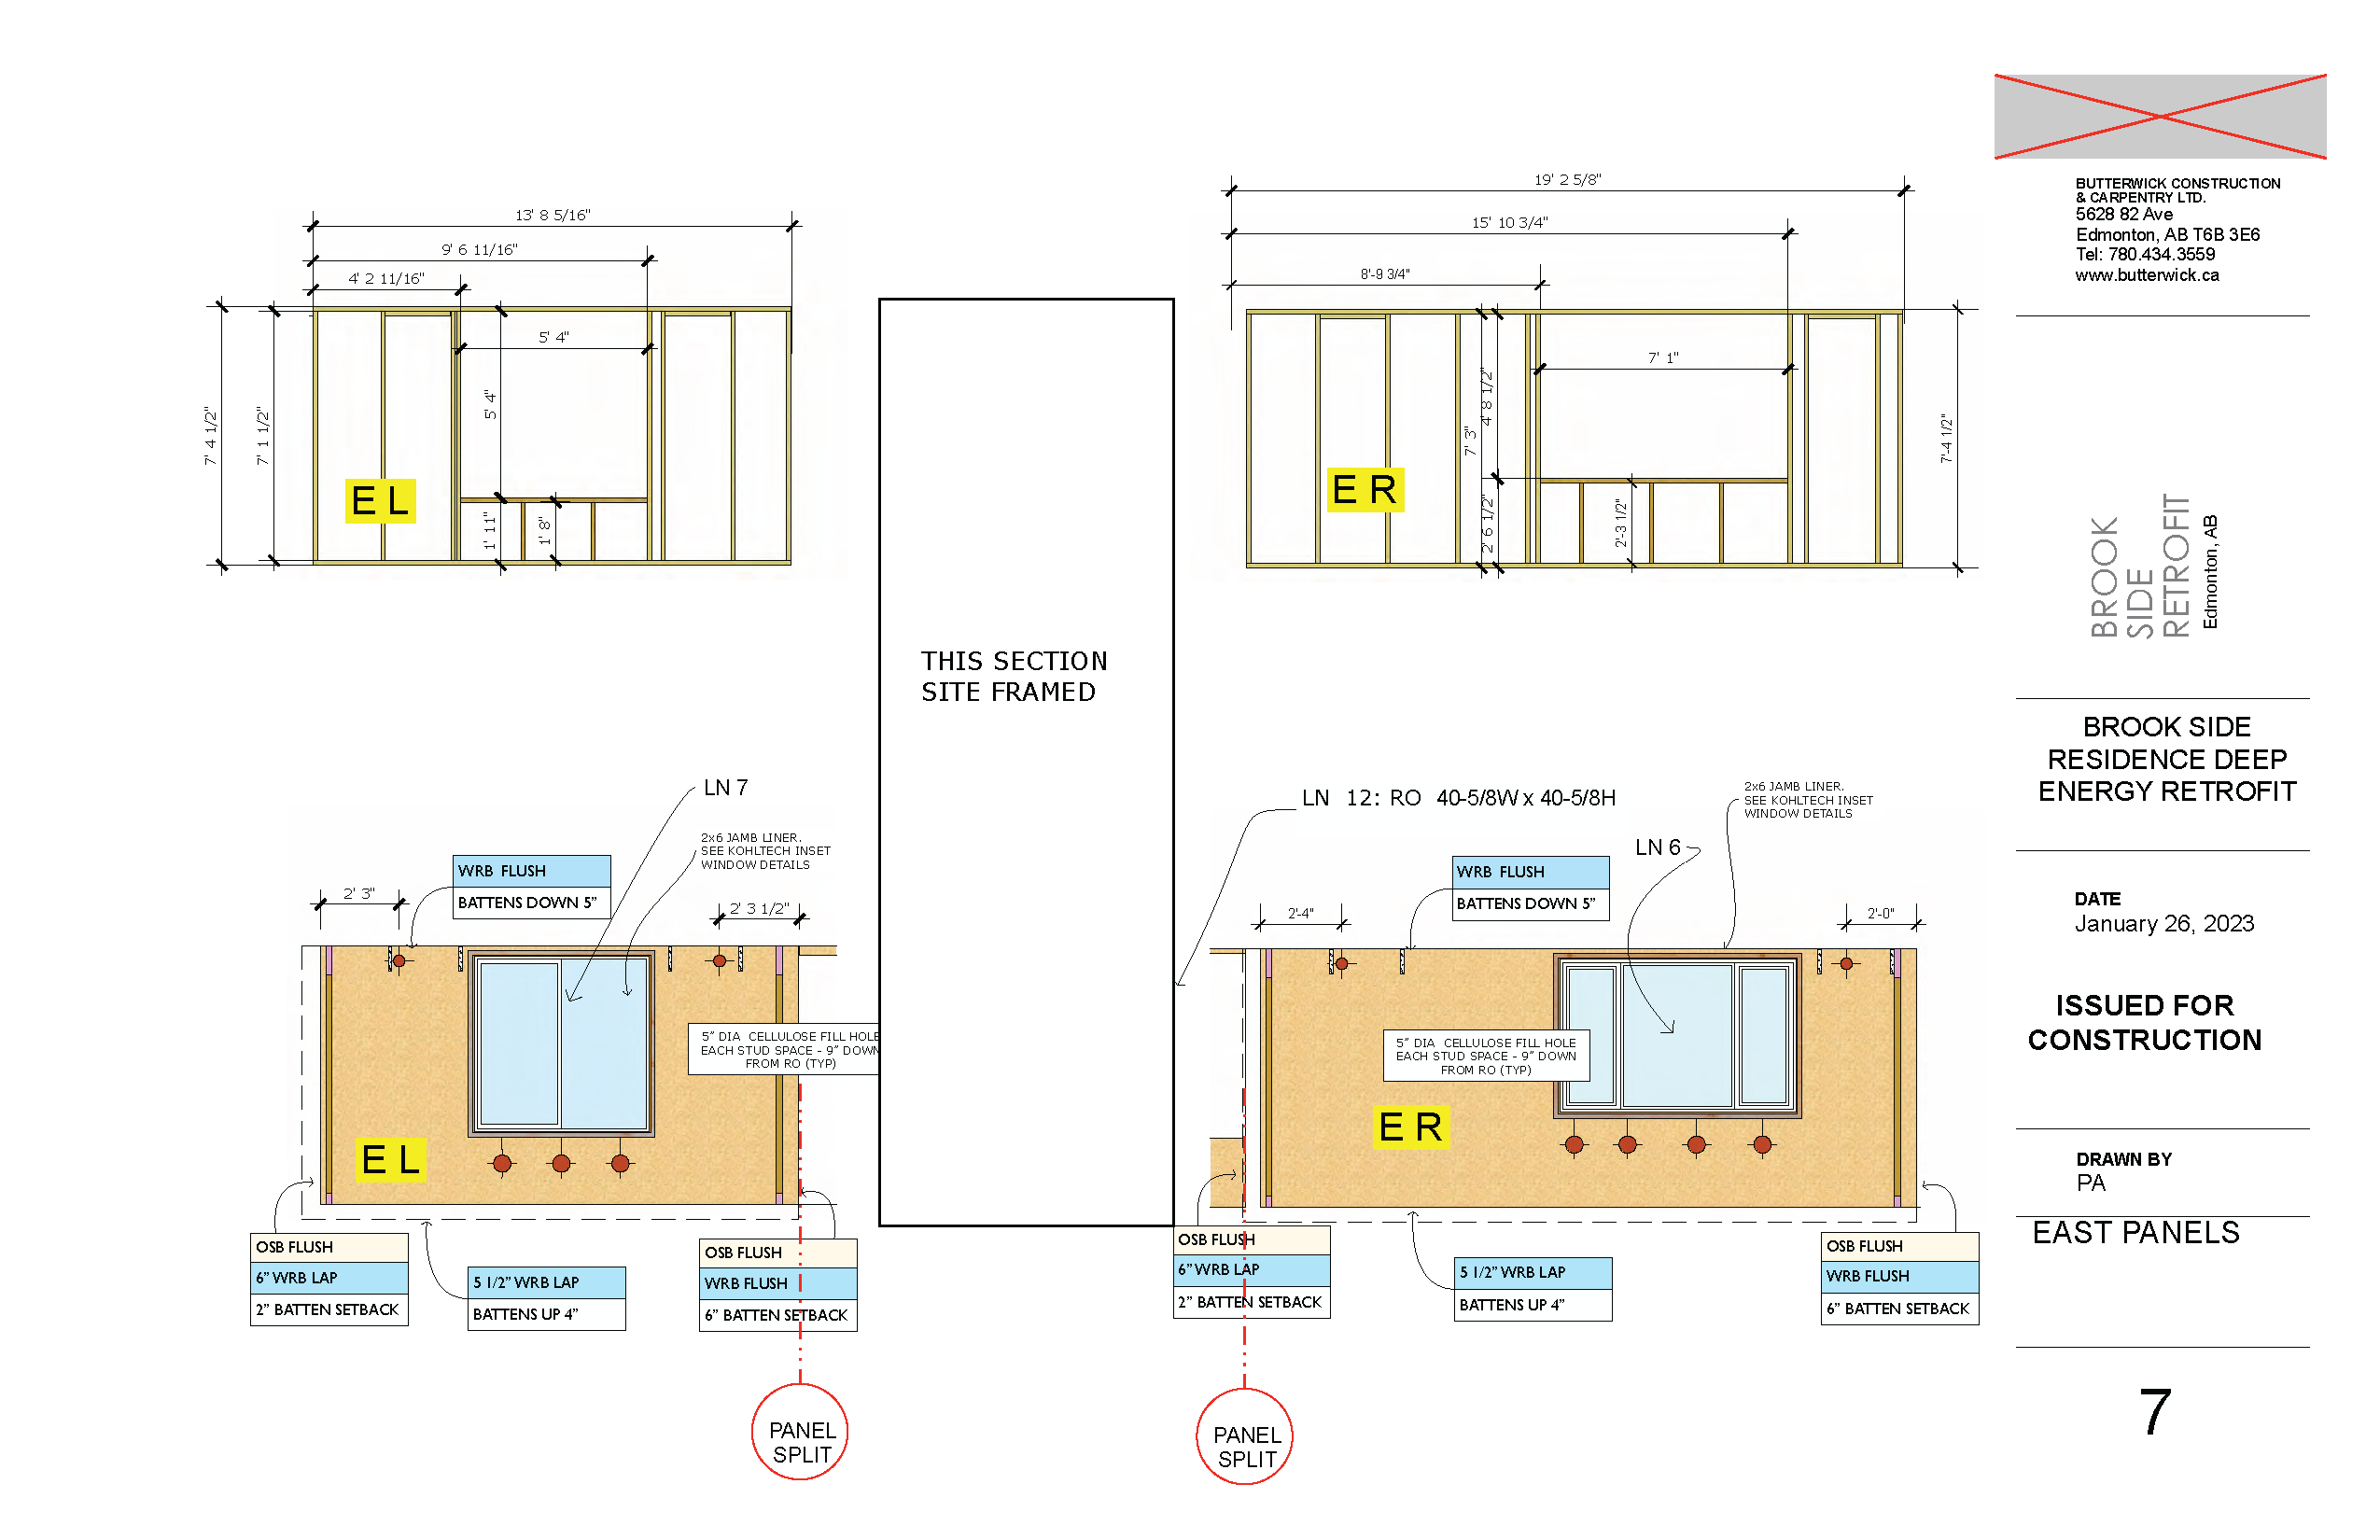
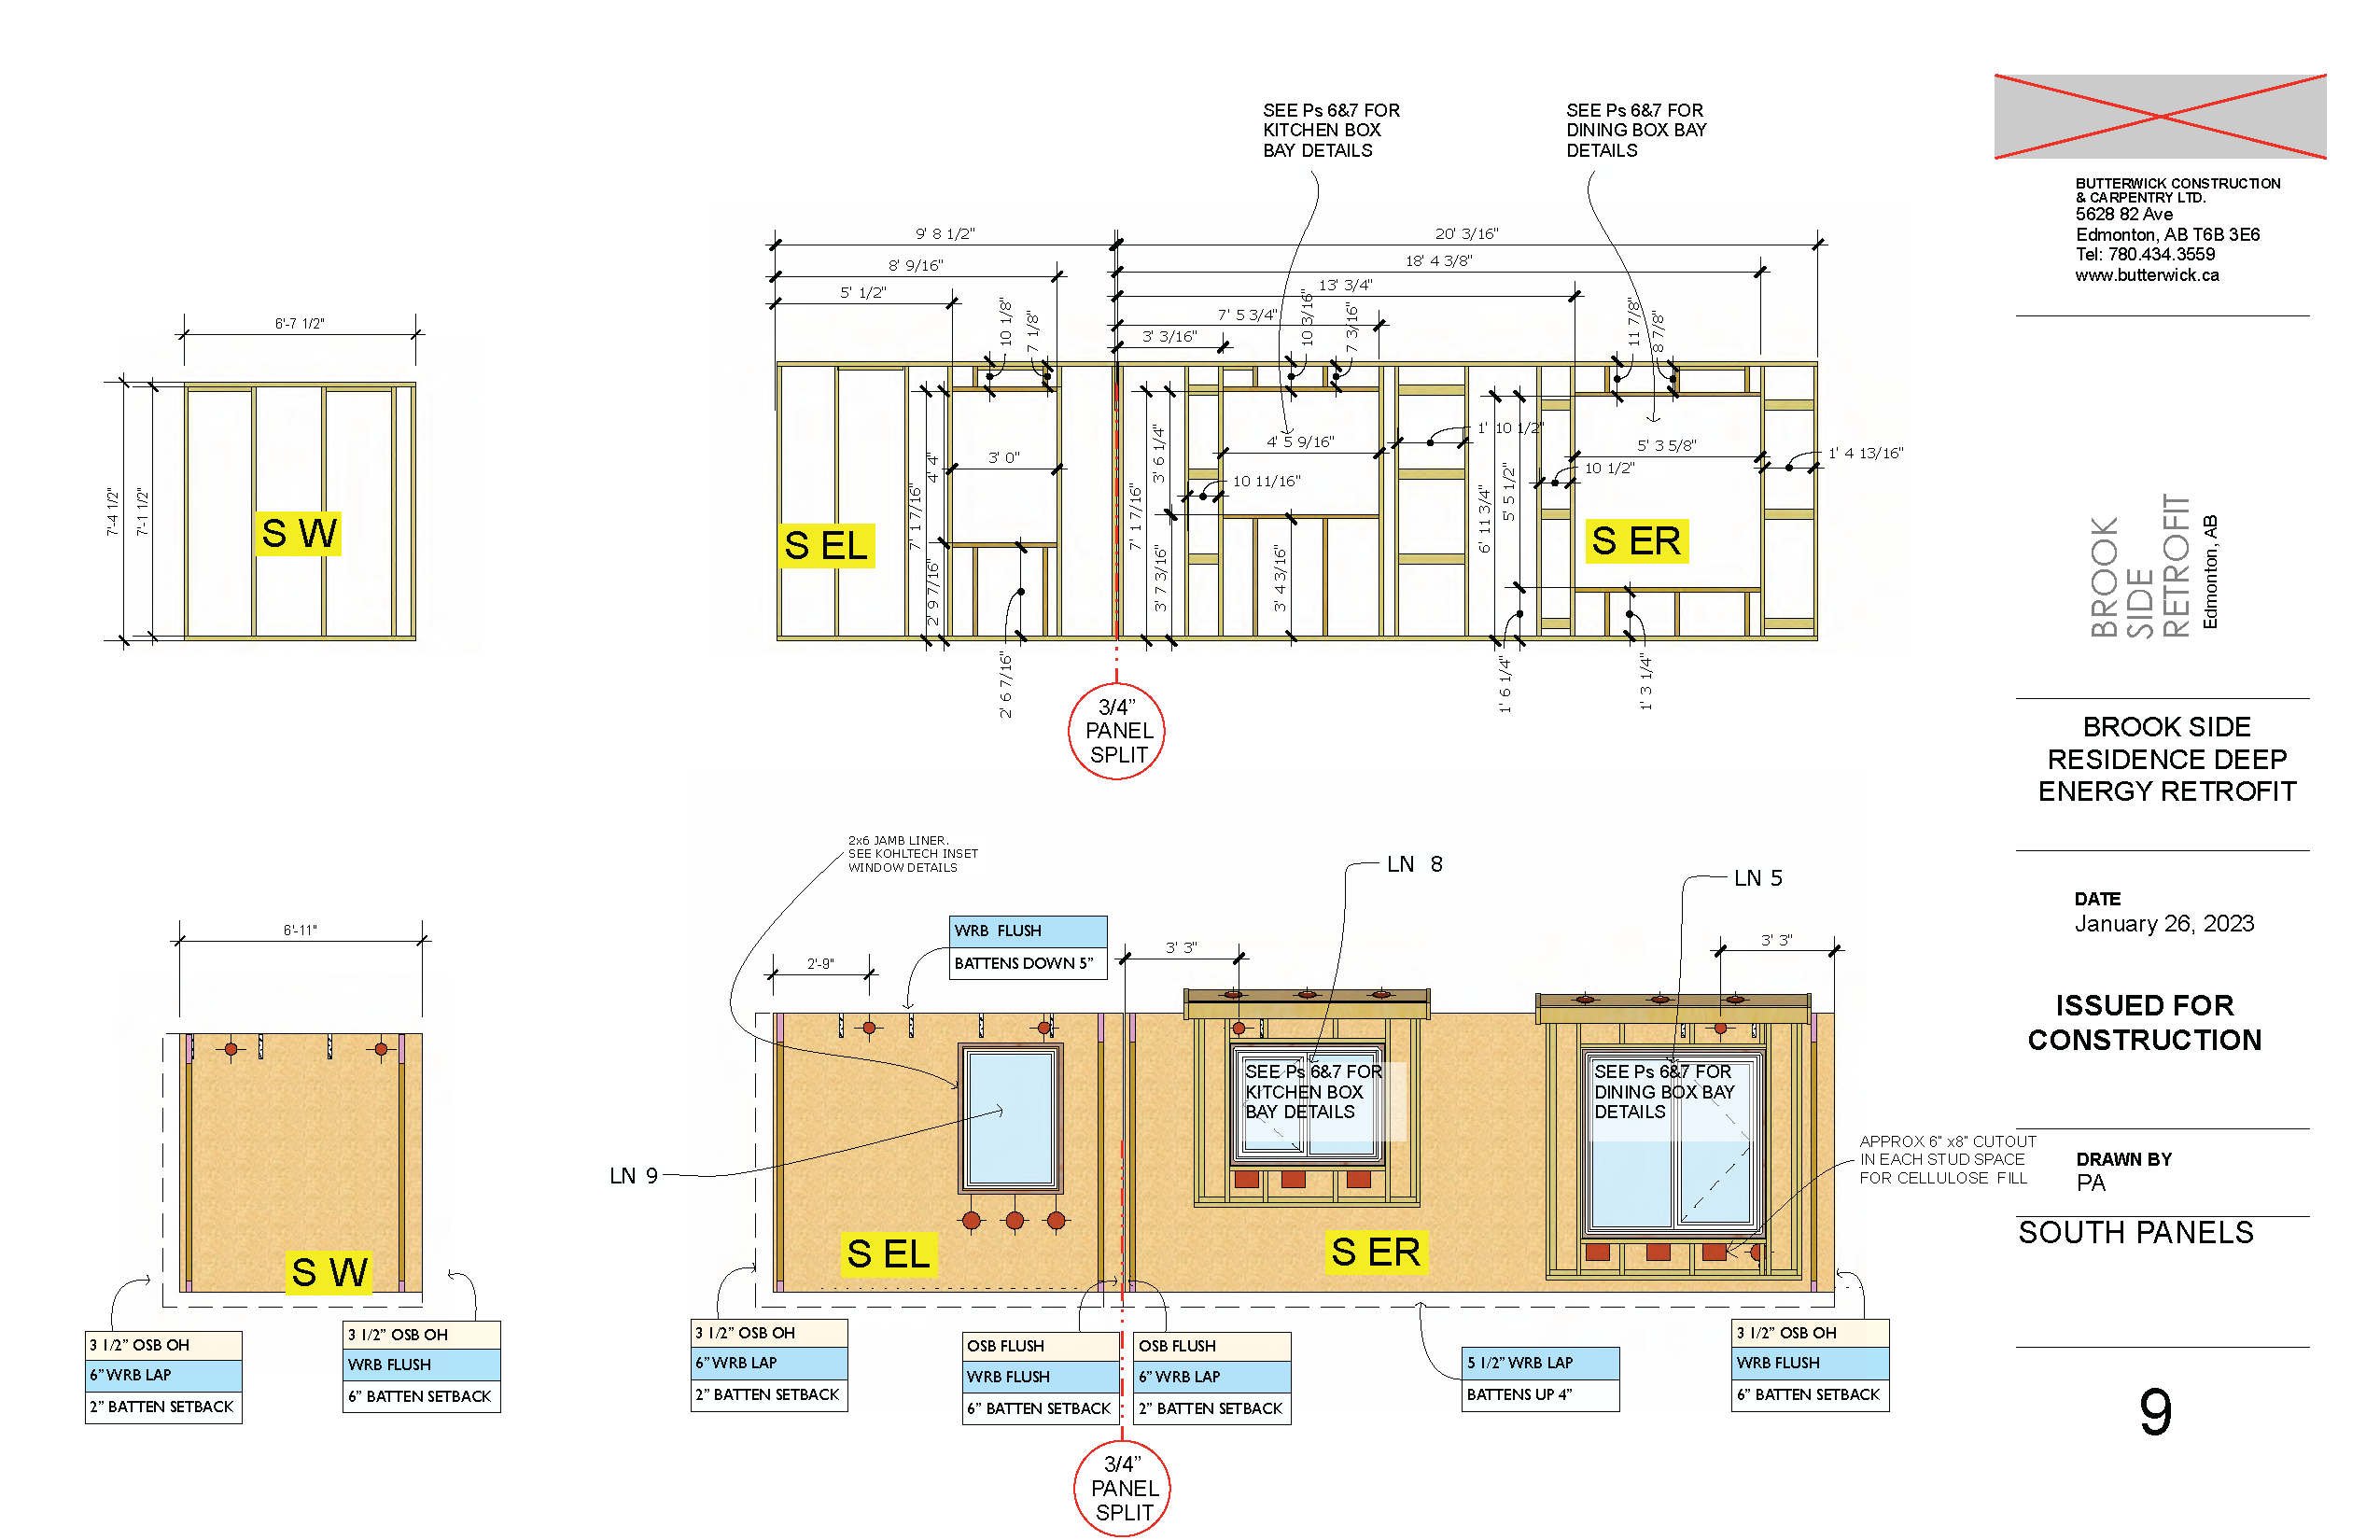
Inspired by a Netherlands green building technique called EnergieSprong, the project used digital capture technology to model the 1970s 1,180-square-foot home to get the exact dimensions needed for the panels to fit, including pre-installed doors and windows. Peter Amerongen, one of Retrofit Canada’s co-founders and a partner at Butterwick Projects, used the 3D model to design airtight, pre-built panels. The panels were manufactured offsite and then installed on the outside of the house, forming a snug thermal cover.
In a matter of months, this 50-year-old house transformed into a state-of-the-art, energy-efficient building with a brand-new look.
The Hoffman retrofit followed a similar construction process as that used on the Sundance Housing Co-op retrofit, the first panelized retrofit project in Canada, and two other single-family-home panelized retrofits, all managed by Butterwick Projects, a green builder in Edmonton, Alberta.
Construction Activities
Pre-panel installation
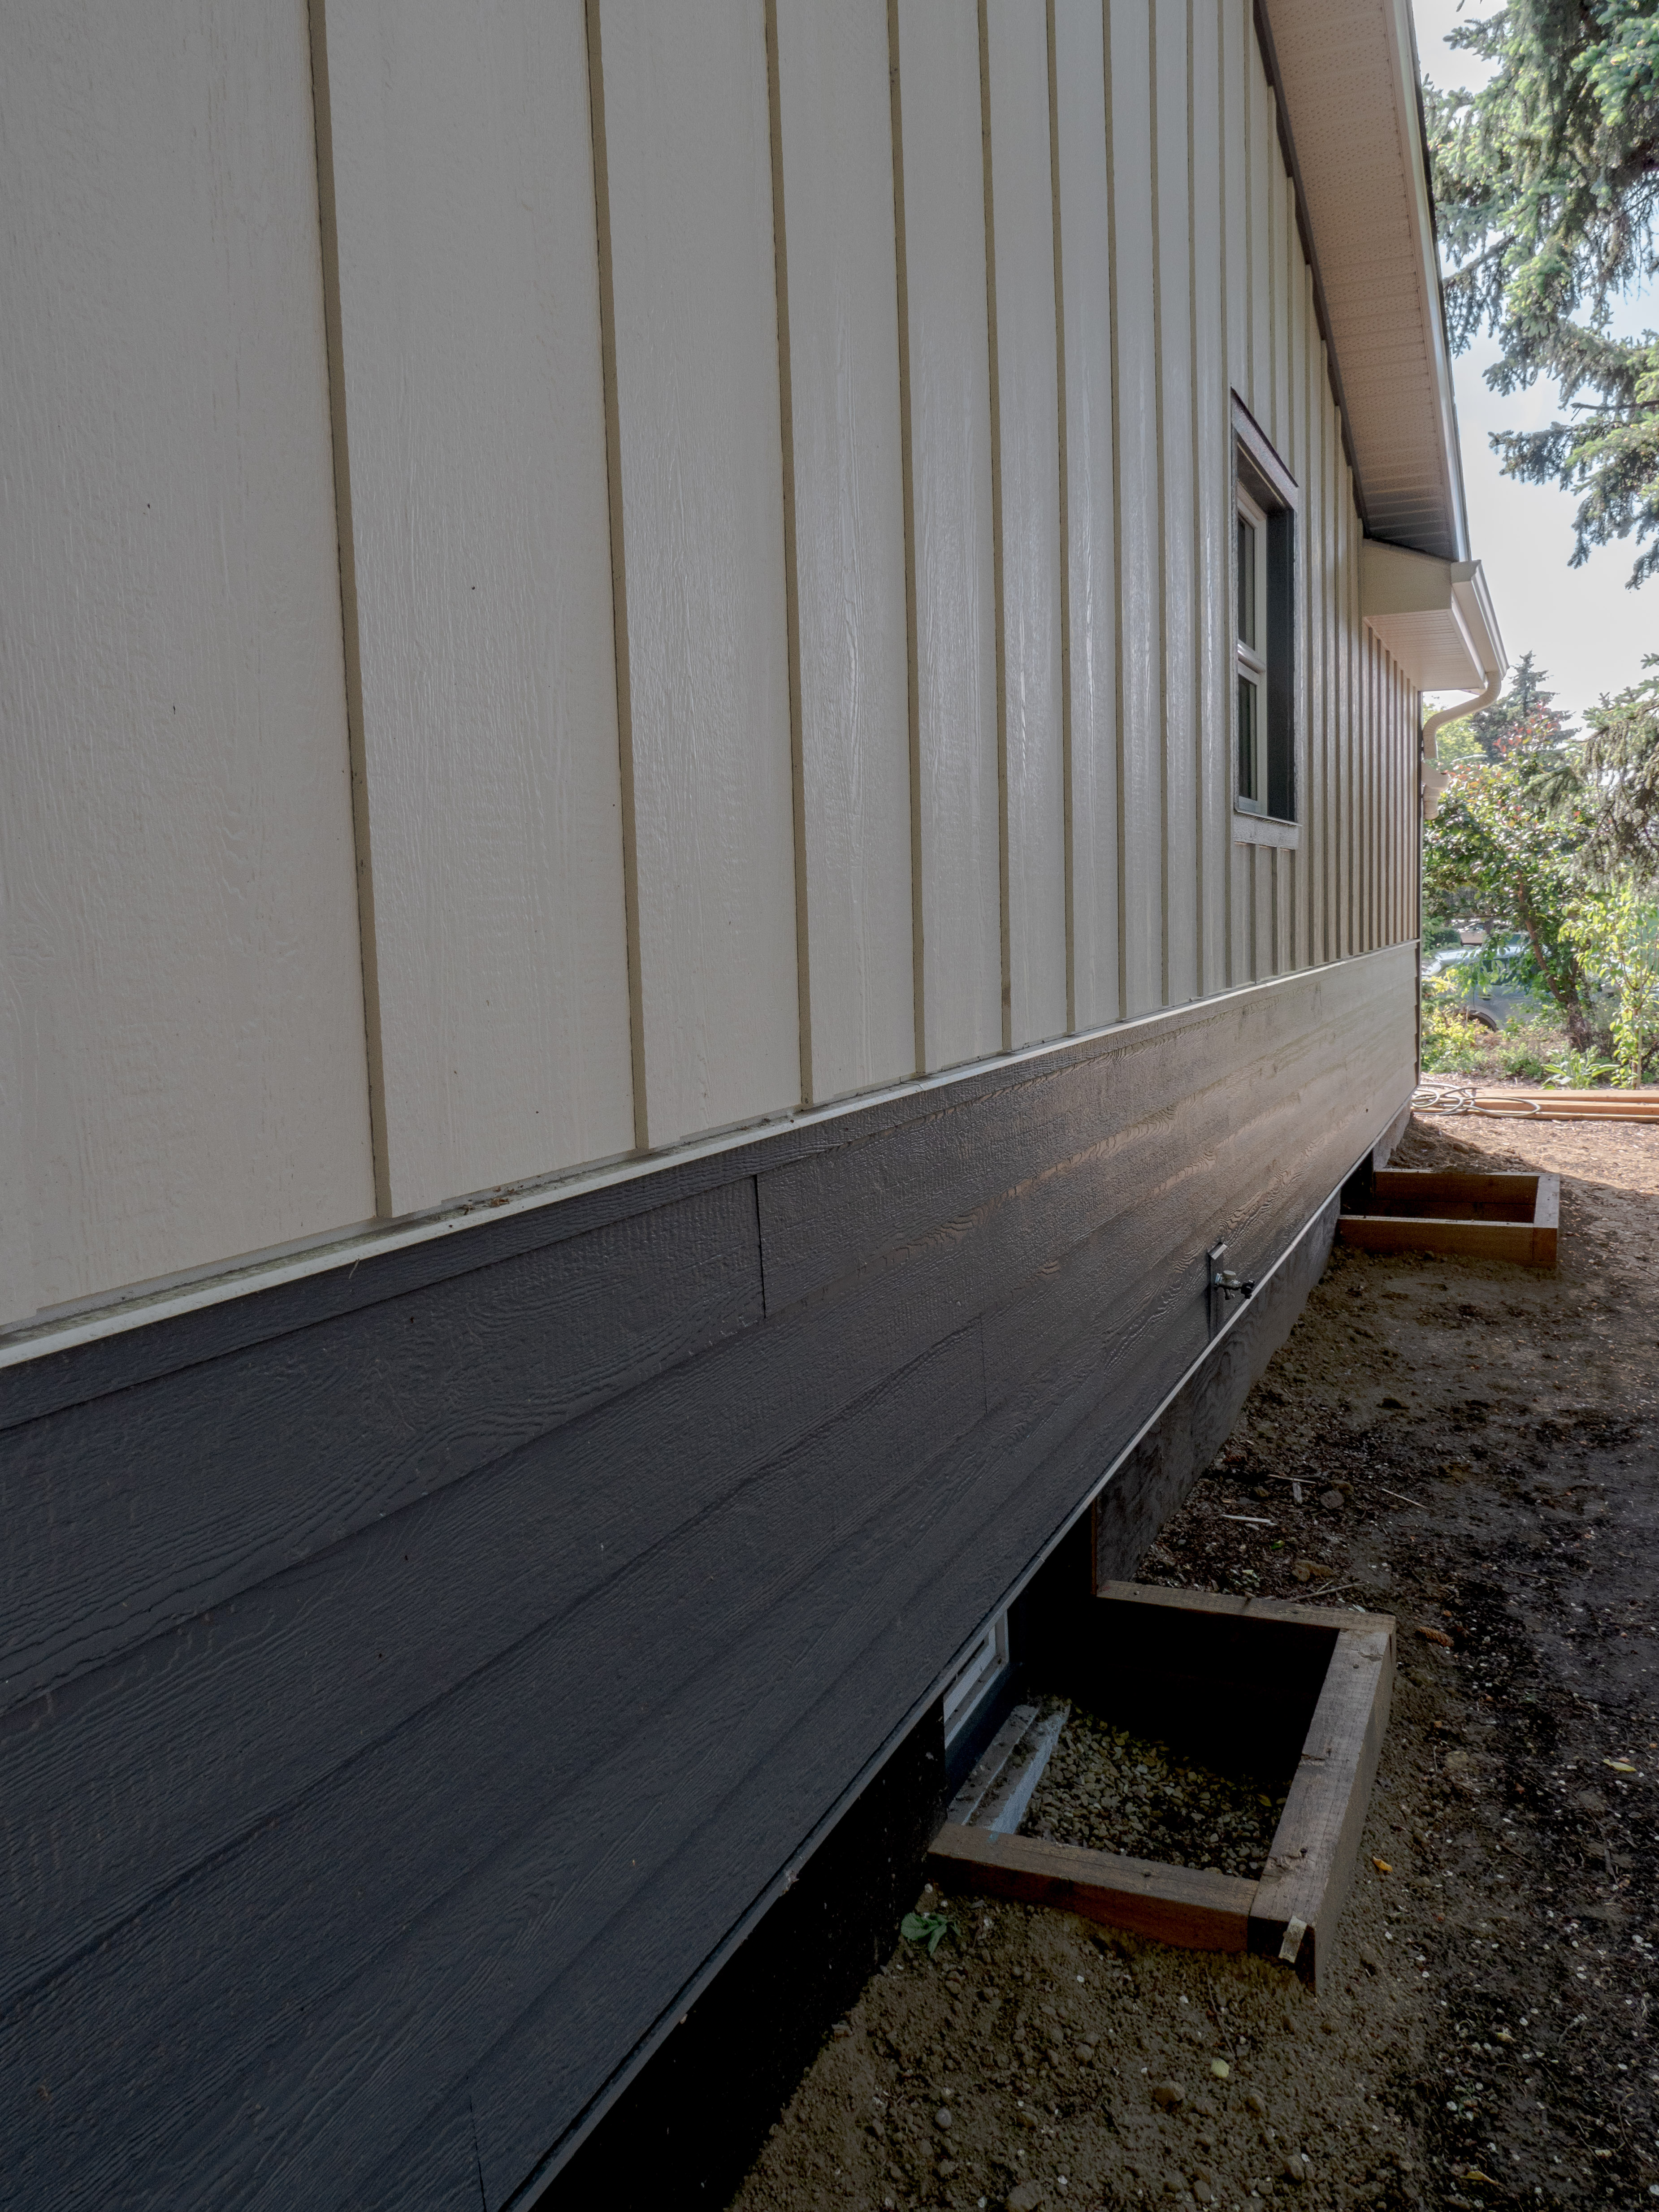
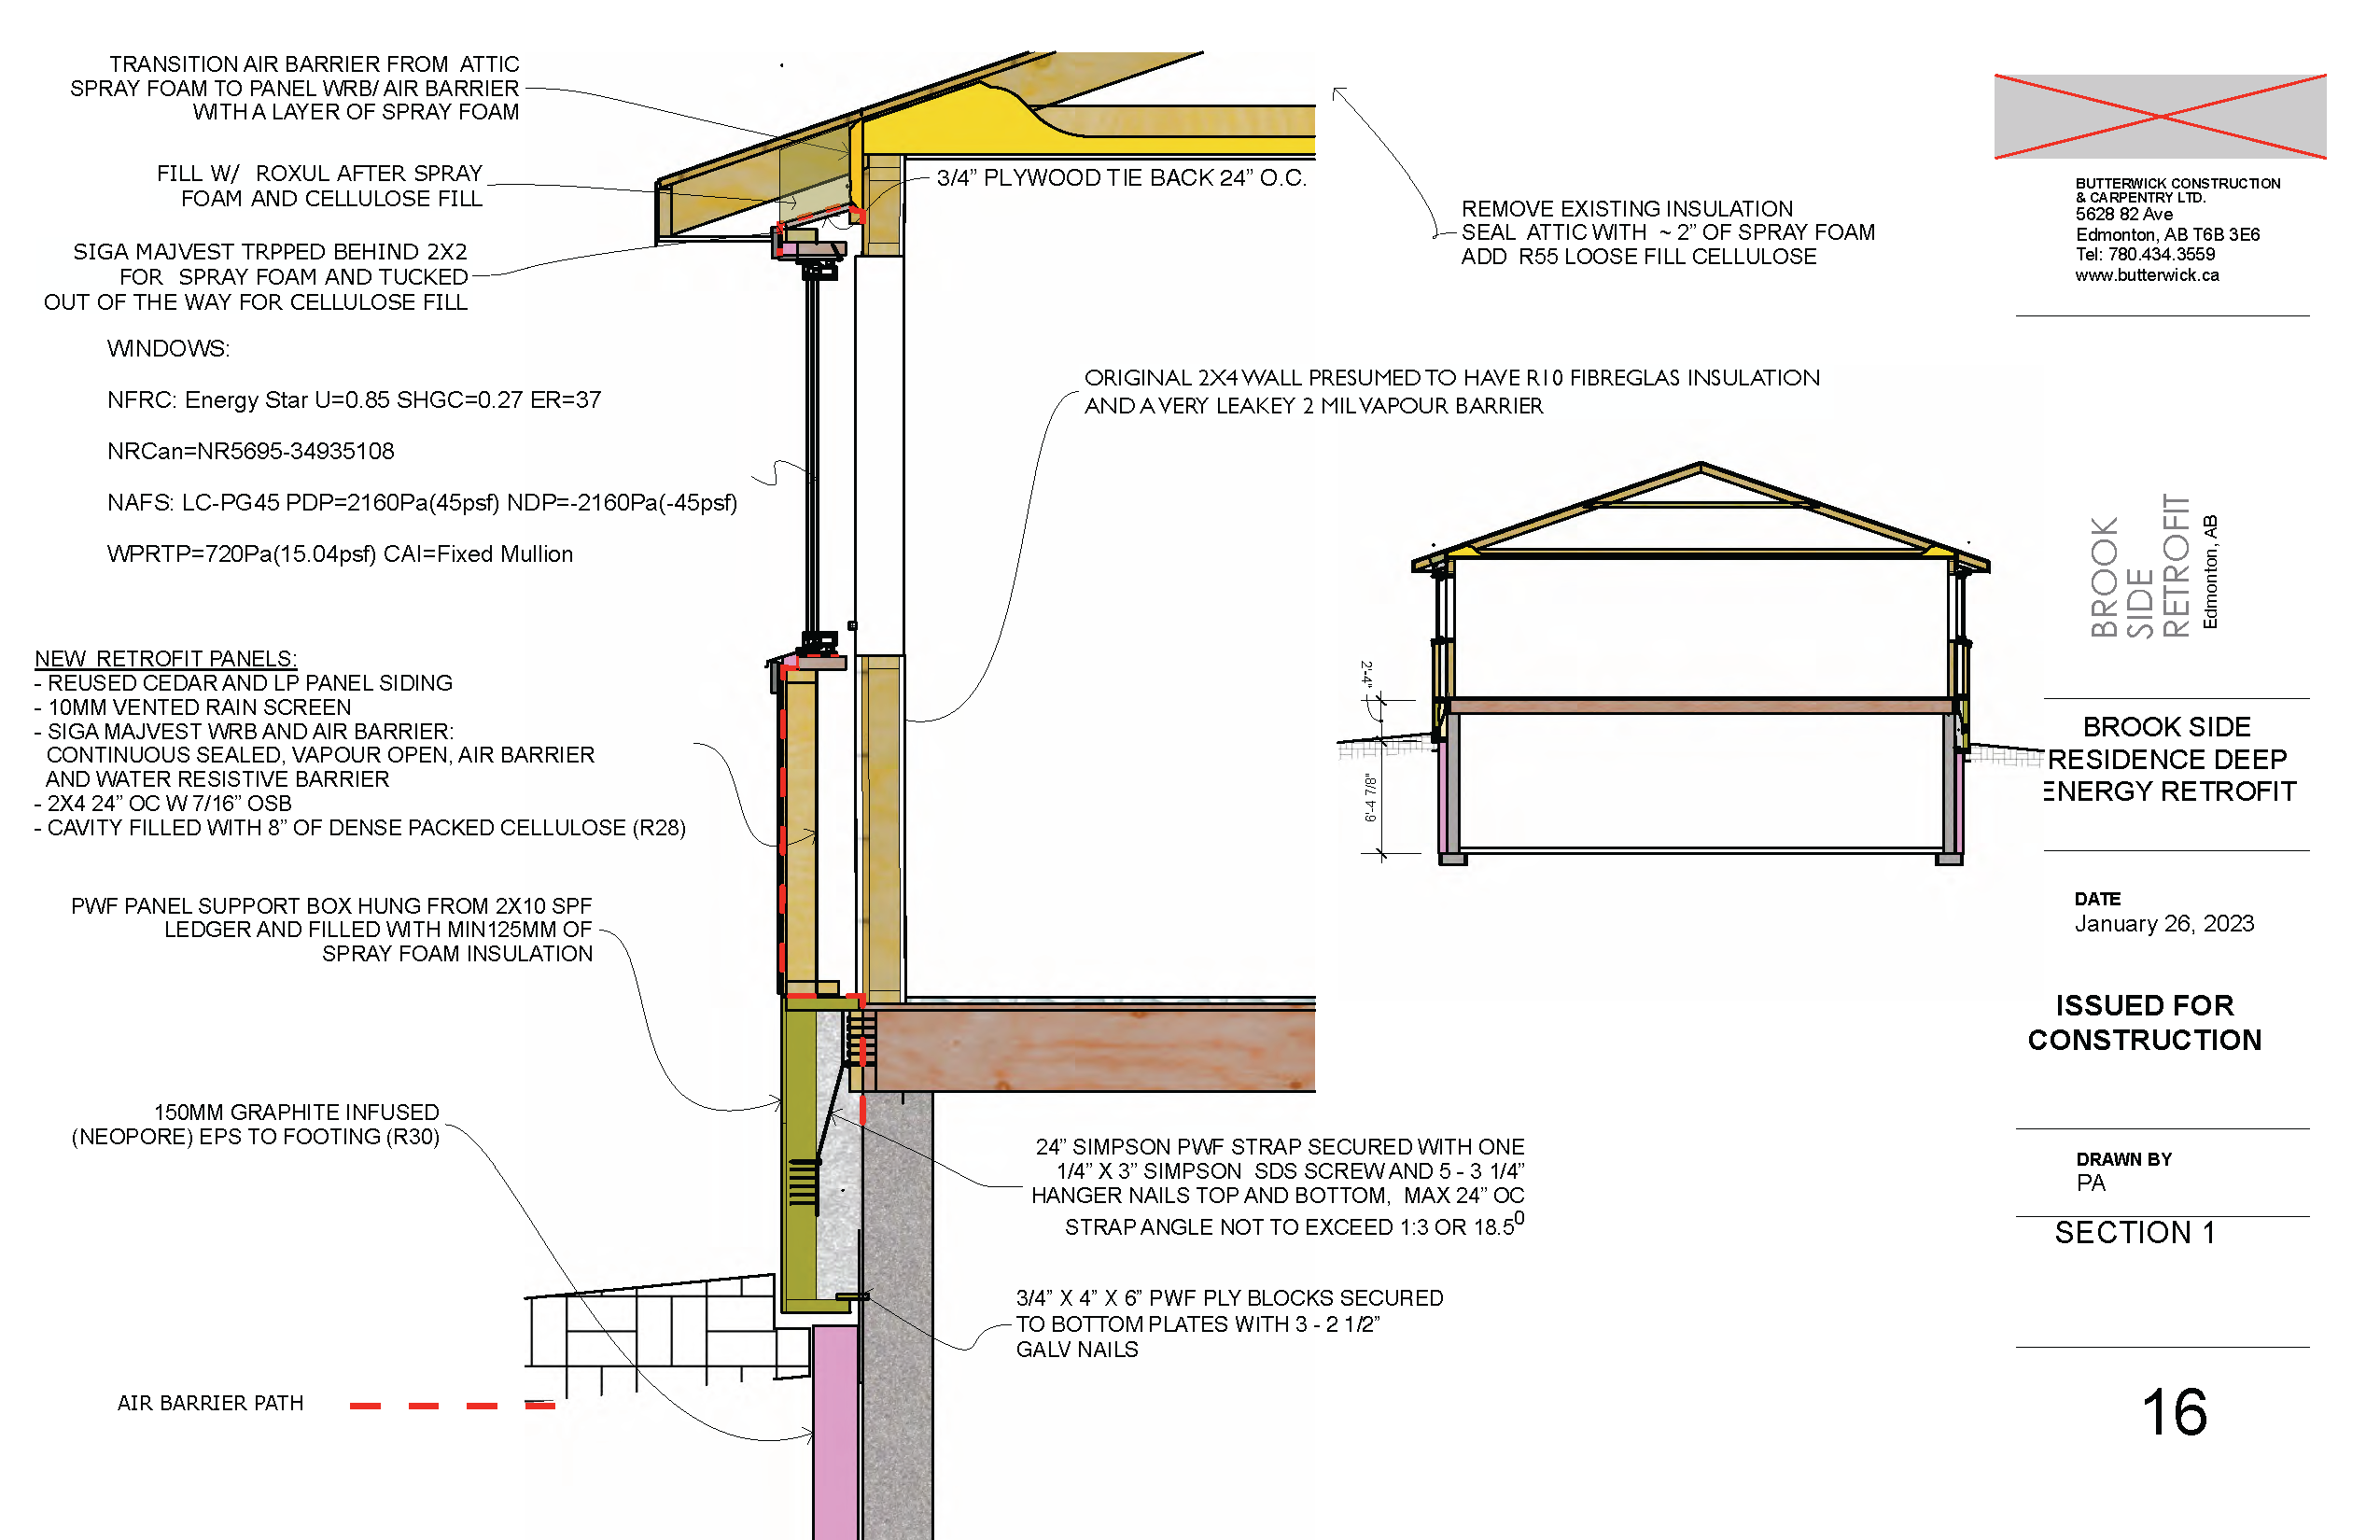
- Use a hydrovac truck to cut a slot around the house so crews could drop in a 5.5” sheet of graphite-infused EPS insulation (R25).
- Install pressure-treated rockwool-insulated panel support box (R28) with penetrations for new ERV and Air source Heat pump, and existing services.
- Install the tie-back blocks that the panels would be attached to.
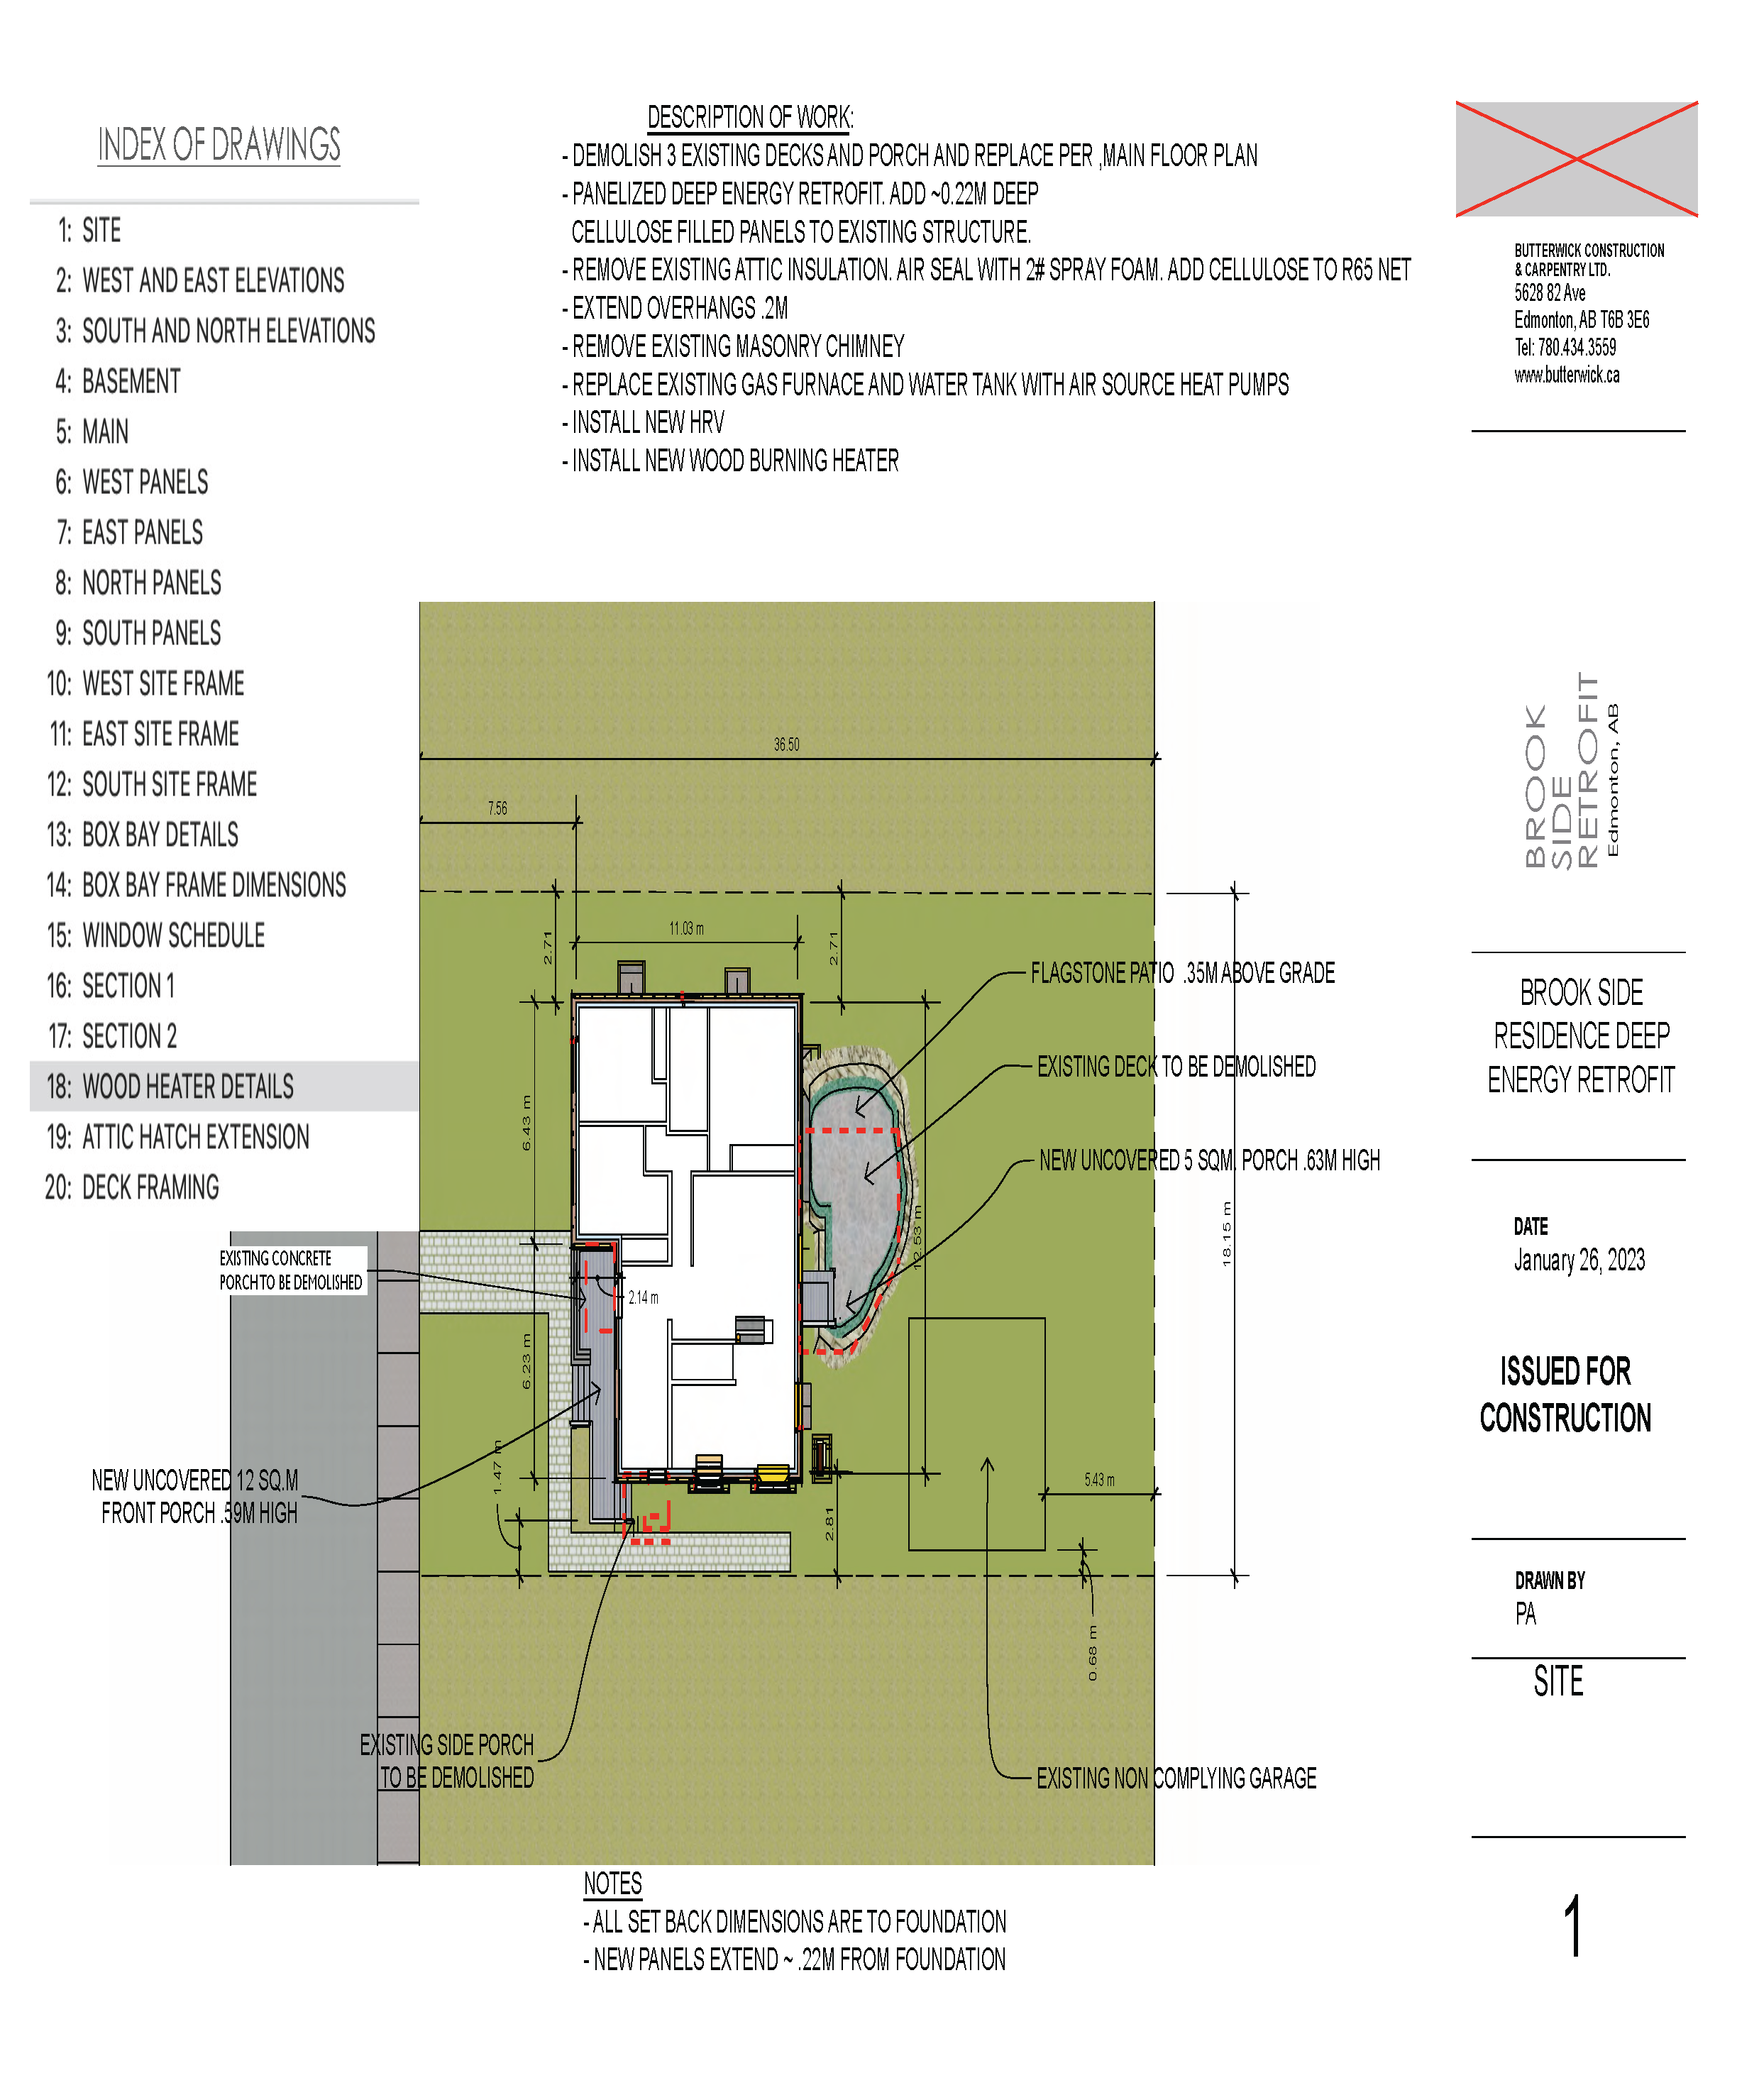
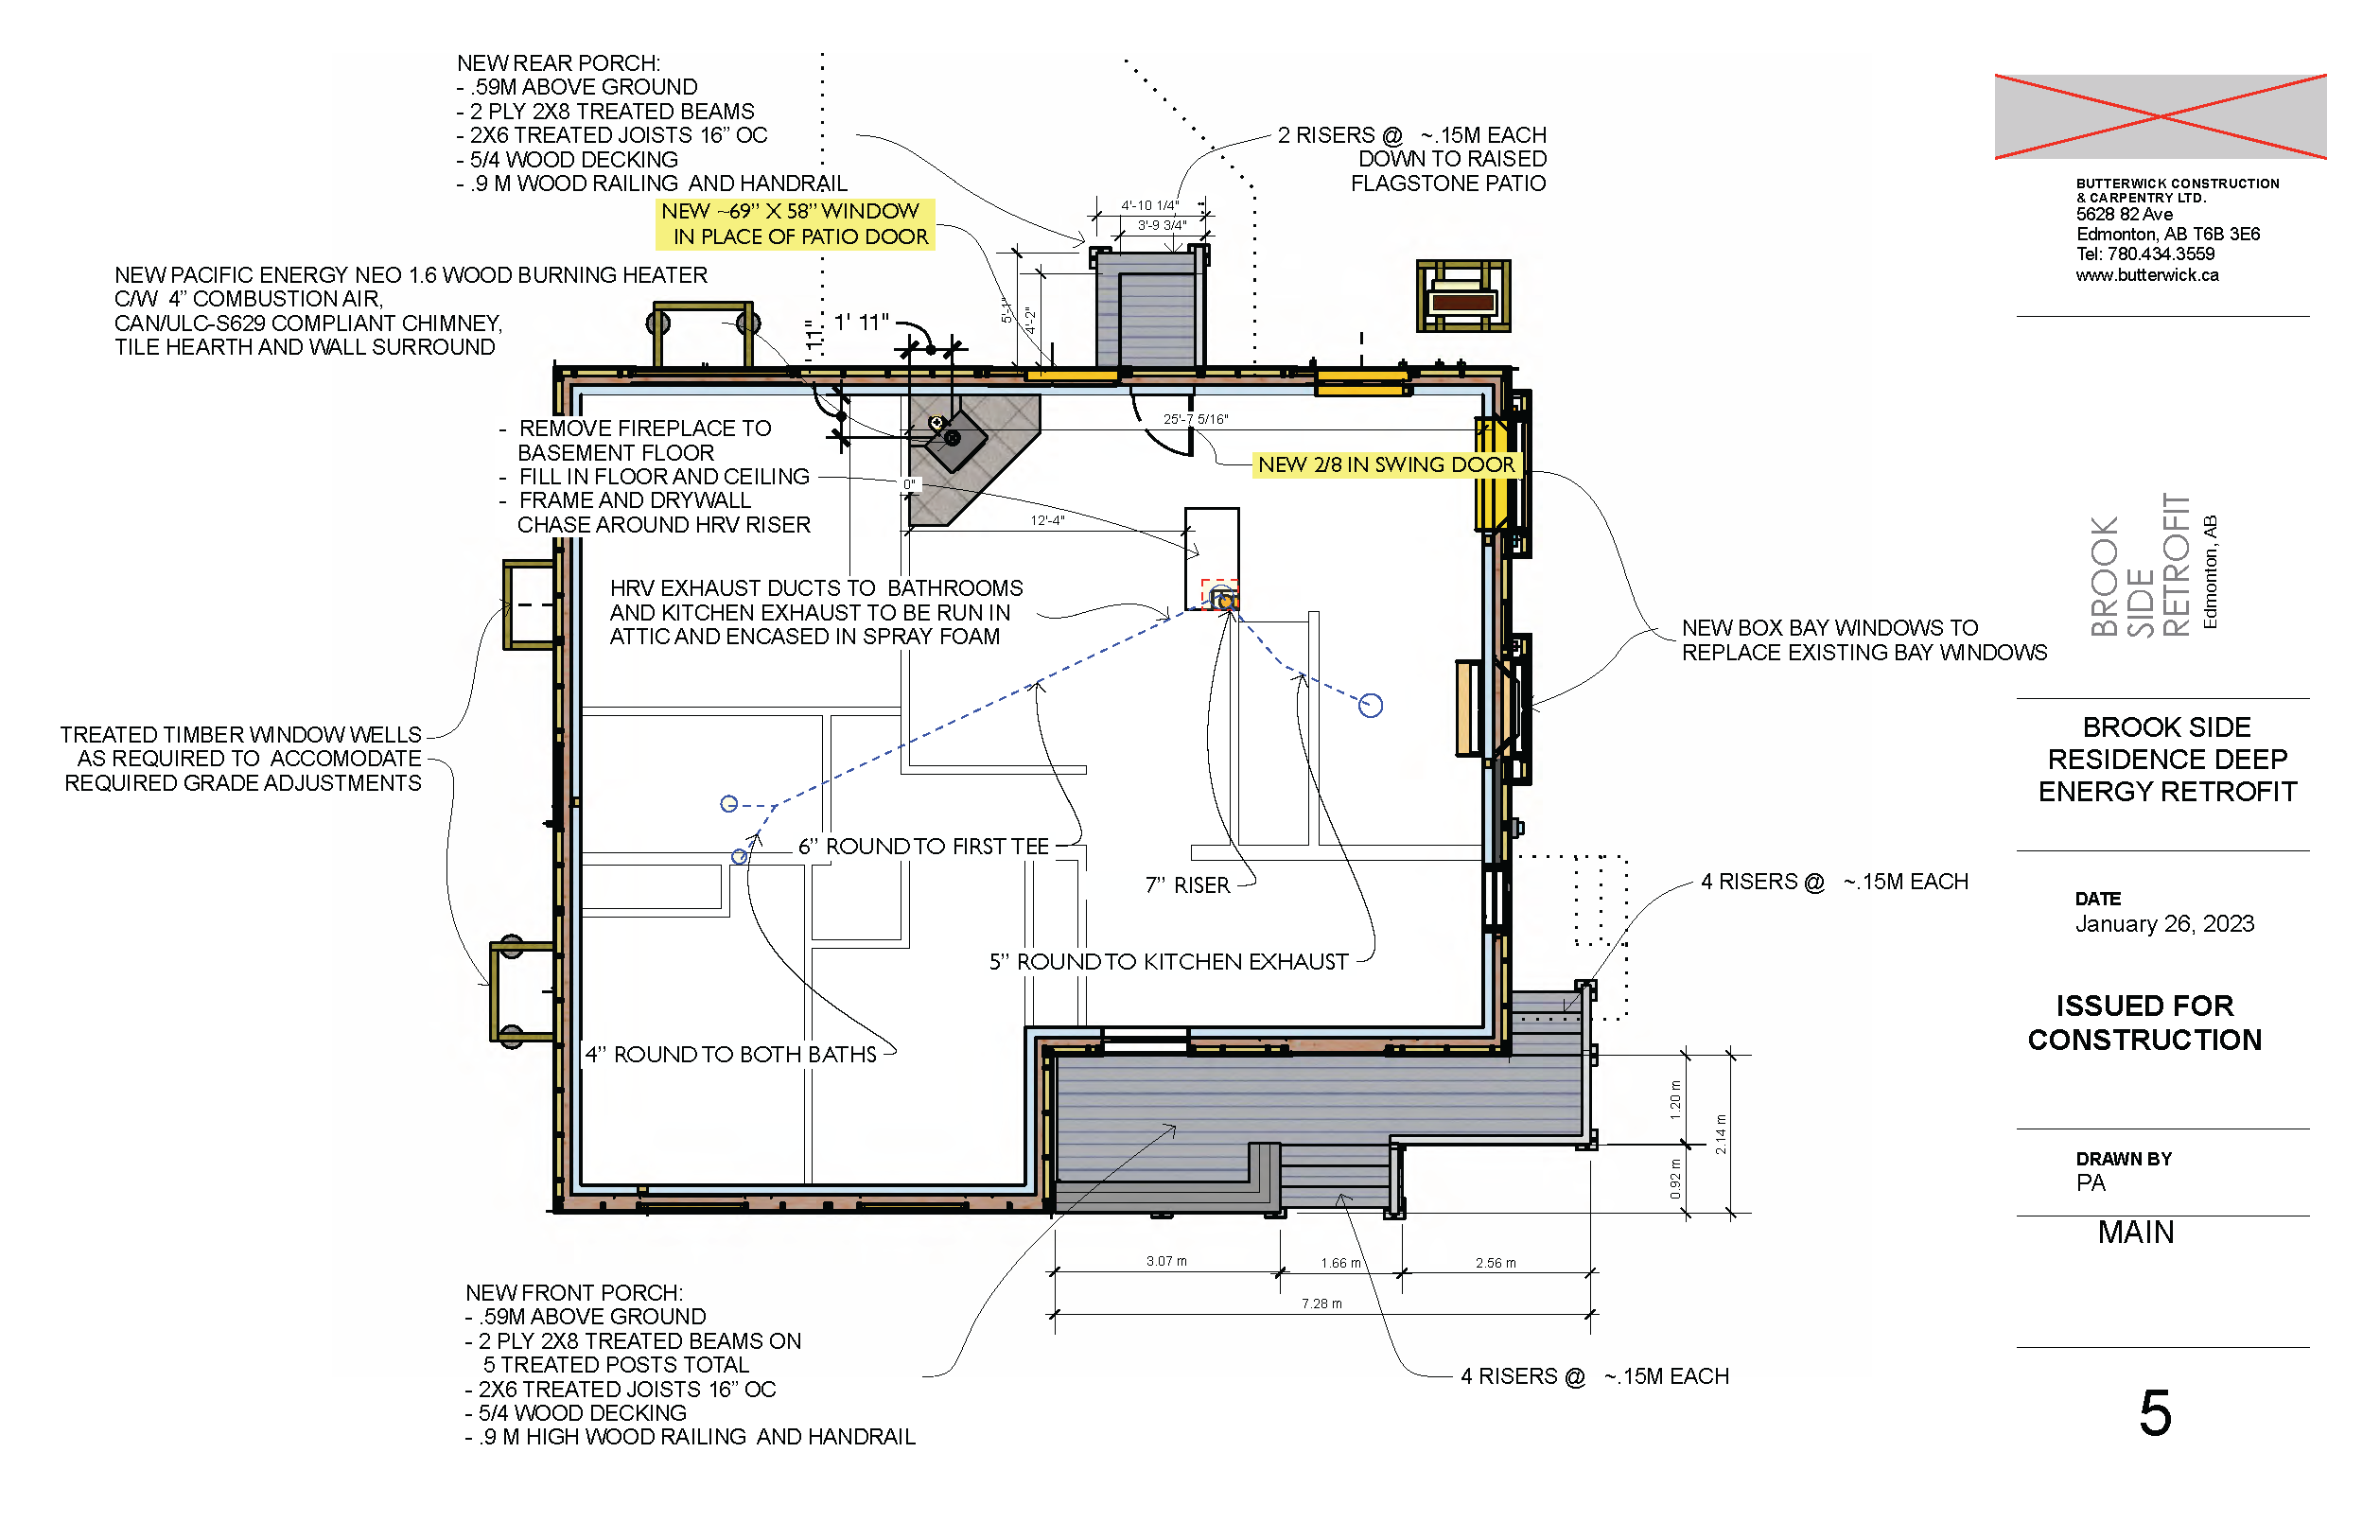
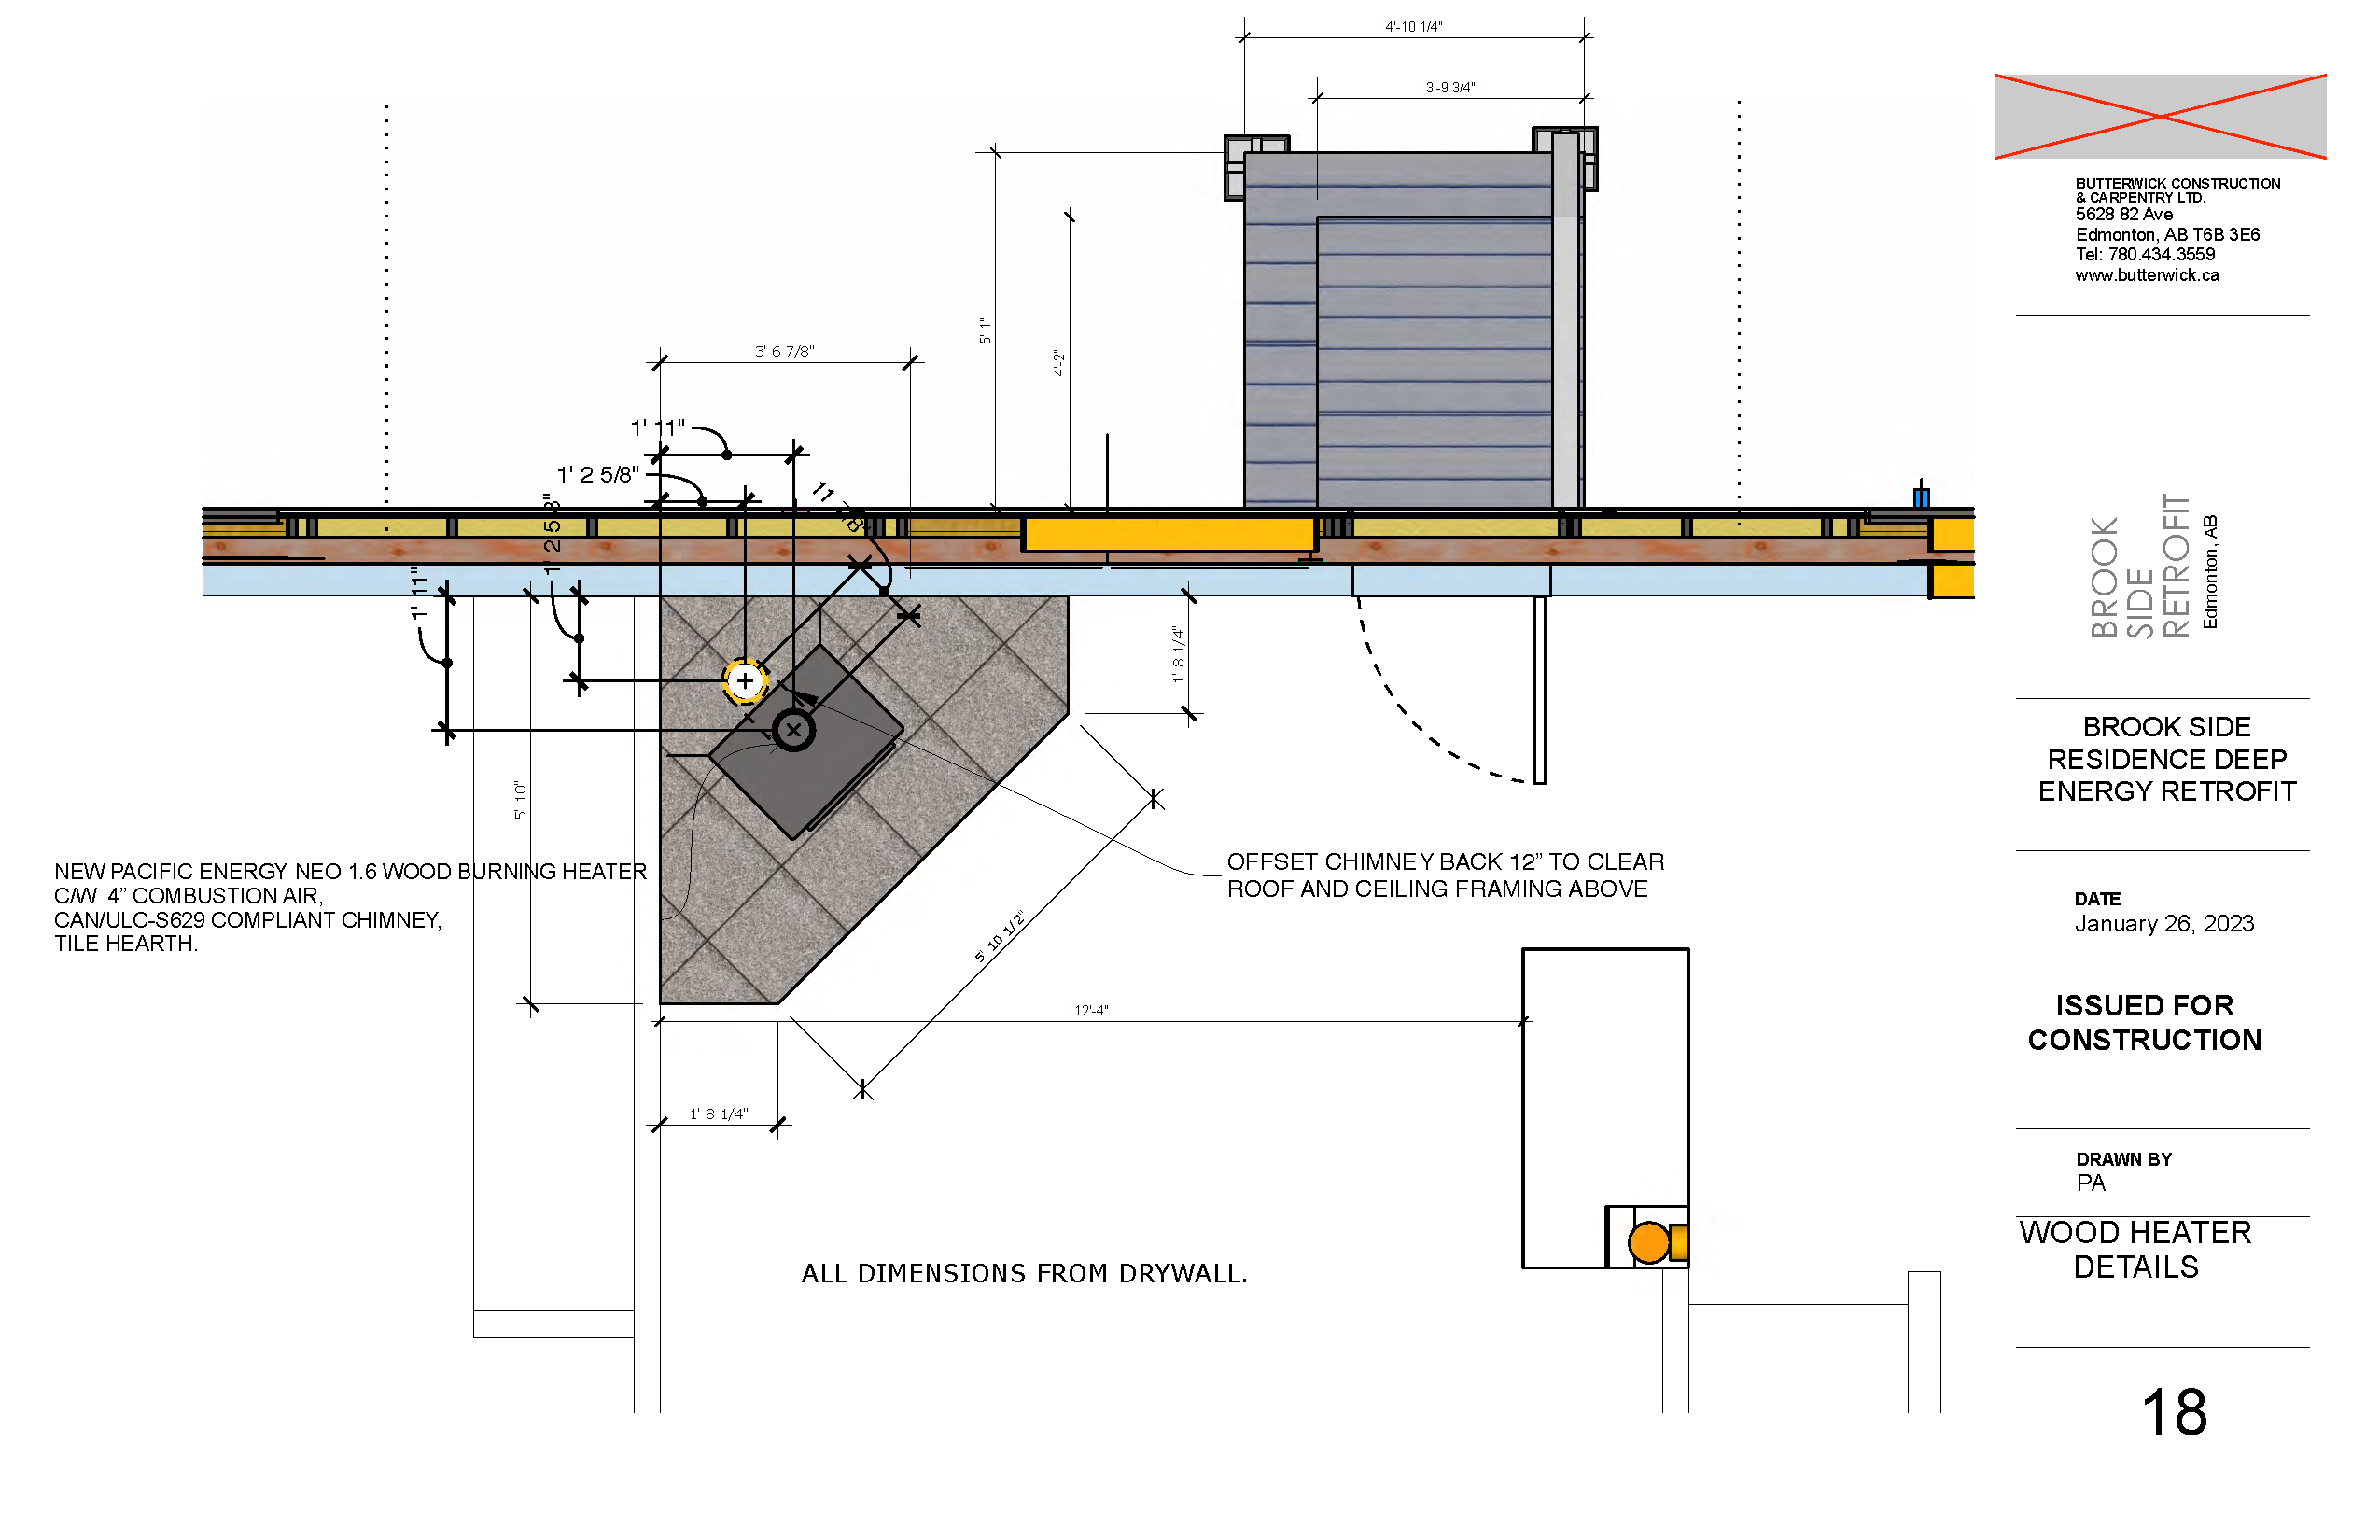
- Demolish and remove a huge brick housing for a leaky fireplace and complete associated interior repair and renovations, including a new ceiling finish.
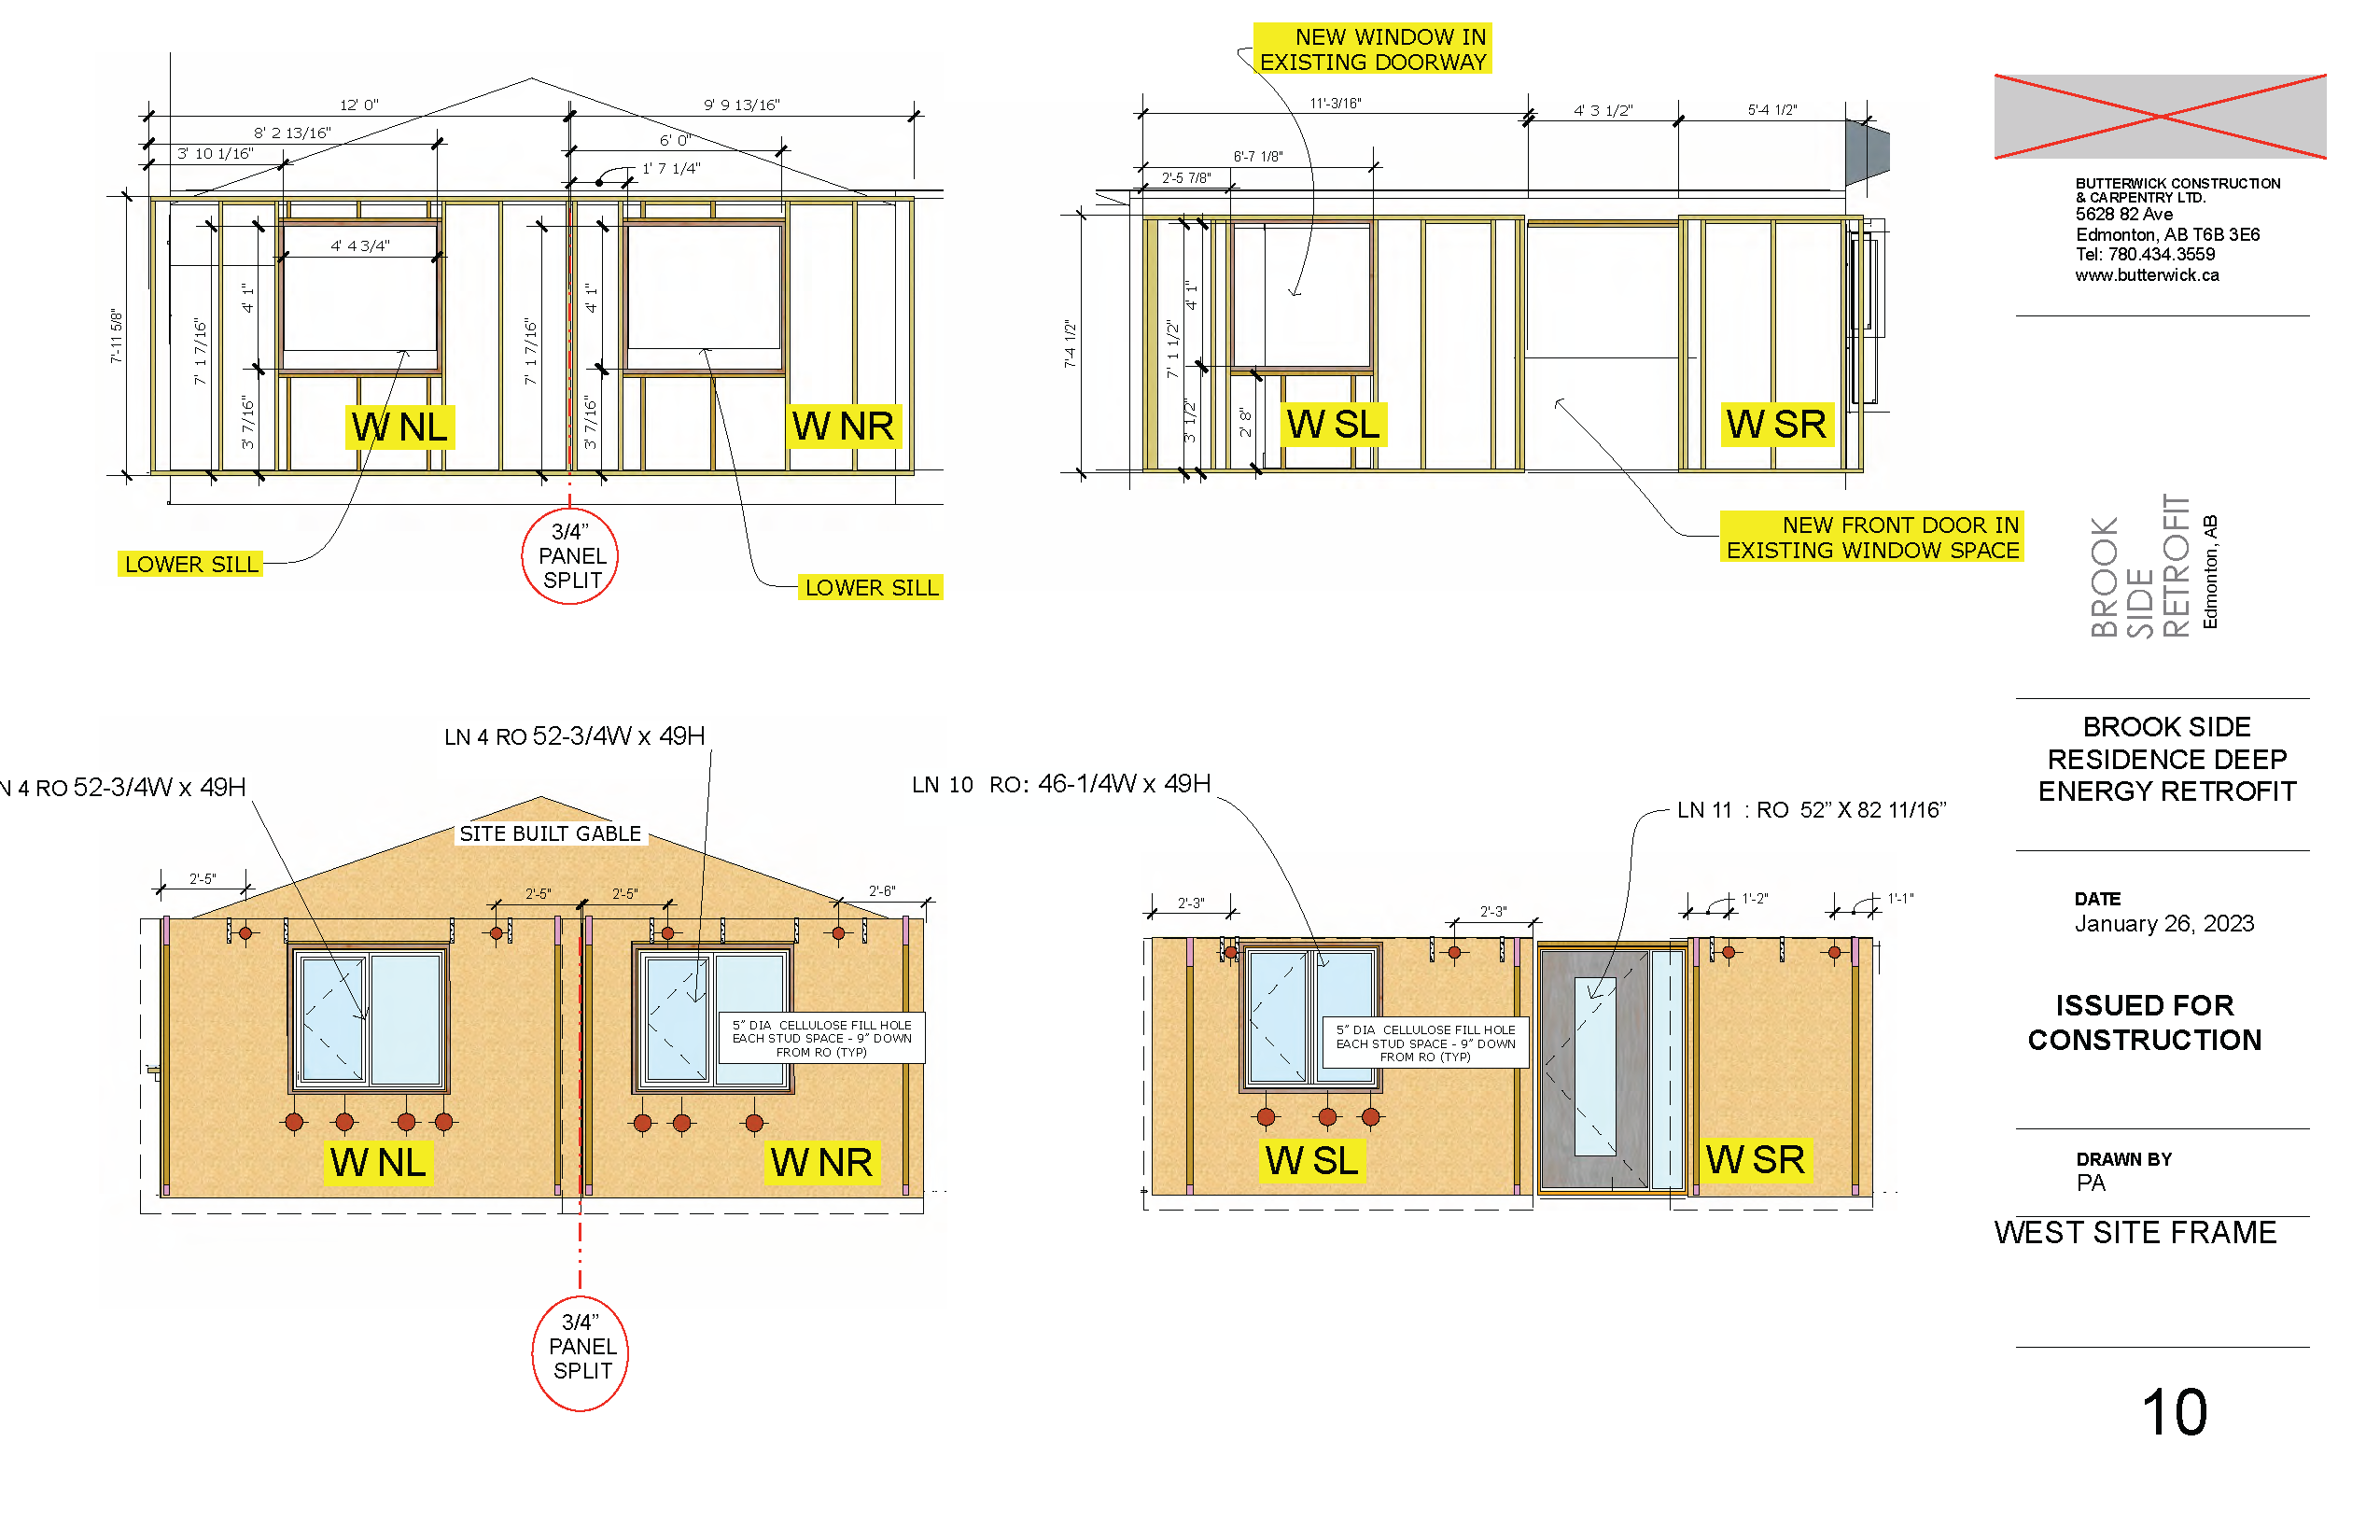
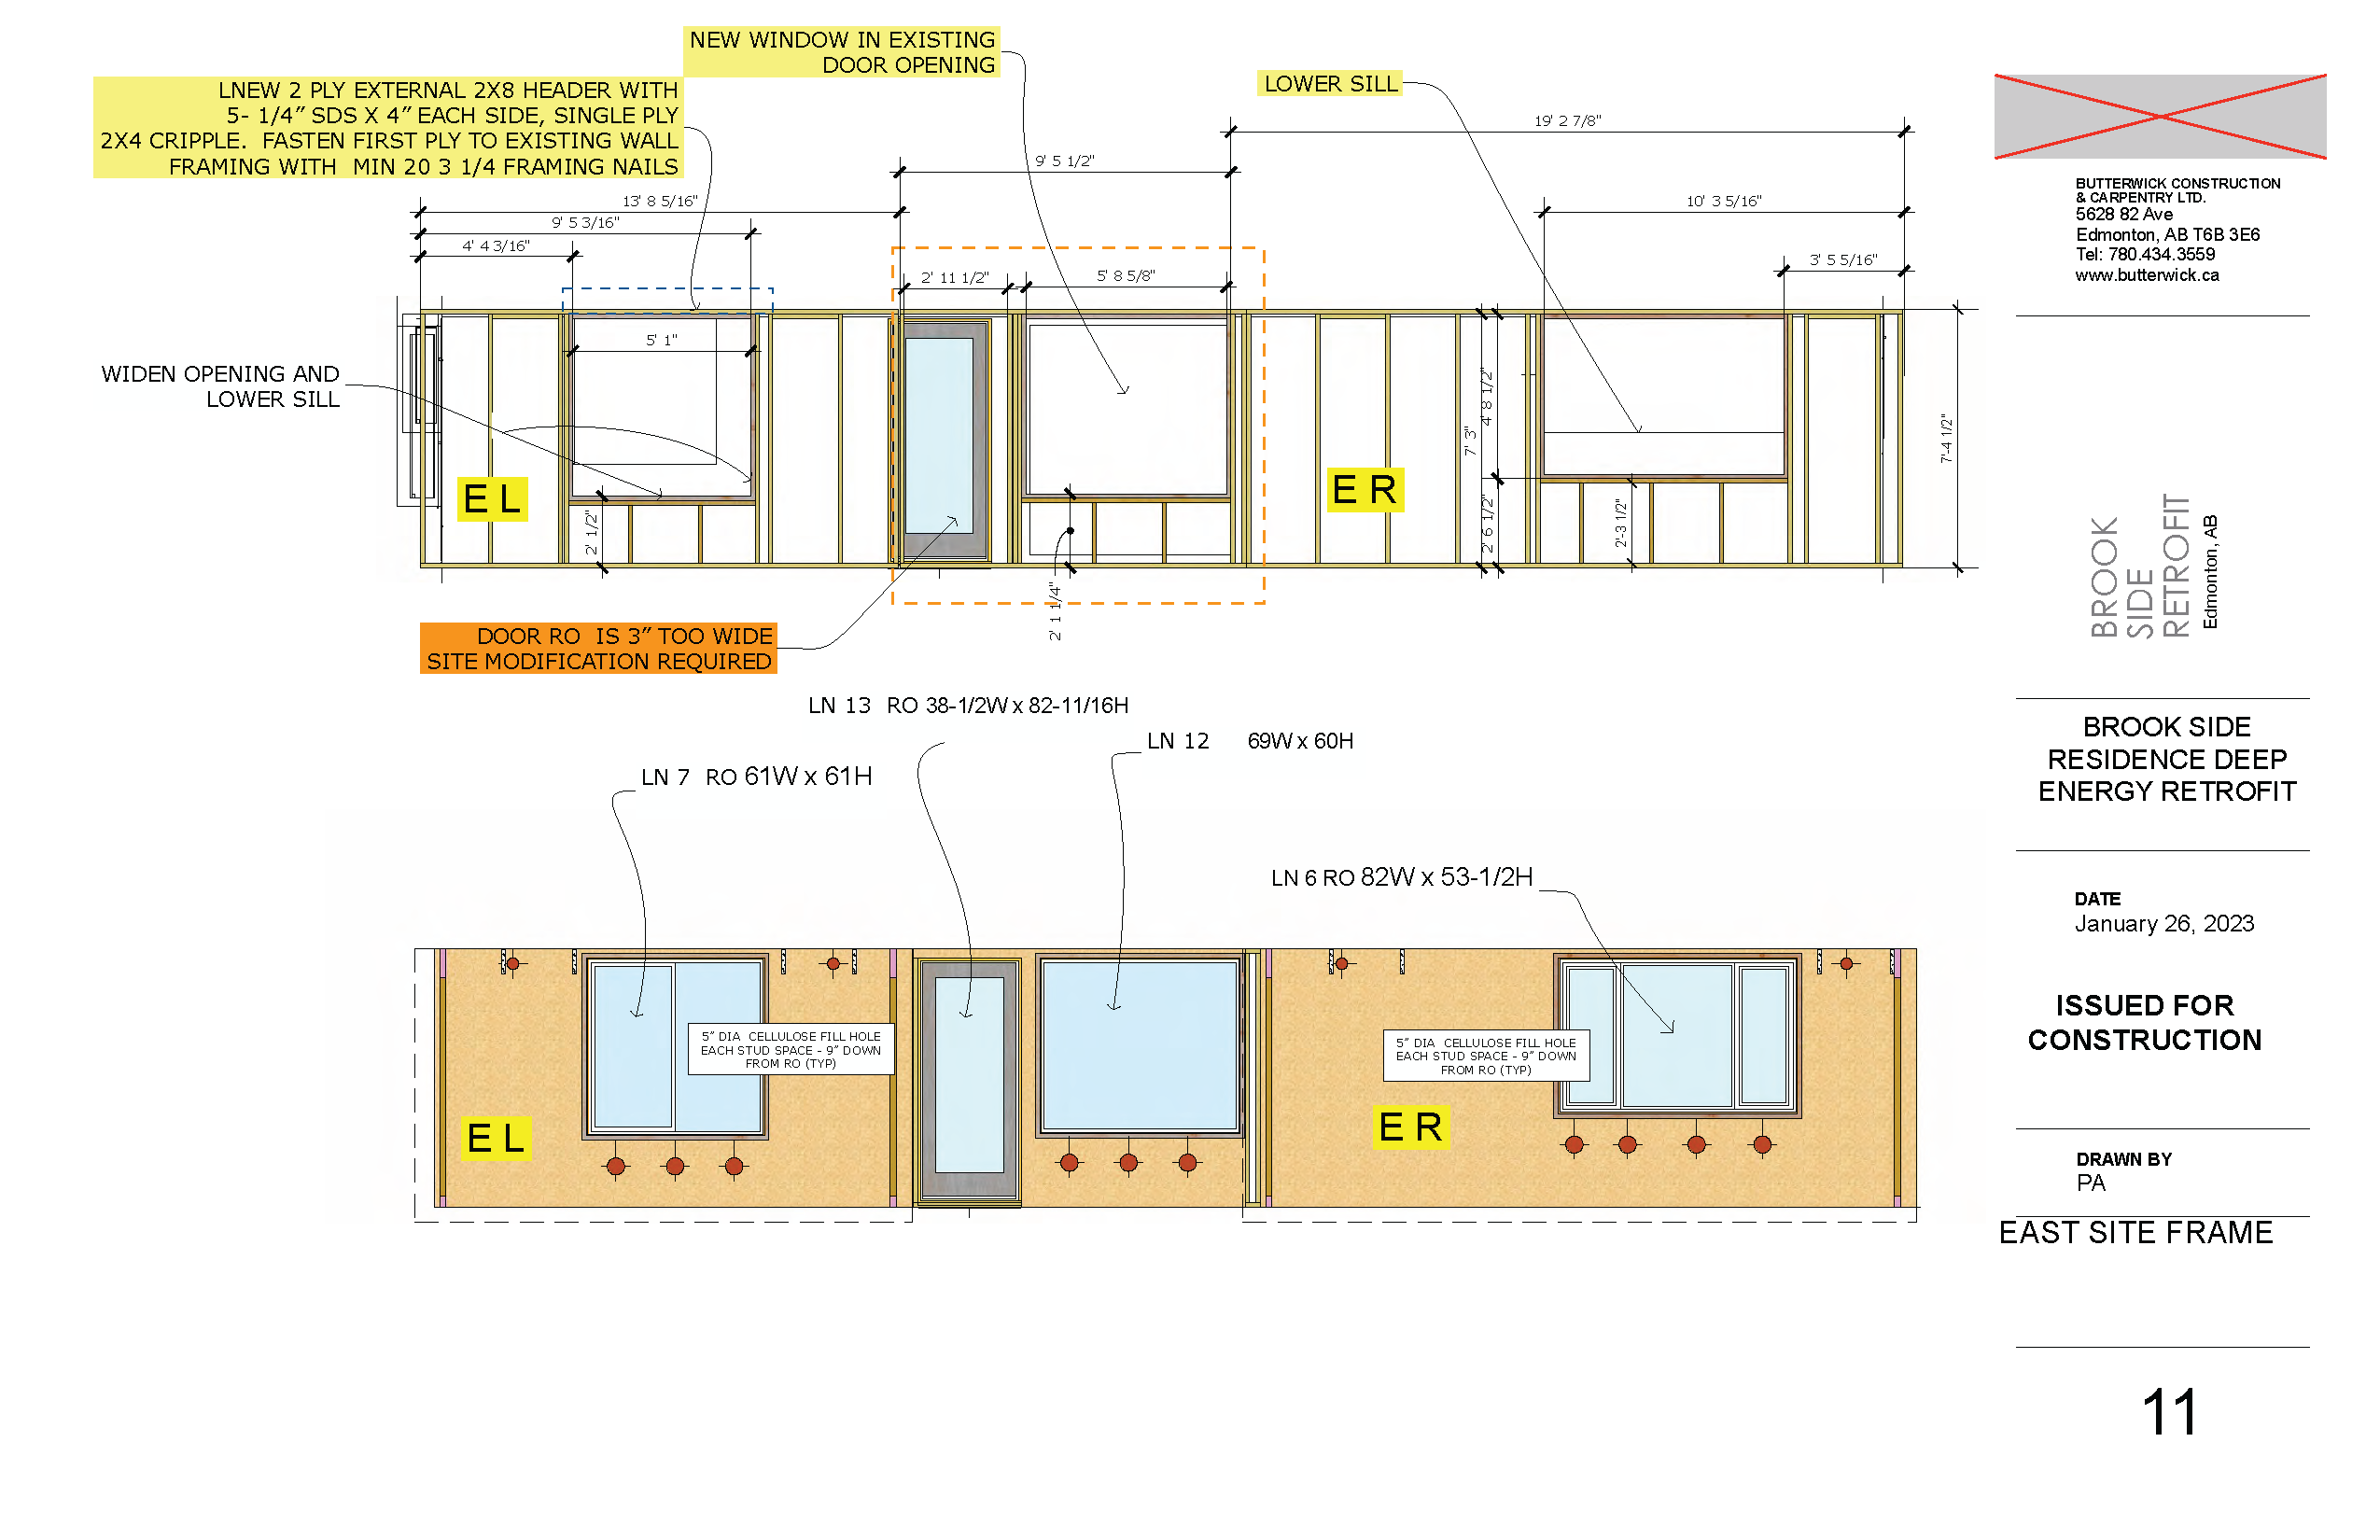
- Remove old windows.
- Reconfigure a number of window and door openings to change the flow of the house and provide more light.
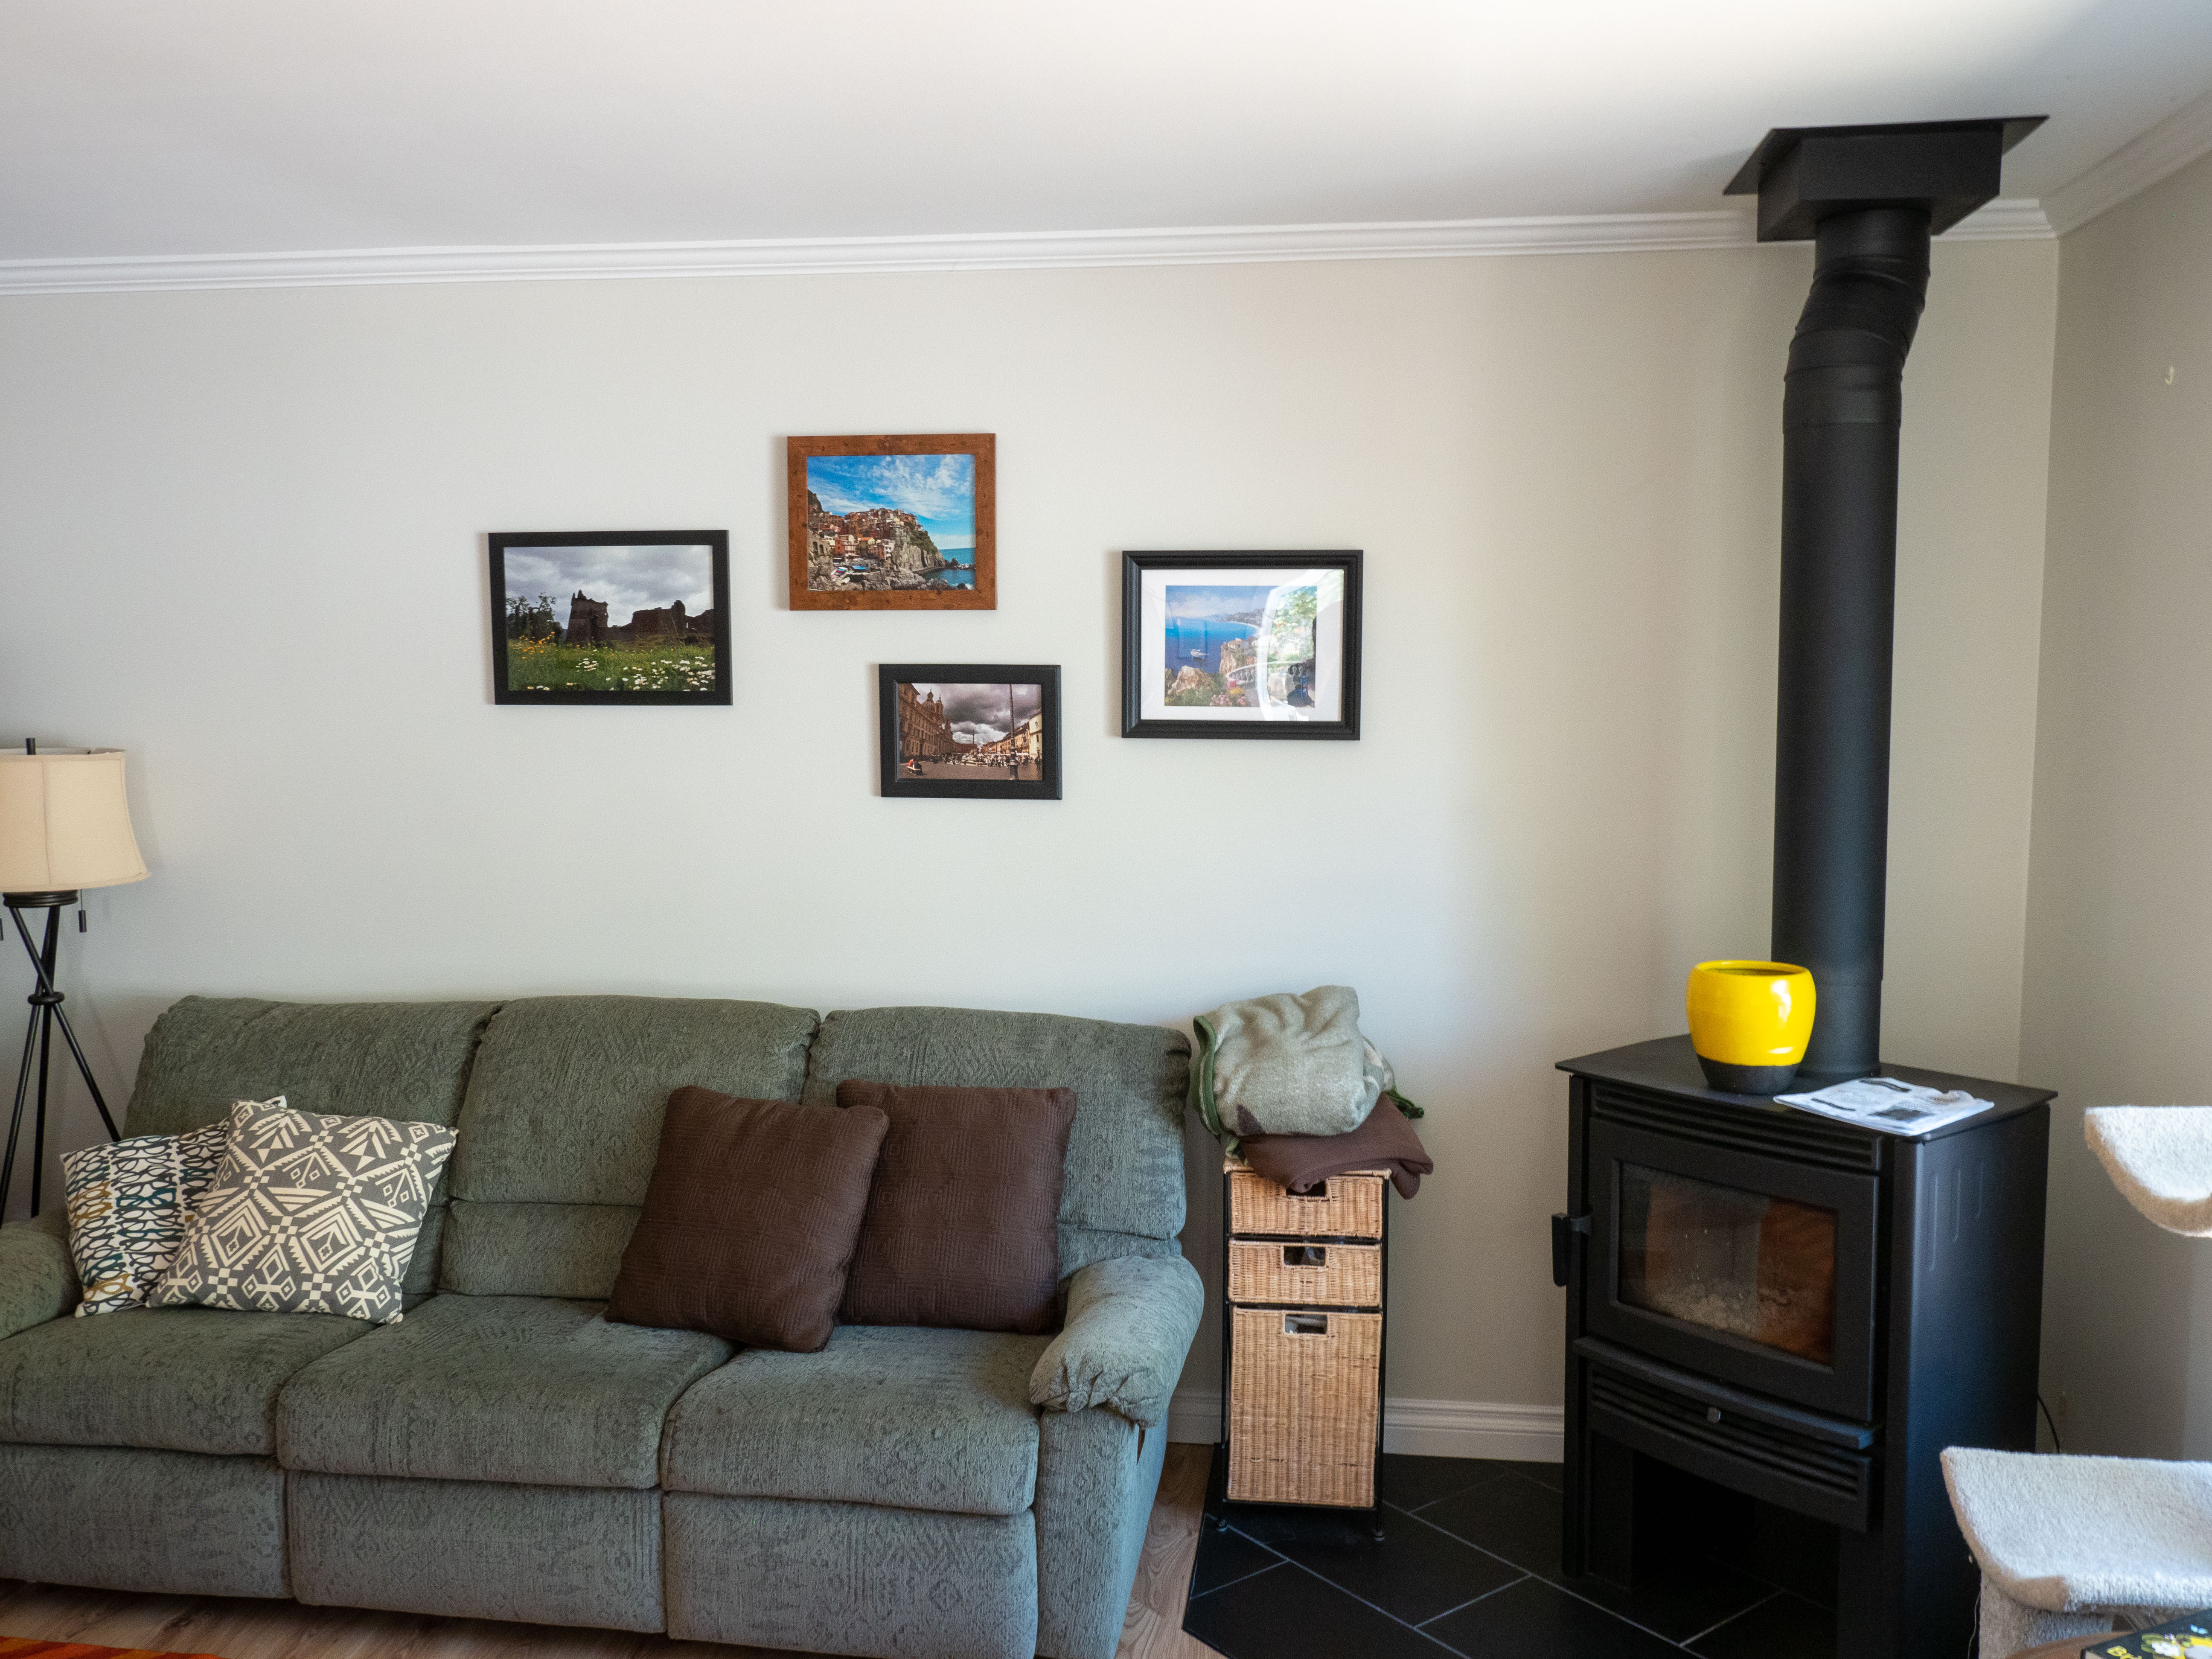
- Install a high-efficiency wood-burning stove.
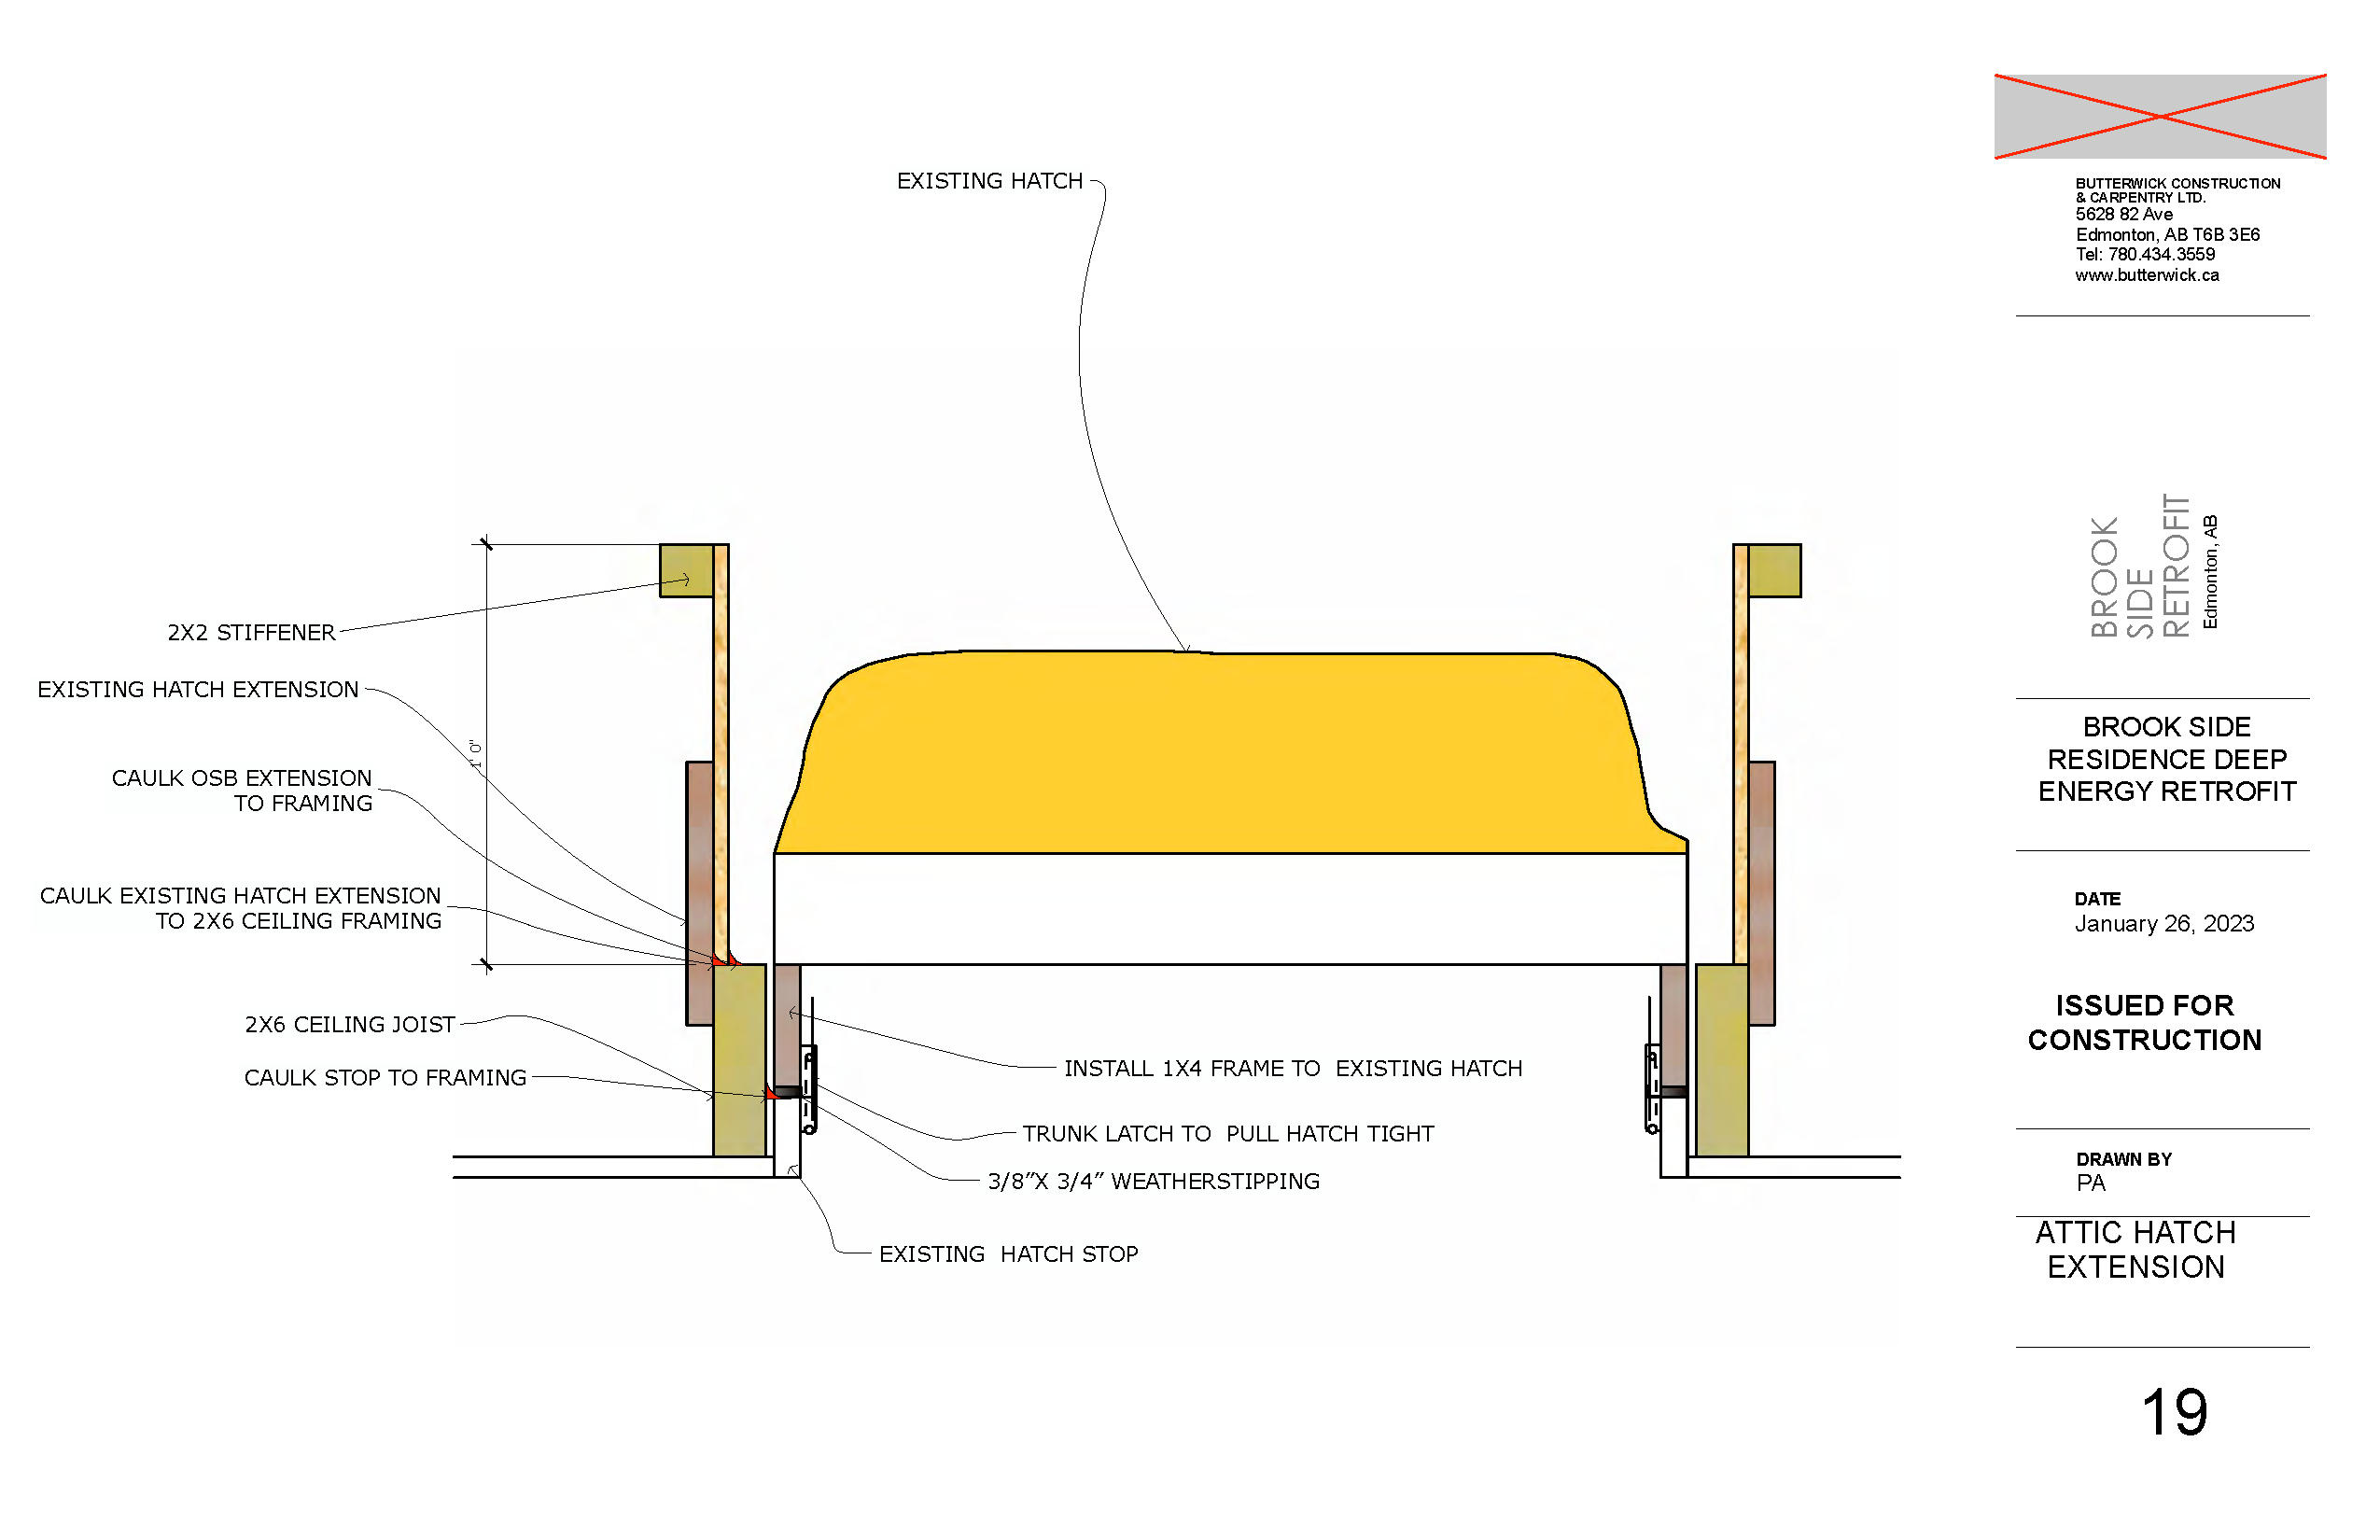
- Remove all insulation from the attic and then use spray foam to make it airtight before blowing in new cellulose insulation.
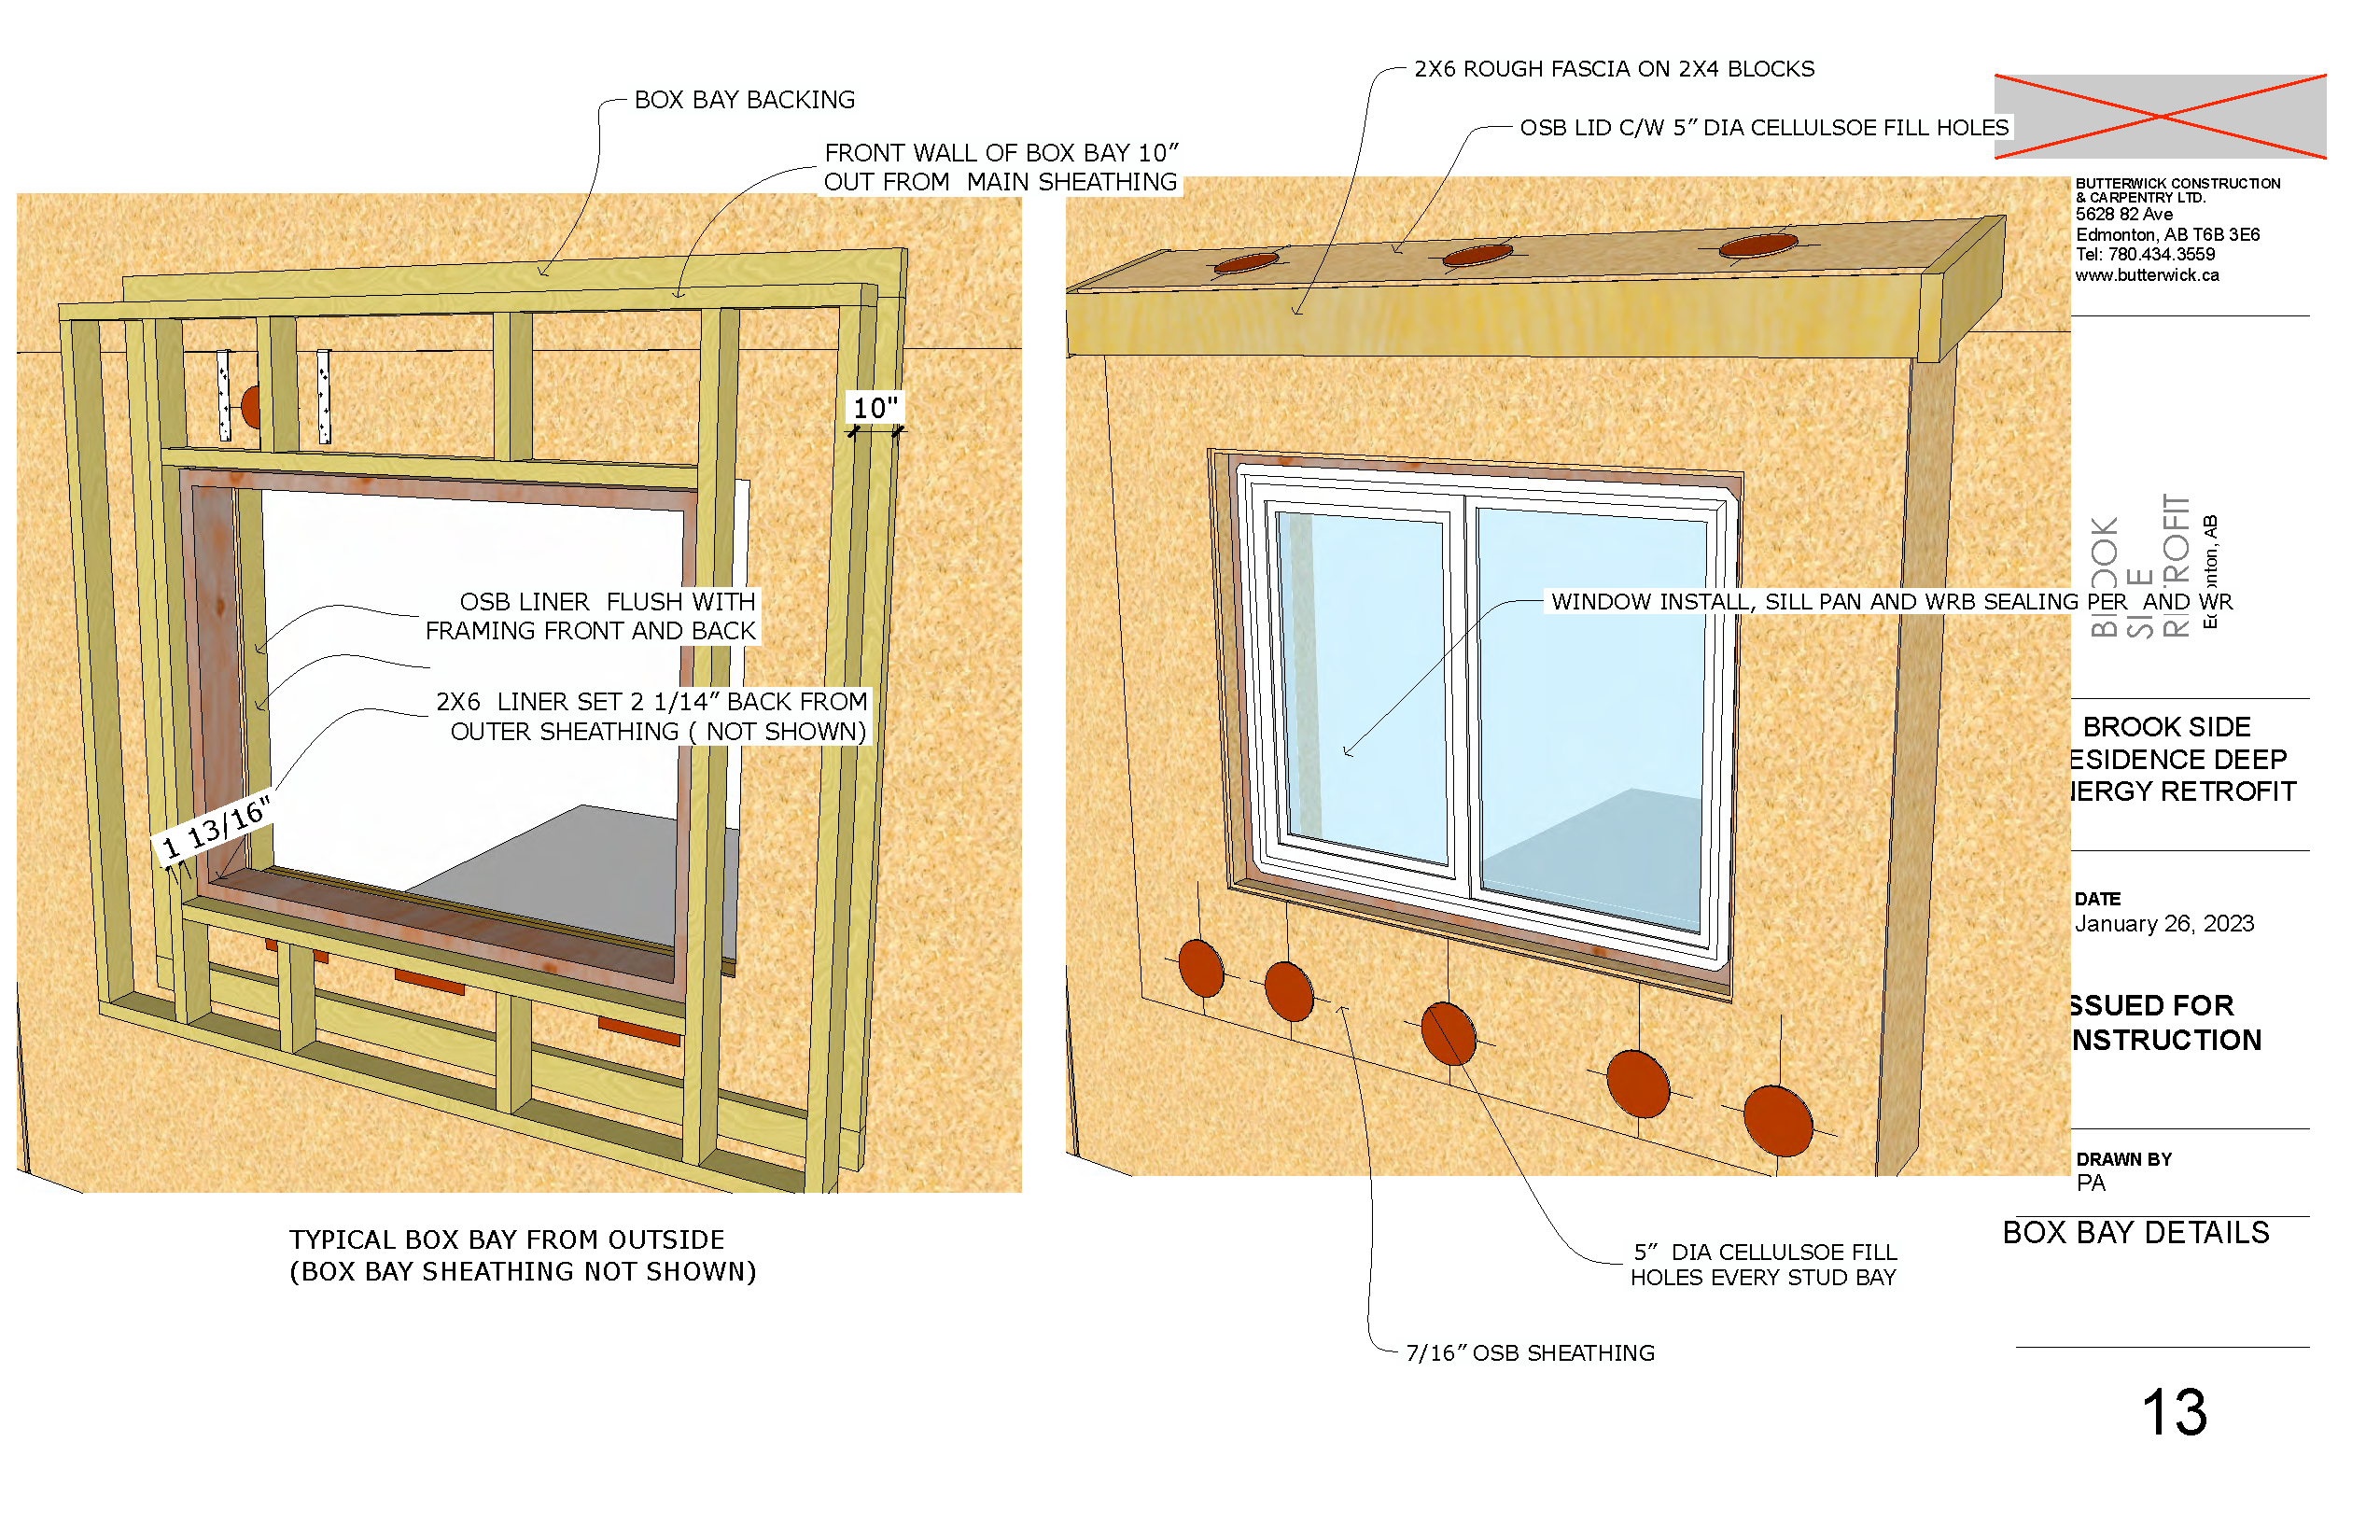
When the panels were built and delivered, Butterwick crews worked with a crane operator to install them. All the panels were installed in less than a day and fit beautifully within the design tolerances. The new high-performance windows were factory-installed in the panels. Doing this in a controlled environment results in bullet-proof installation that enhances long-term durability.
Post-panel installation
- Install tie-back straps to secure the panels in place.
- Seal the water-resistive barrier (WRB) from panel to panel and the panel support box.
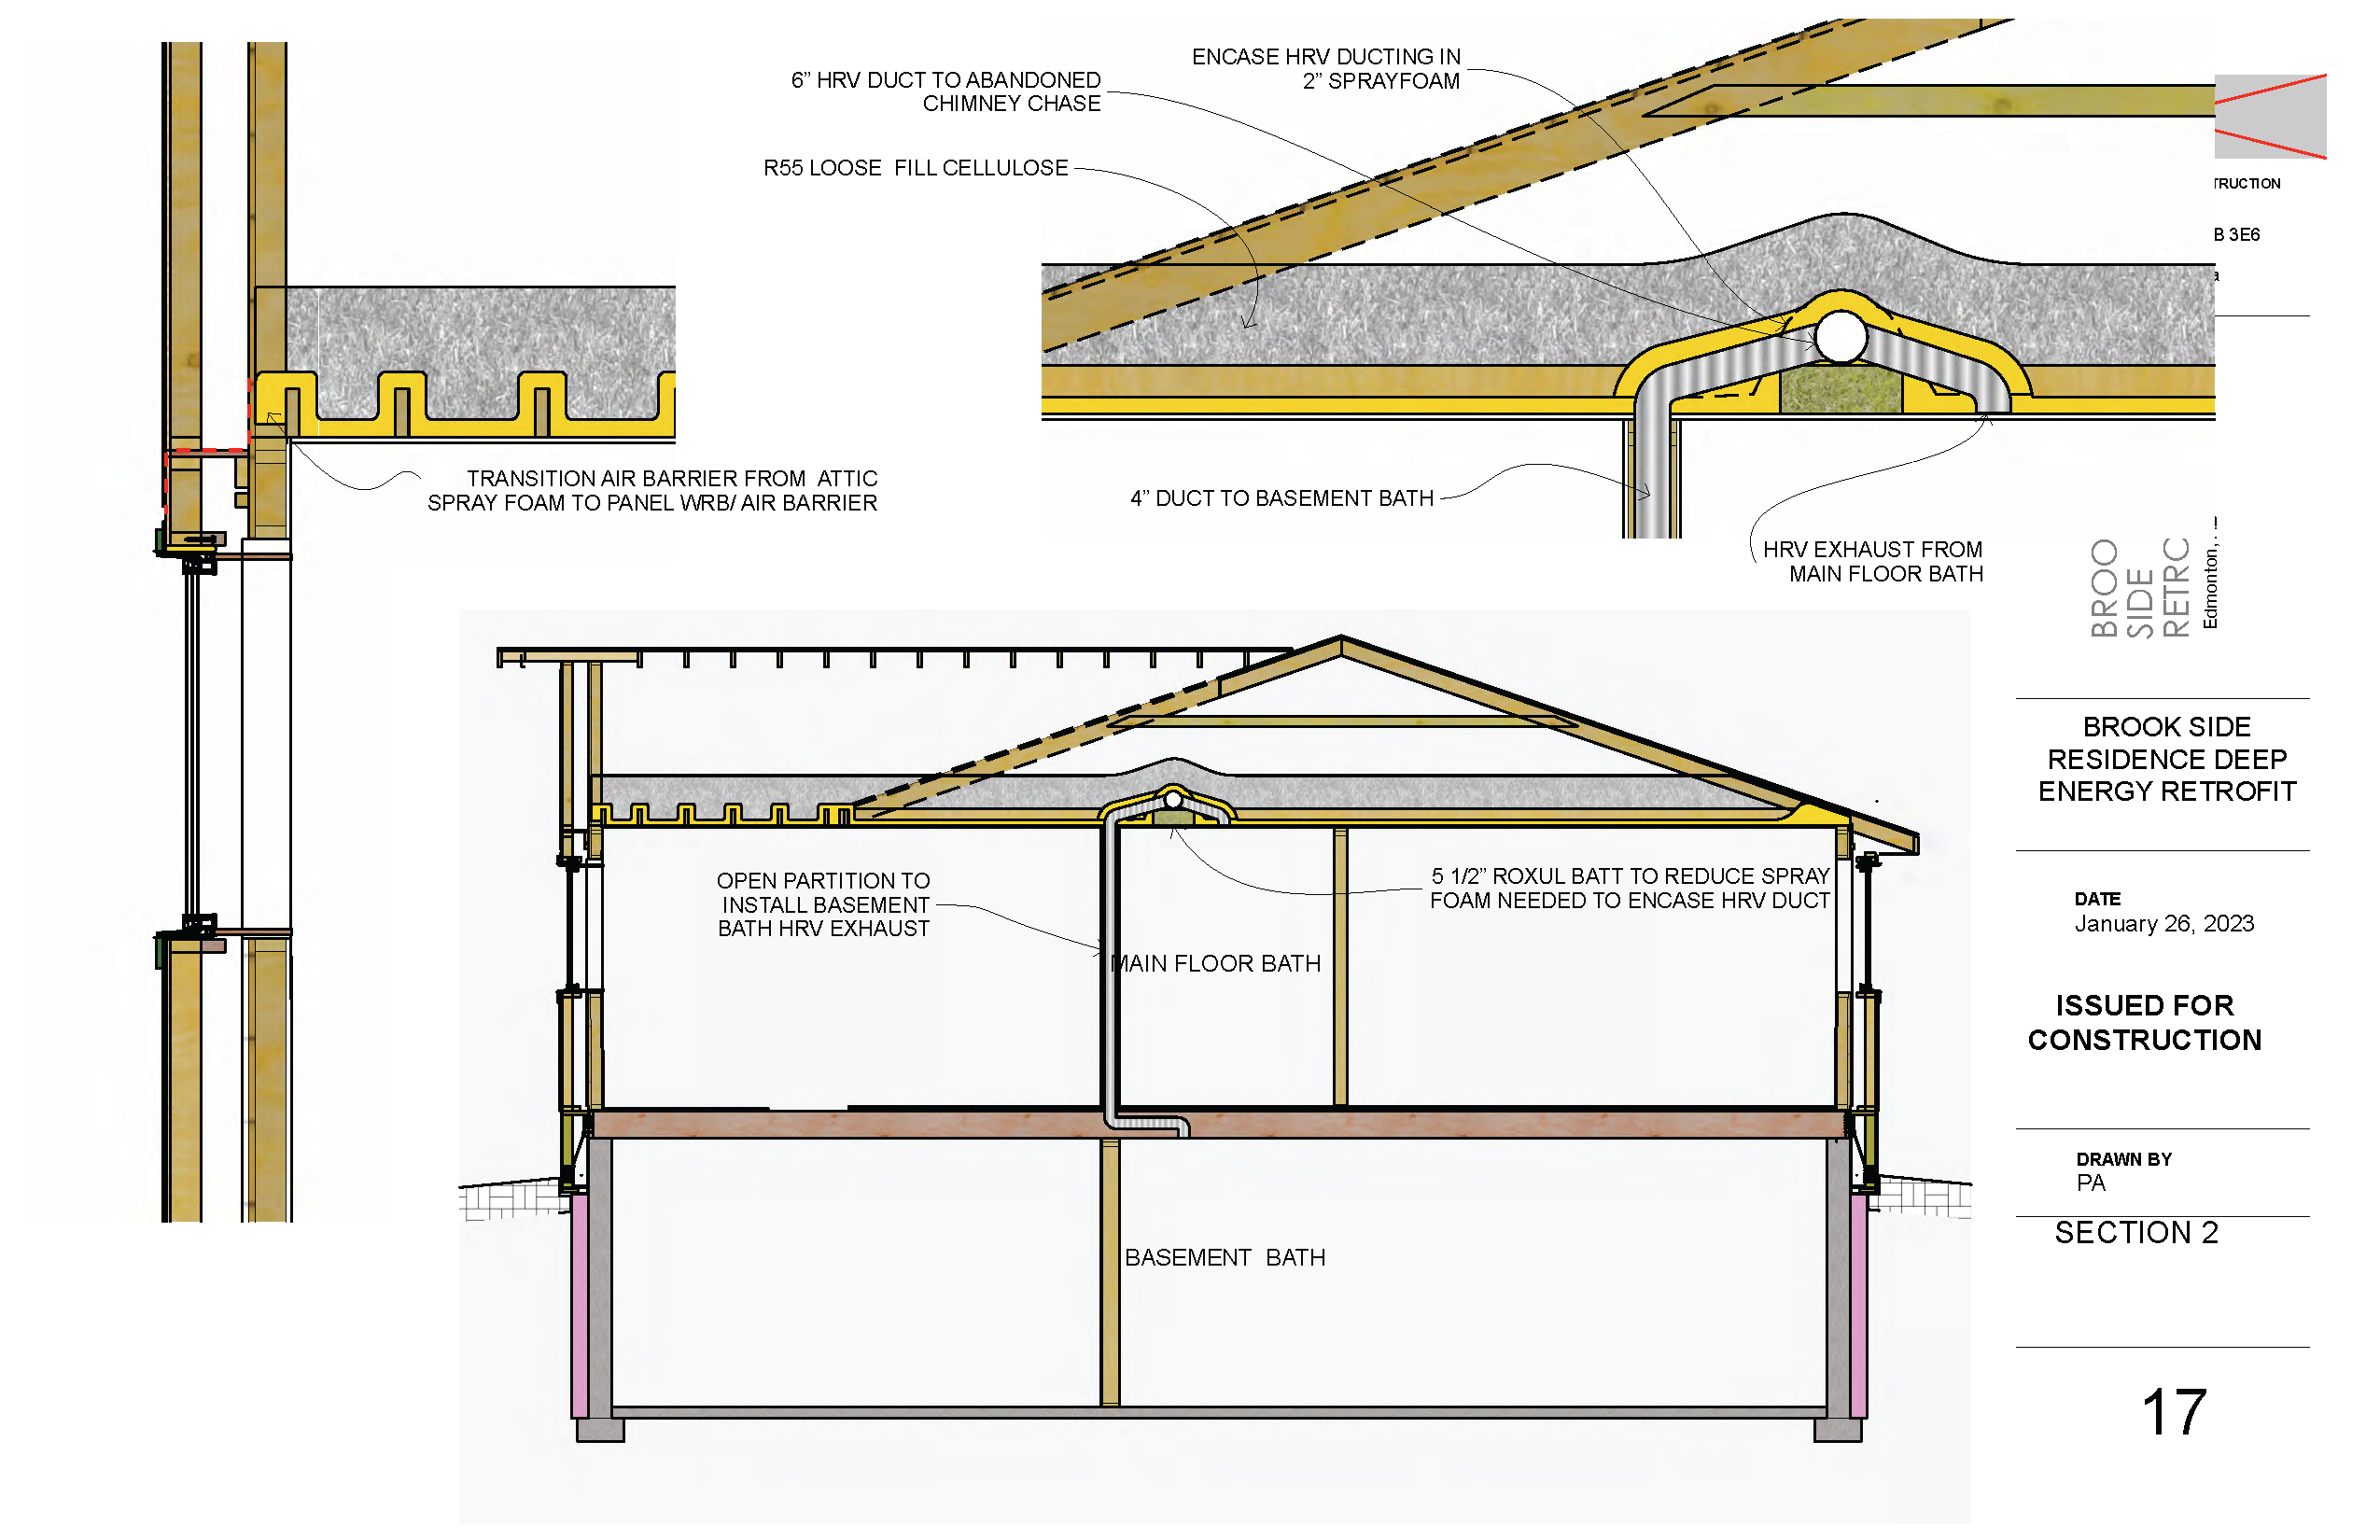
- Install the ERV Ducting to serve the main floor bathroom and kitchen.
- Seal the entire attic, including over the ERV ducting, taking care to leave the edges so they can be tied into the water-resistive barrier on the panels.
- Make a continuous air seal between the panels’ water-resistant barrier and the attic’s spray foam layer.
- Replace the gas furnace and hot water tank with Air Source Heat Pumps and disconnect the gas line.
- Install a high-efficiency Energy Recovery Ventilator that will provide a continuous supply of healthy fresh air.
- Interior finishing windows and doors
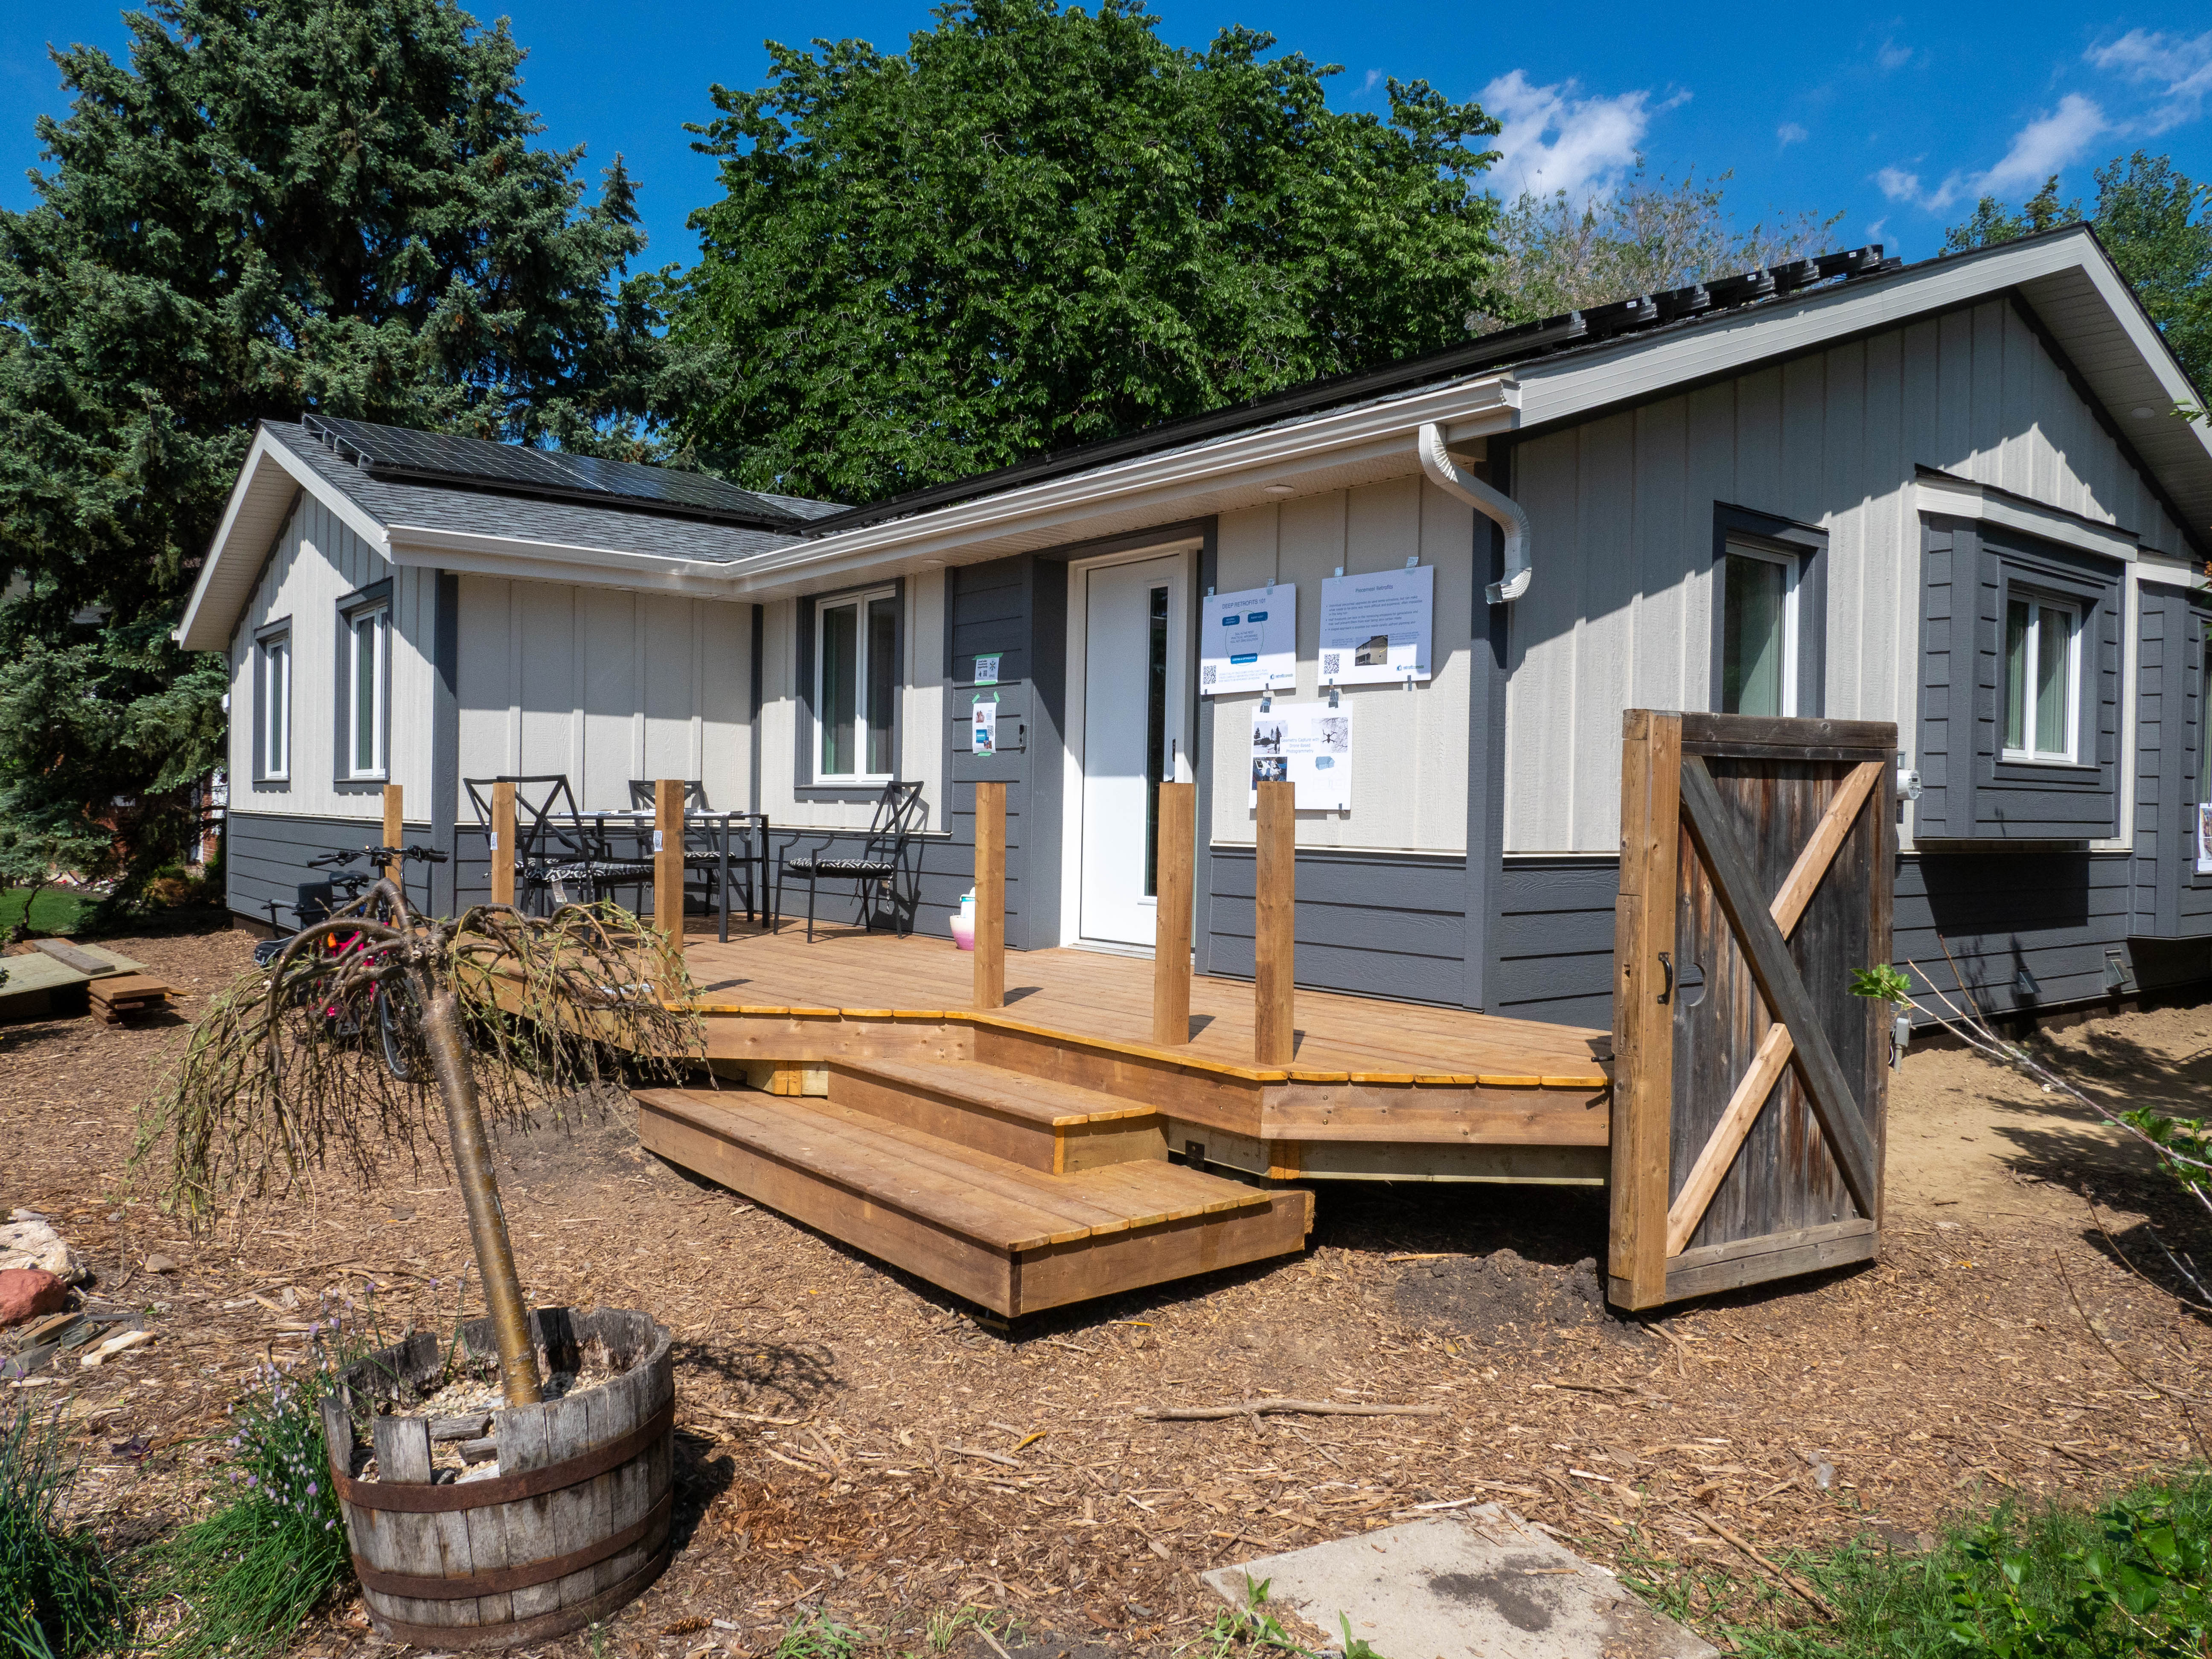
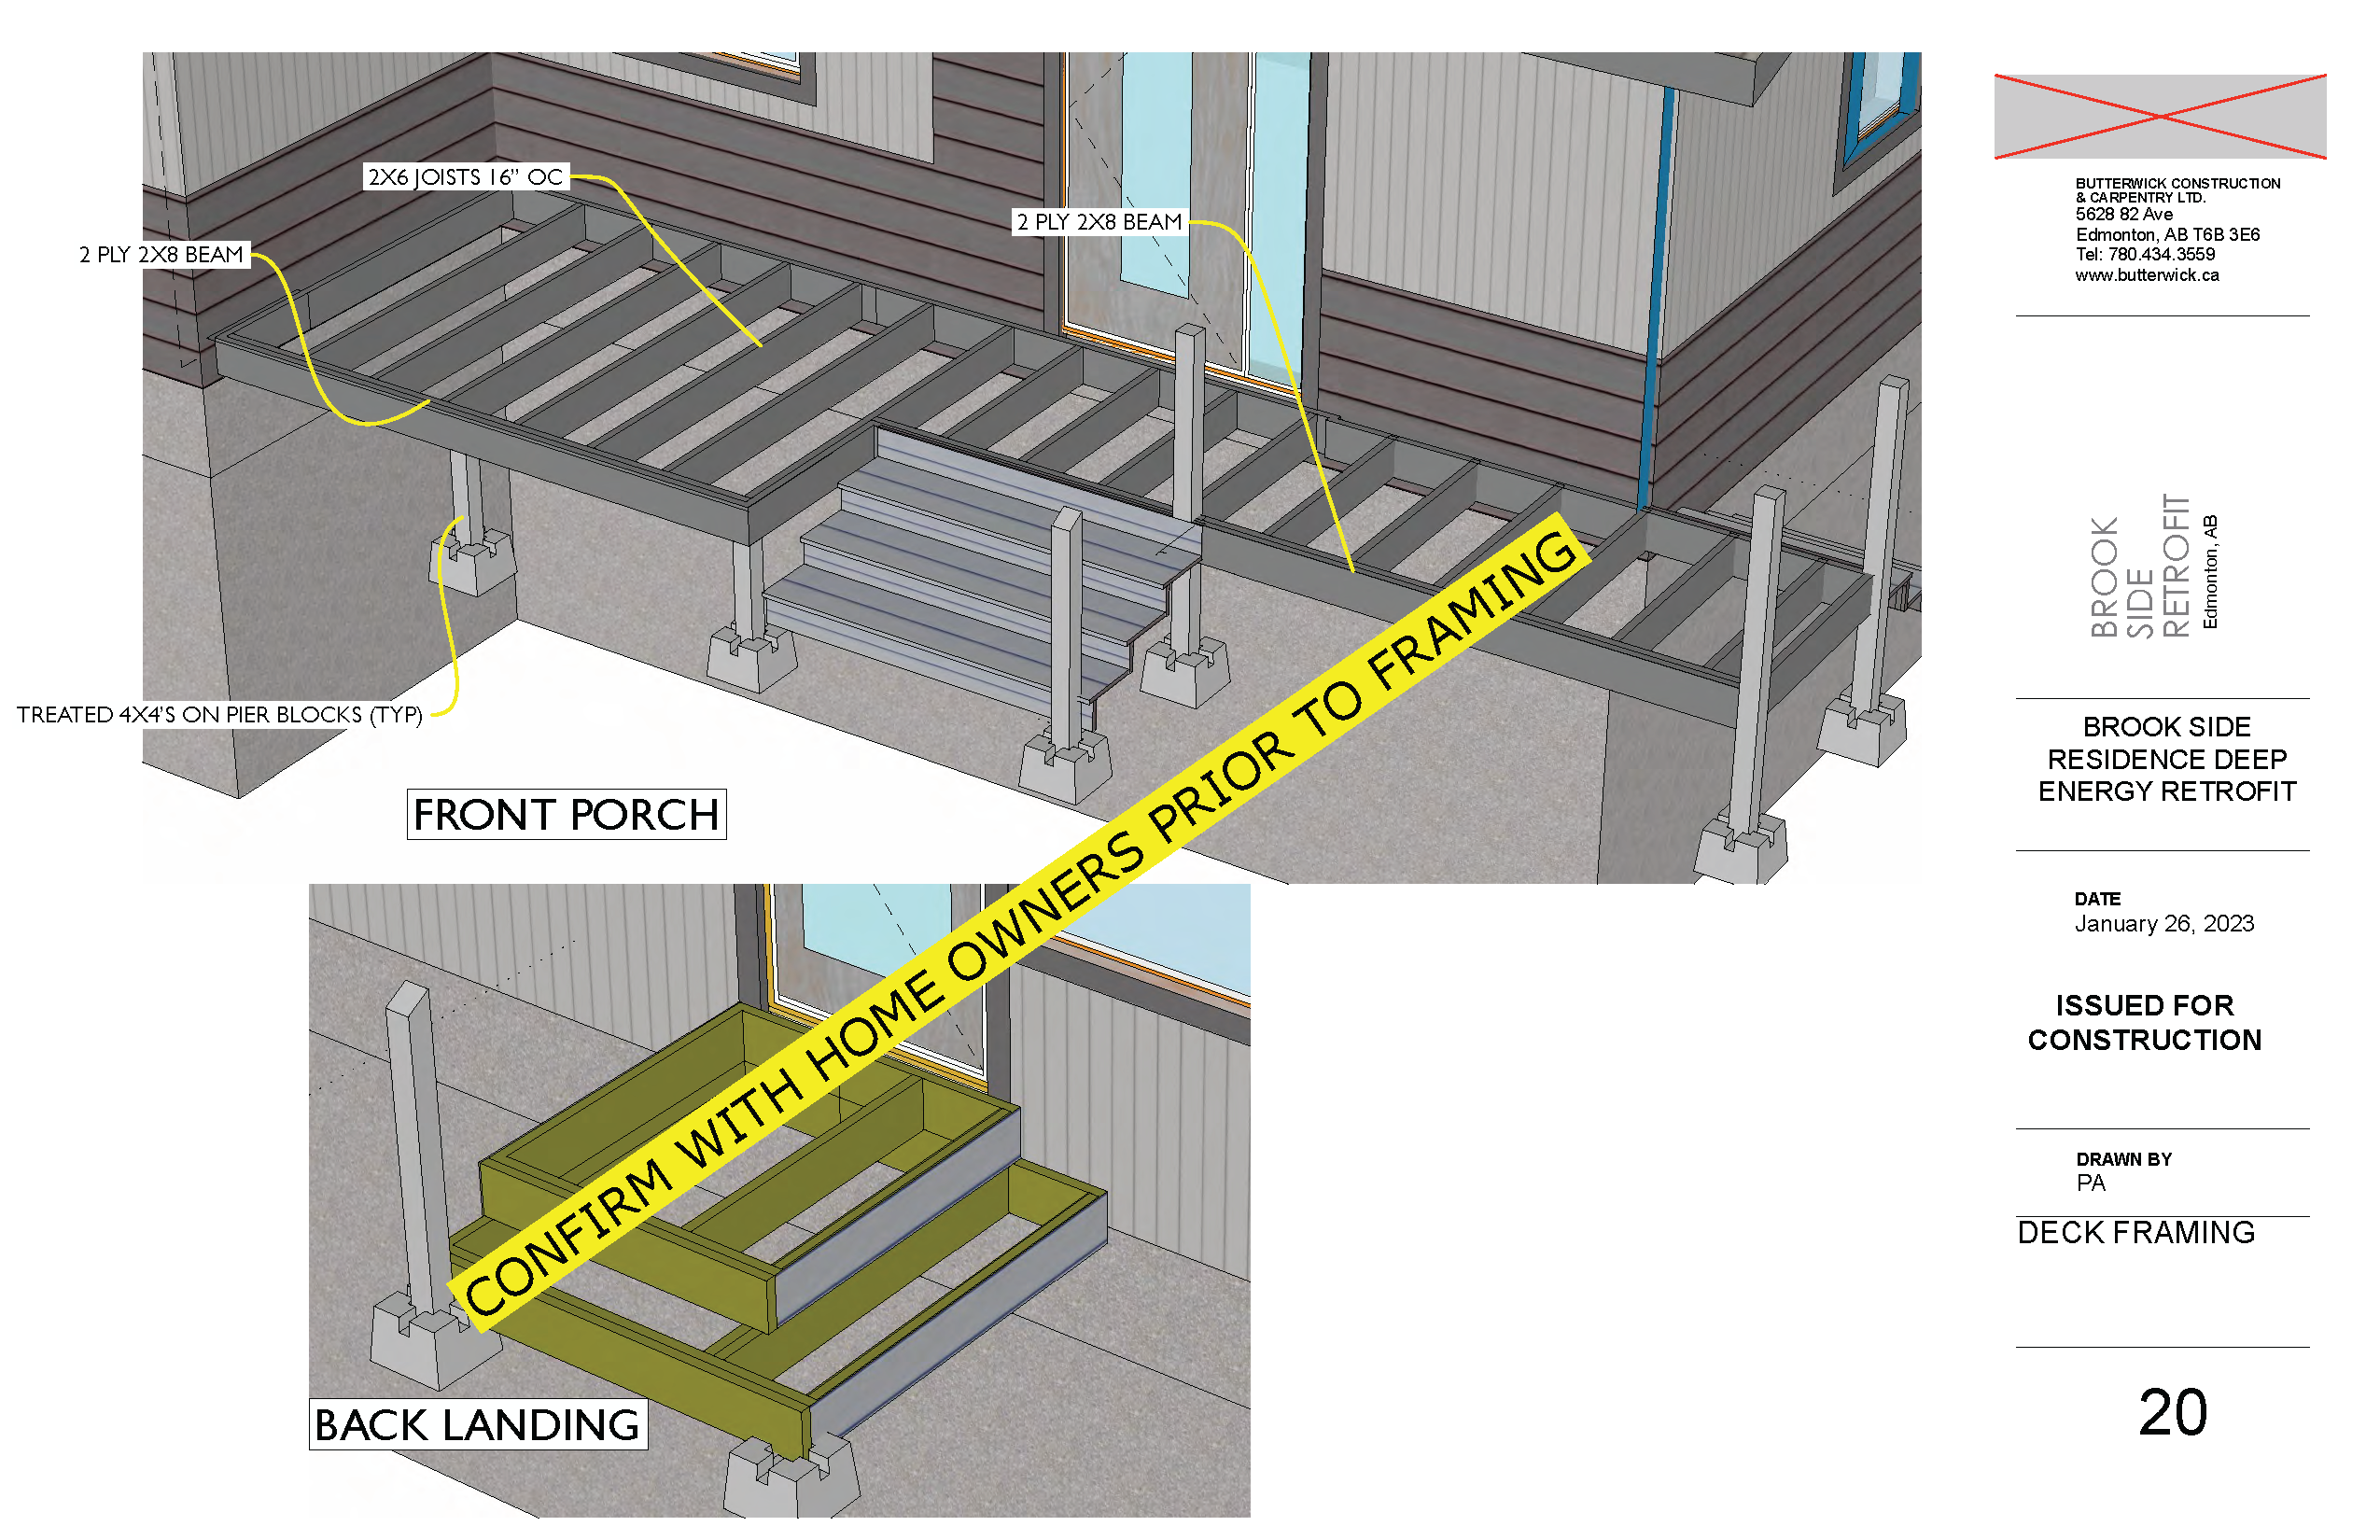
- Build a new deck and front porch
Funding Sources Greener Homes Grant Interest-Free Loan Funded in part for innovation by Smart Sustainable Resilient Infrastructure Association Home Energy Retrofit Accelerator
Lessons Learned
Challenges
Living in a construction zone
One of the benefits of a panelized retrofit is that most of the work is on the outside of the home, meaning residents can remain during construction. In this case, the reconstruction was more disruptive for the family because of the removal of a massive brick chimney and fireplace. On the bright side, removing the chimney provided an easy solution for getting HRV ducting into the attic so it could feed the kitchen and bathroom – and the Hoffmans are enjoying a literally brighter, open living space.
Project management and costs
Doing a full, net-zero retrofit can be a complicated undertaking. The project management is not easy, but Sean says that homeowners can mitigate this with careful planning and by giving the project the attention it deserves.
“You need to be aware that if you put more time and attention into the project, it’s going to go more smoothly and faster,” Sean said. “If you don’t, then it’ll take a bit longer, and you might have unexpected problems.”
Another challenge is that using brand-new technology and techniques to make an old home net-zero comes with a price tag. A retrofit similar to the Hoffman’s currently ranges from $100 to $200 thousand, depending on the building and what it needs to get to net-zero. But the Hoffmans are philosophical about it. They want to see the technique explored so it can be rolled out for millions of homes in short order, bringing down costs substantively.
Melanie says that for her, this was a natural next step of taking climate action at an individual level.
“My commitment to climate action is such an important value for me that it makes the final costs of this project absolutely worth it,” she said. “Your house is probably your most valuable asset and one of your largest sources of personal carbon emissions, next to travel. So why not invest where you can make a real difference?"
“Your house is probably your most valuable asset and one of your largest sources of personal carbon emissions, next to travel. So why not invest where you can make a real difference?" – Melanie Hoffman, Homeowner
Undoing previous work
Before the retrofit, the Hoffmans had made some energy-efficiency improvements to their house. Some of these piecemeal upgrades had to be redone because they weren’t part of a comprehensive retrofit plan. For example, some insulation was added to the attic without first sealing the substantial air leaks. Unfortunately, crews had to suck all that insulation out of the attic so they could seal it up with a continuous 2” layer of spray foam. Besides the wasted energy, a leaky attic risks damaging the home through moisture build-up in winter.
What went well
Panel Installation
Like other panelized retrofits Butter Projects has done, this project provided further proof that panelization works: the panels fit perfectly. Watch a video of the panel "fly-in" at the Hoffman’s.
Design team
Melanie and Sean were very impressed by the holistic approach that the design team used on the project from start to finish. This team approach supported nimble problem-solving that used a big-picture lens to make real-time decisions.
Dramatically improved efficiency
The retrofit also slashed the home’s energy consumption from 128 to 16 GJ a year. The house is now 70 to 80 per cent more efficient and gets nearly all its power from rooftop solar arrays. Check out the Before and After table below for more details.
A transformed home
In Melanie’s words, “ the finished product is beautiful.” But besides having a brand new-looking house, there’s a long list of improvements.
The house has a new basement-to-attic, super-insulated and airtight envelope, state-of-the-art HVAC equipment like a heat pump and air exchange and new high-performing windows and doors.
The Hoffmans enjoy nice, even temperatures throughout the house. The new exterior, sided with LP SmartSide, will last for decades. Their place looks like it was built yesterday but still has its original character. The building can now protect its occupants from climate-change-related extreme weather like air pollution from wildfires or prolonged heat waves and cold snaps. The house is also way quieter thanks to the added insulation, and the indoor air quality is fresher and healthier. In the winter, the family gathers around the high-efficiency wood stove they installed during the retrofit.
Before & After
General |
Envelope |
Mechanical & Electrical |
Annual Energy Usage |
Carbon Emissions* |
Technical Documents
Drawings or Details


Photos
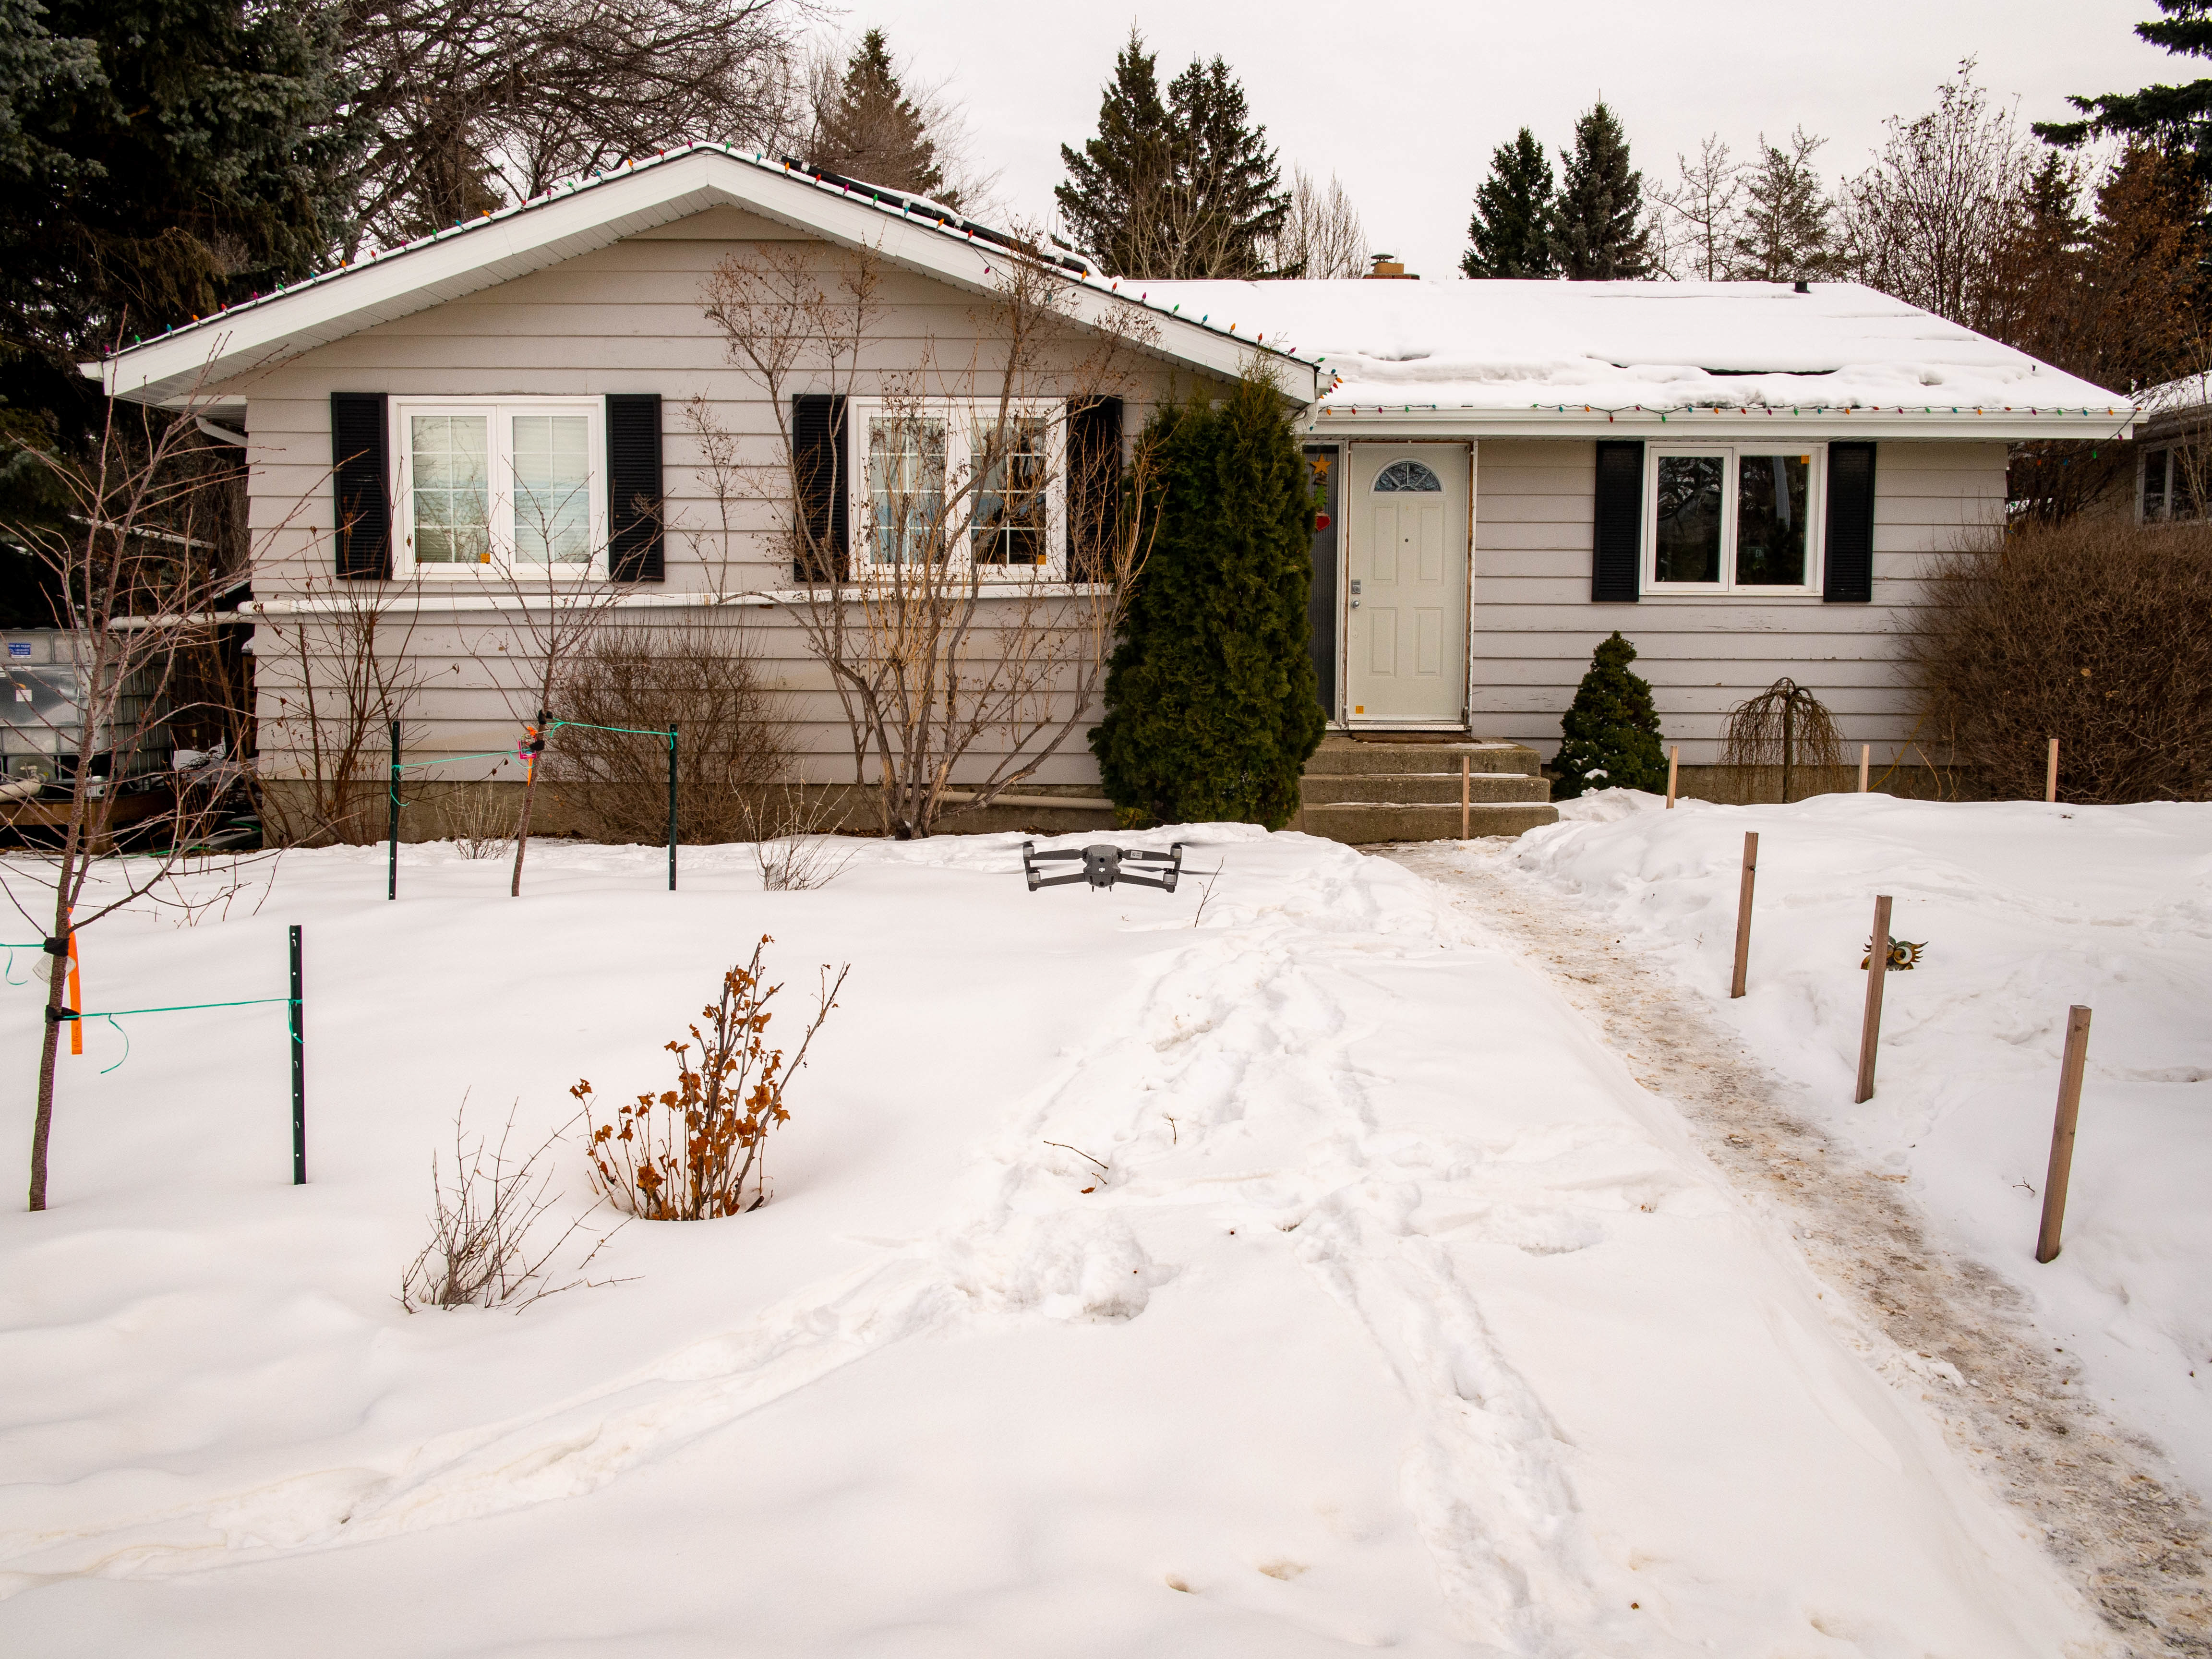
Pre Retrofit
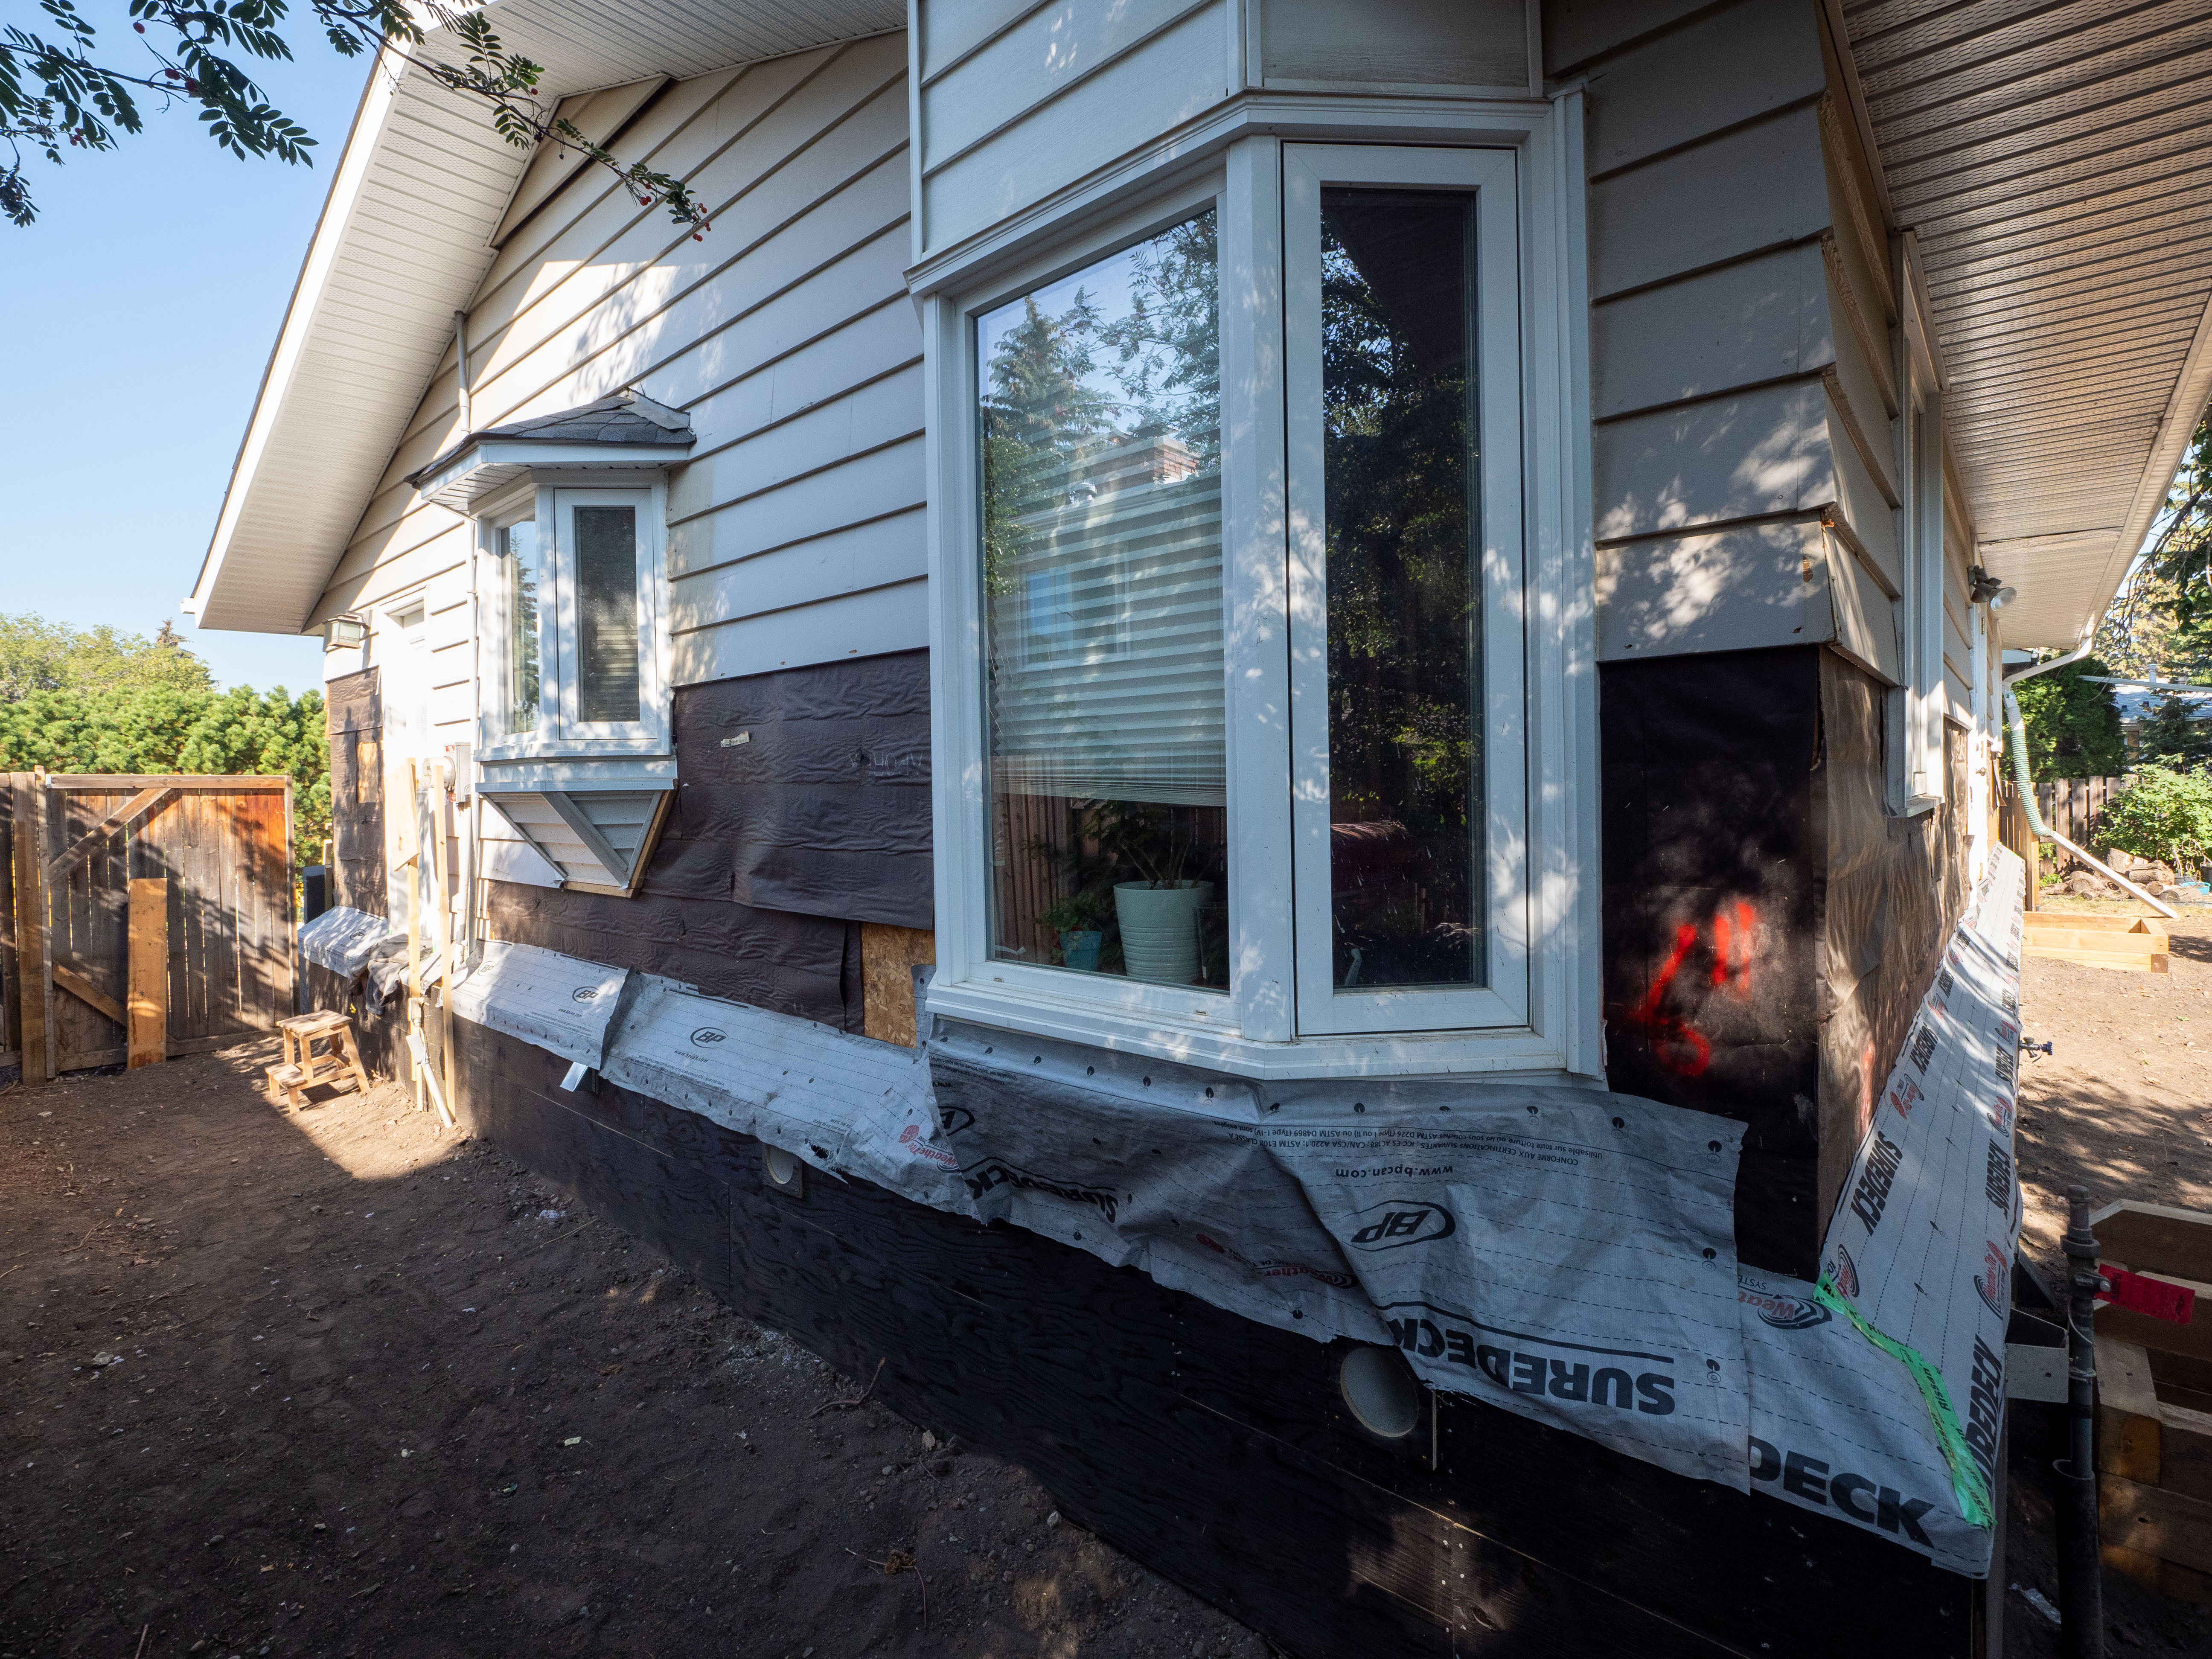
During Construction

Post Retrofit