Southeastern Ontario Phased Retrofit
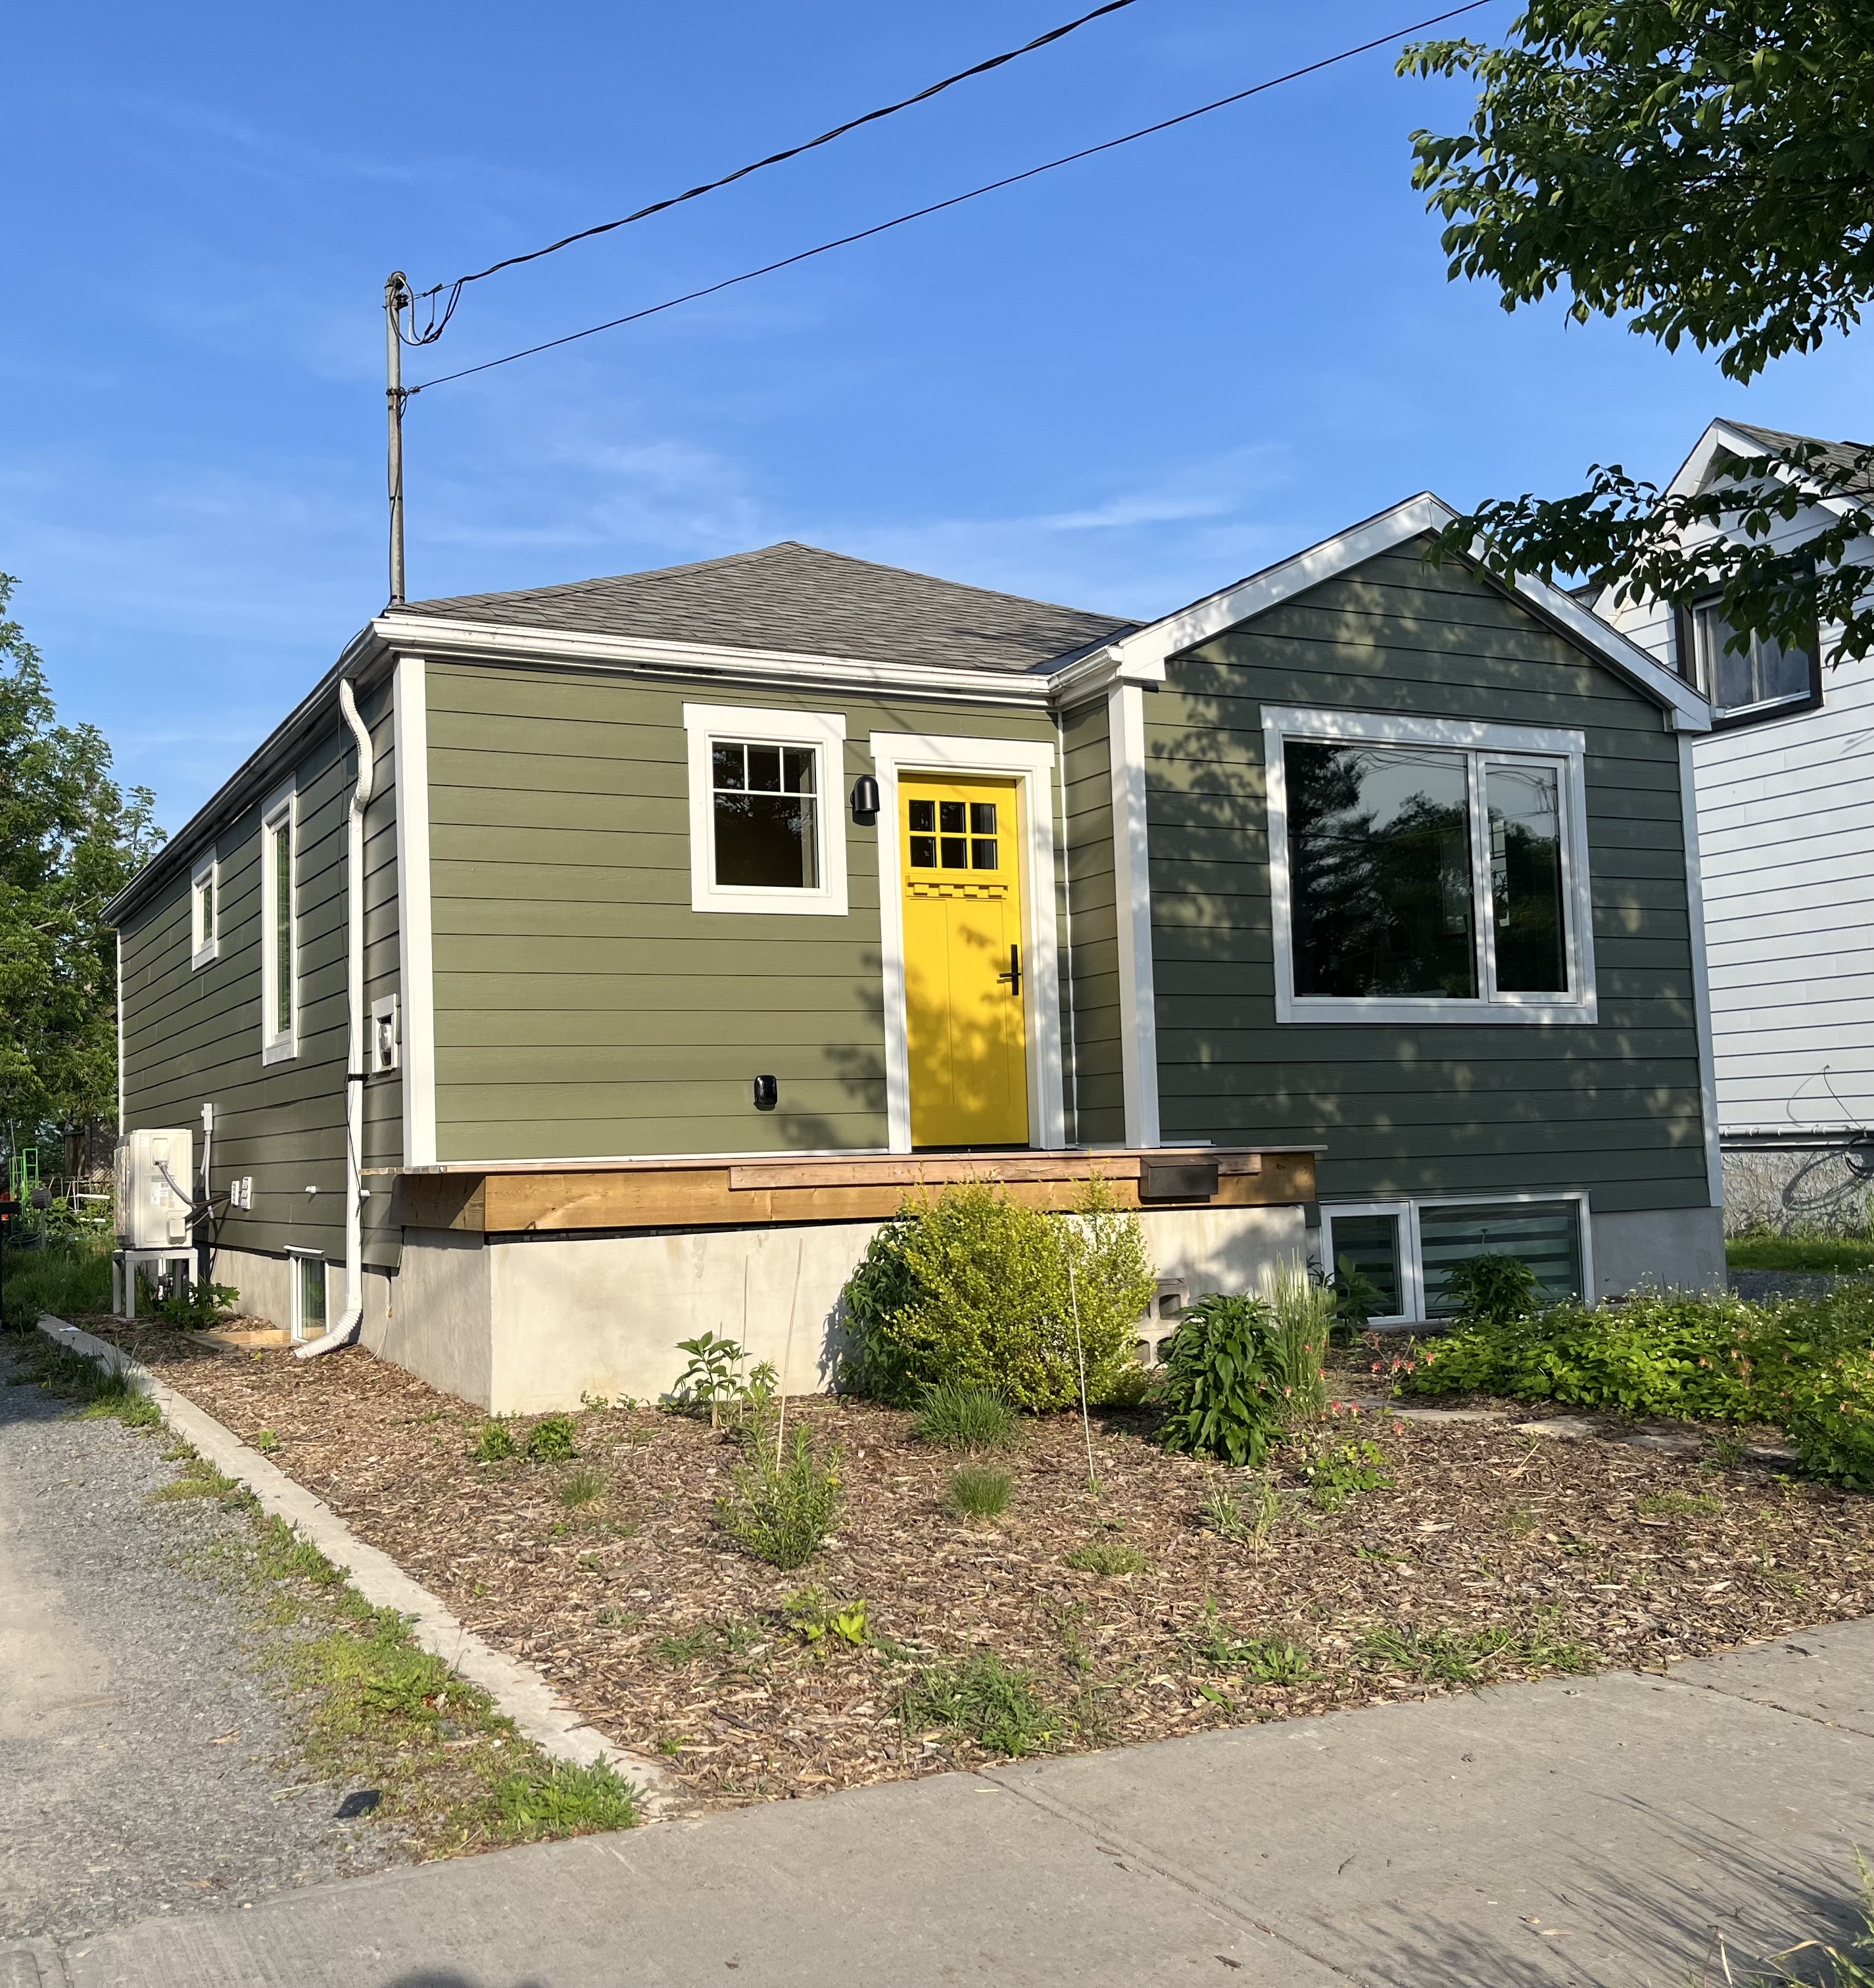
This case study about a deep retrofit of a wartime bungalow is an excellent example of a phased retrofit done right.
| Building Type | Single-Family Bungalow (incl. 1.5 Story) | Location | Southeastern, ON |
| Year Built | 1950 | Foundation Type | Concrete (Full Basement) |
| Structure Type | Wood-Framed | Post-Retrofit Total Floor Area | 145m2 |
| Climate Zone | 6 | Heating Degree Days | 4000 |
| Retrofit Status | In Progress | Year Completed | 2023 |
| Retrofit Phasing | Yes | Geometry Changed | No |
| Annual Energy Savings | 65.49% | Operational Carbon Savings | 4.36 tCO2eq/y |
| Retrofit Type | Envelope and Mechanical |
Project Team
- ReNü Engineering ( Energy Advisor )
- Homesol Building Solutions ( Energy Auditor )
- Clearview ( Builder )
- Aerecura ( Builder )
Project Priorities
- Reduce Energy Consumption
- Achieve Net Zero or Net Zero Ready
- Increase Thermal Comfort
- Improve Indoor Air Quality
- Reduce GHG Emissions
- Repair and/or Renew Exterior
Upgrades
Envelope Improvements
- Attic / Roof Internal Insulation
- Foundation Walls Interior Insulation
- Air Sealing / Airtightness
Mechanical: Ventilation Improvements
- Energy Recovery Ventilator (ERV)
Structure and Space Improvements
- Remediation Work
Health, Safety & Sustainability Improvements
- Low-Embodied Carbon Materials
Project Description
The Retrofit Story
Introduction
We were looking for an affordable home in southeastern Ontario with deep energy retrofit potential when we found this charming wartime bungalow. We wanted to do the job right in order to avoid costly rework in the future, but our budget would not allow us to undertake the entire project at once. Working with a deep retrofit expert, we have developed a manageable, staged approach where each of the stages took into account the other work that would need to be done.
First Steps
Building Condition Assessment
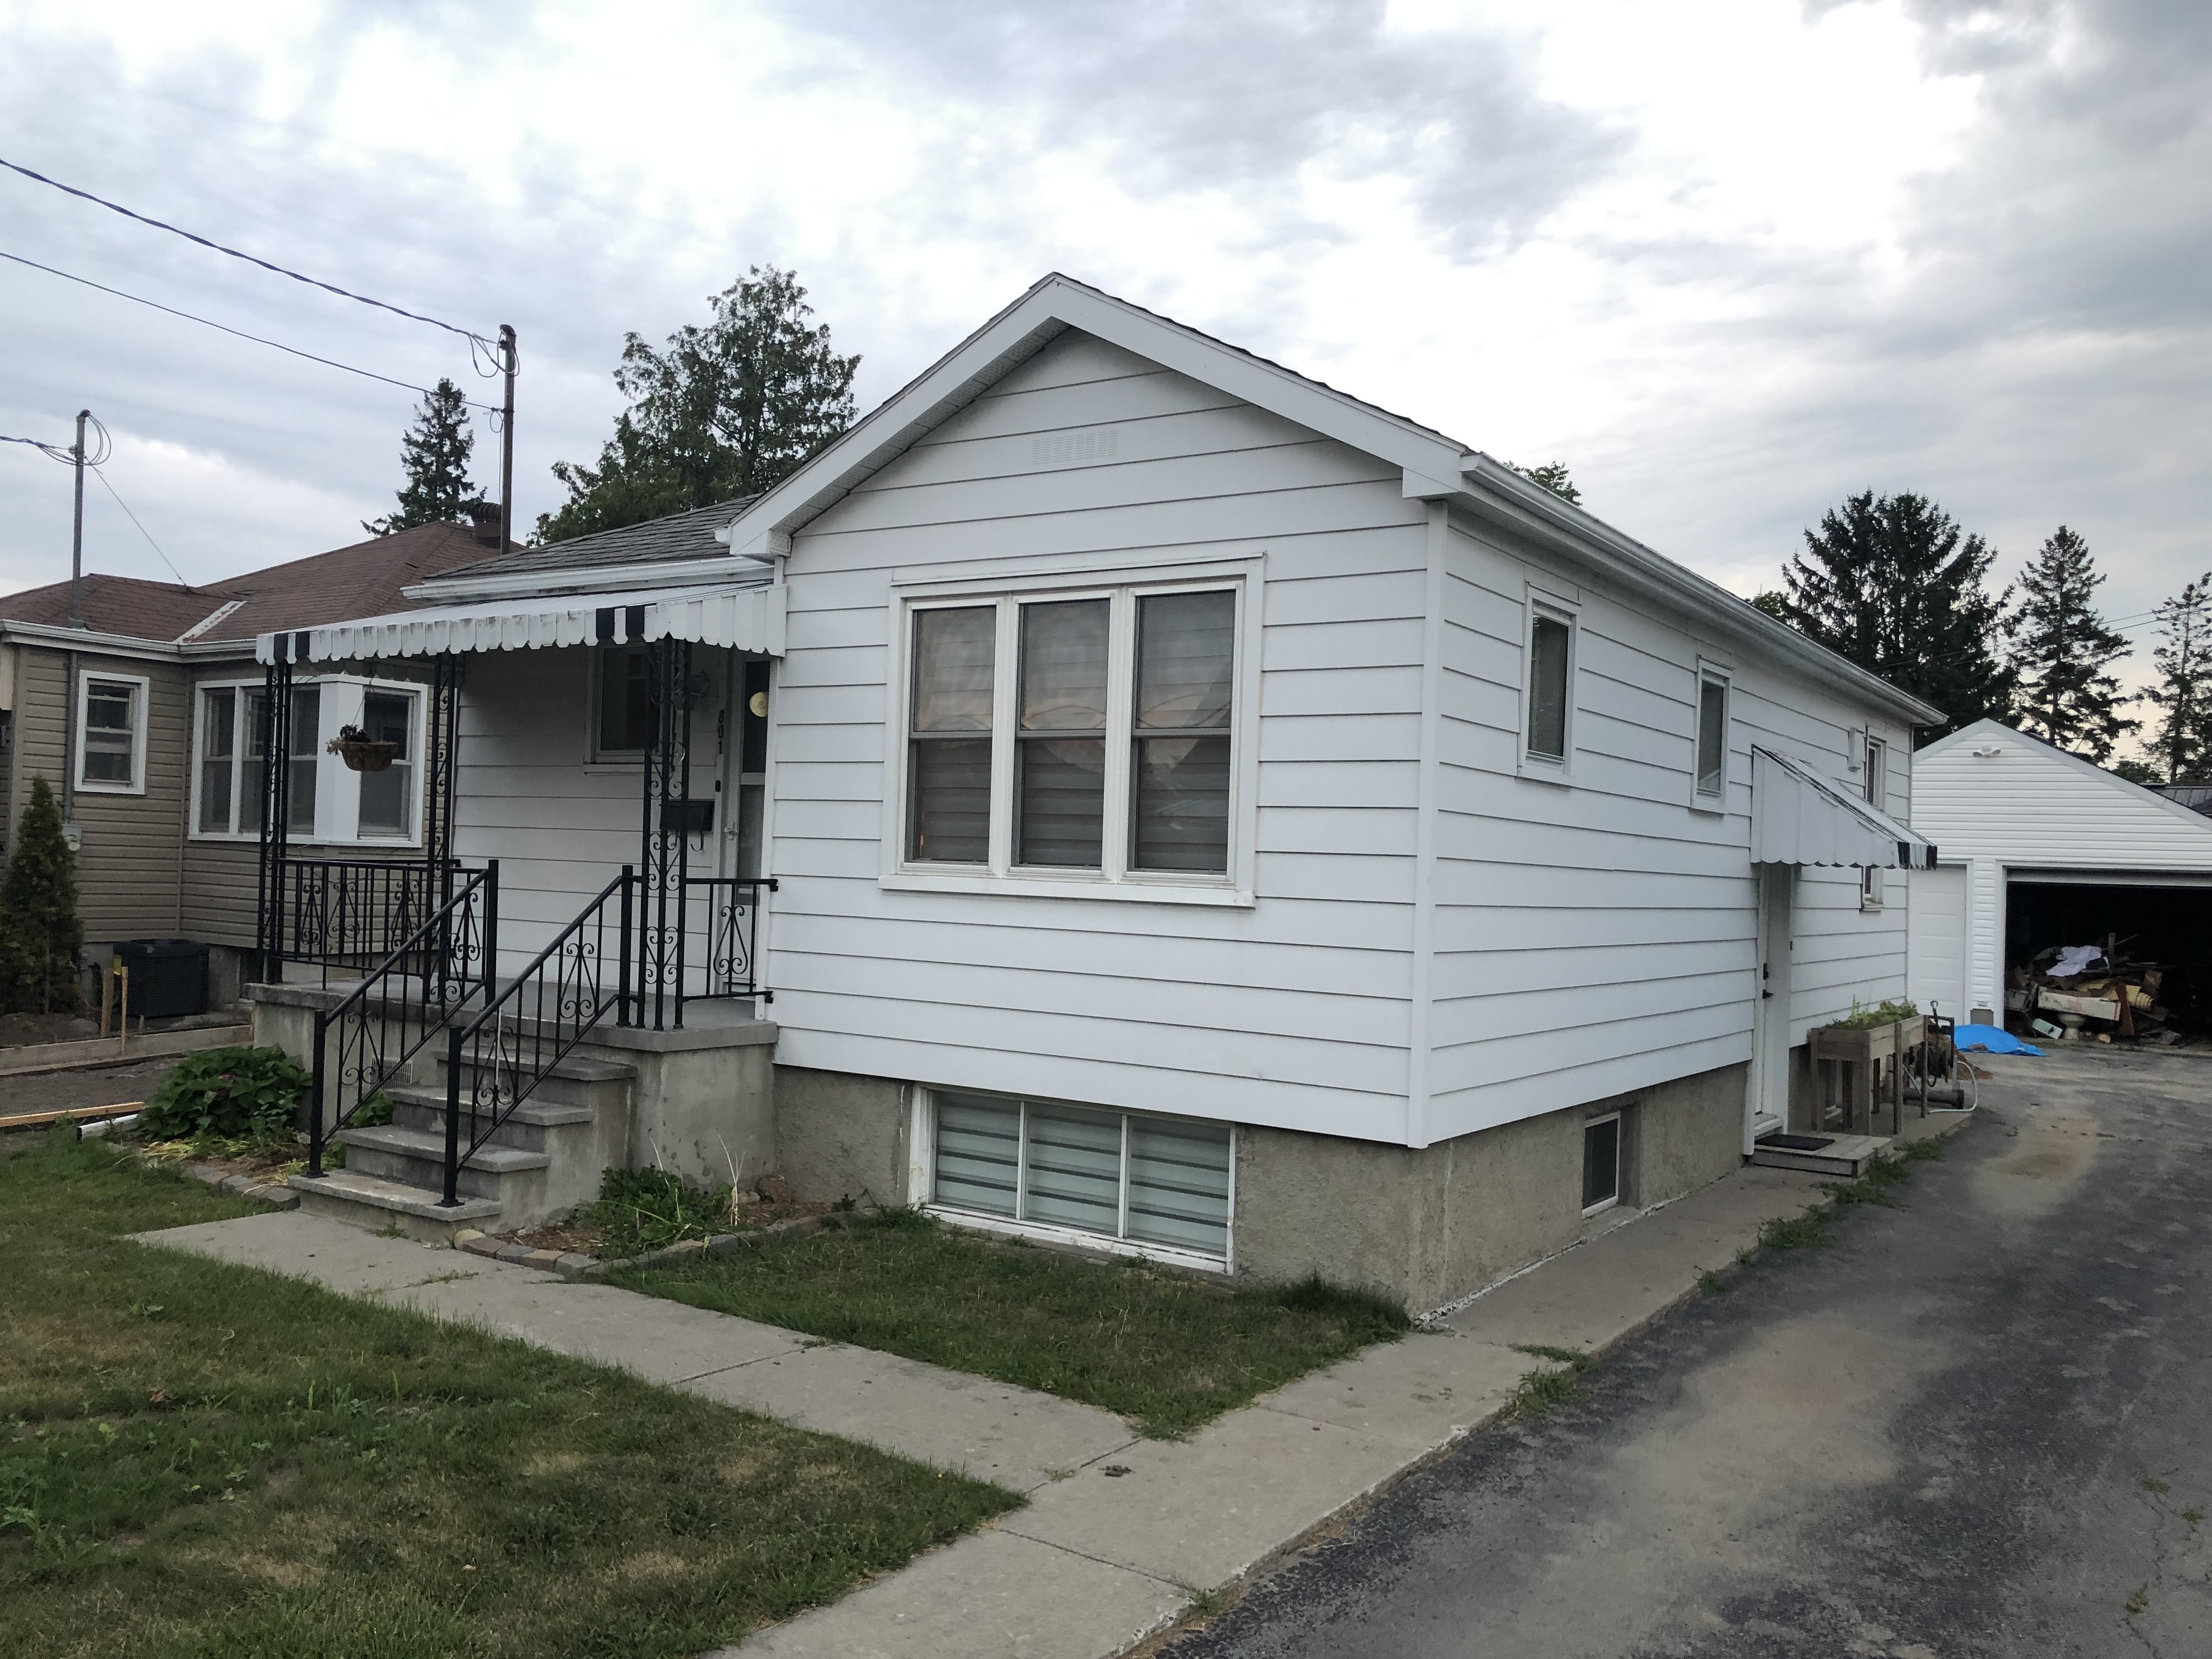
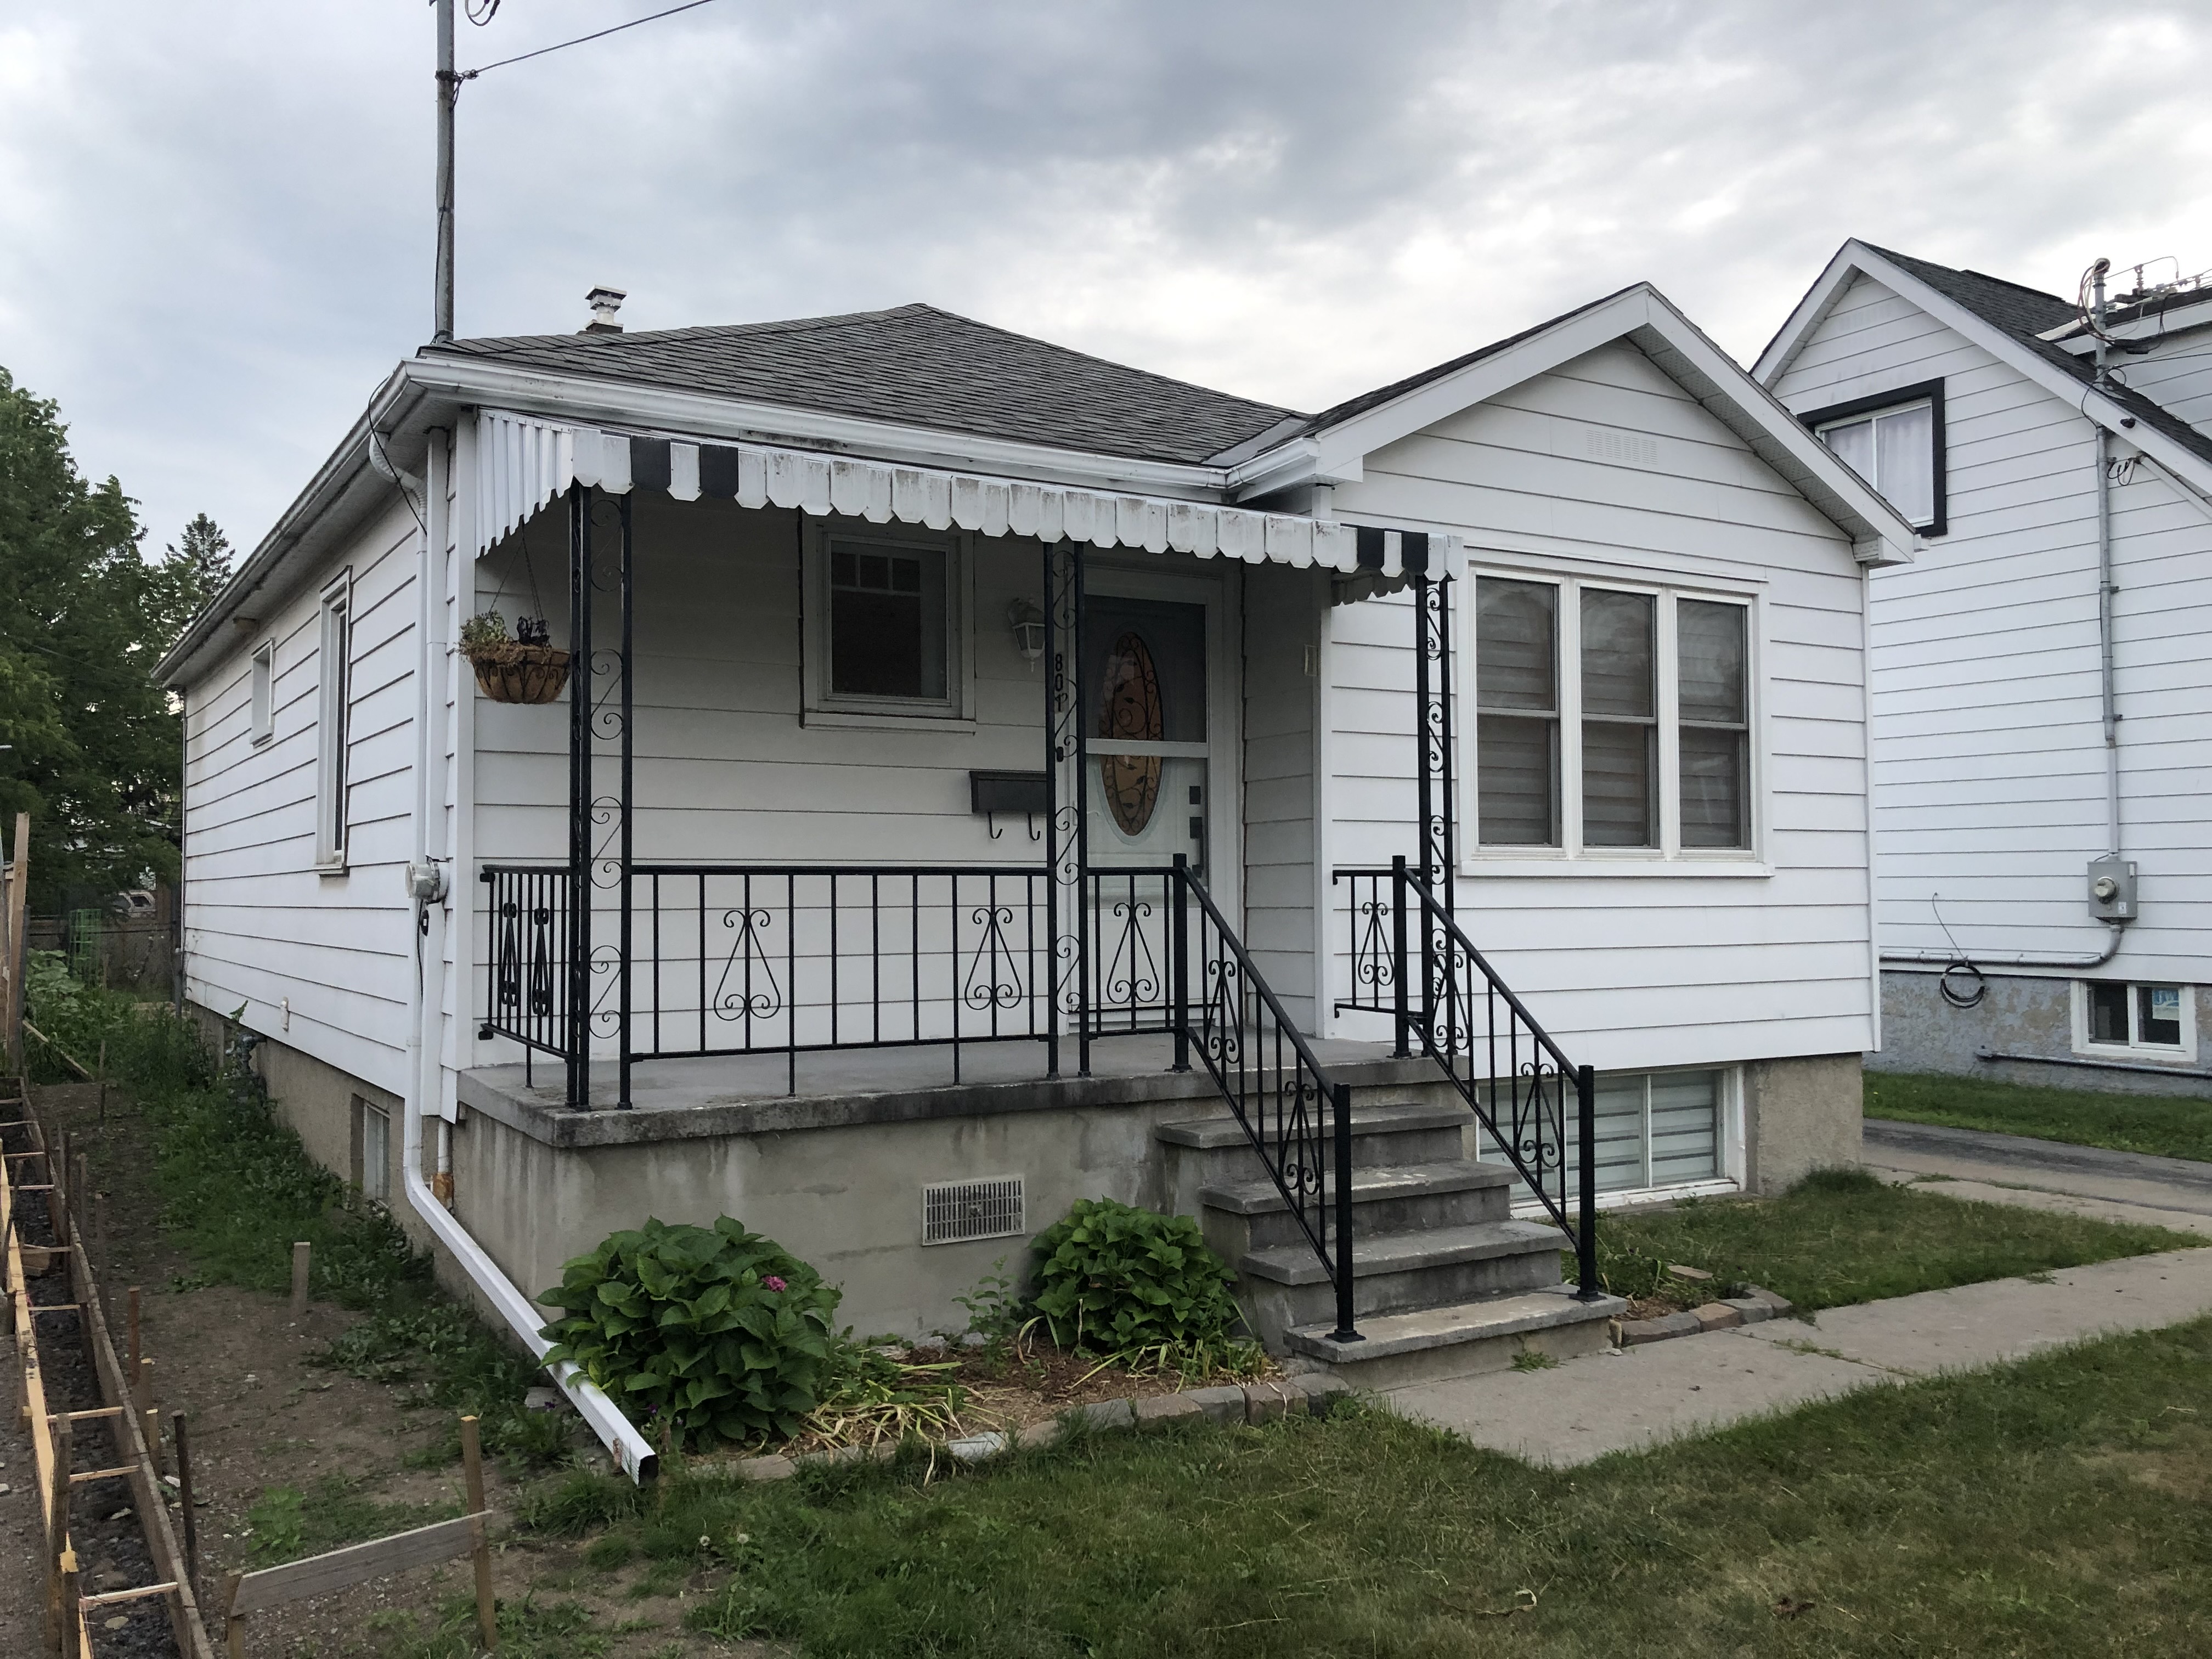
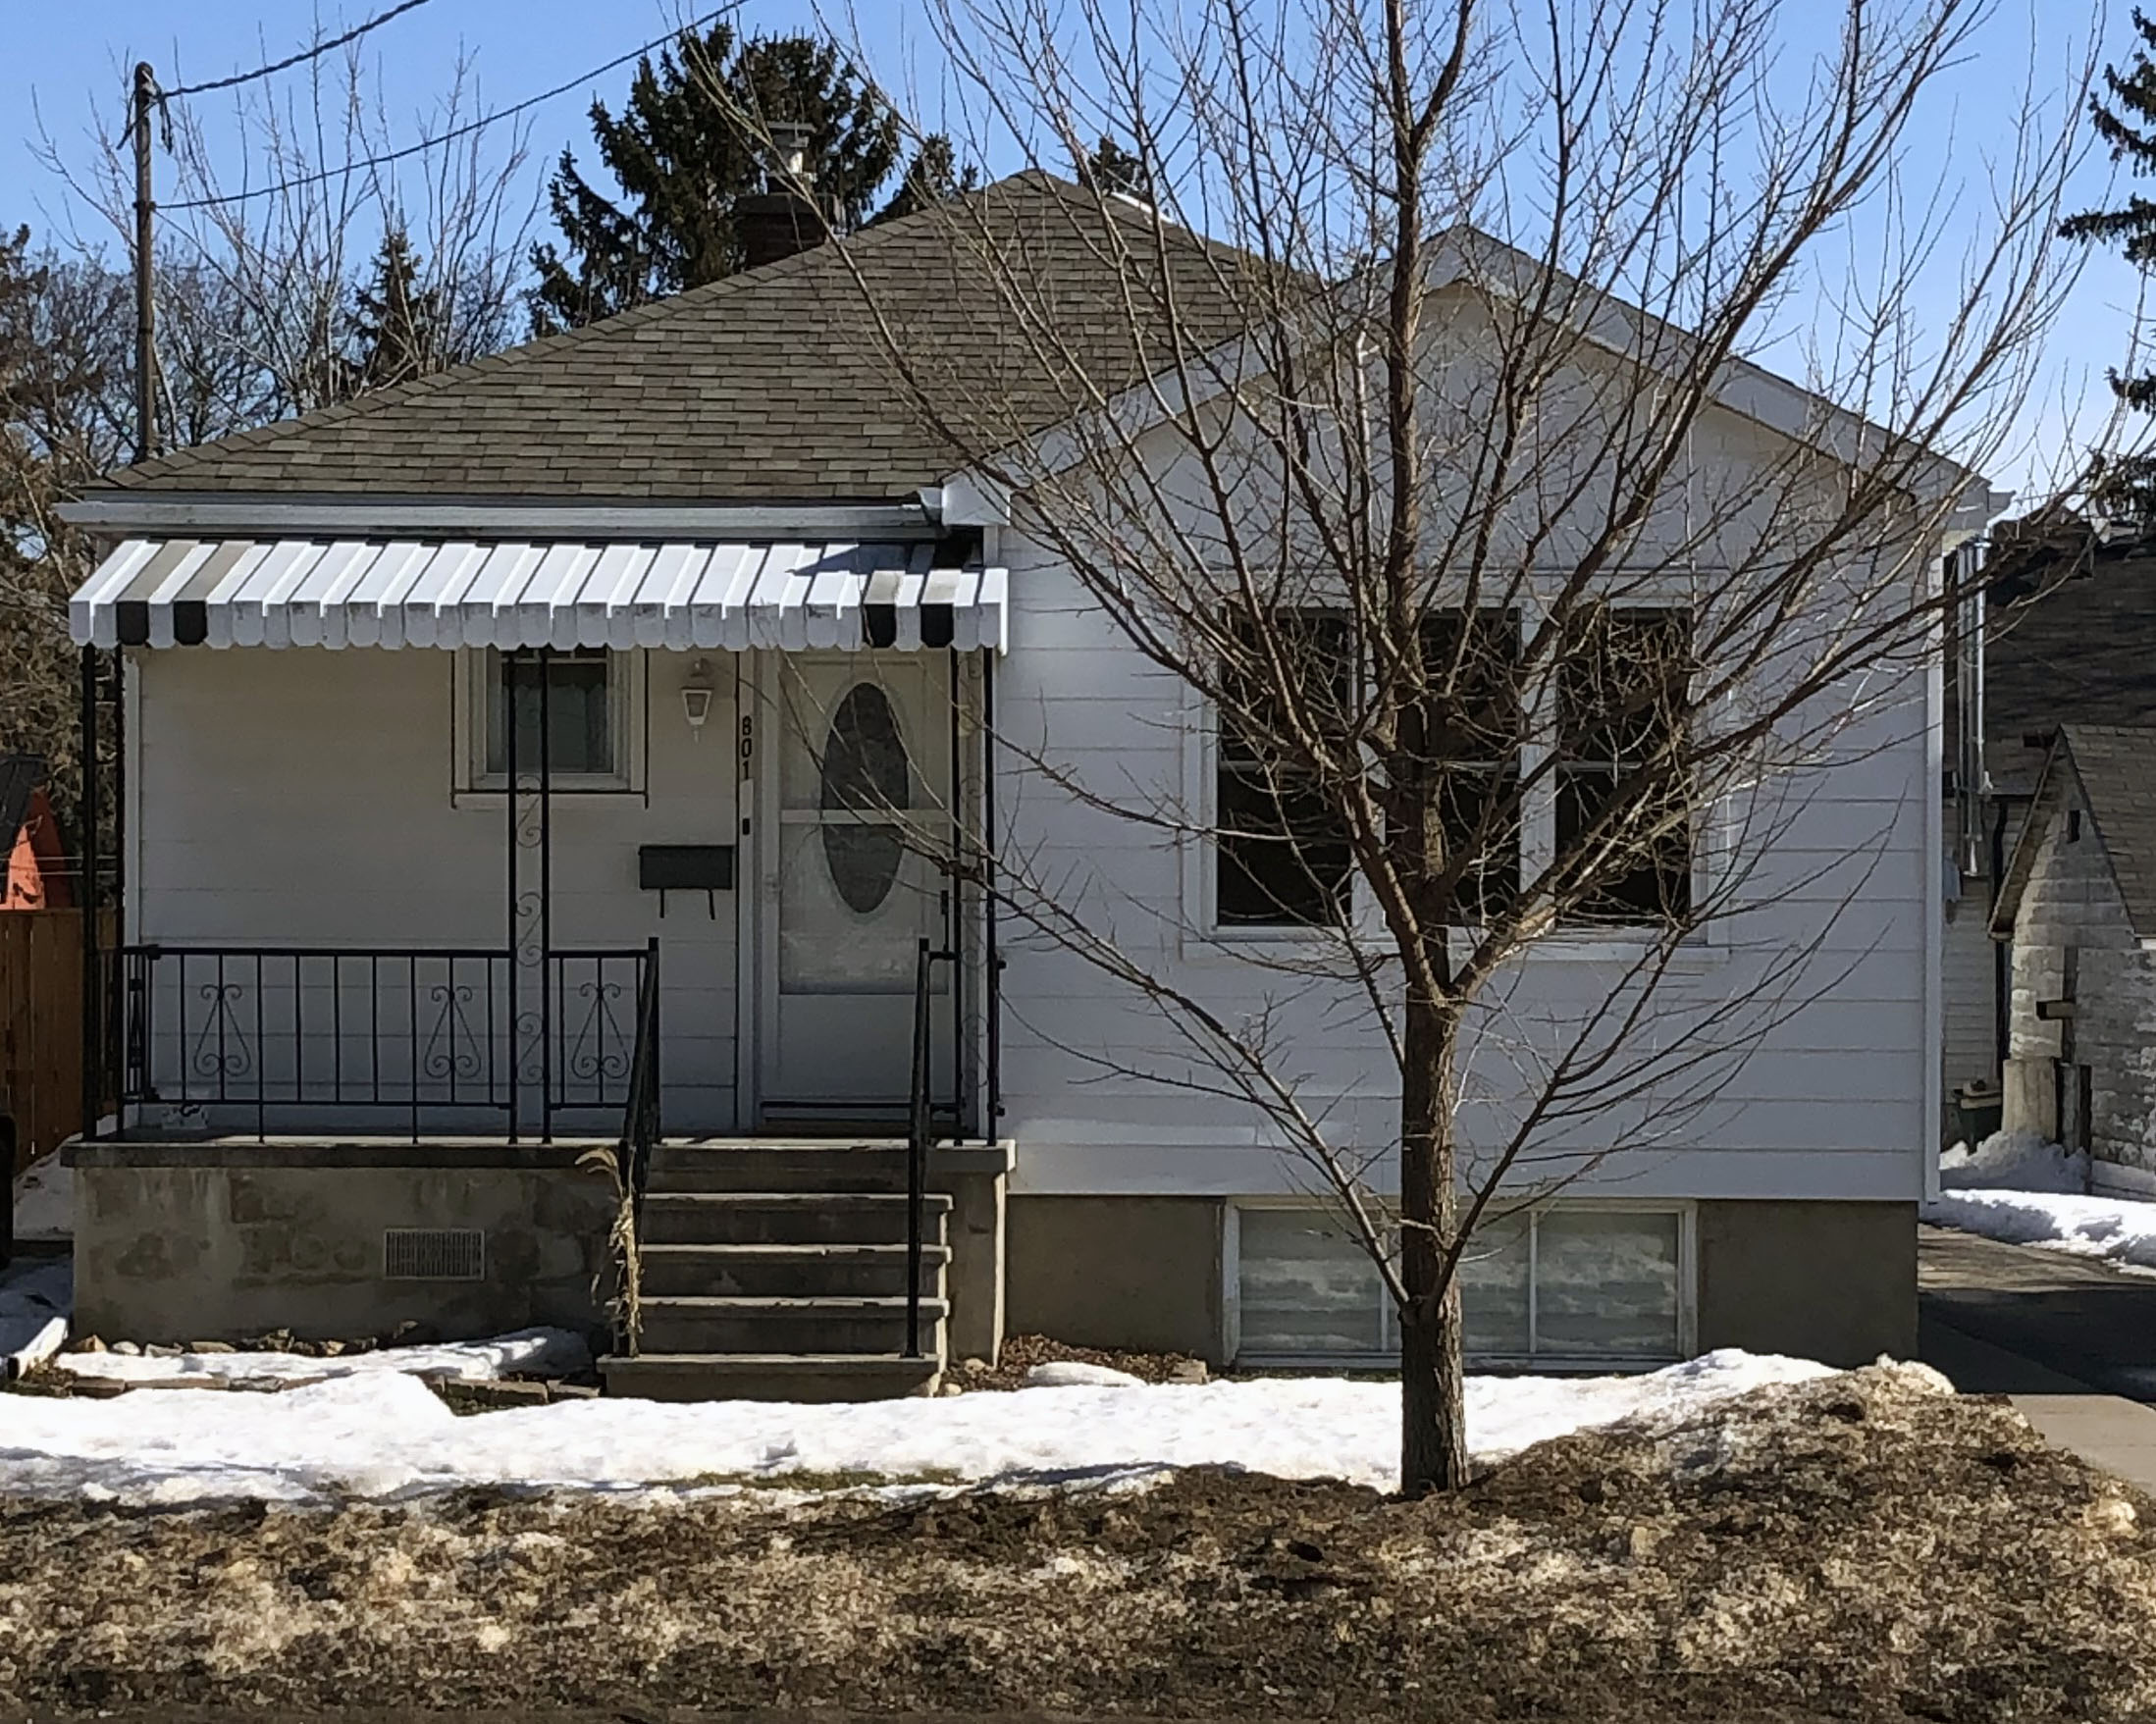
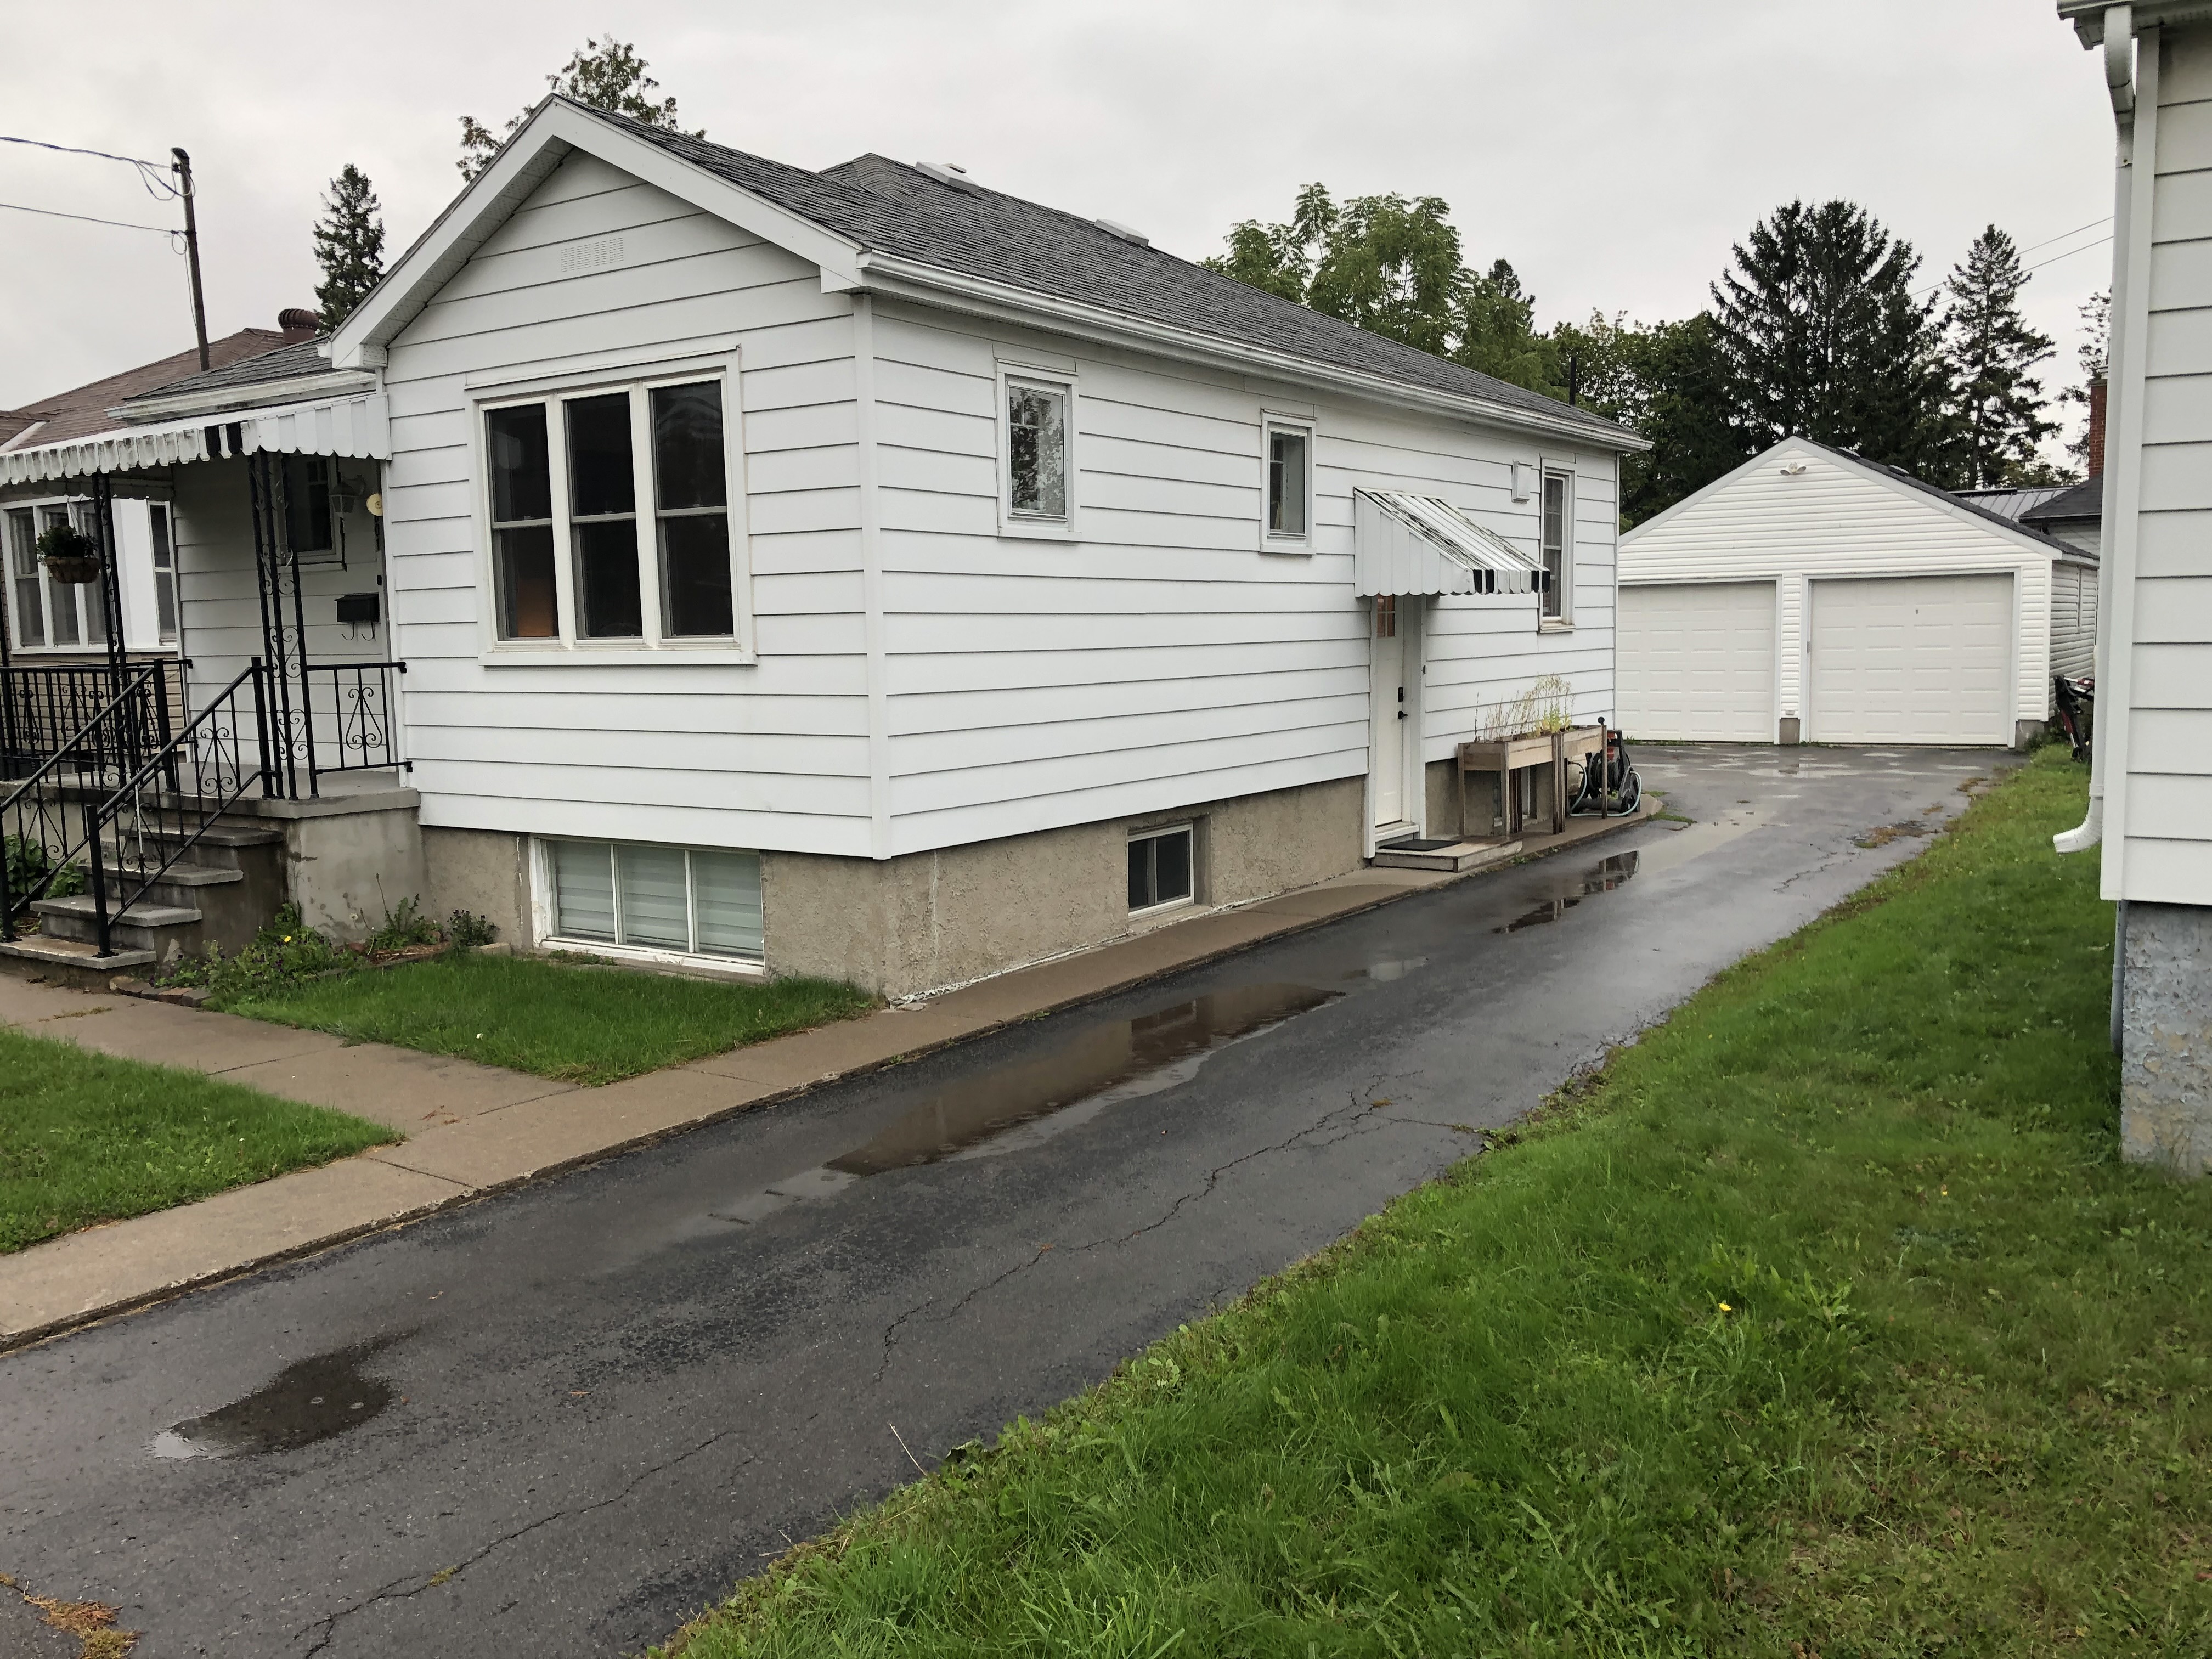
When we first looked at the house, we found it was in good shape overall, but had a very old furnace and air conditioning unit, minimal insulation, and old windows. Aesthetically, it was outdated but had original wood floors and other charming features. We thought it had great potential for both a retrofit to make it energy efficient and DIY renovation work to make it more liveable and attractive. It was appealing that not a lot had been done to it, meaning that we wouldn’t have to pay for or redo piecemeal upgrades that had been done before.
After moving in, we tested the vermiculite attic insulation and learned it contained asbestos, which would require remediation before we could add new insulation. We also noticed that the basement was quite cold in the winter and had some moisture issues, leading us to prioritize the foundation phase of the retrofit.
Energy Audit
Next, we hired Homesol Building Solutions to perform an energy audit. The audit showed where the biggest savings could be achieved. Because we were determined to get to net zero and are on a limited budget, we knew we had to get everything we did right – on the first try and as efficiently as possible. Our adviser used the energy audit to dial in the best set of net zero-ready energy specifications for the whole house that also took into account how the house was when we started. (See Before and After specs).
Planning the Deep Retrofit Stages
The next step was to develop a plan where we could retrofit our house in affordable stages while meeting the net-zero specifications. The advisor helped us come up with a plan that accounts for later stages so that we will never have to undo or take apart previous work. Stage 2 – The Attic (below) shows the kind of thinking that’s needed.
Since we were eager to address the basement moisture issues as soon as possible, we decided to tackle the foundation insulation first and add a waterproofing membrane and weeping tile as part of the same excavation project.
The original plan was to make the house as efficient as possible before adding a heat pump. We would do most of the upgrades, the foundation and the attic, and then upgrade the exterior wall insulation and windows before doing the mechanical needed to electrify the home.
However, because our air conditioning died in late 2023, we decided to do the mechanical after completing the basement walls and attic because these were the largest sources of heat loss.
Because the cold climate heat pump is sized for the full retrofit, we may have some issues in the very coldest weather. So until we do the exterior walls and windows, we will keep a couple of electric heaters handy.
Finally, at stage five, we will add rooftop solar.
This staged approach allowed us to address immediate issues with the structure and was flexible enough to account for unforeseen developments like the air conditioning unit giving out. Most importantly, it provided a clear, practical order of operations that will get us to net-zero.
Project Stages
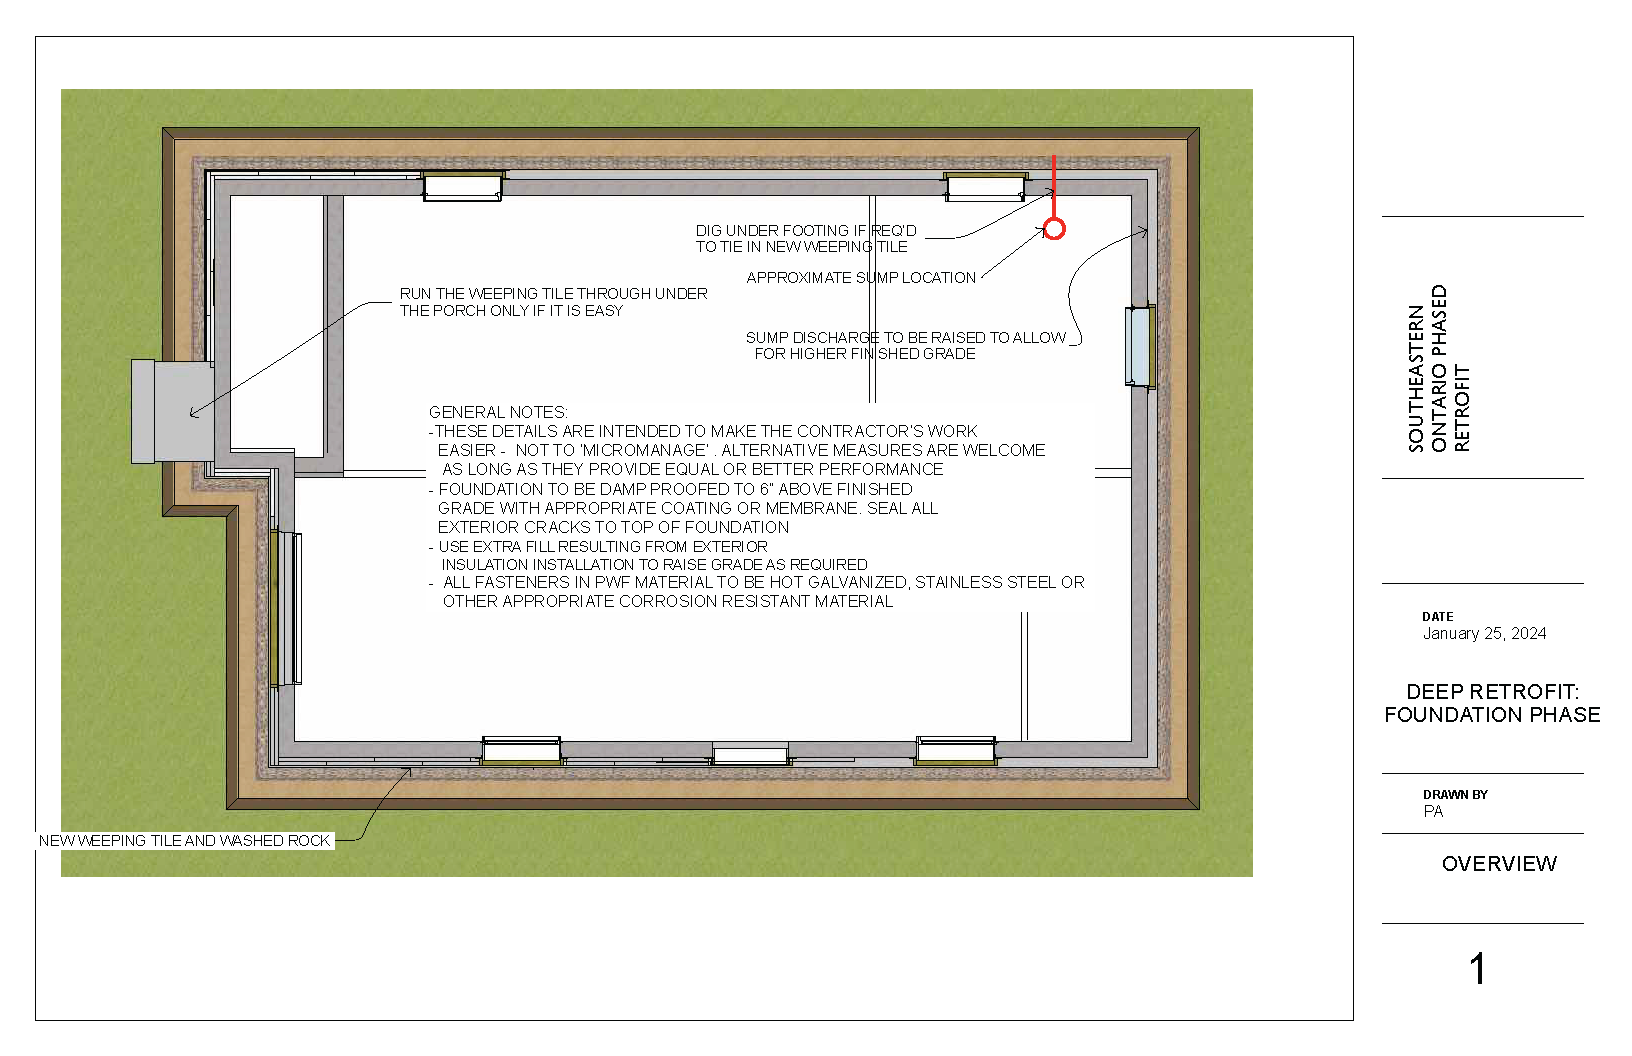
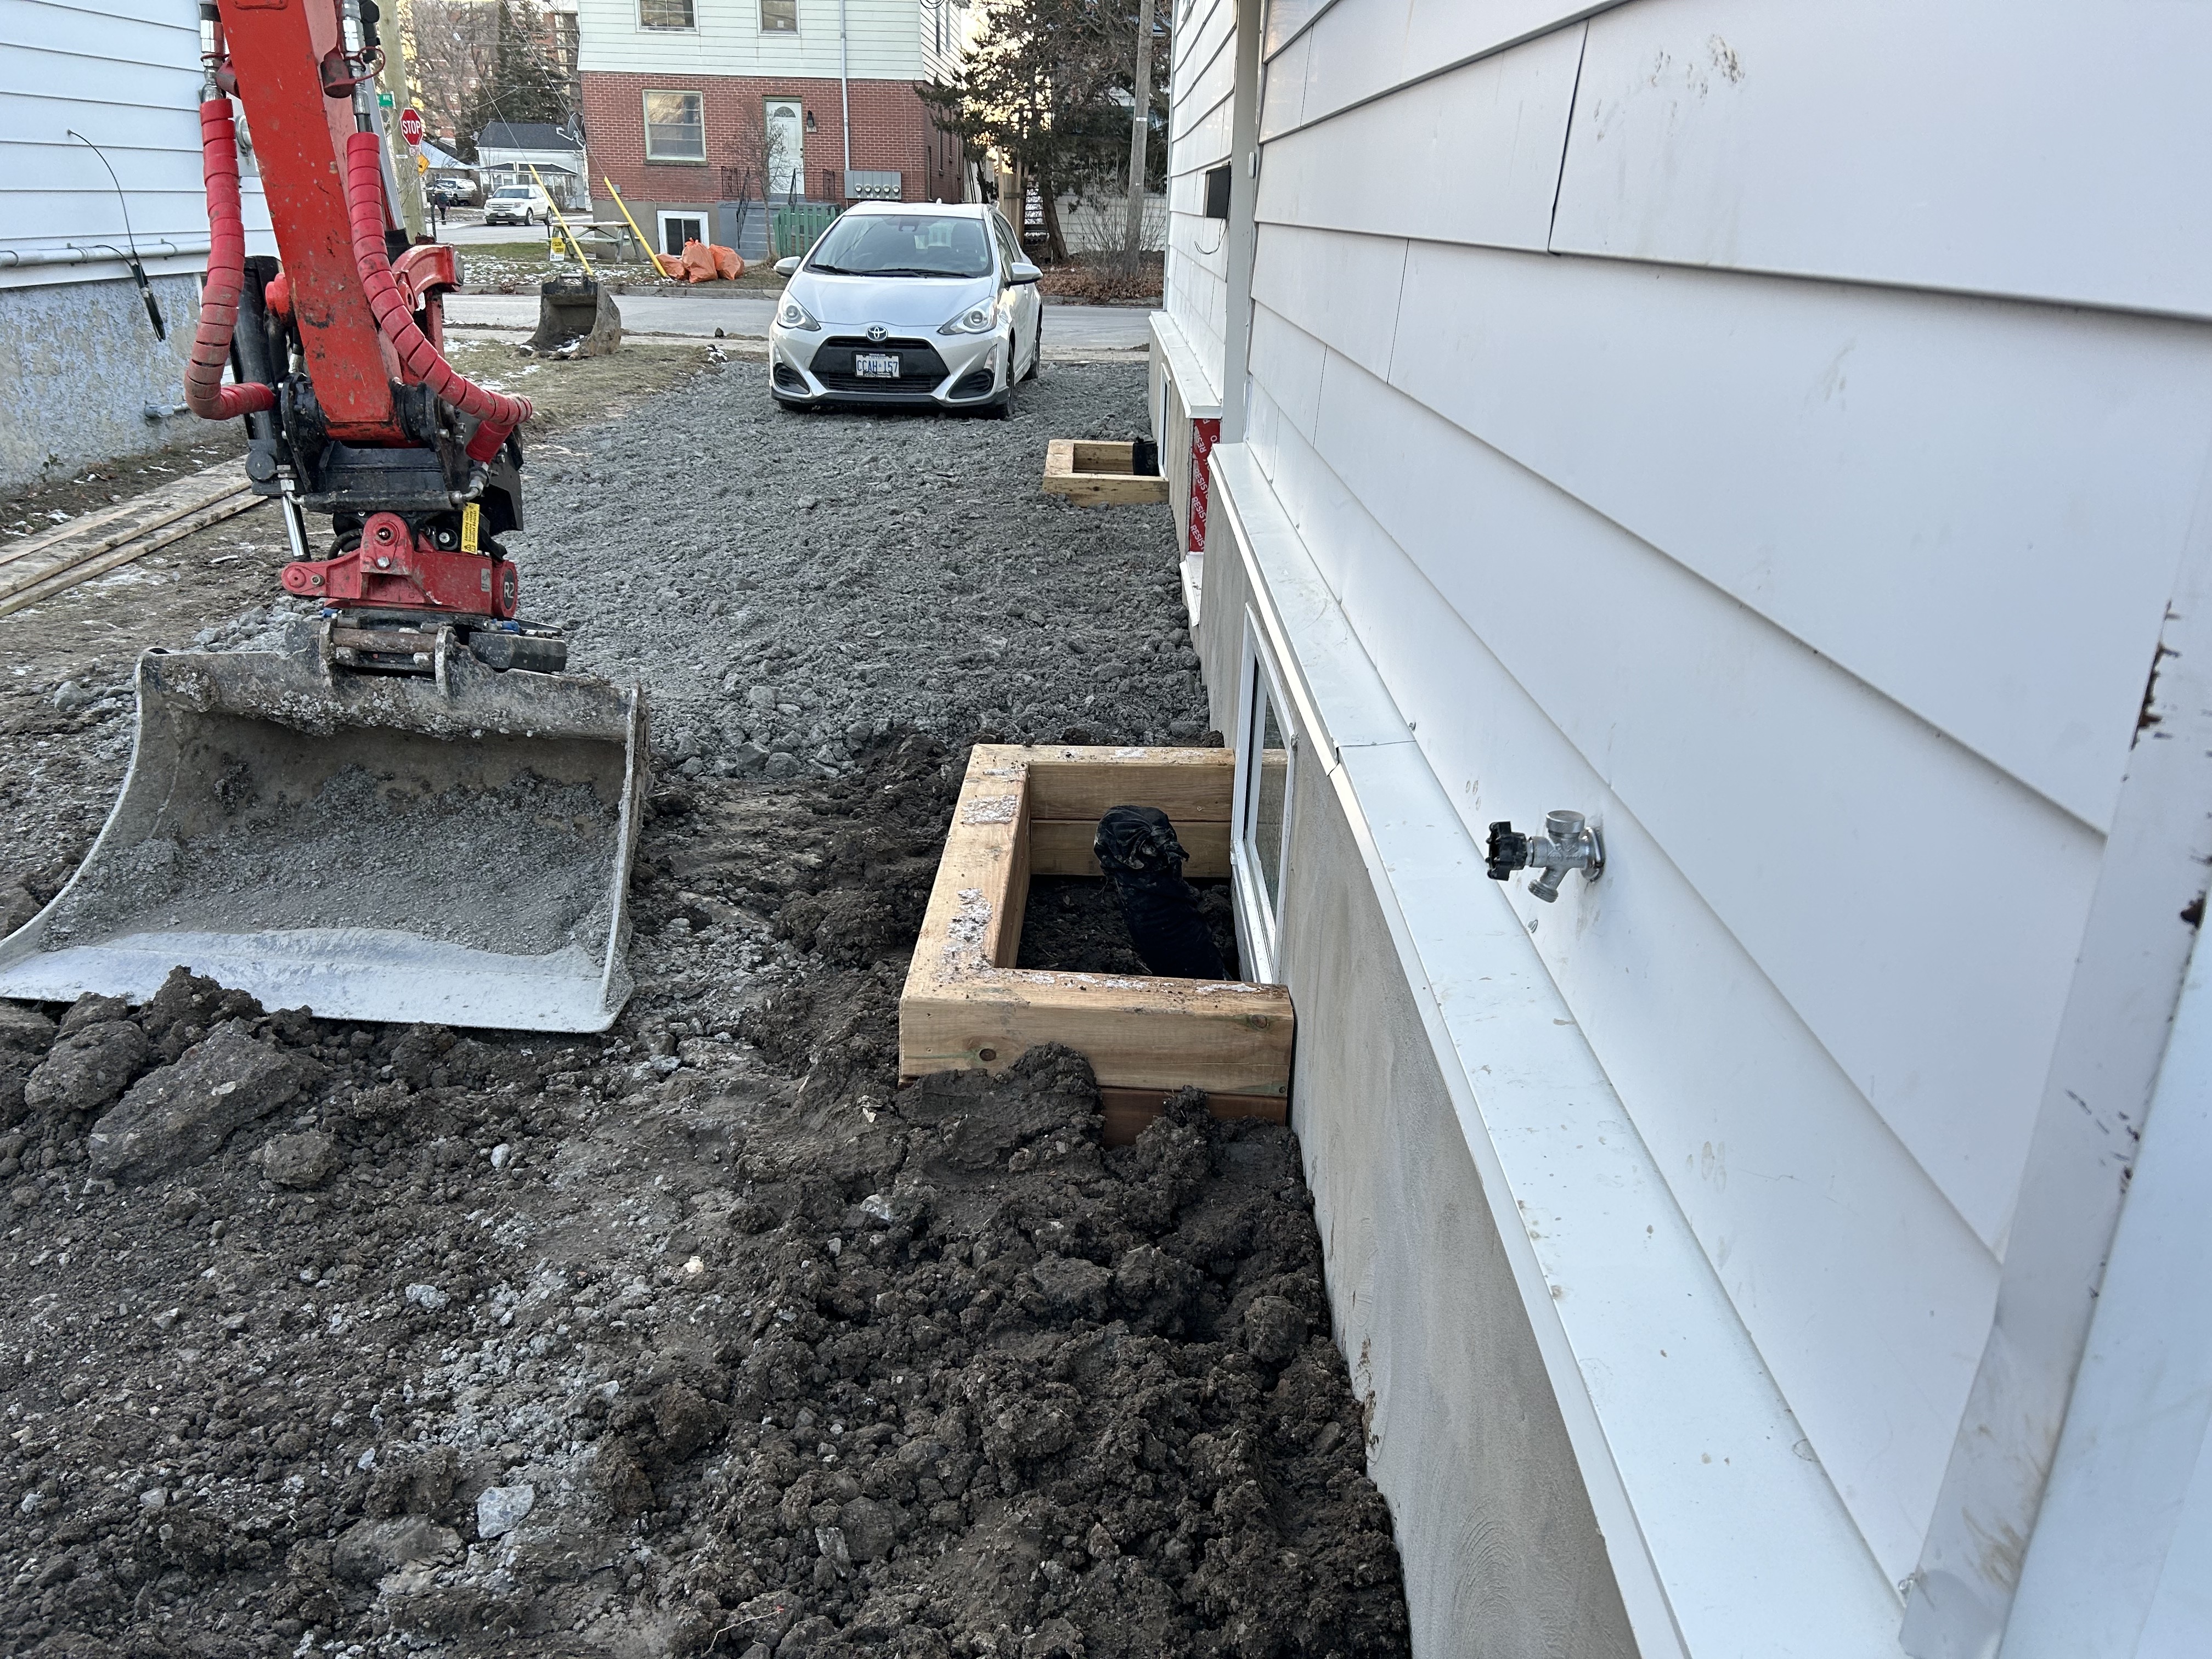
Stage 1: Foundation (Completed Fall 2023)
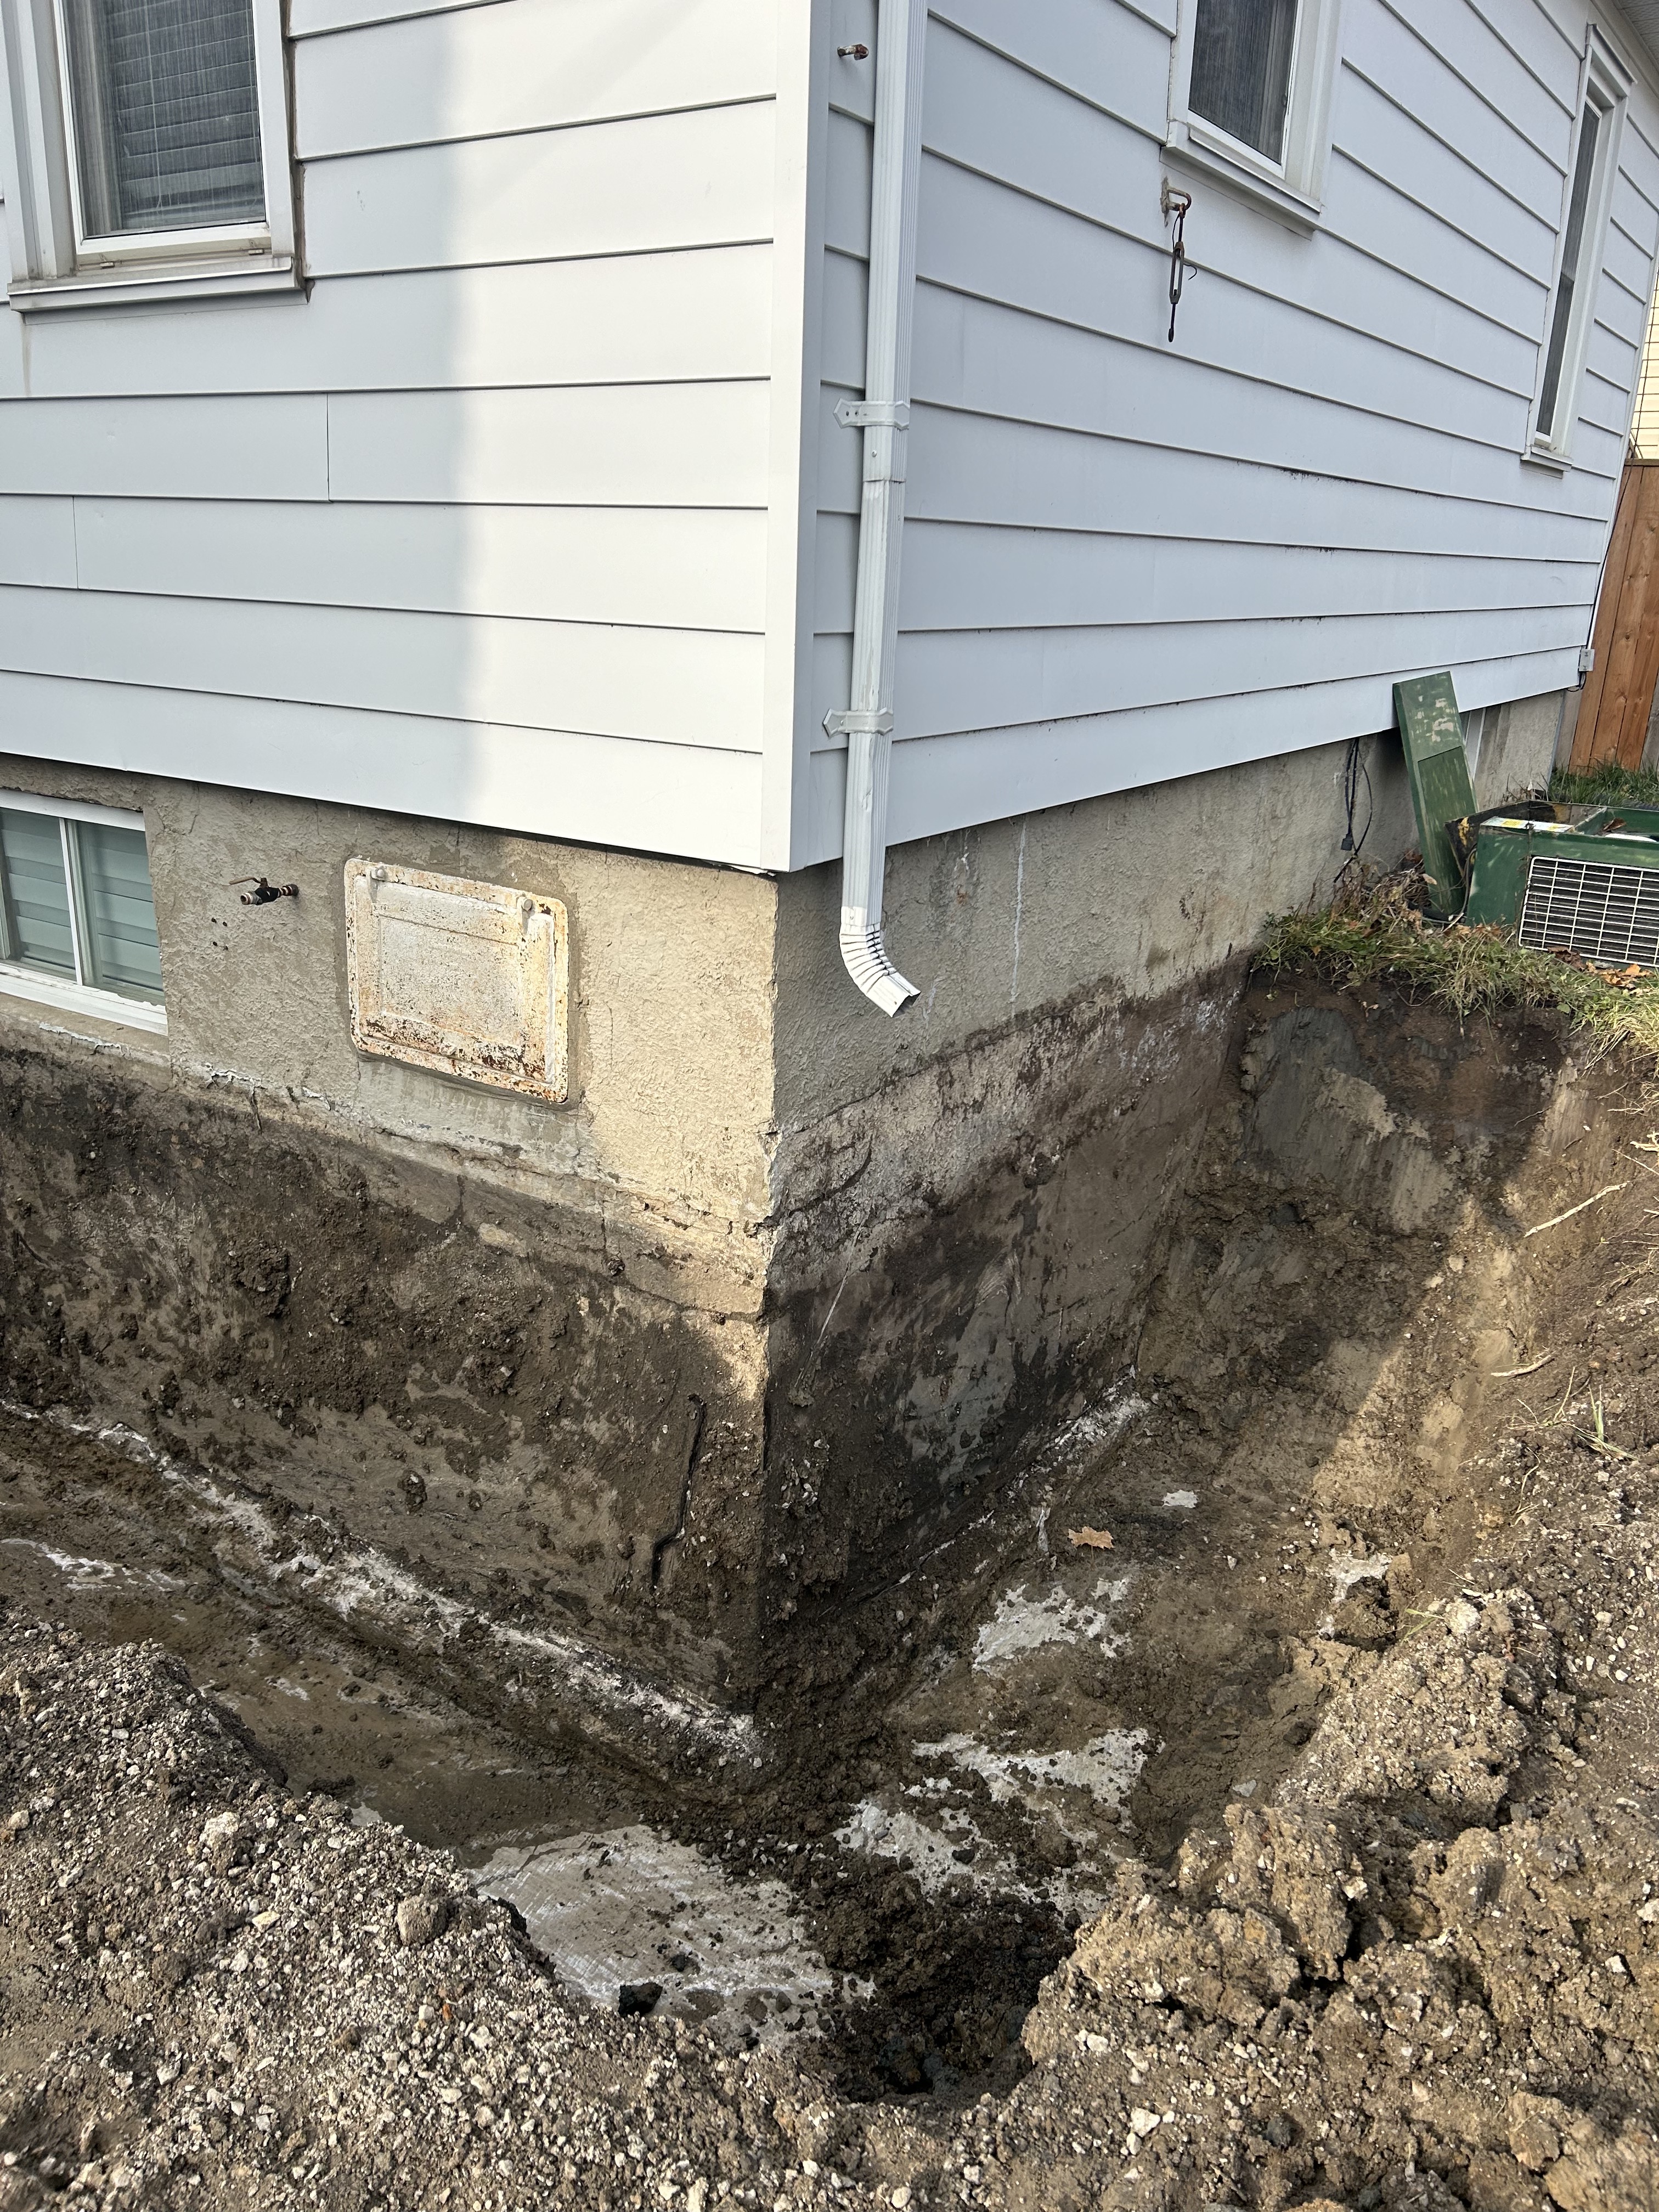
It made sense to do the basement first. The basement accounted for the biggest portion of the building’s annual heat loss (around 30%). It was cold and uncomfortable. (We work from home and spend a lot of time in our basement office.) It also leaked in two places. The steps in this phase included:
Stage 1 Steps
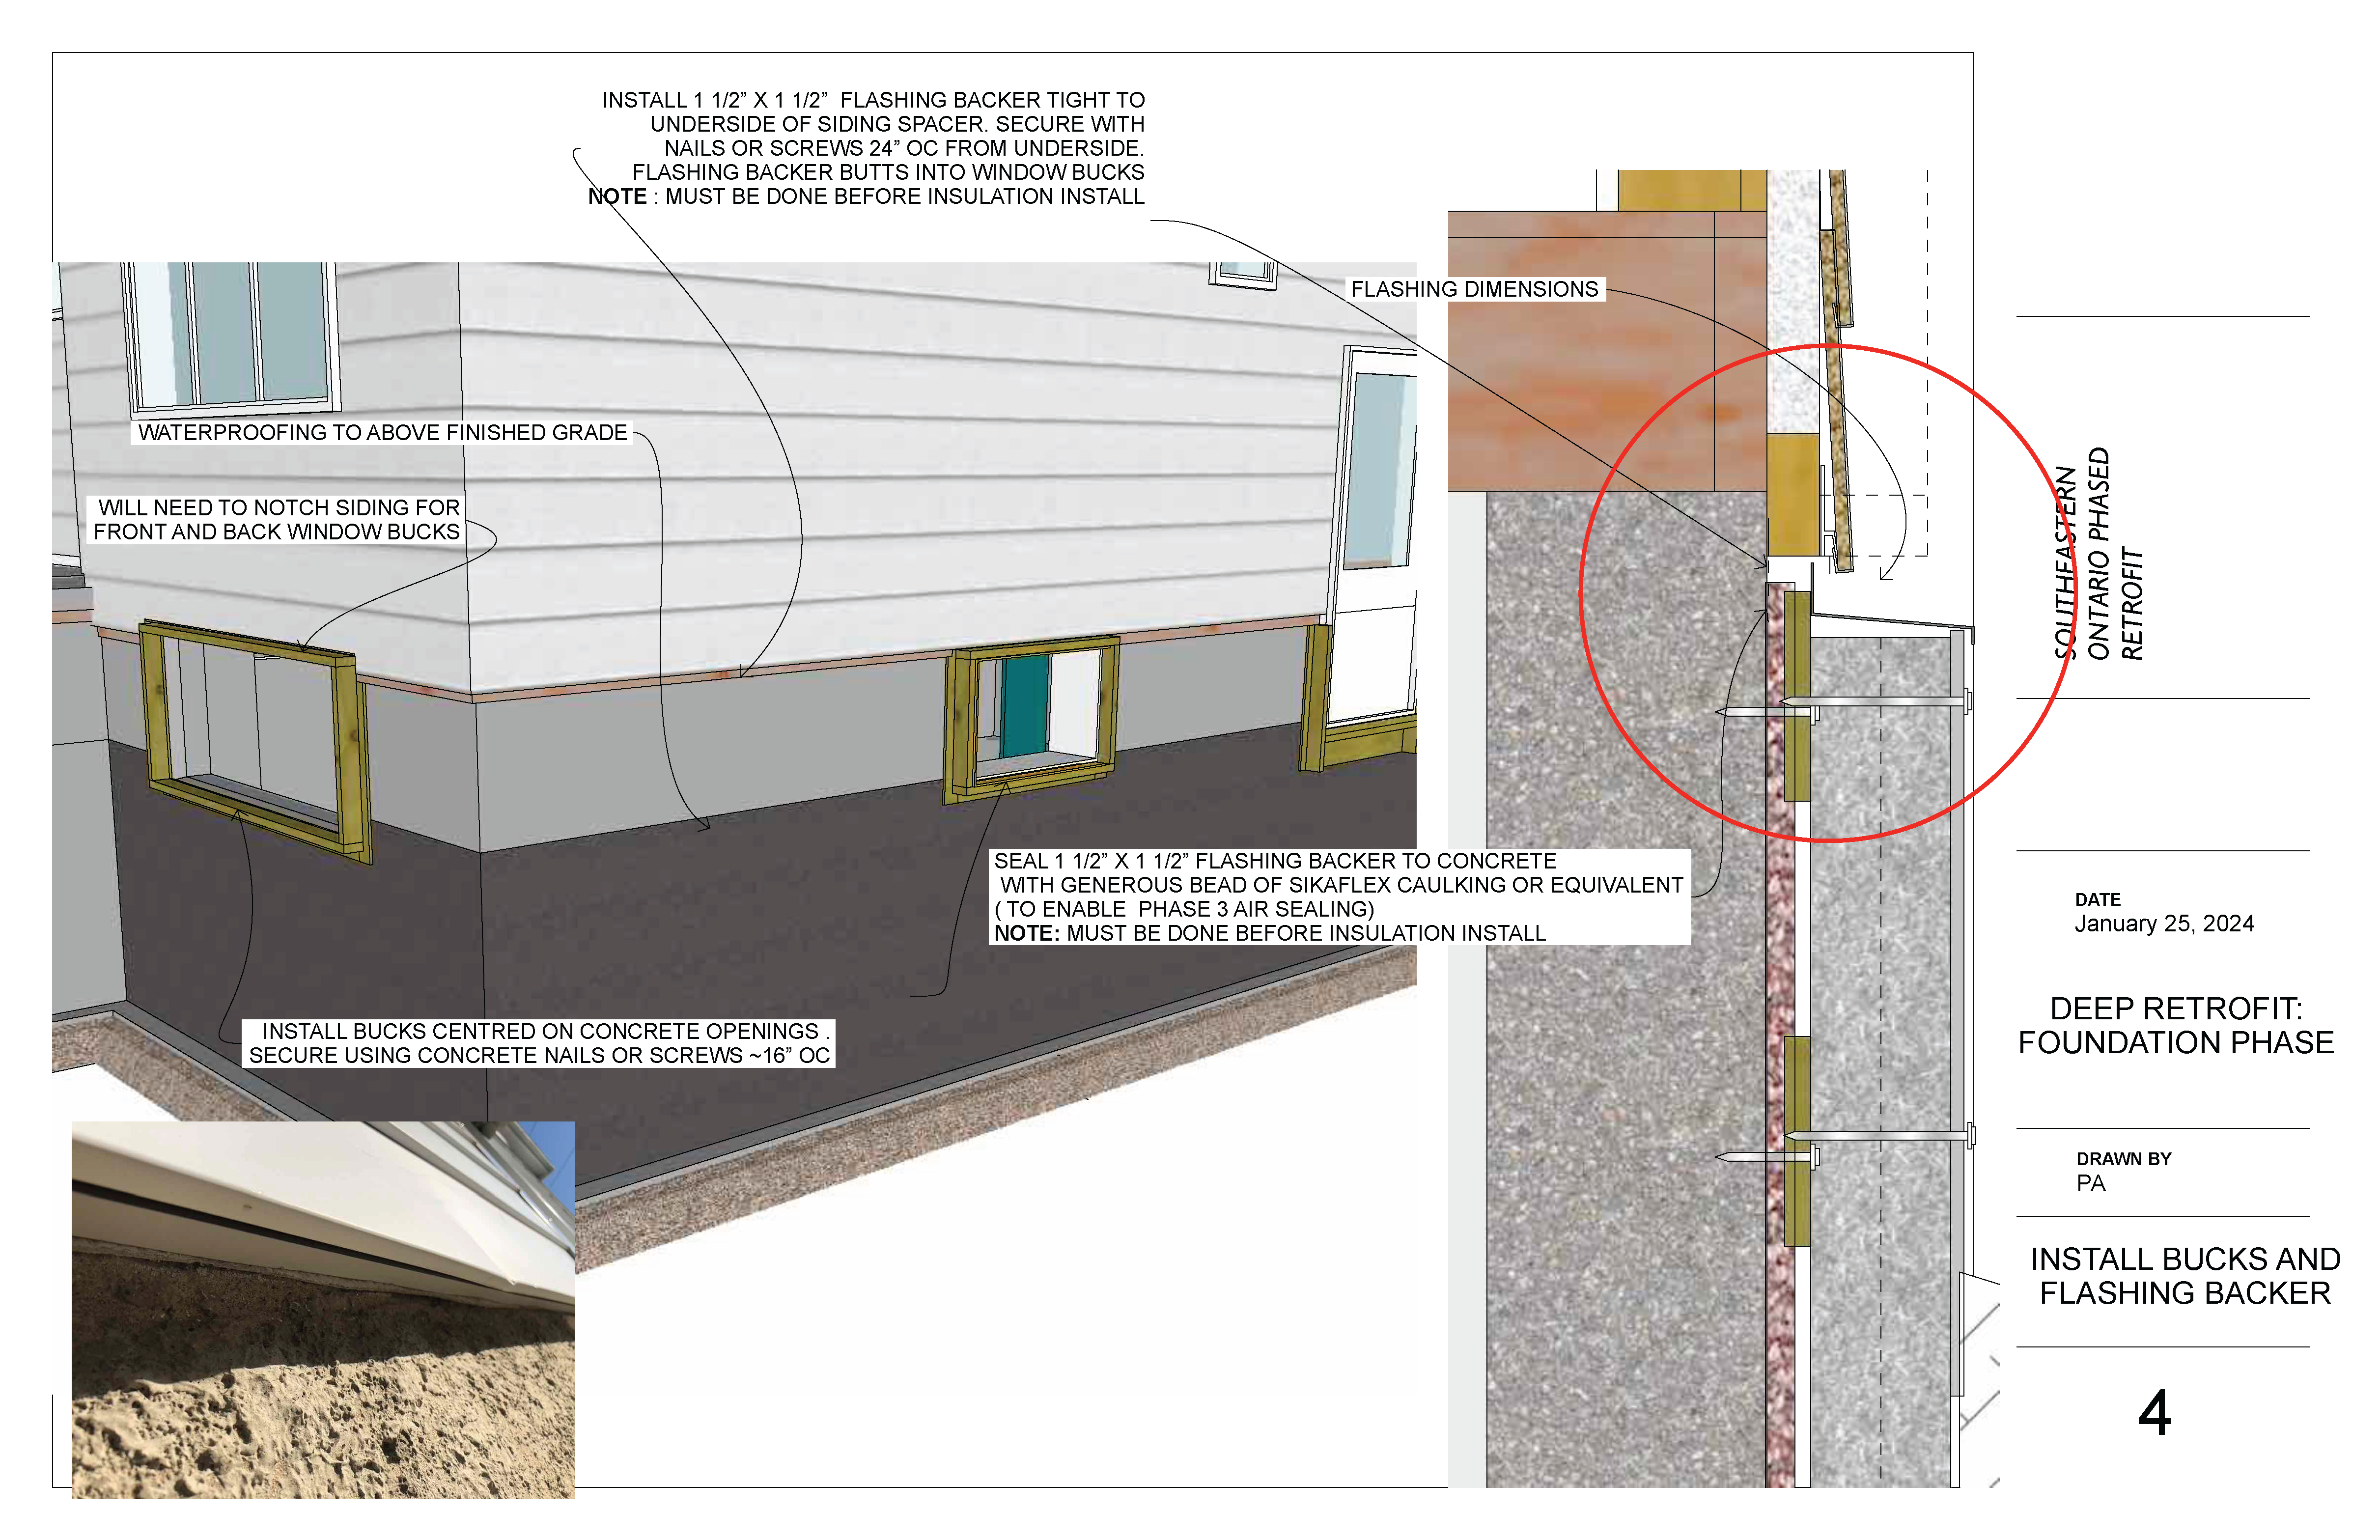
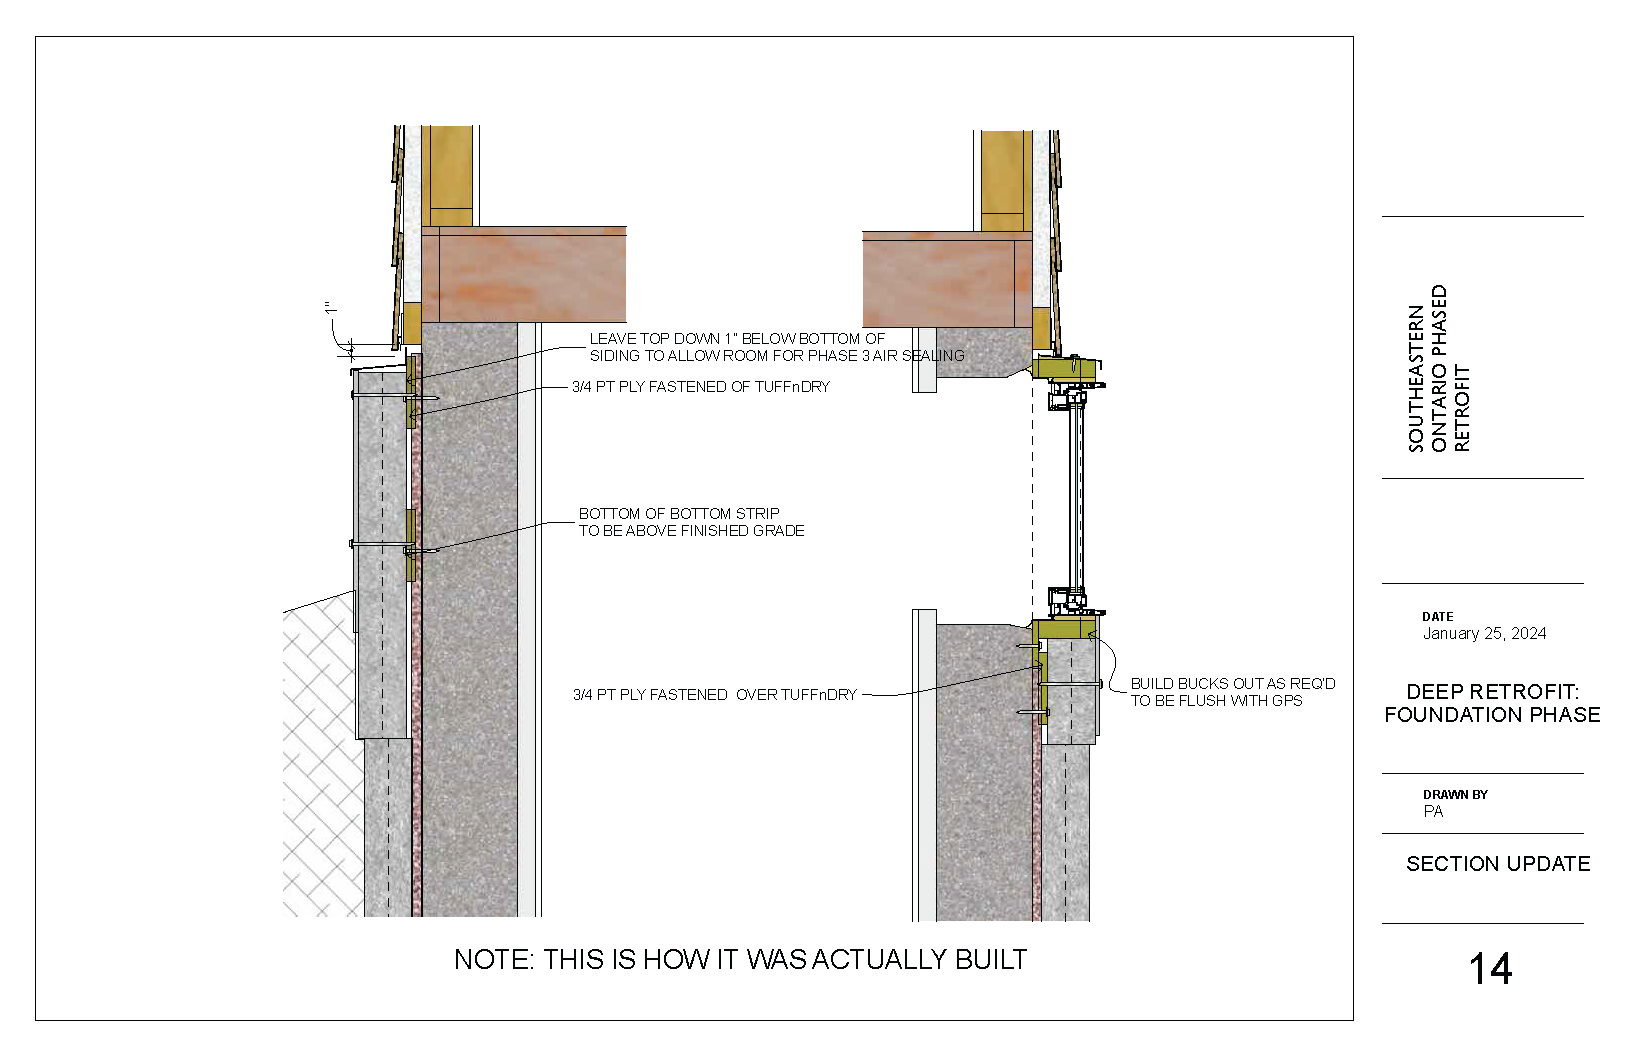
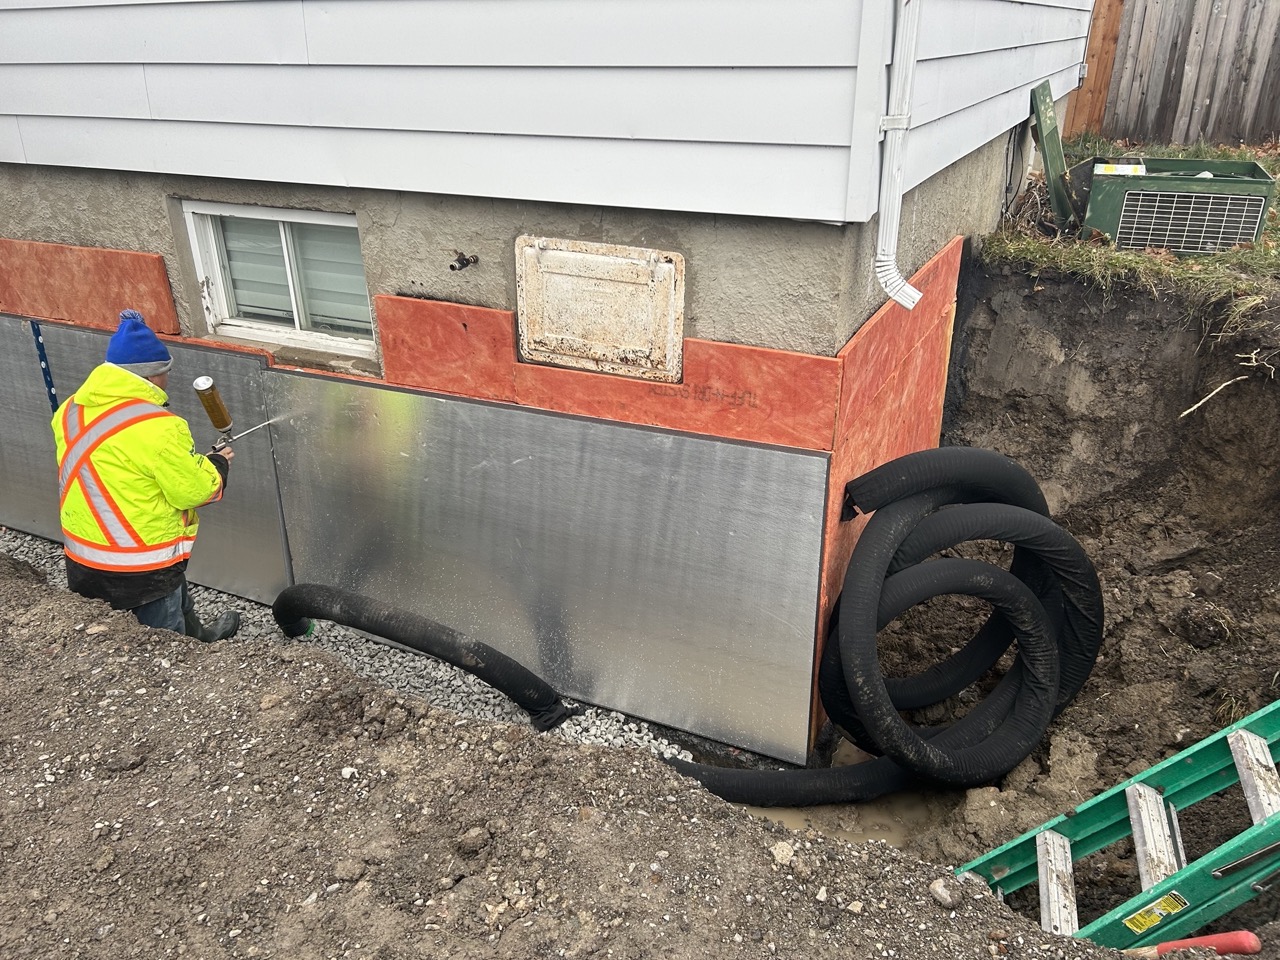
- Excavating to the footings, inspecting the foundation, sealing any cracks, and applying new waterproofing.
- Installing new weeping tile and sump.
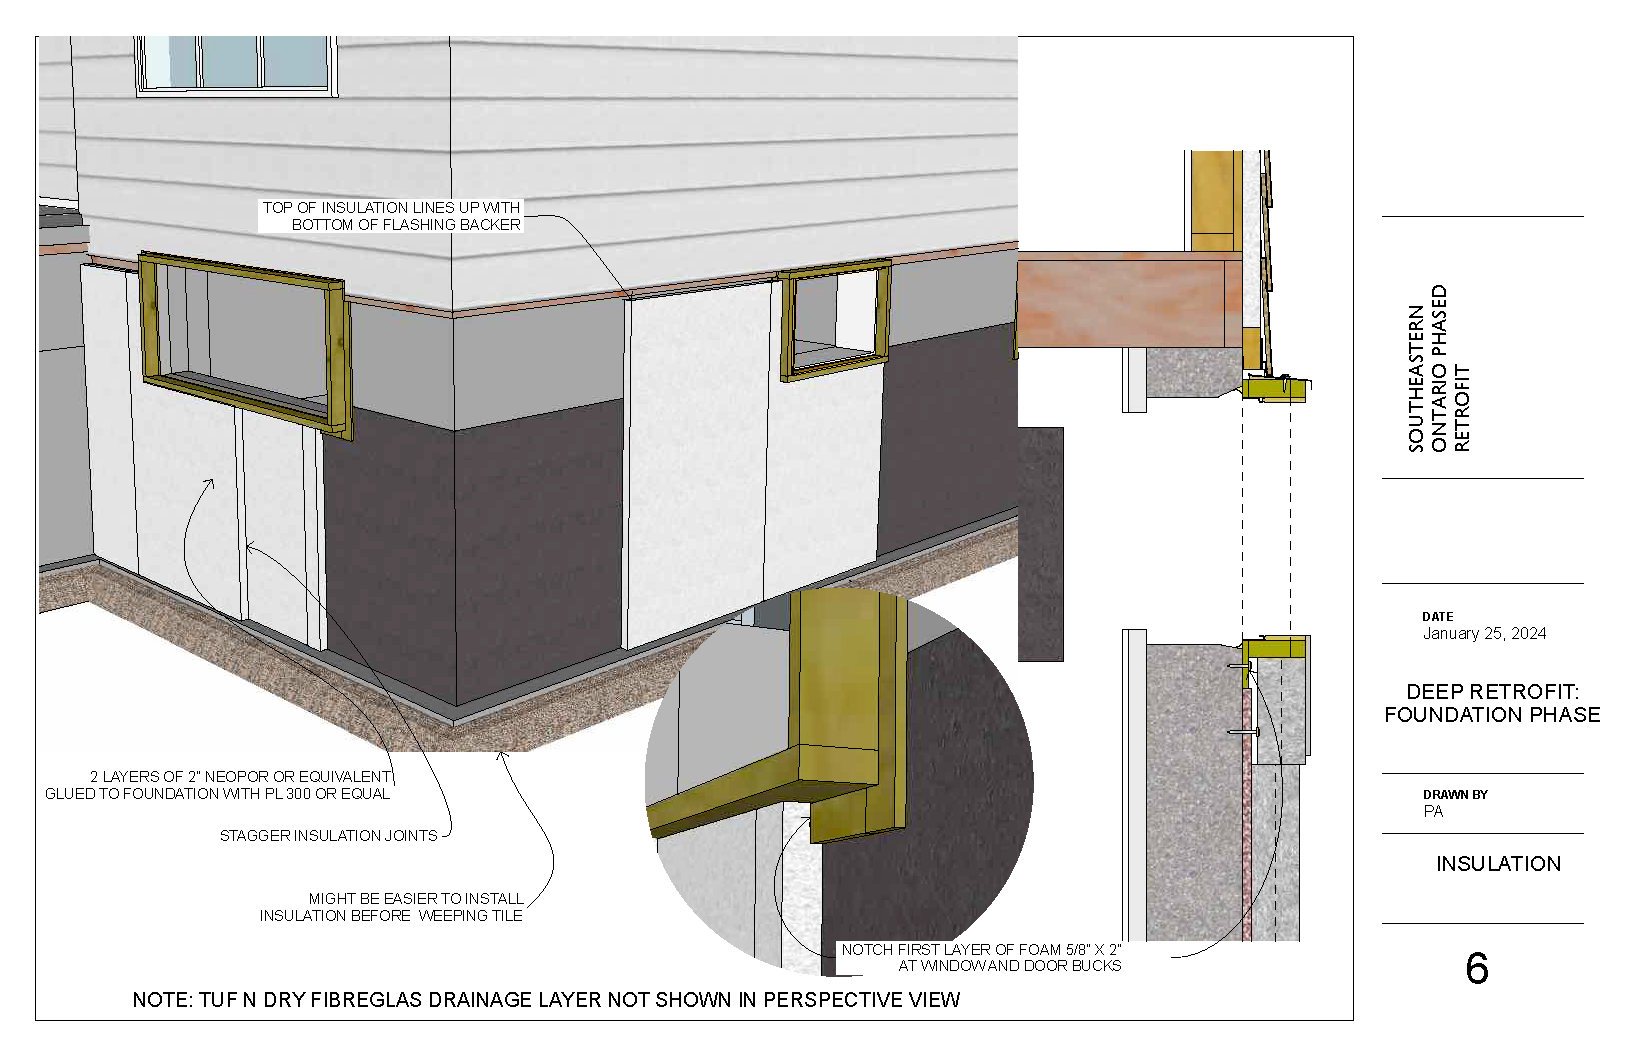
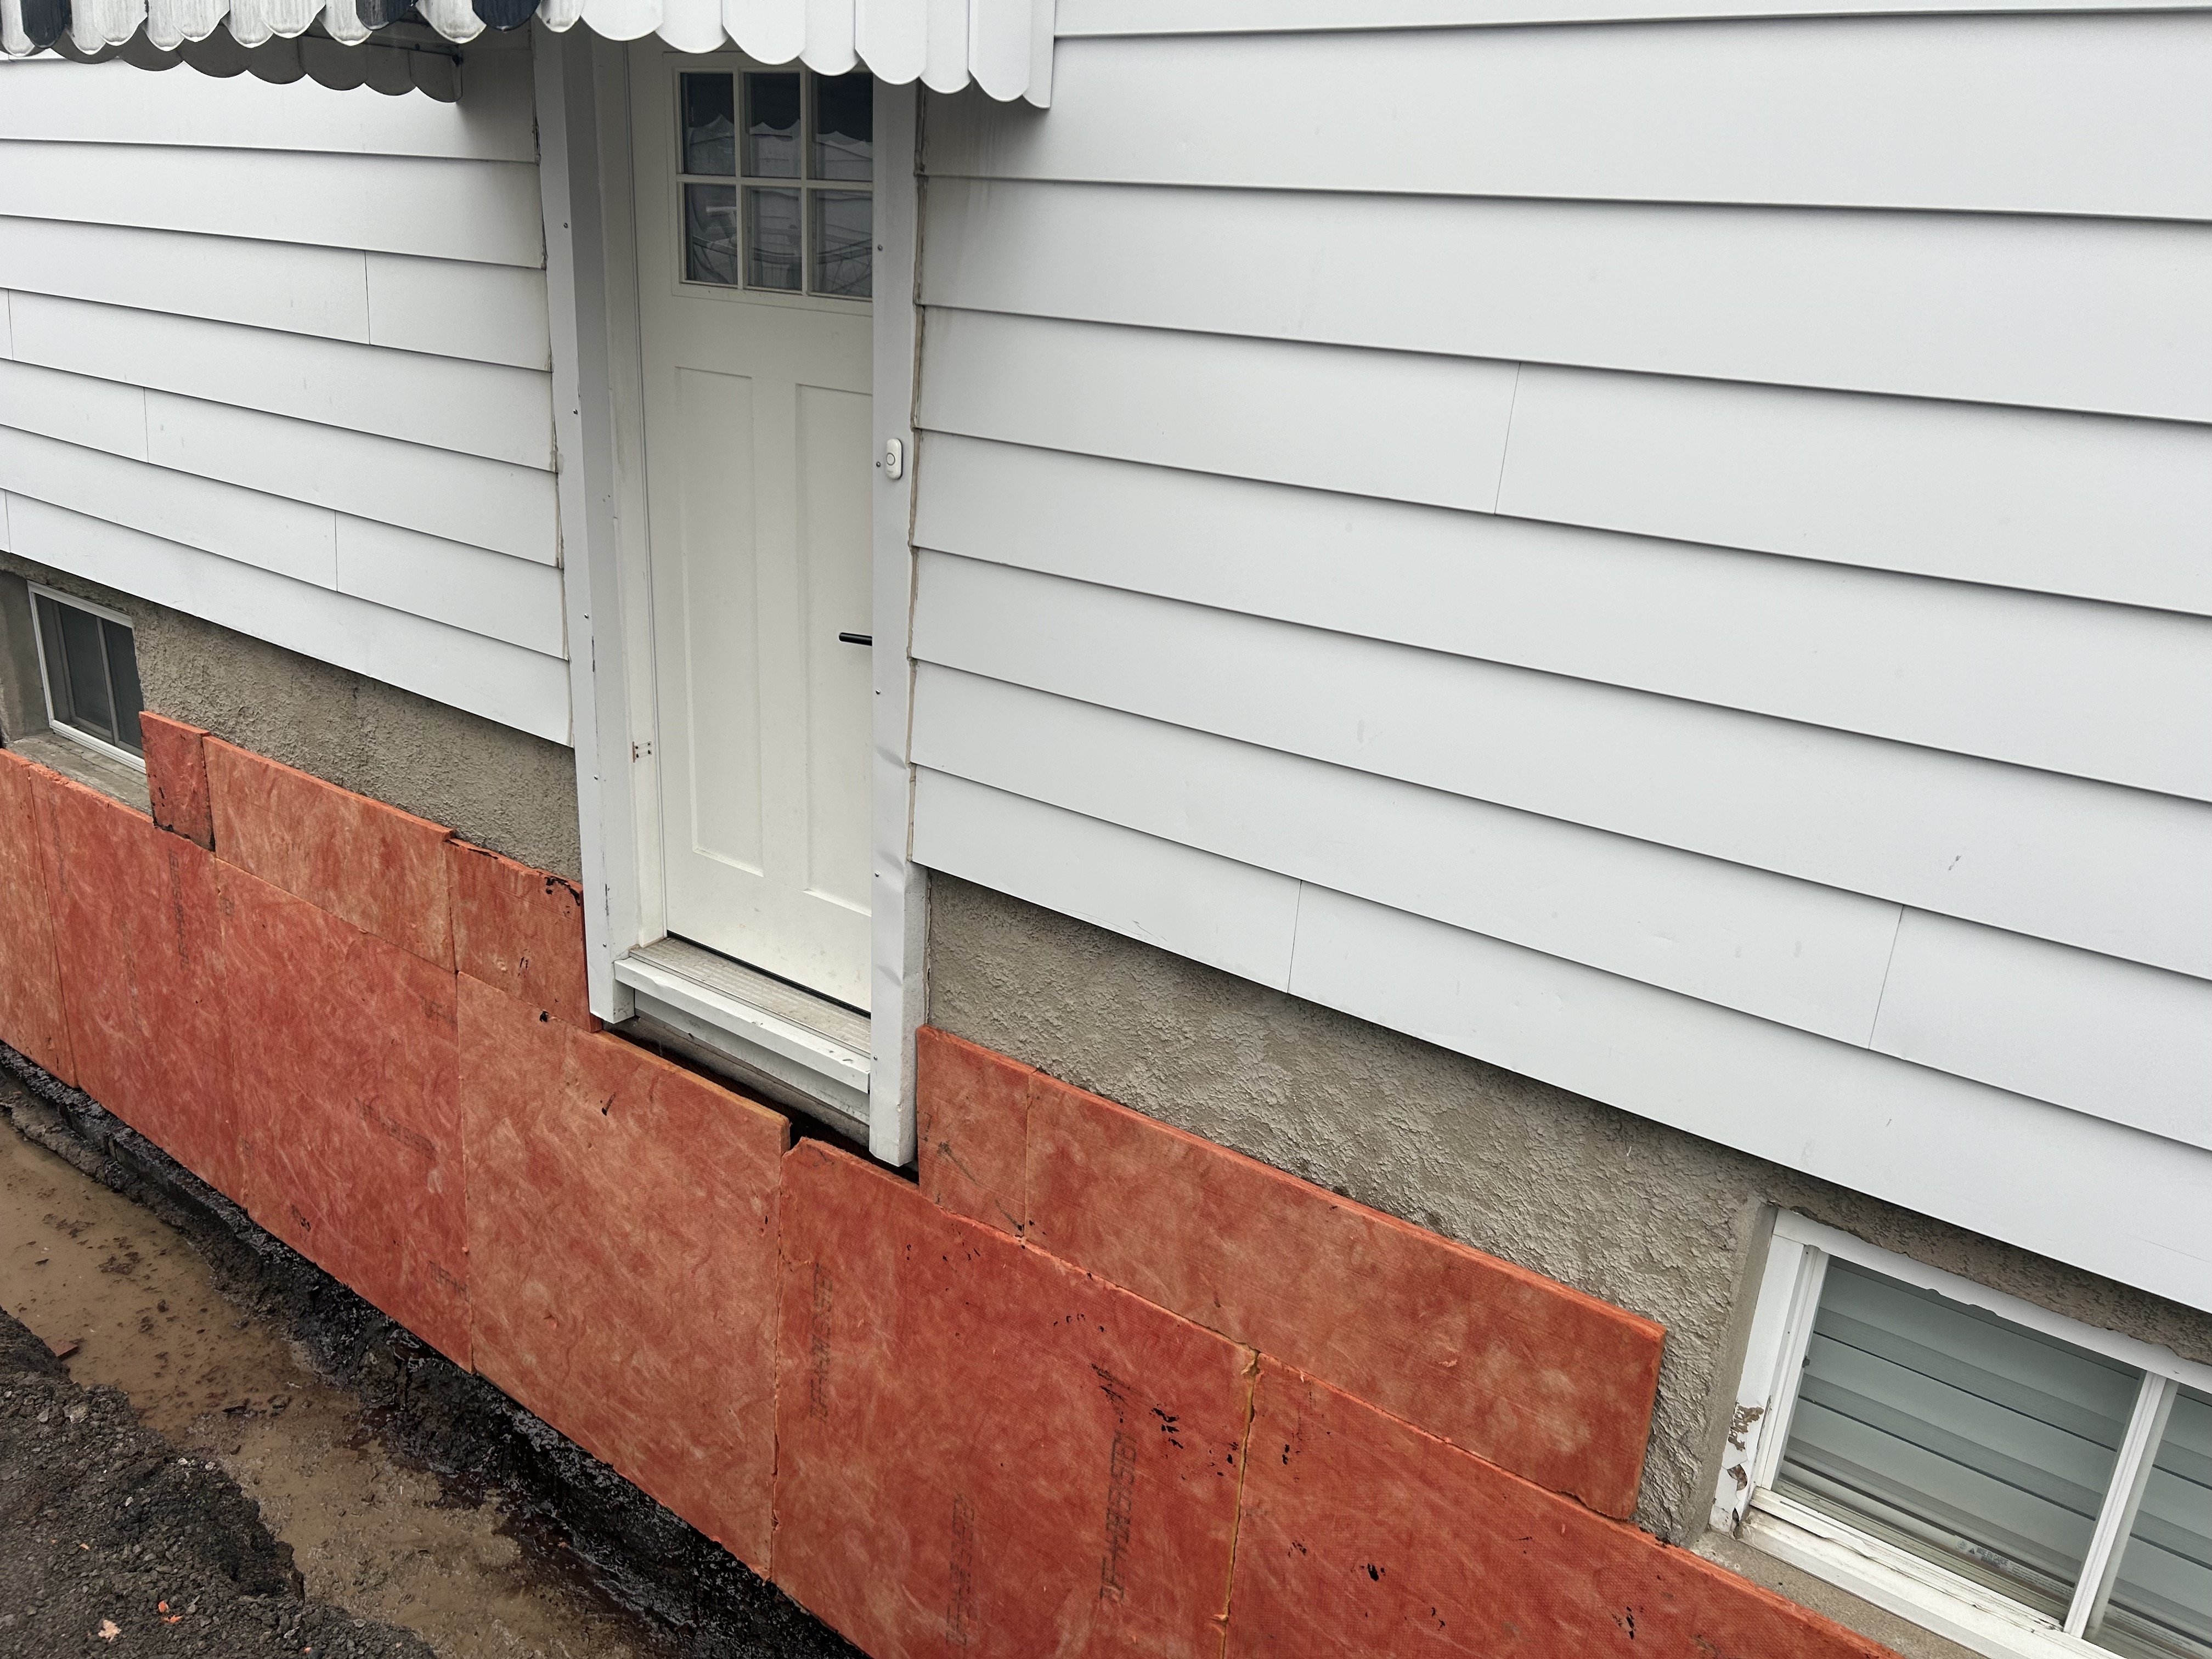
- Installing low global warming potential (GWP) styrofoam insulation to R24.
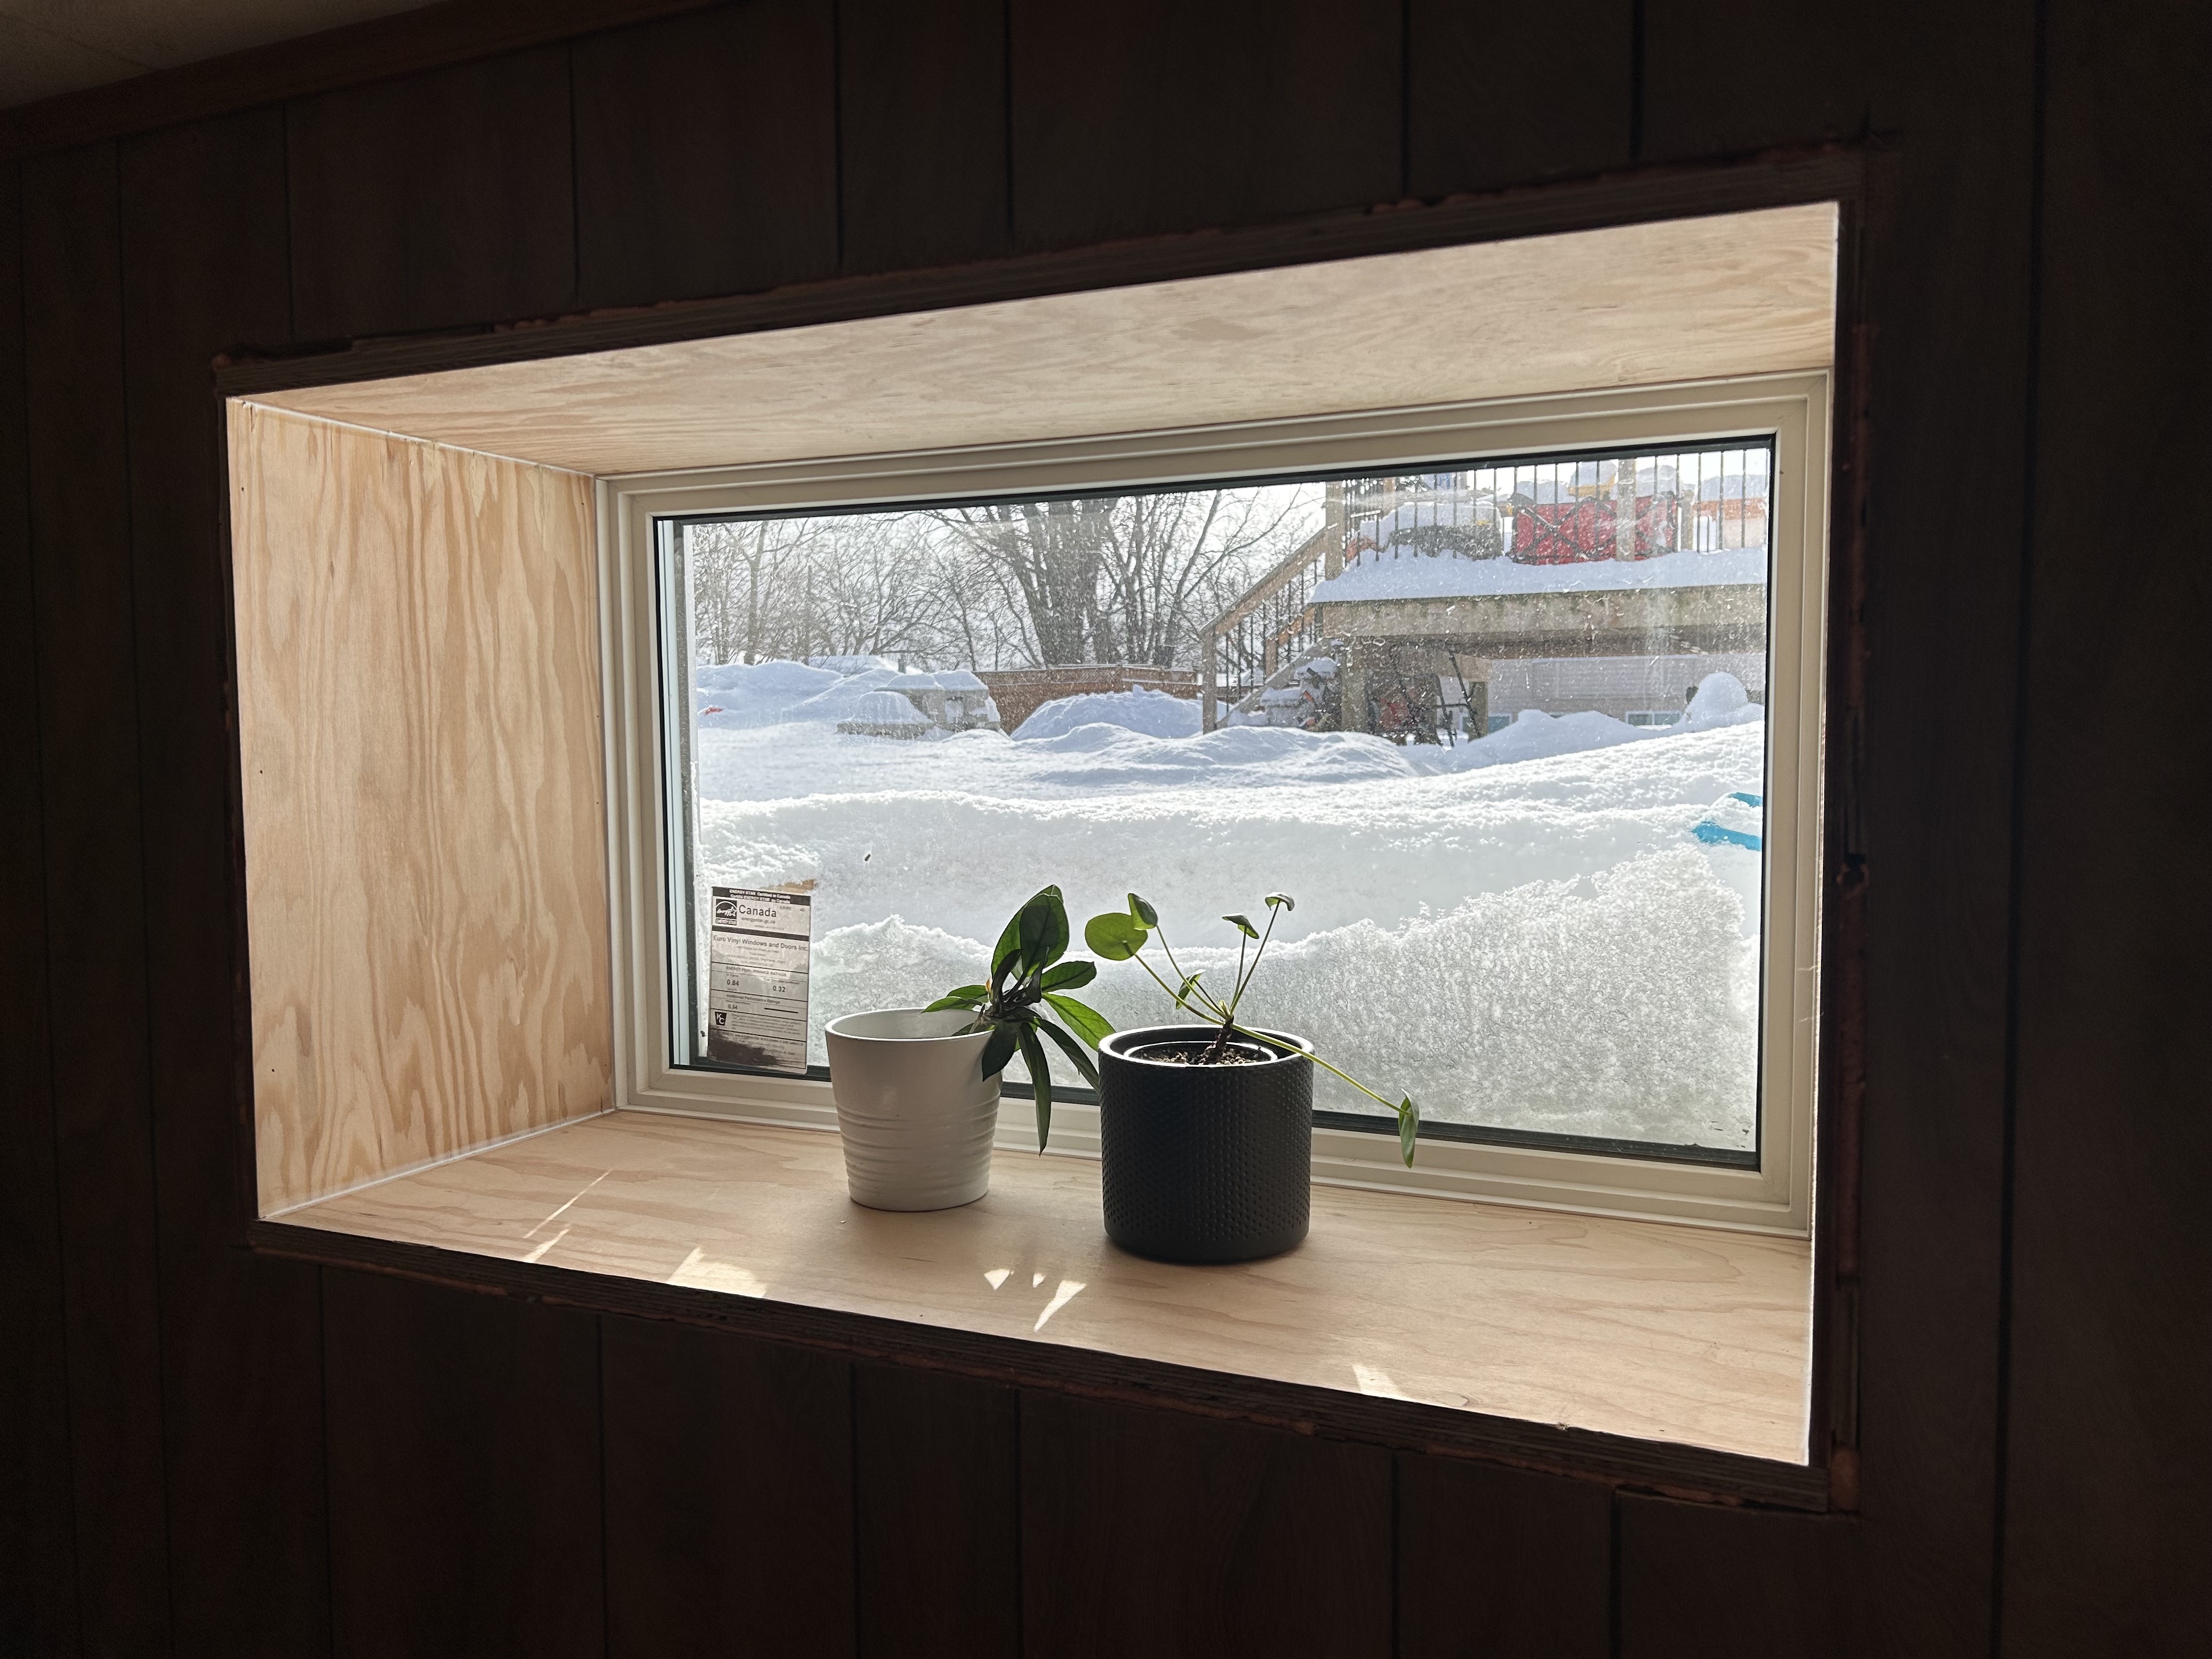
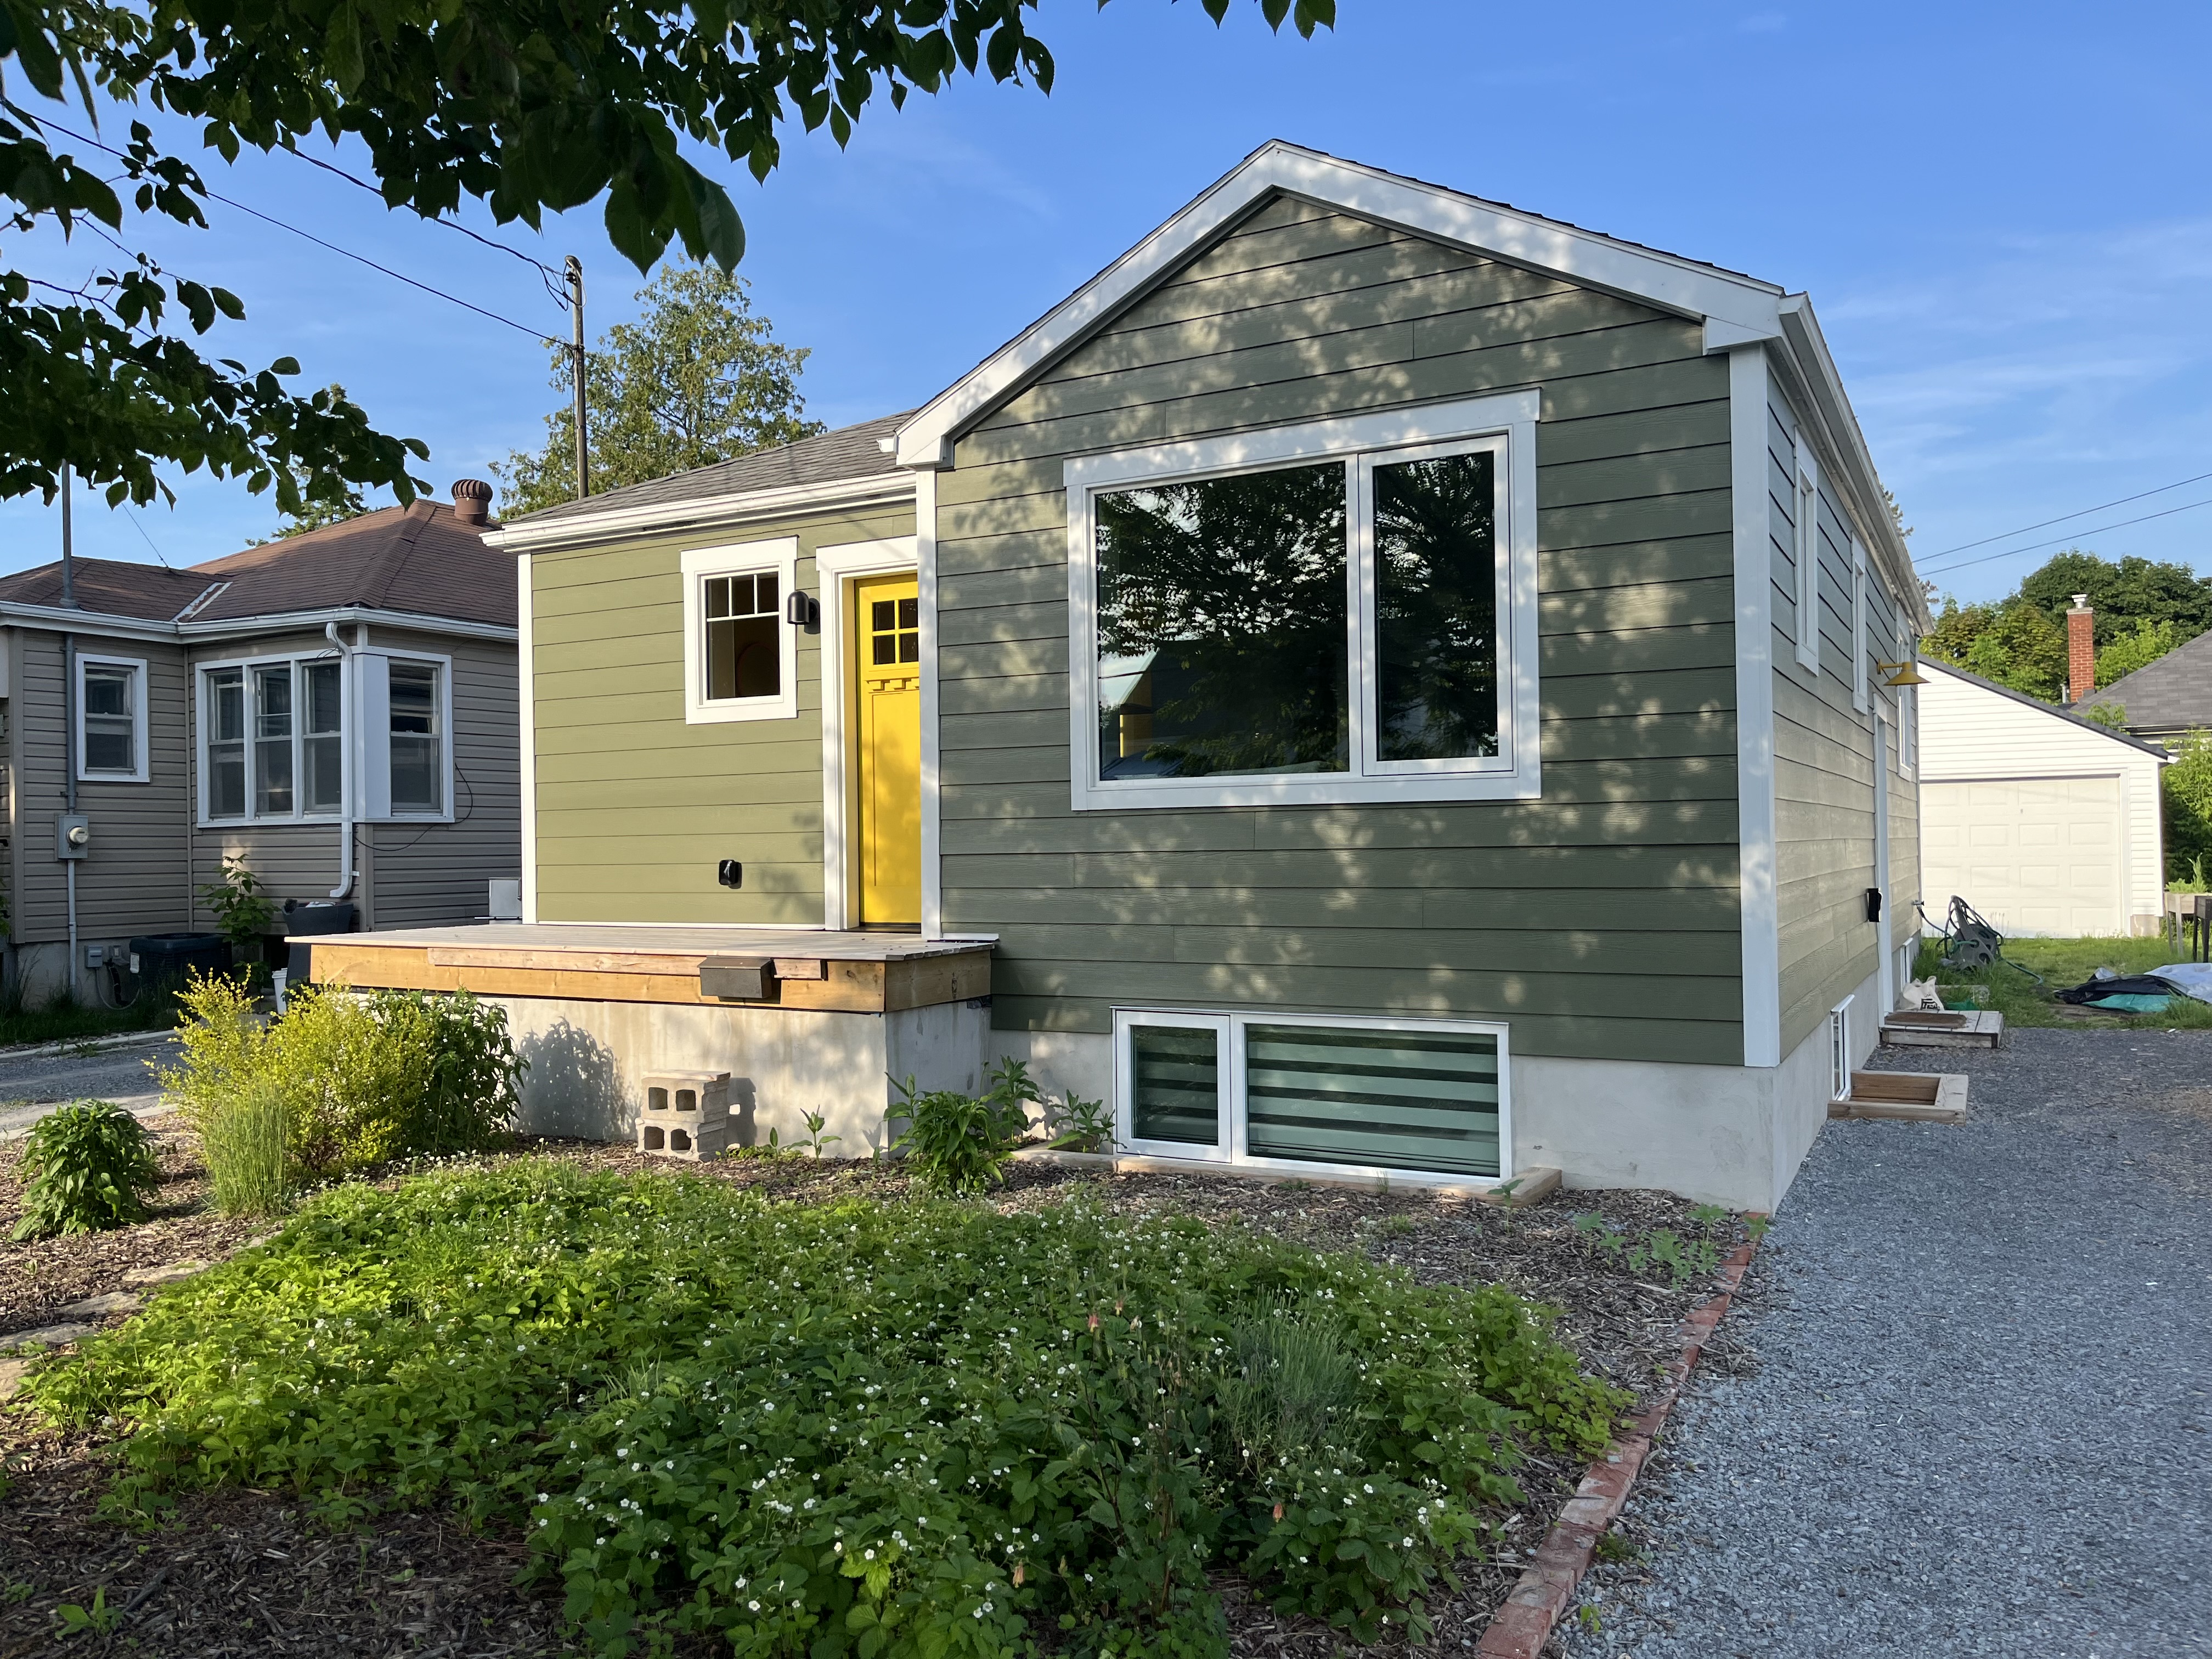
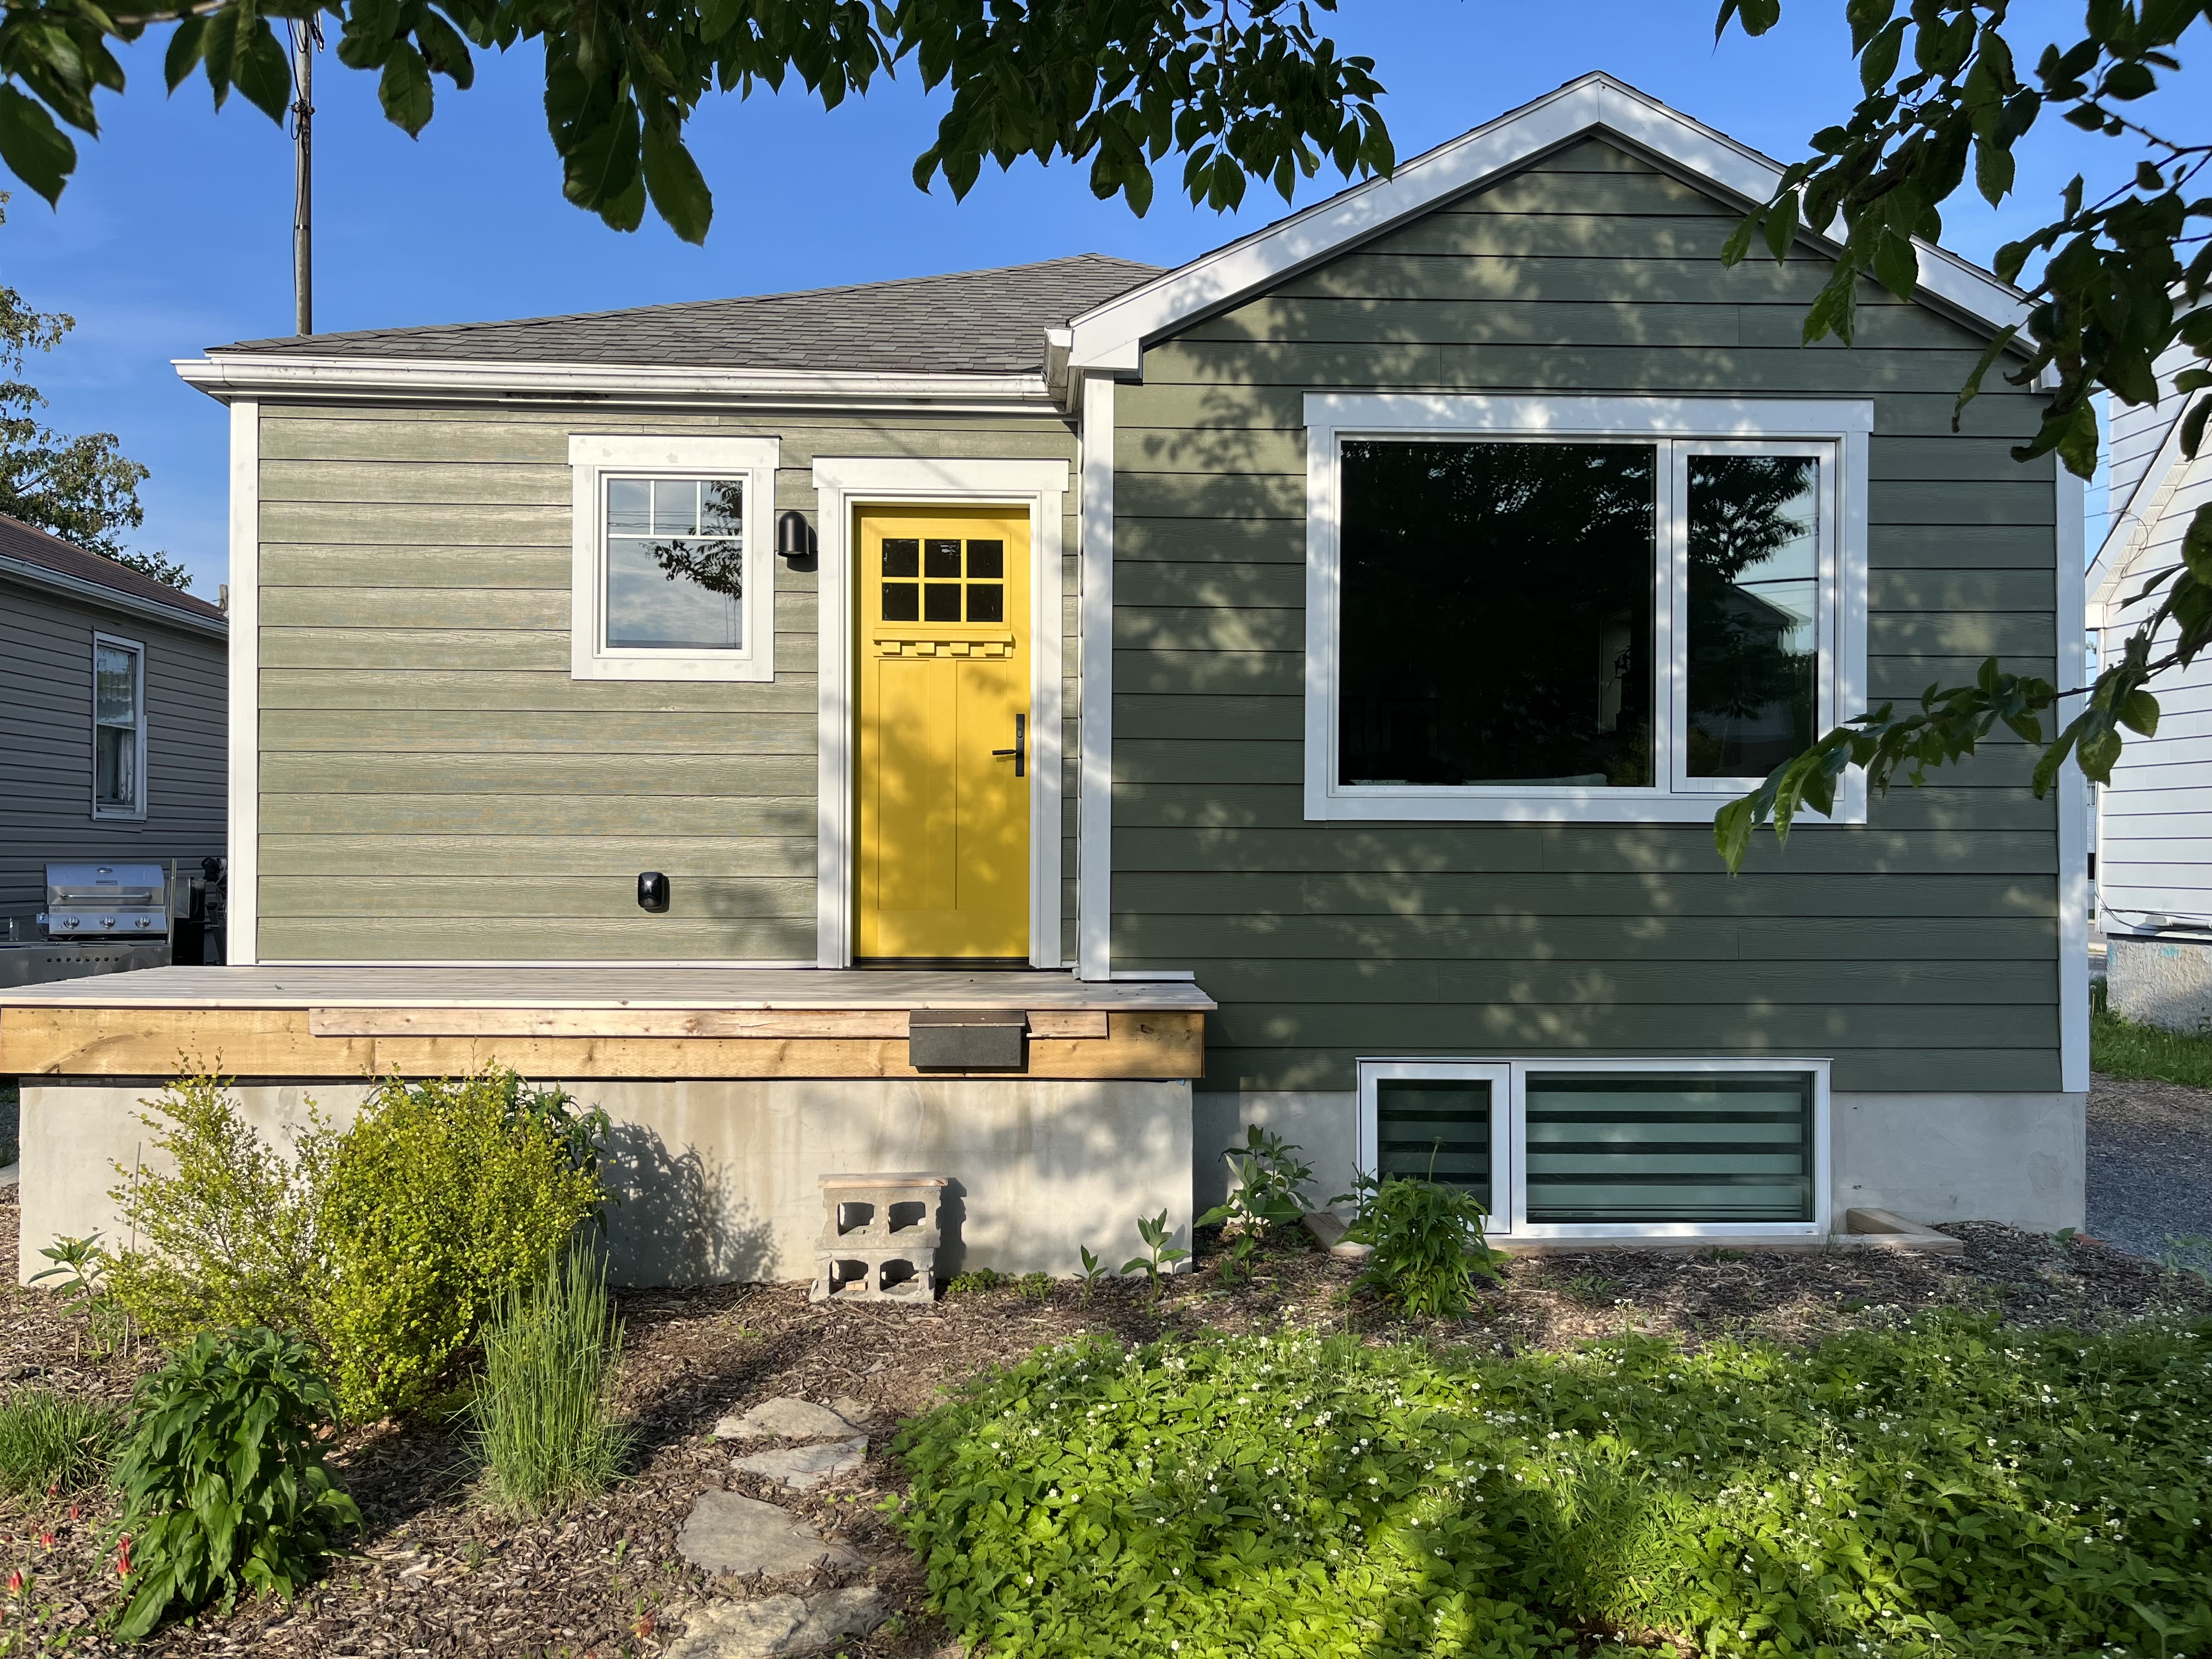
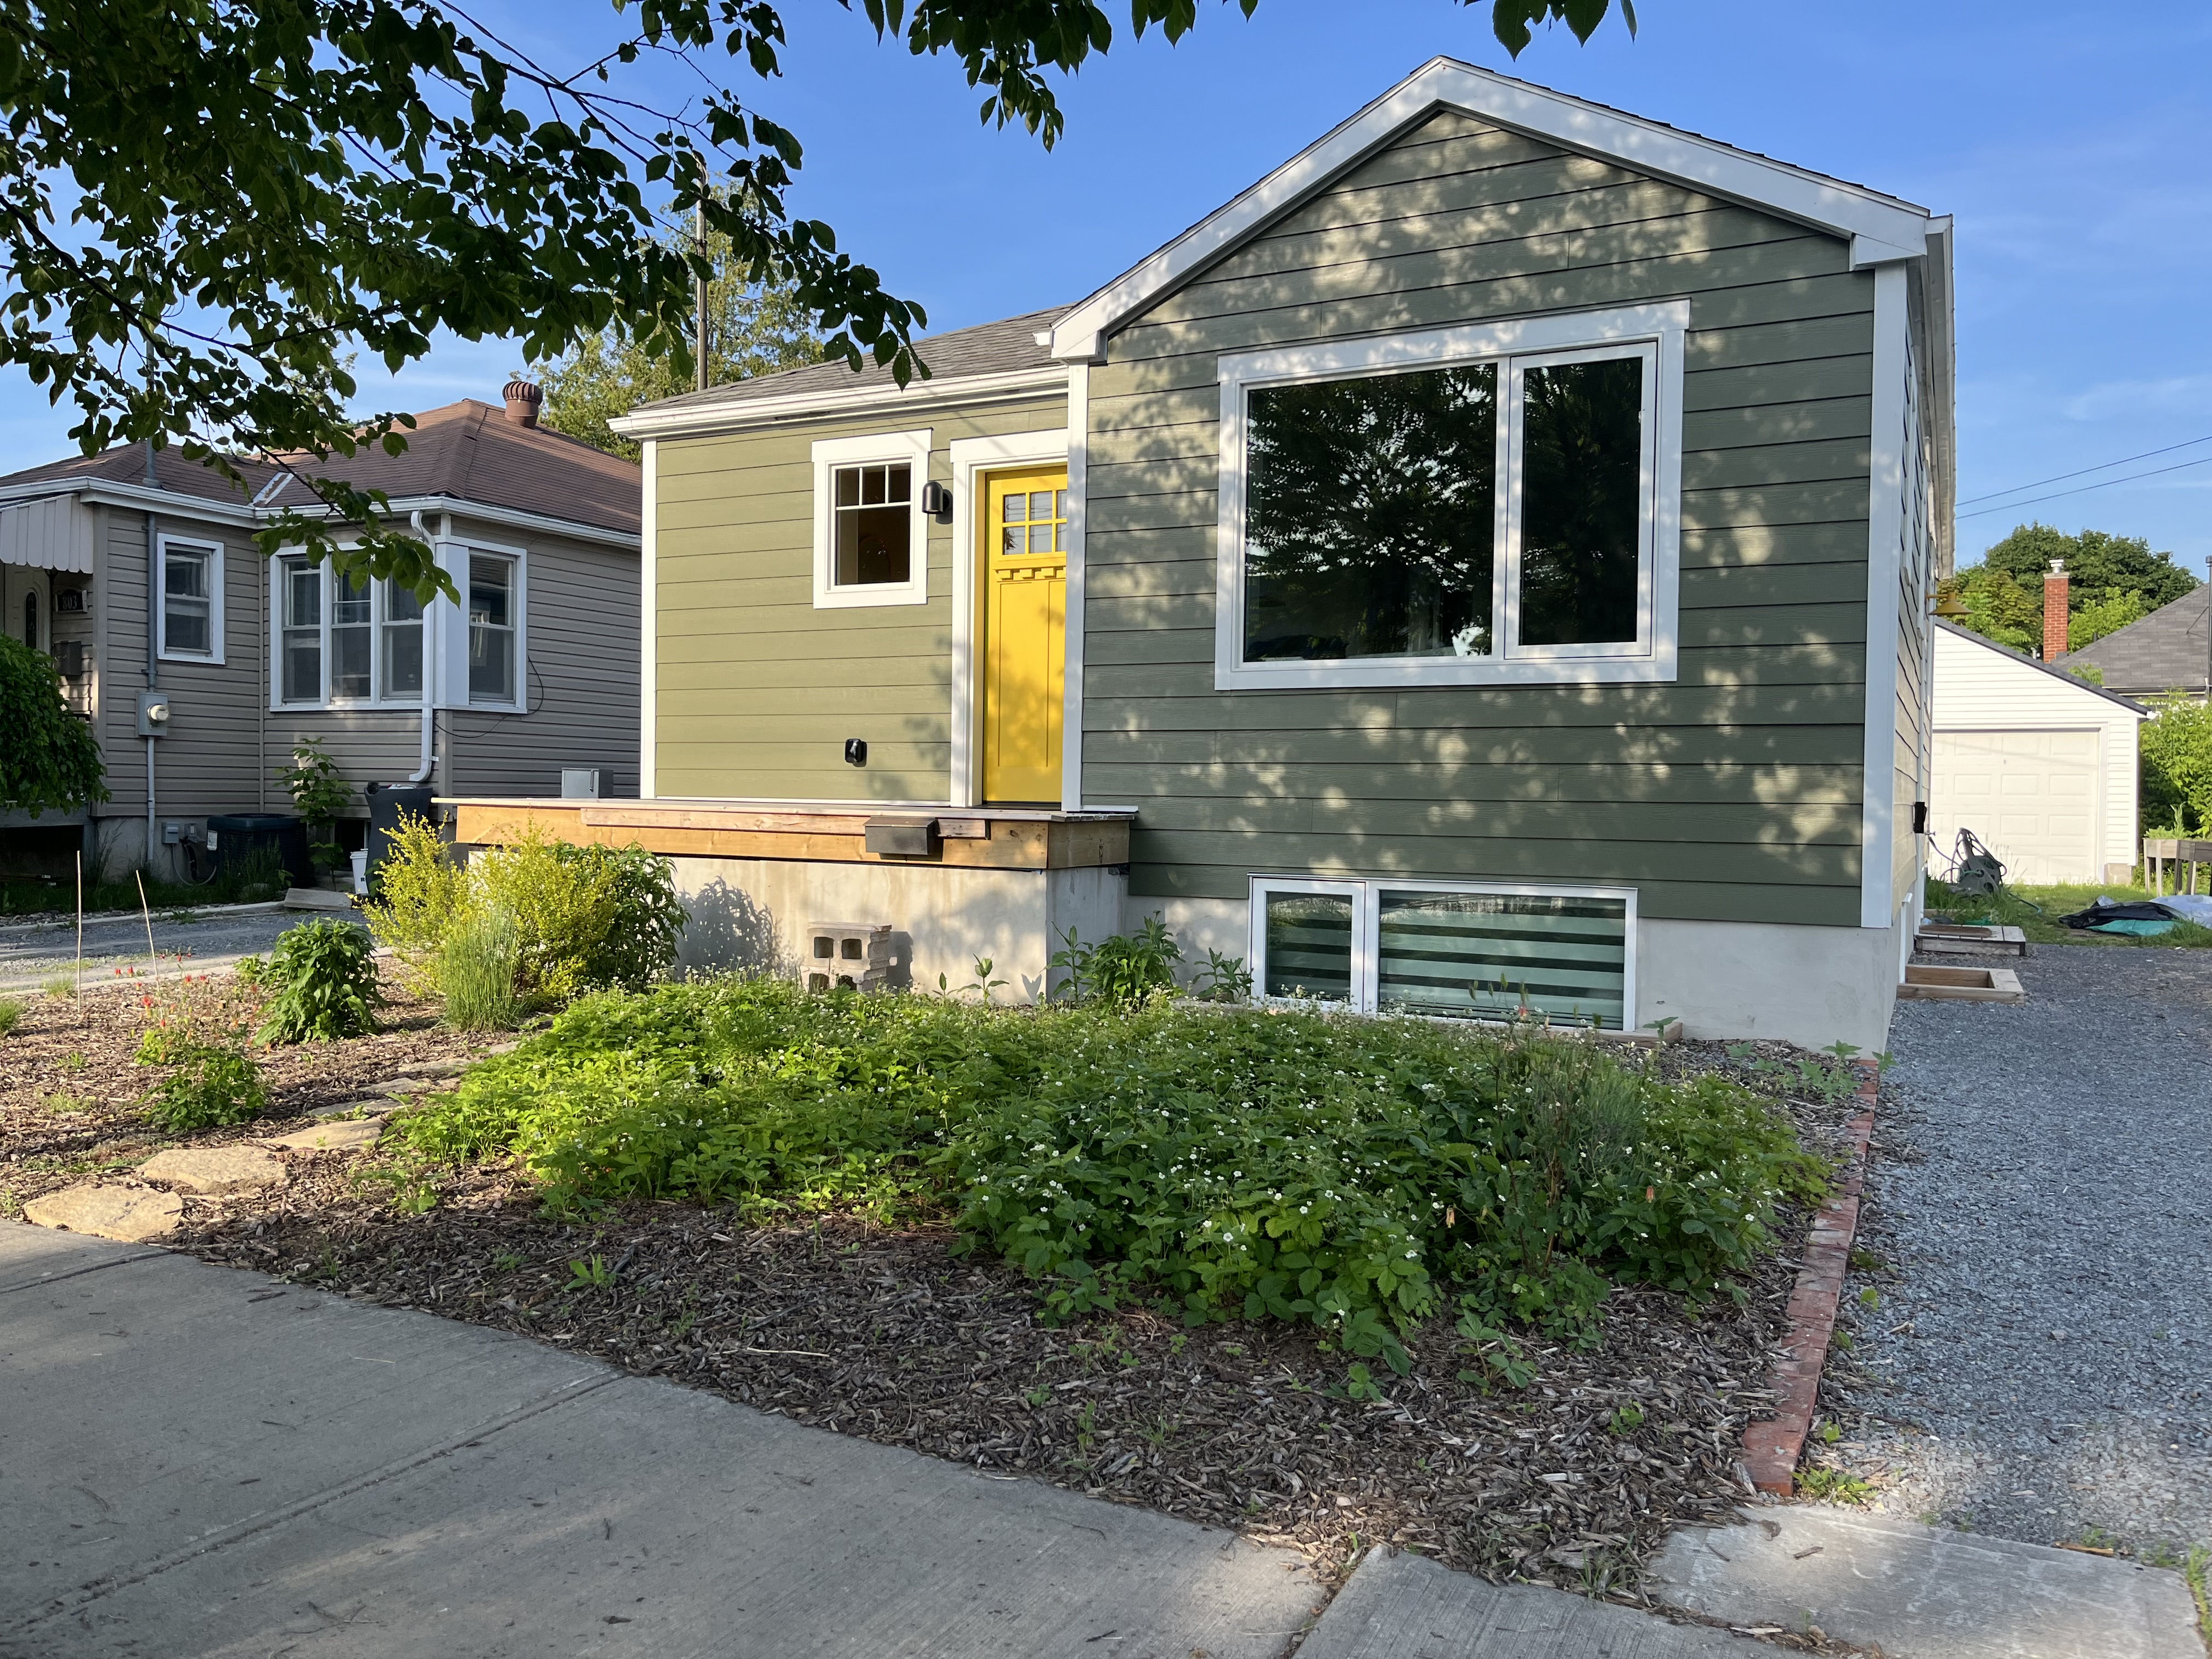
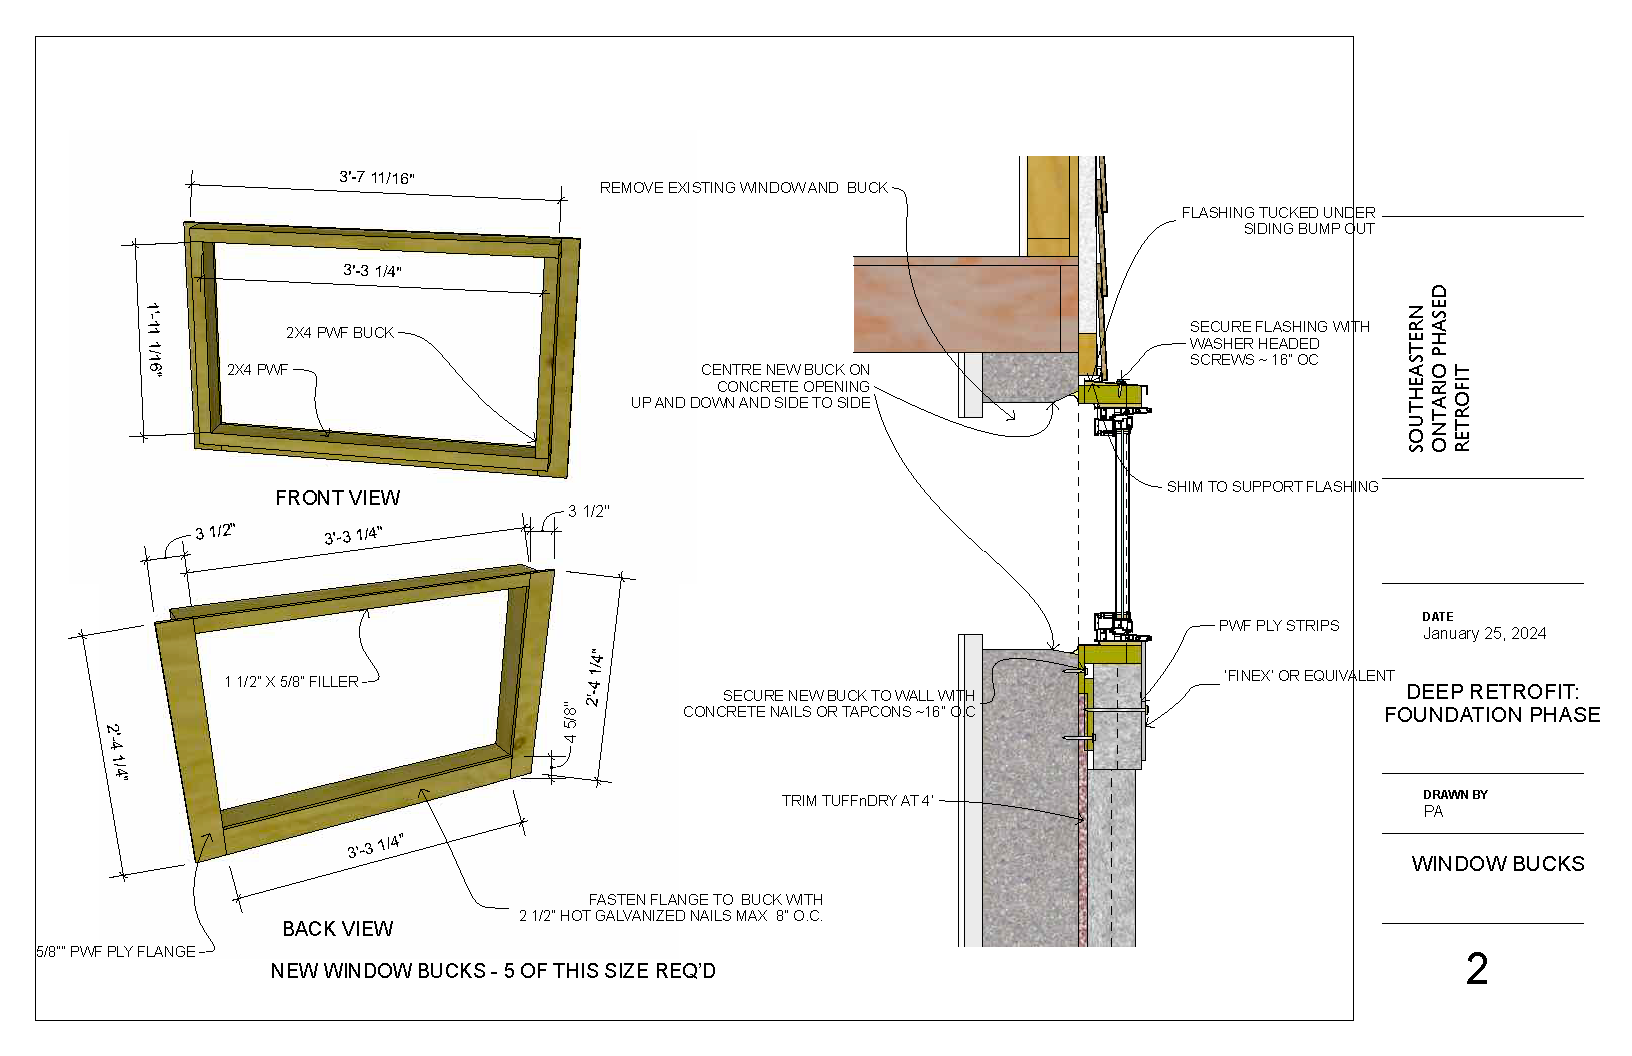
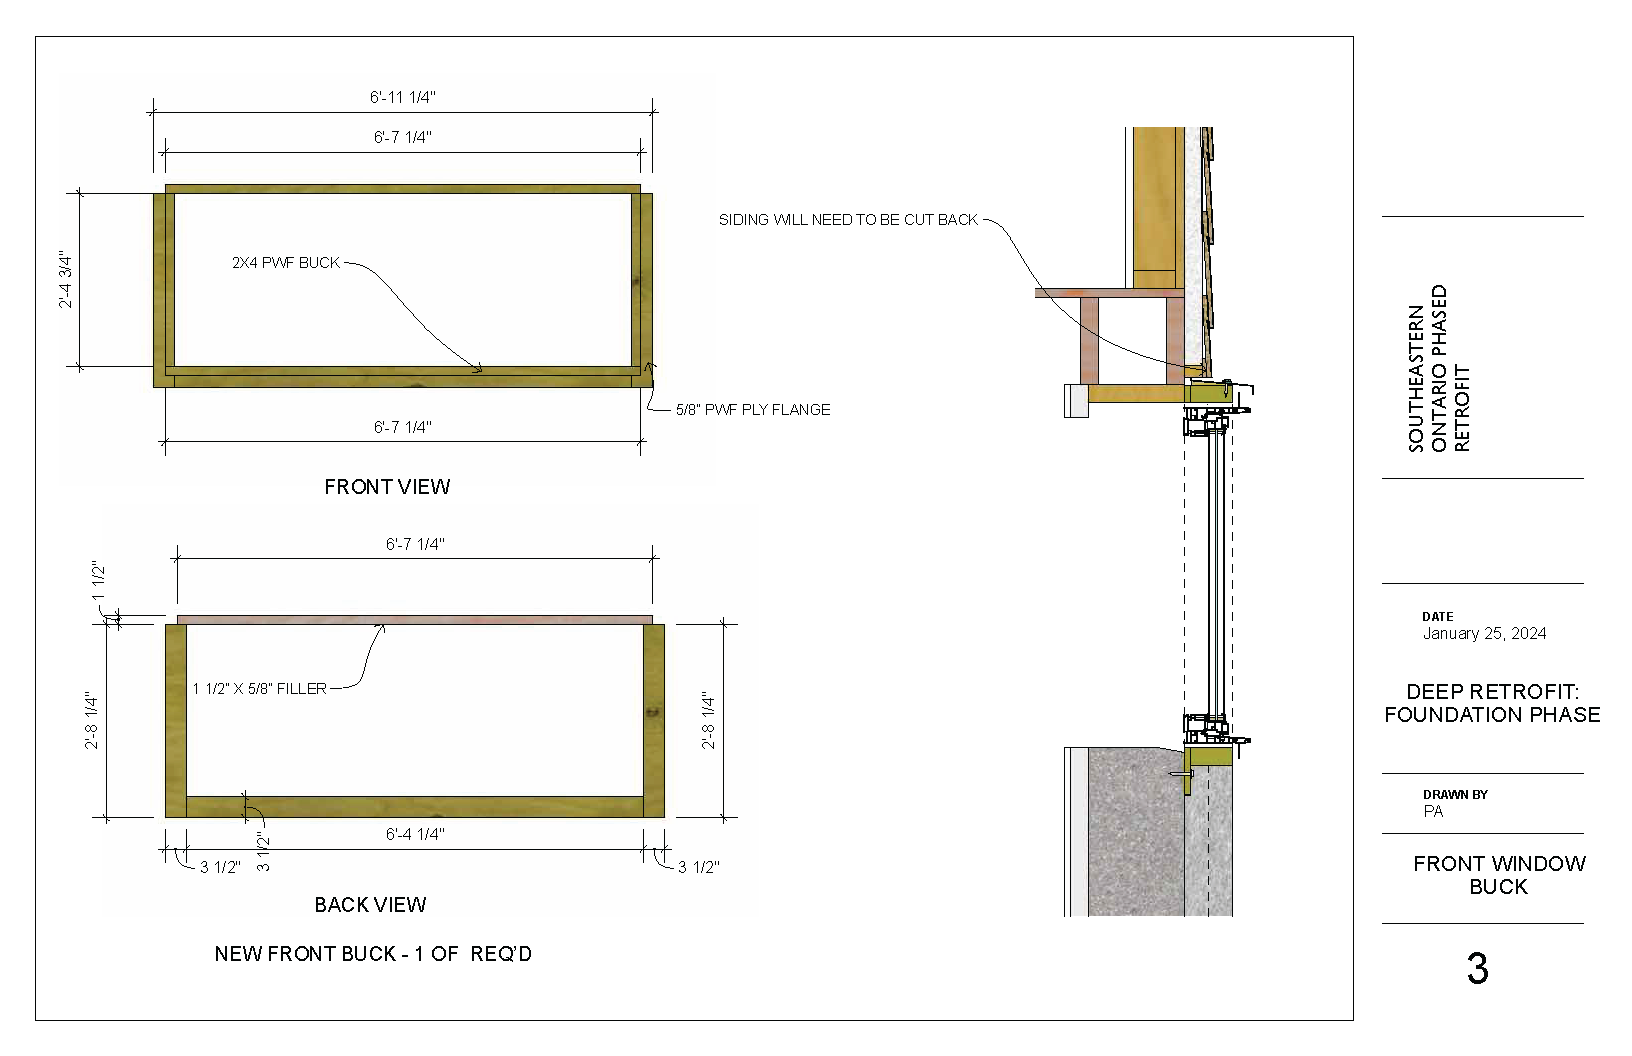
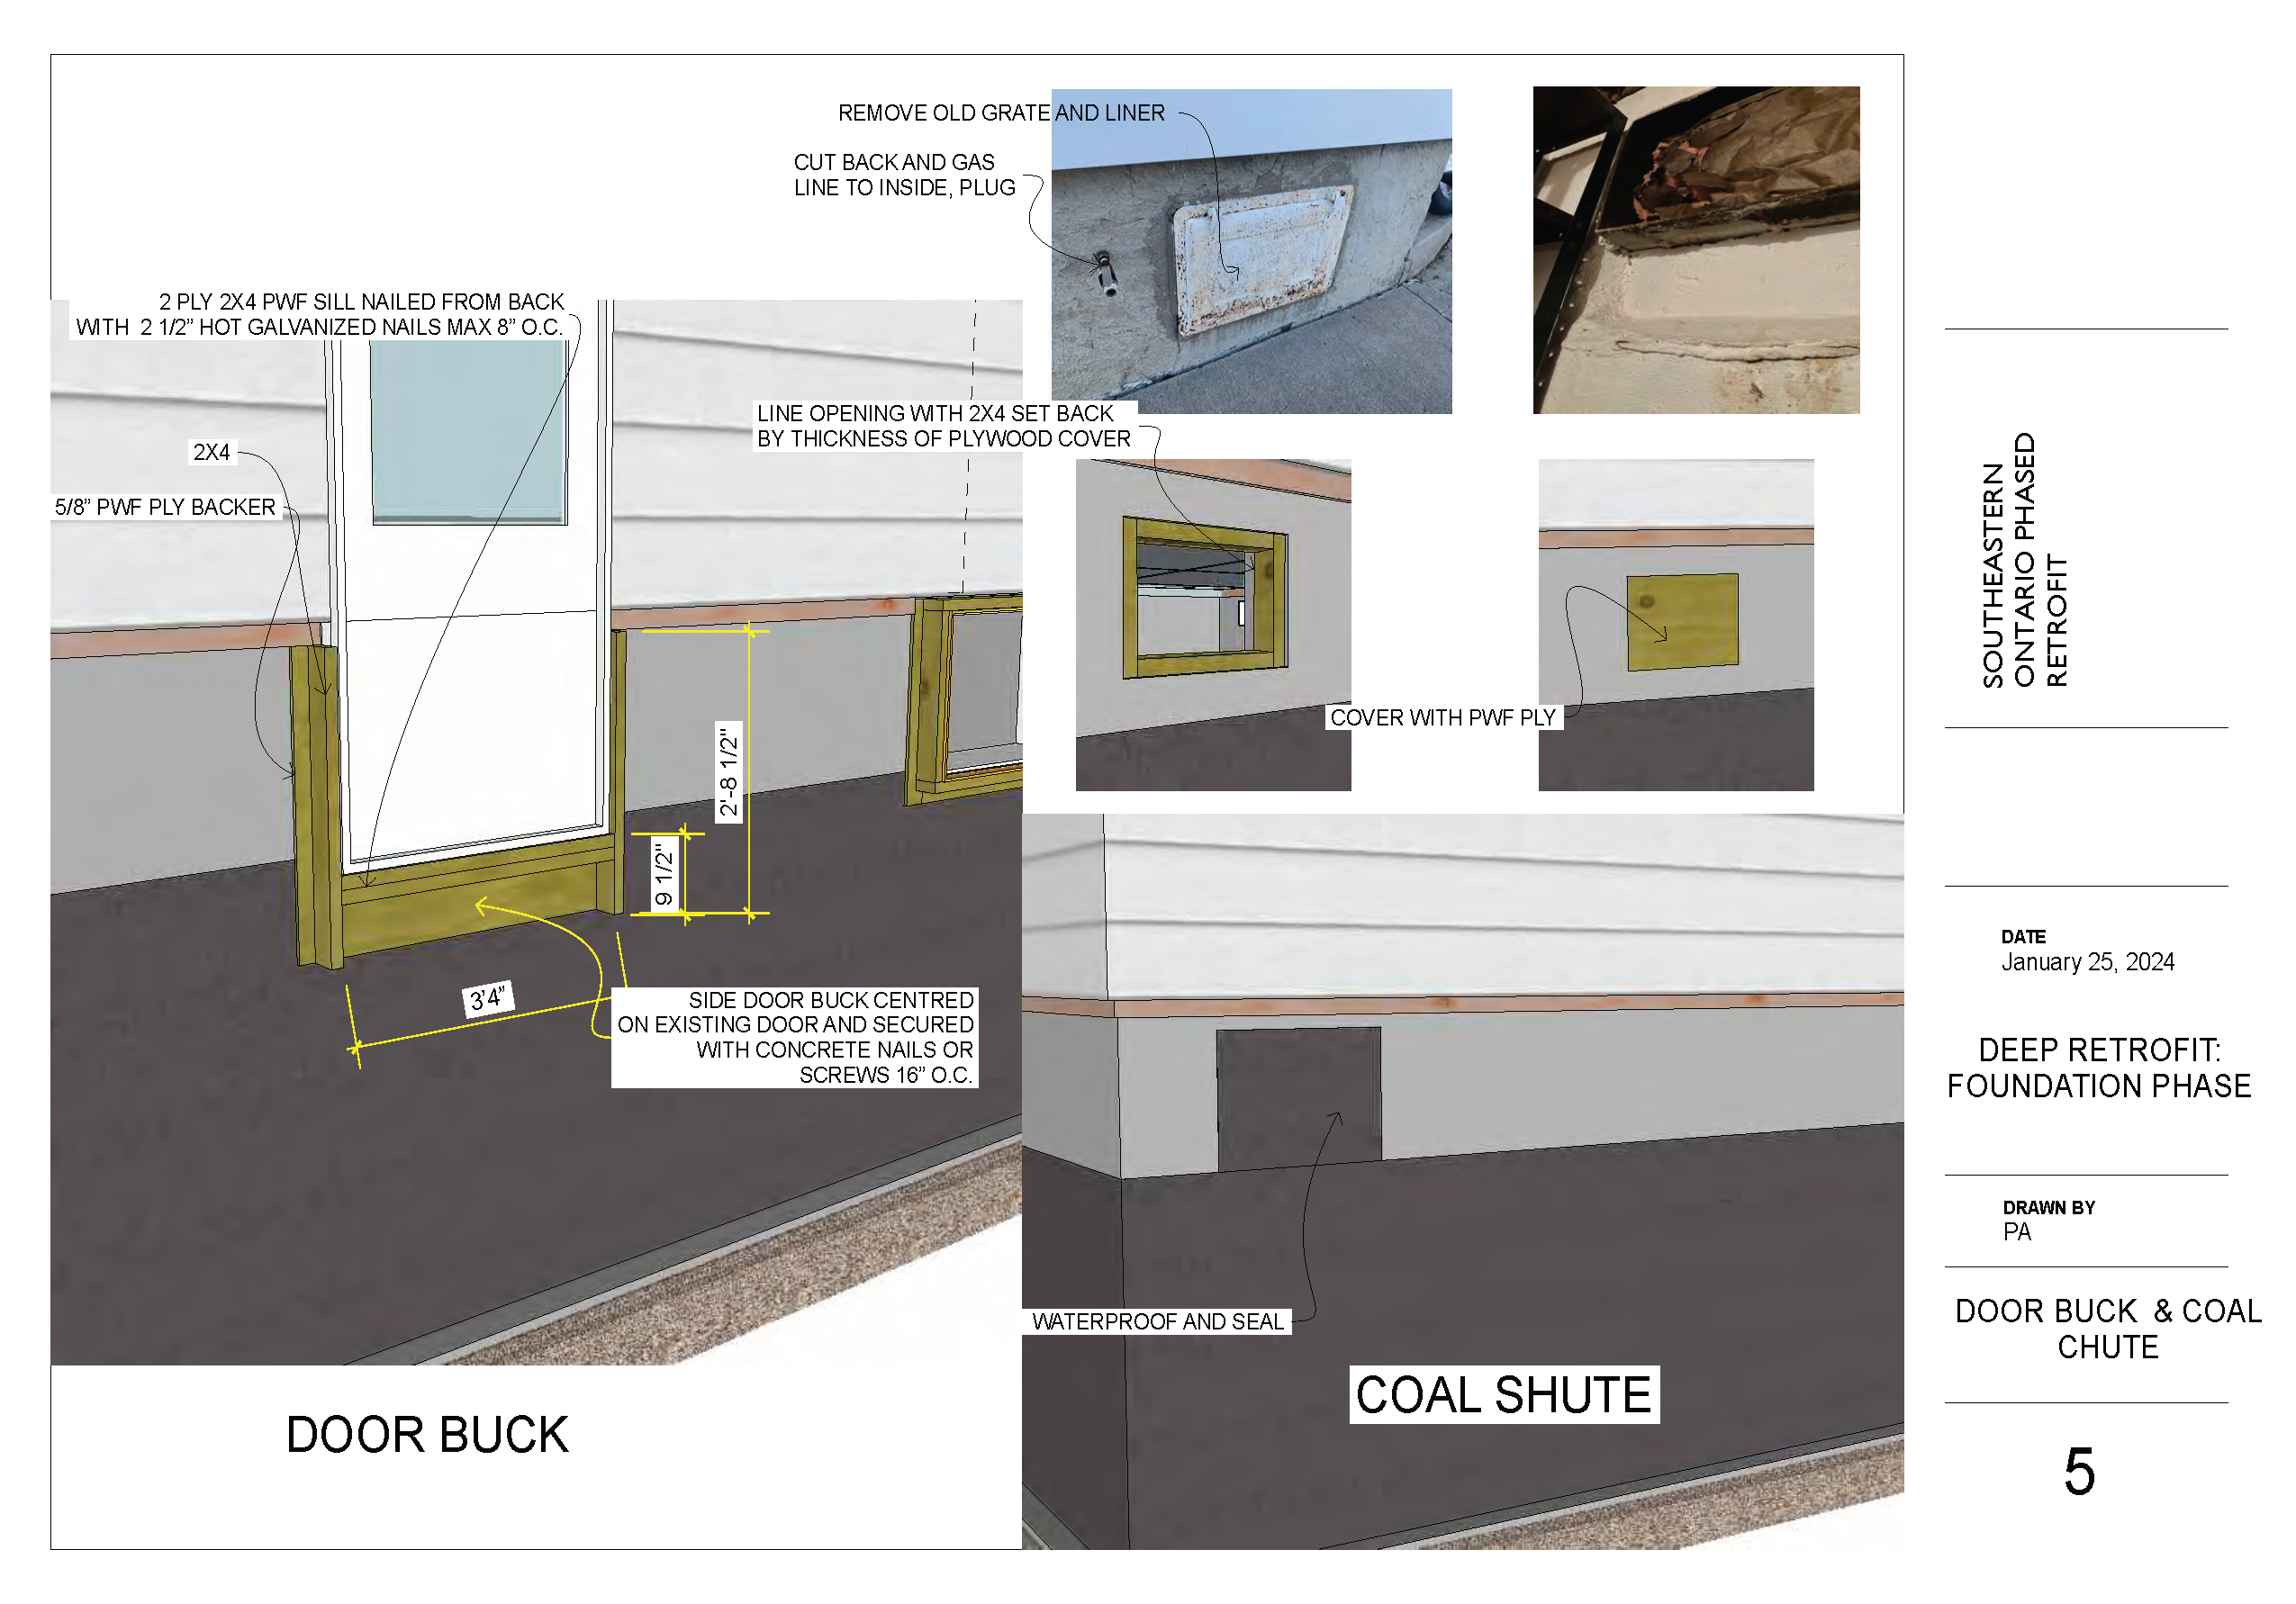
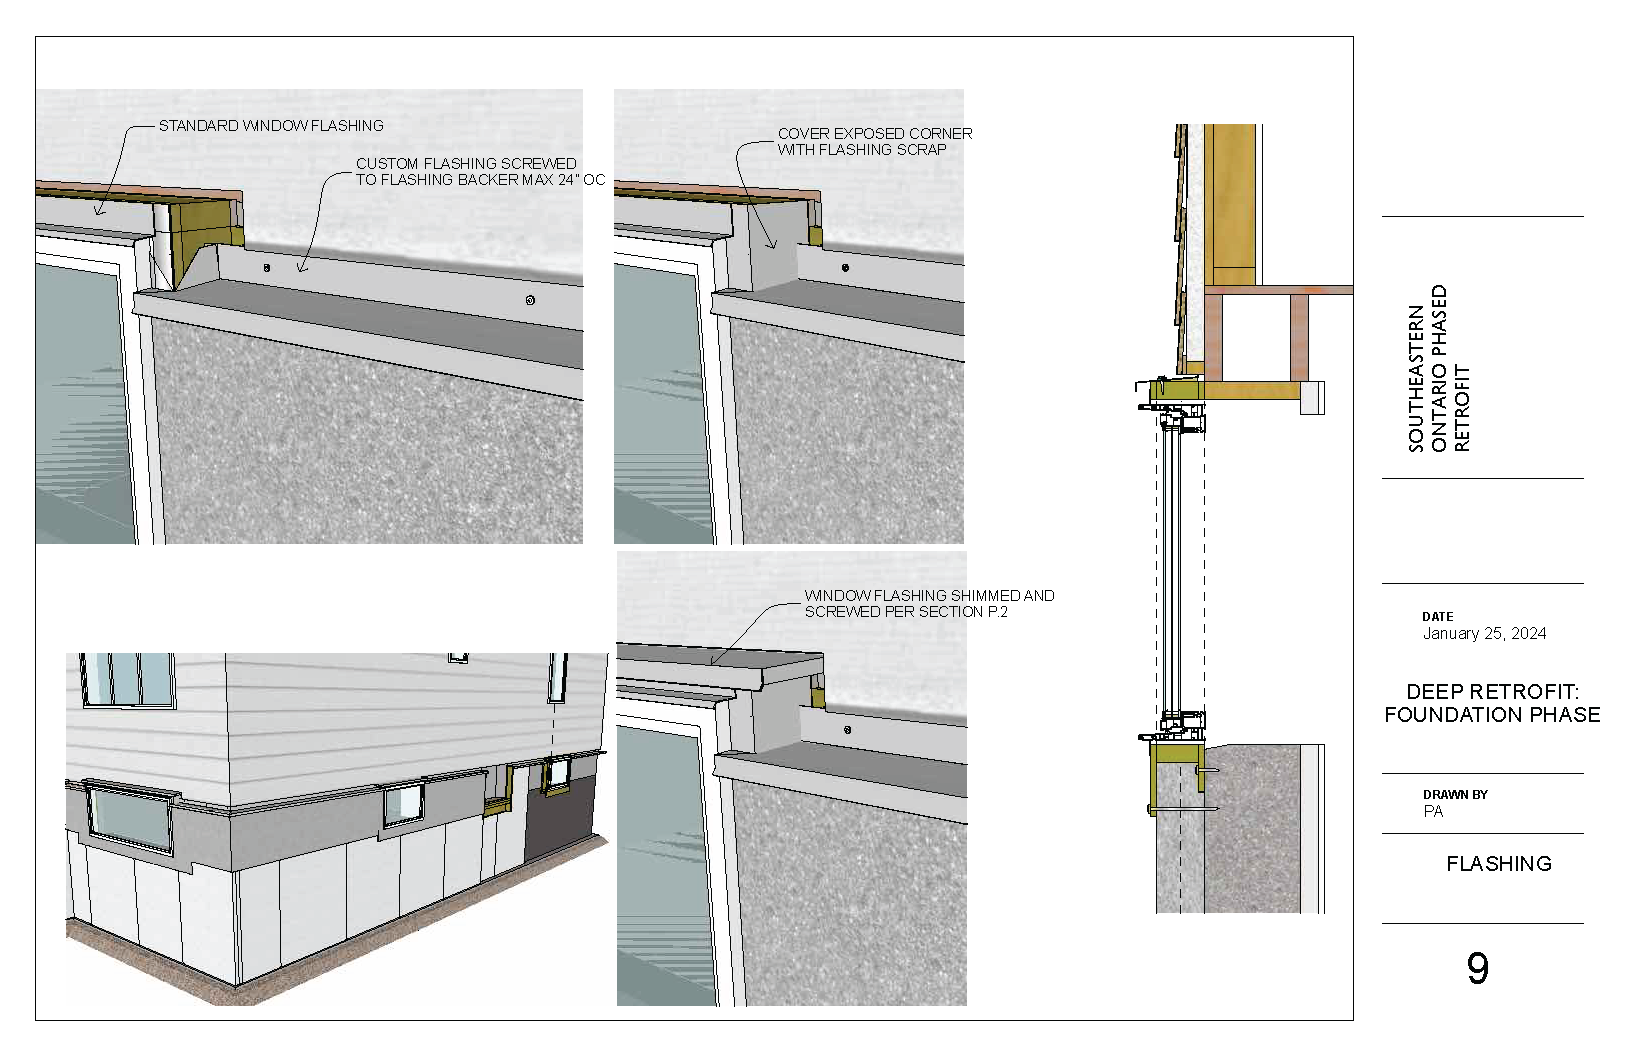
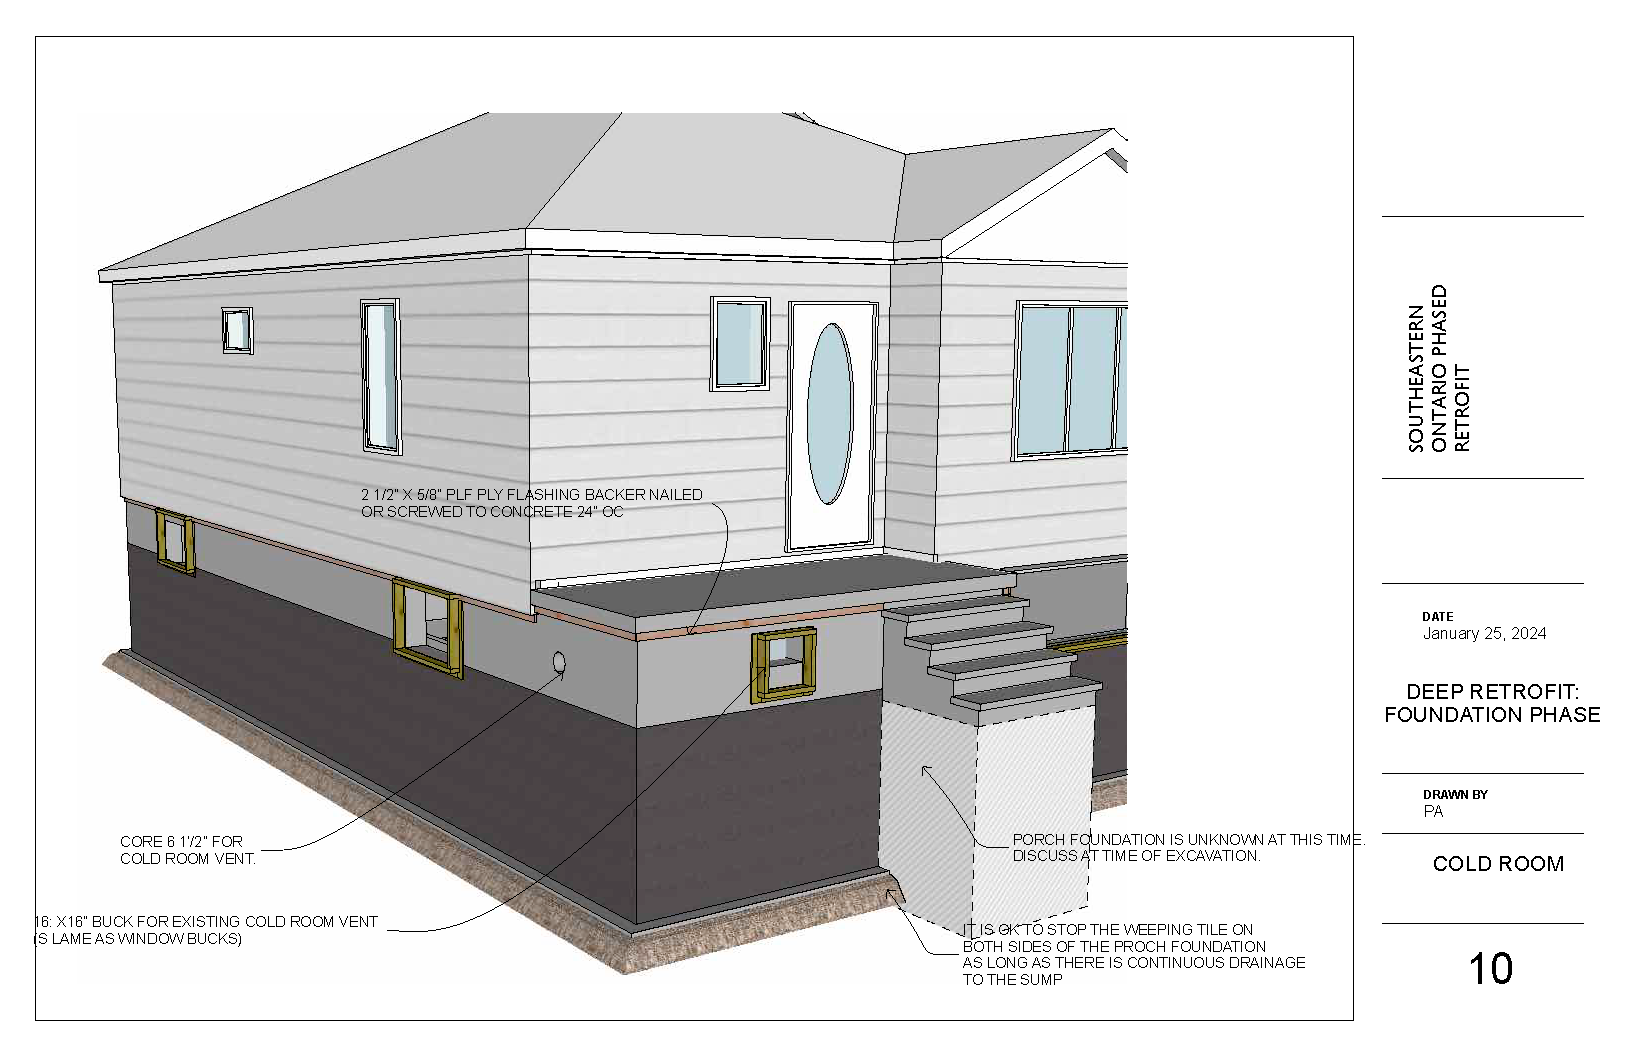
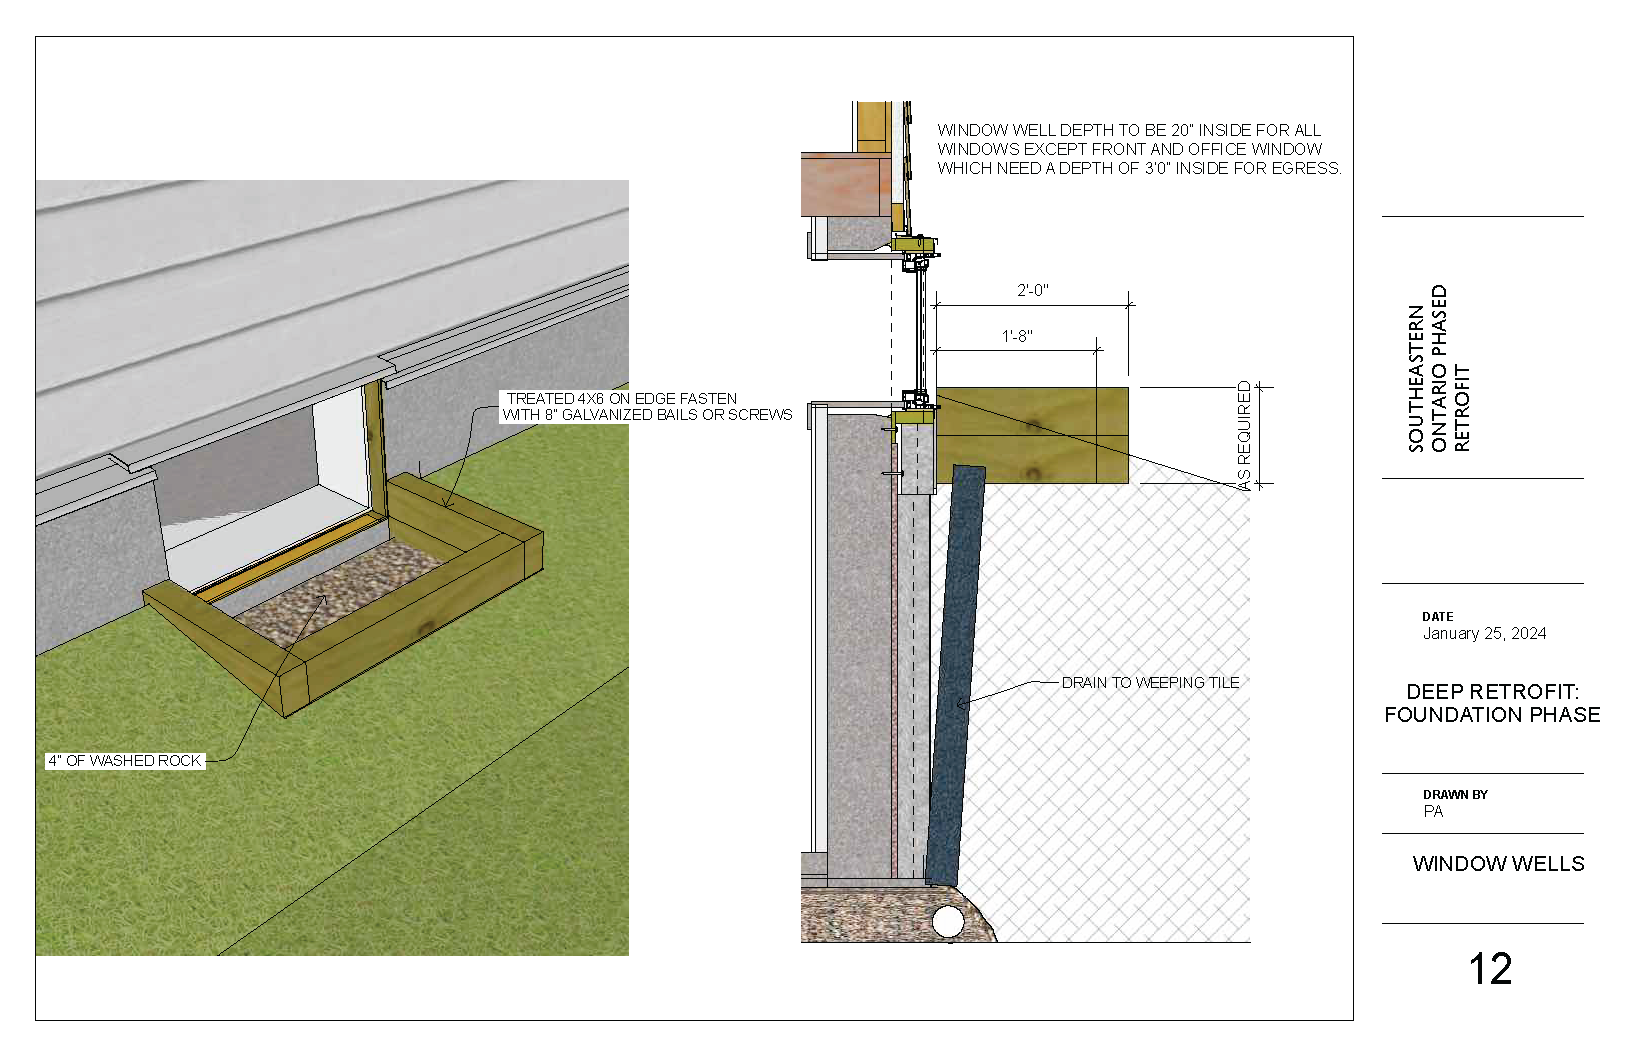
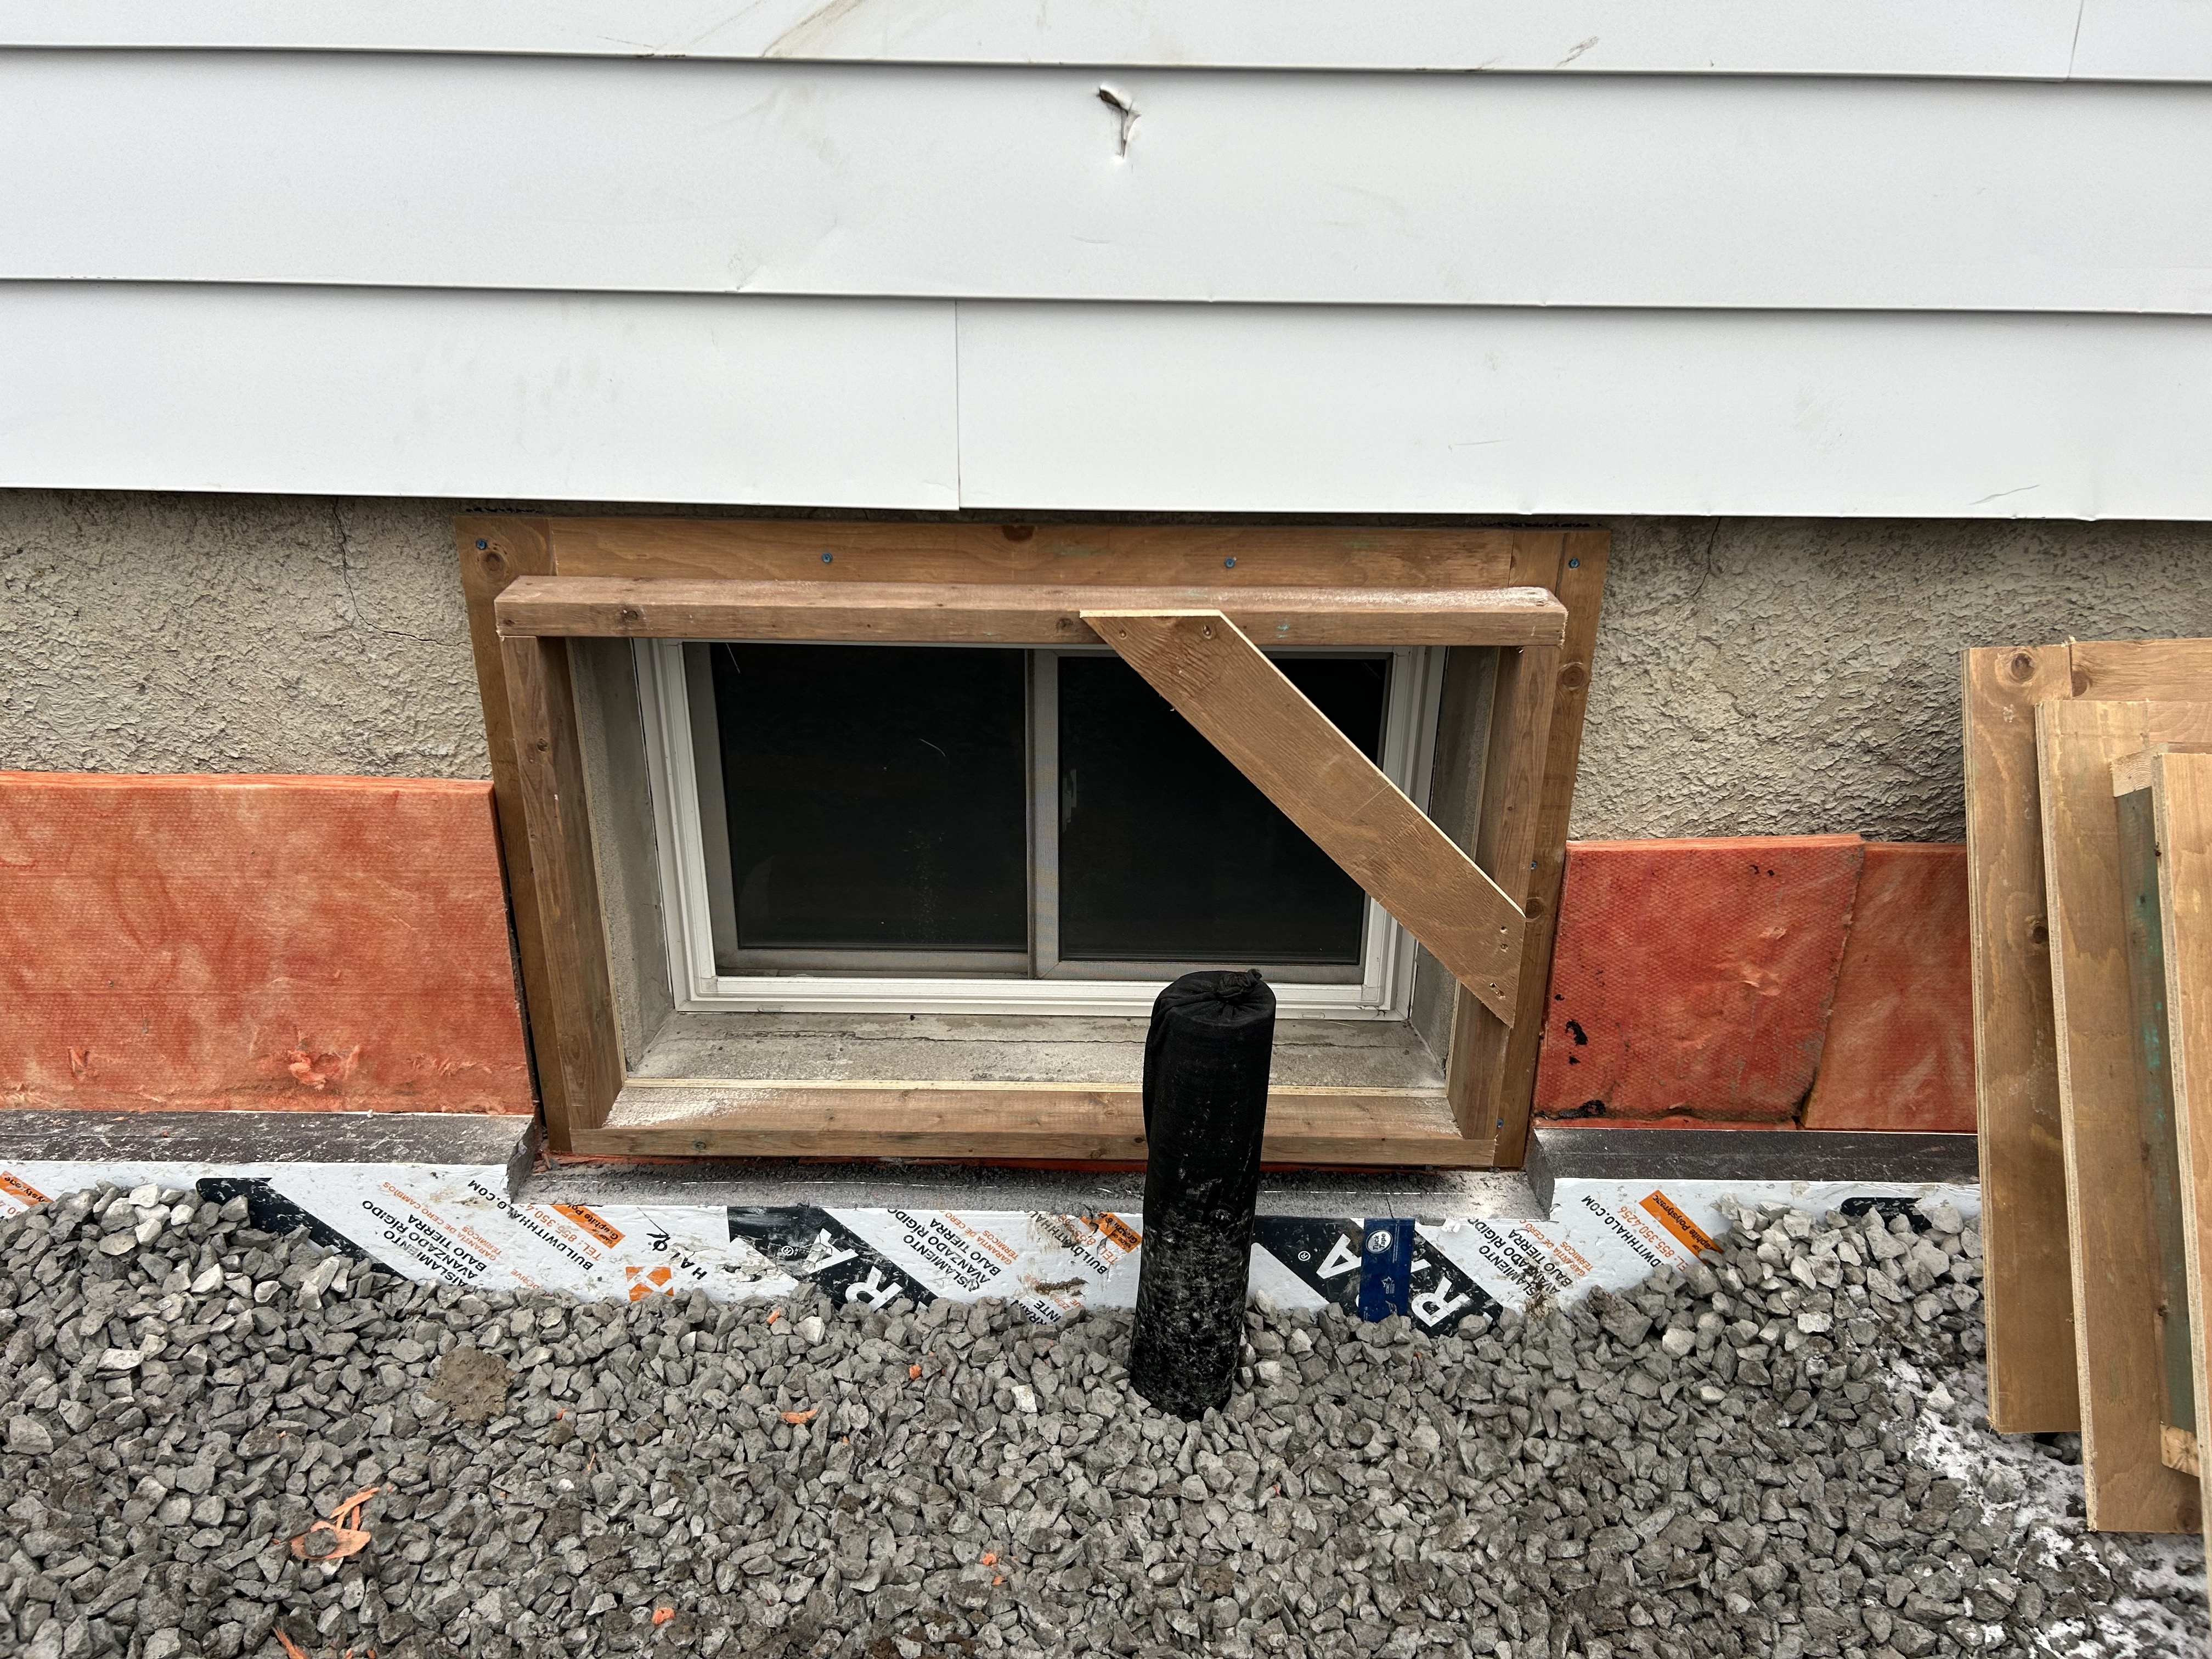
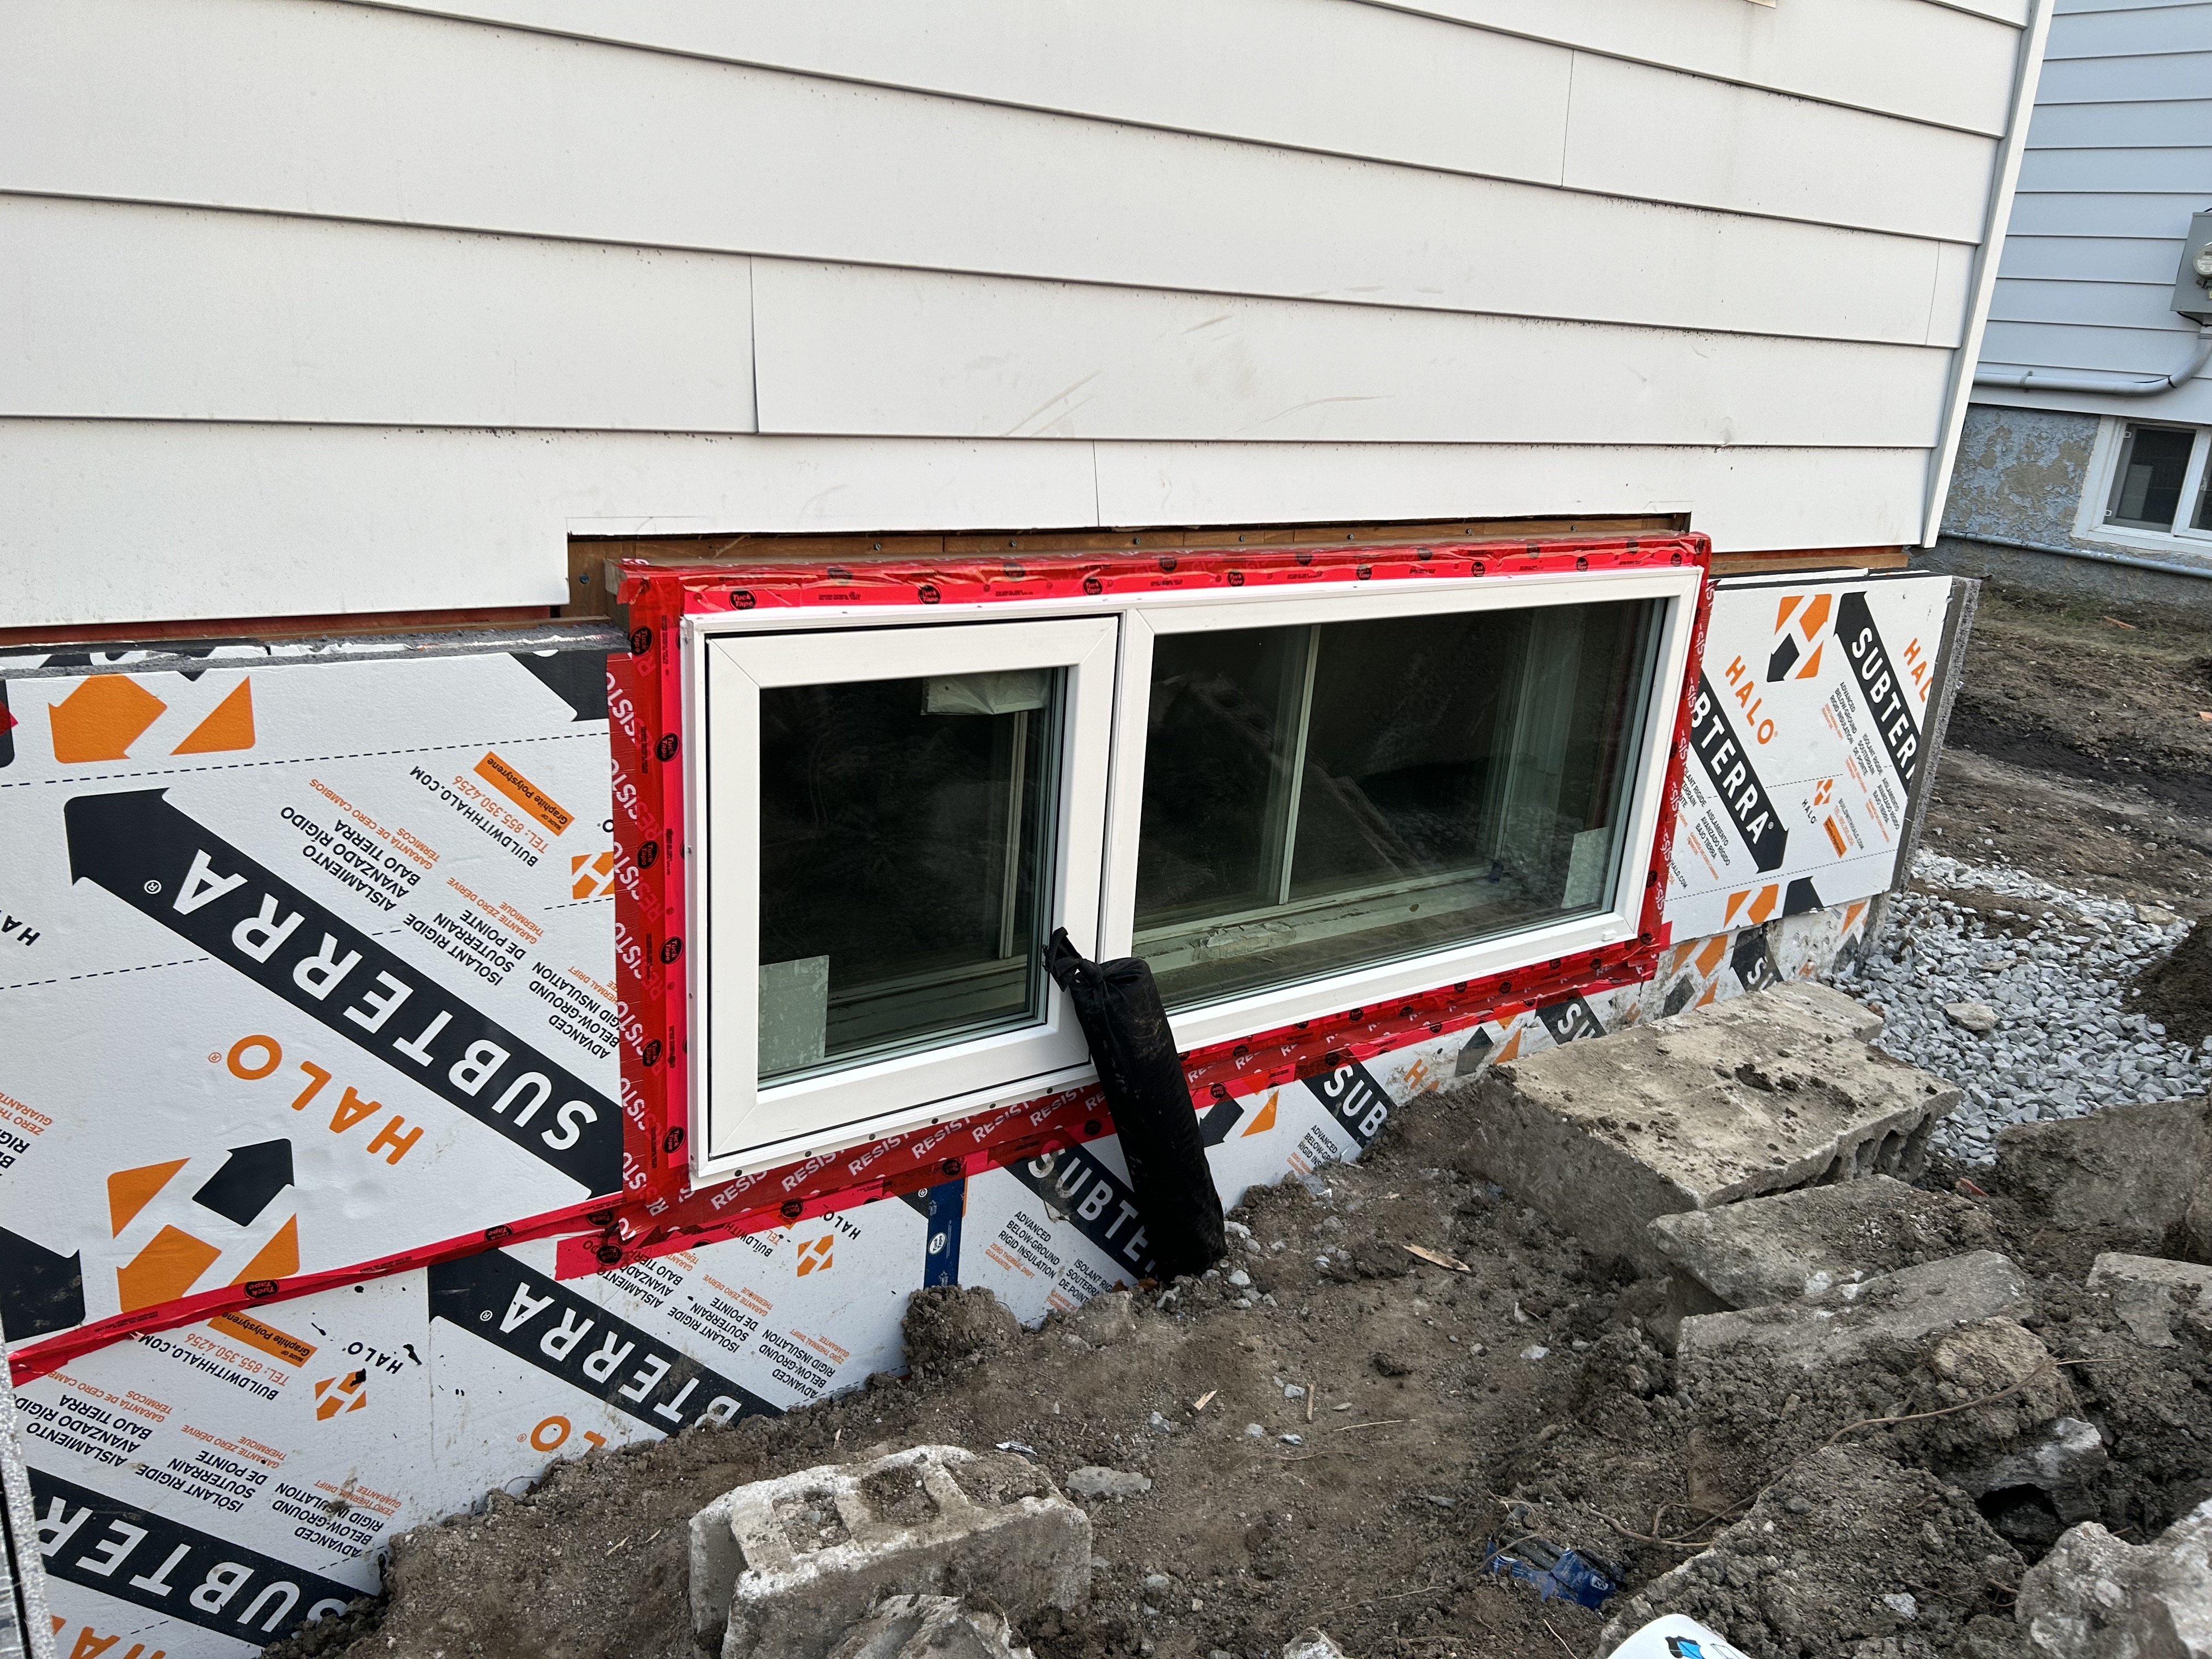
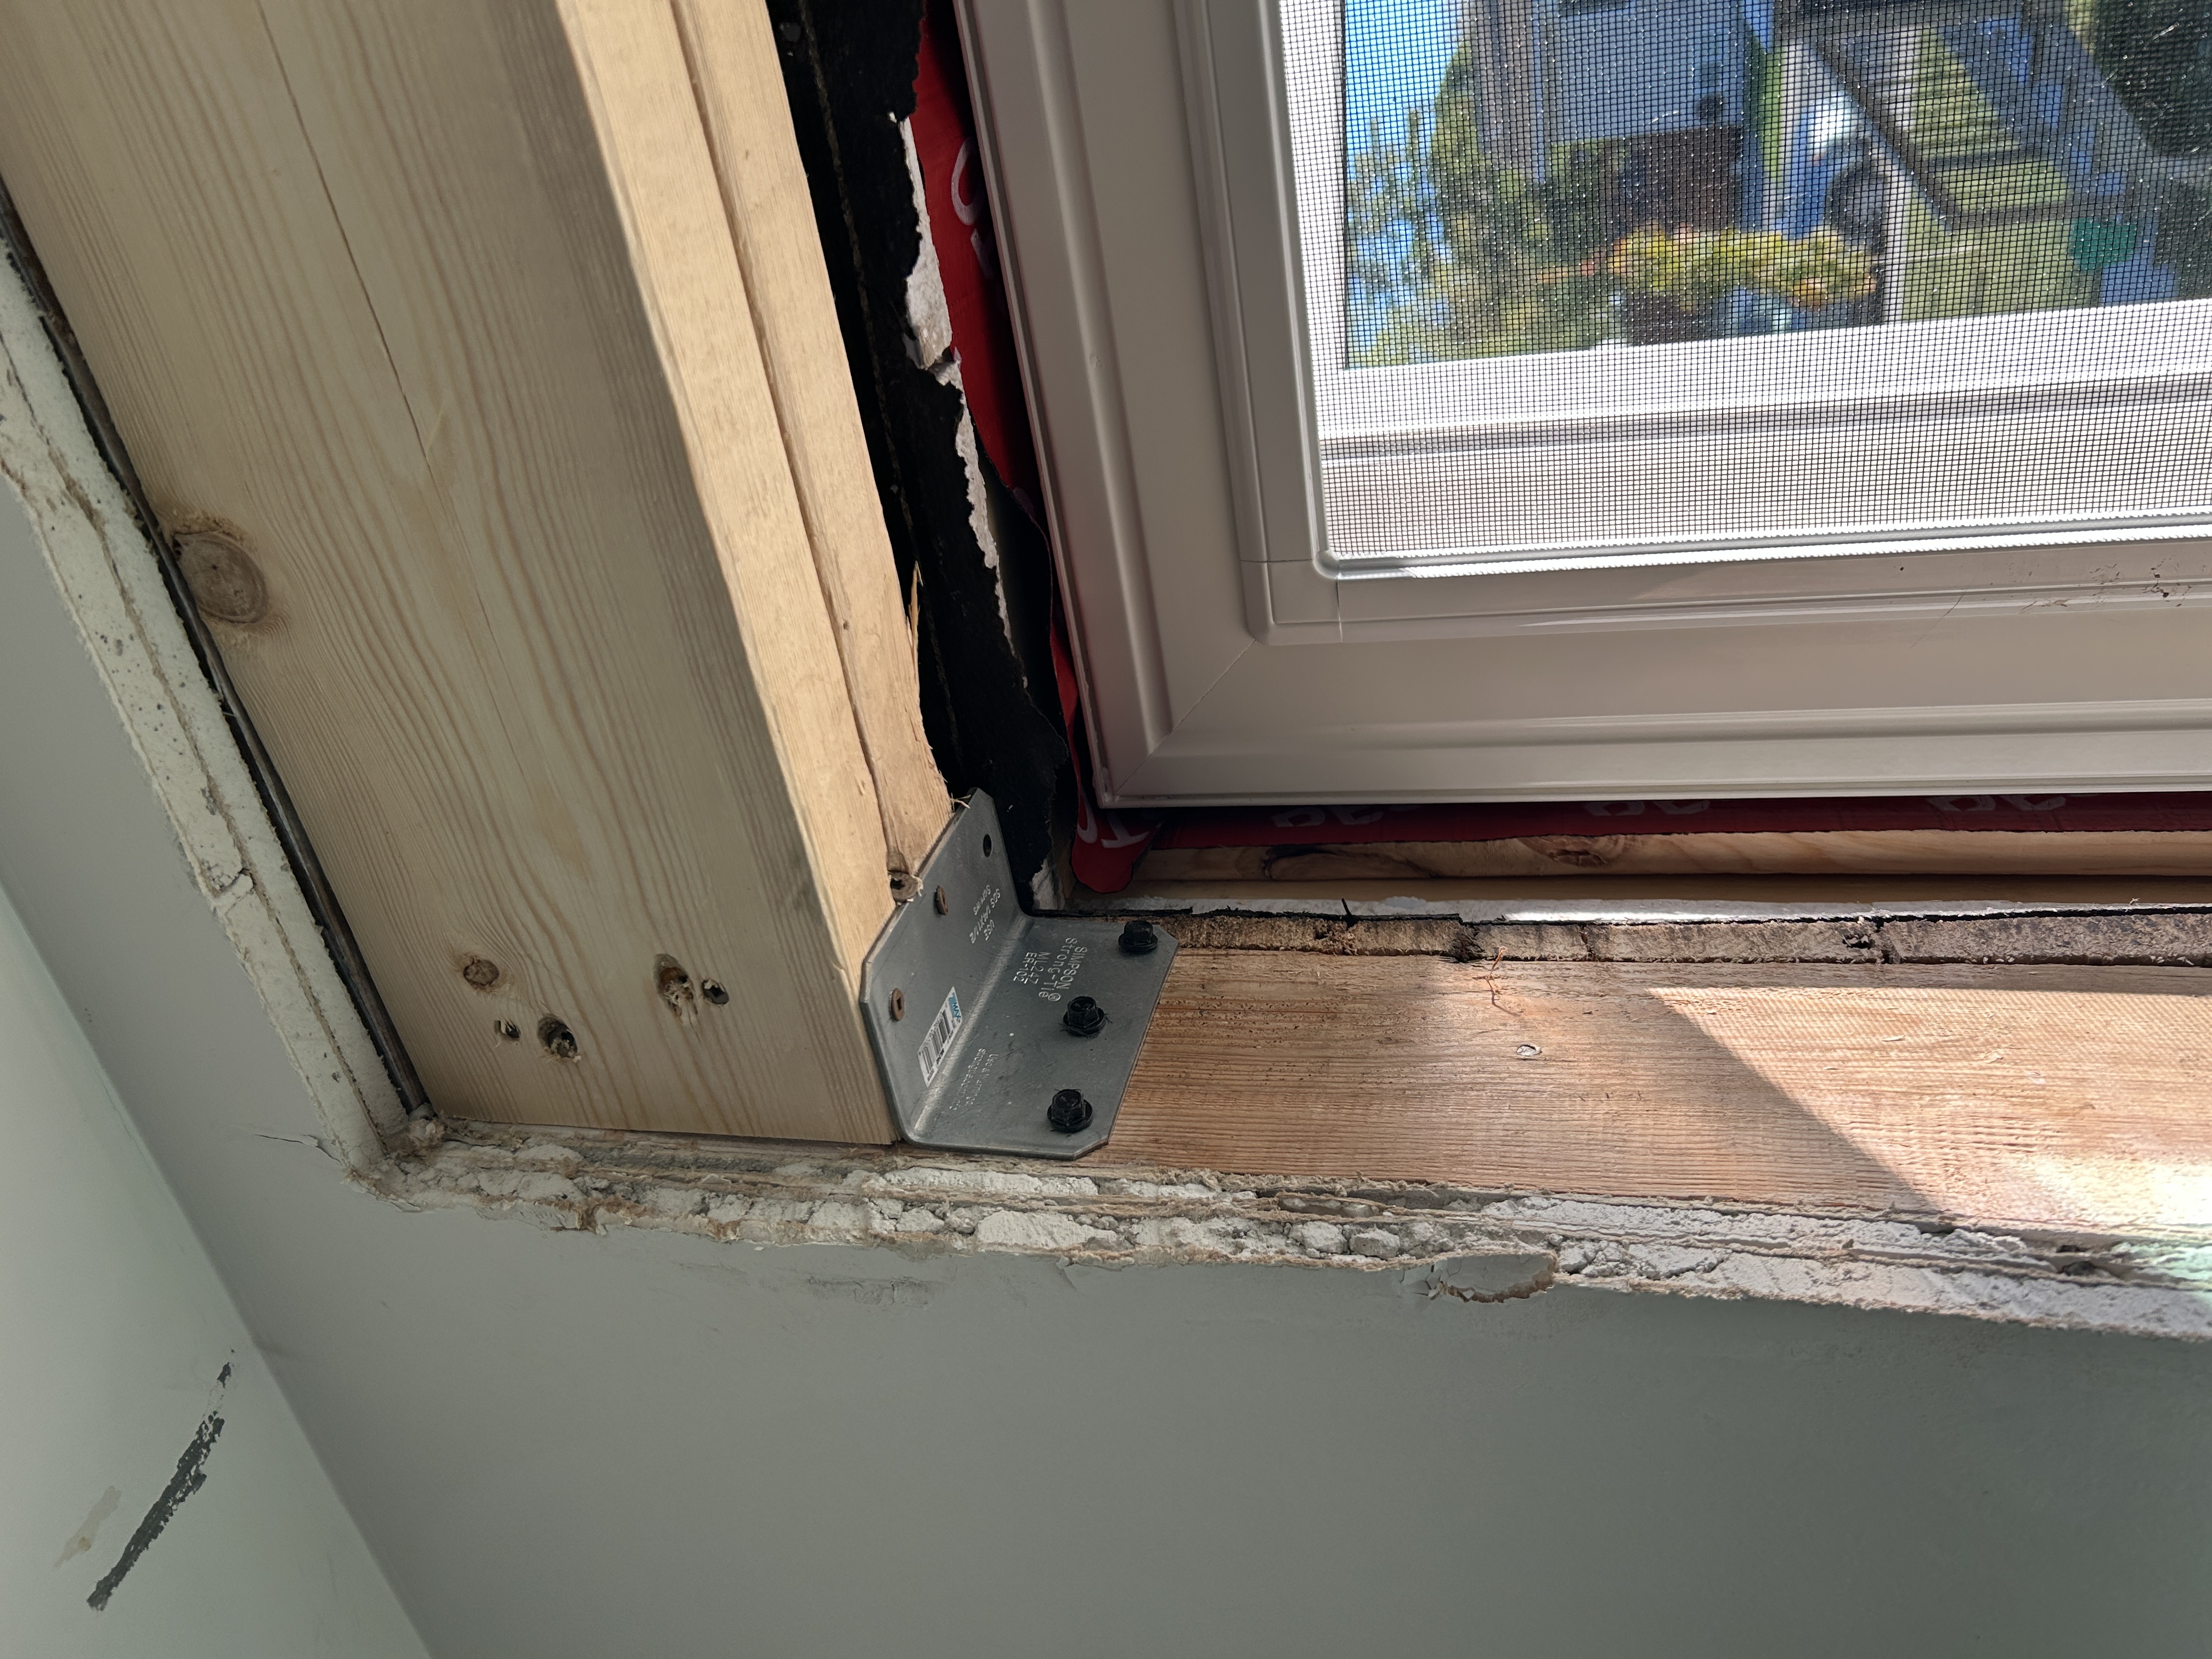
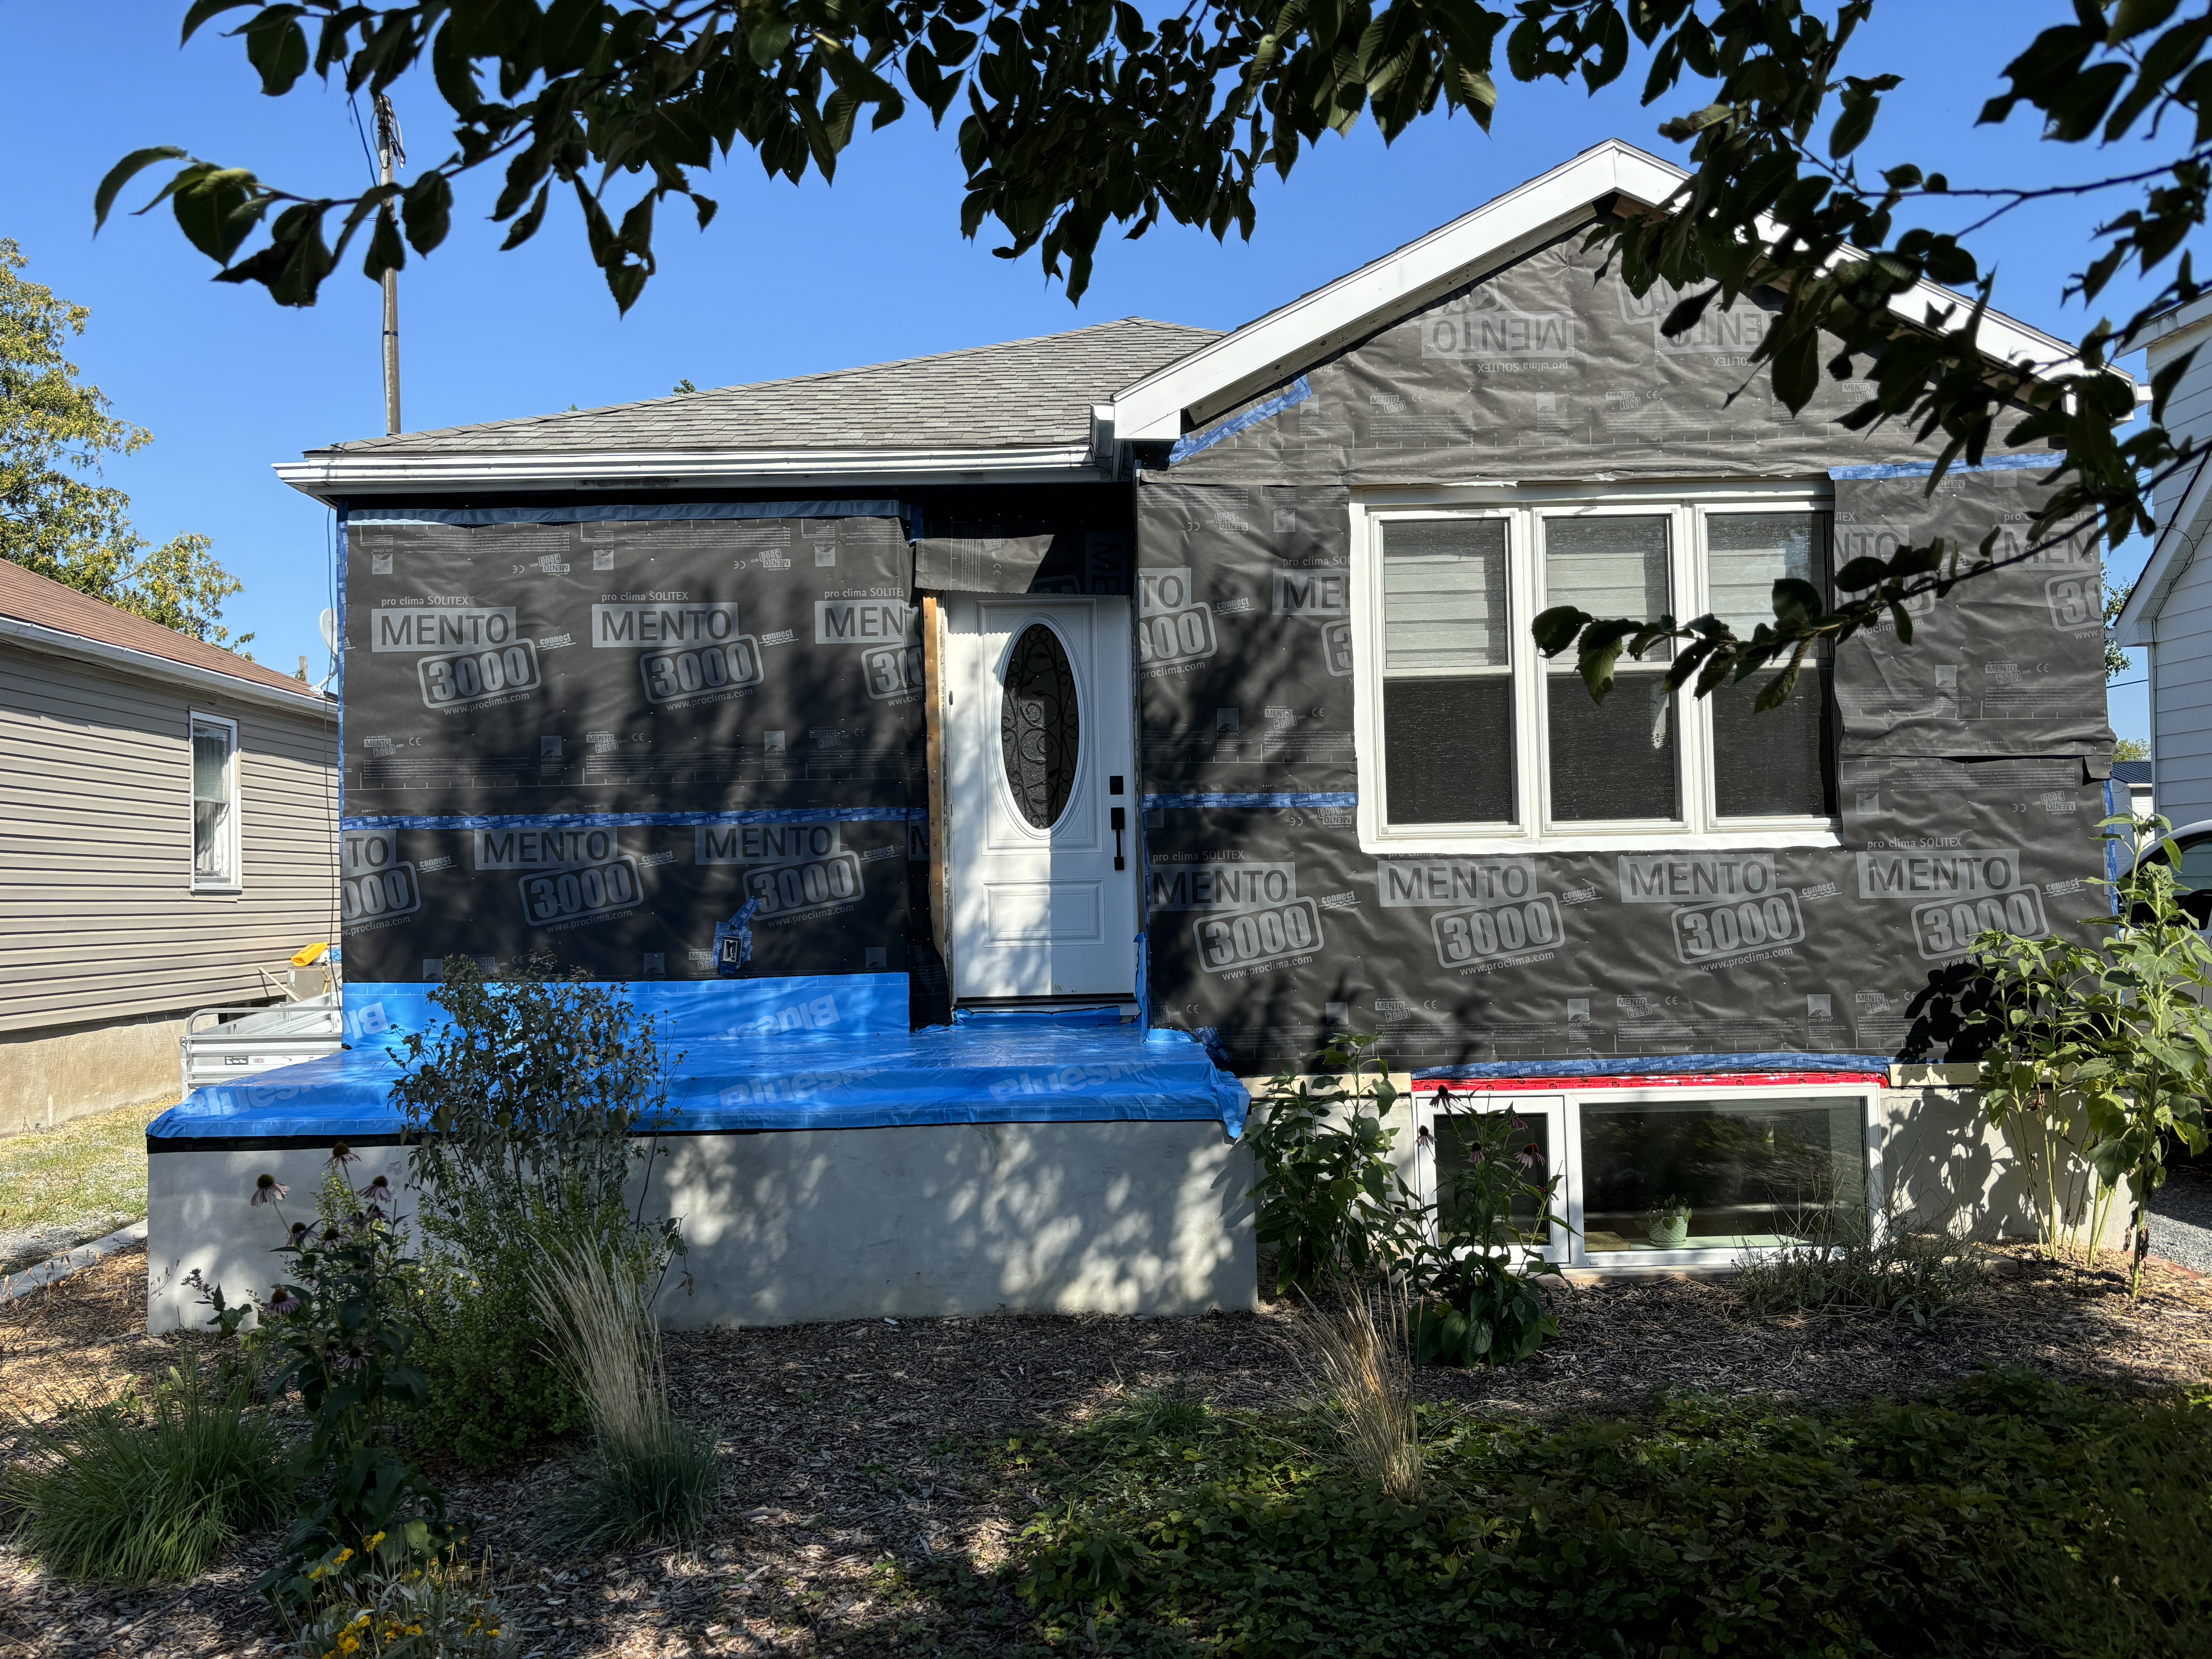
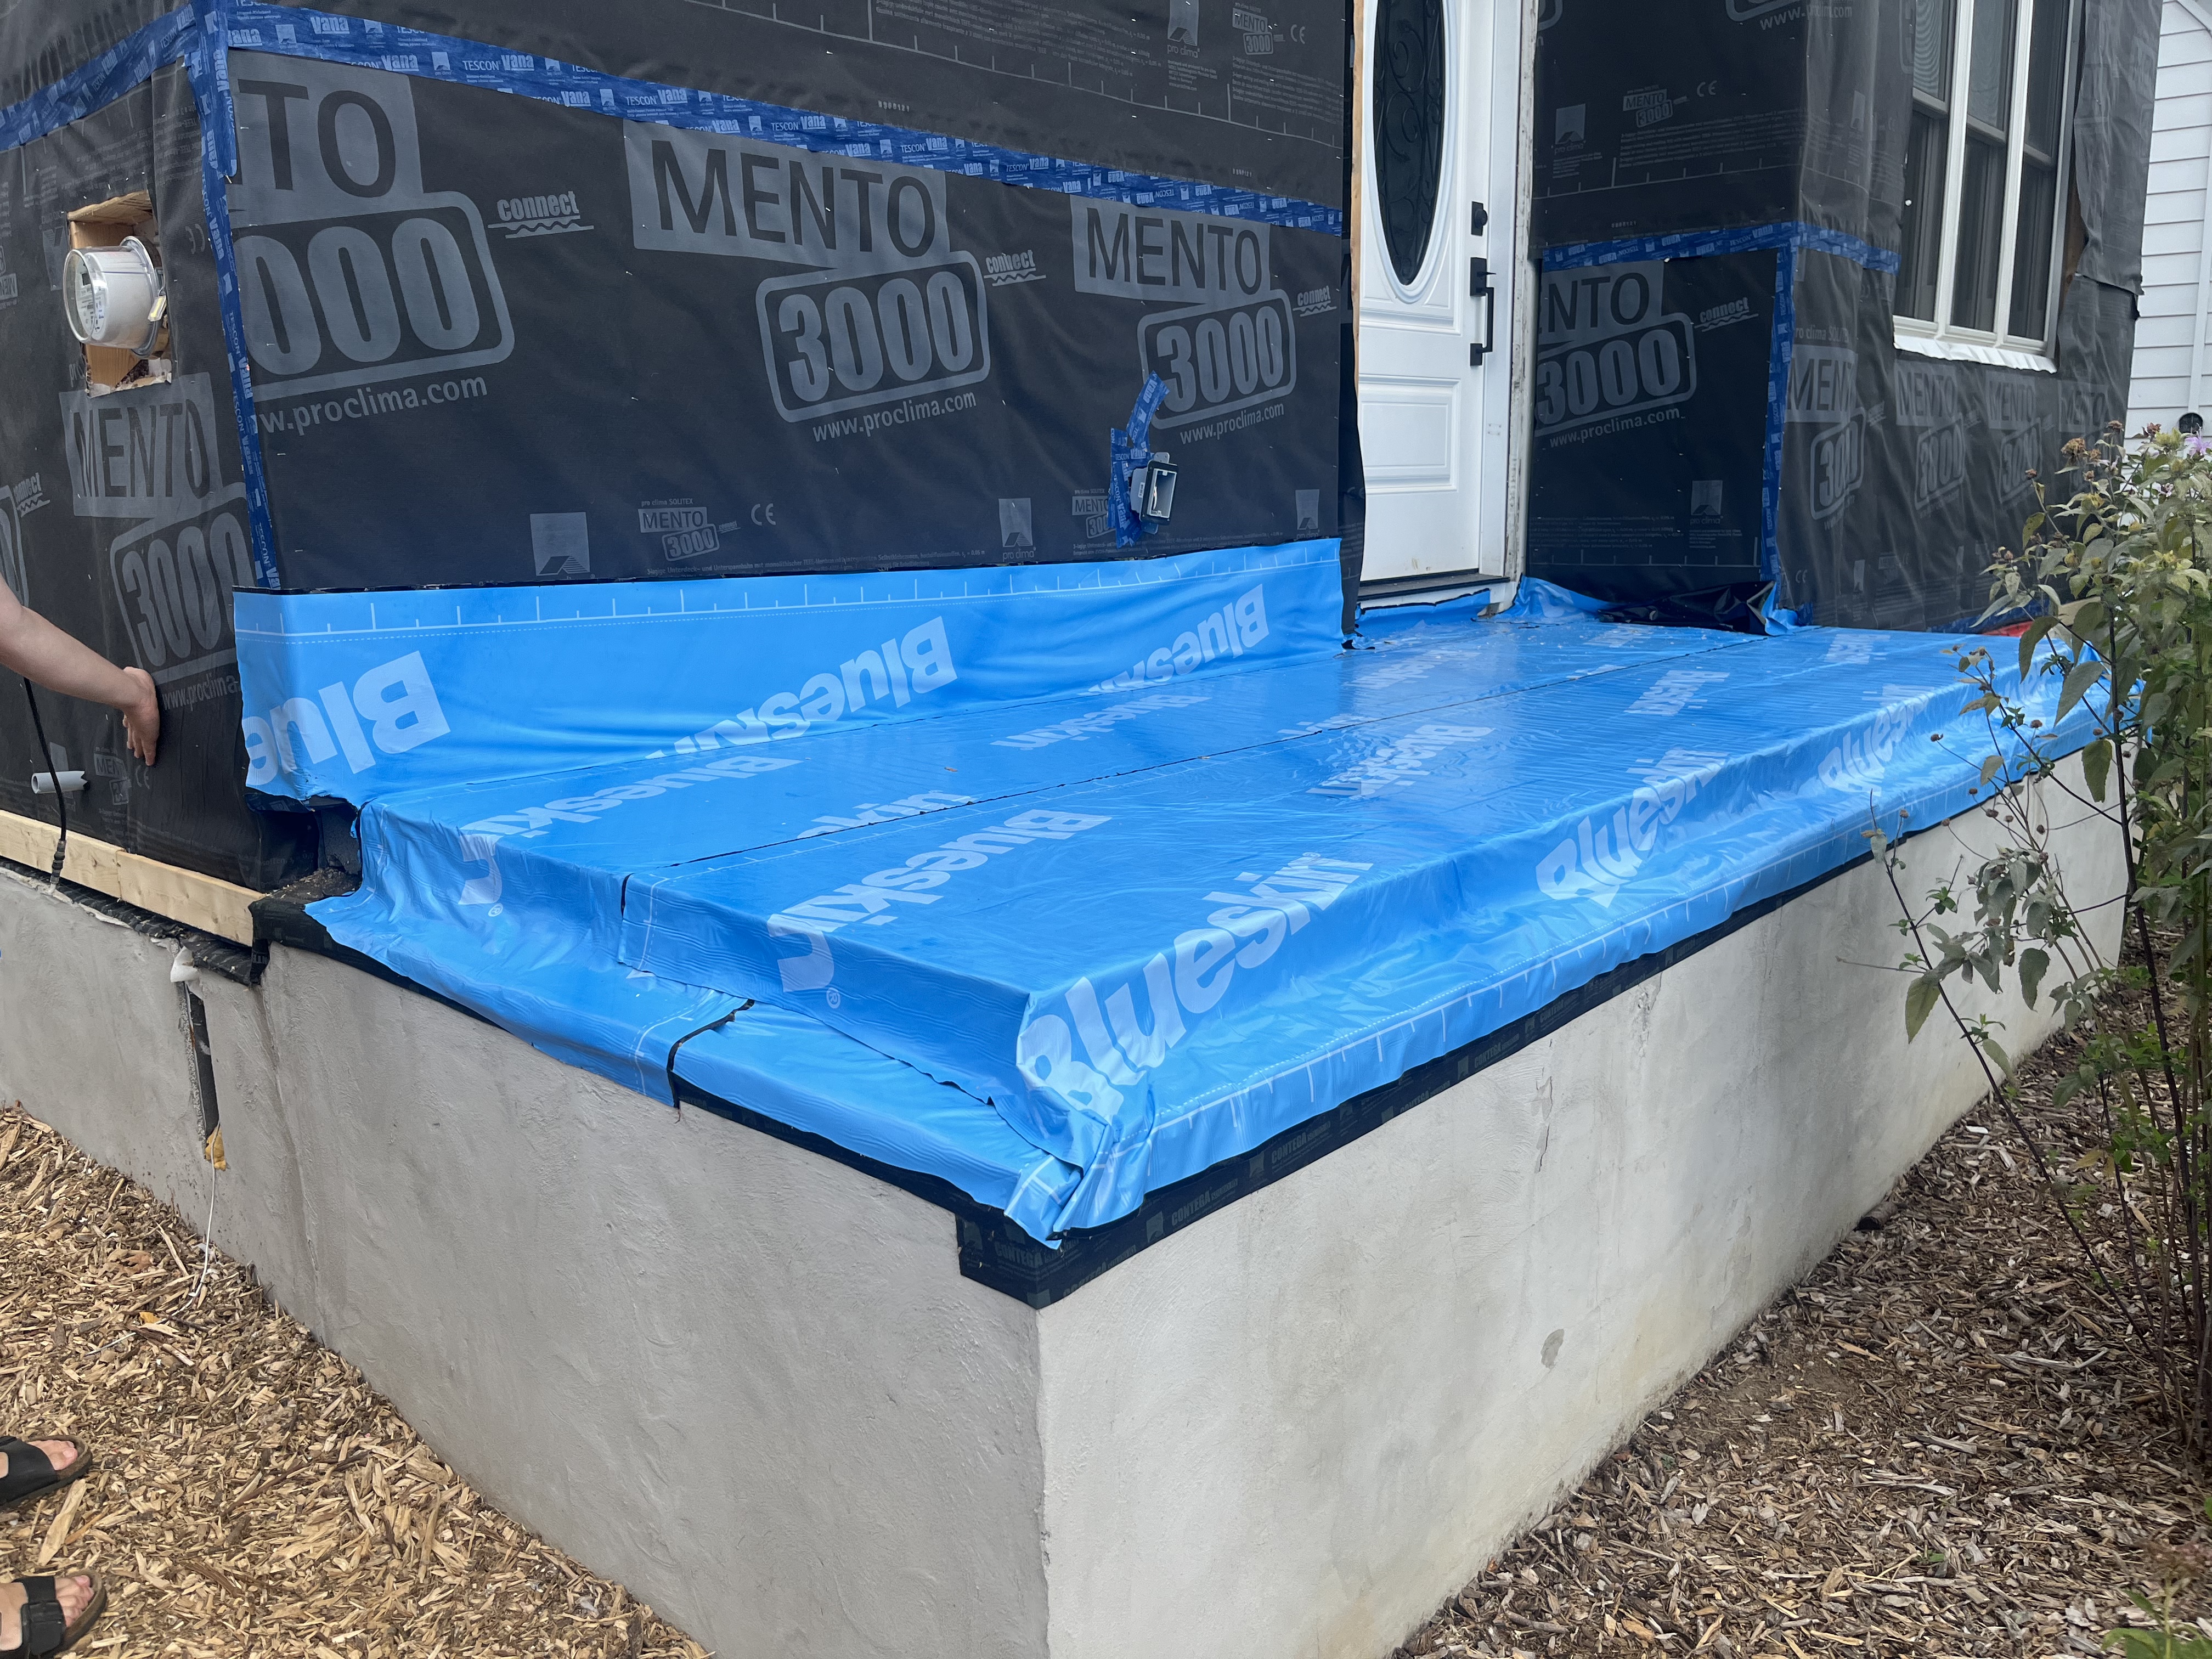
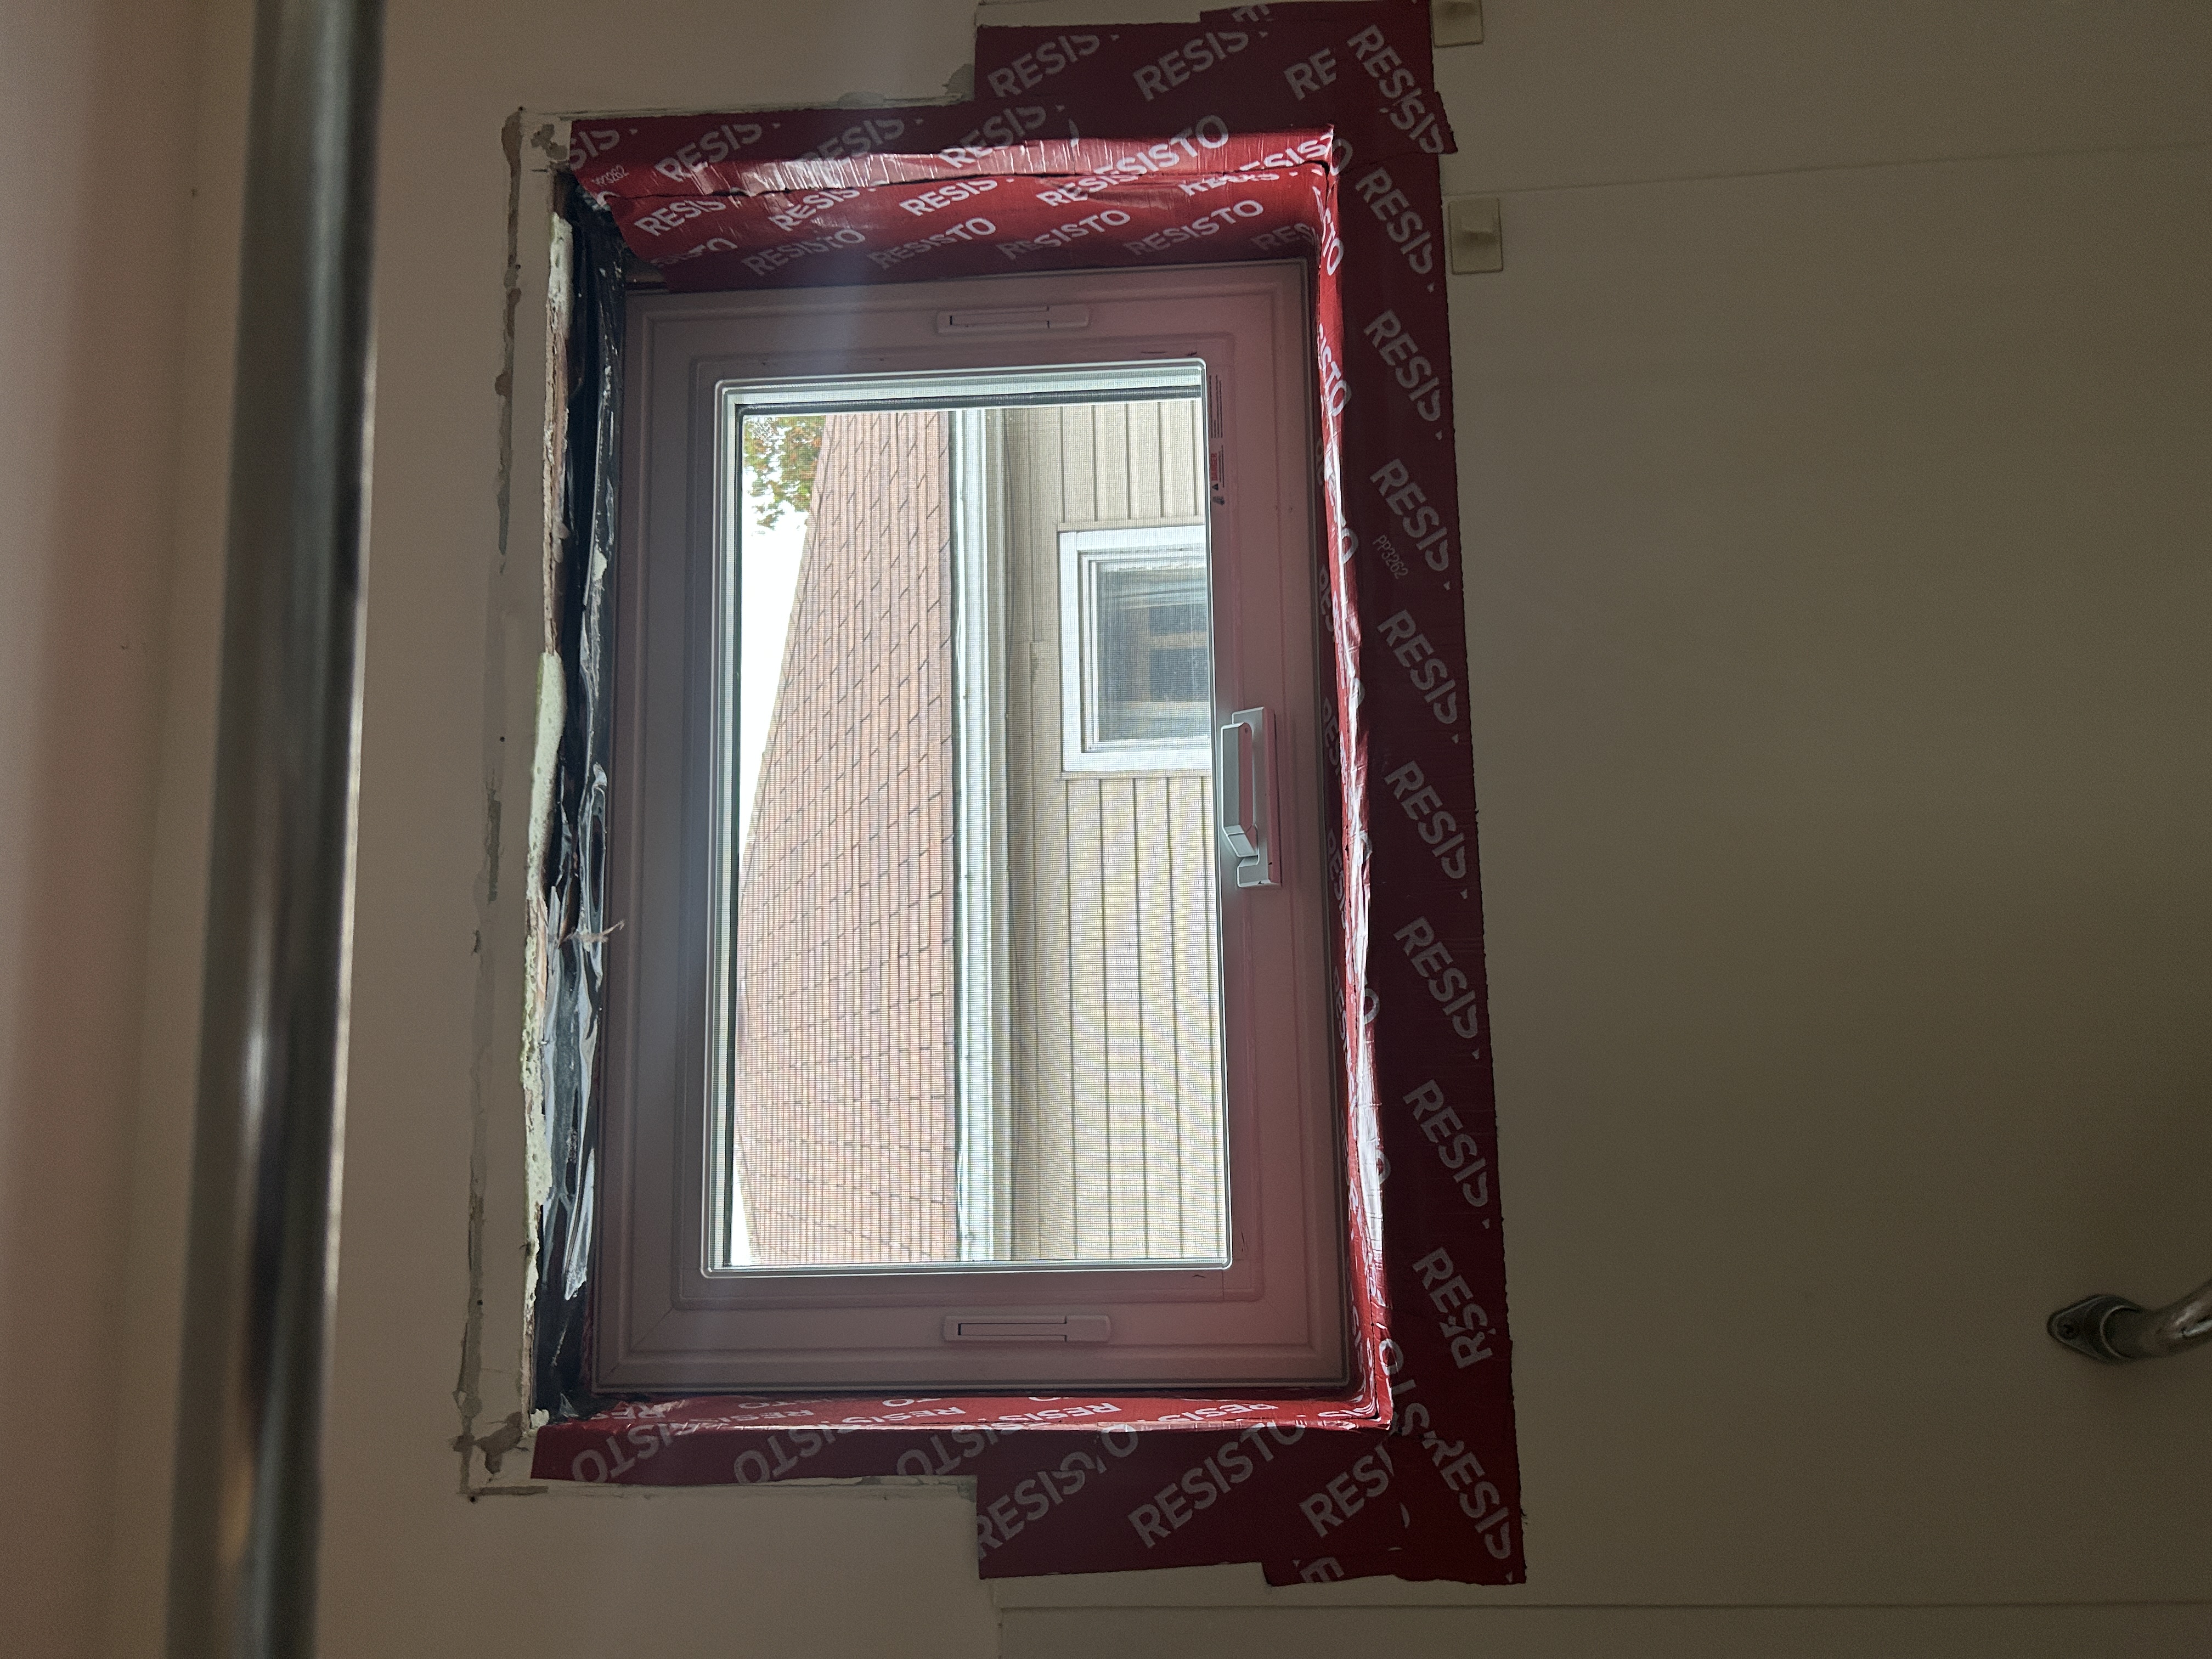
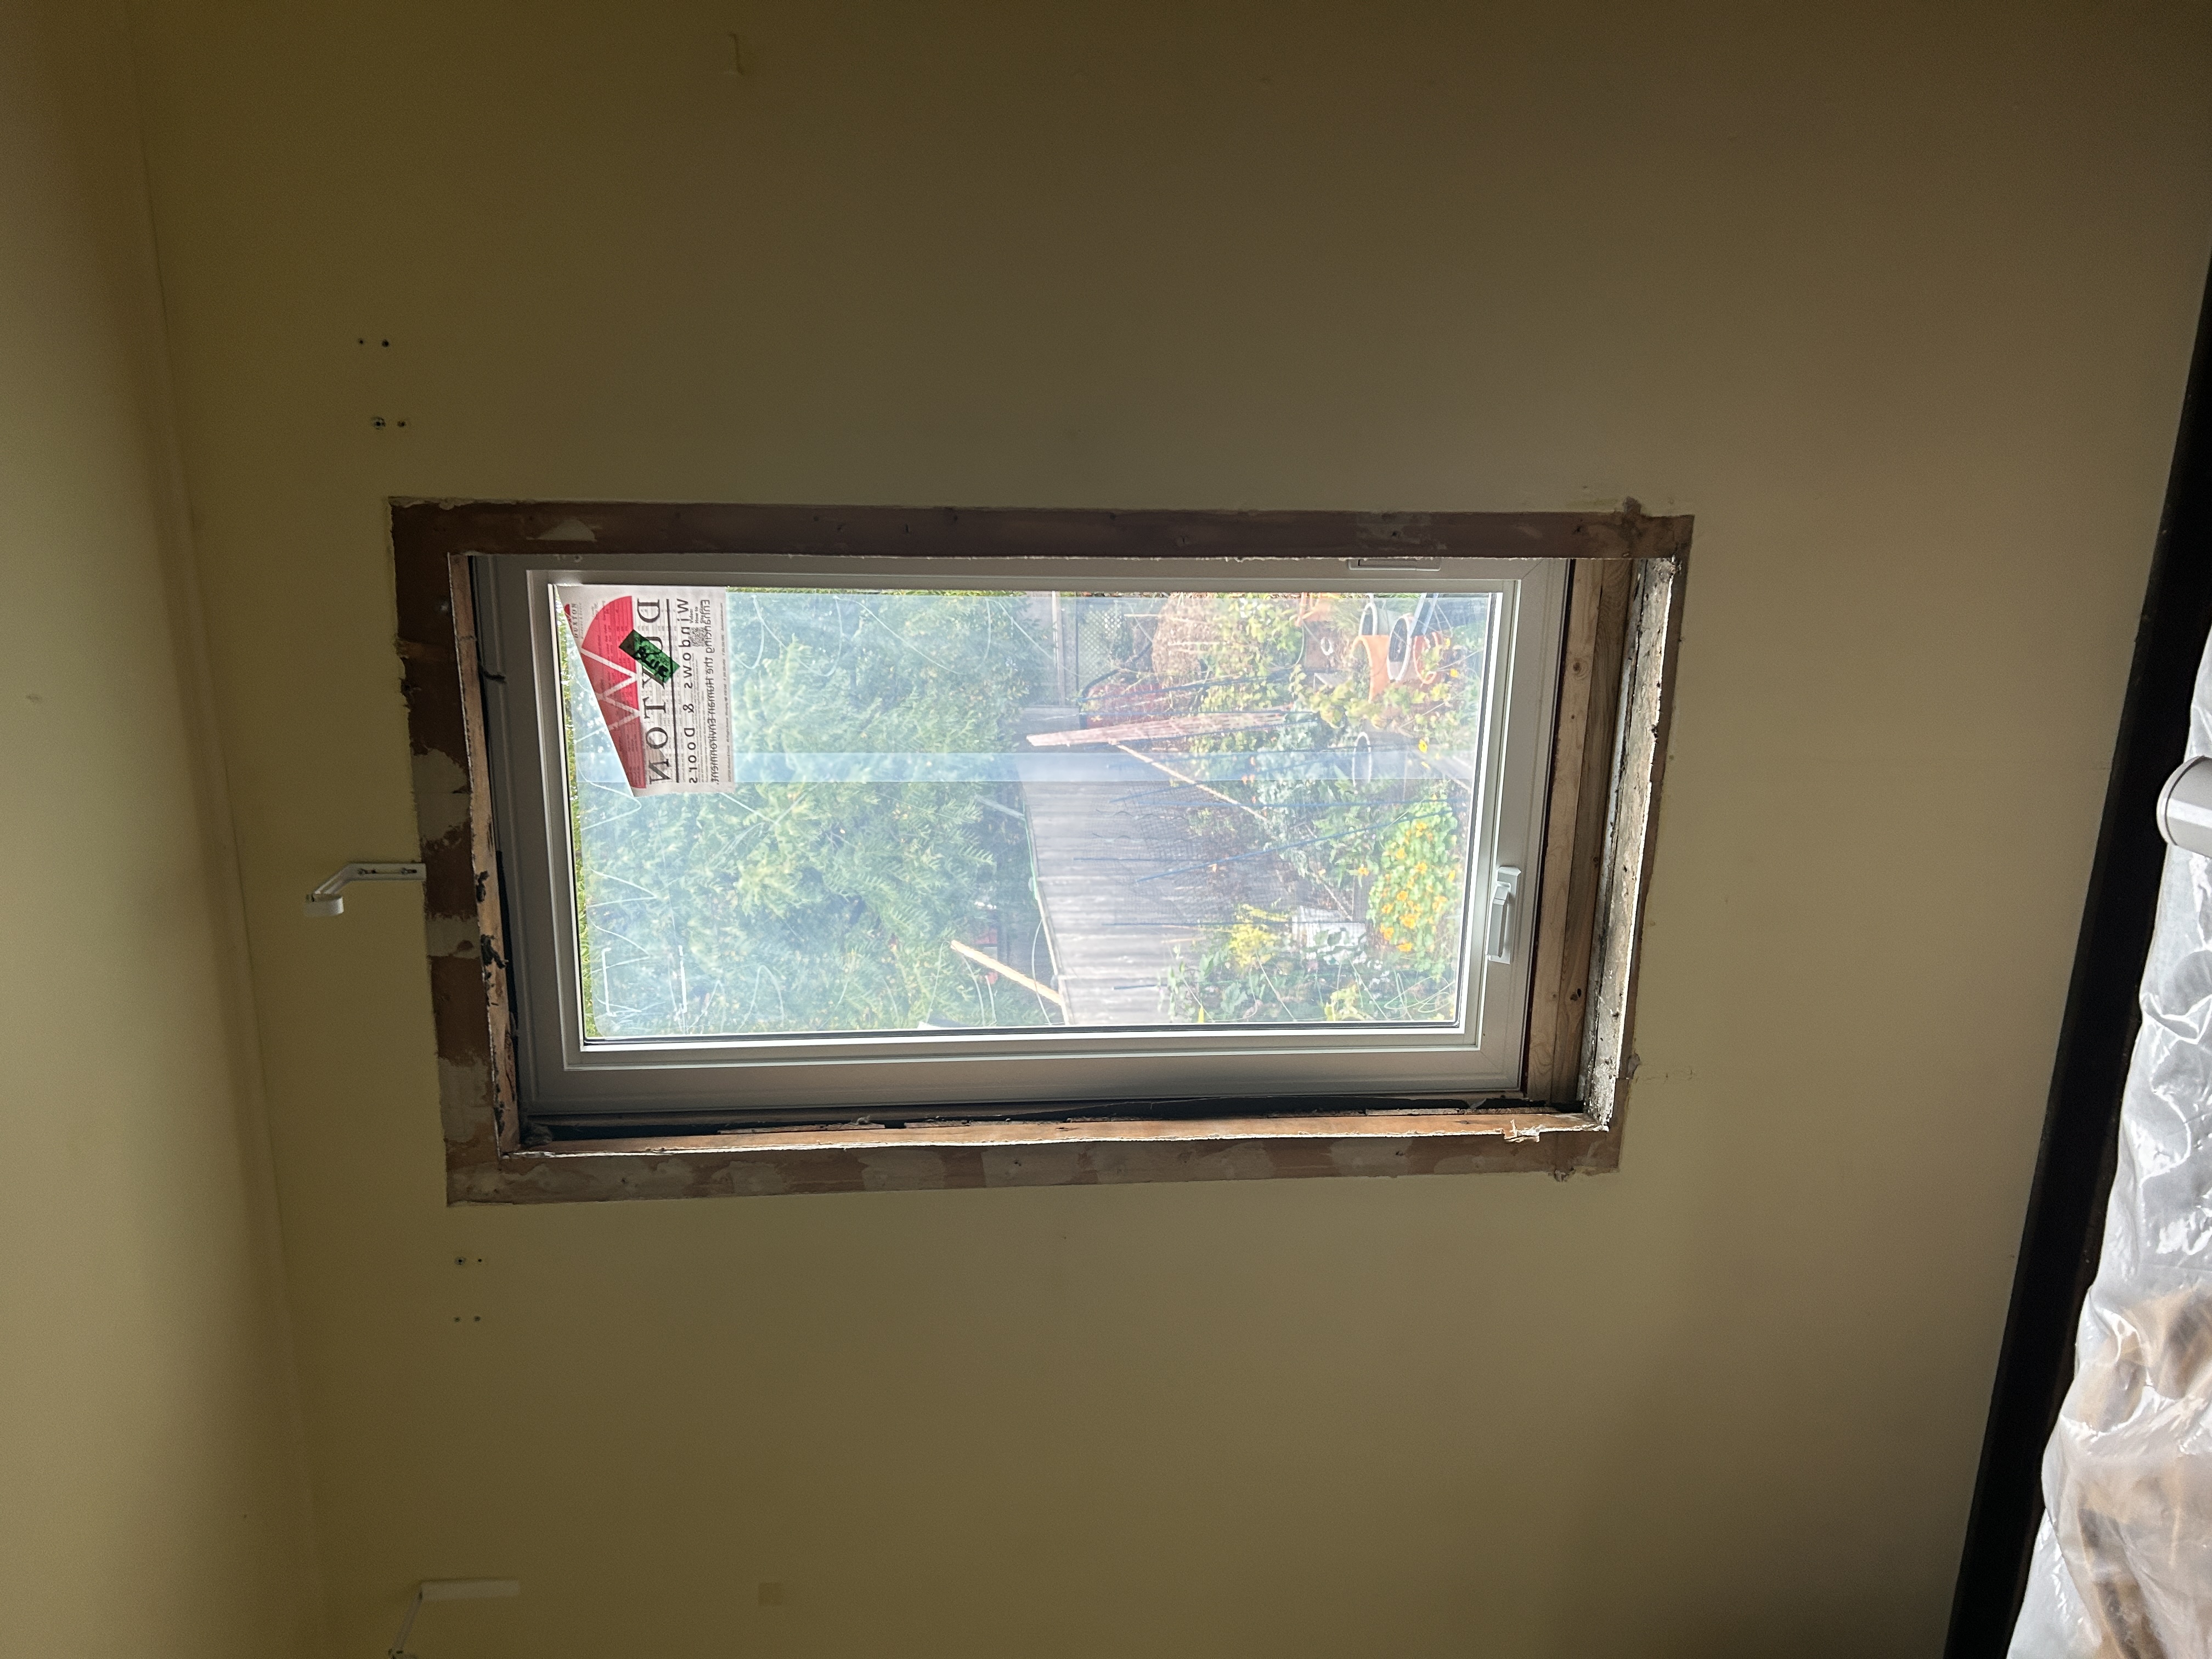
- Replacing basement windows with triple-glazed, LOW‑E Argon-filled windows, and adding window wells so the grade could be raised for better drainage.
- Providing for an air-tight connection to the wall air barrier to be installed in Phase 3.
- Adding temporary flashing over the new insulation to keep the water out until after the upper walls could be done.
- Removing the old asphalt driveway. To be replaced with a small driveway later, reclaiming more space for the backyard.
- Re-grading around the entire foundation (will be completed in Spring 2024, after the ground has had a chance to settle)
Stage 1 lessons learned:
Contractors: We initially struggled to find contractors in our area who were open to the project because many viewed it as unnecessarily complicated and did not value energy efficiency. Through asking around in our neighbourhood, we eventually found a great general contractor. He was open to trying new things, willing to listen, and focused on doing things right. While liaising with our Alberta-based deep retrofit expert and the general contractor in Ontario, we learned the importance of good drawings, constructive dialogue, and flexibility in service of the overall vision.
Excavation: Despite some rainy weather, the excavation went smoothly. We were pleasantly surprised that the foundation was in good shape, so it required minimal repair, and the original backfill was not rocky (like in some parts of the neighbourhood) so we were able to reuse it. The house is also quite close to its neighbour on the north side, which posed some challenges during the excavation phase.
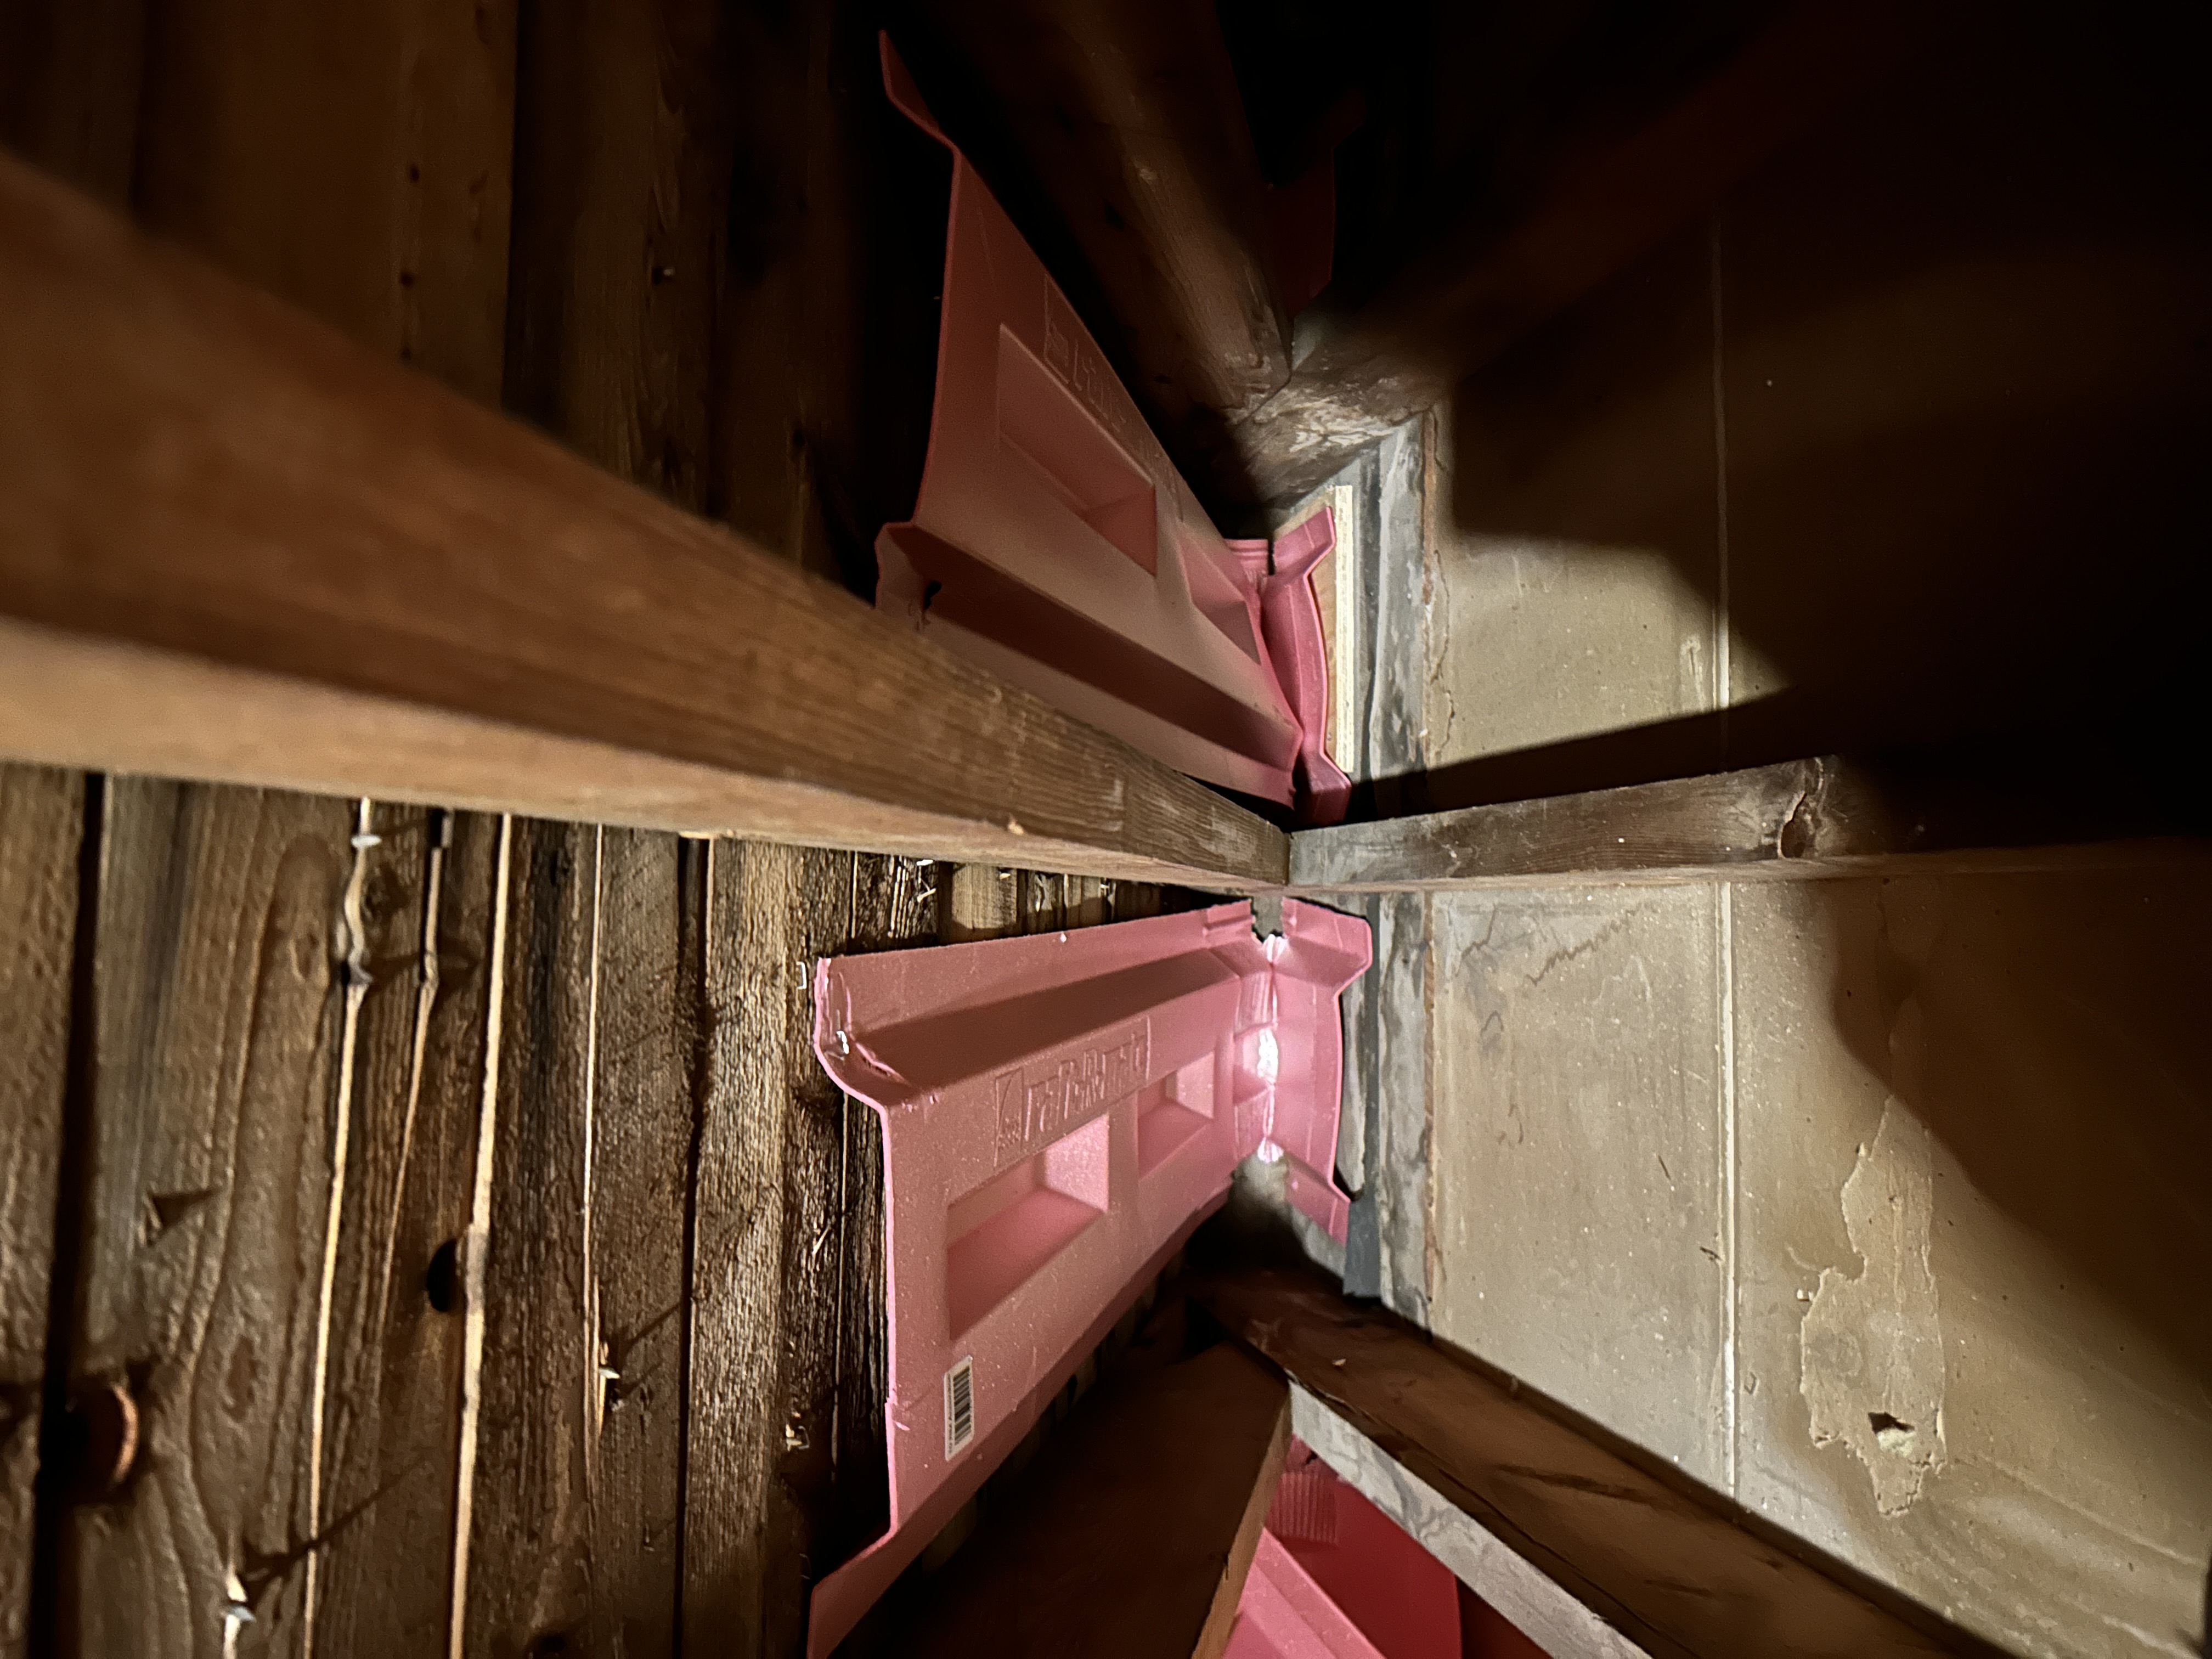
Waterproofing: We did not plan for the waterproofing contractors to use the pink fibreglass insulation you can see in some of the photos, but it was part of their “Tuff-n-Dri” system so we let them go ahead. We asked them to add more of it — all the way to the bottom of the siding — to create an even base for our GPS insulation.
Insulation: We had planned to install the 4’x’8’ boards vertically, but the excavators suggested installing them horizontally in two rows so they could partially backfill. This was a good idea because it minimized how long the trench was open to rain and made it easier for contractors to work on the window buck and strapping for the upper row of insulation and cement board.
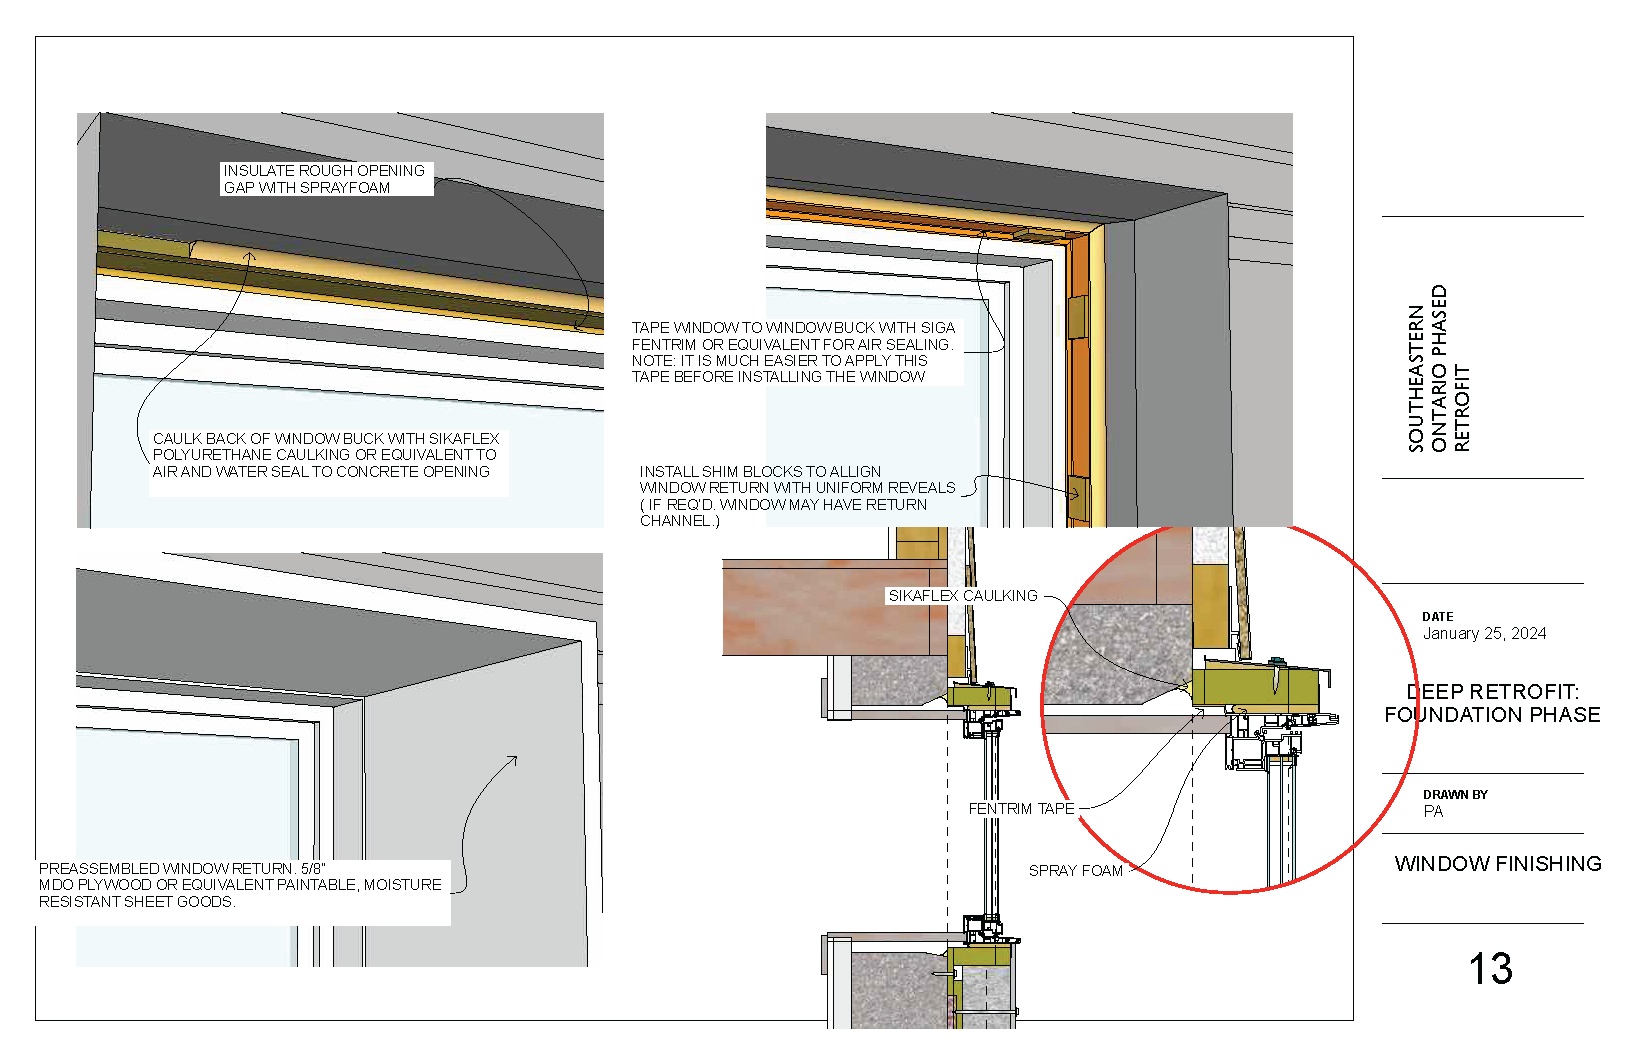
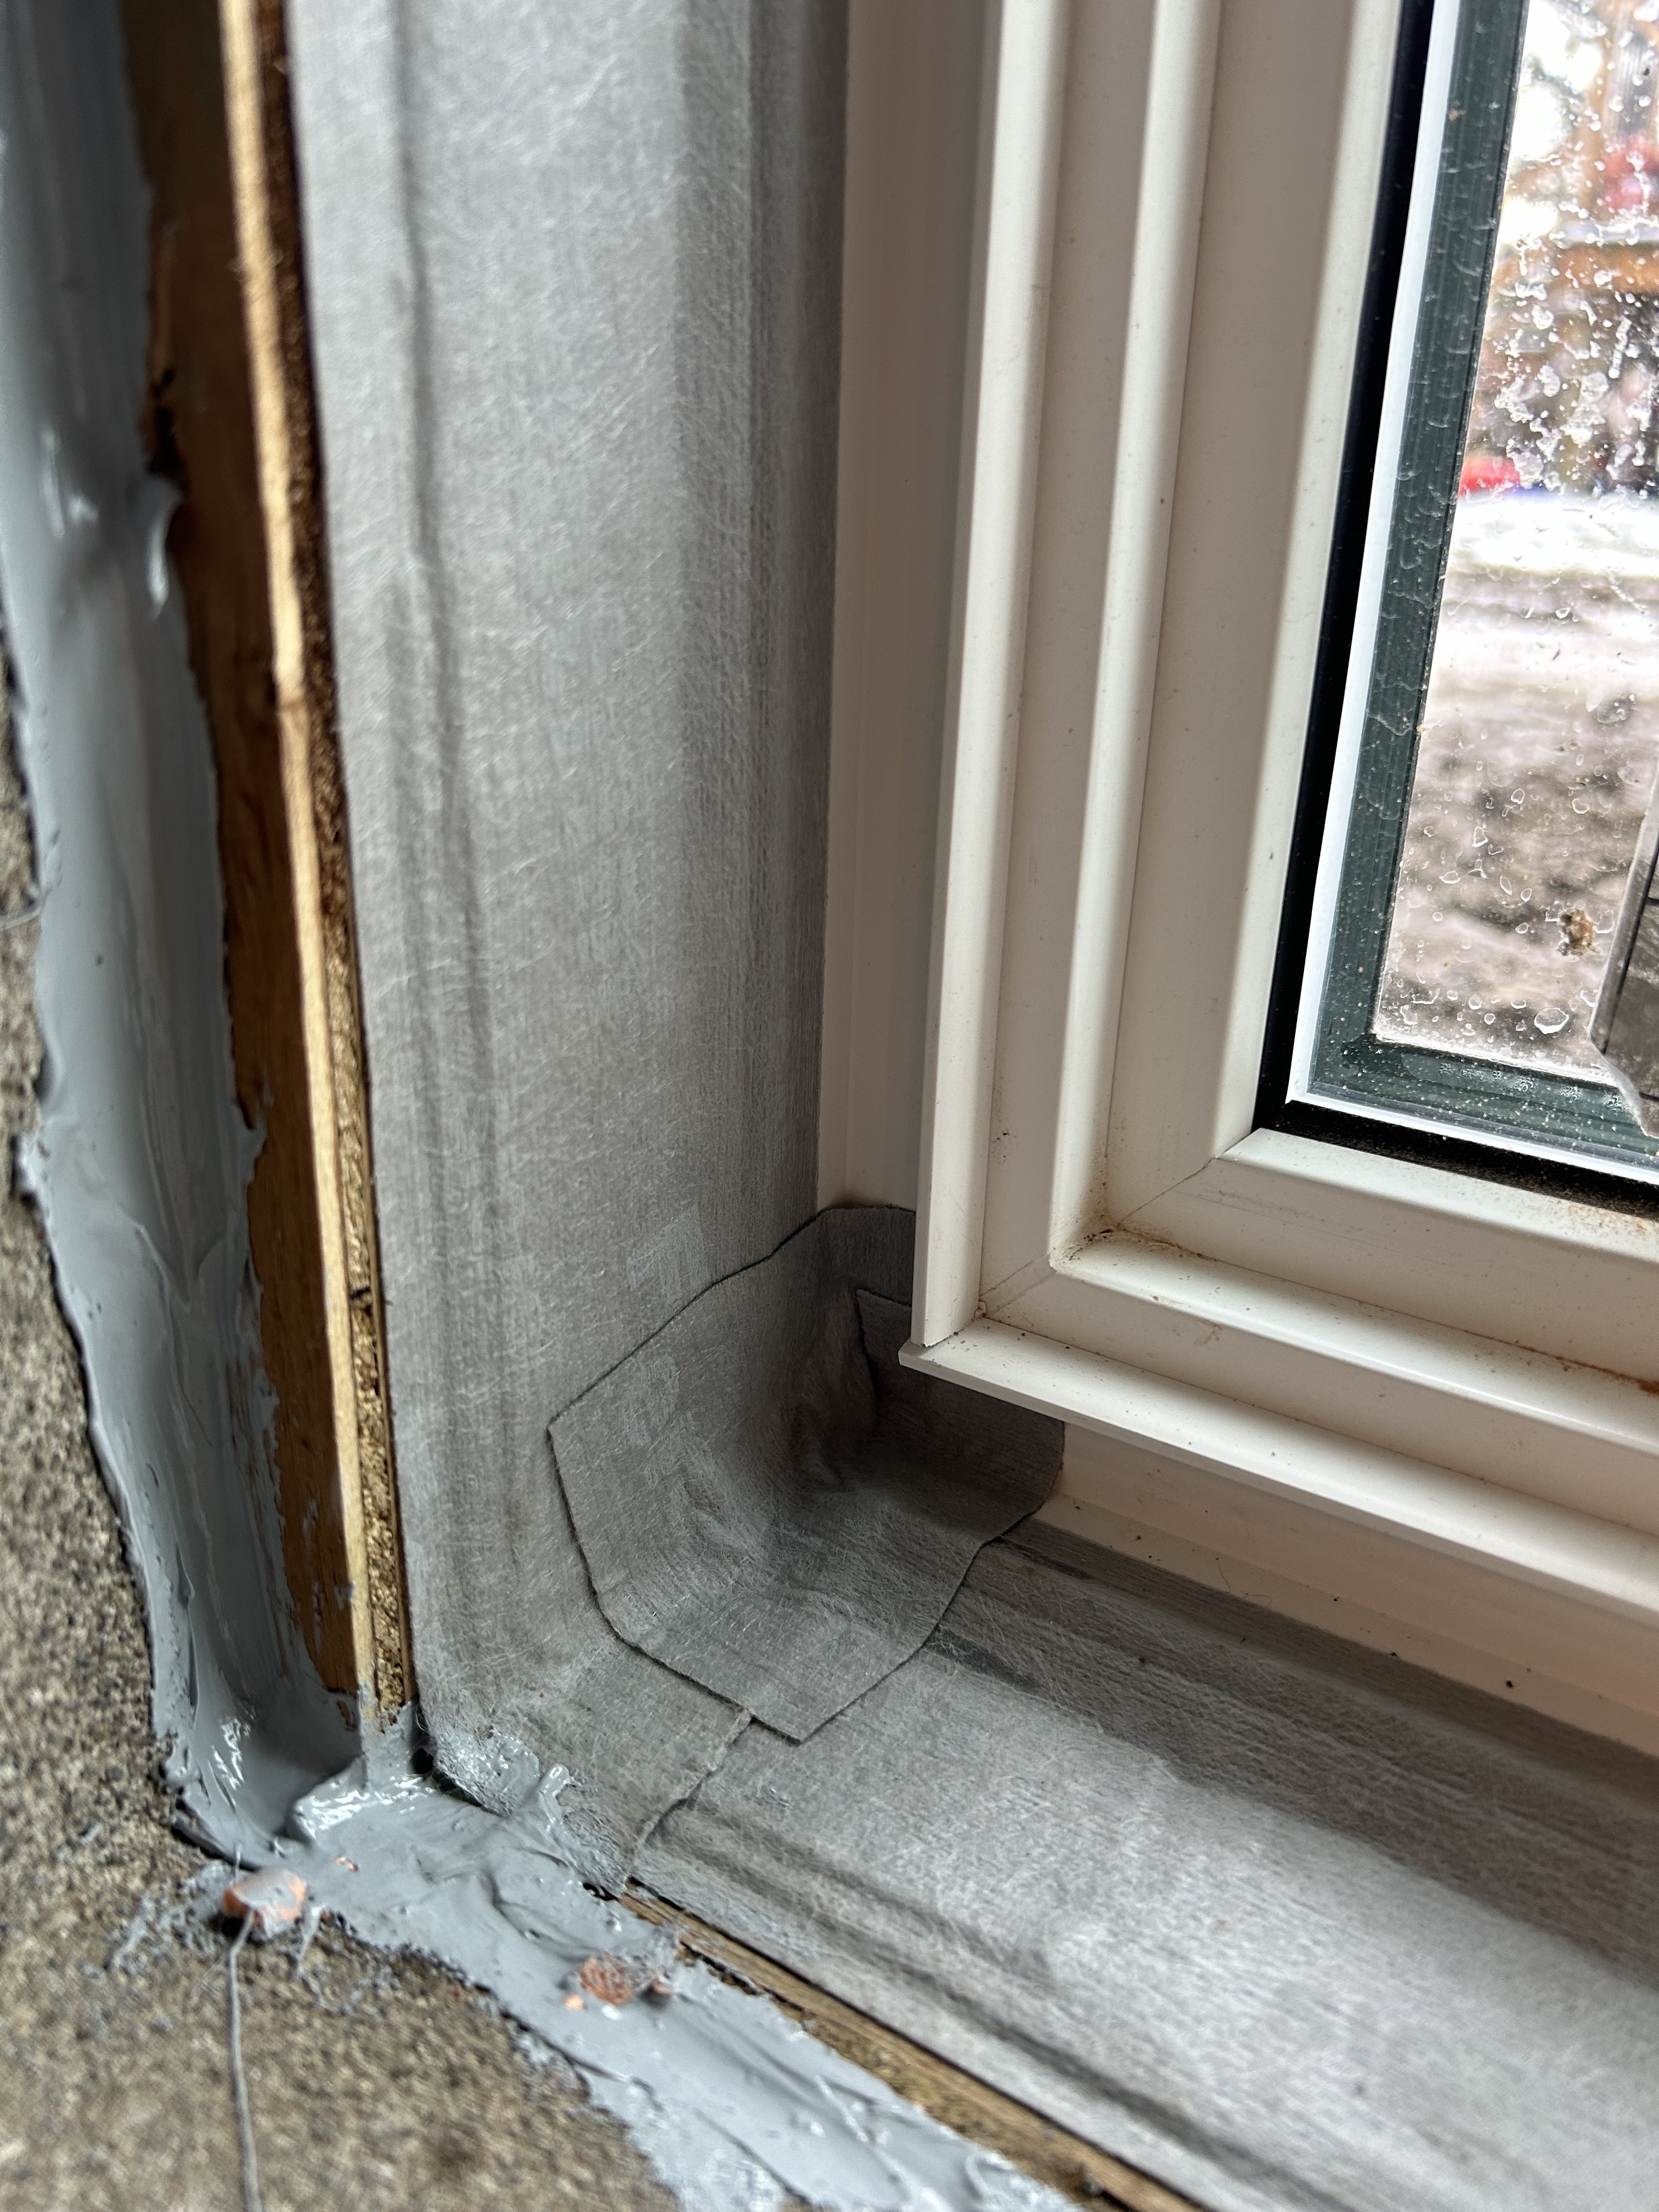
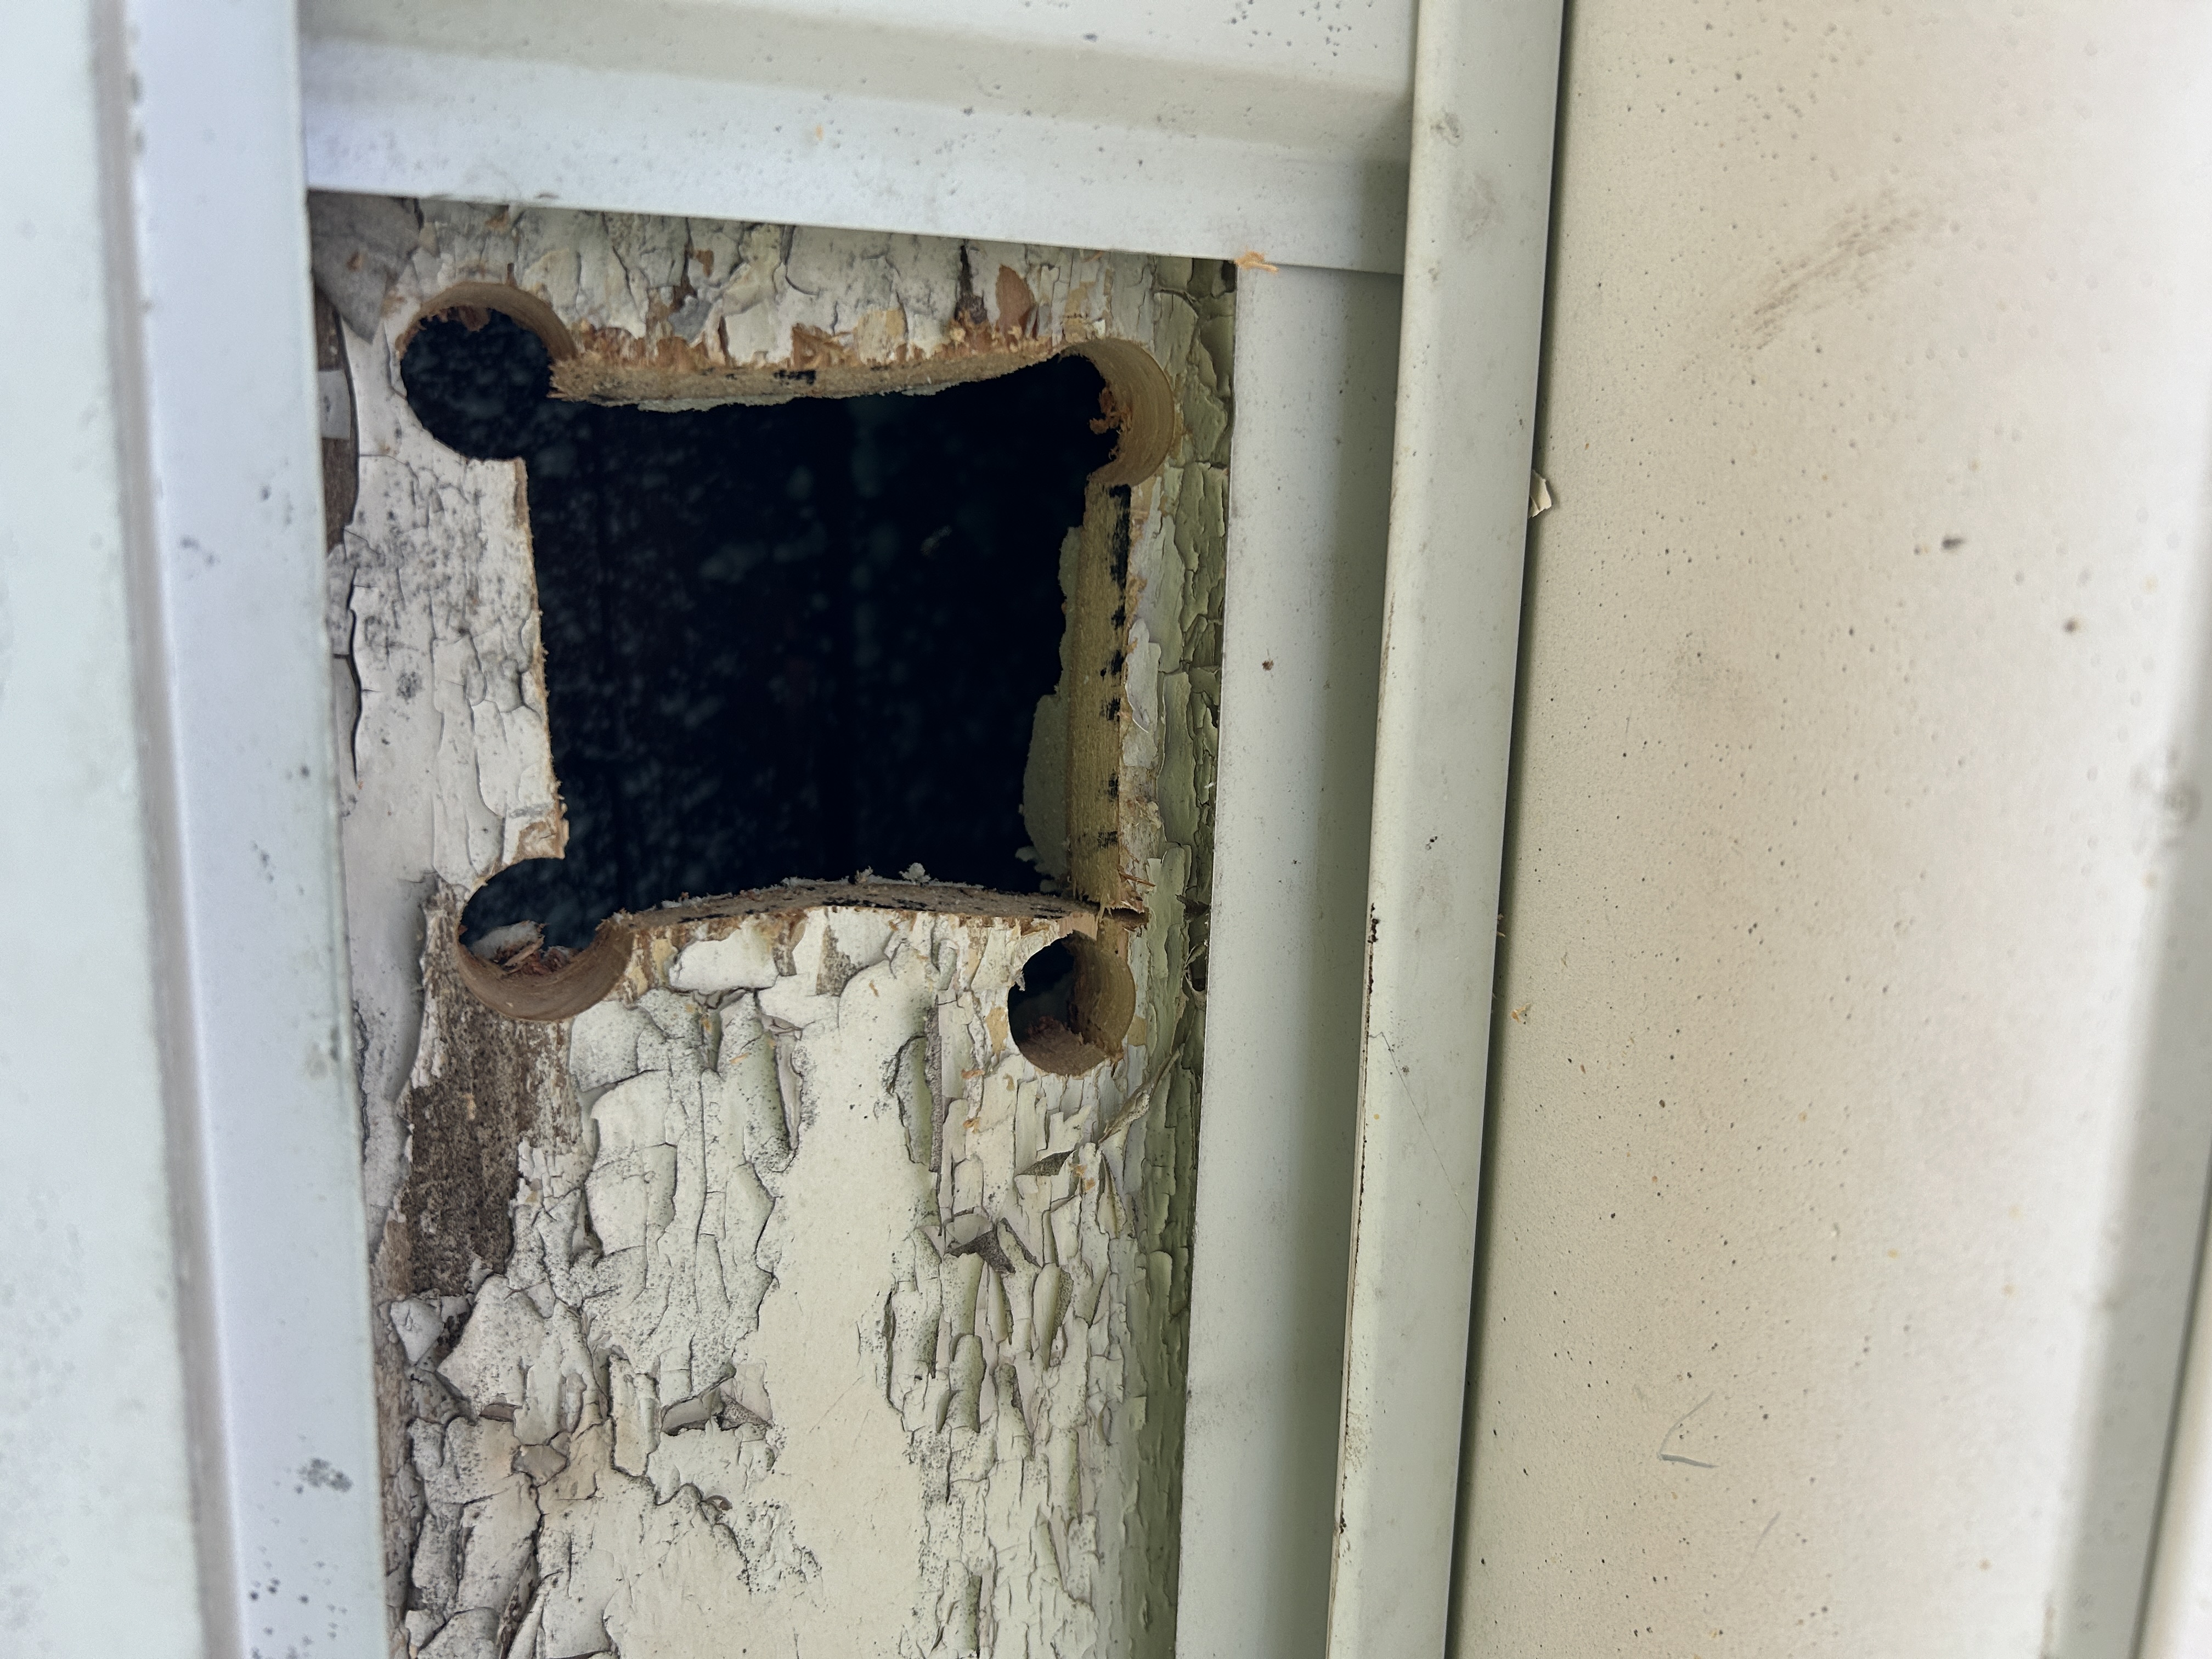
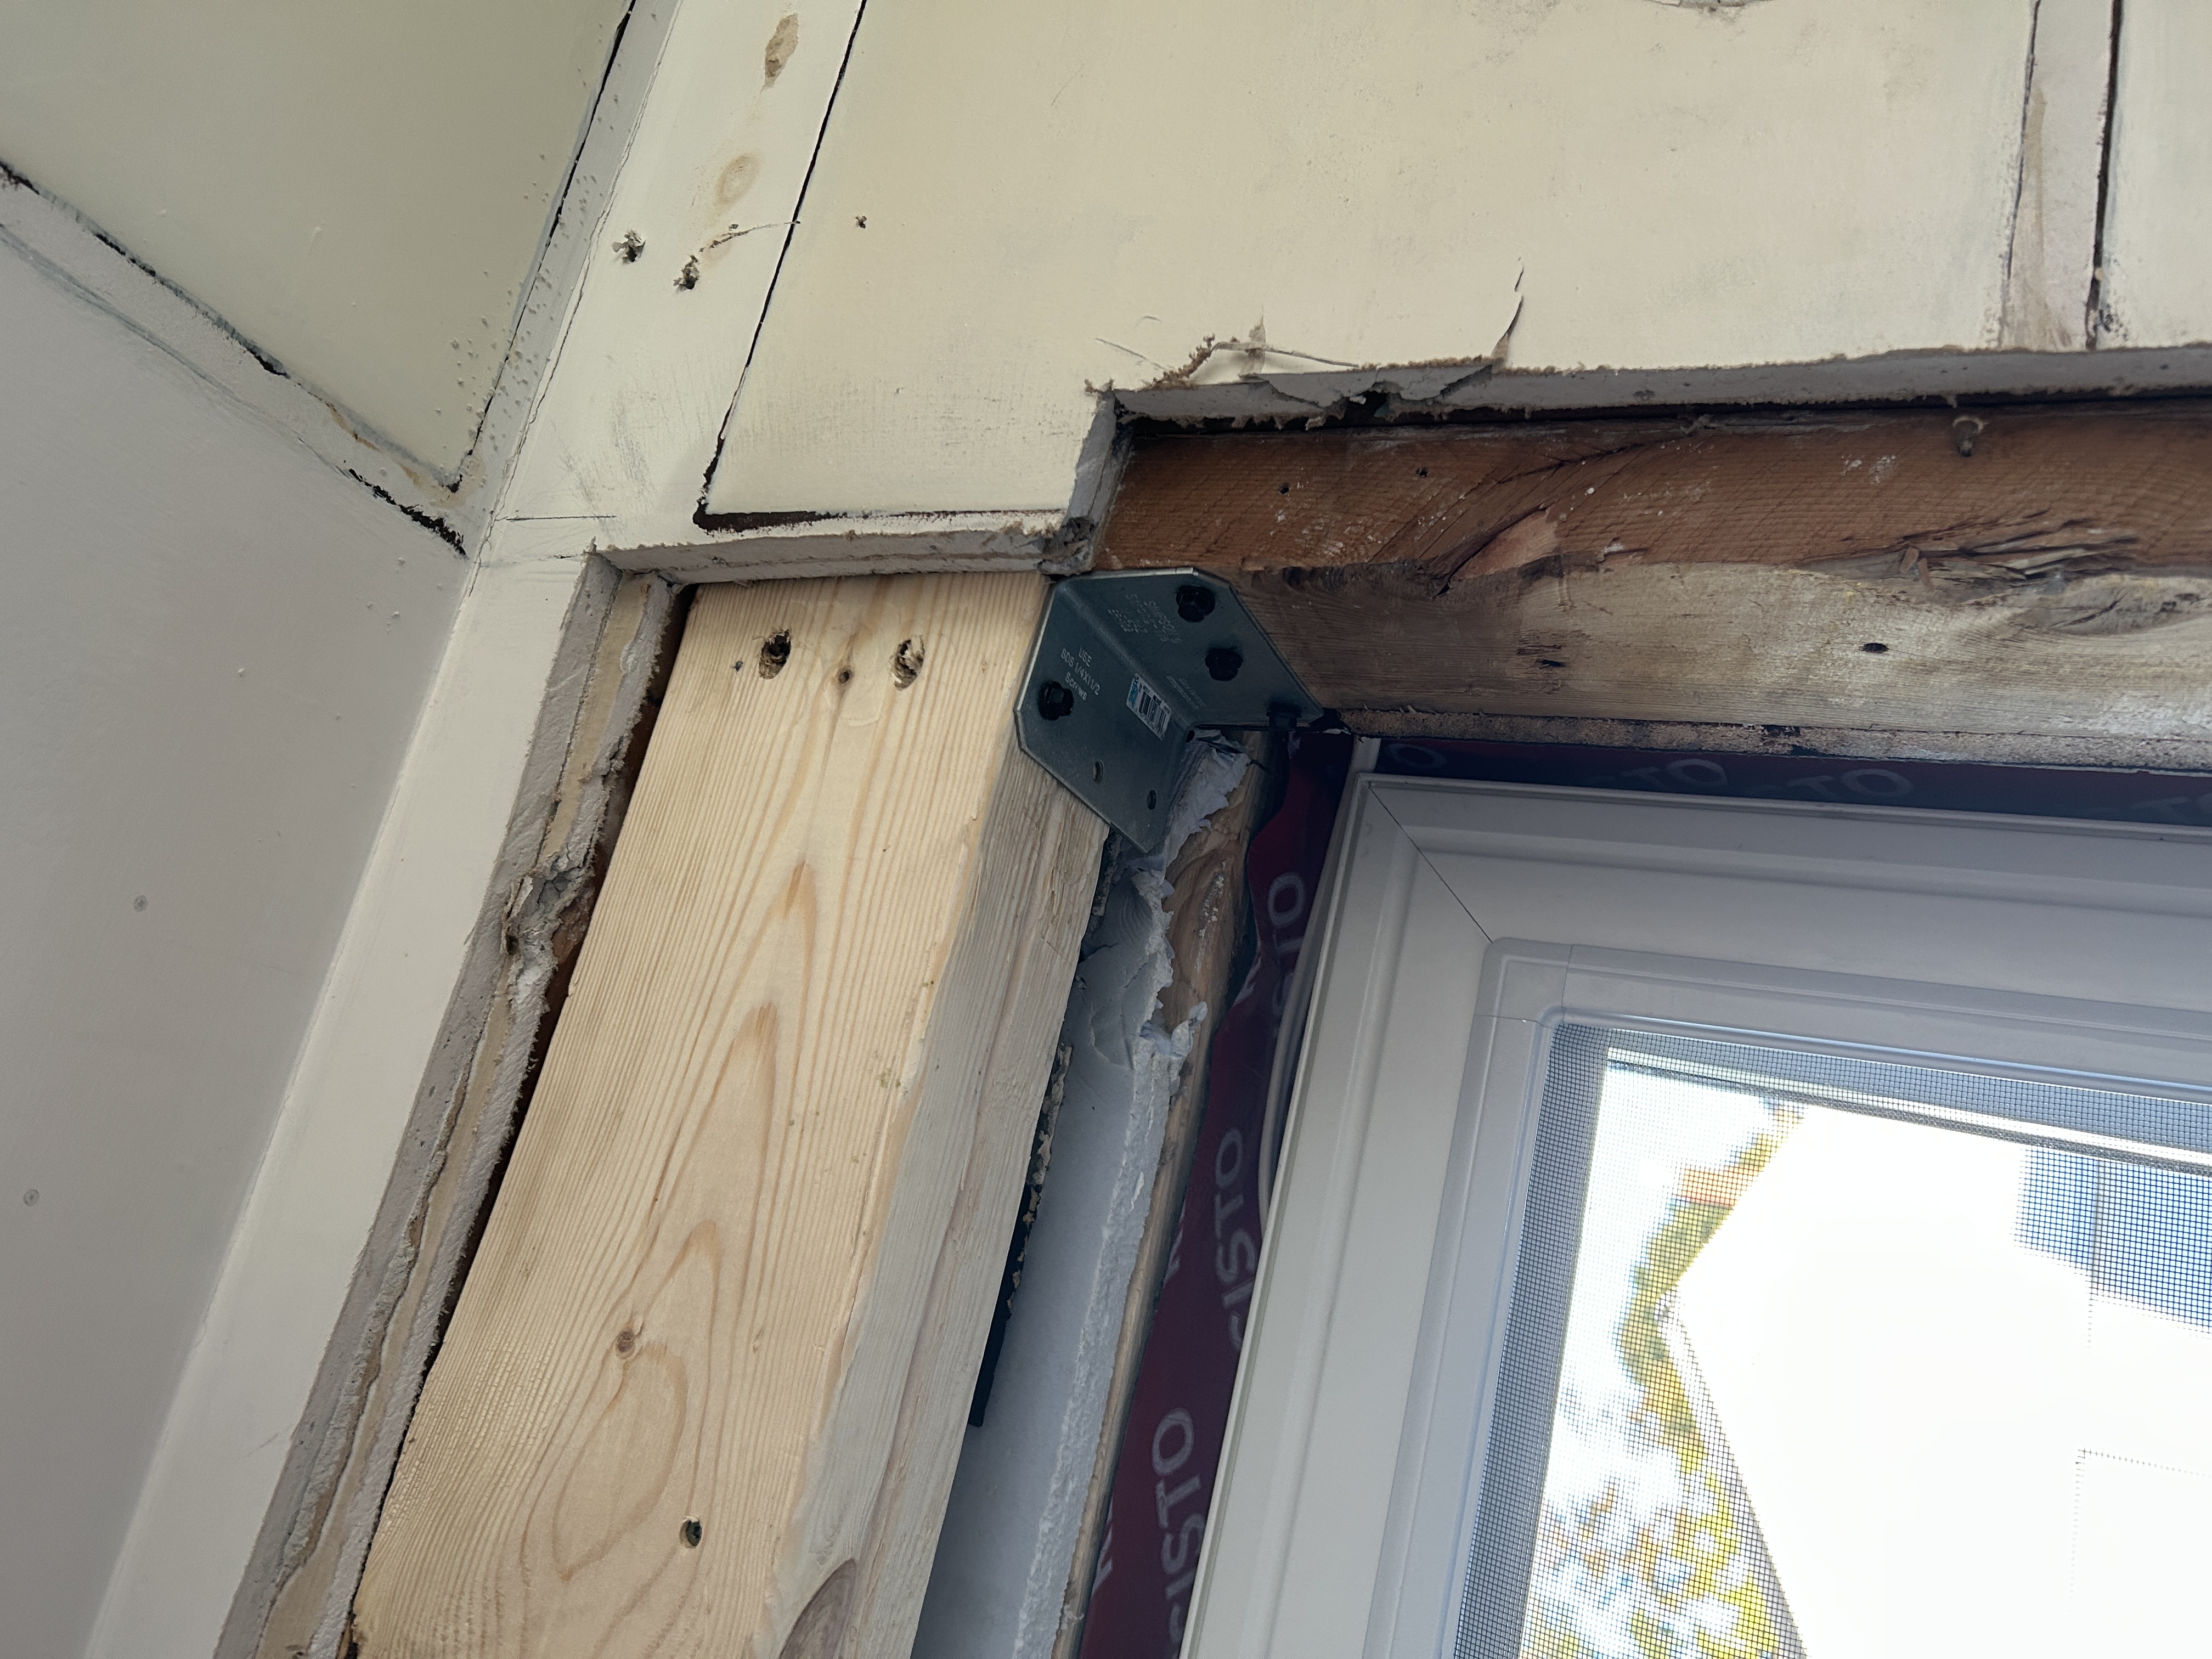
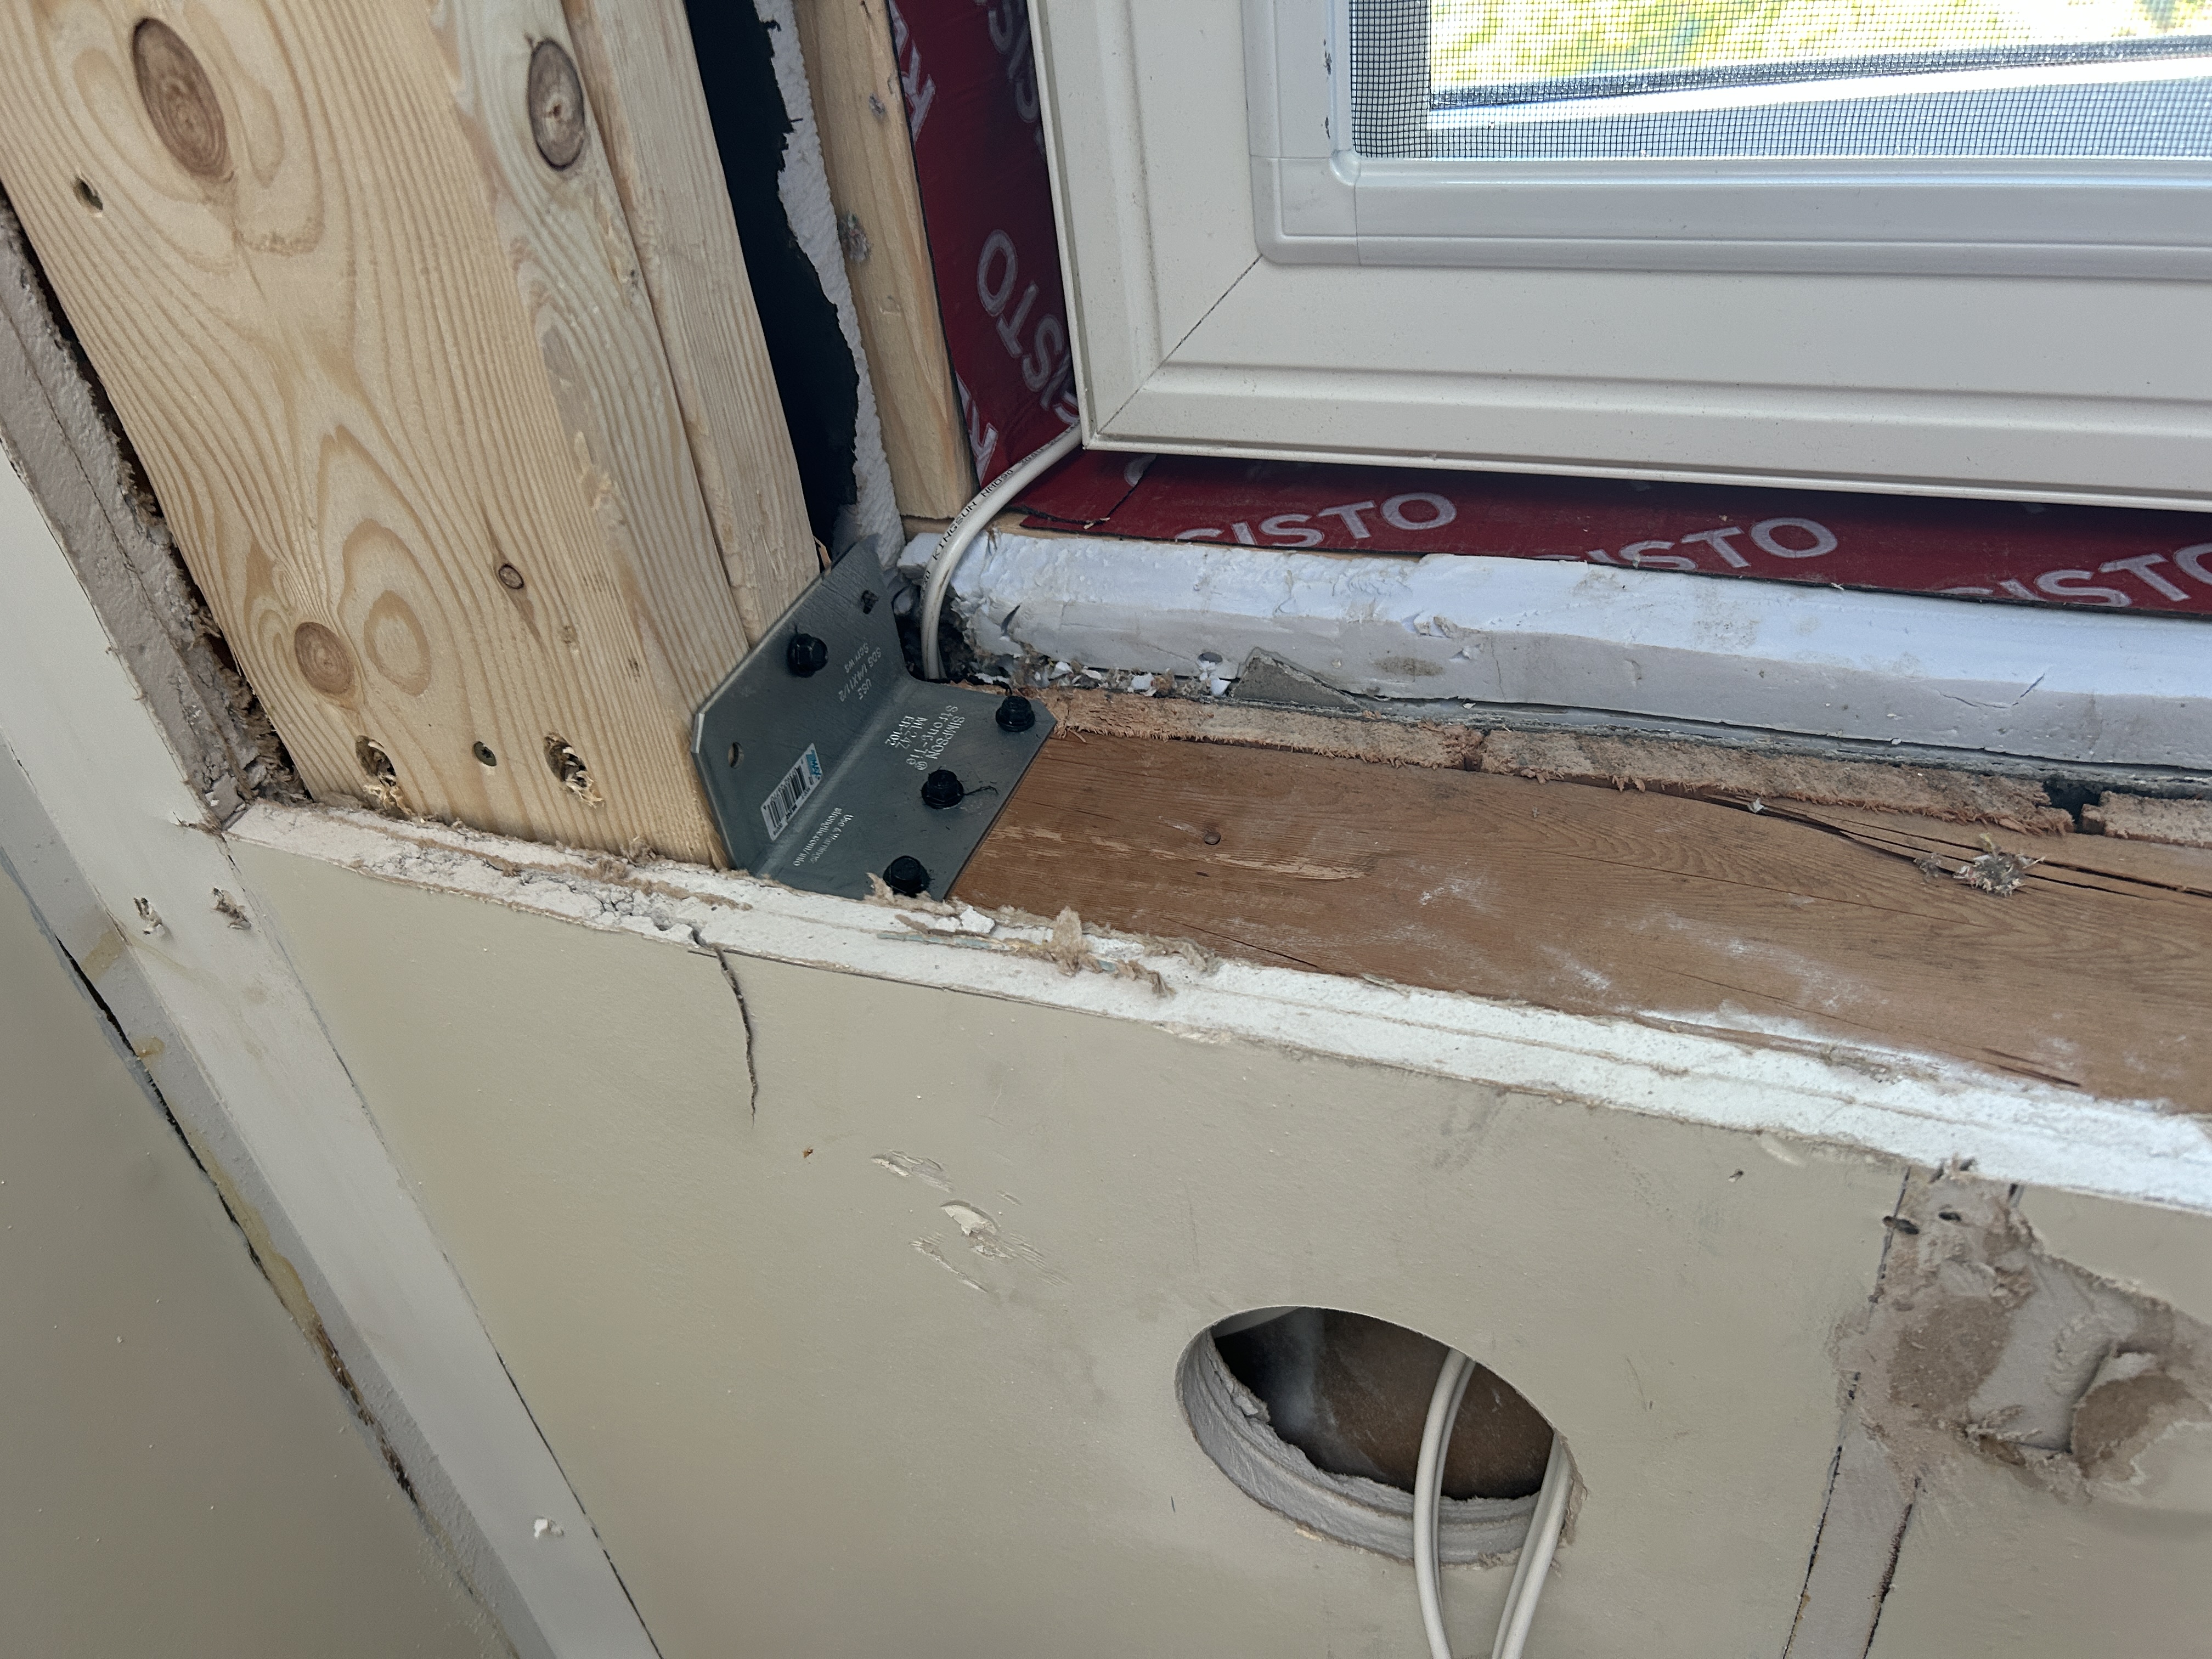
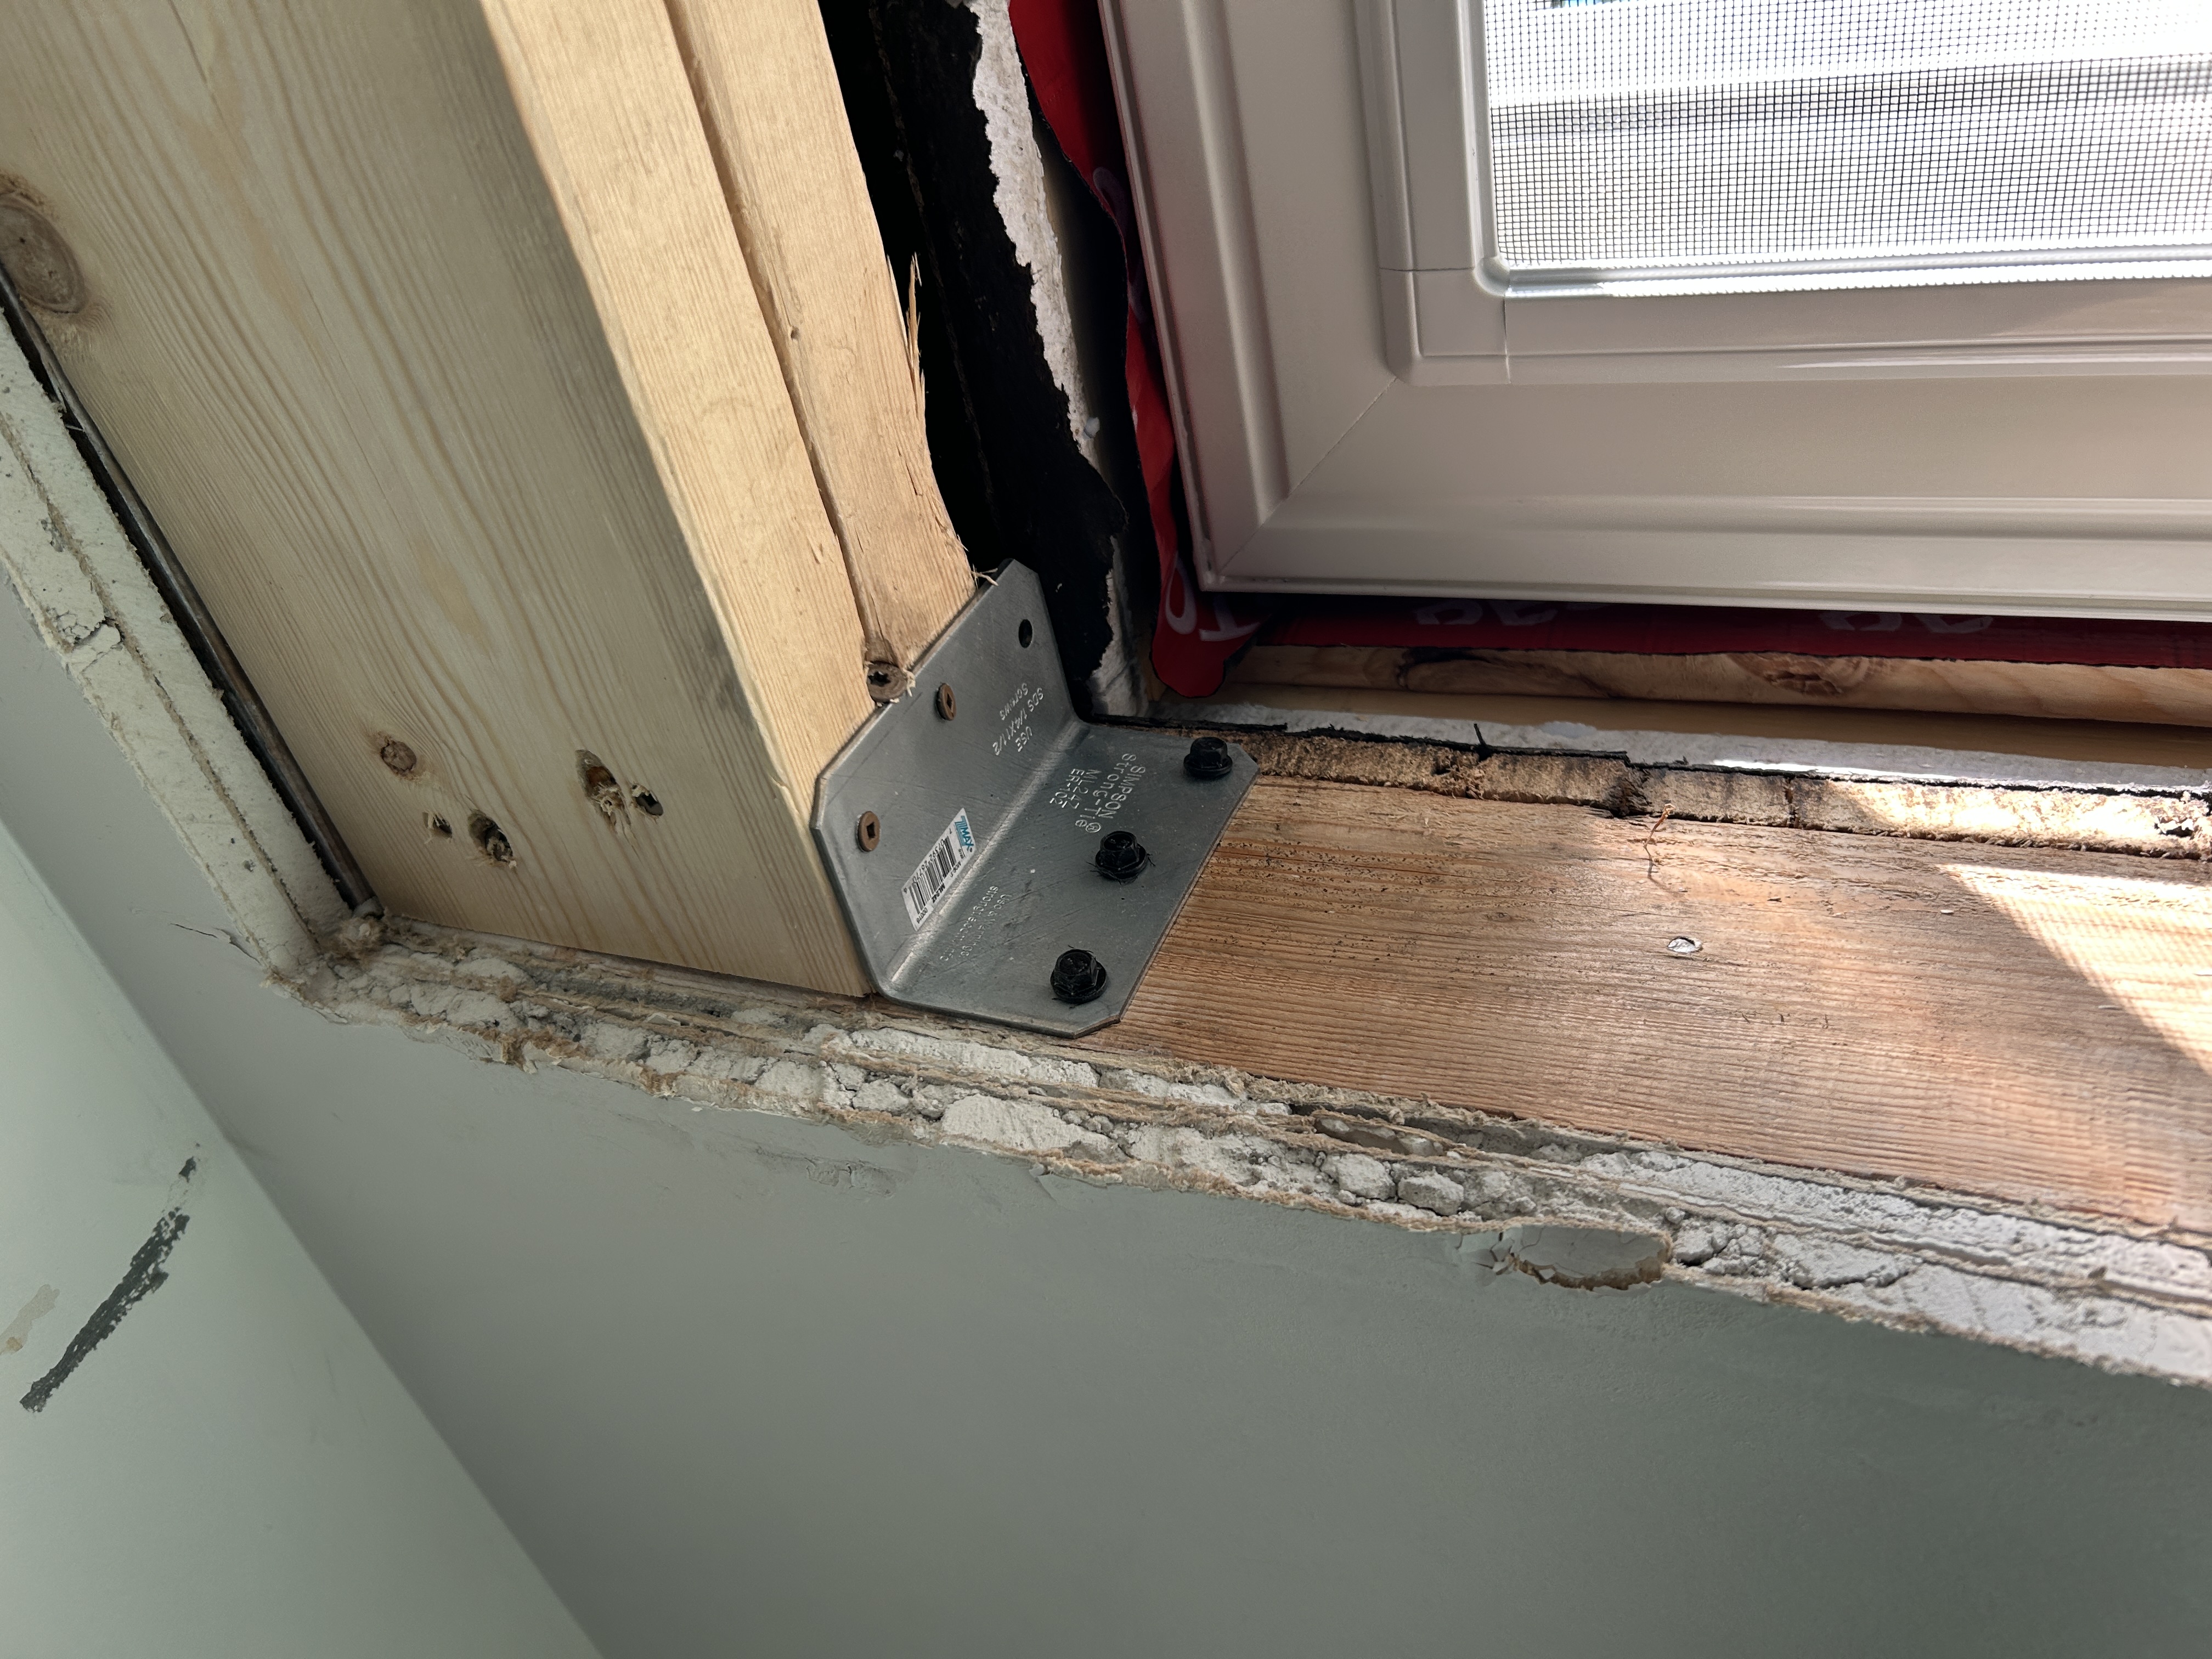
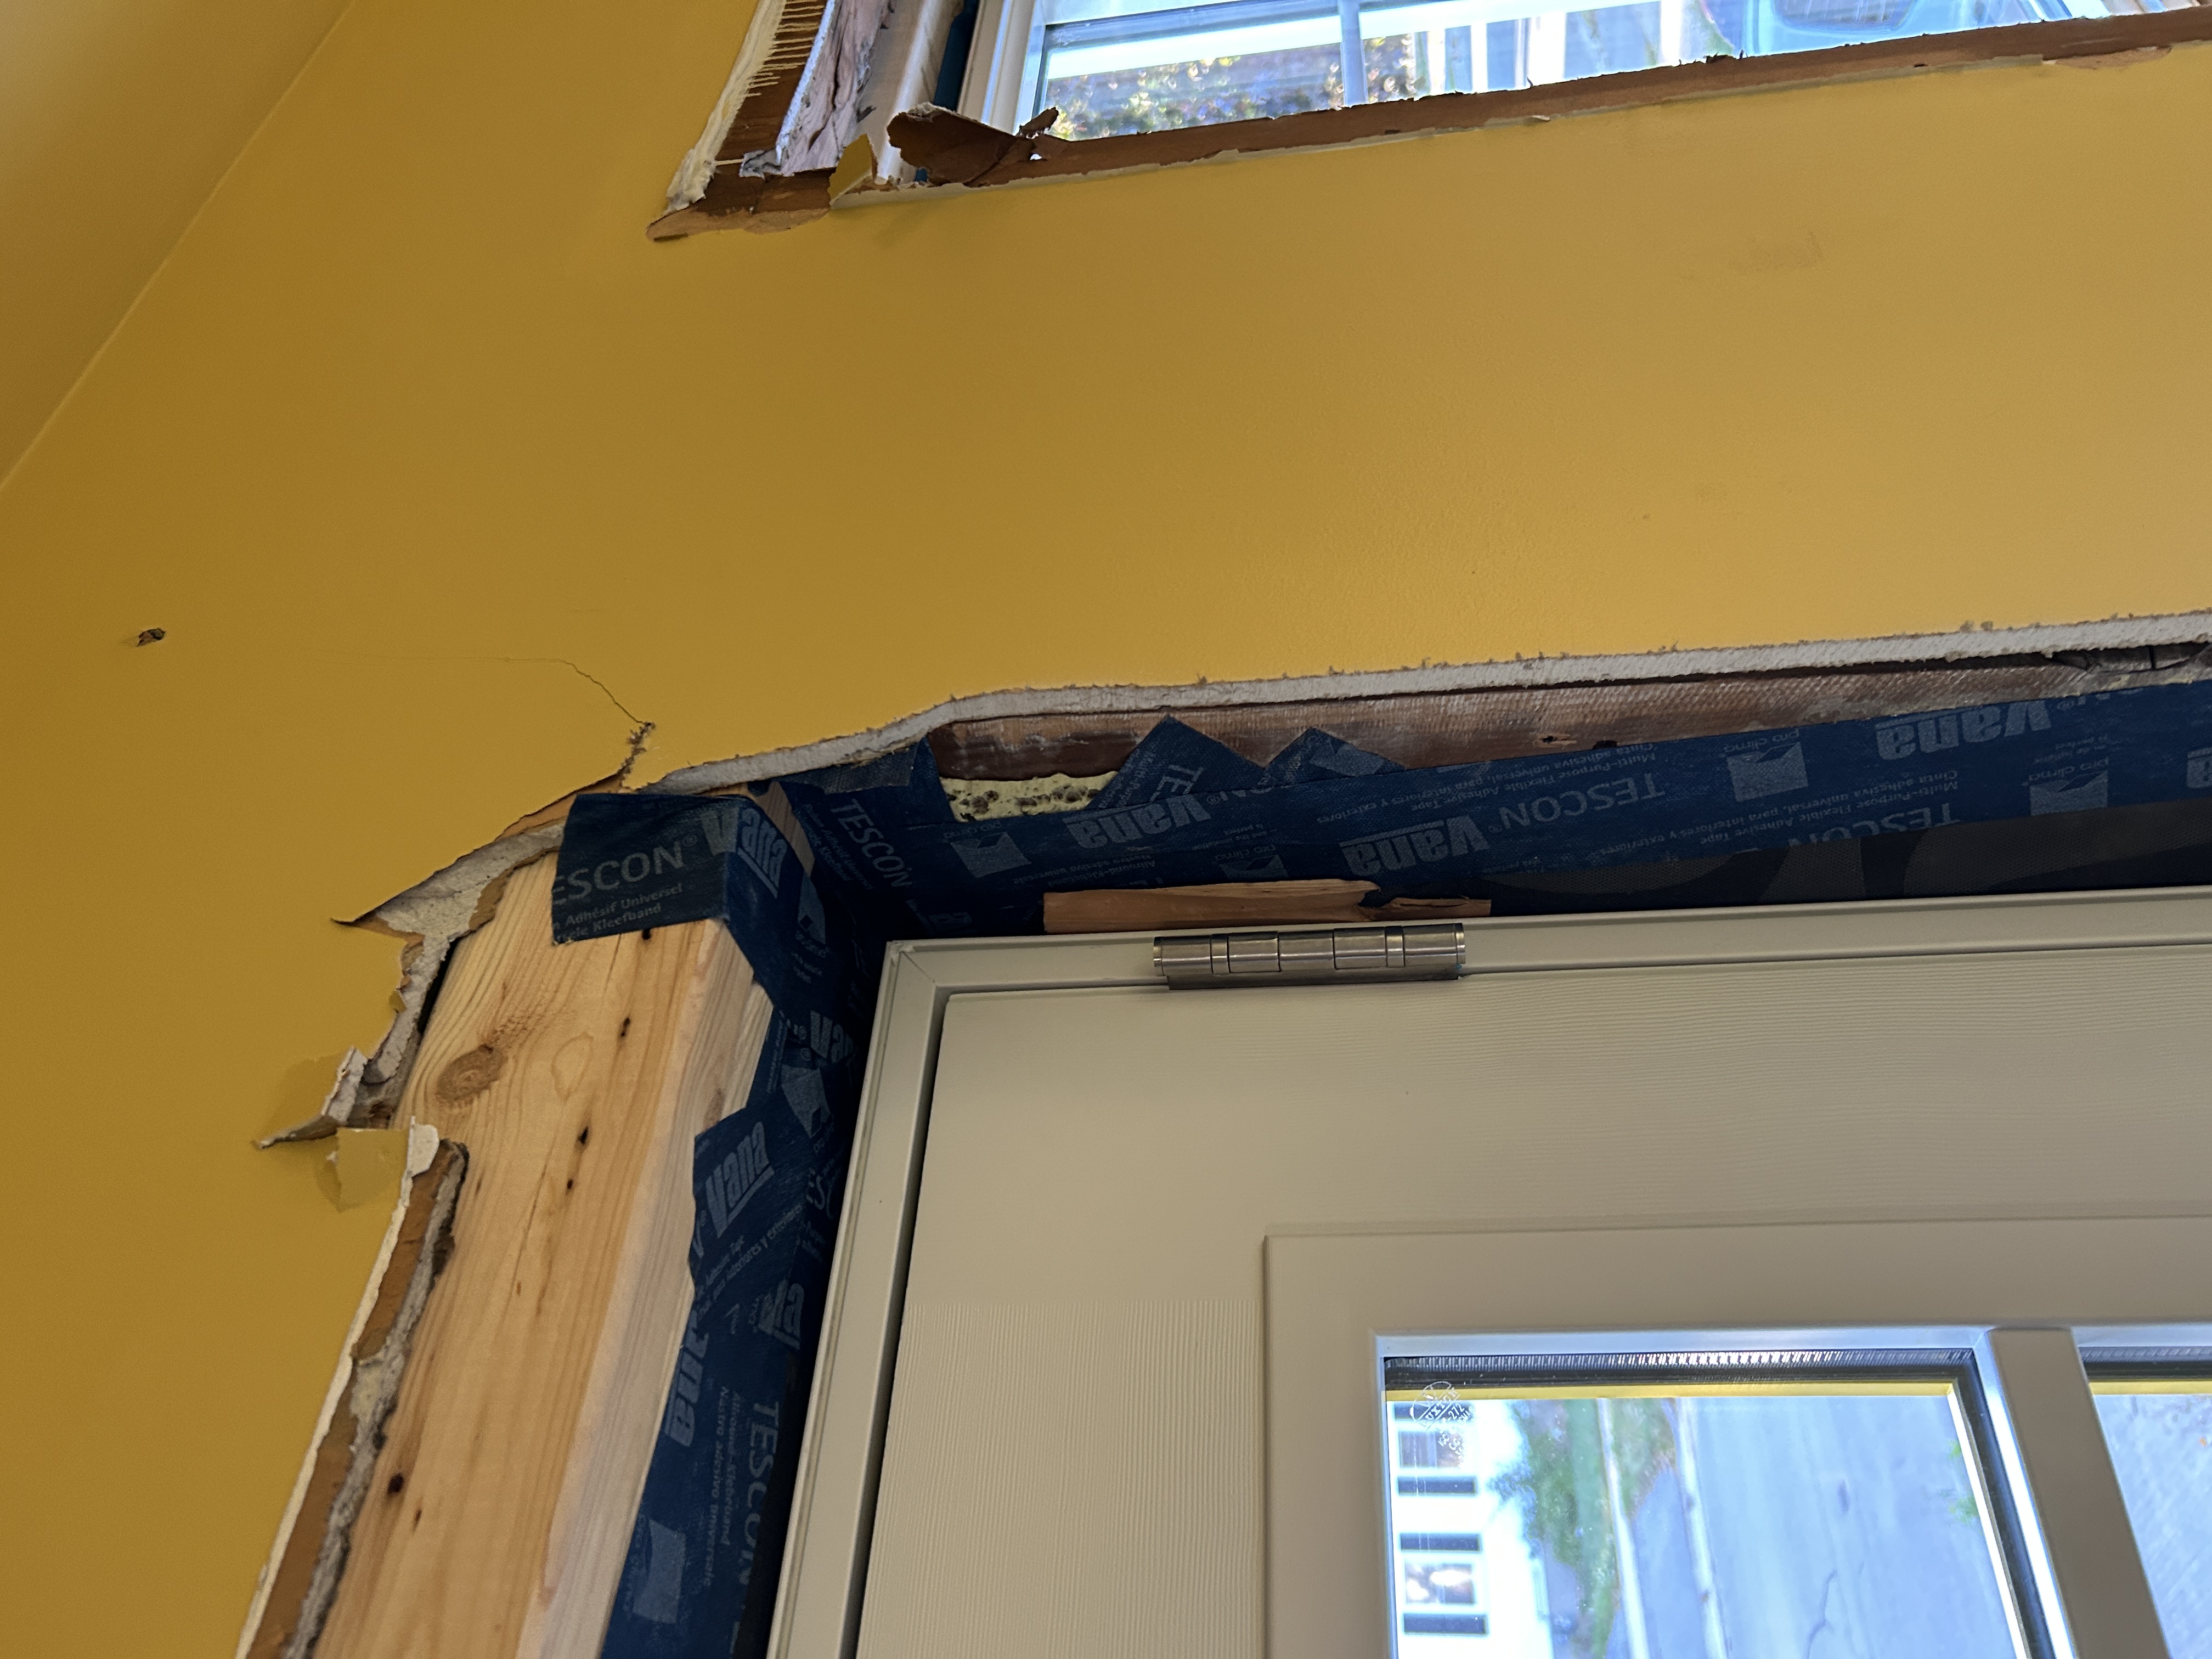
Windows: Windows were installed in pressure-treated ‘bucks’ affixed to the outside of the foundation so that the windows could be installed in the most efficient location- in the middle of the new insulation layer. It made the air sealing a little more complicated but simplified the problem of making it waterproof. As an added bonus, we now have deep window sills on the interior, which is a great design feature. We used Sikaflex caulking and Fentrim tape to air seal on the inside. There was some extra labour involved in enlarging the rough openings to allow the window returns to sit level.
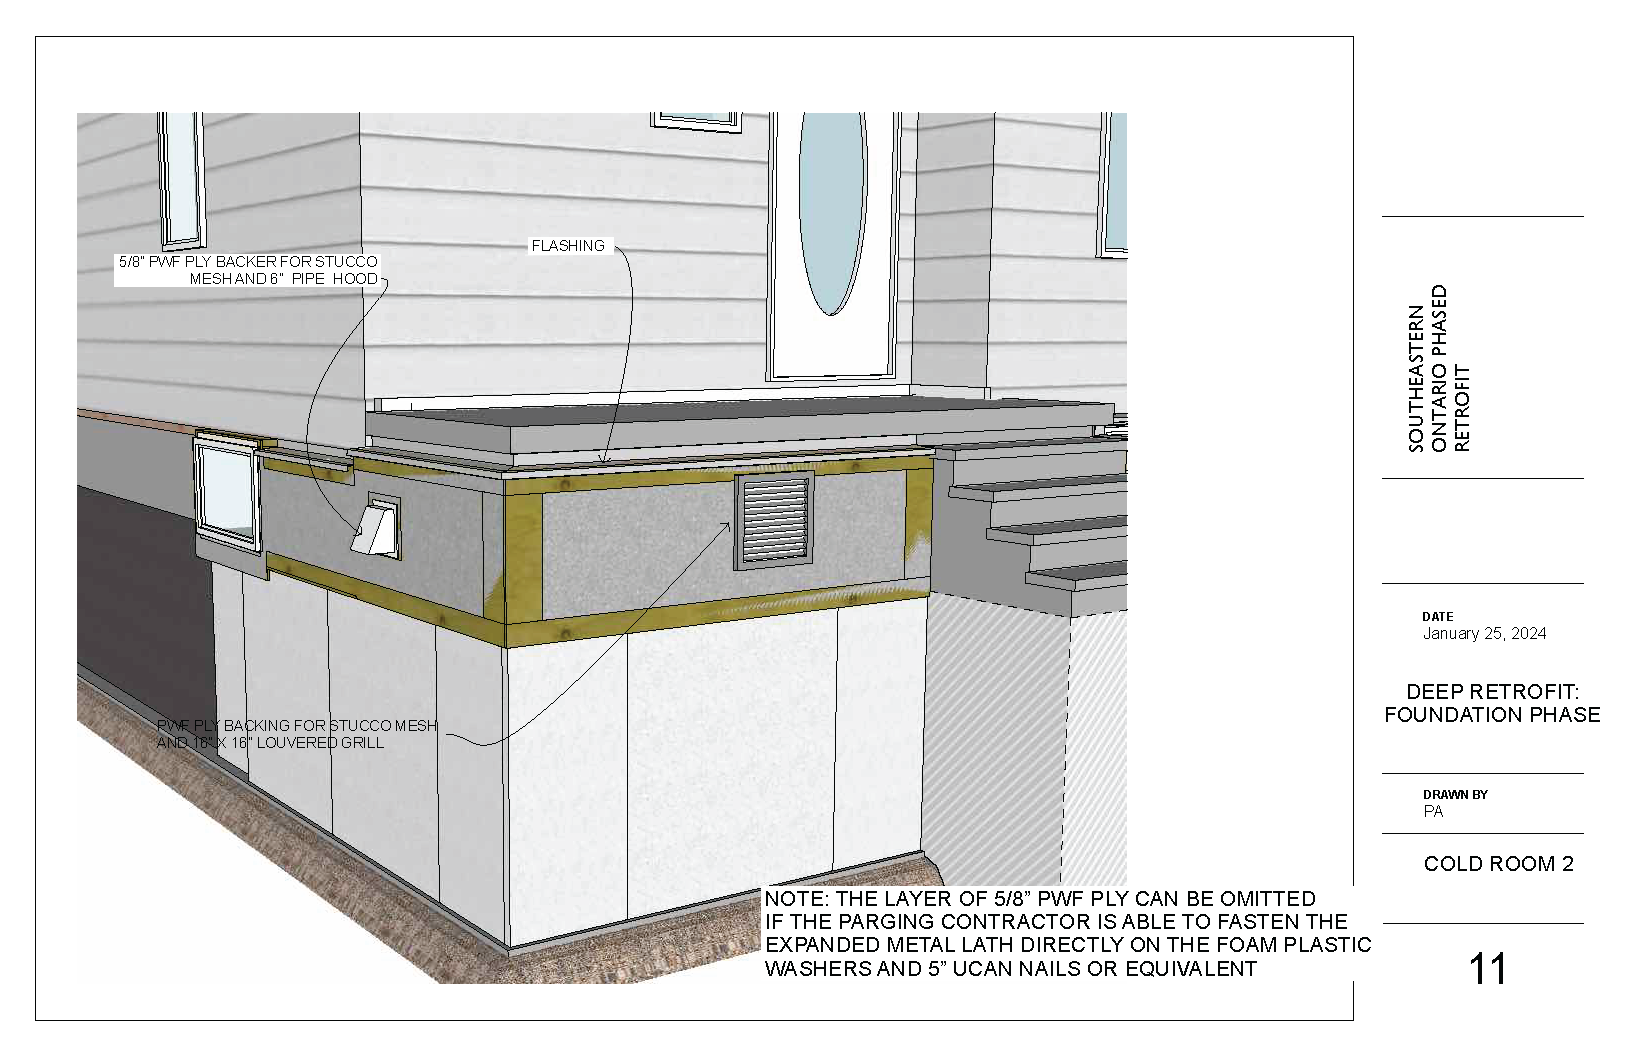
Coldroom: We wanted to preserve the passive cooling function of the existing cold room, which required special planning during stage 1.
Stage 2: Attic Preparation and Mechanical (Spring 2024)
Before efficiency upgrades, space heating alone accounted for 54% of the house’s estimated annual energy use and water heating for 21%. We initially planned to tackle this later in the project, but we moved it up because the air conditioning unit died.
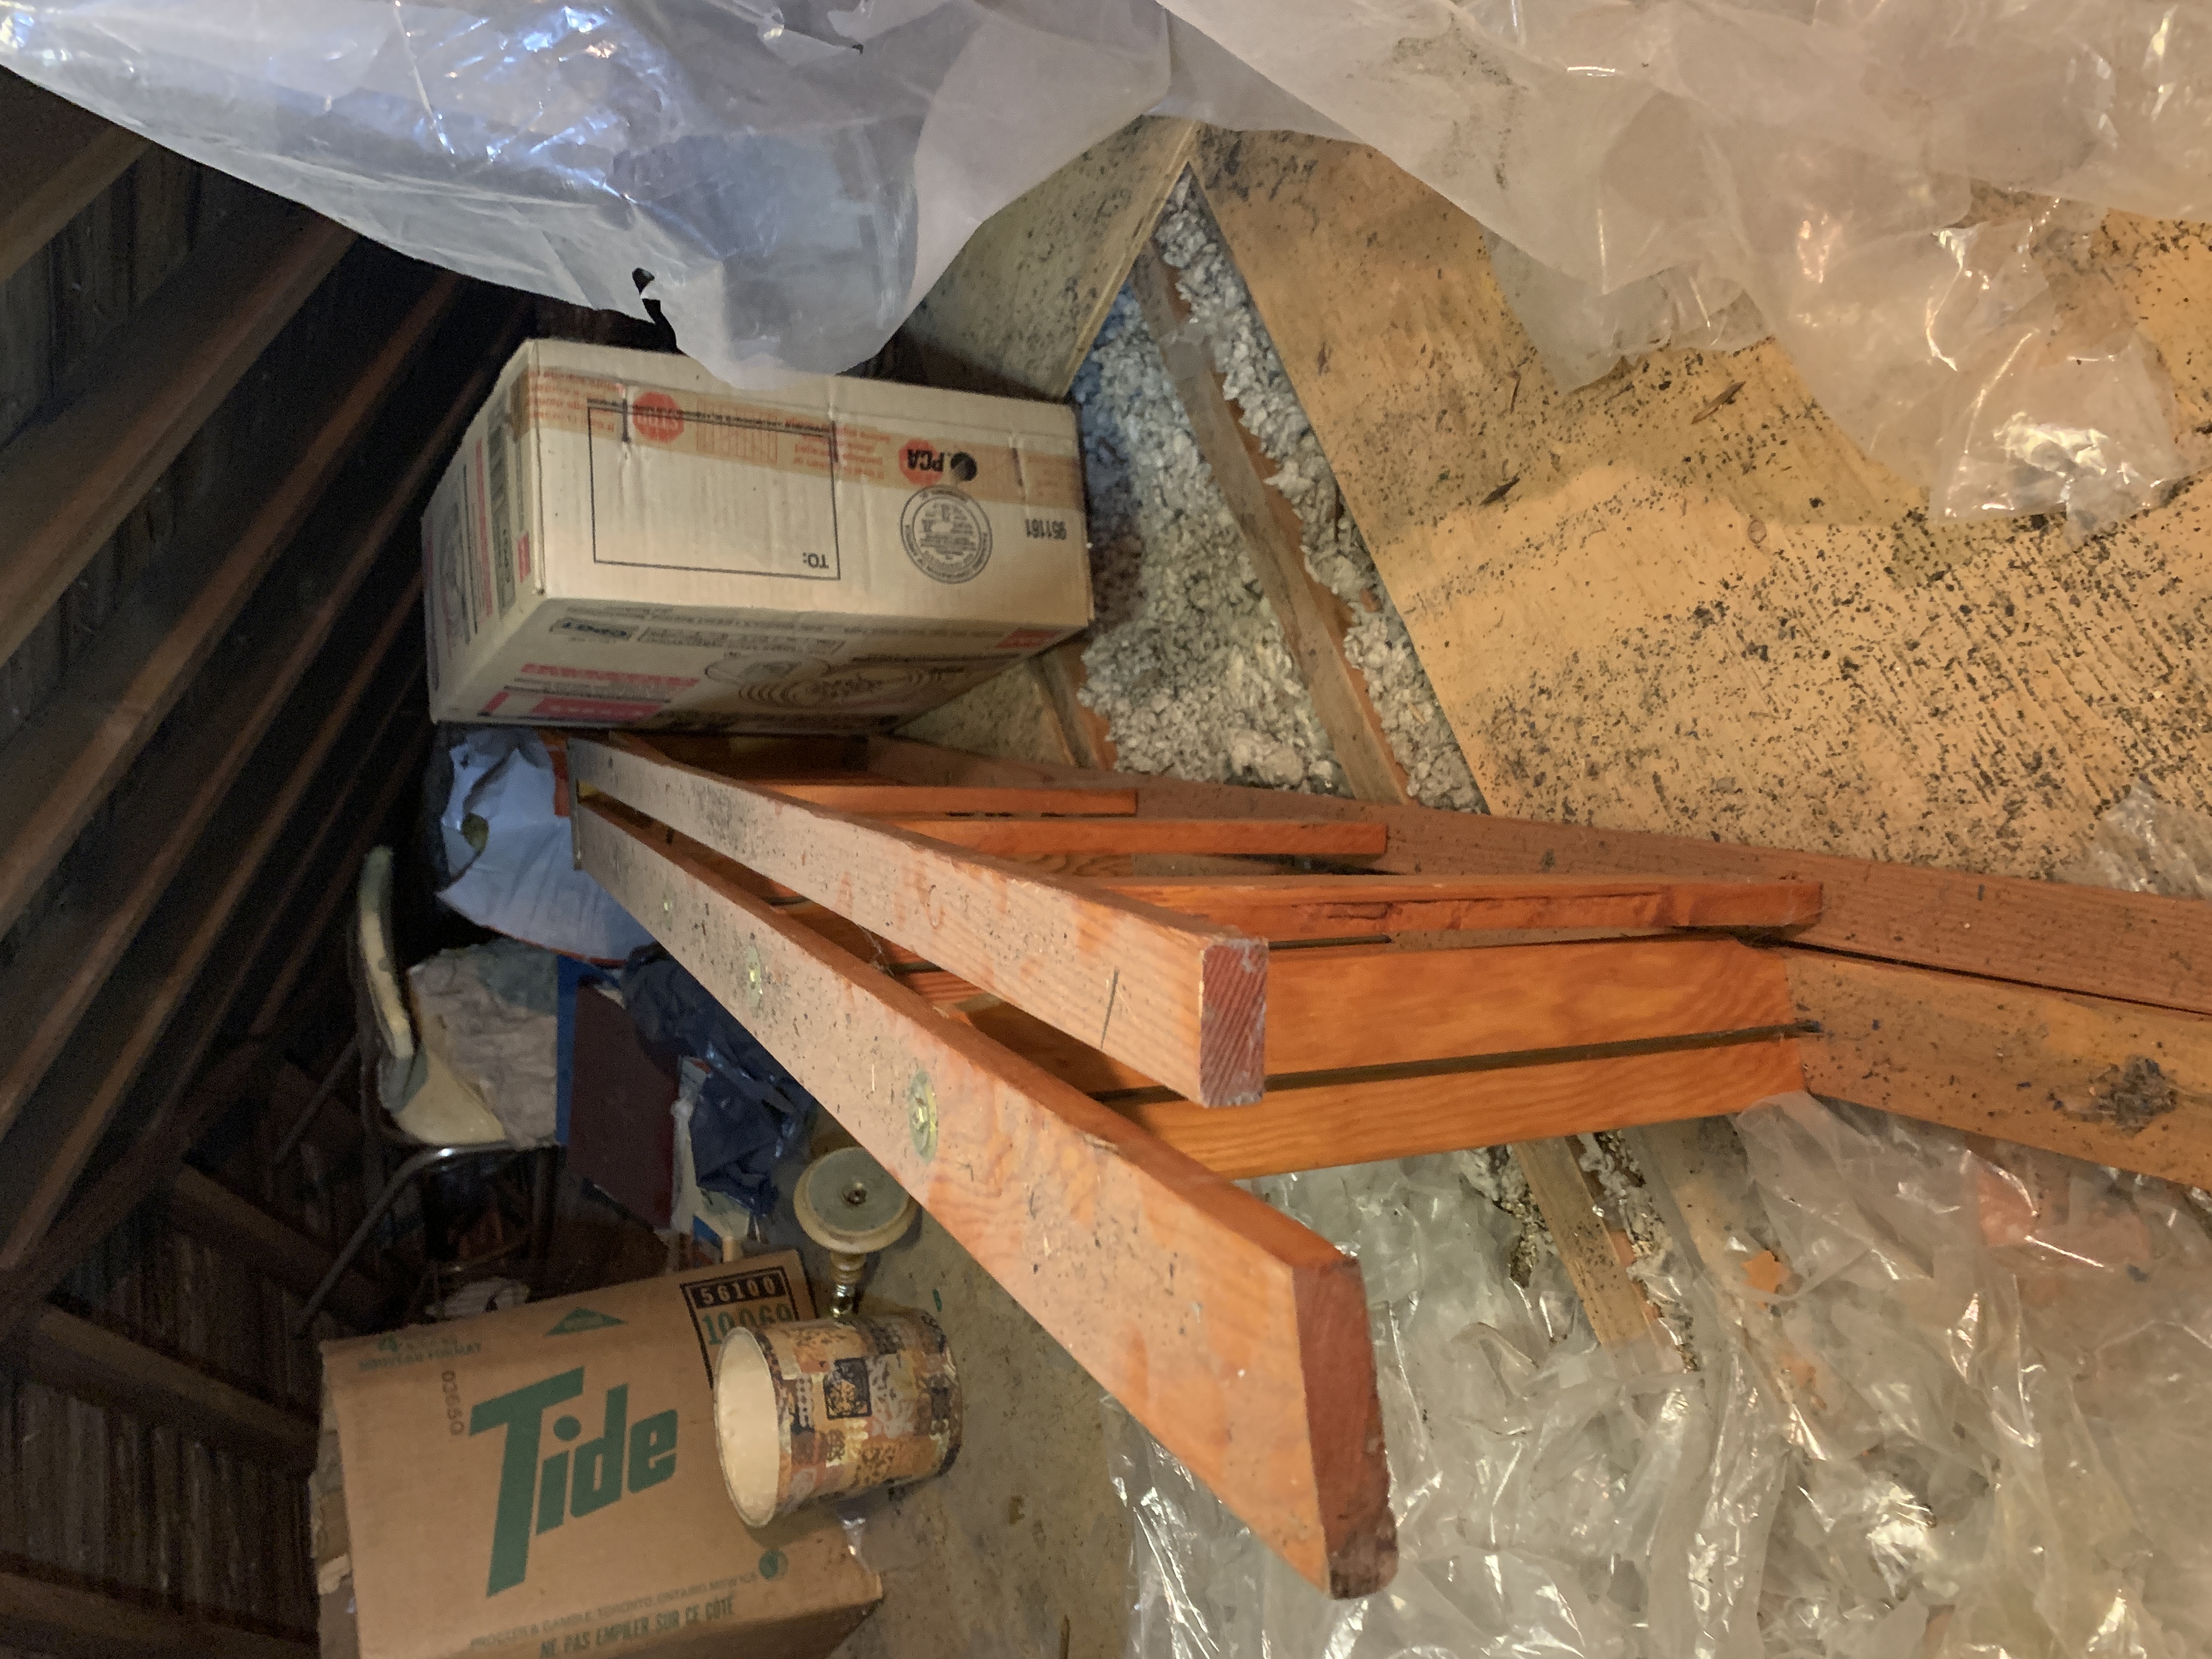
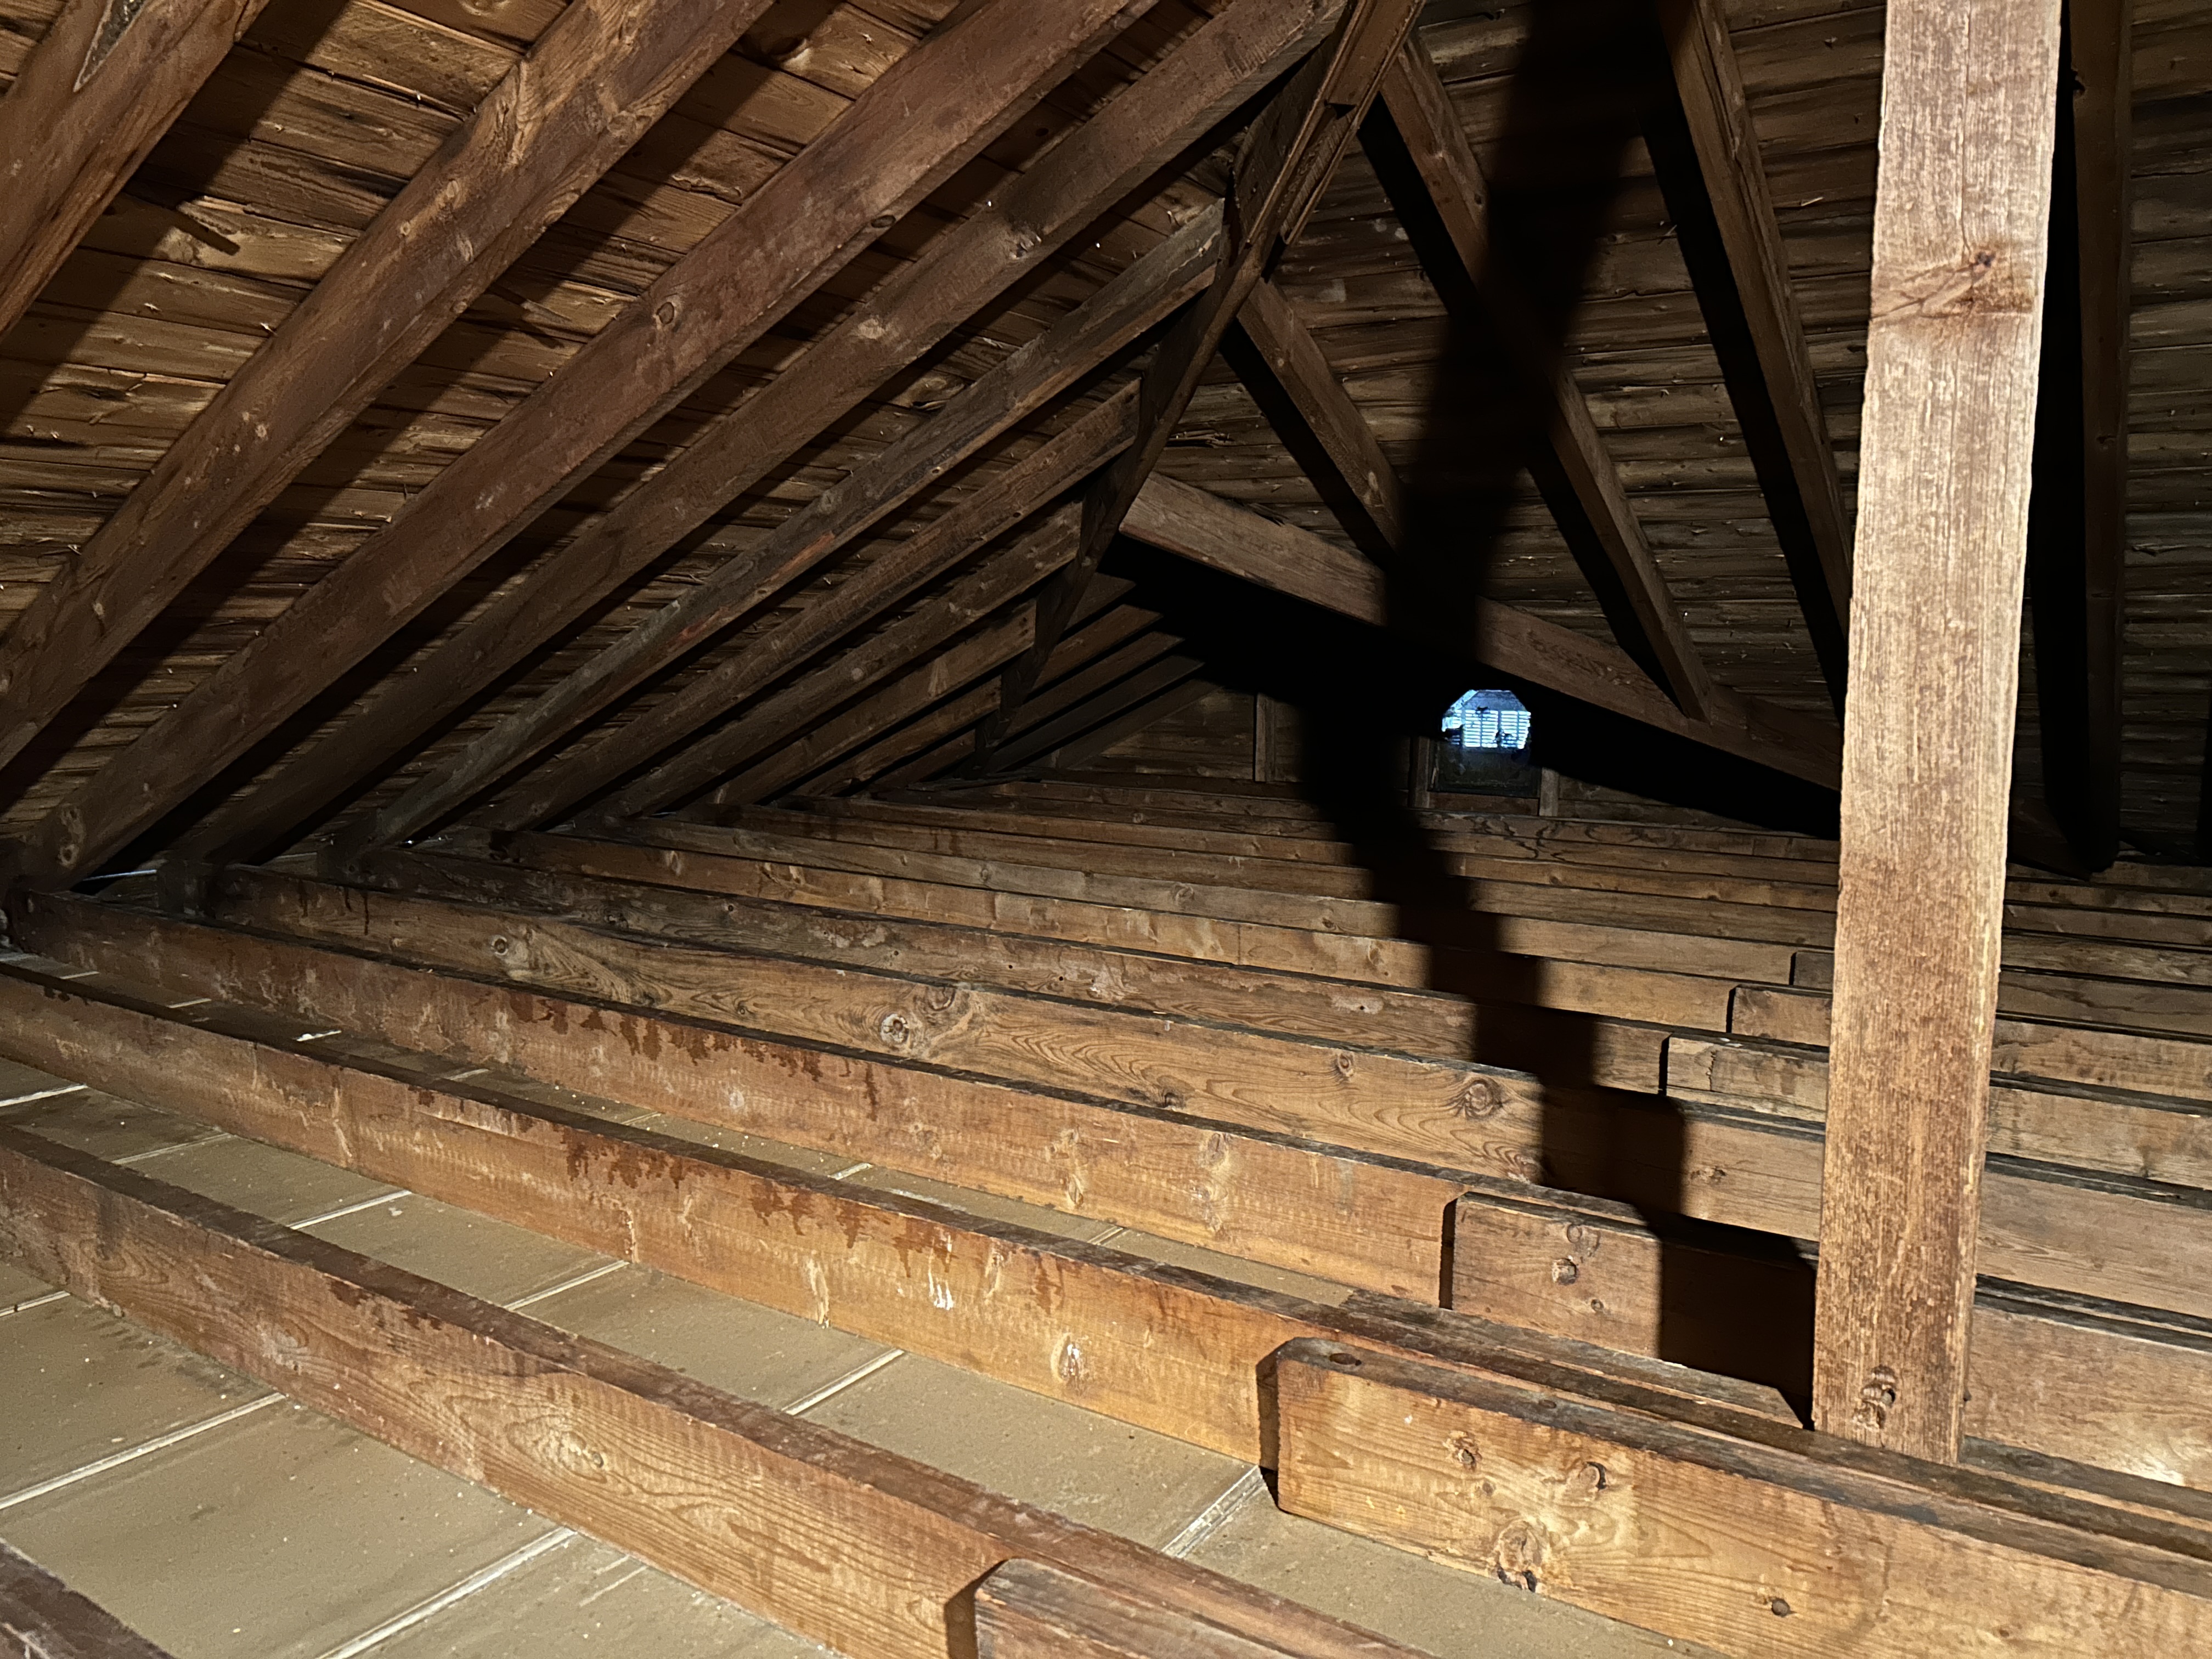
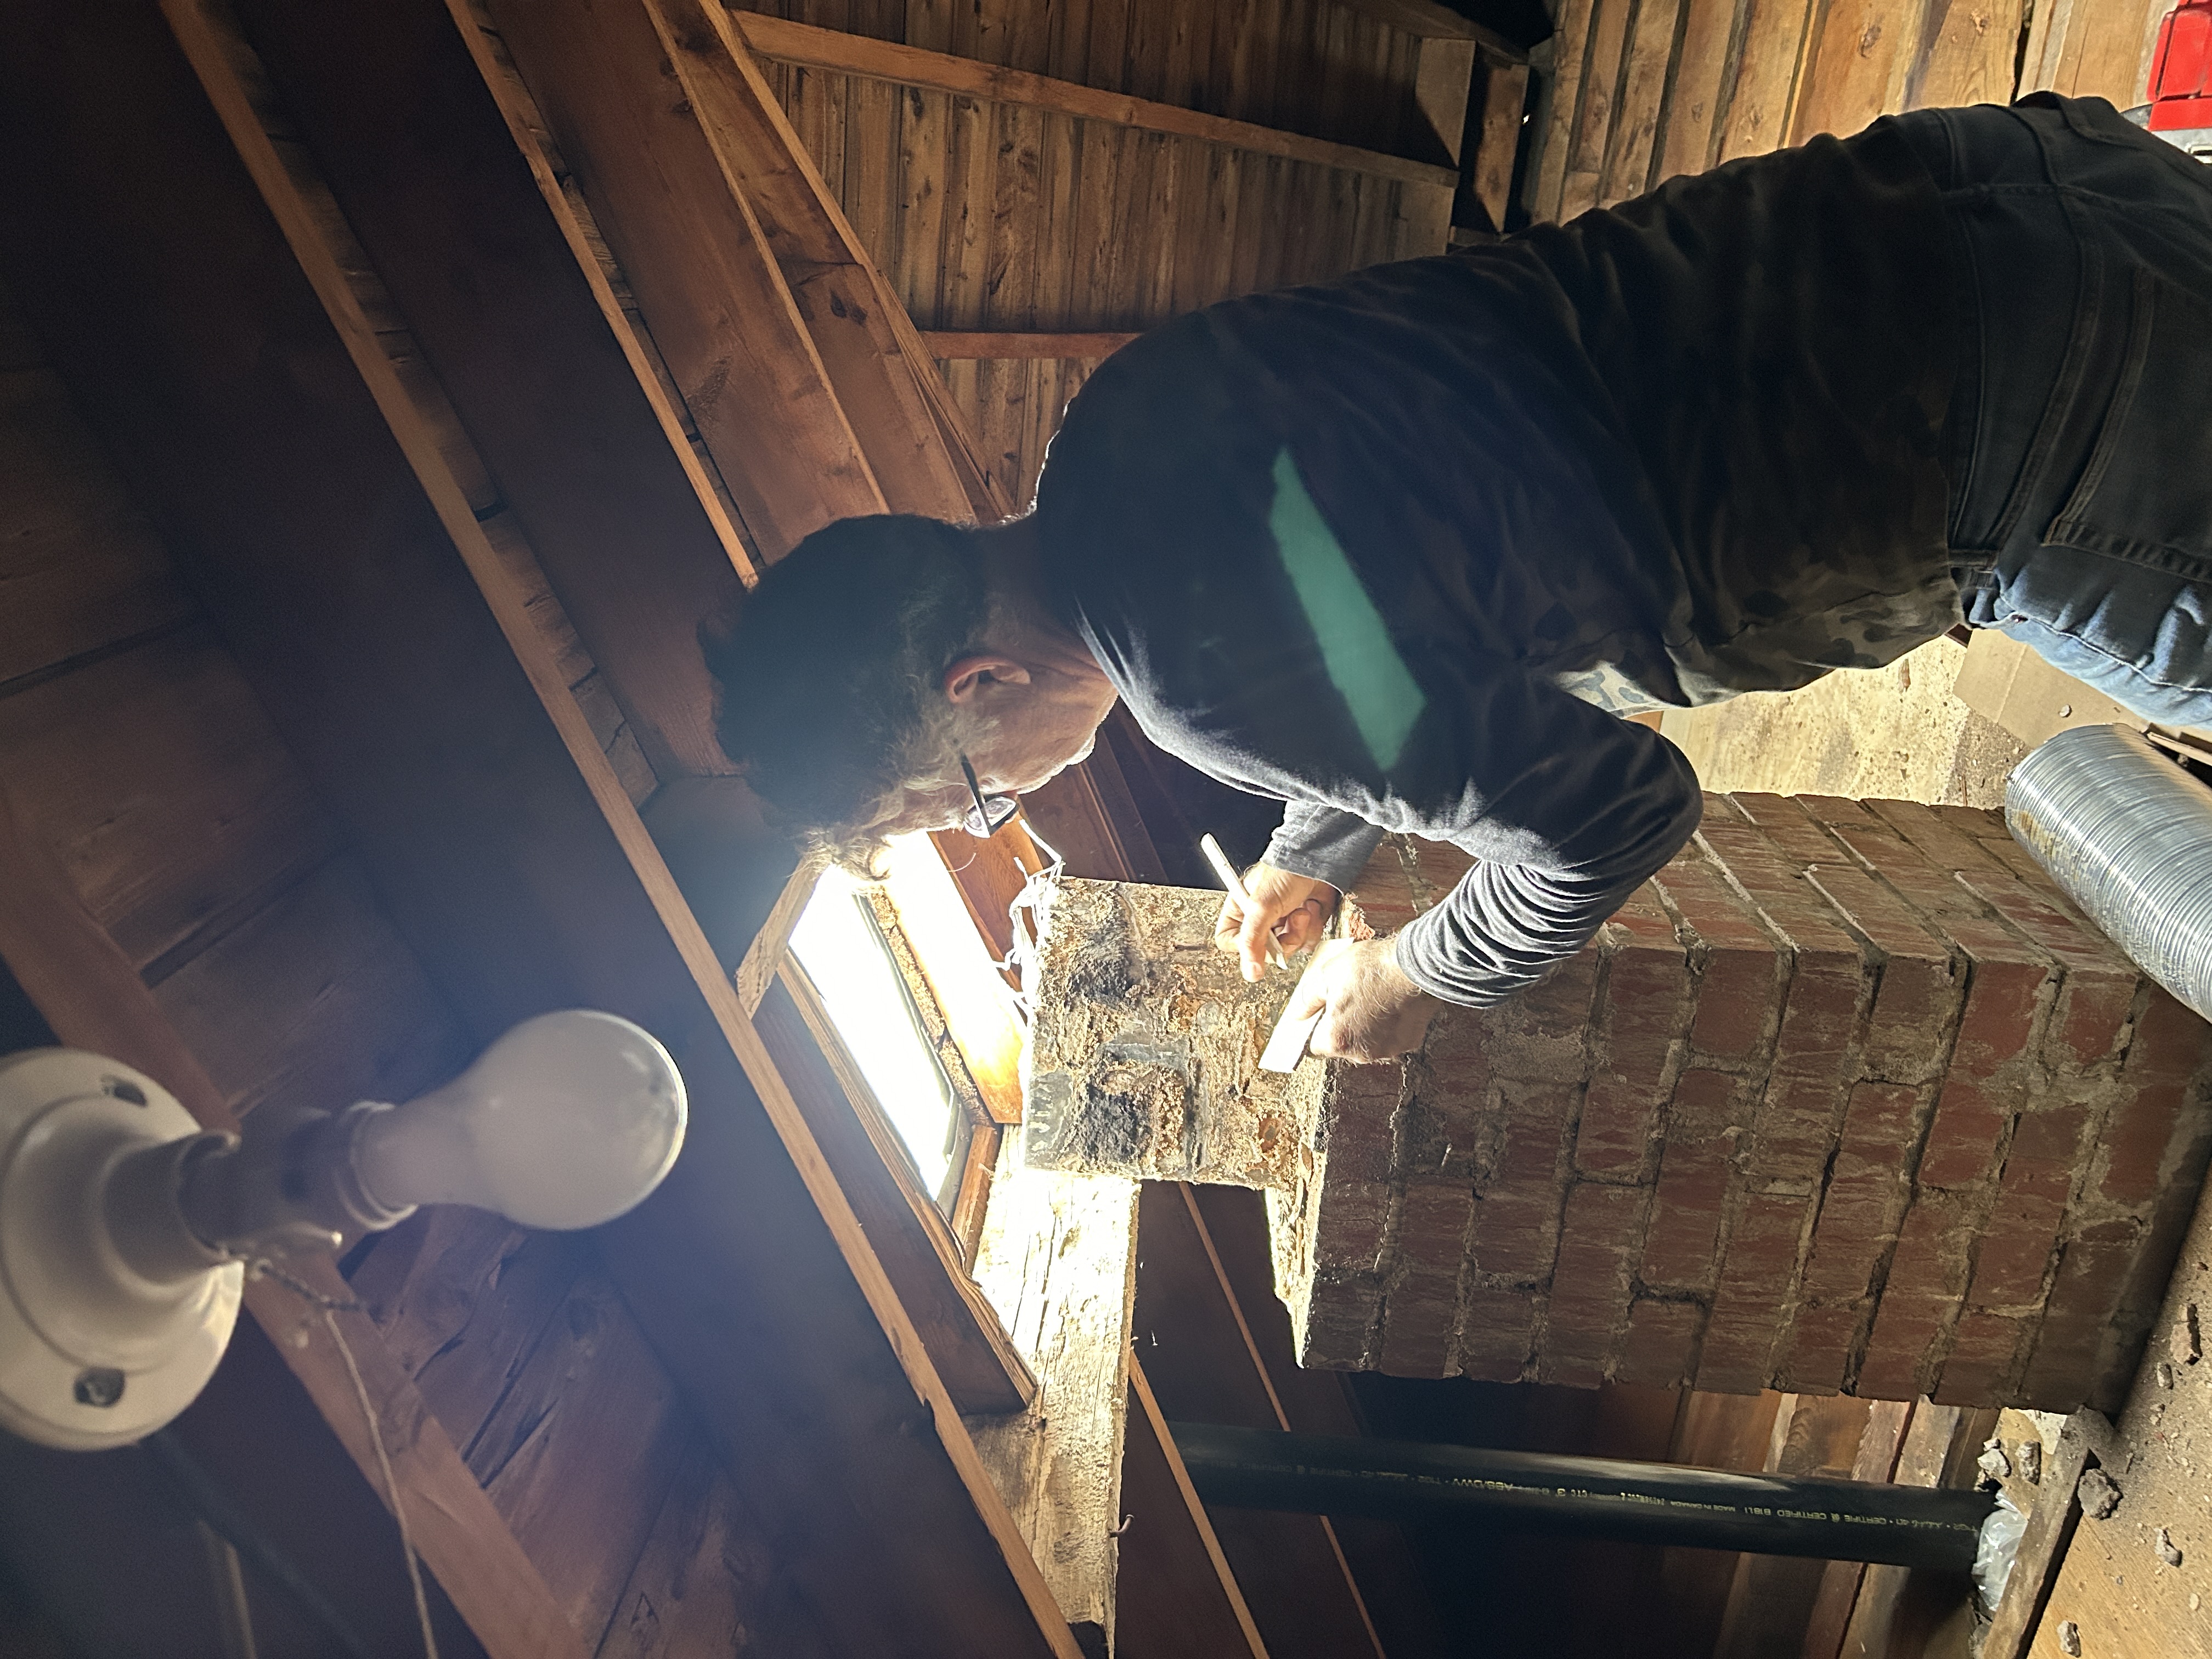
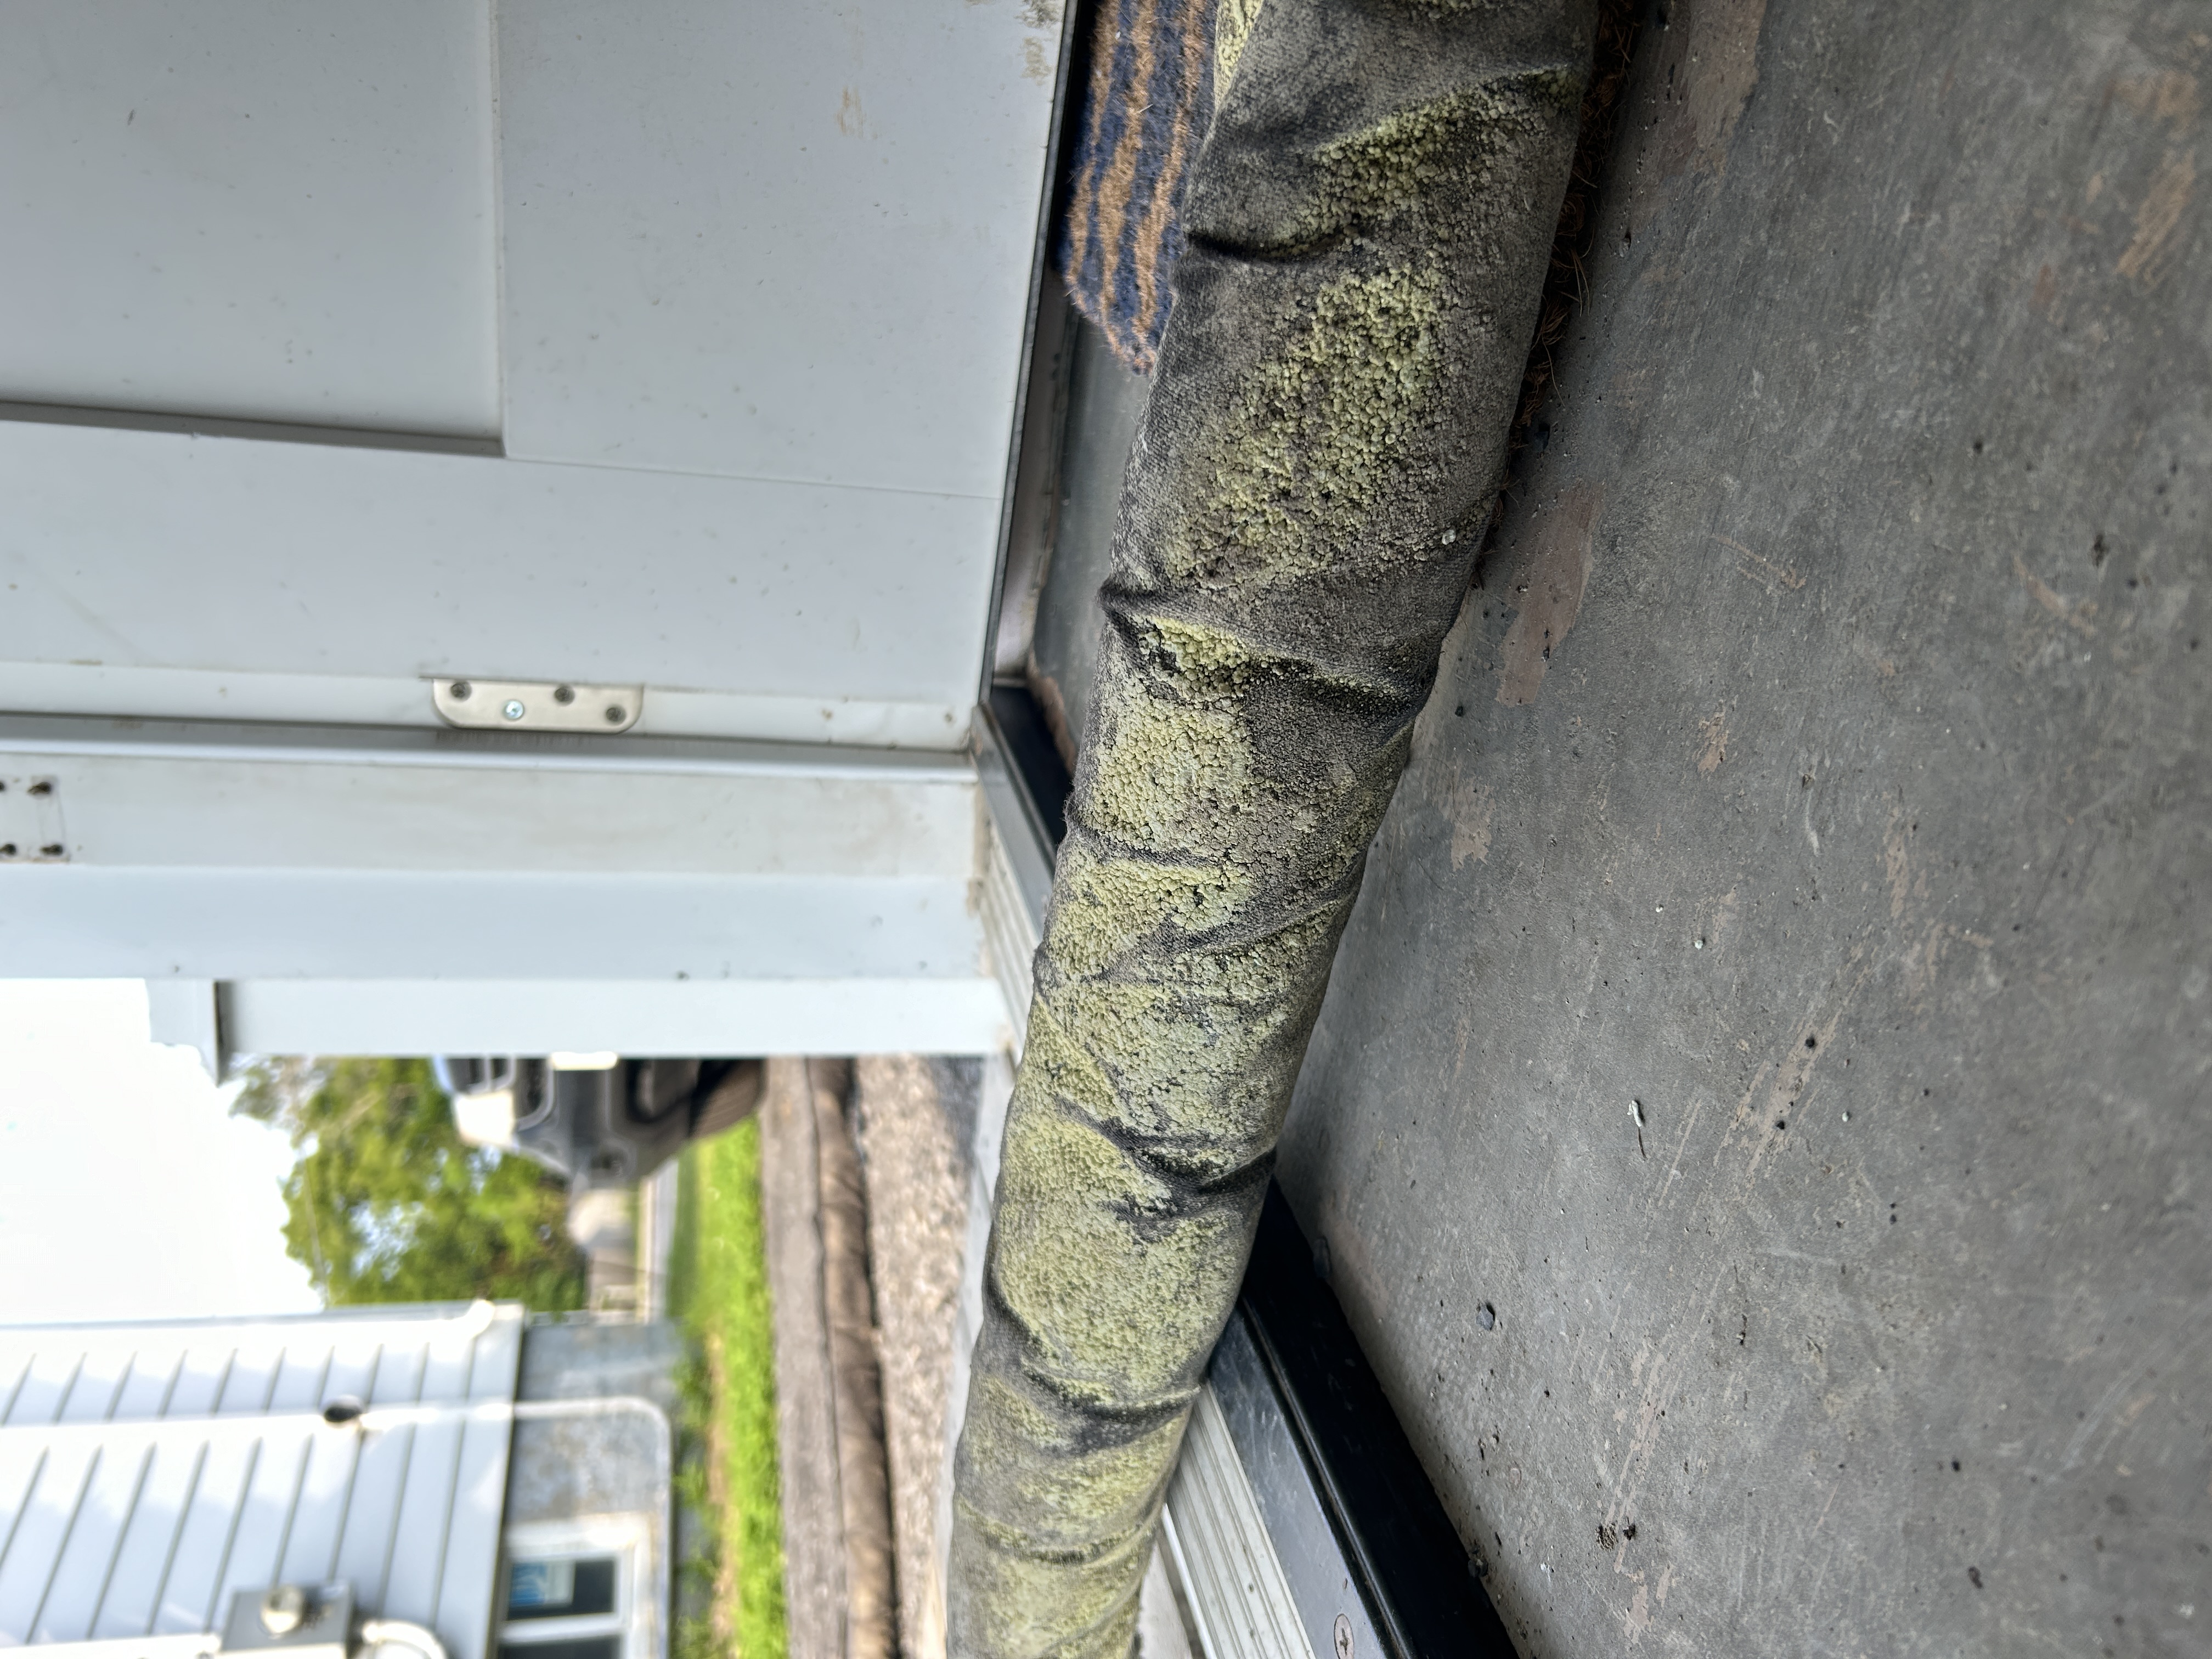
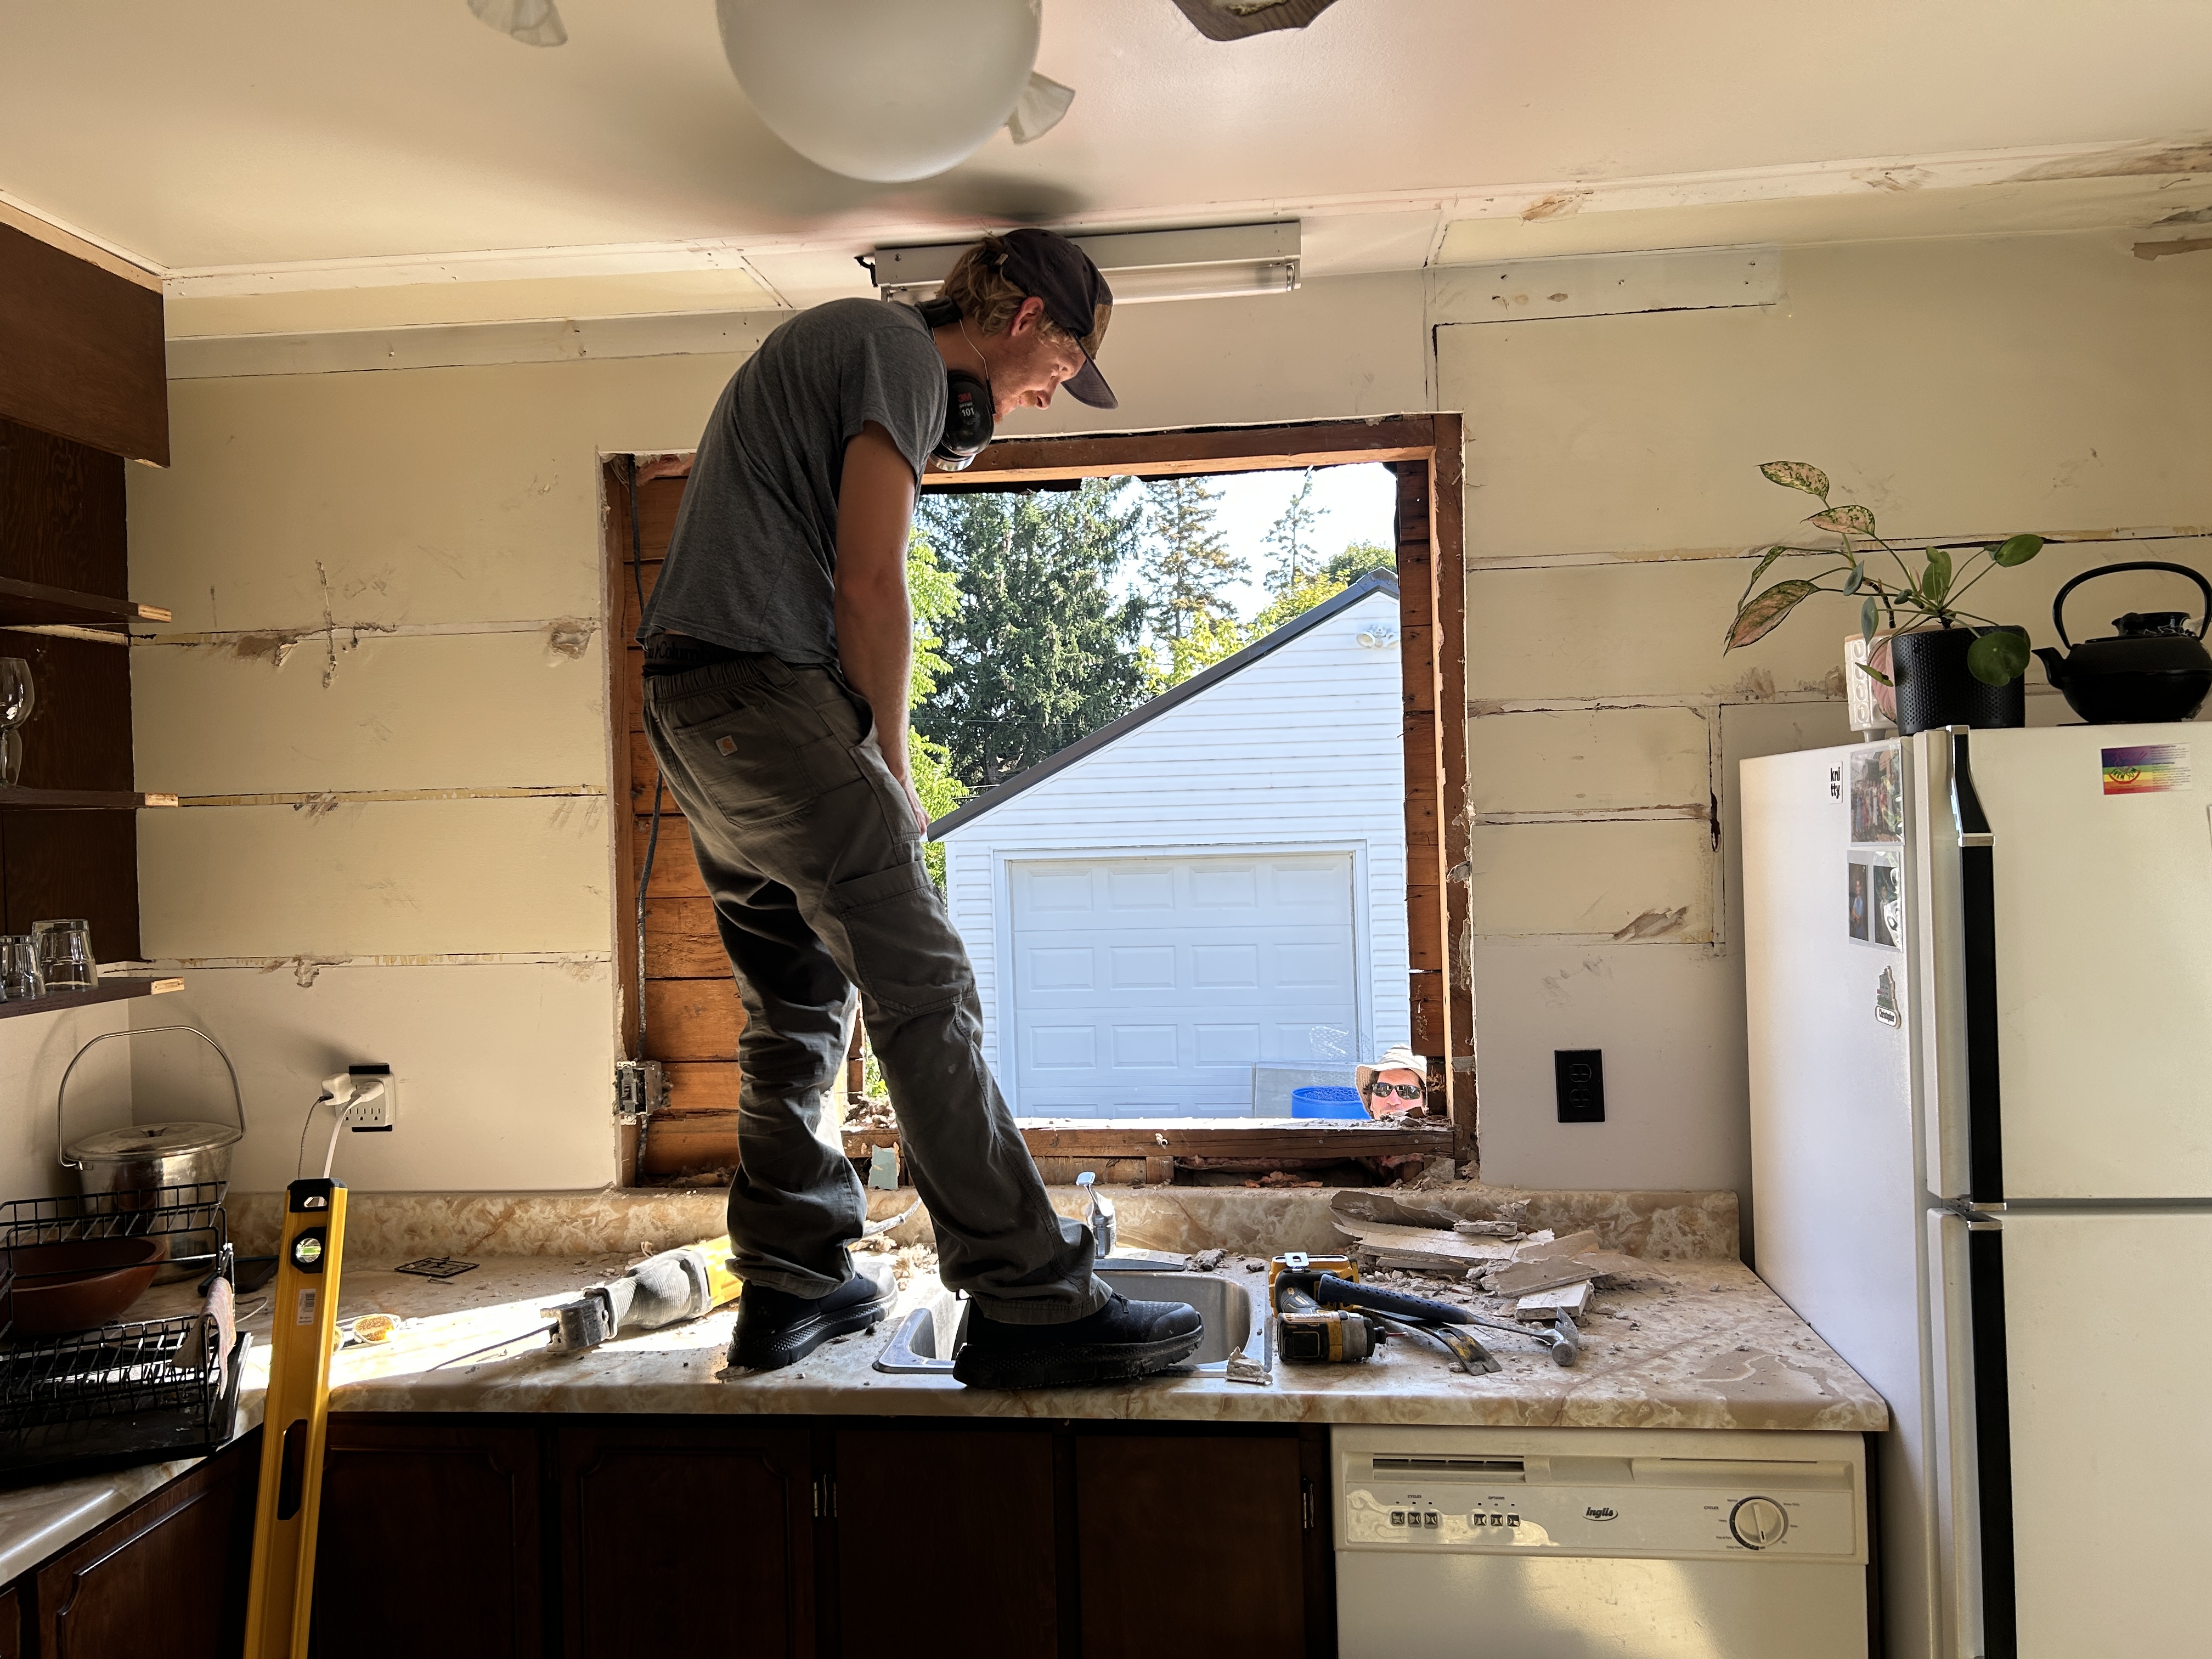
We planned to place ducting for the Energy Recovery Ventilator in the attic and run it down the chimney to the basement, so the first step was to clean out the attic. The attic contained about 5” of old vermiculite insulation, which testing showed contained some asbestos, so we hired an environmental services company to professionally clean out the space.
We thought we might have to upgrade our electrical service during this stage, but we managed to avoid that by using a 15-amp heat pump water heater instead of a 30-amp model.
Stage 2: Steps
- Completely cleaning out the attic
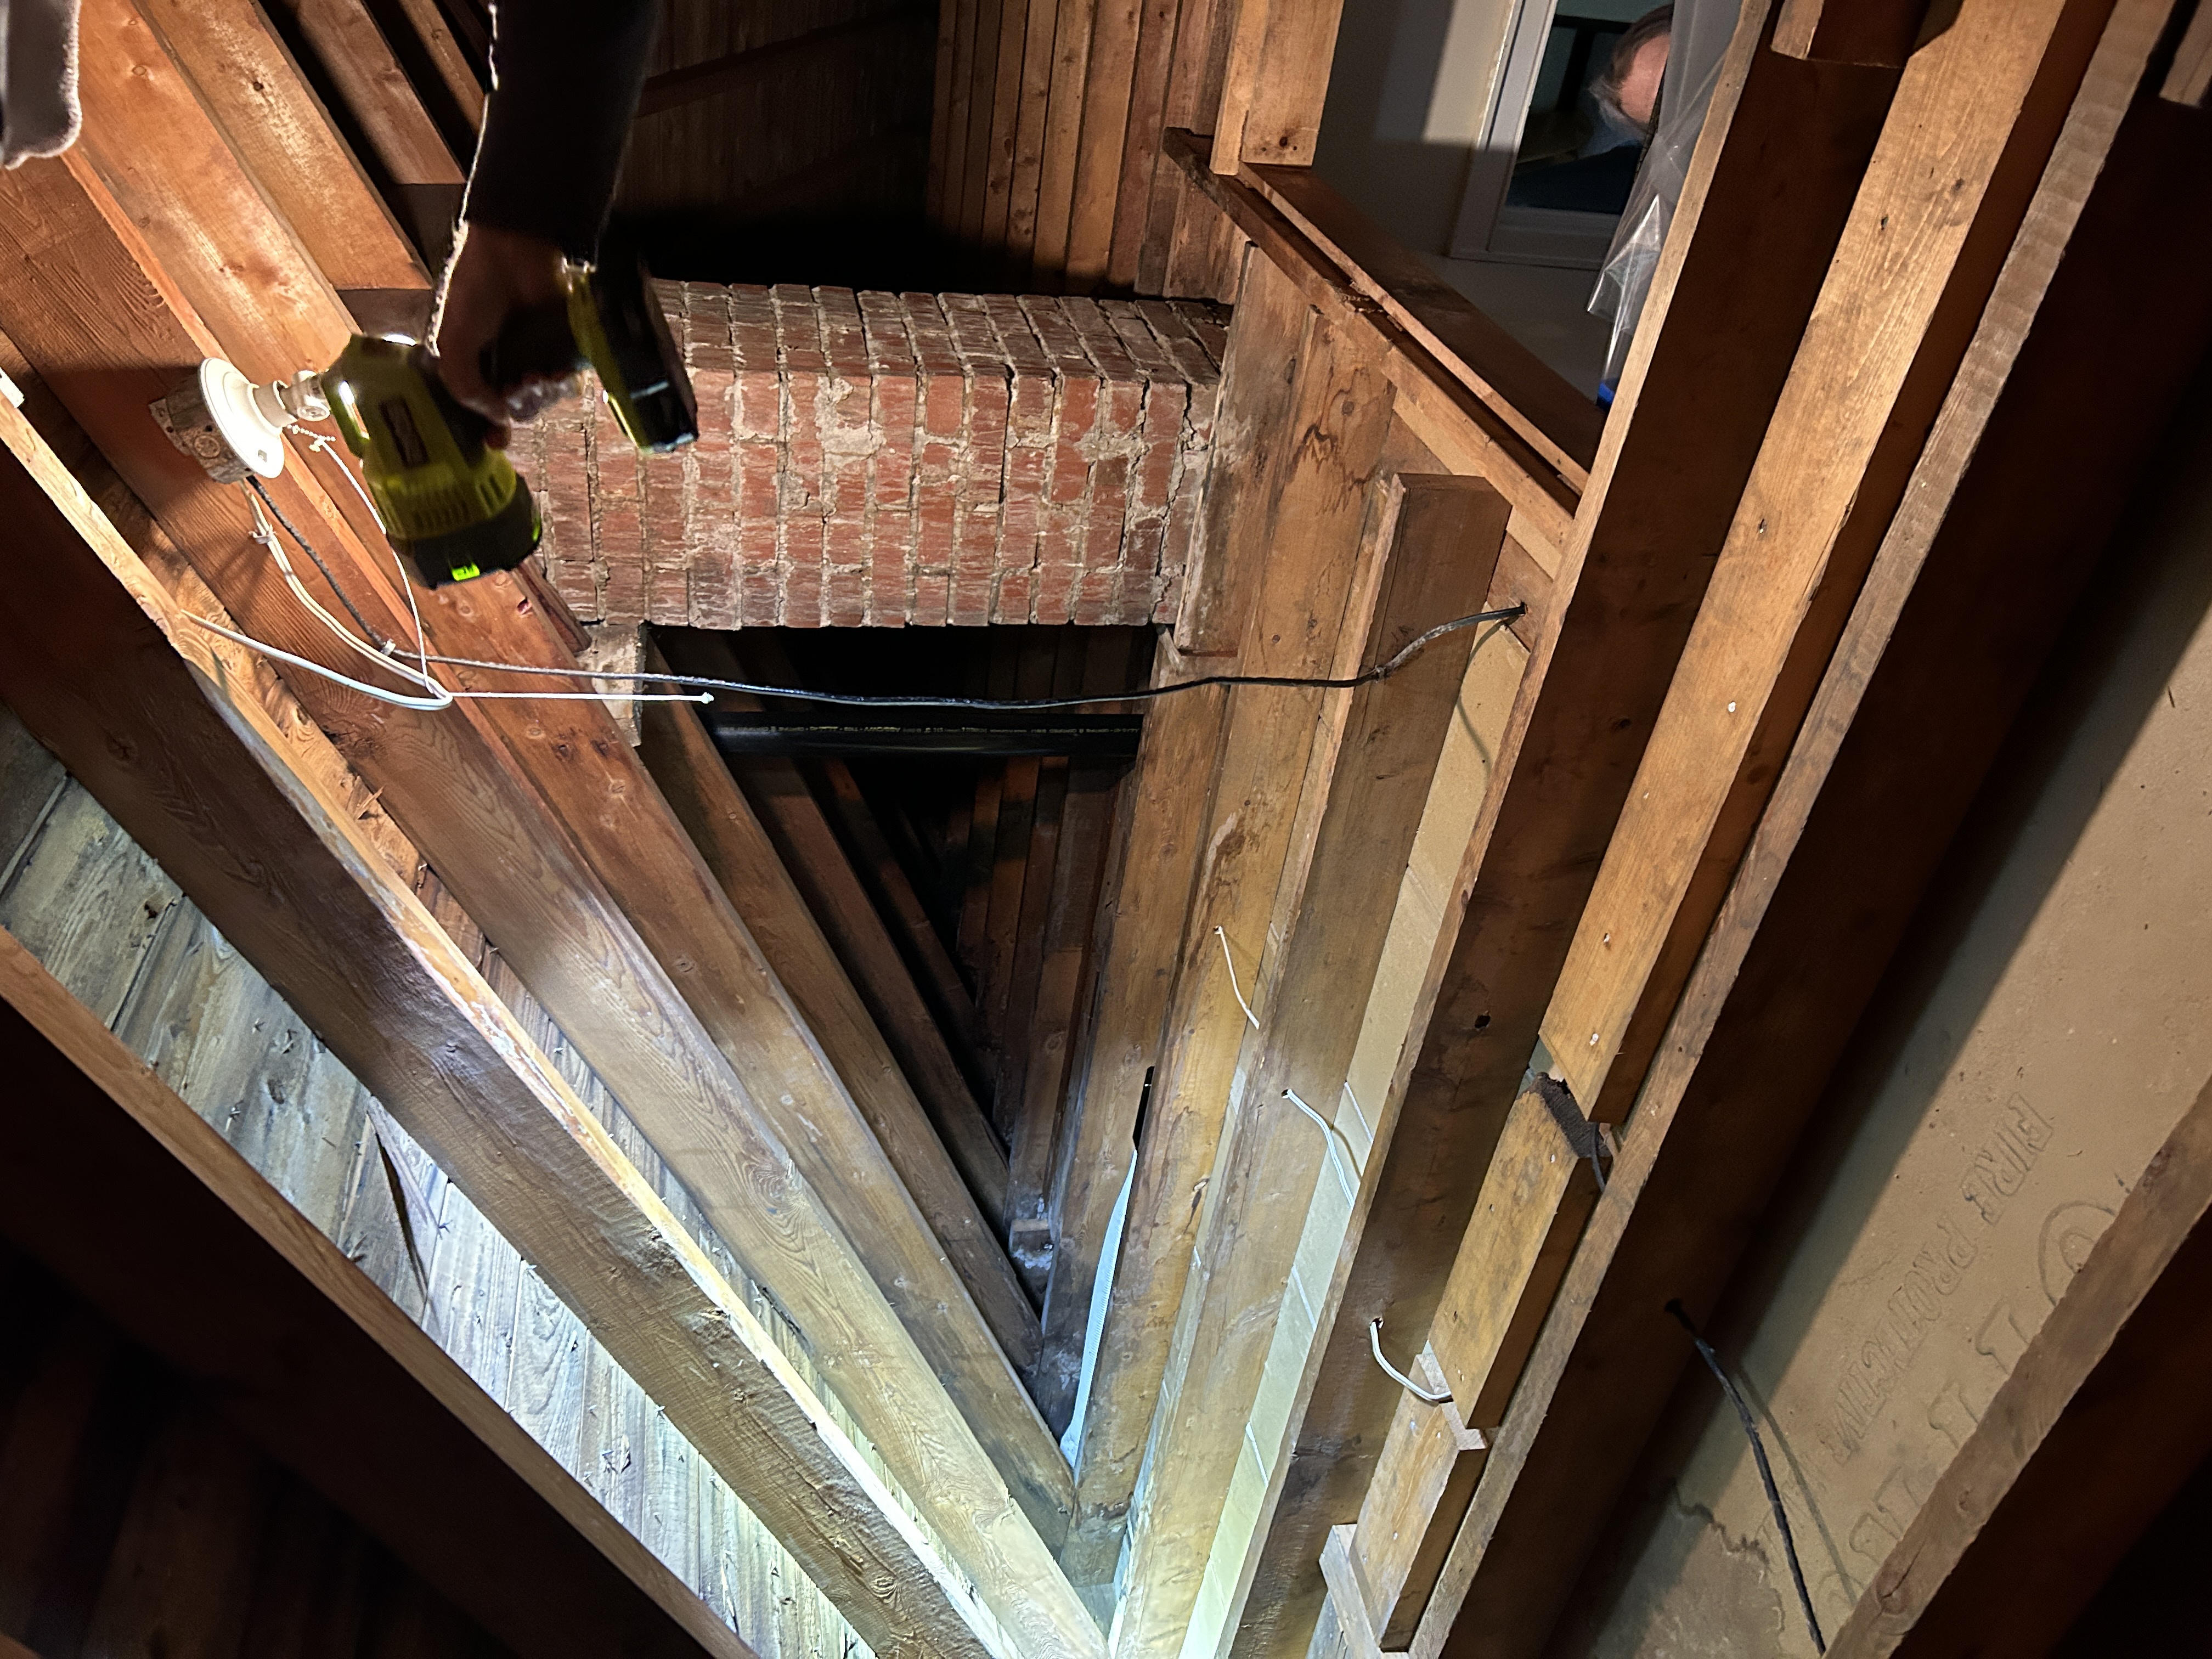
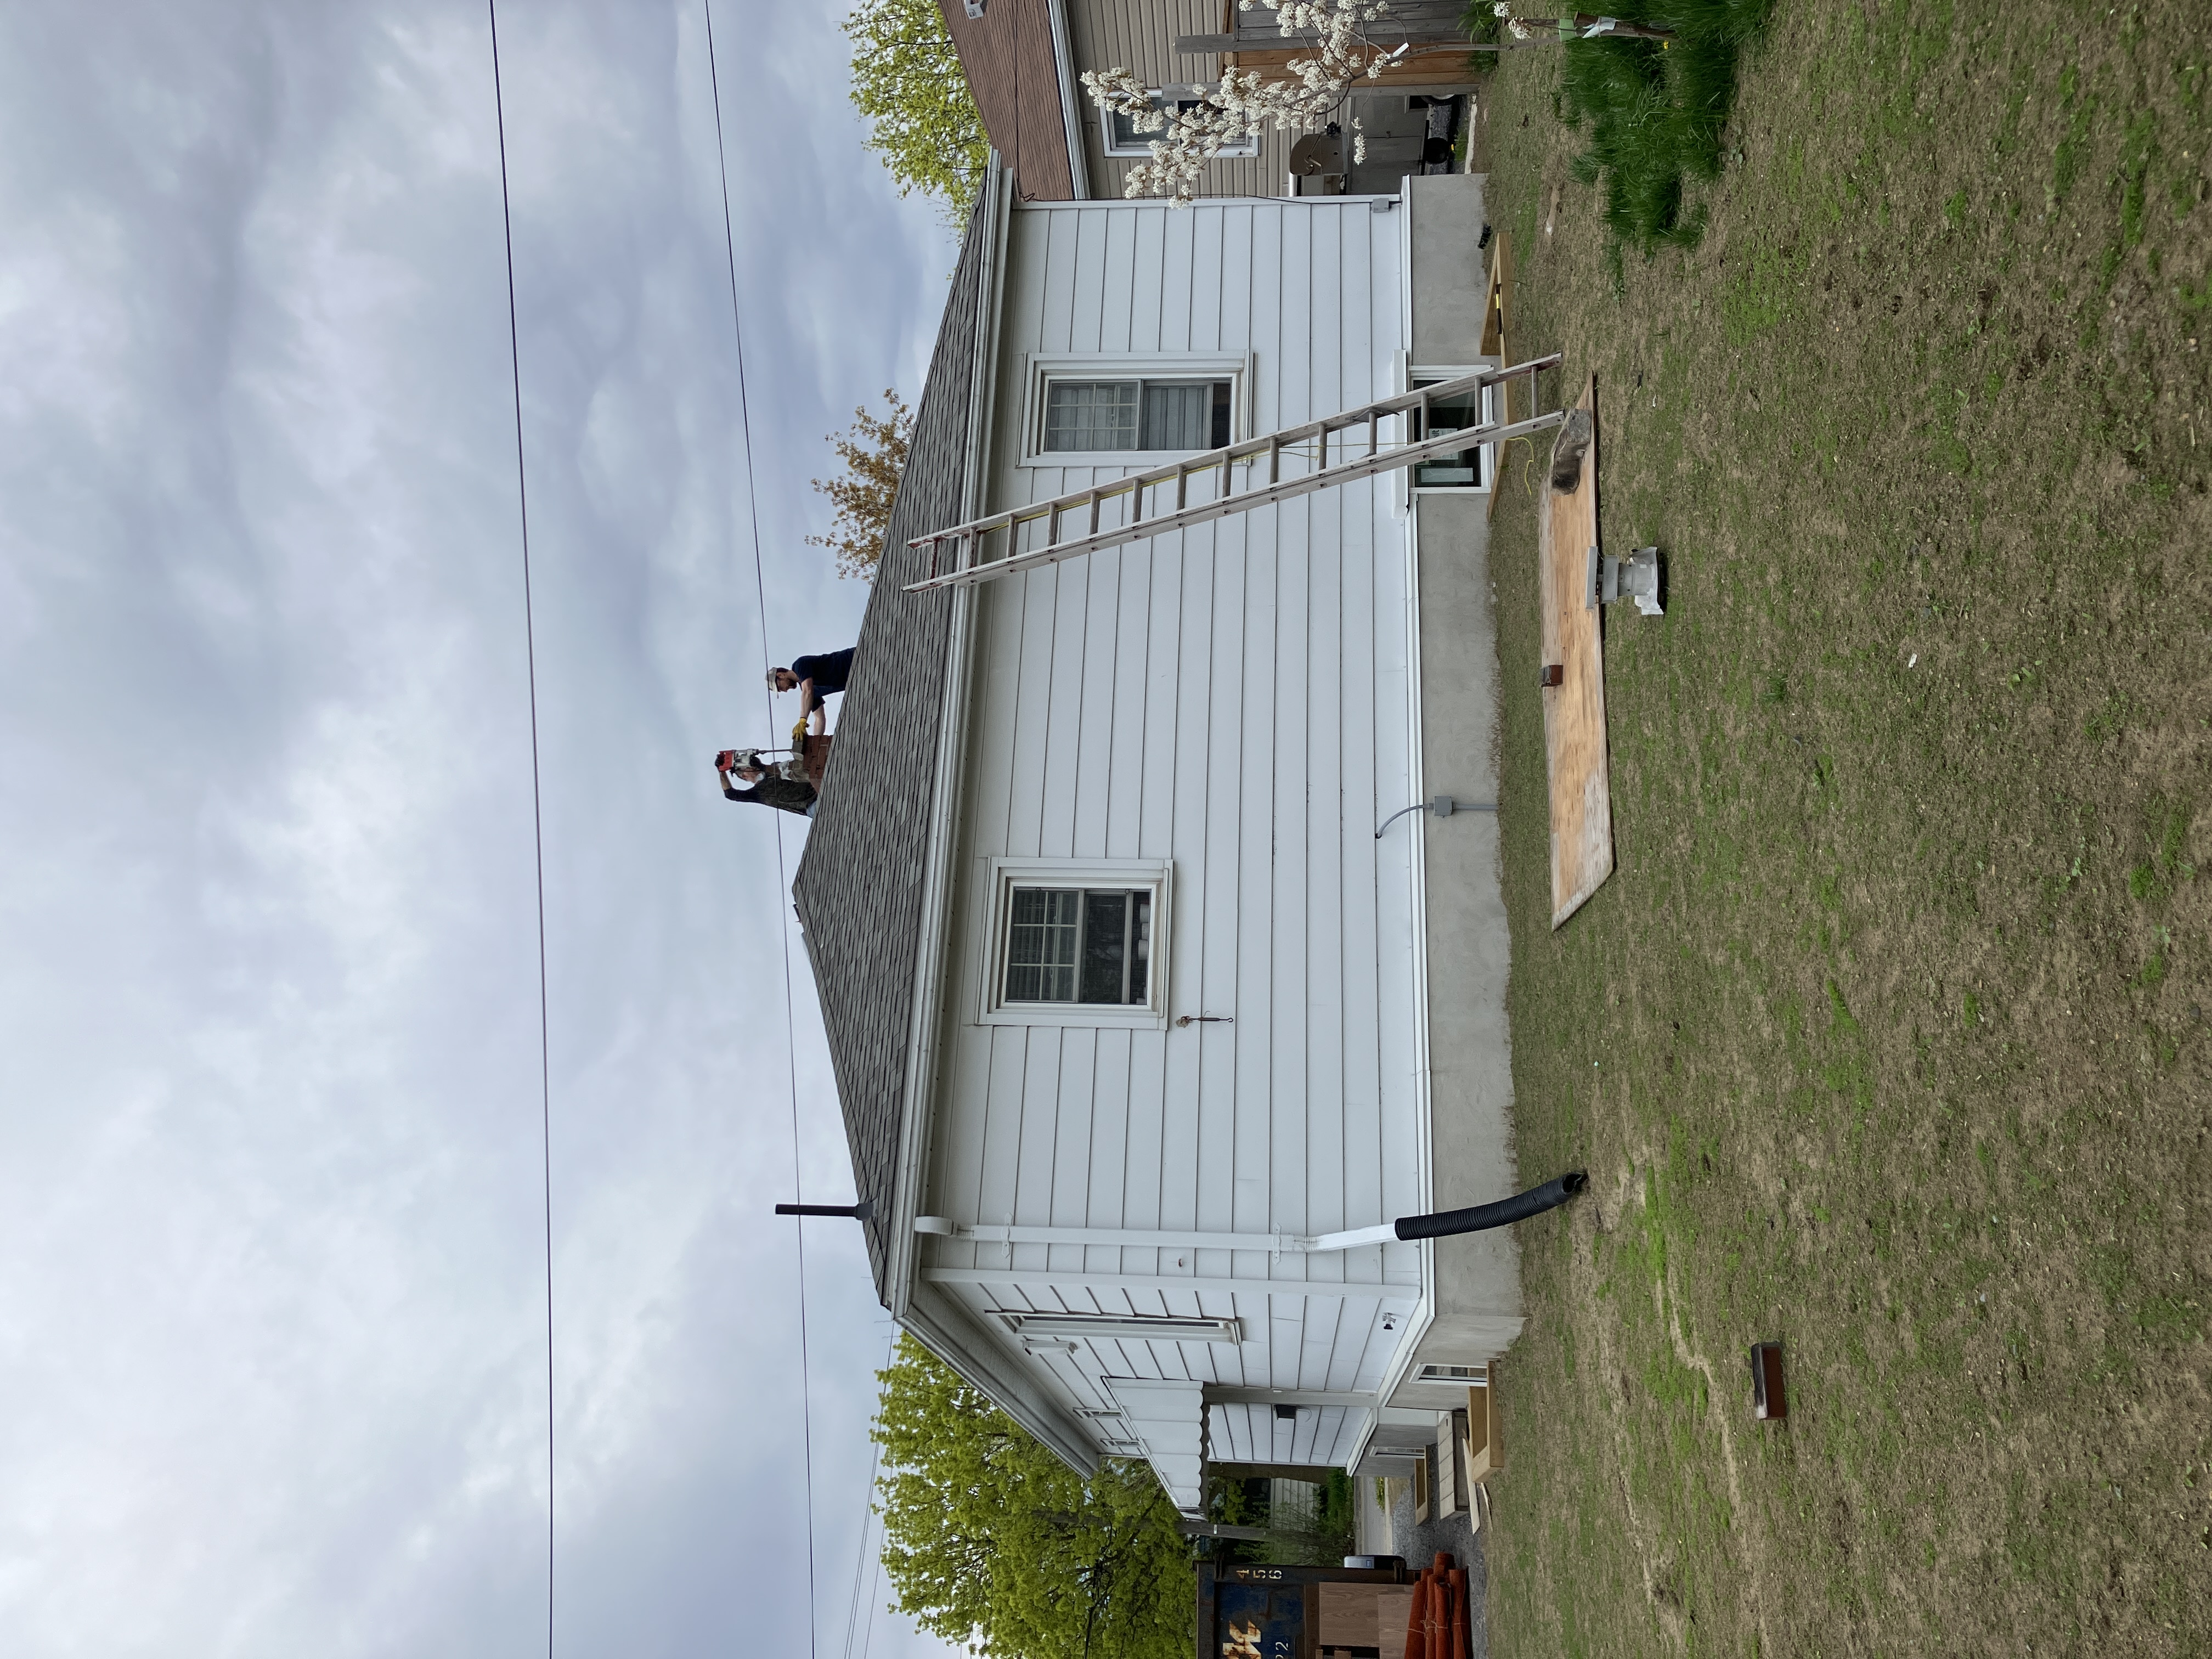
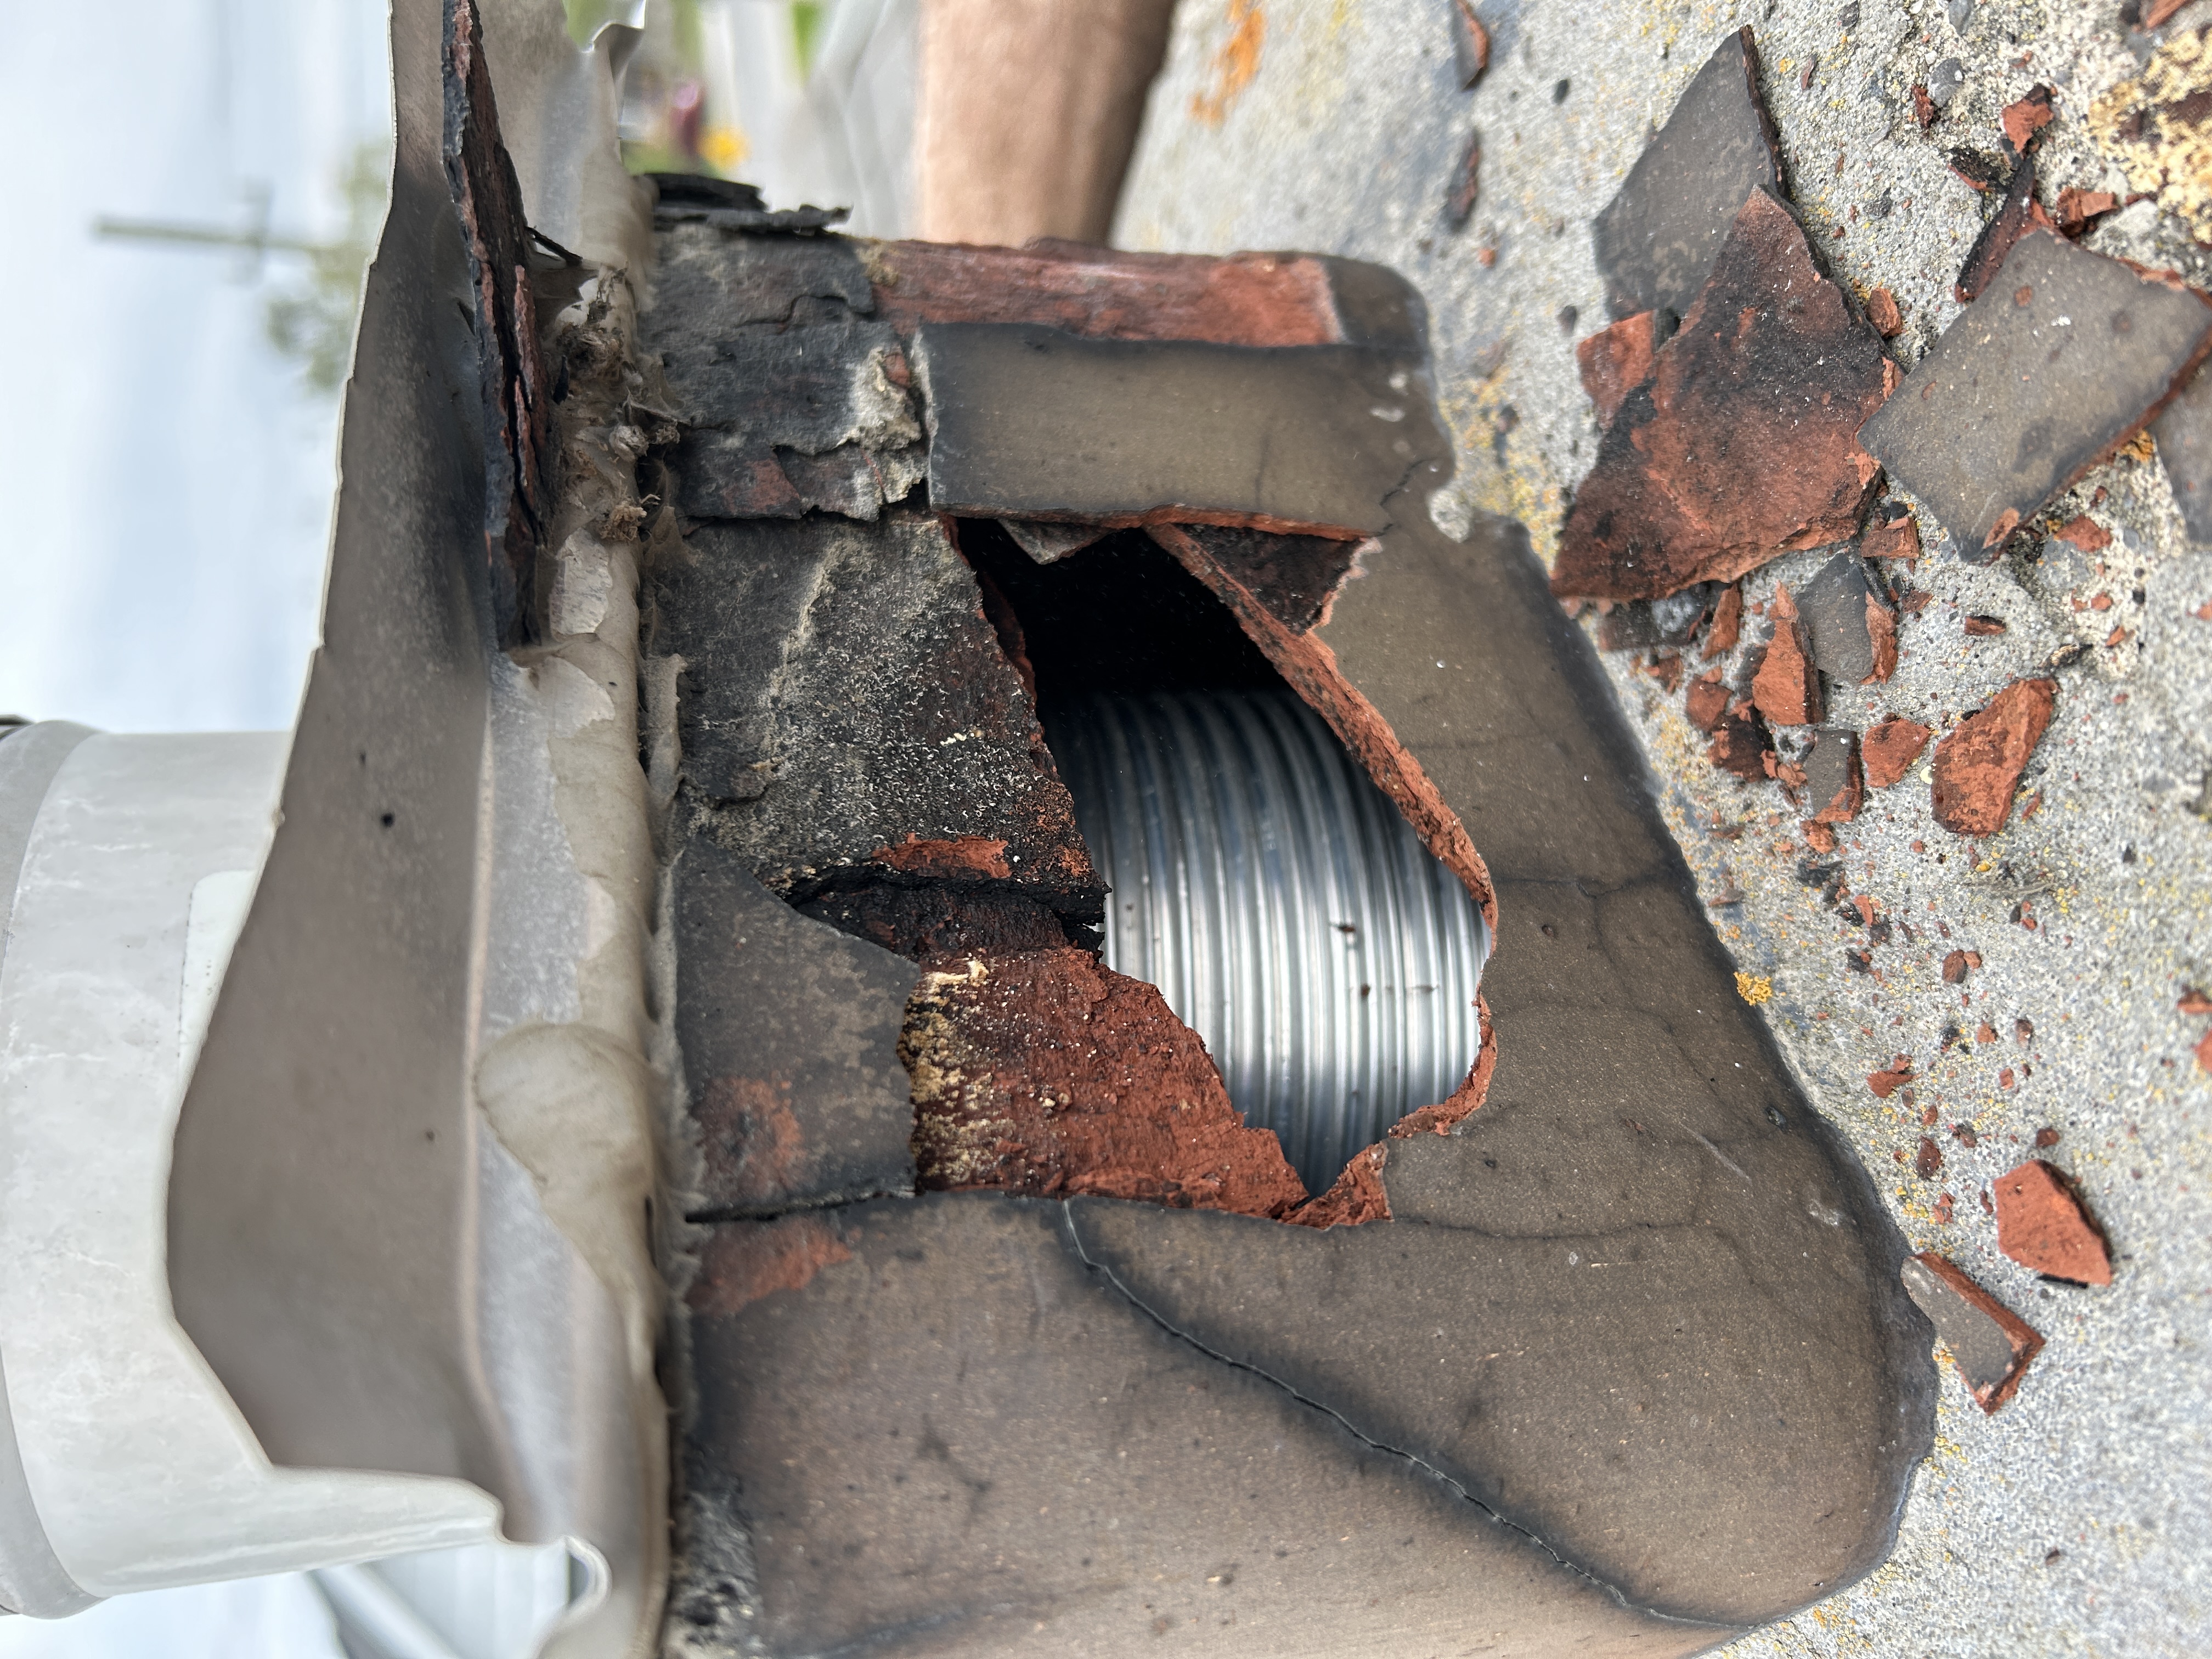
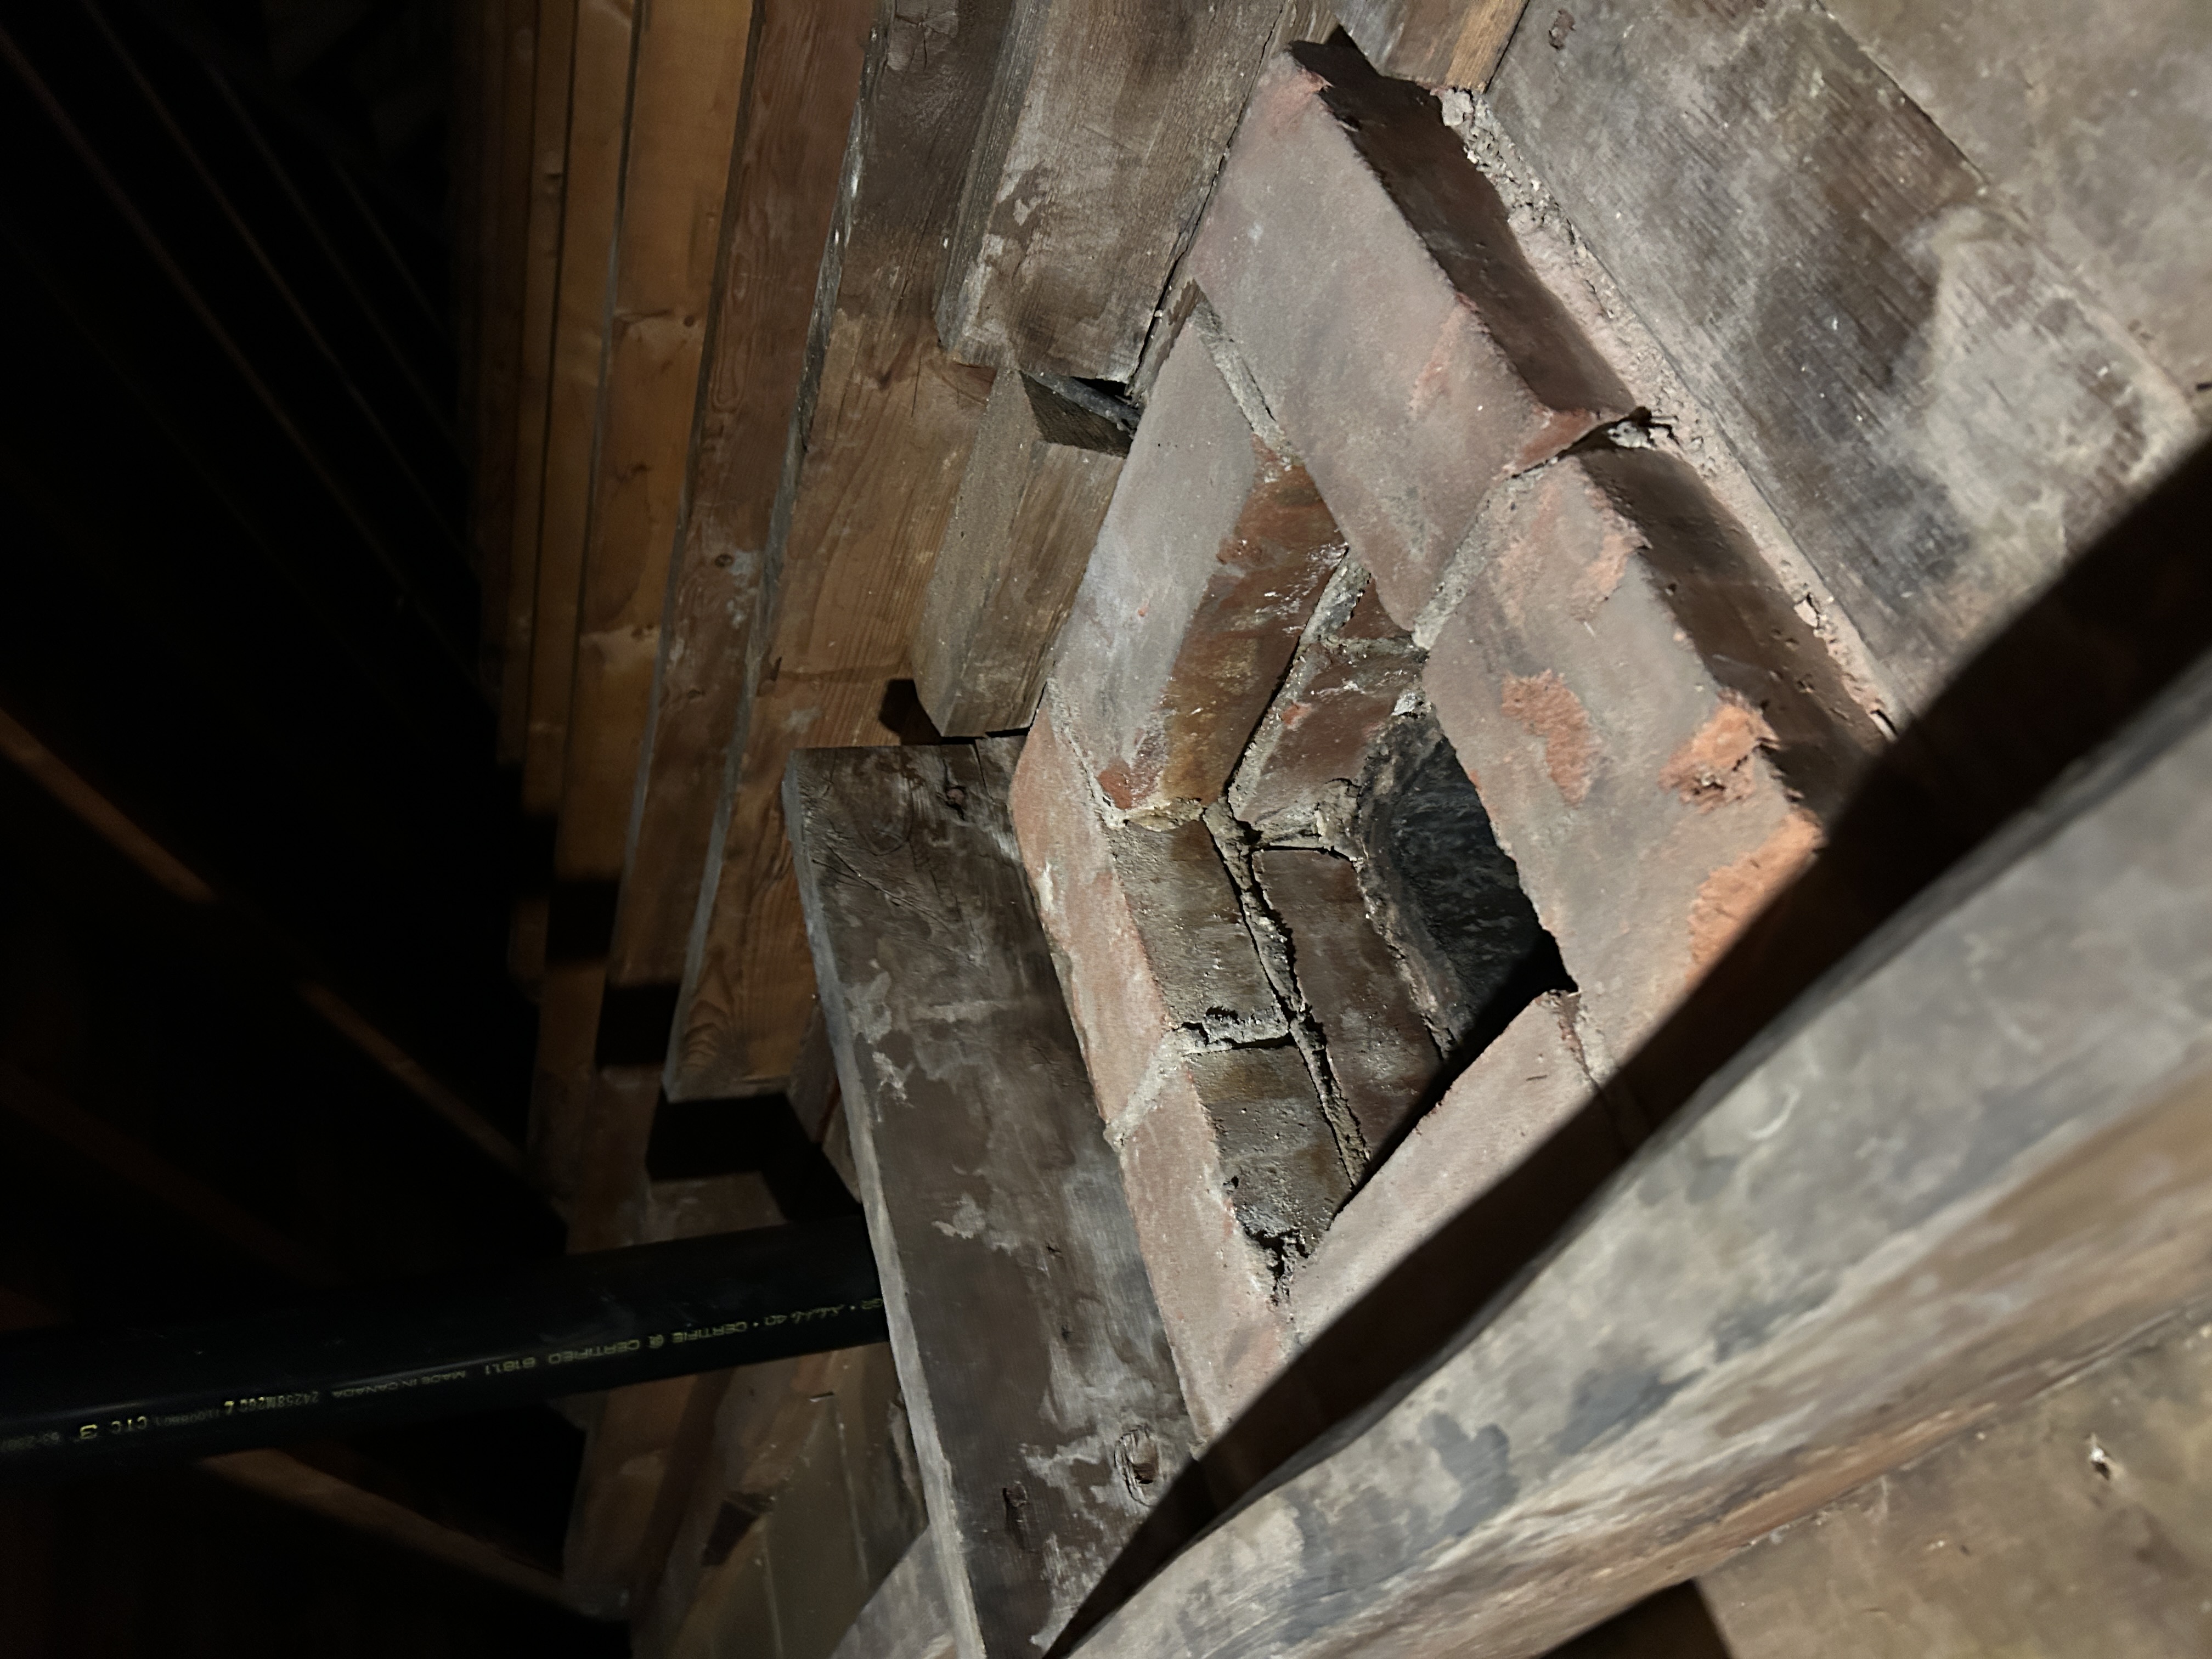
- Demolishing chimney down to attic floor level
- Installing duct for future kitchen range hood with exhaust vent where chimney used to exit roof
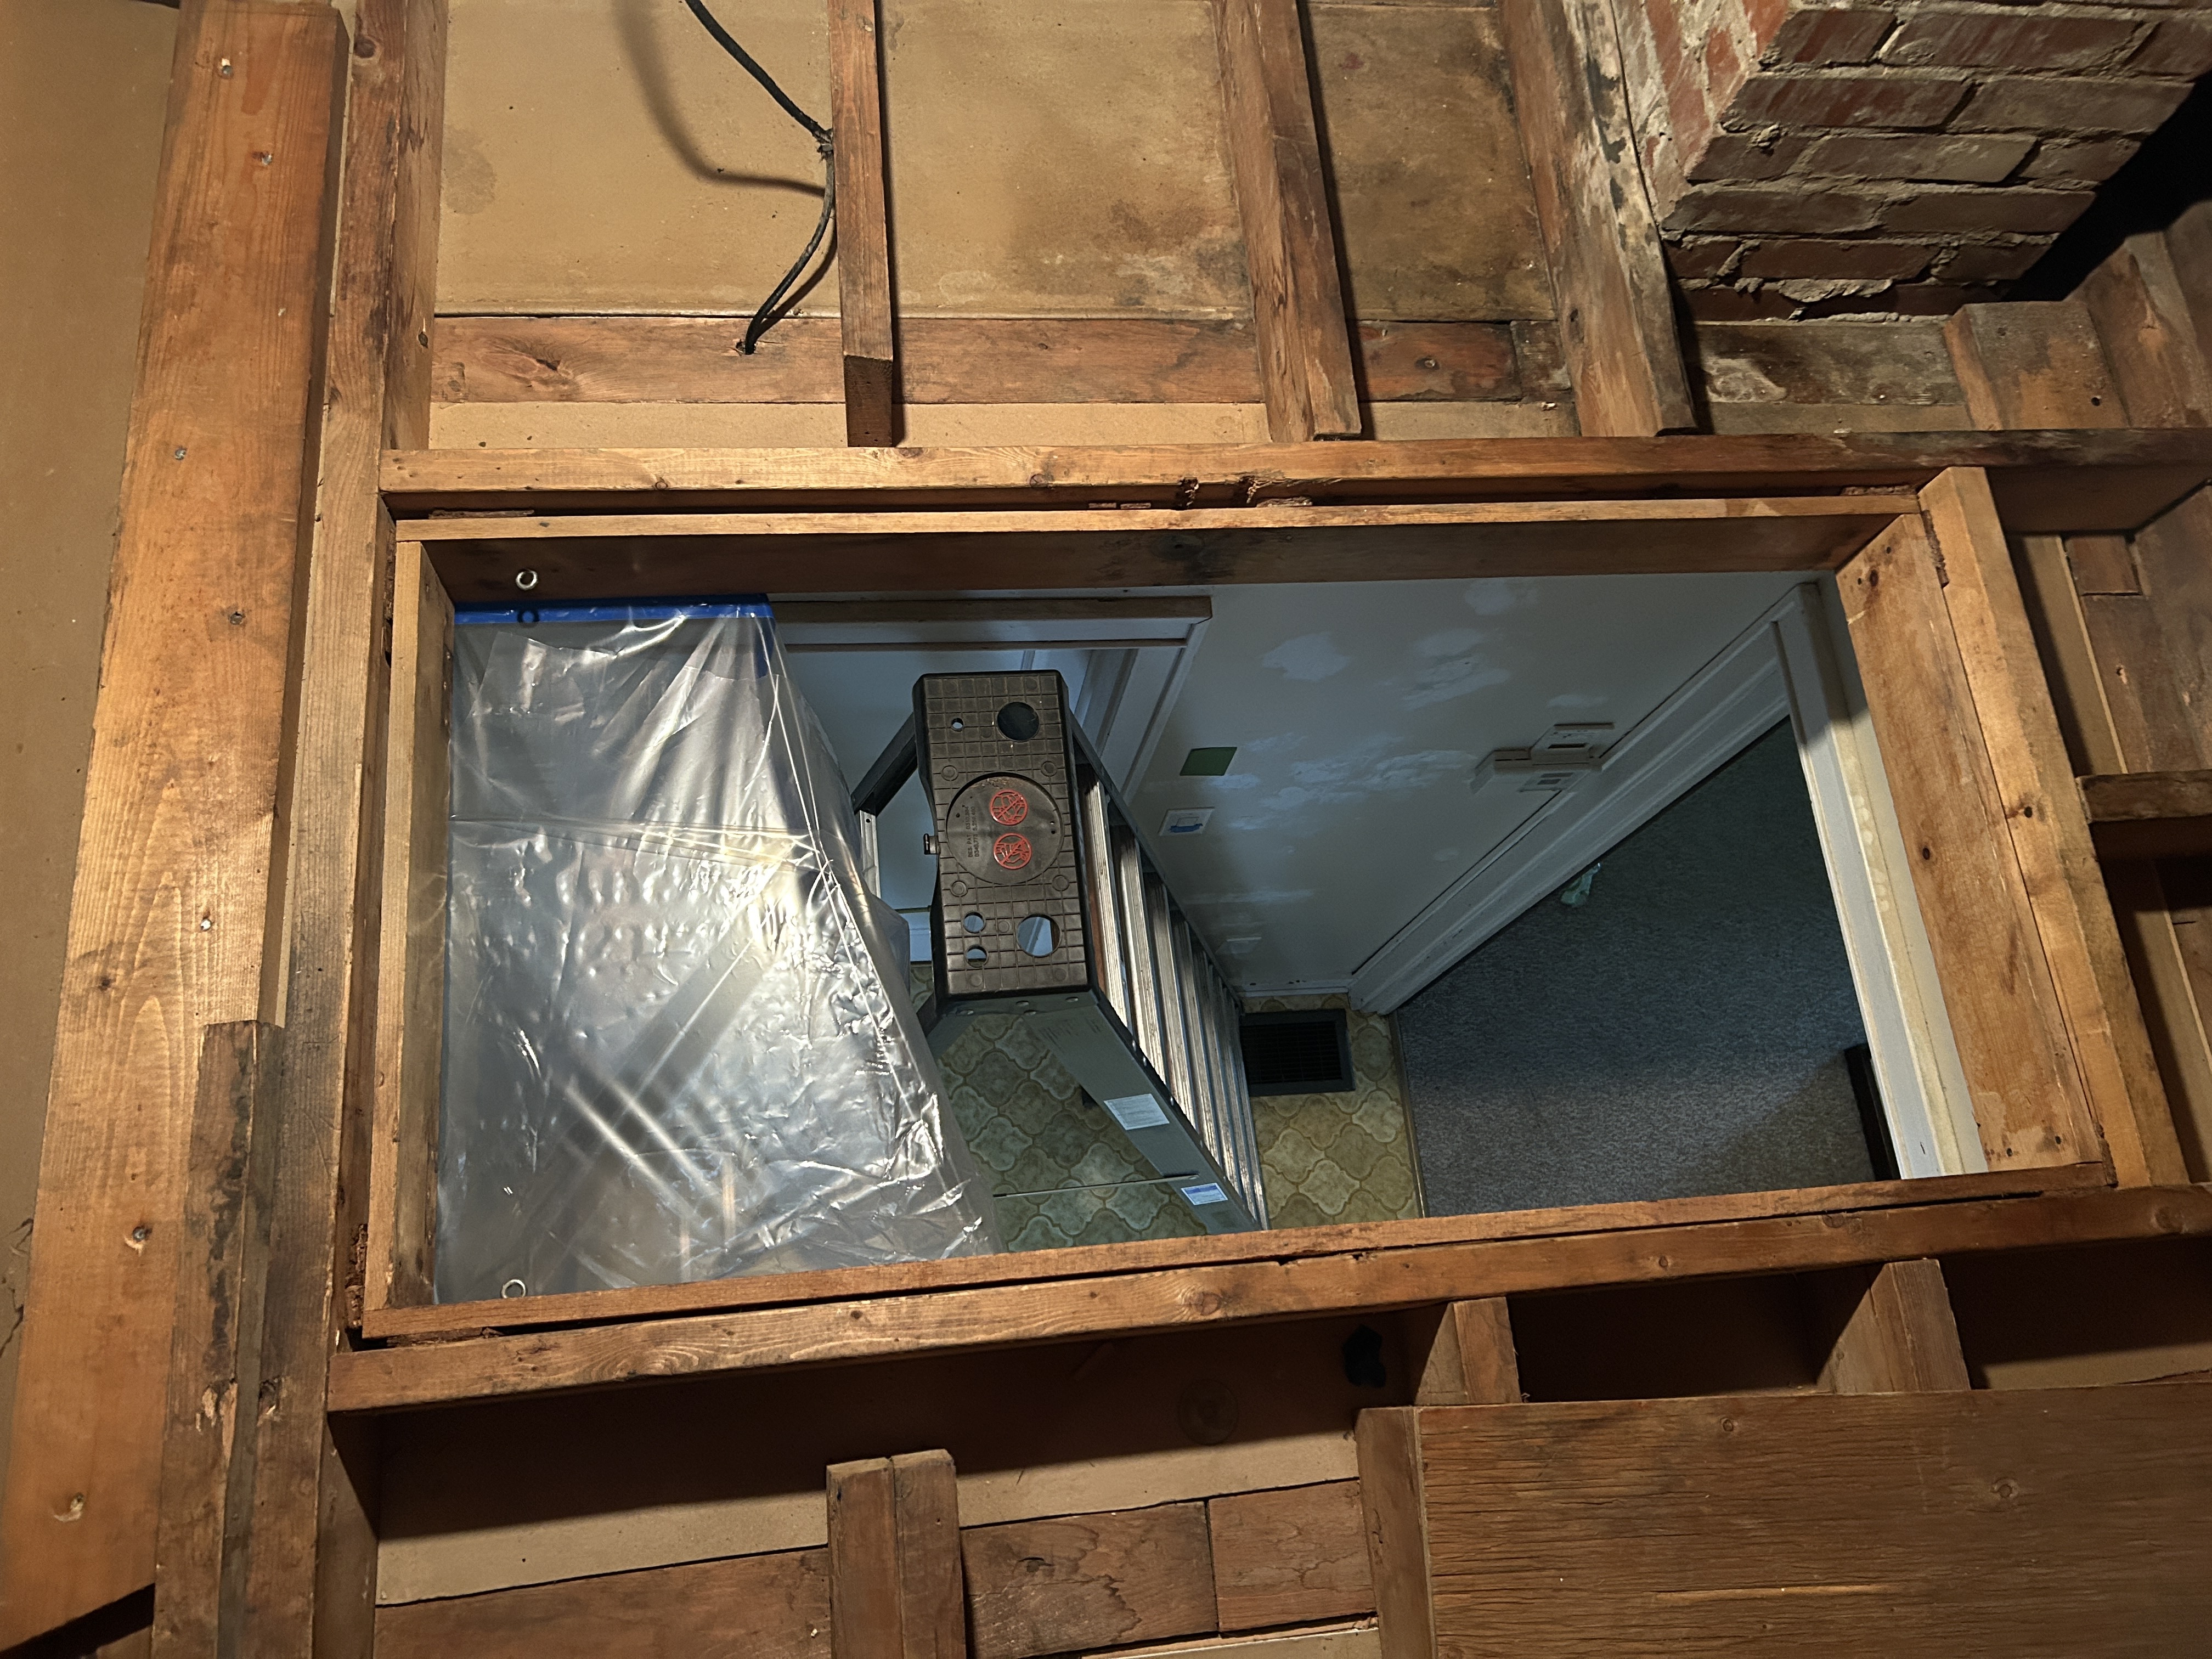
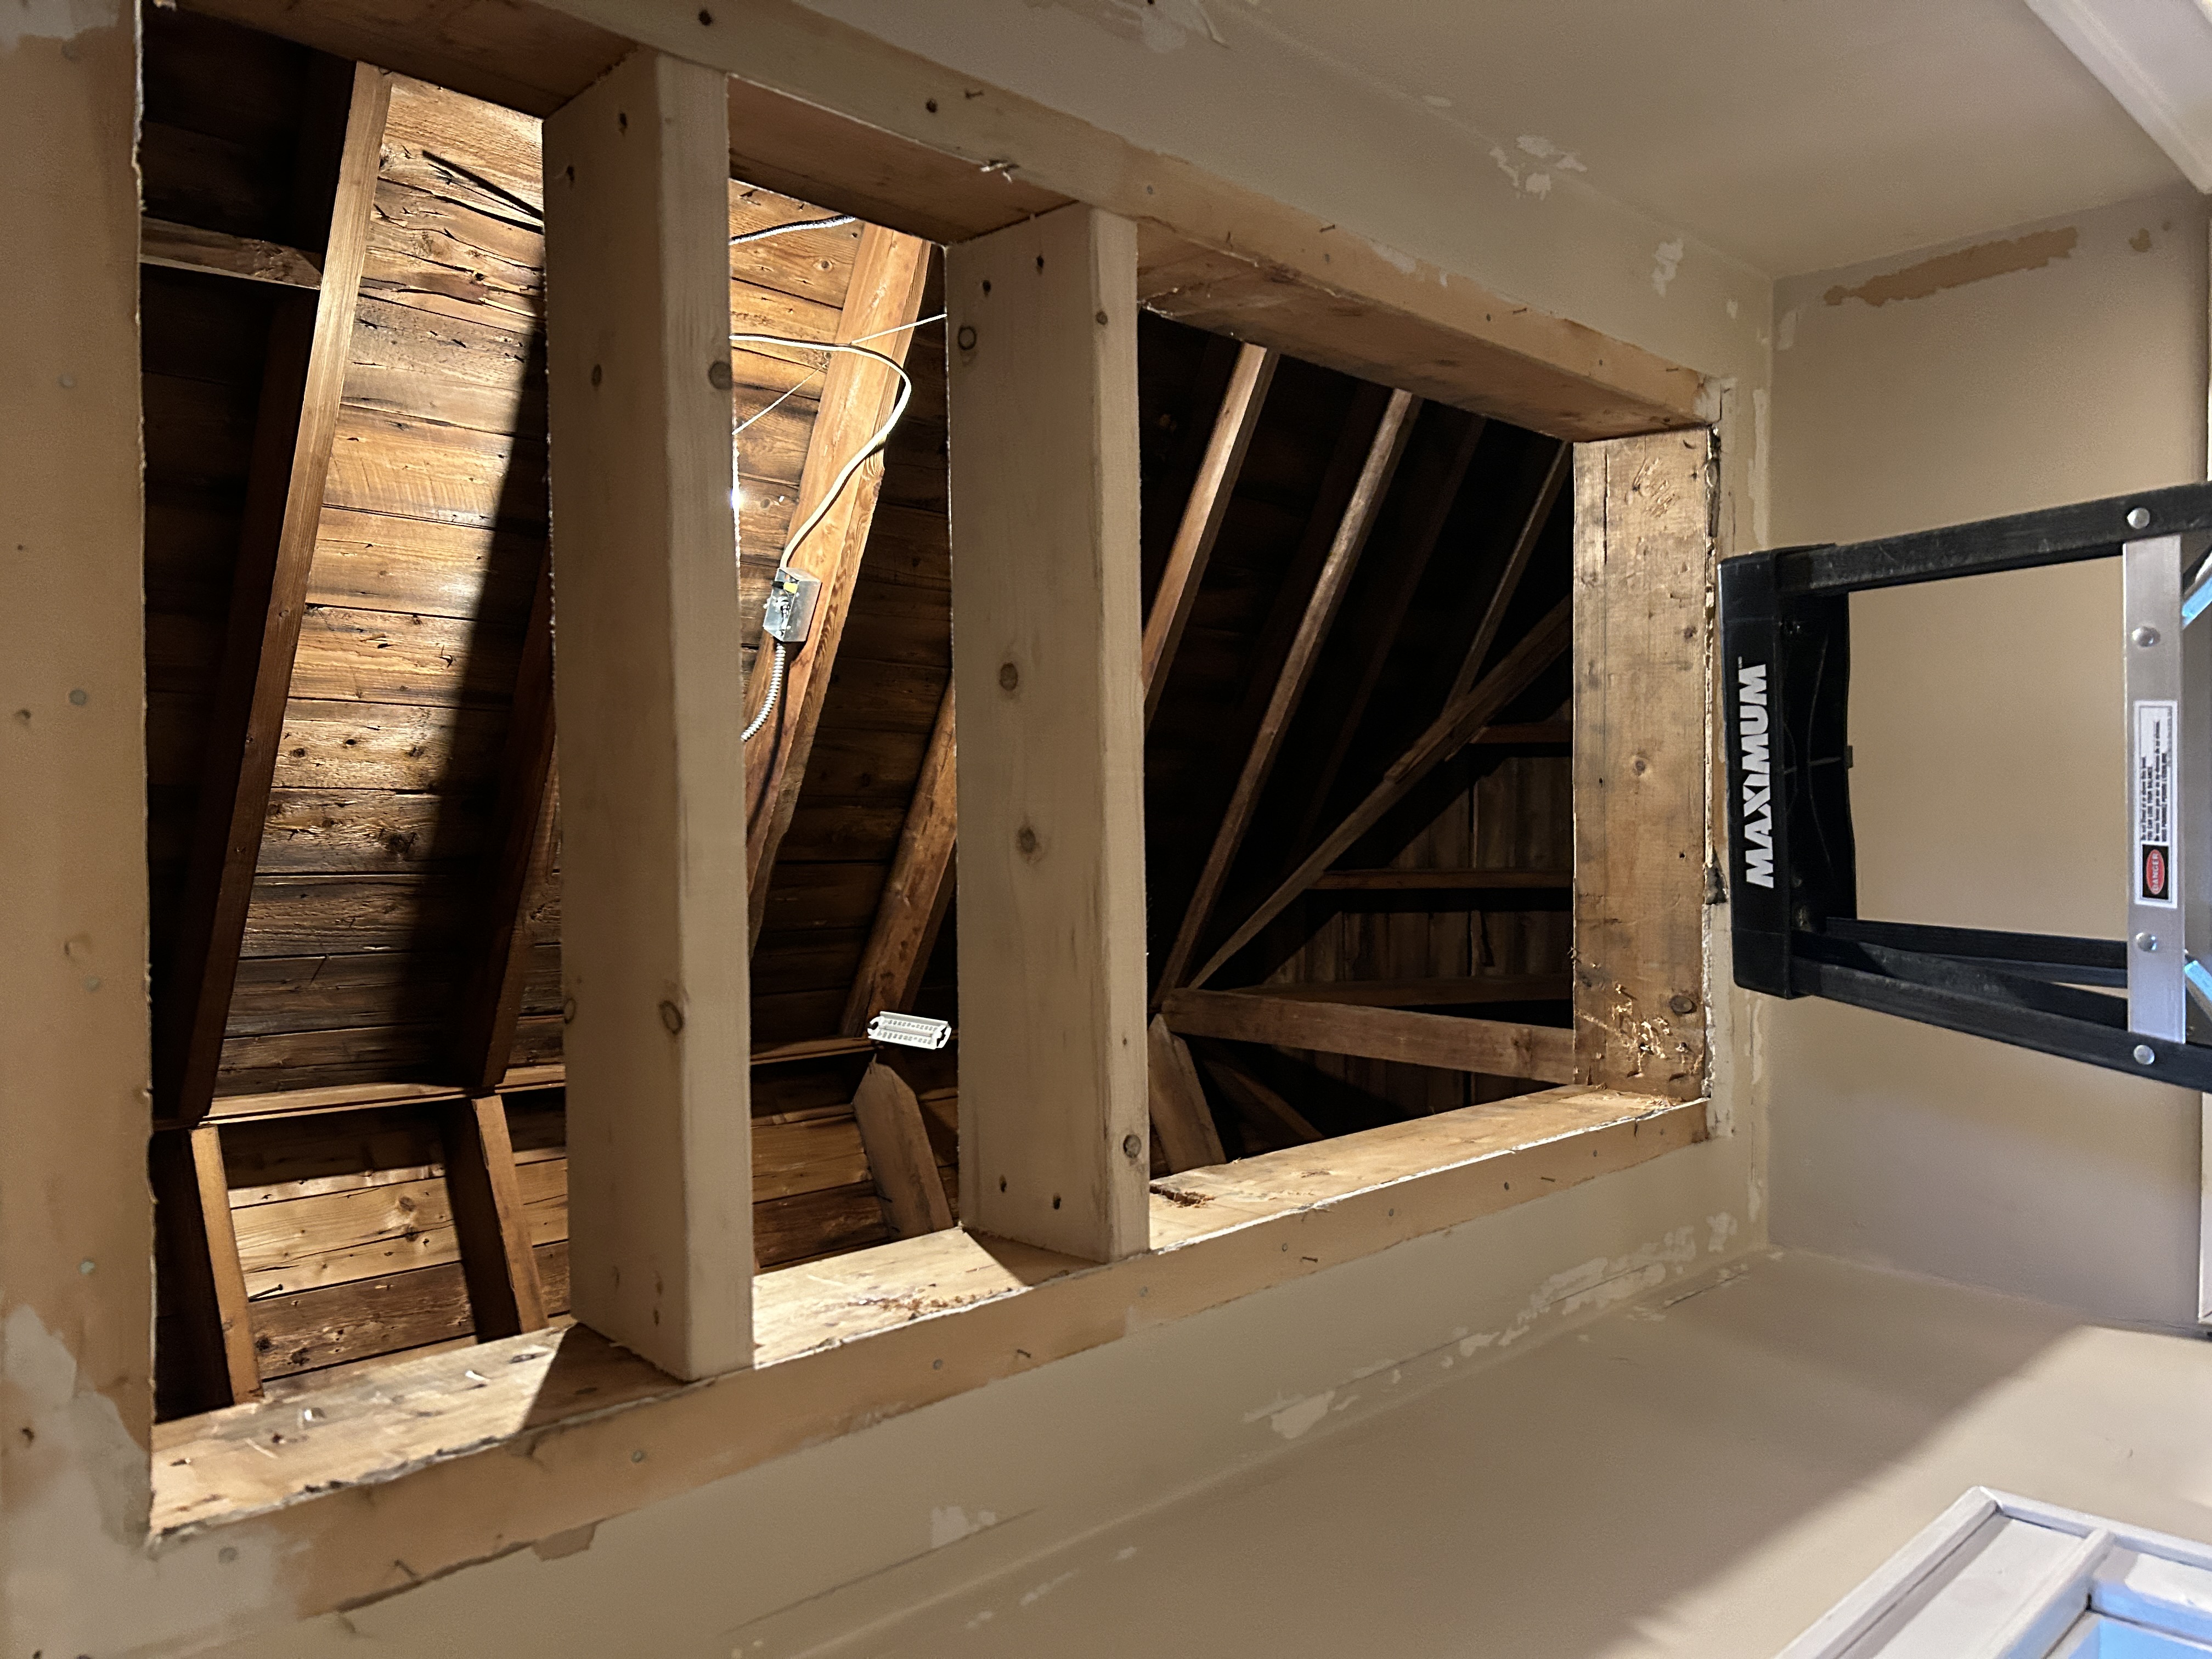
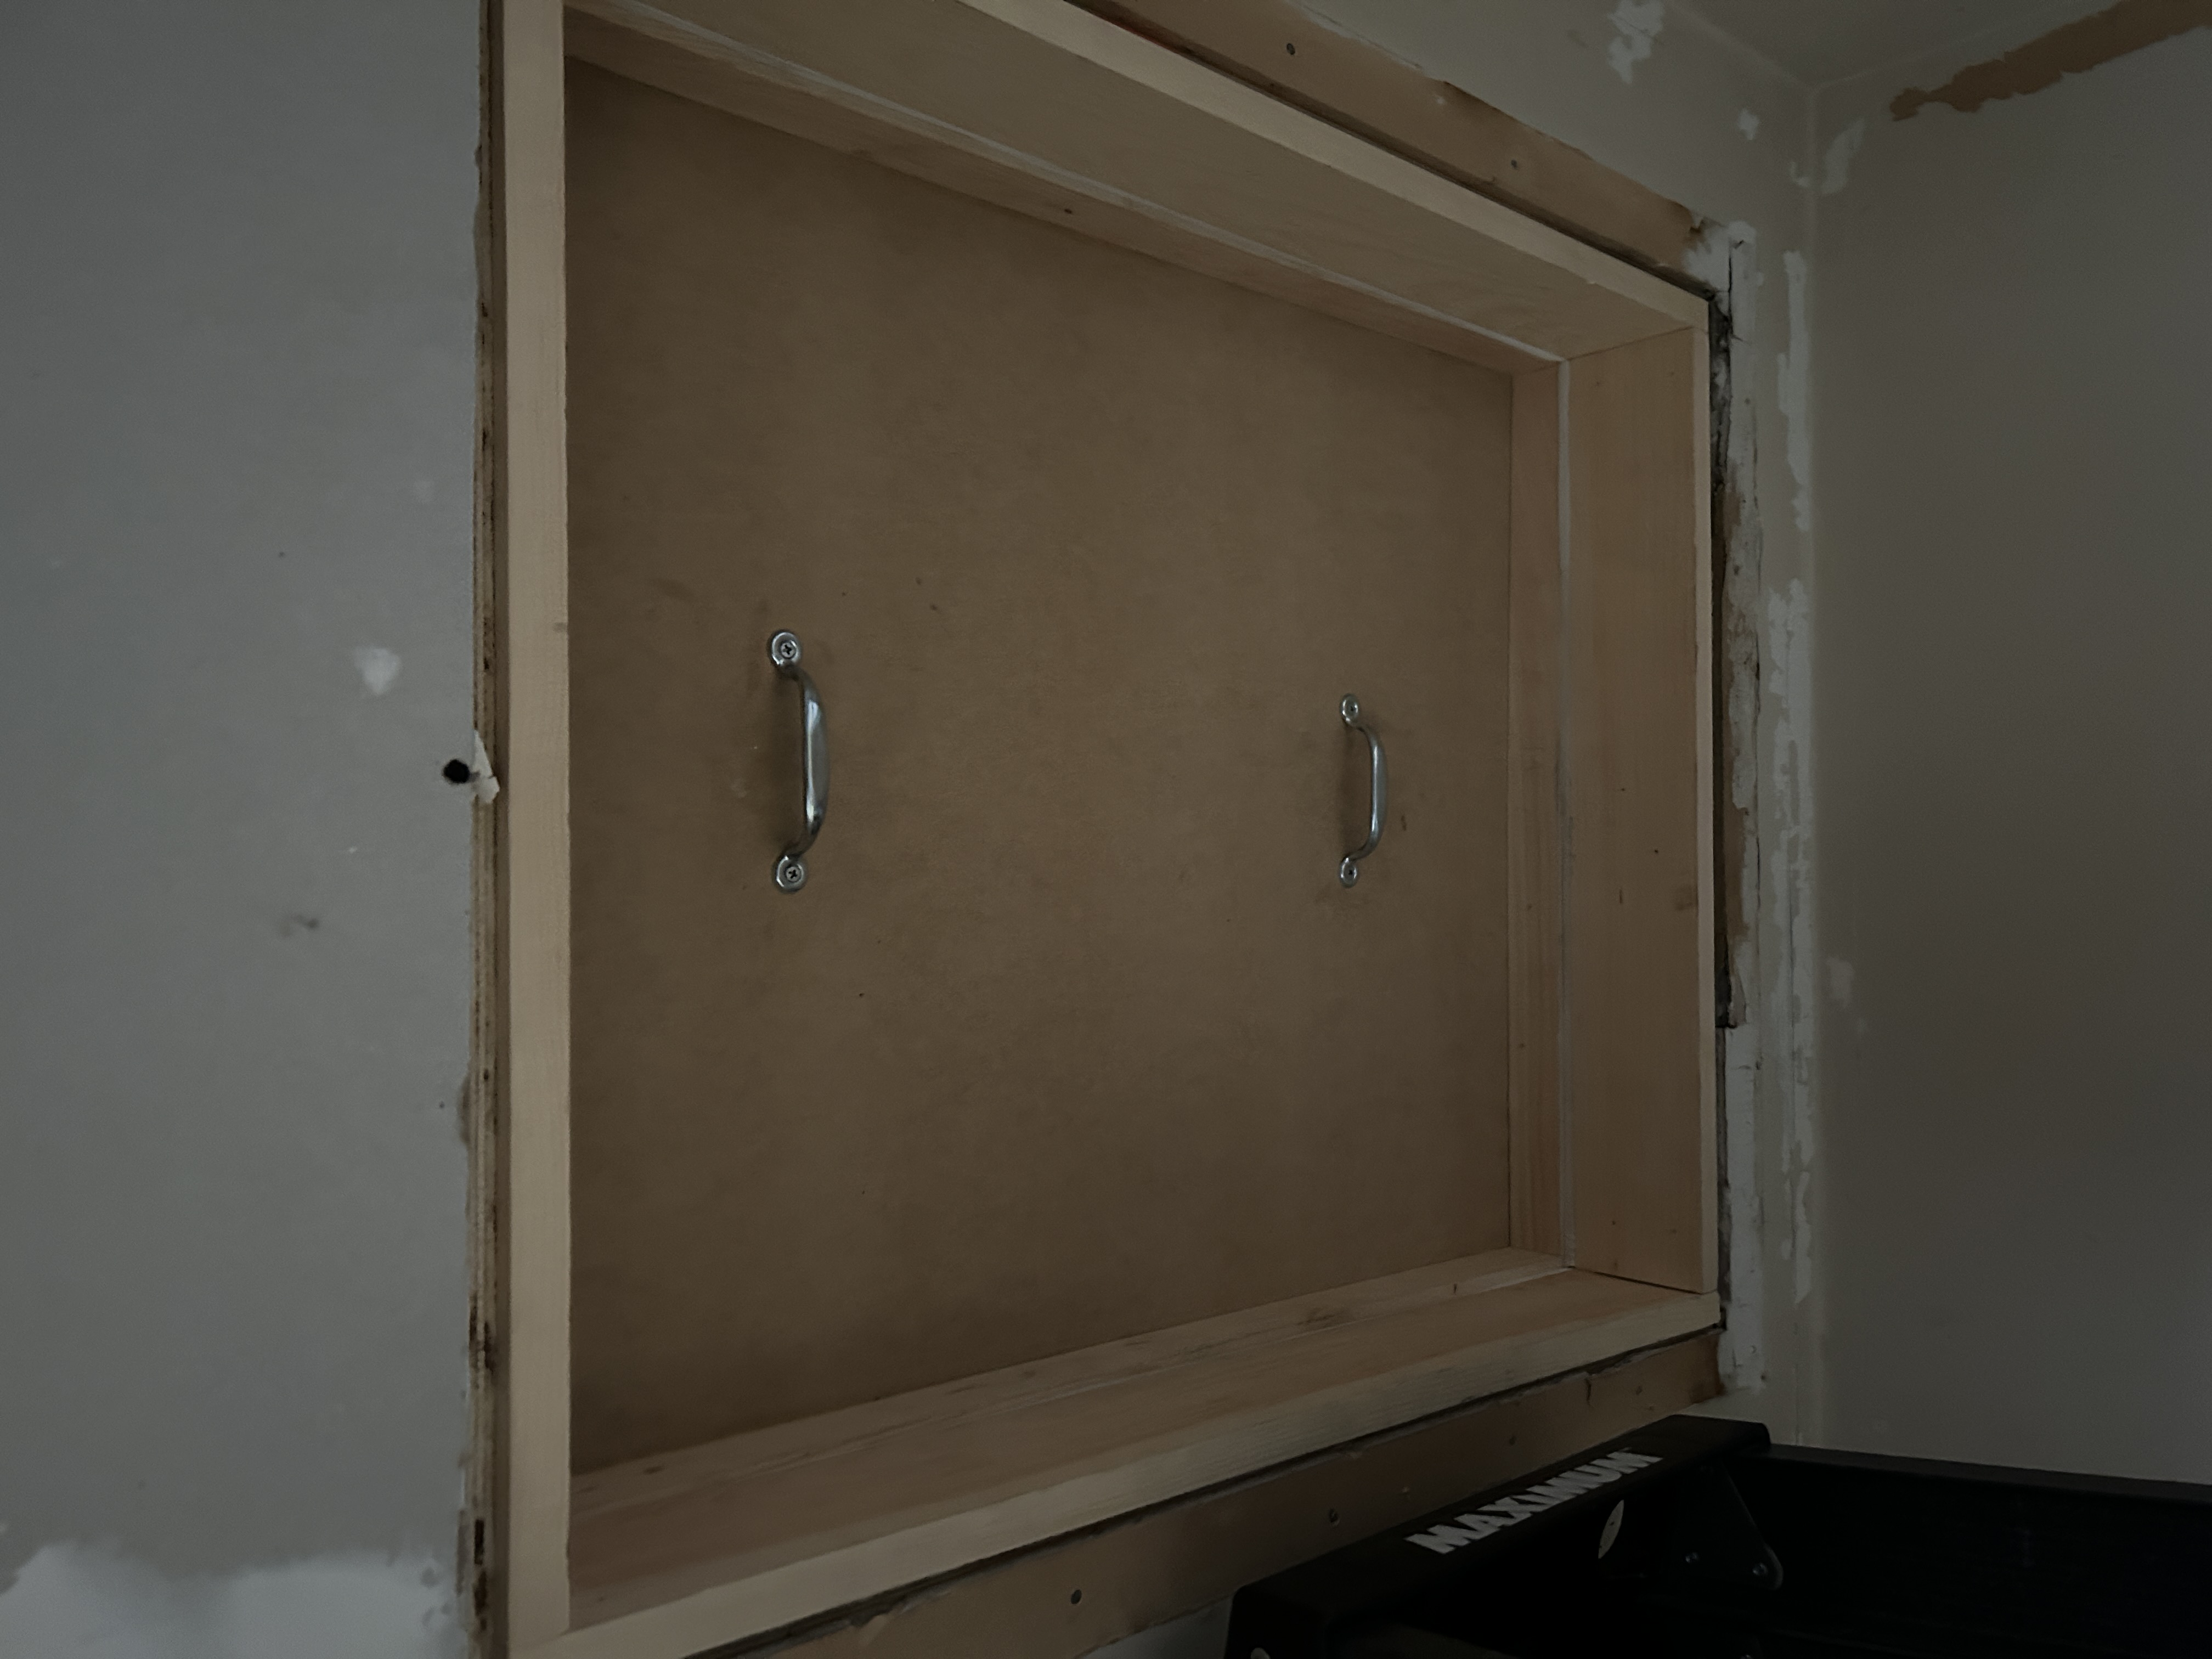
- Reducing the size of the attic opening and building an airtight hatch
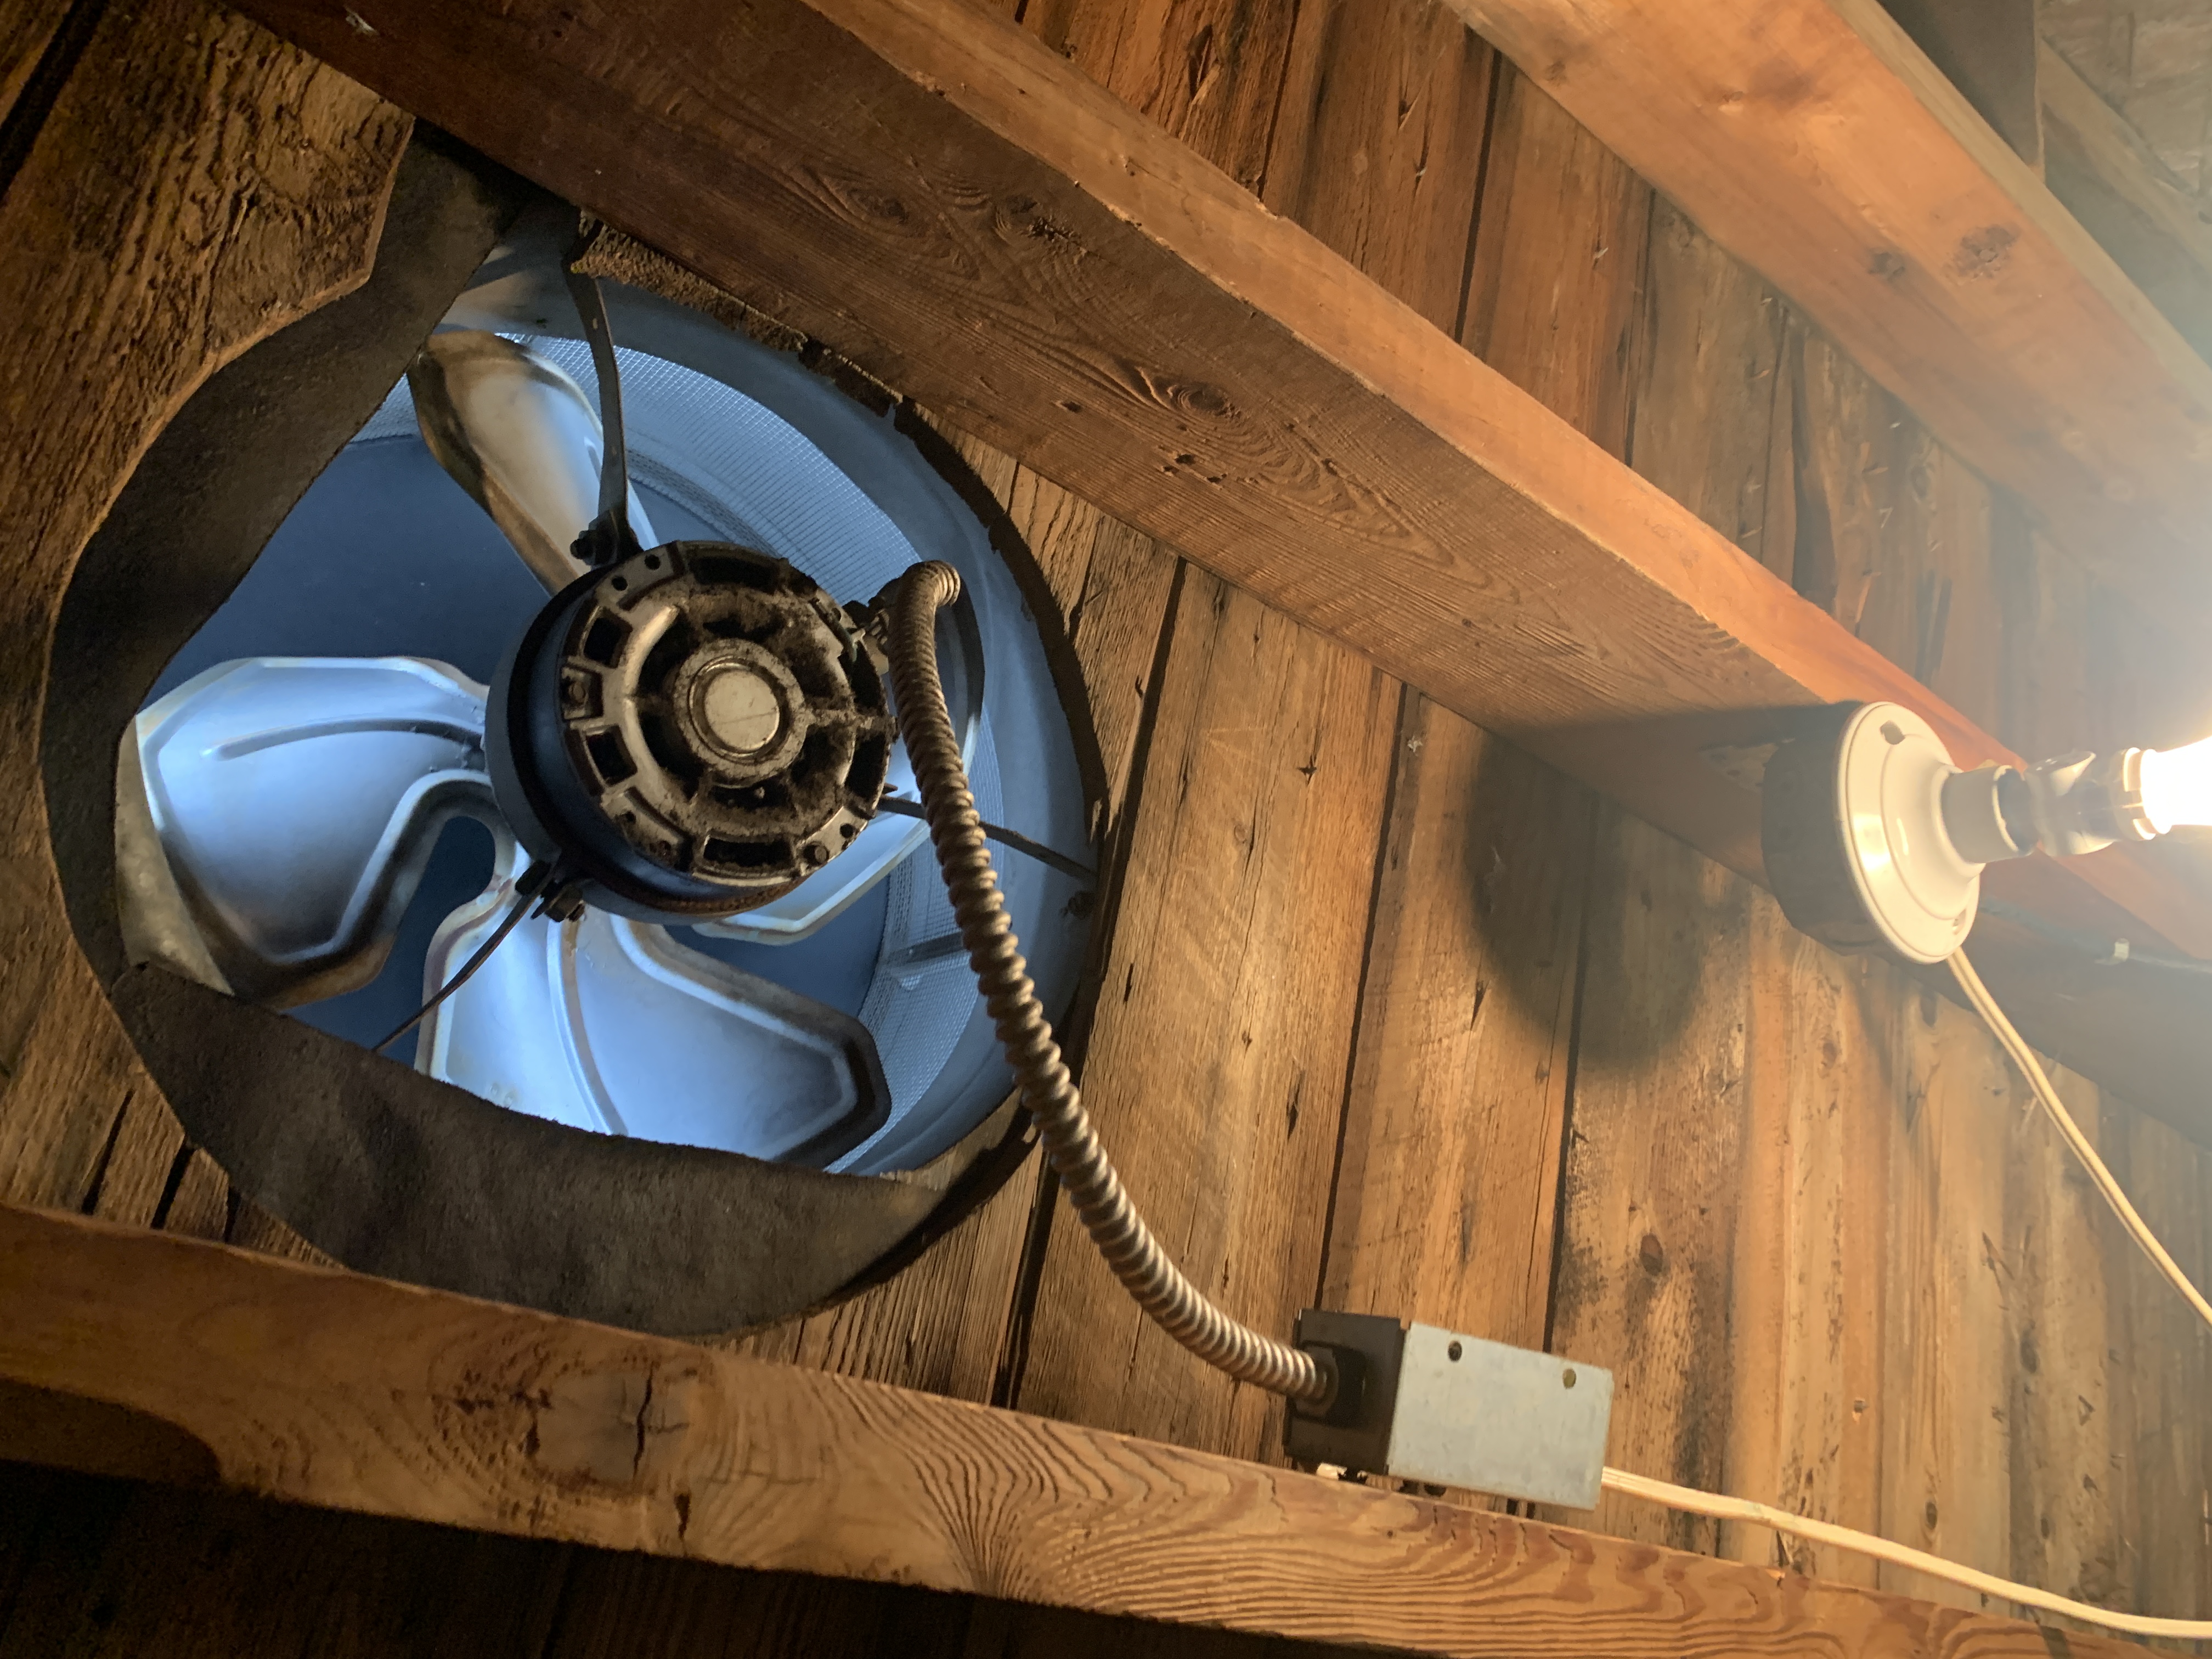
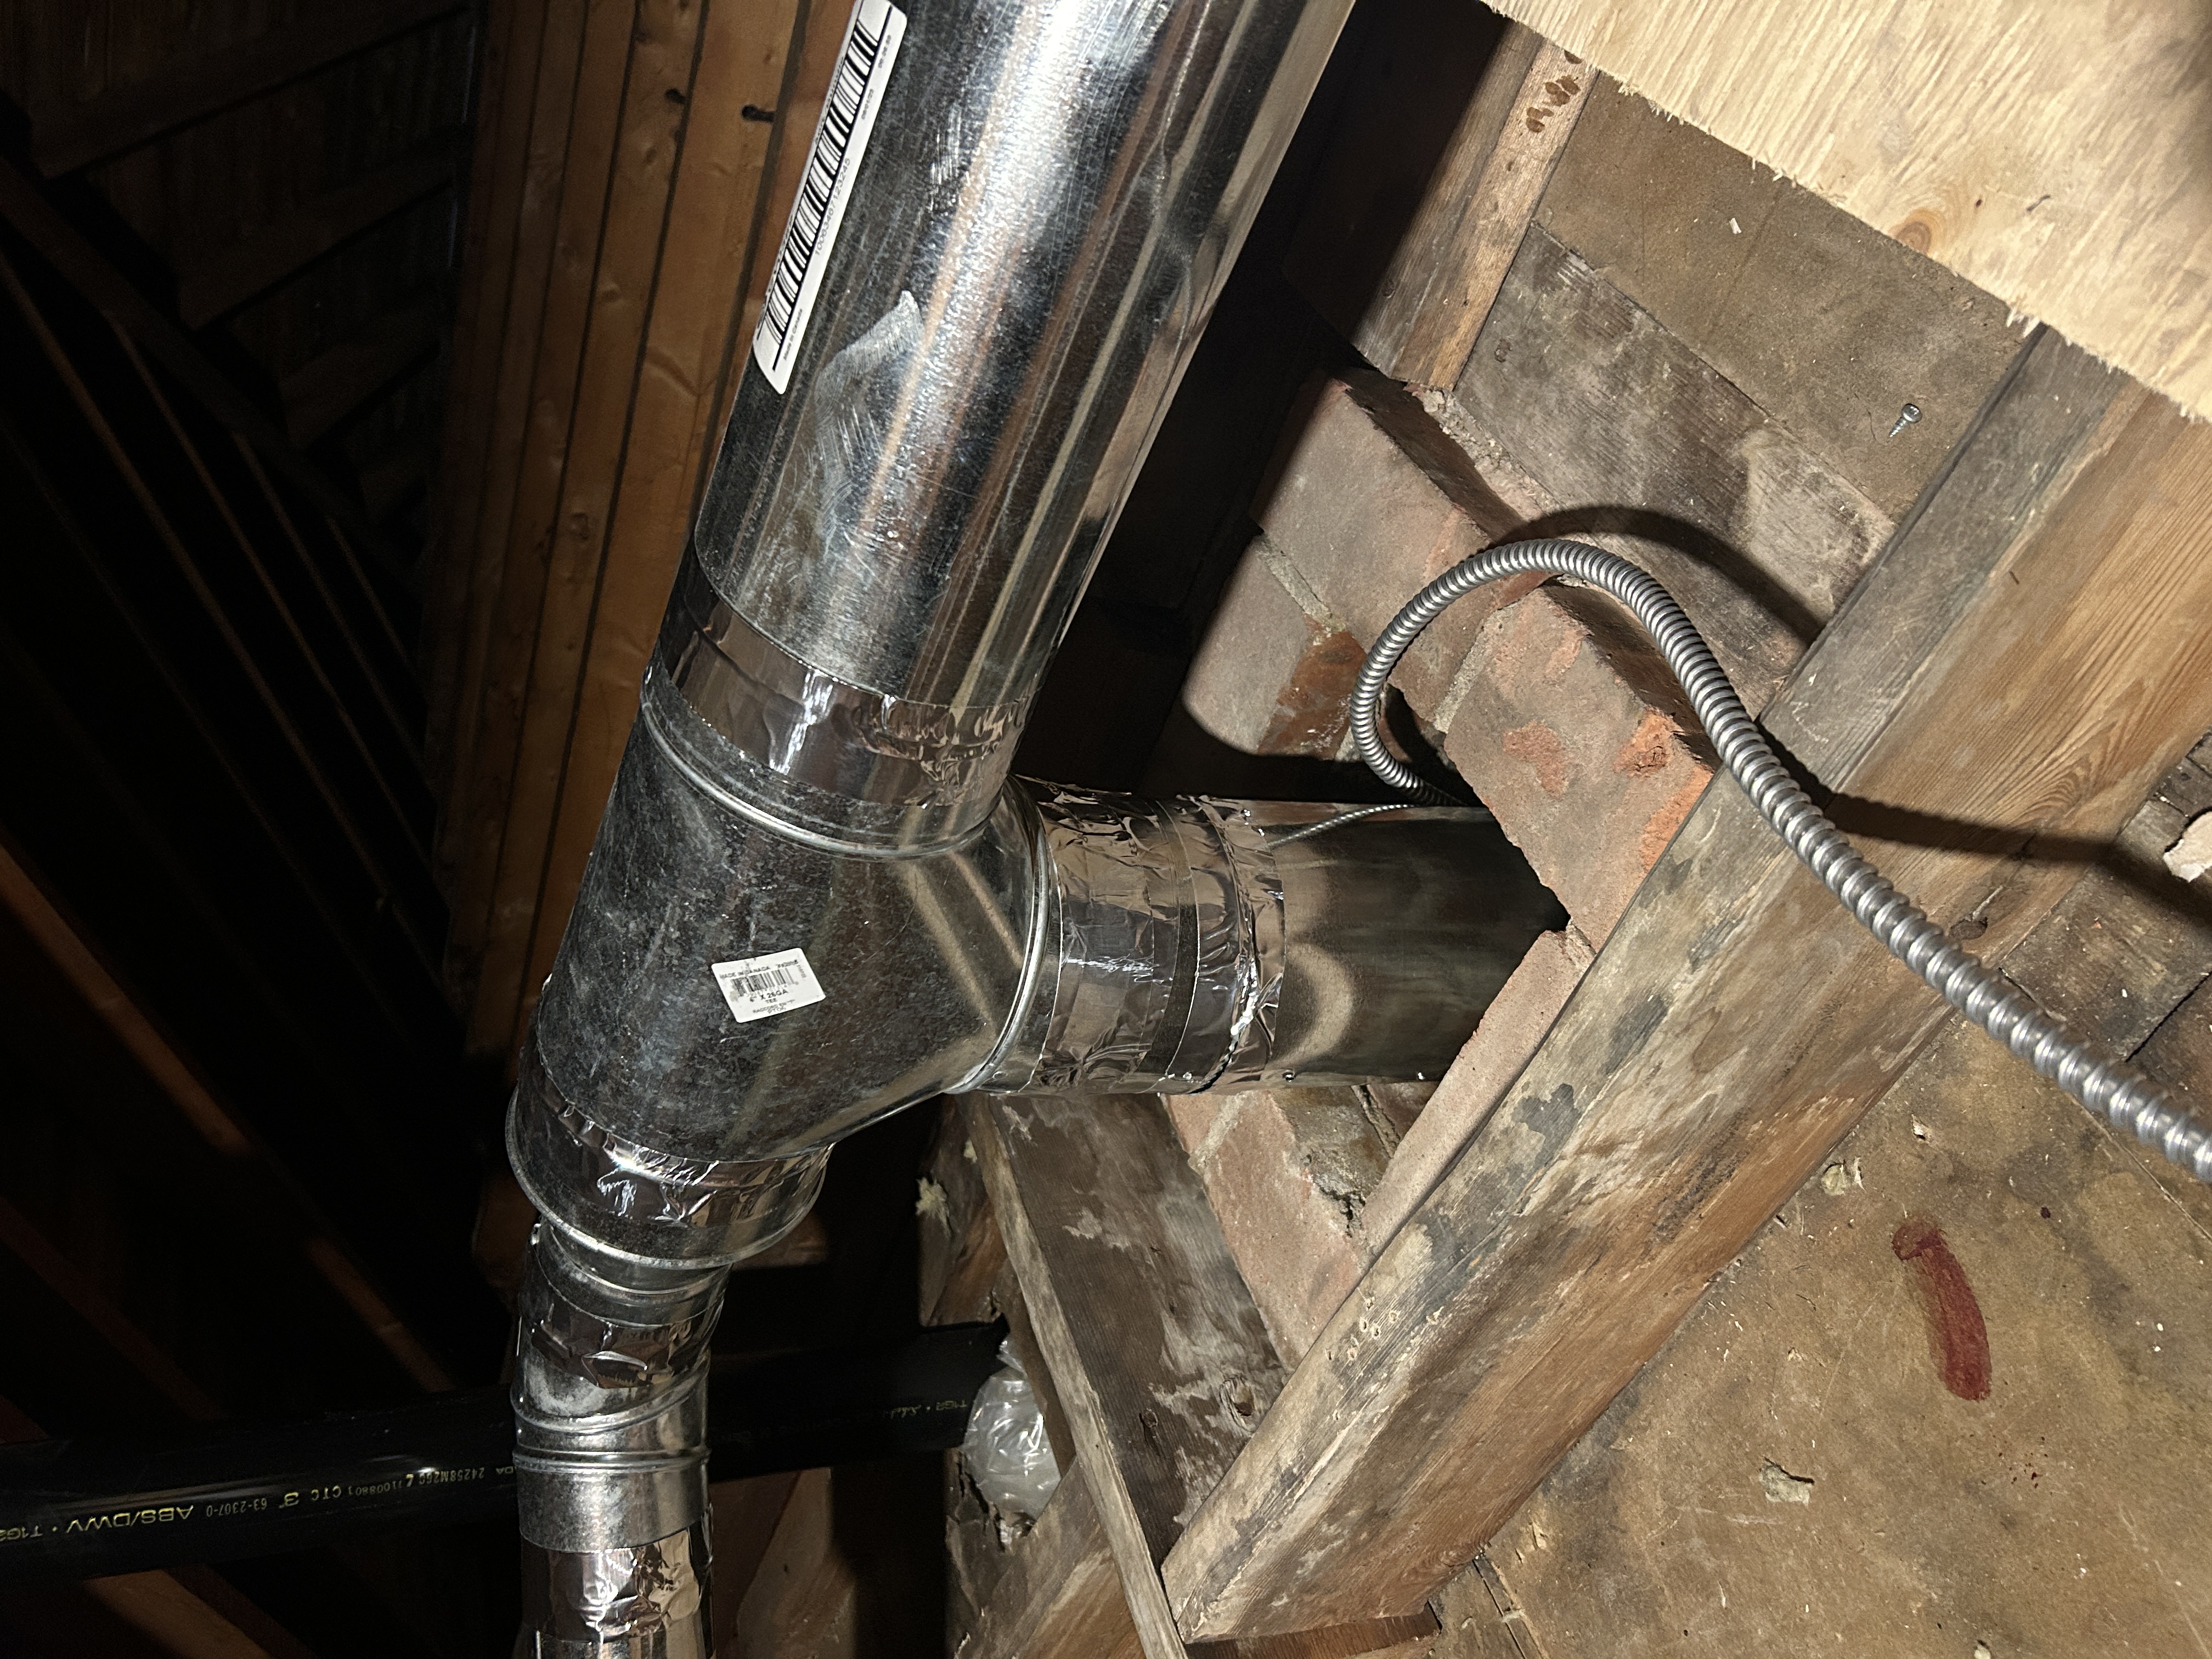
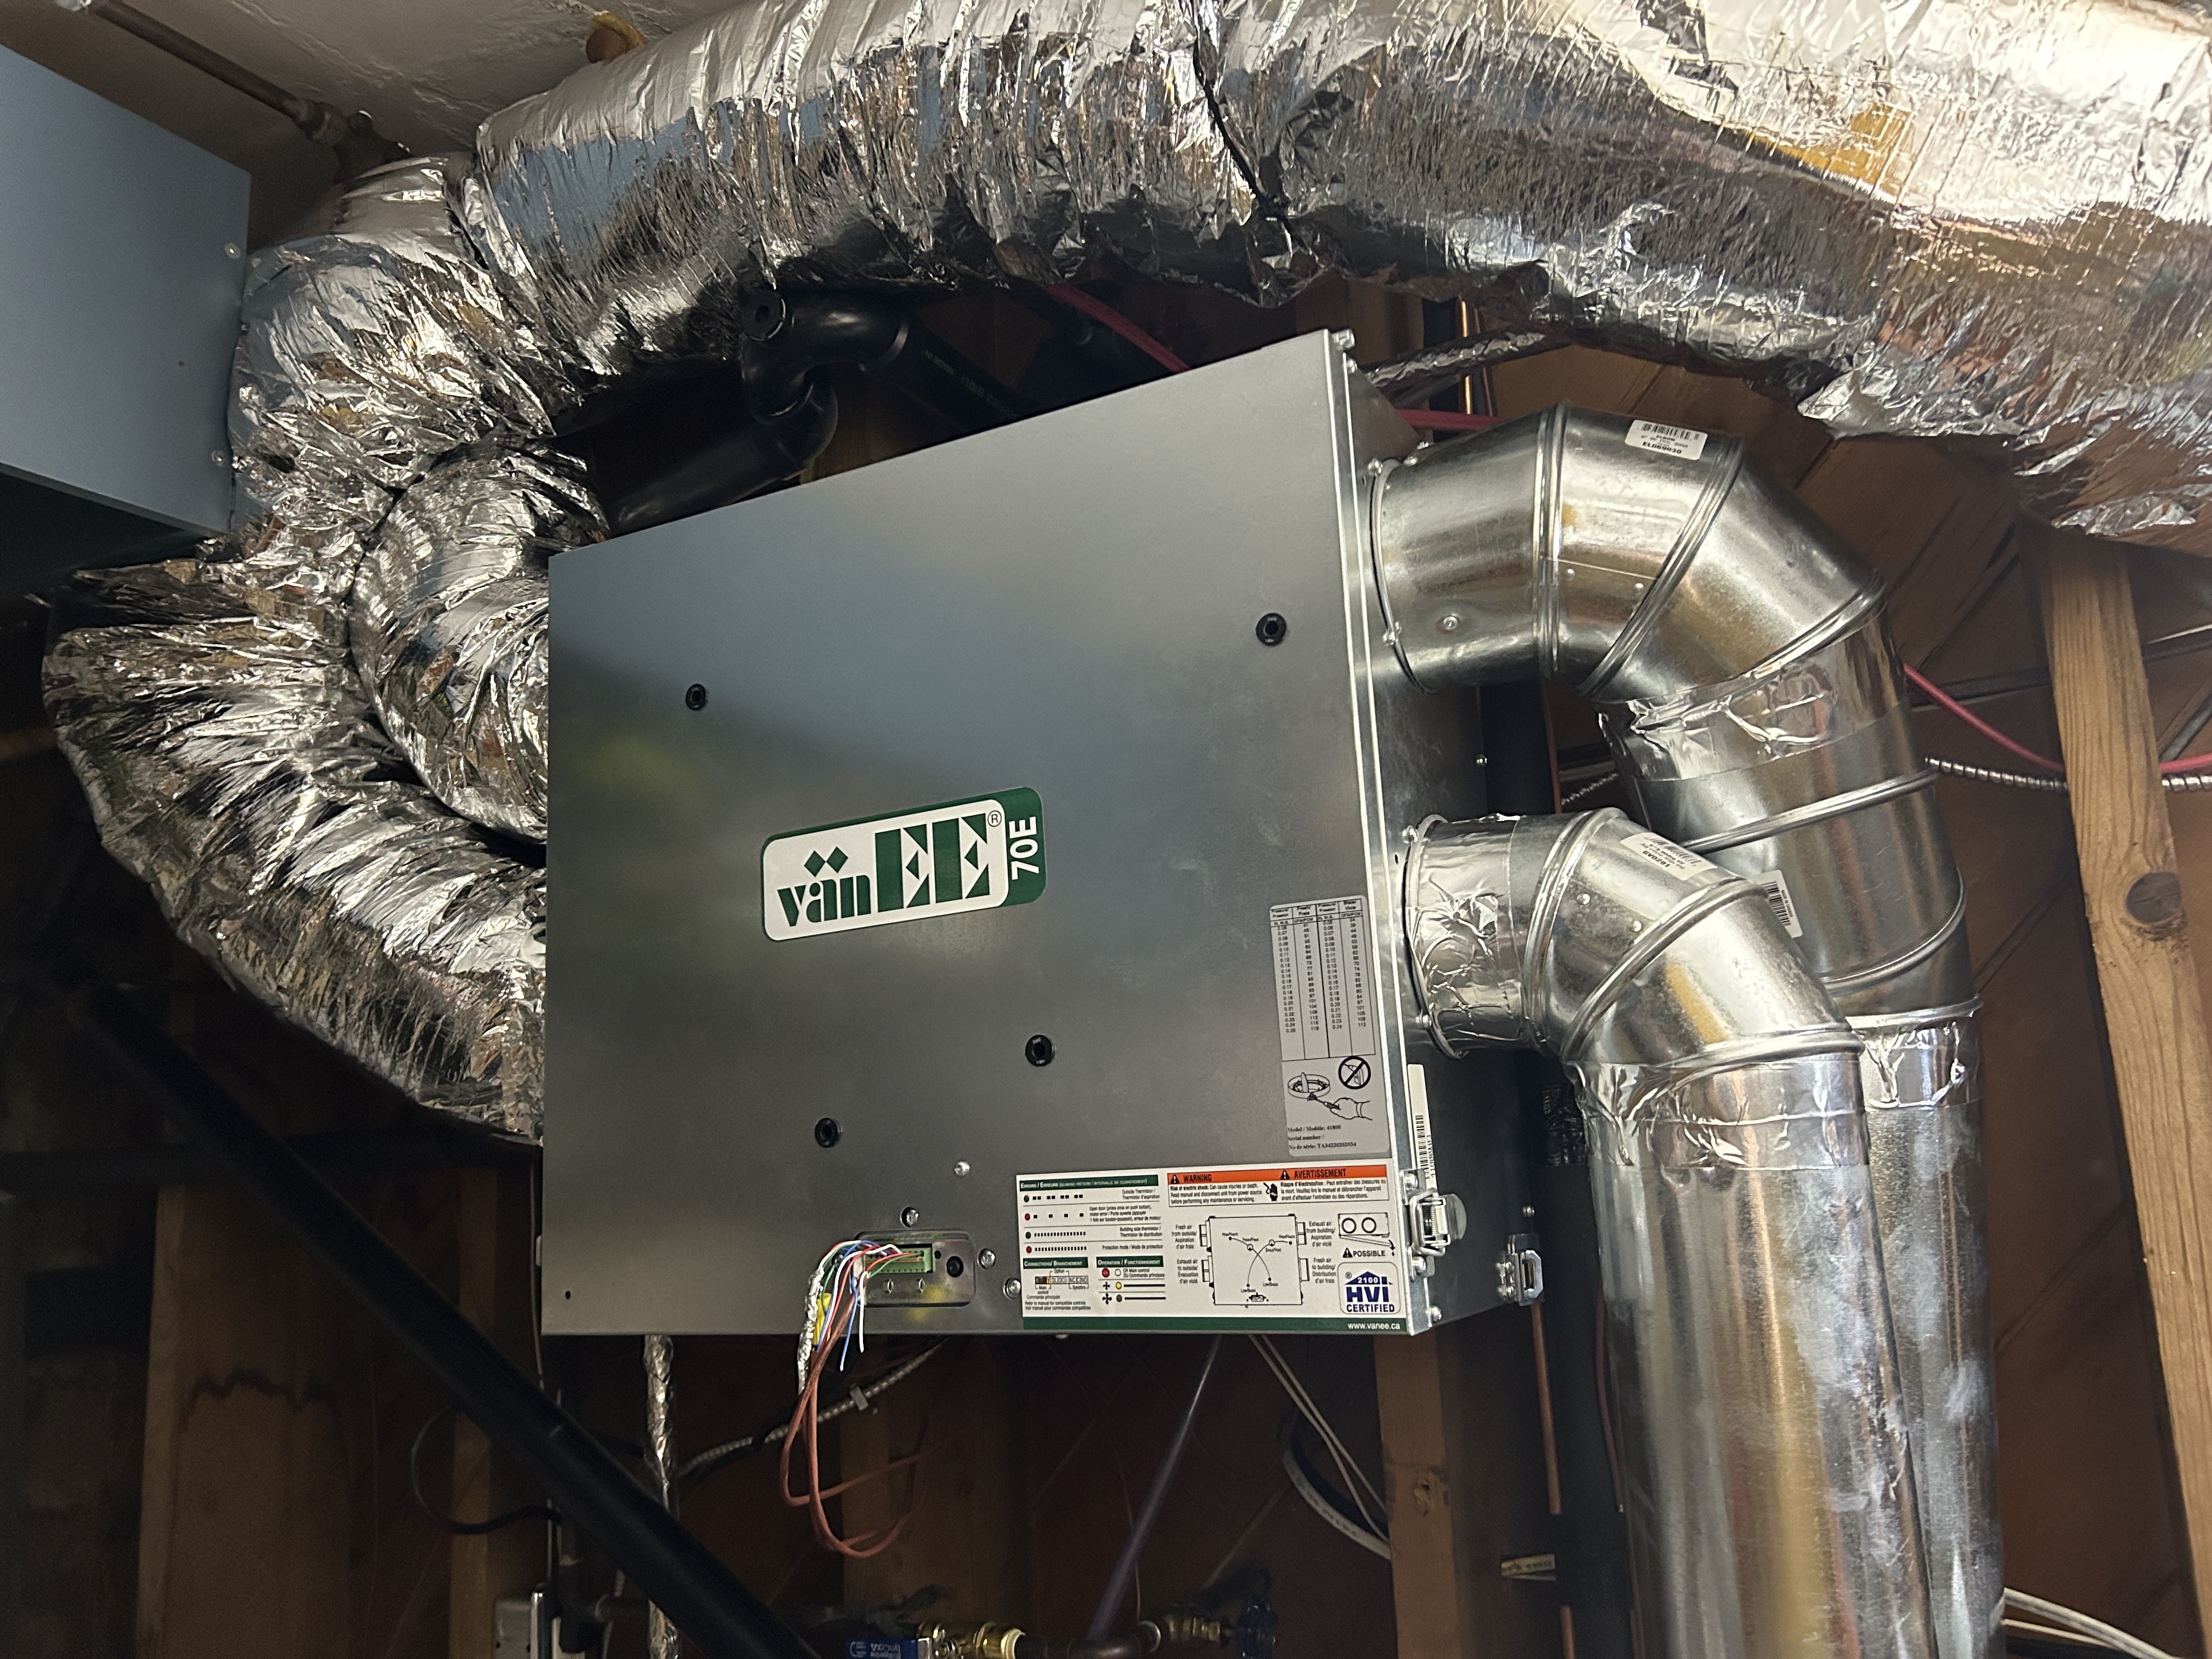
- Installing ERV ducts in attic with exhaust vents in kitchen, bathroom, and basement (see drawings)
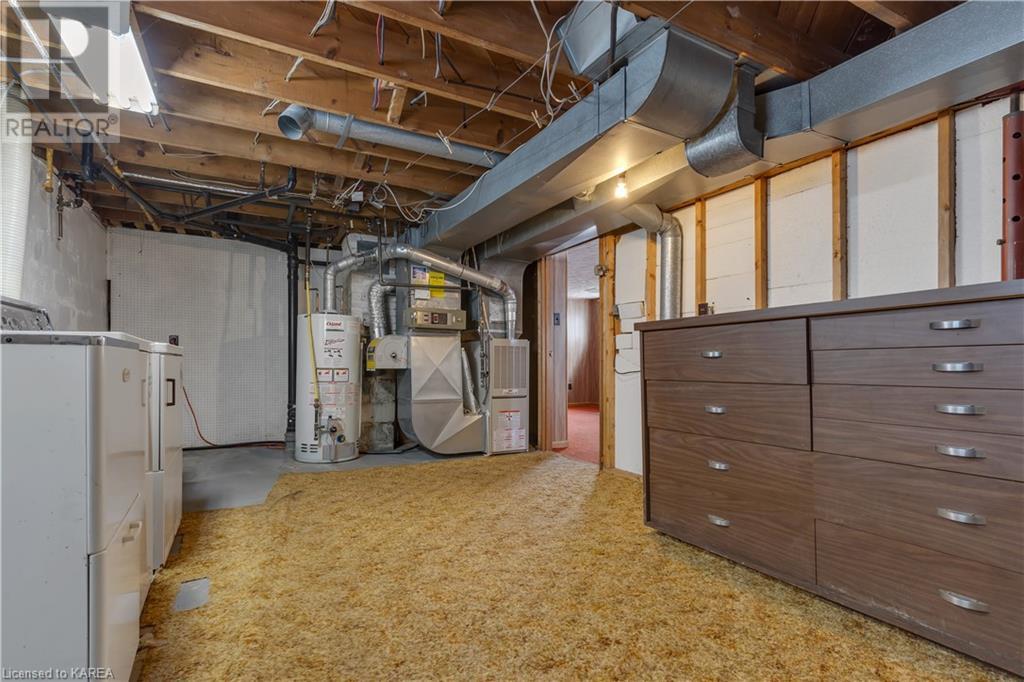
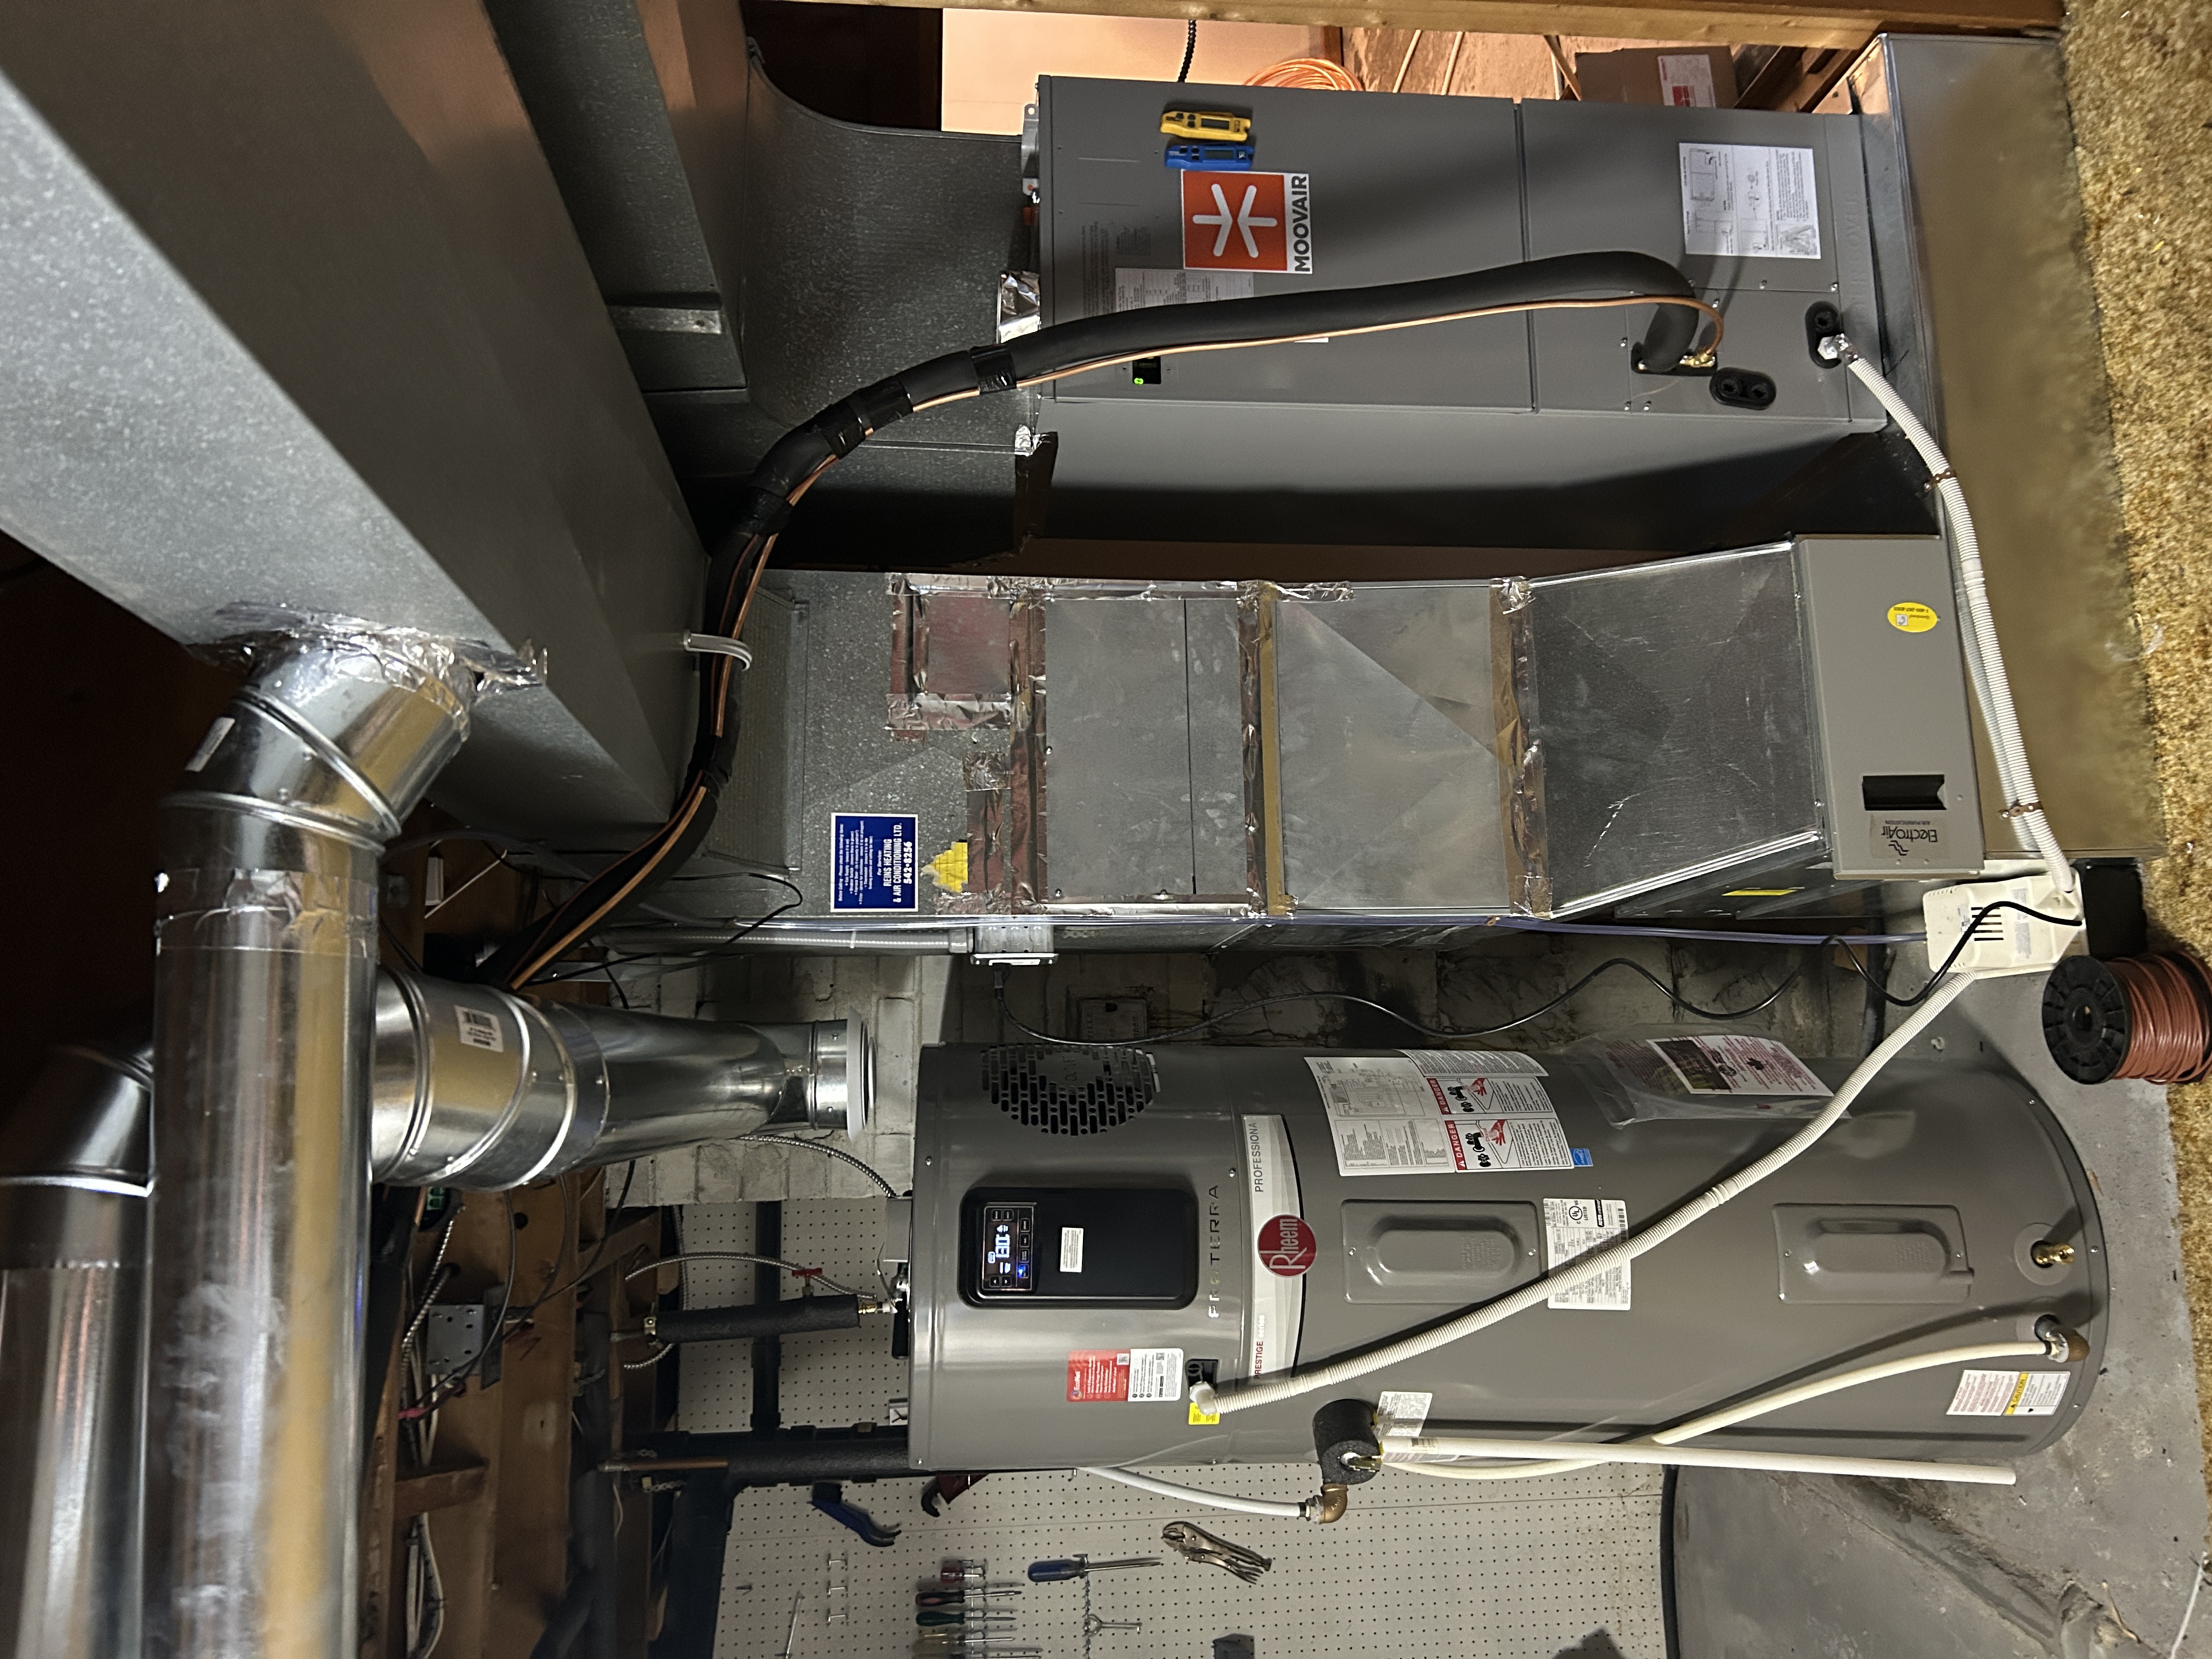
- Installing ERV in basement mechanical area
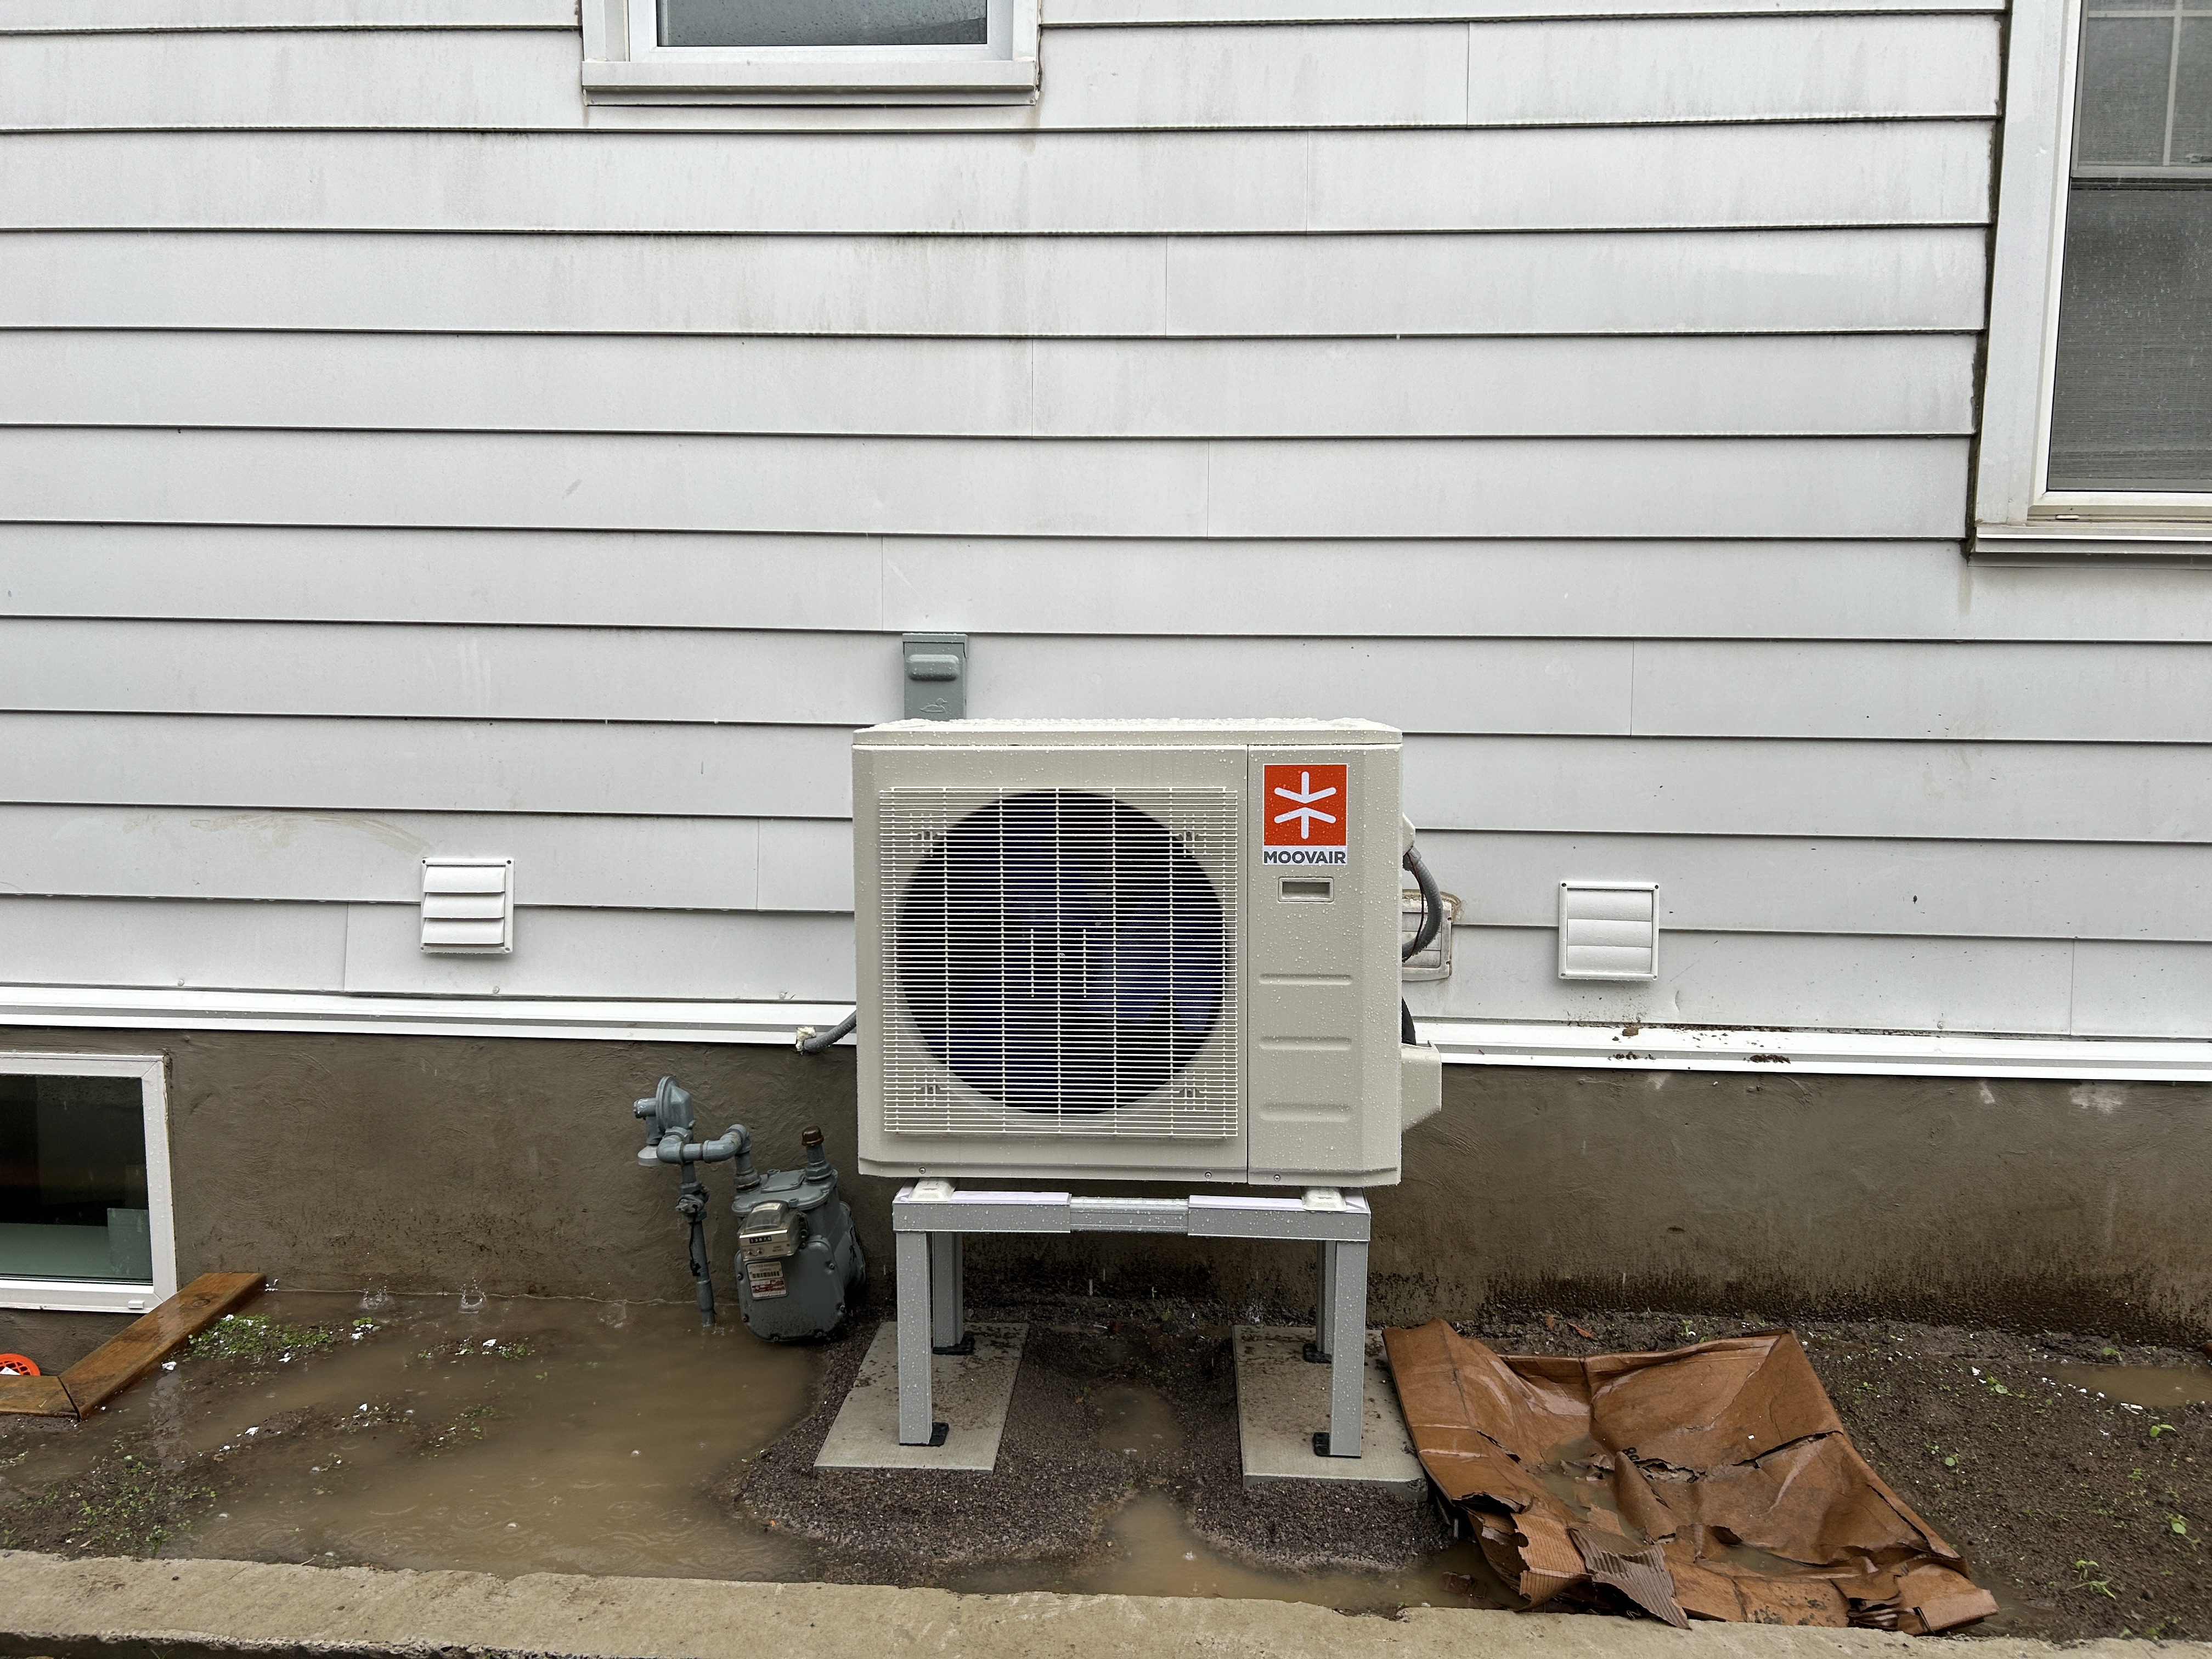
- Installing a cold climate air source heat pump for heating and cooling
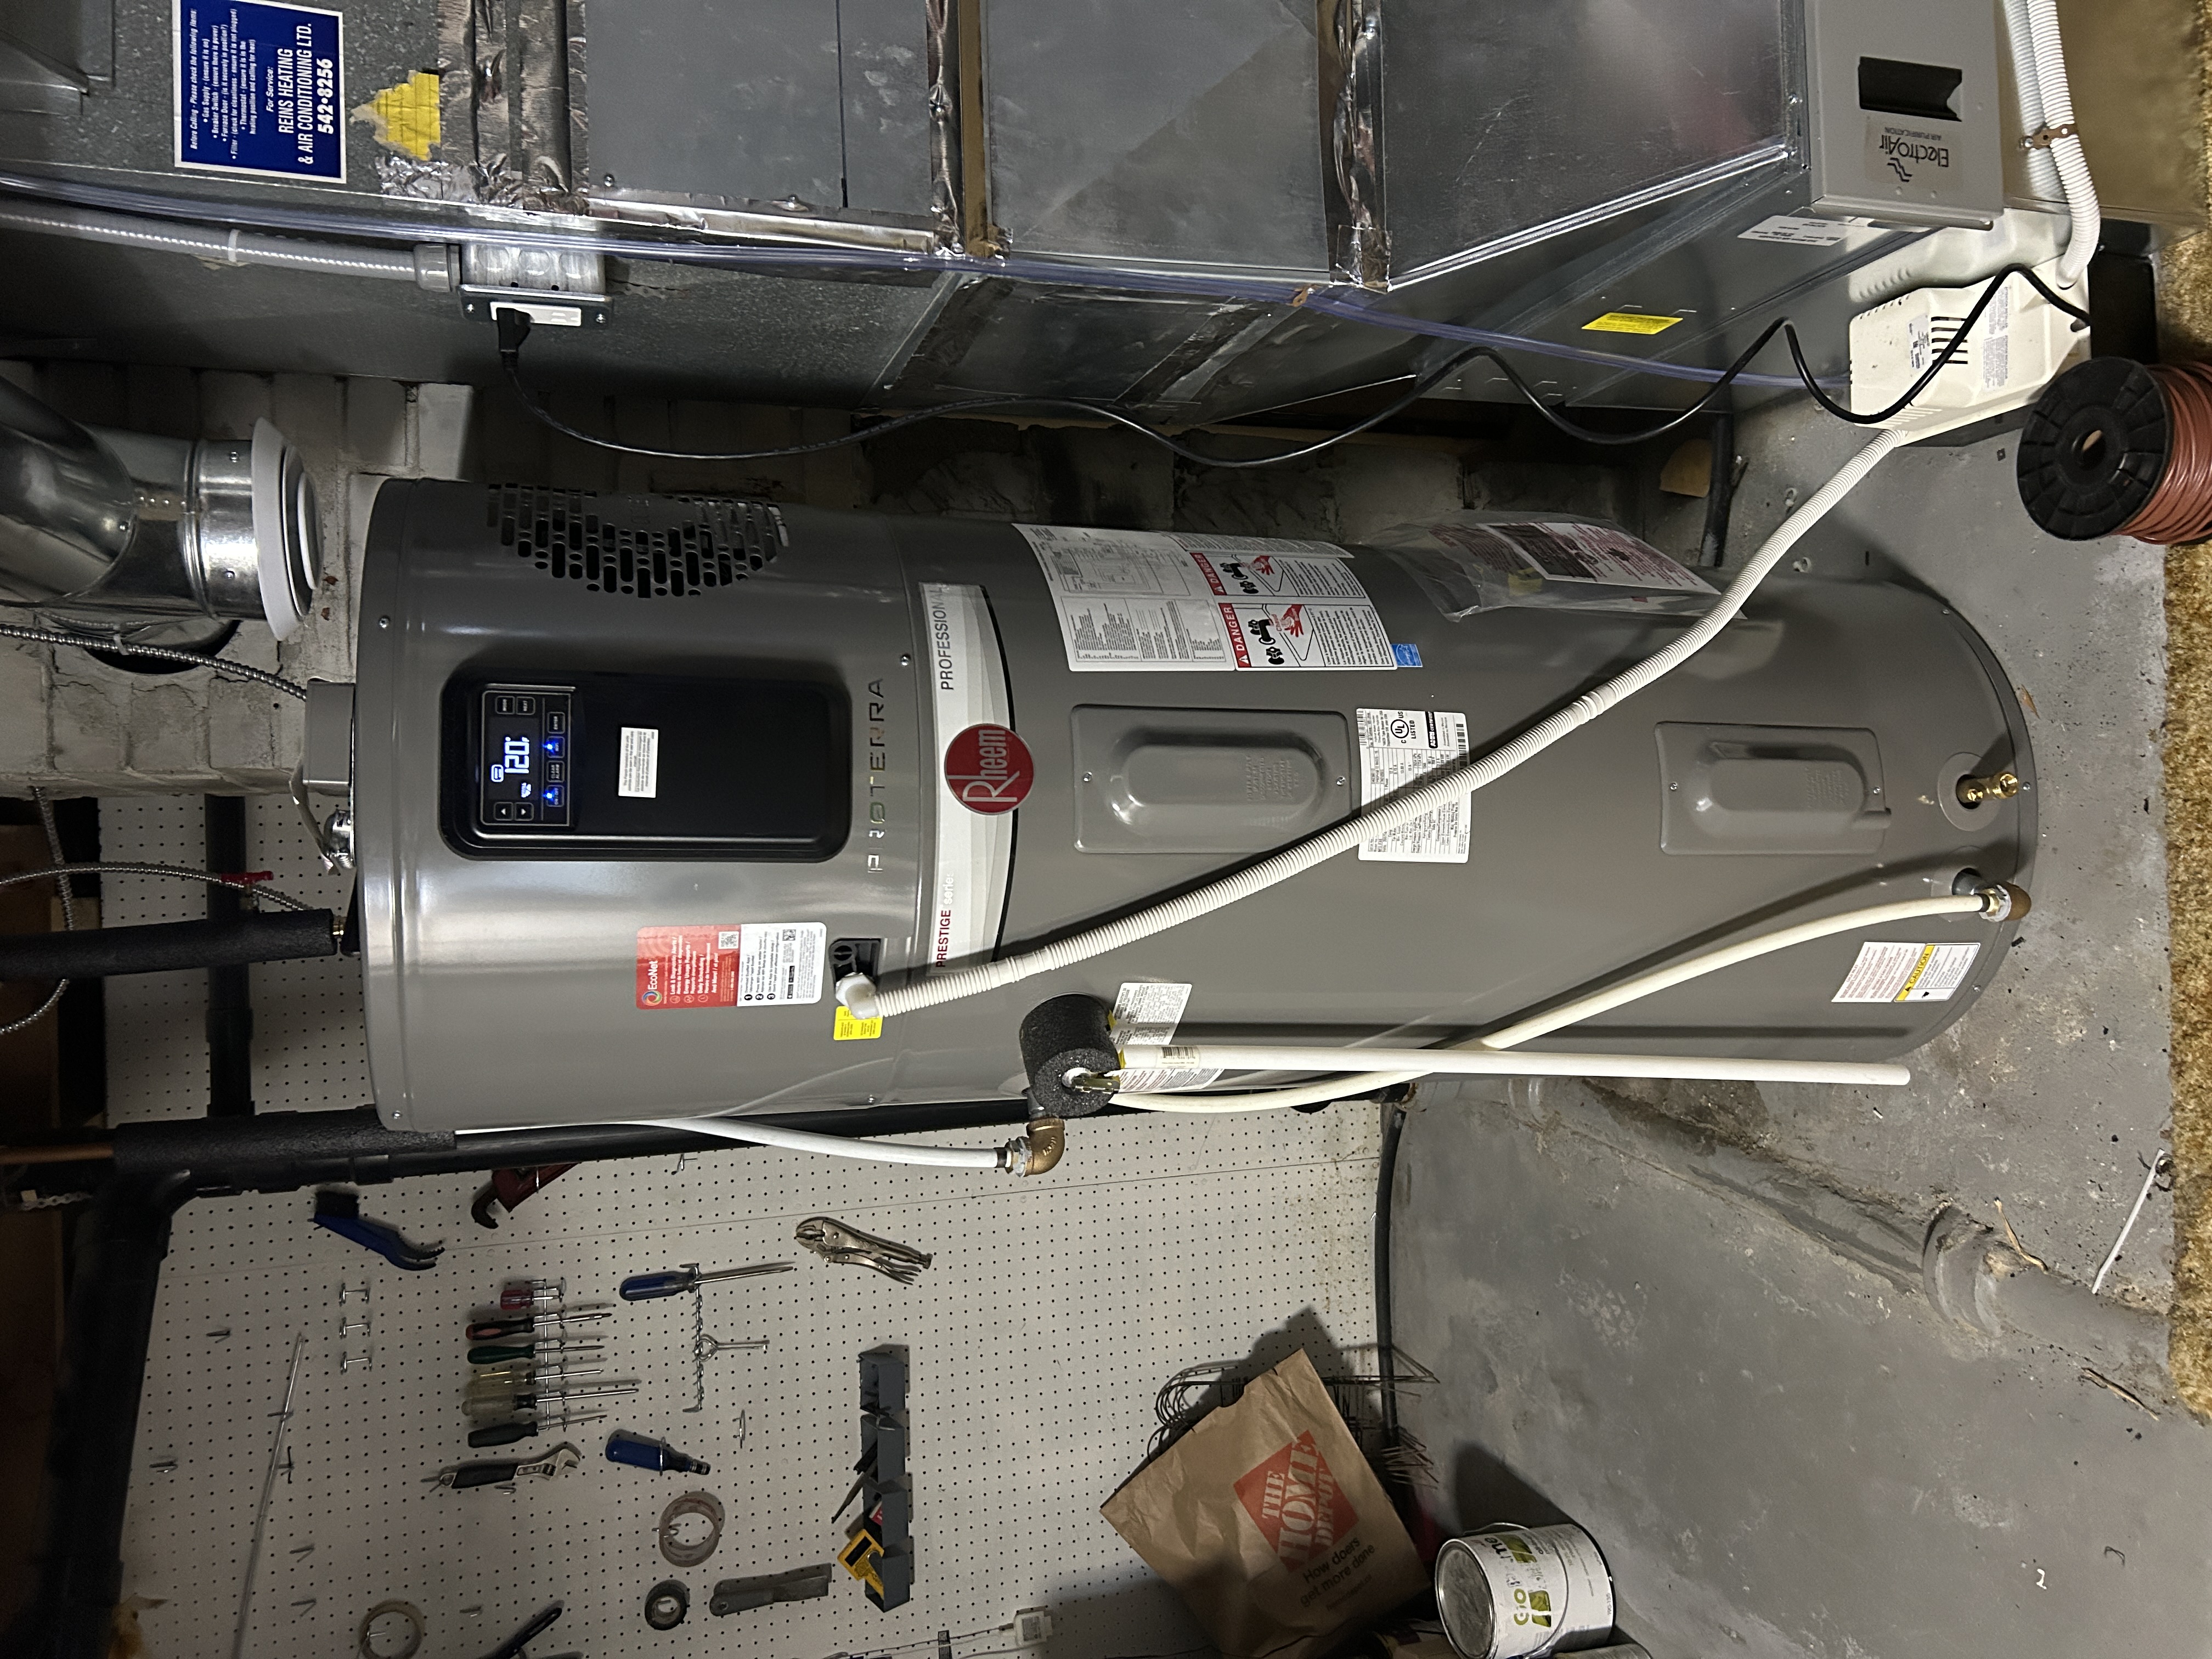
- Installing a heat pump water heater
Stage 2: Lessons
Cost-savings through DIY We were able to save money by demolishing the chimney, resizing the attic hatch, and installing the range hood duct ourselves. **
Avoiding a service upgrade It took some work to avoid a costly and unnecessary electrical service upgrade. We had to insist on a 15-amp instead of a 30-amp heat pump water heater and push the contractor to exclude an electrical resistance backup system from the heat pump air handler. It seems like most Canadians looking to electrify their homes are being guided towards service upgrades almost by default, so more education needs to be done.**
Heat pump savings The heat pumps that contractors offered us in our initial round of quotes were more expensive than the model we ultimately landed on. We were able to save money by asking for a cheaper option and confirming through the output table that it would provide the performance we need.**
Heat pump water heater We’re really happy with the highly efficient heat pump water heater, but it puts out quite a bit of cold air when it’s refilling/reheating the tank. This free cooling is welcome in the summer, but not in the winter. We will look into adding a duct later so the cold air exhaust can be piped out of the house or into a cold room where we plan to store vegetables.
Stage 3: Attic Air Sealing and Insulation (Summer 2024)
The pre-retrofit report showed that the heat loss through the attic was about 15% of the total, not including attic air leakage.
The attic was also very likely to be responsible for a lot of the air leakage. We were unable to test the actual air leakage during the pre-retrofit energy audit for fear of sucking vermiculite (which we addressed in Stage 2) into the house.
Stage 3: Steps
- Running armoured cable from attic to basement for the PV system that will be installed in Phase 5
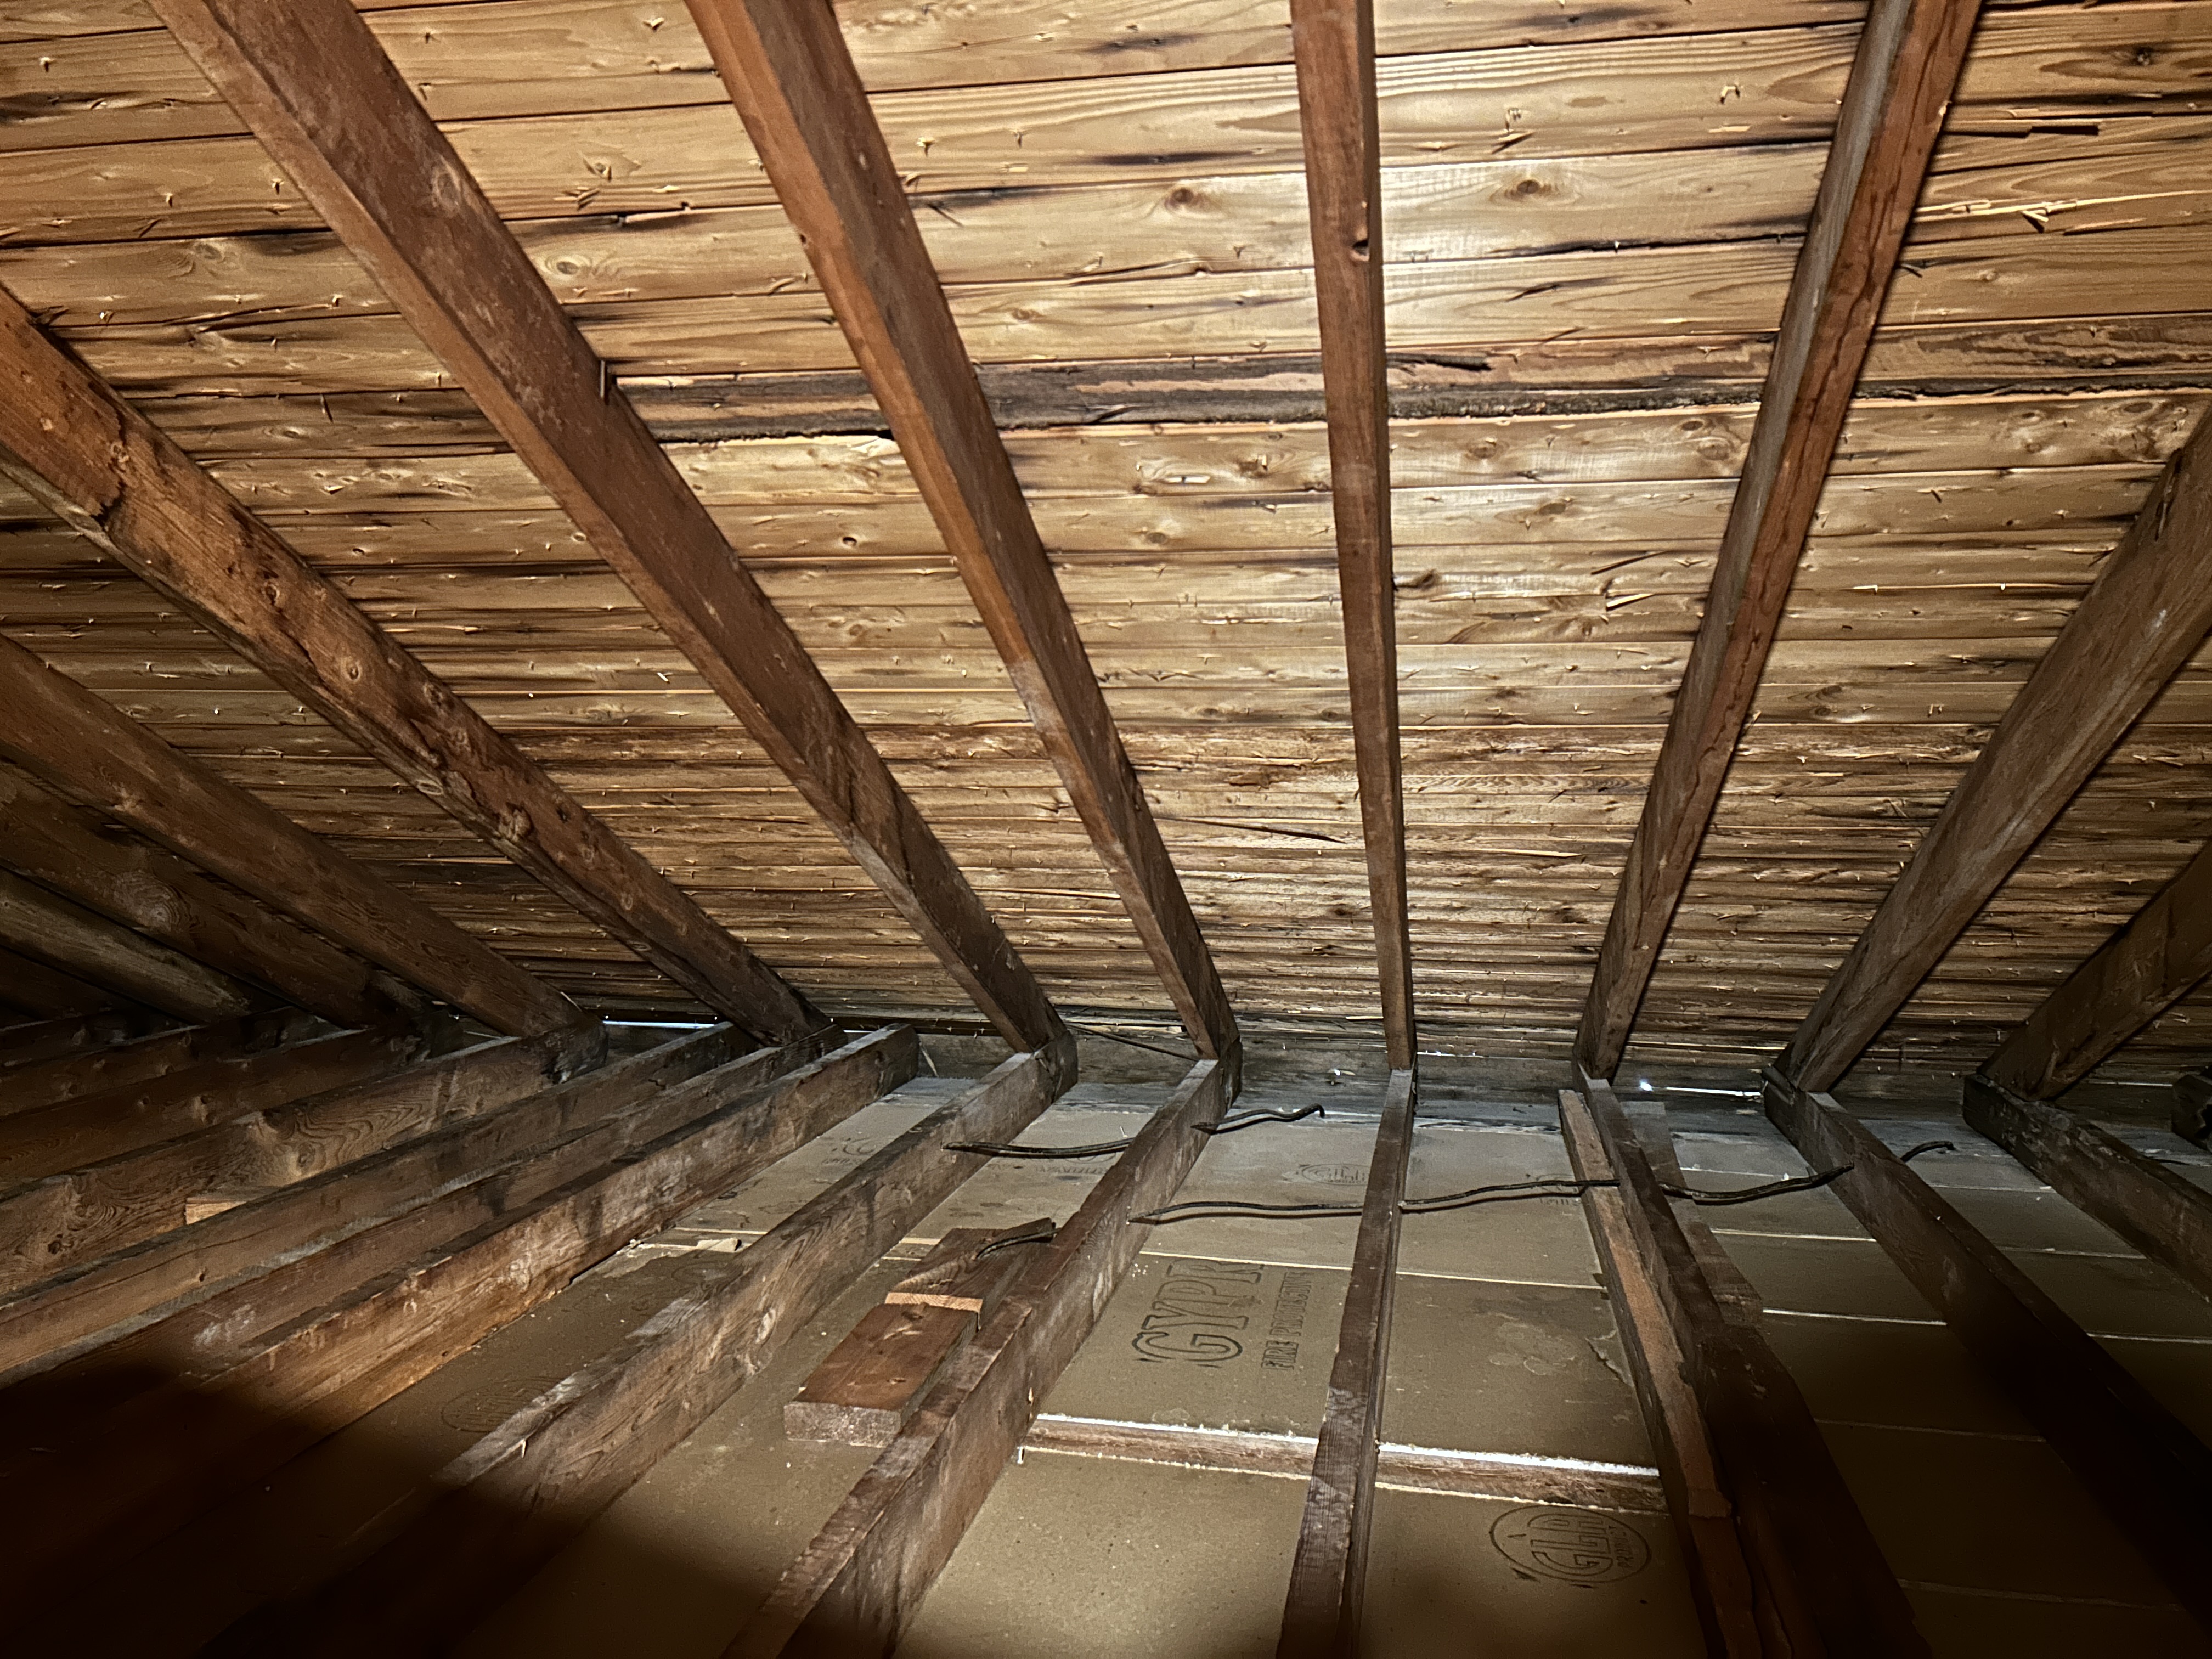
- Installing collar ties to reinforce roof for future PV system
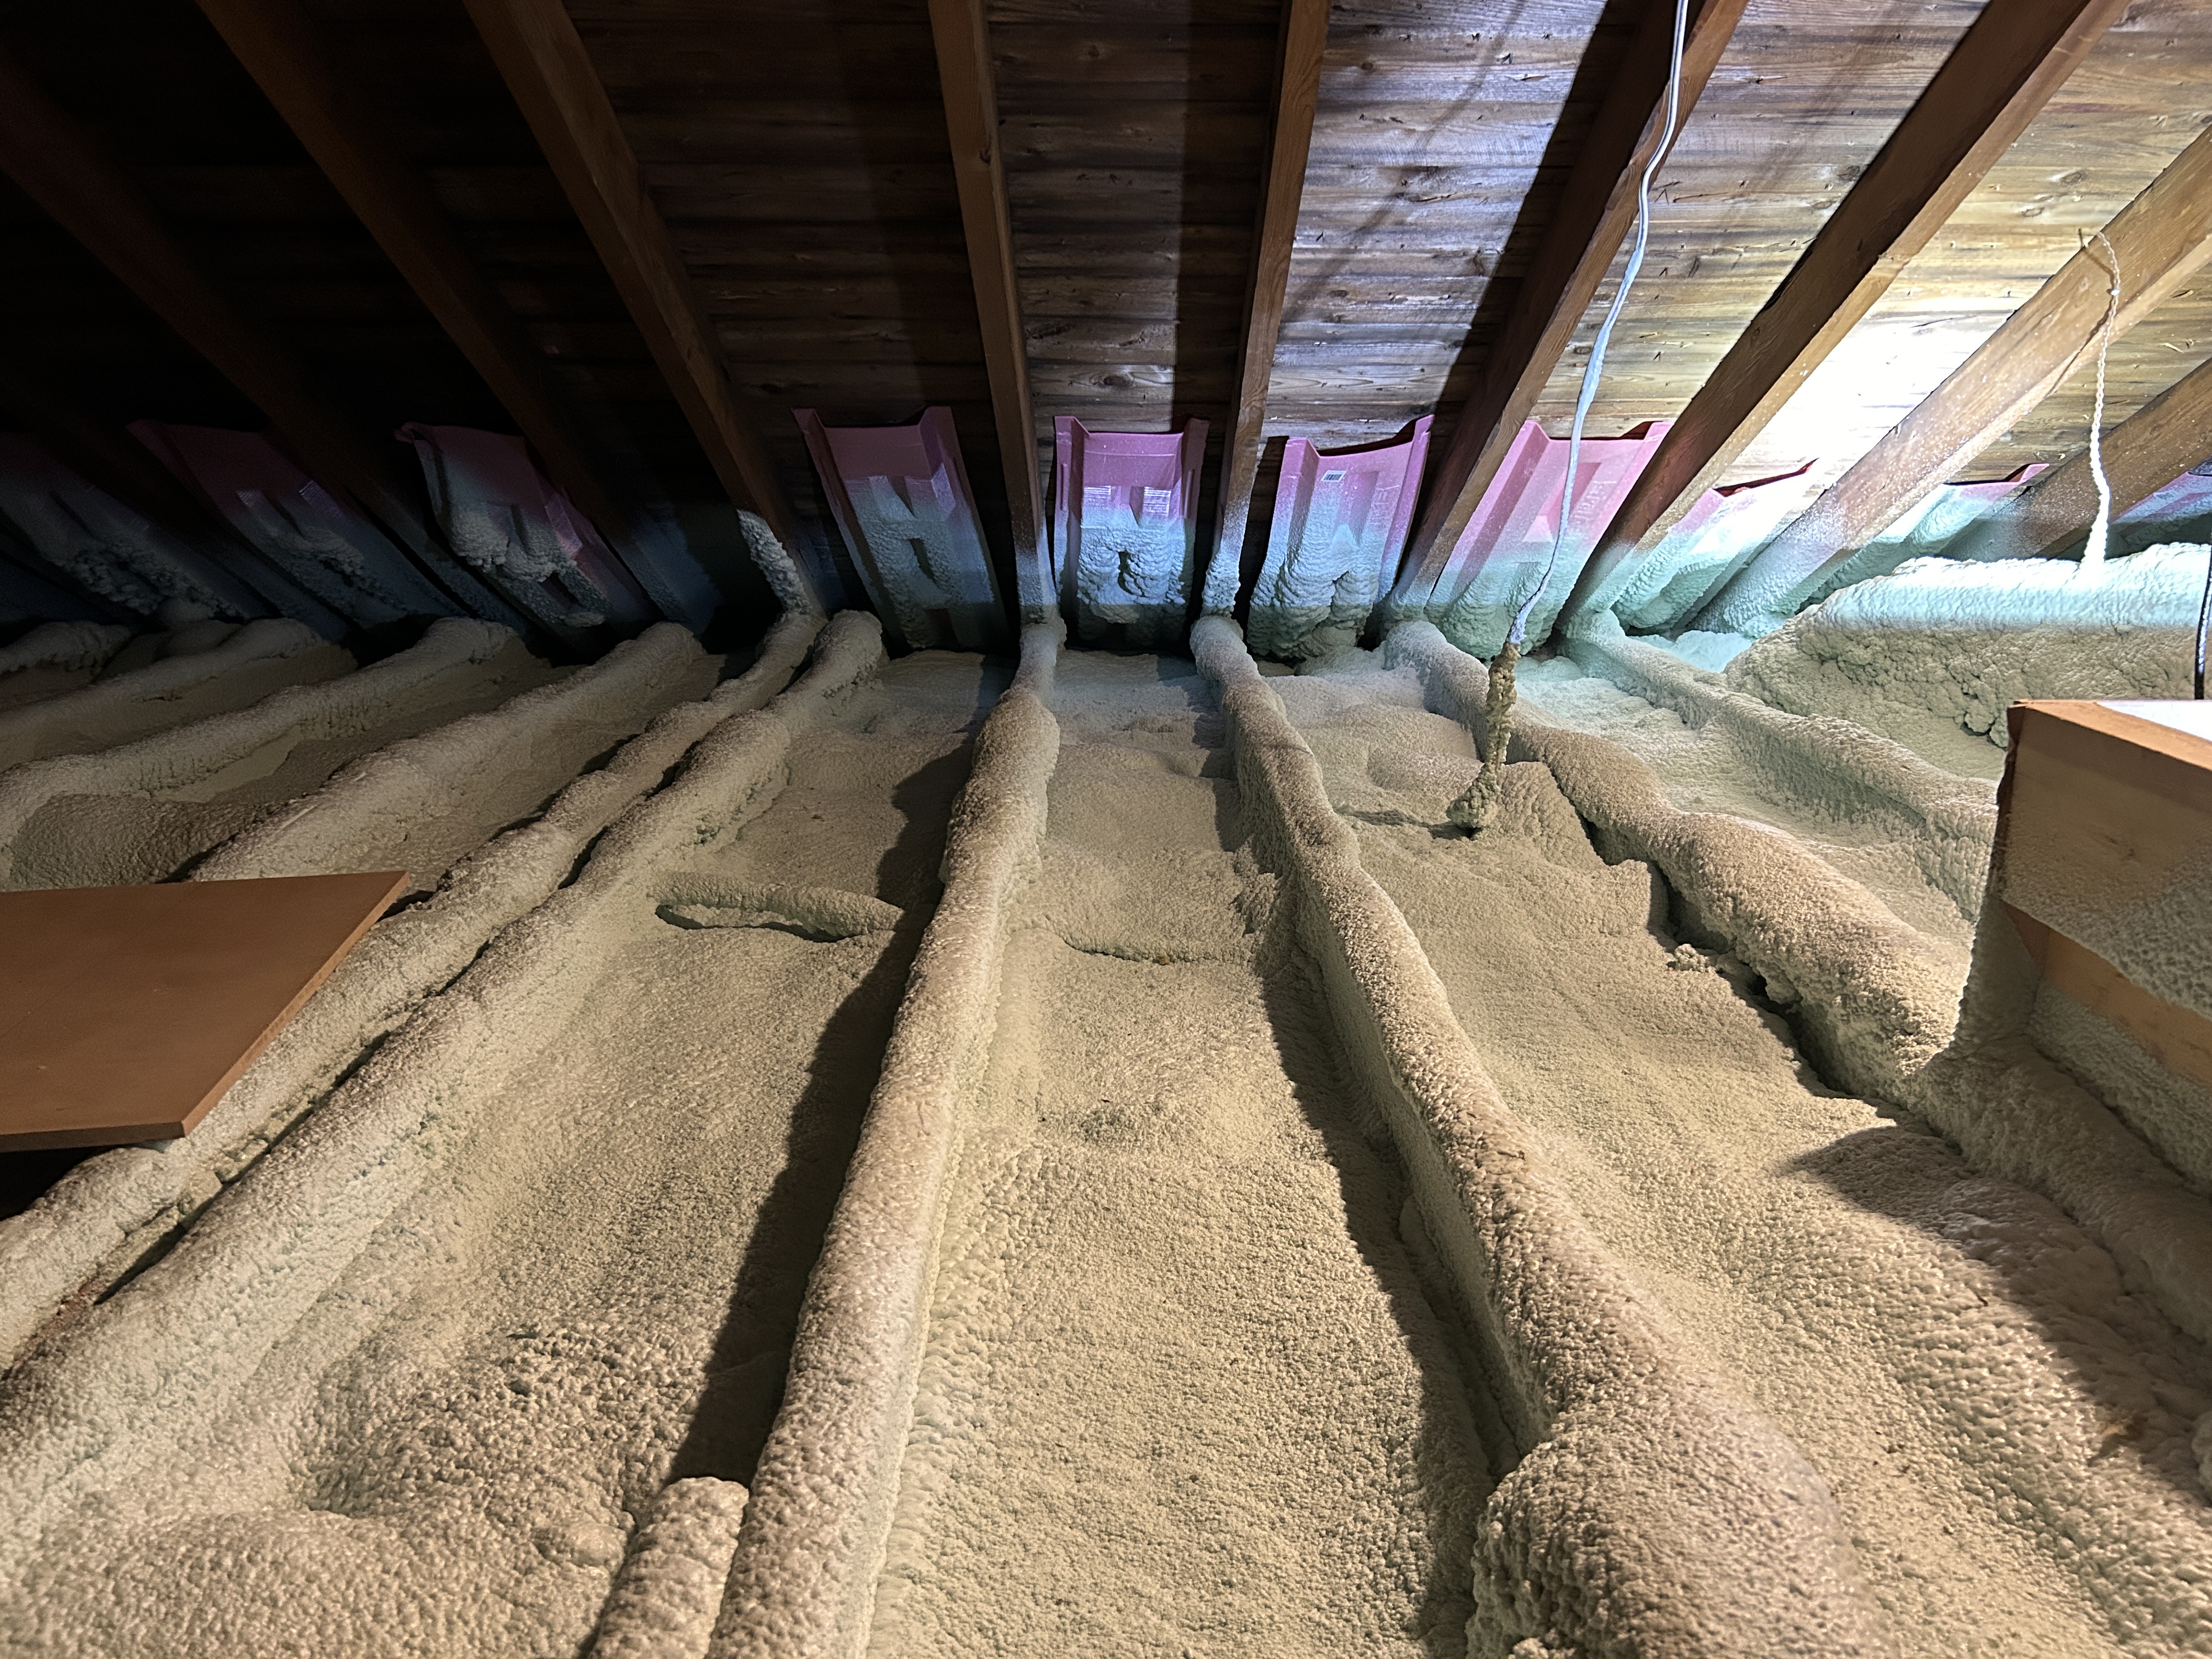
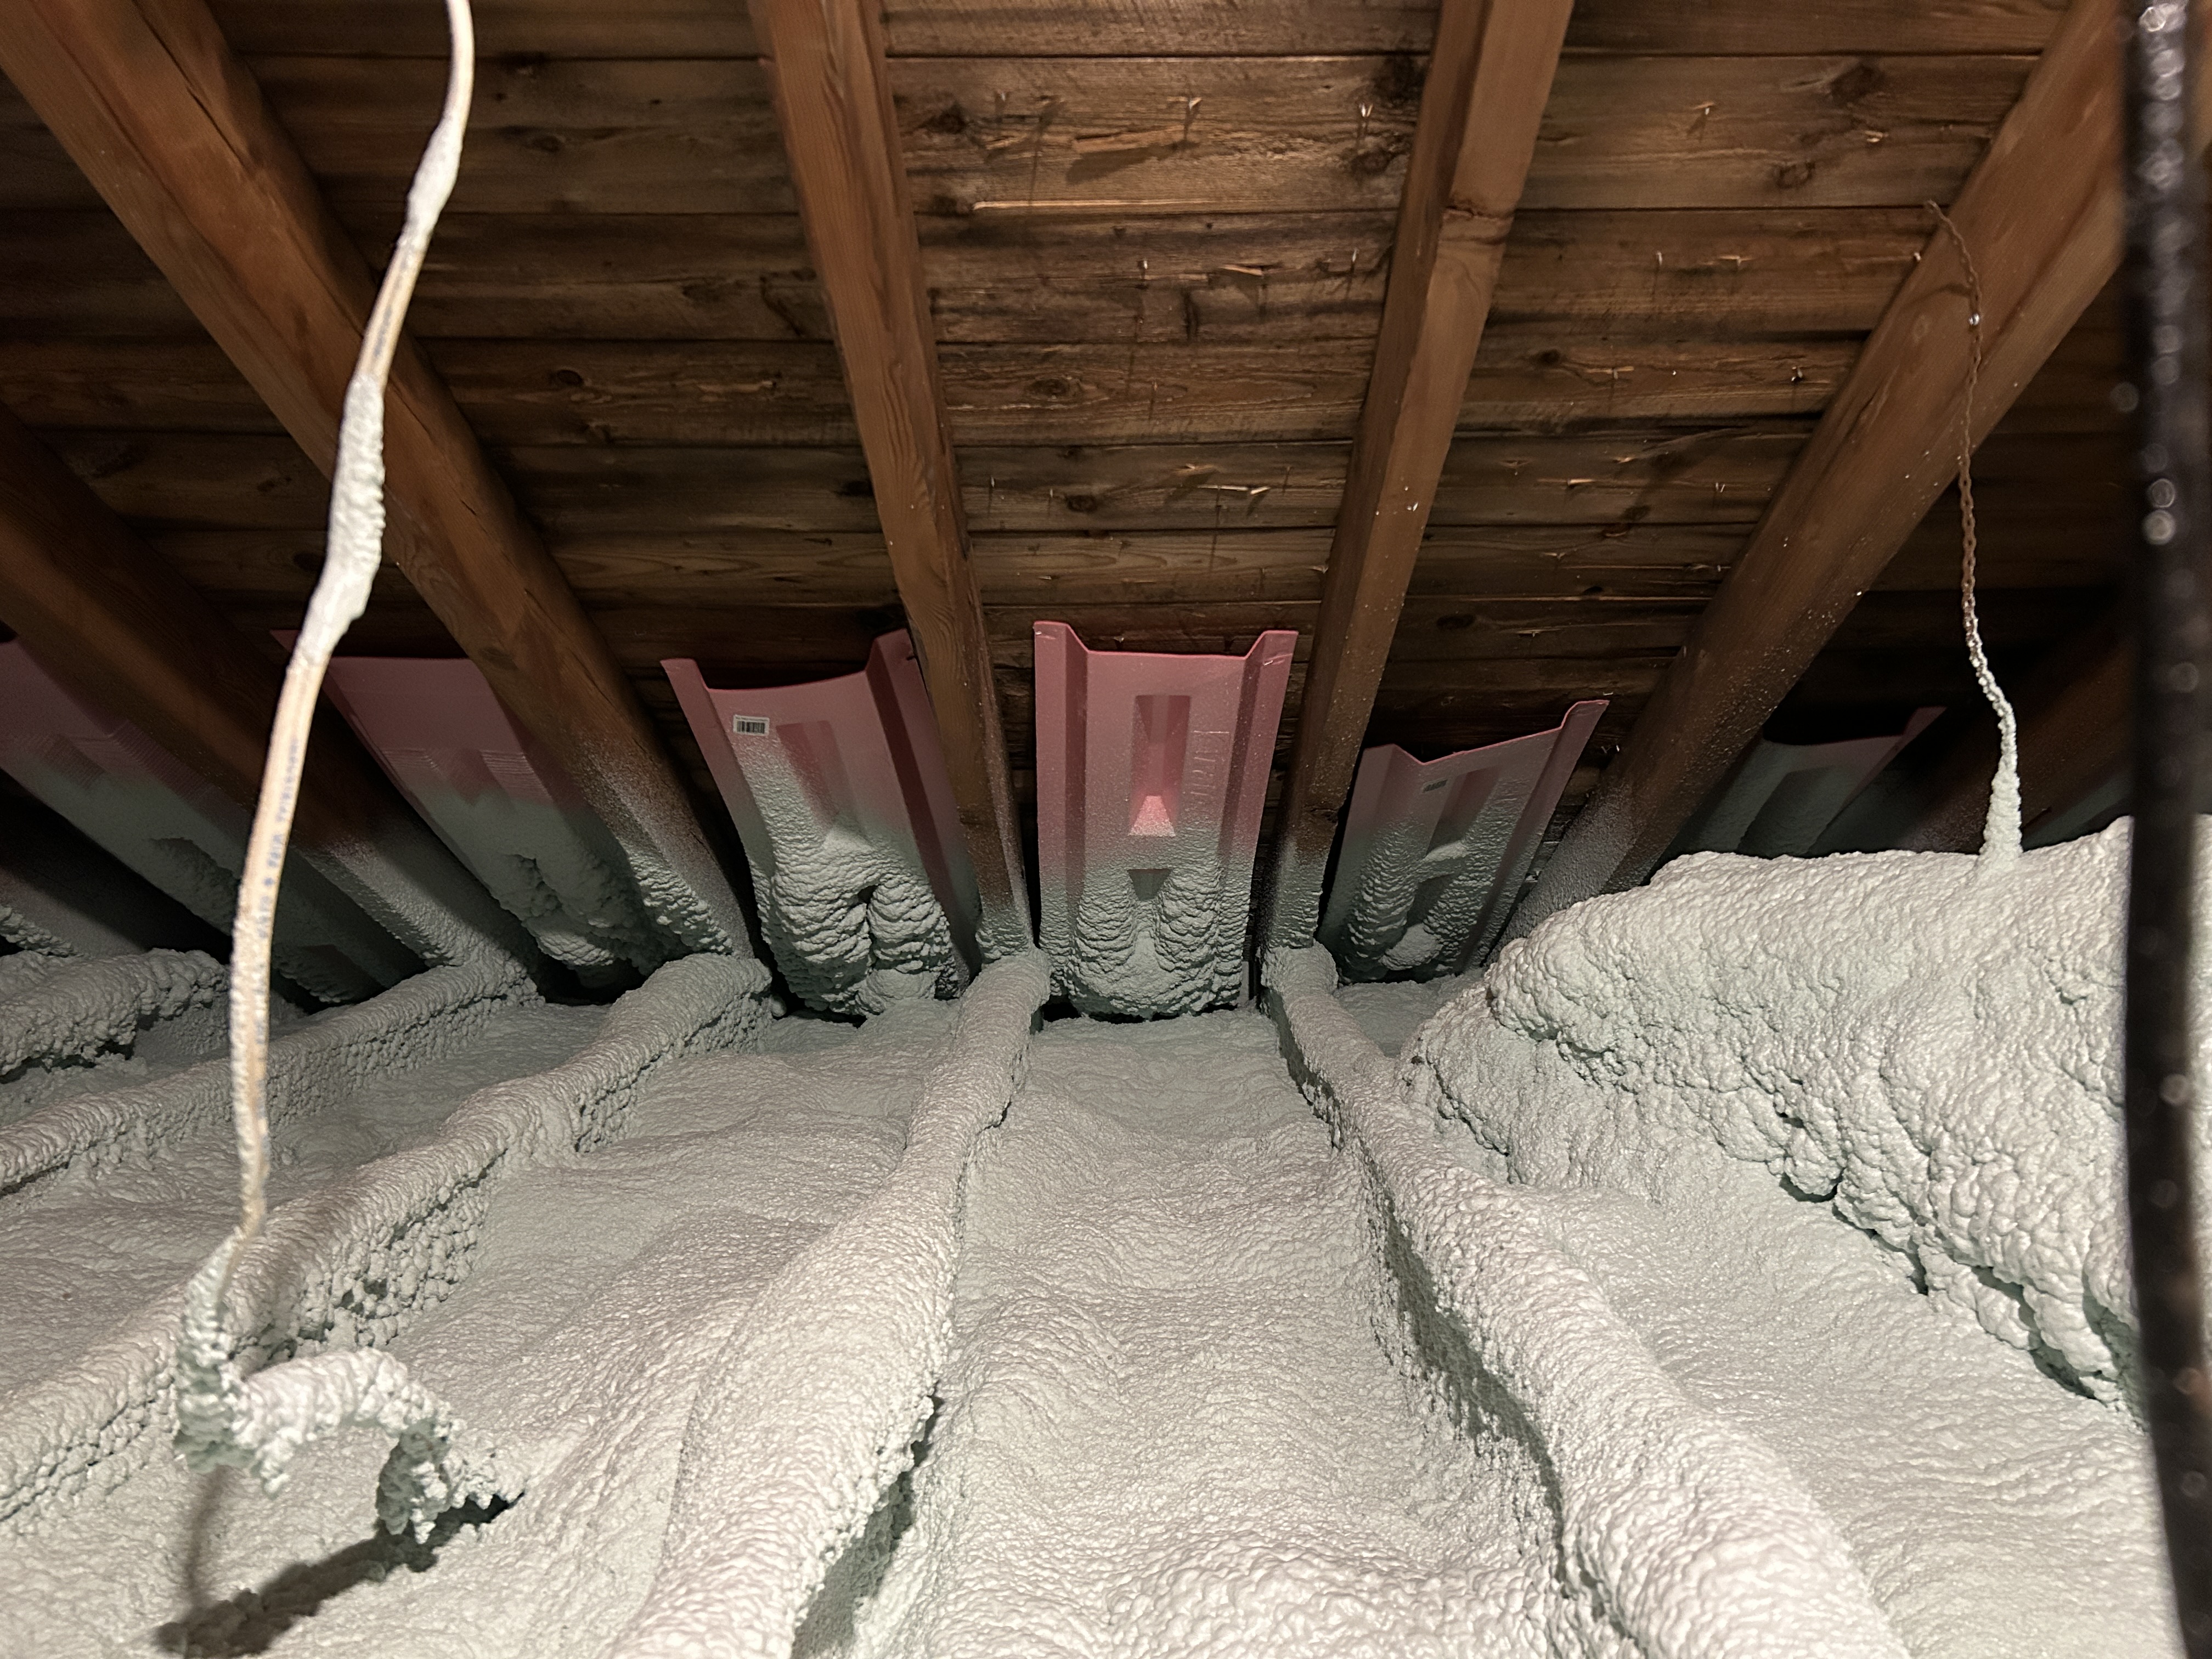
- Adding baffles for roof ventilation
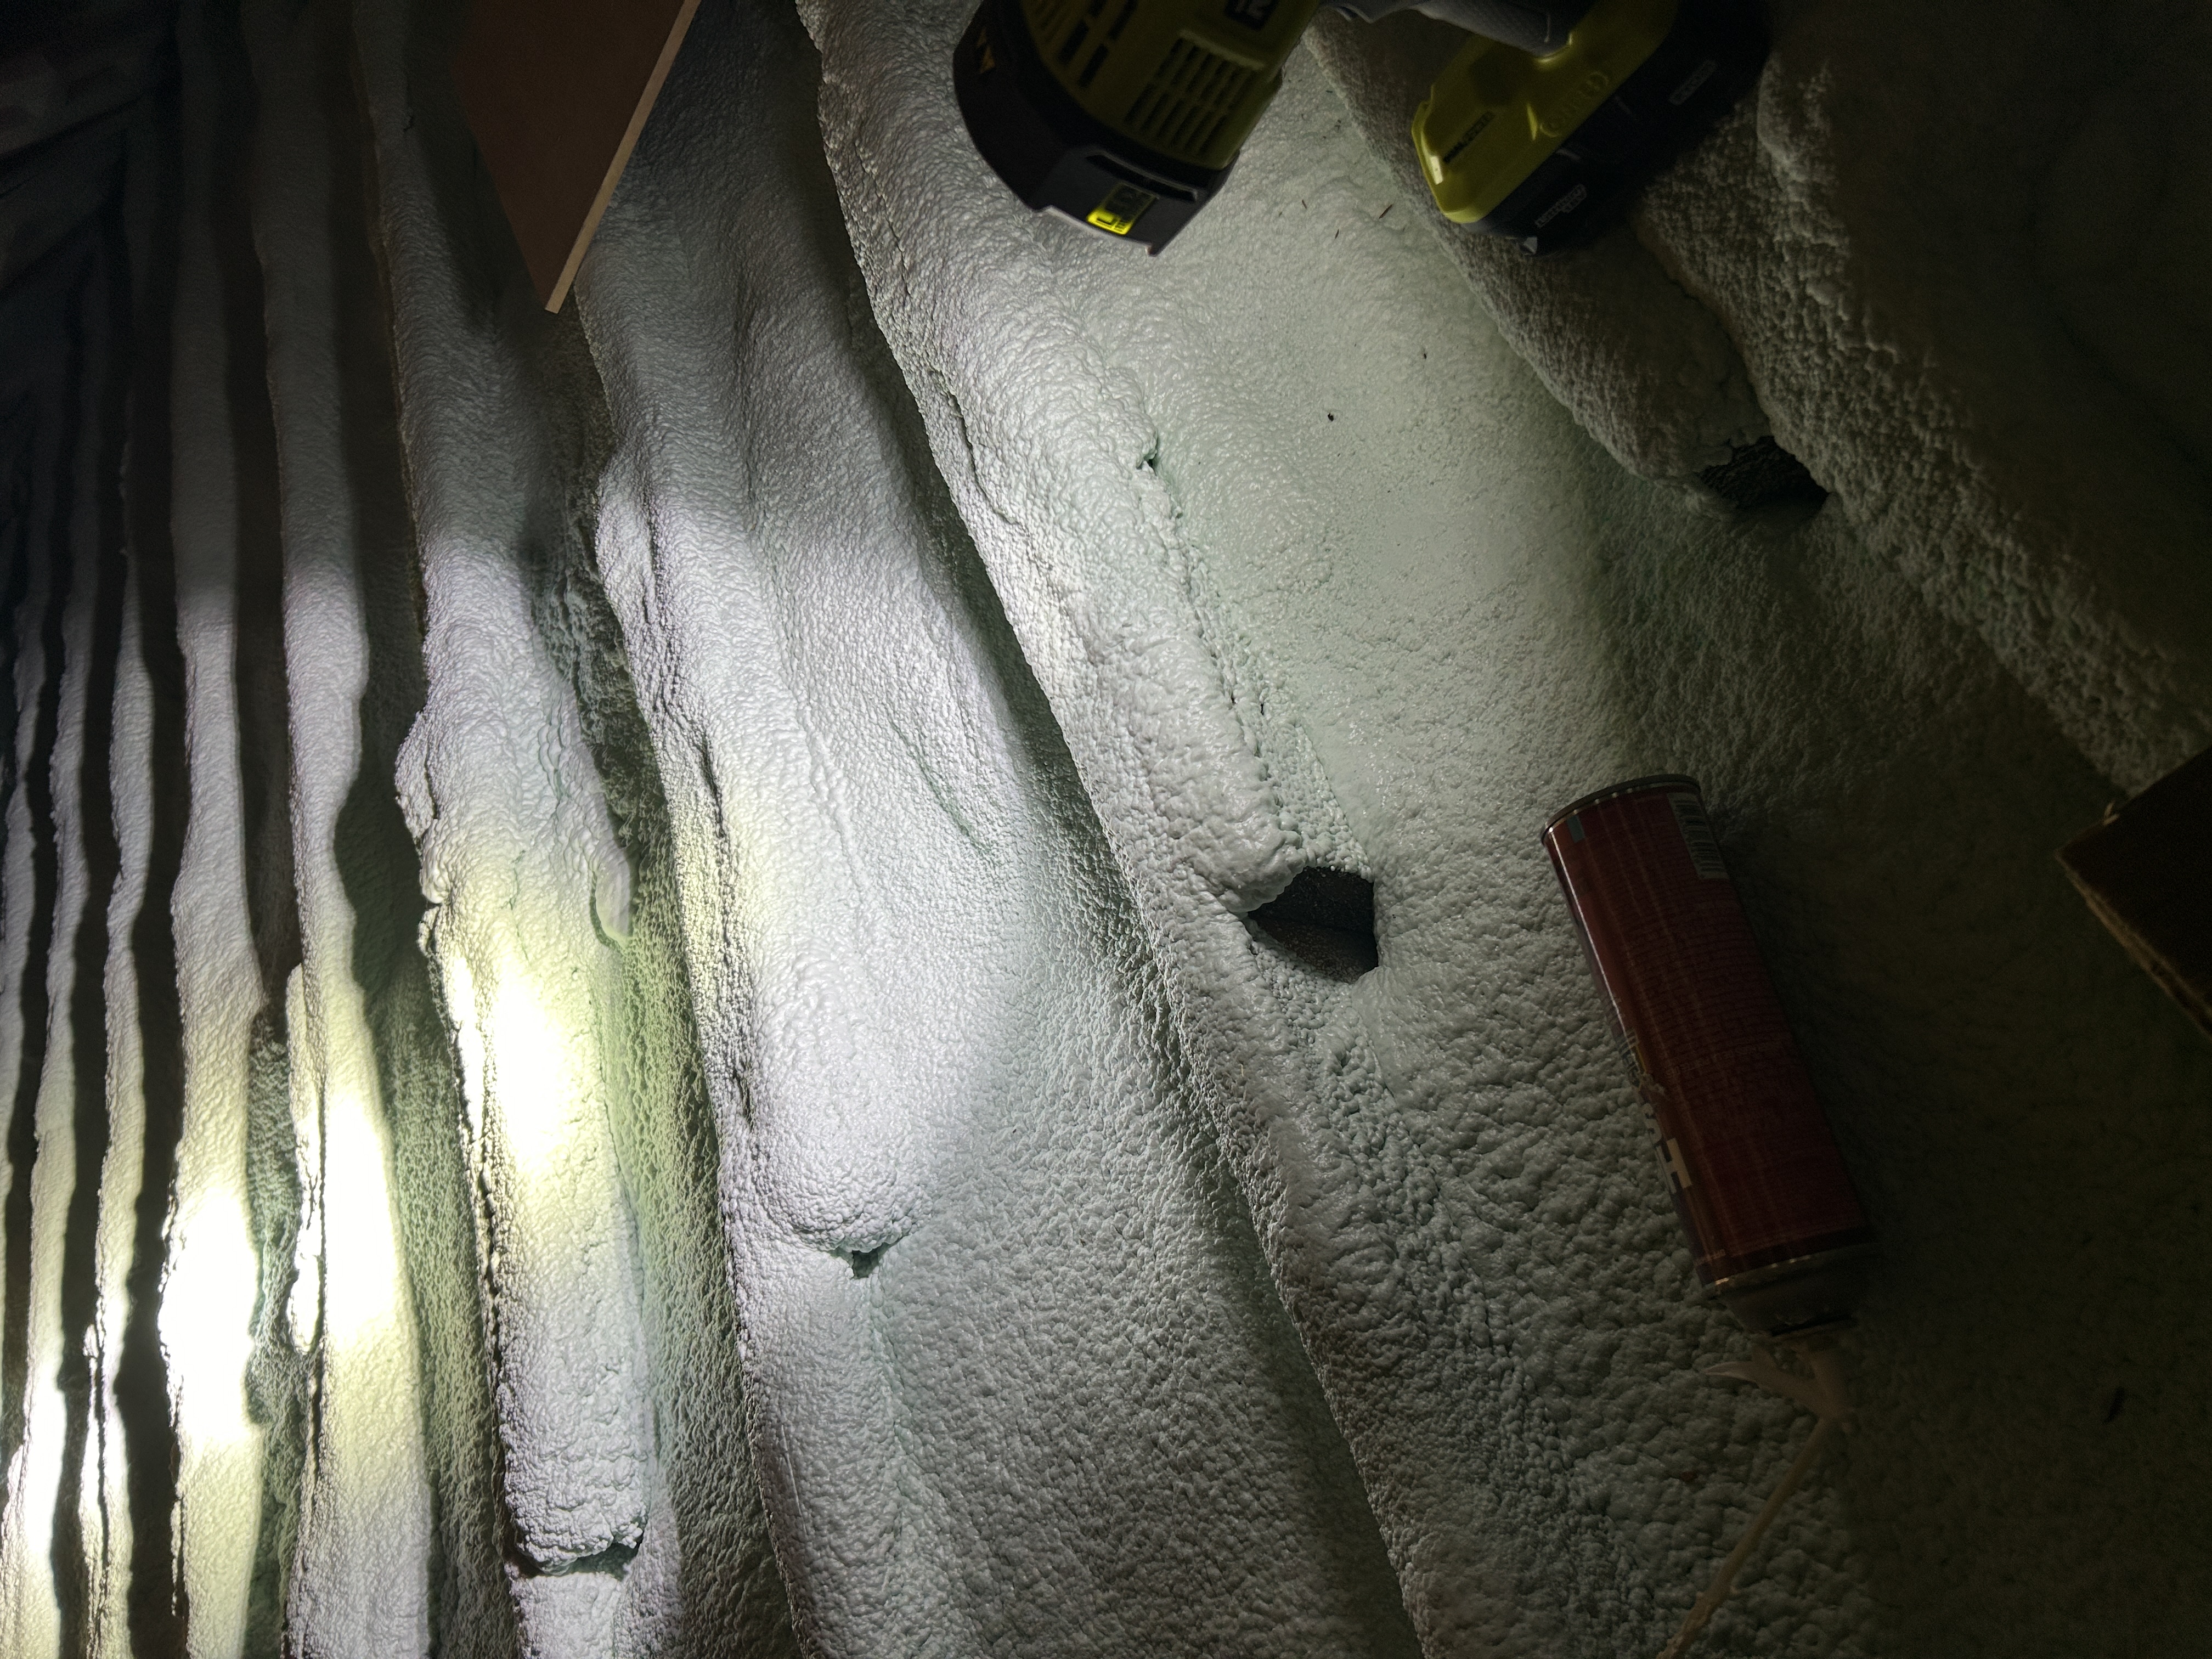
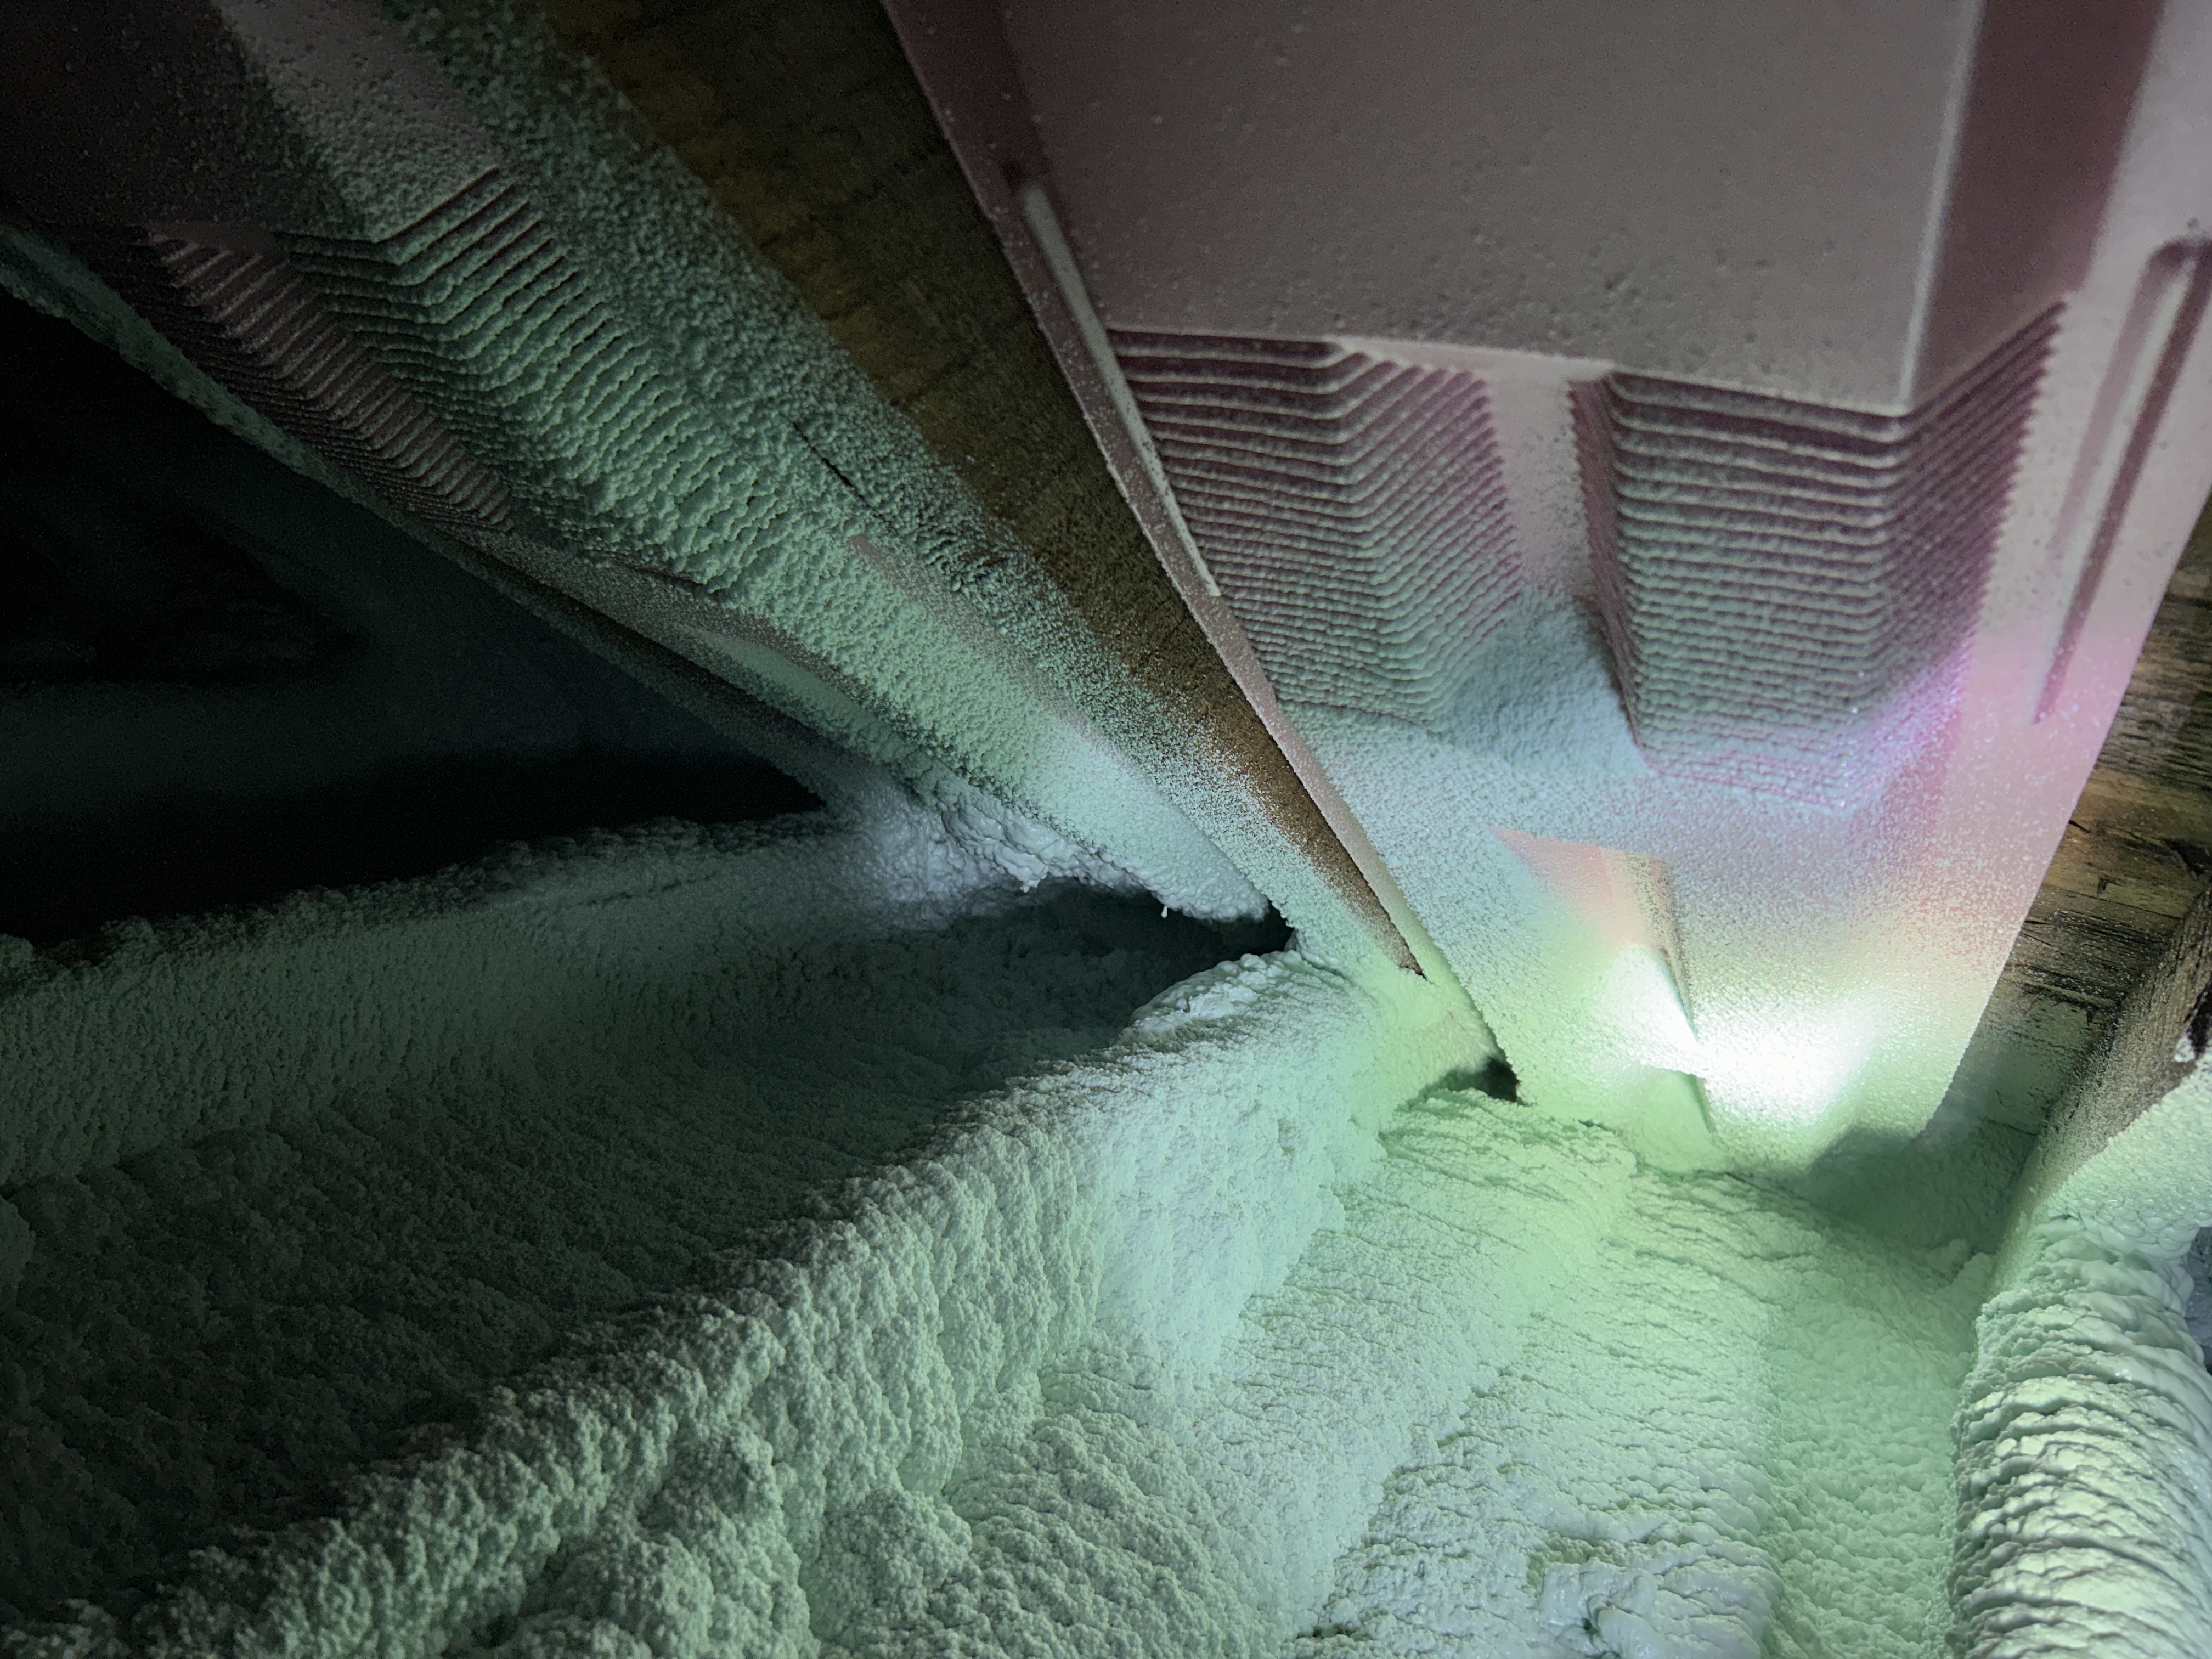
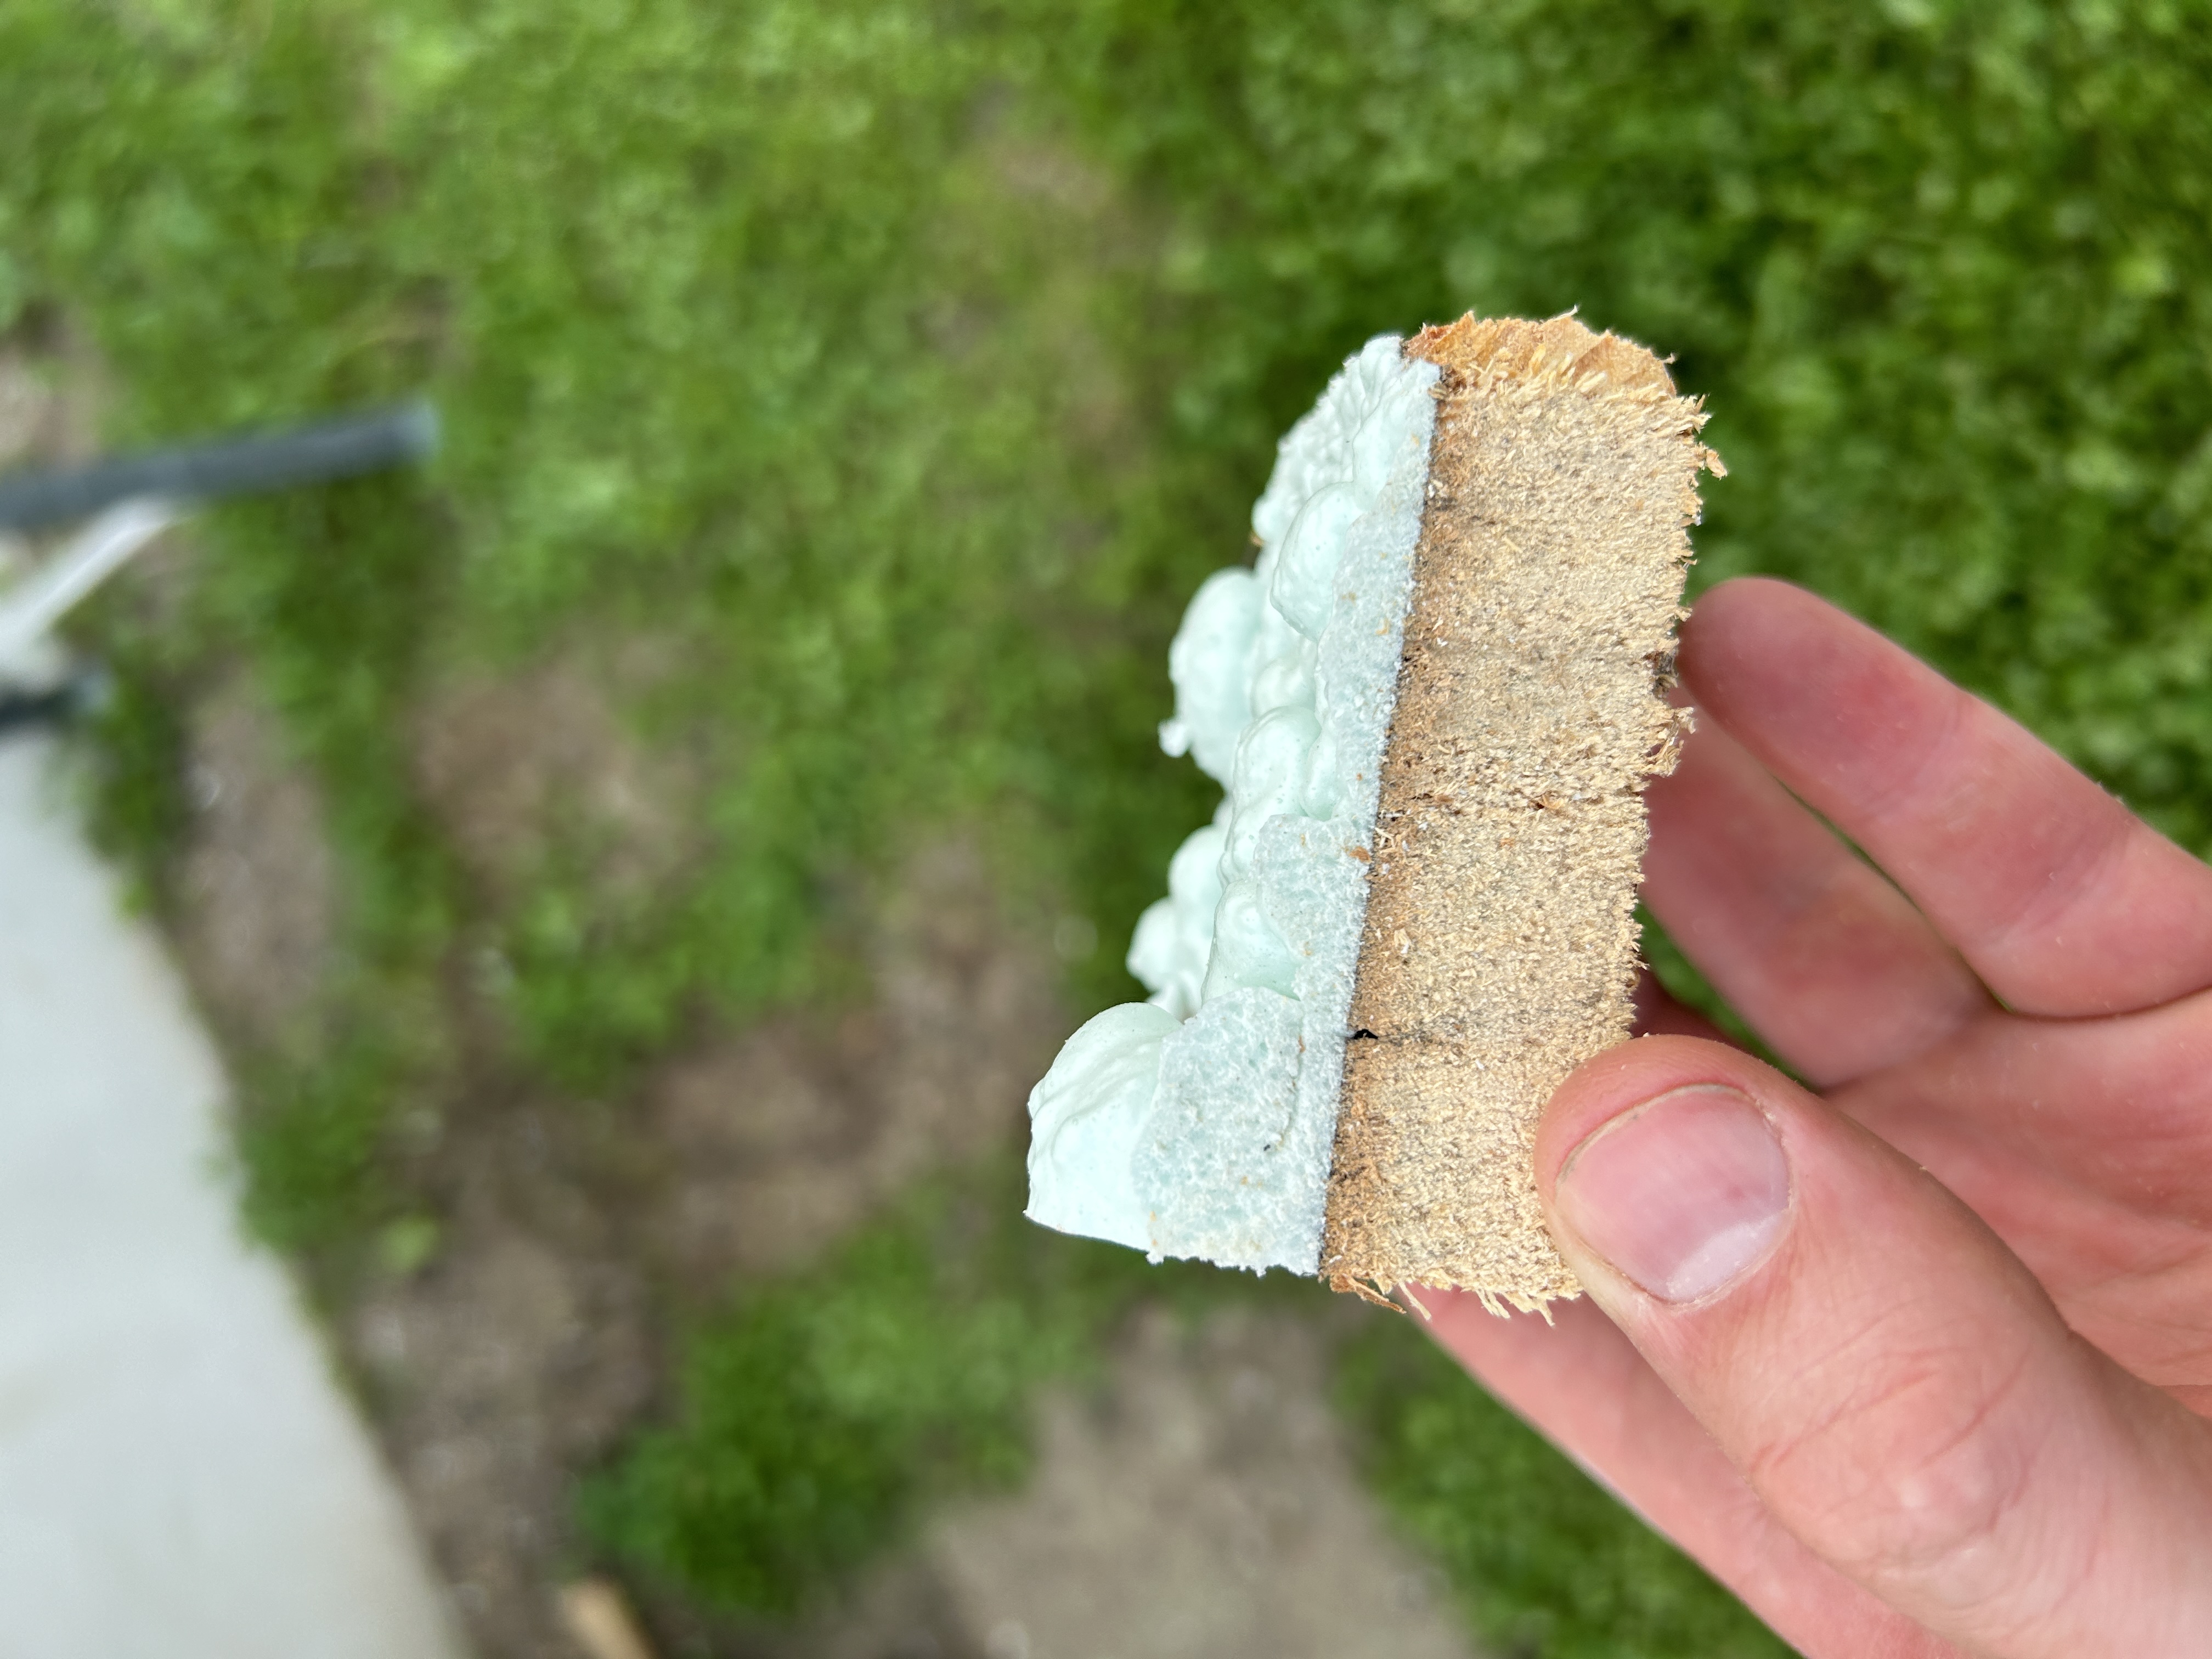
- Air sealing the attic with at least 50mm of low GWP spray foam, taking care to seal in the ERV ducting and detail the perimeter so that the new exterior wall air barrier in Phase 4 can be tied to it.
- Inspecting air sealing with a thermal camera to find and seal any leaks
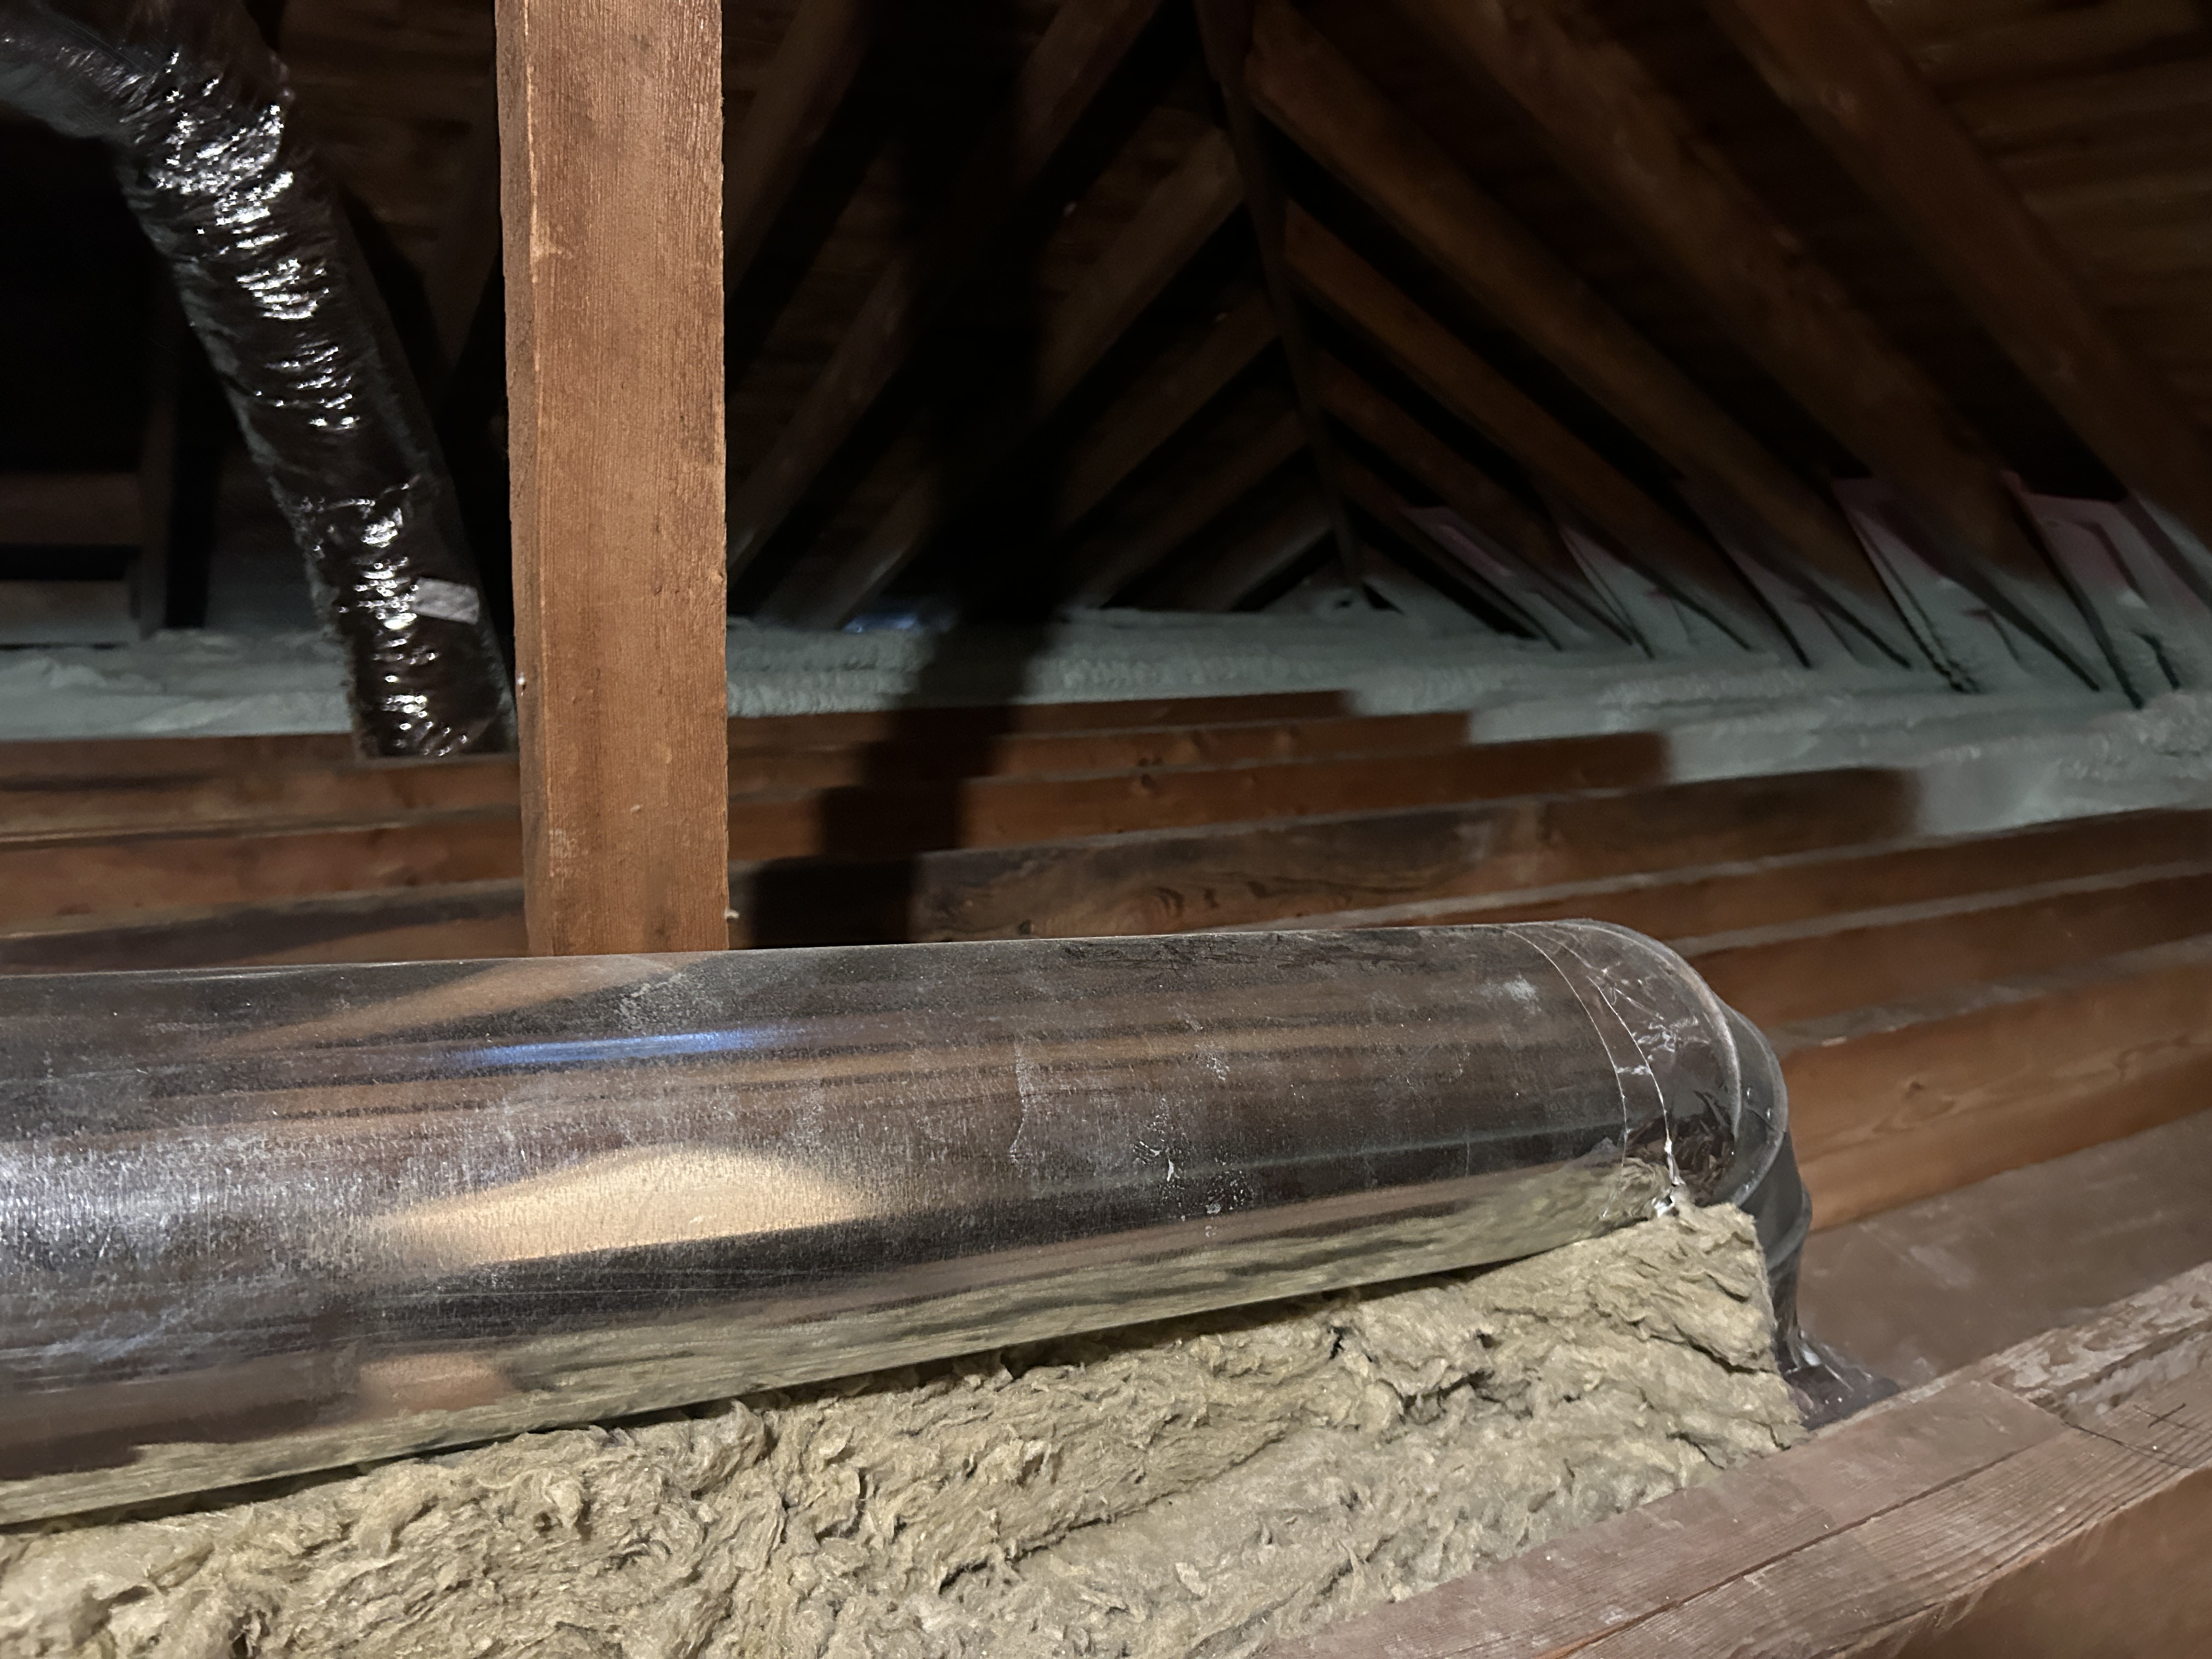
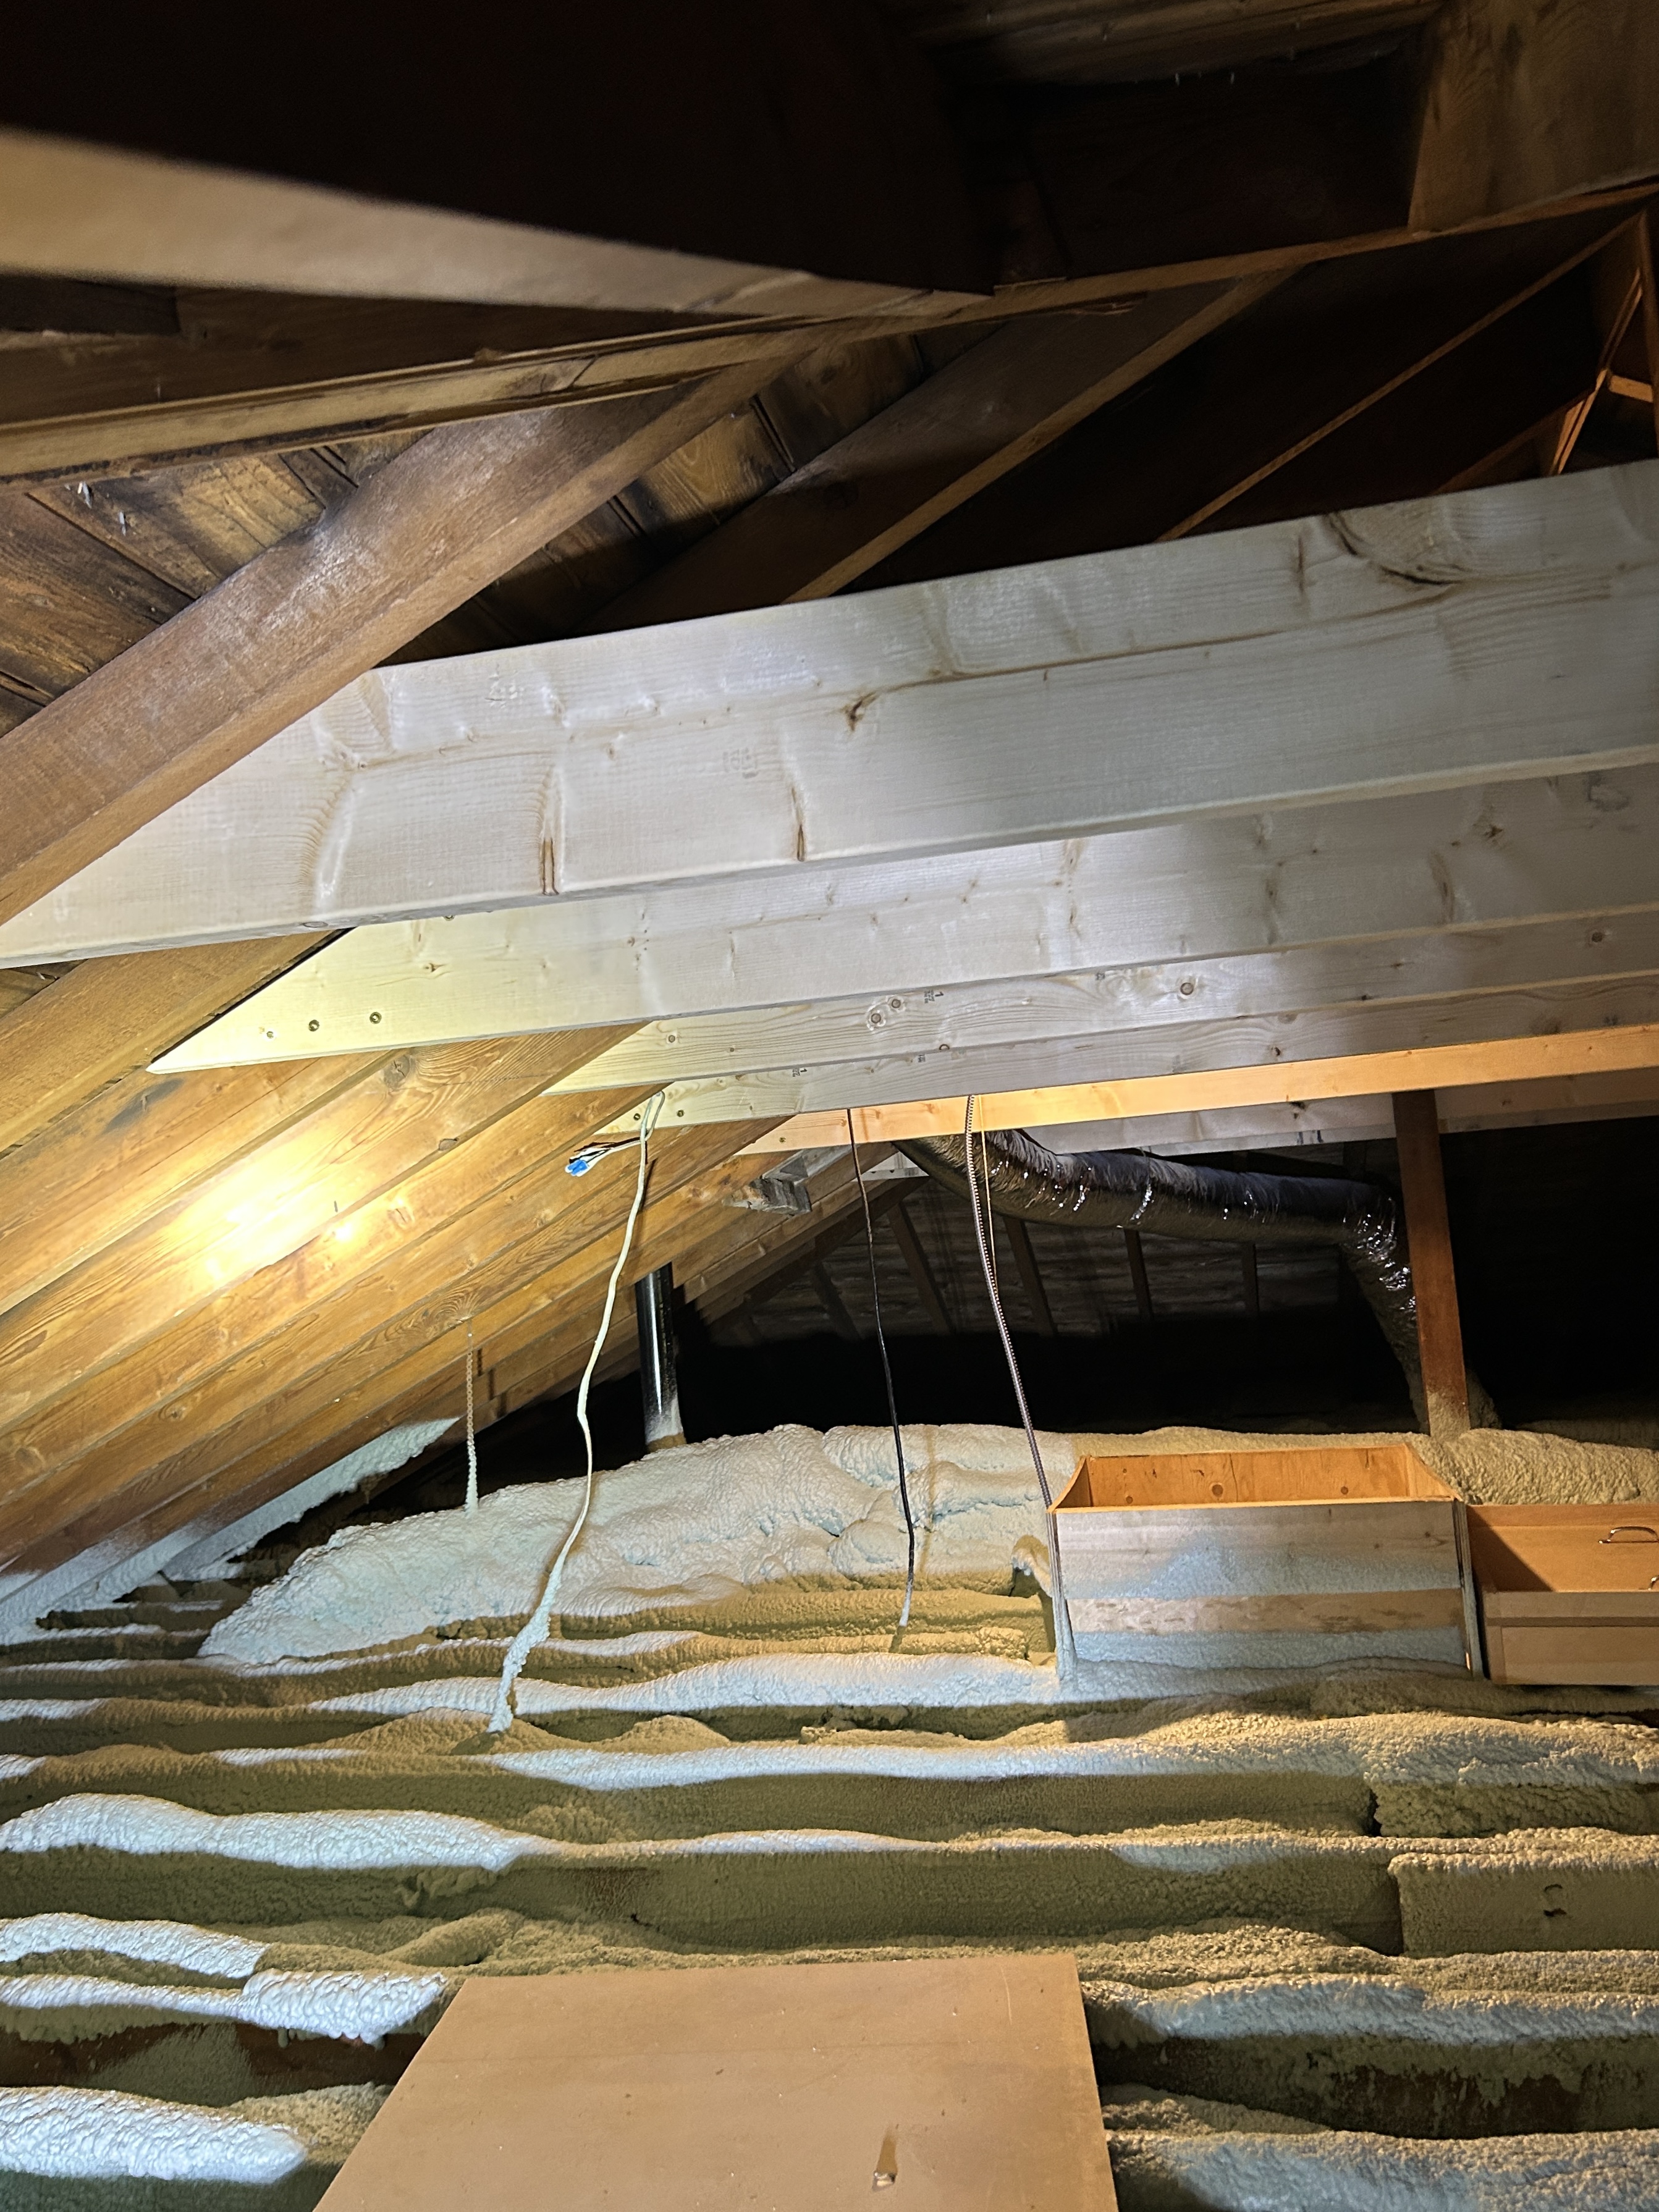
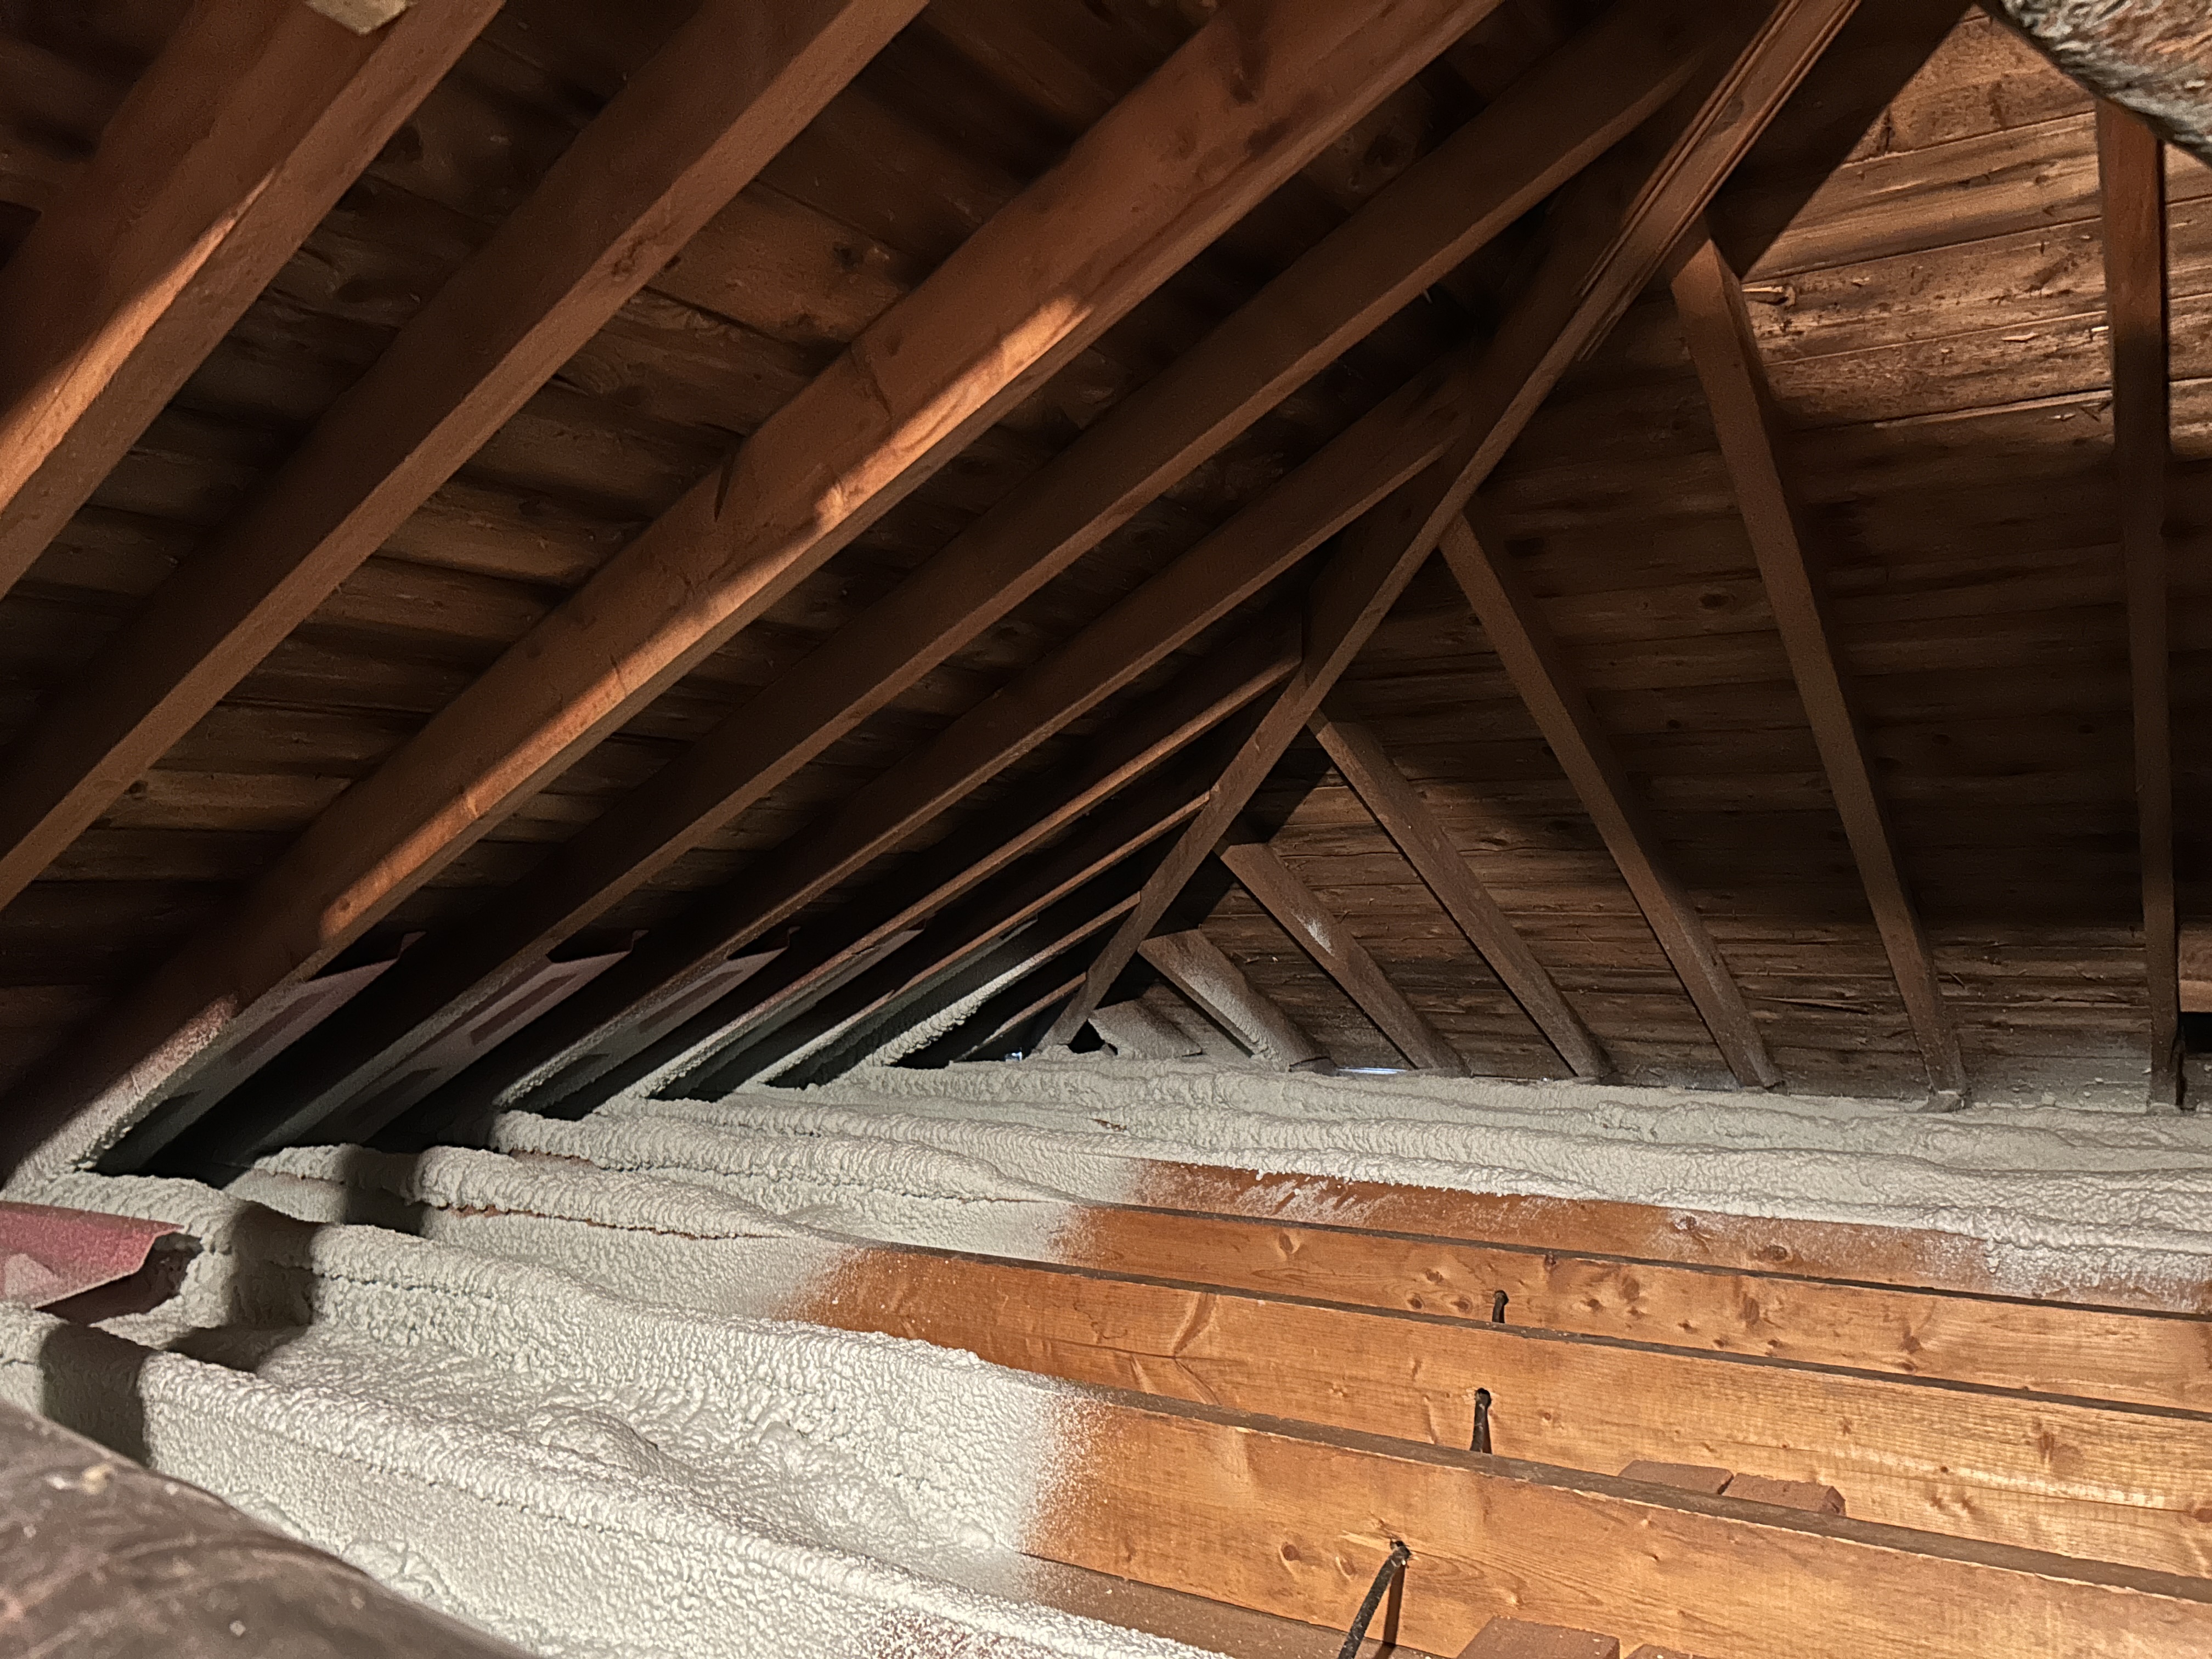
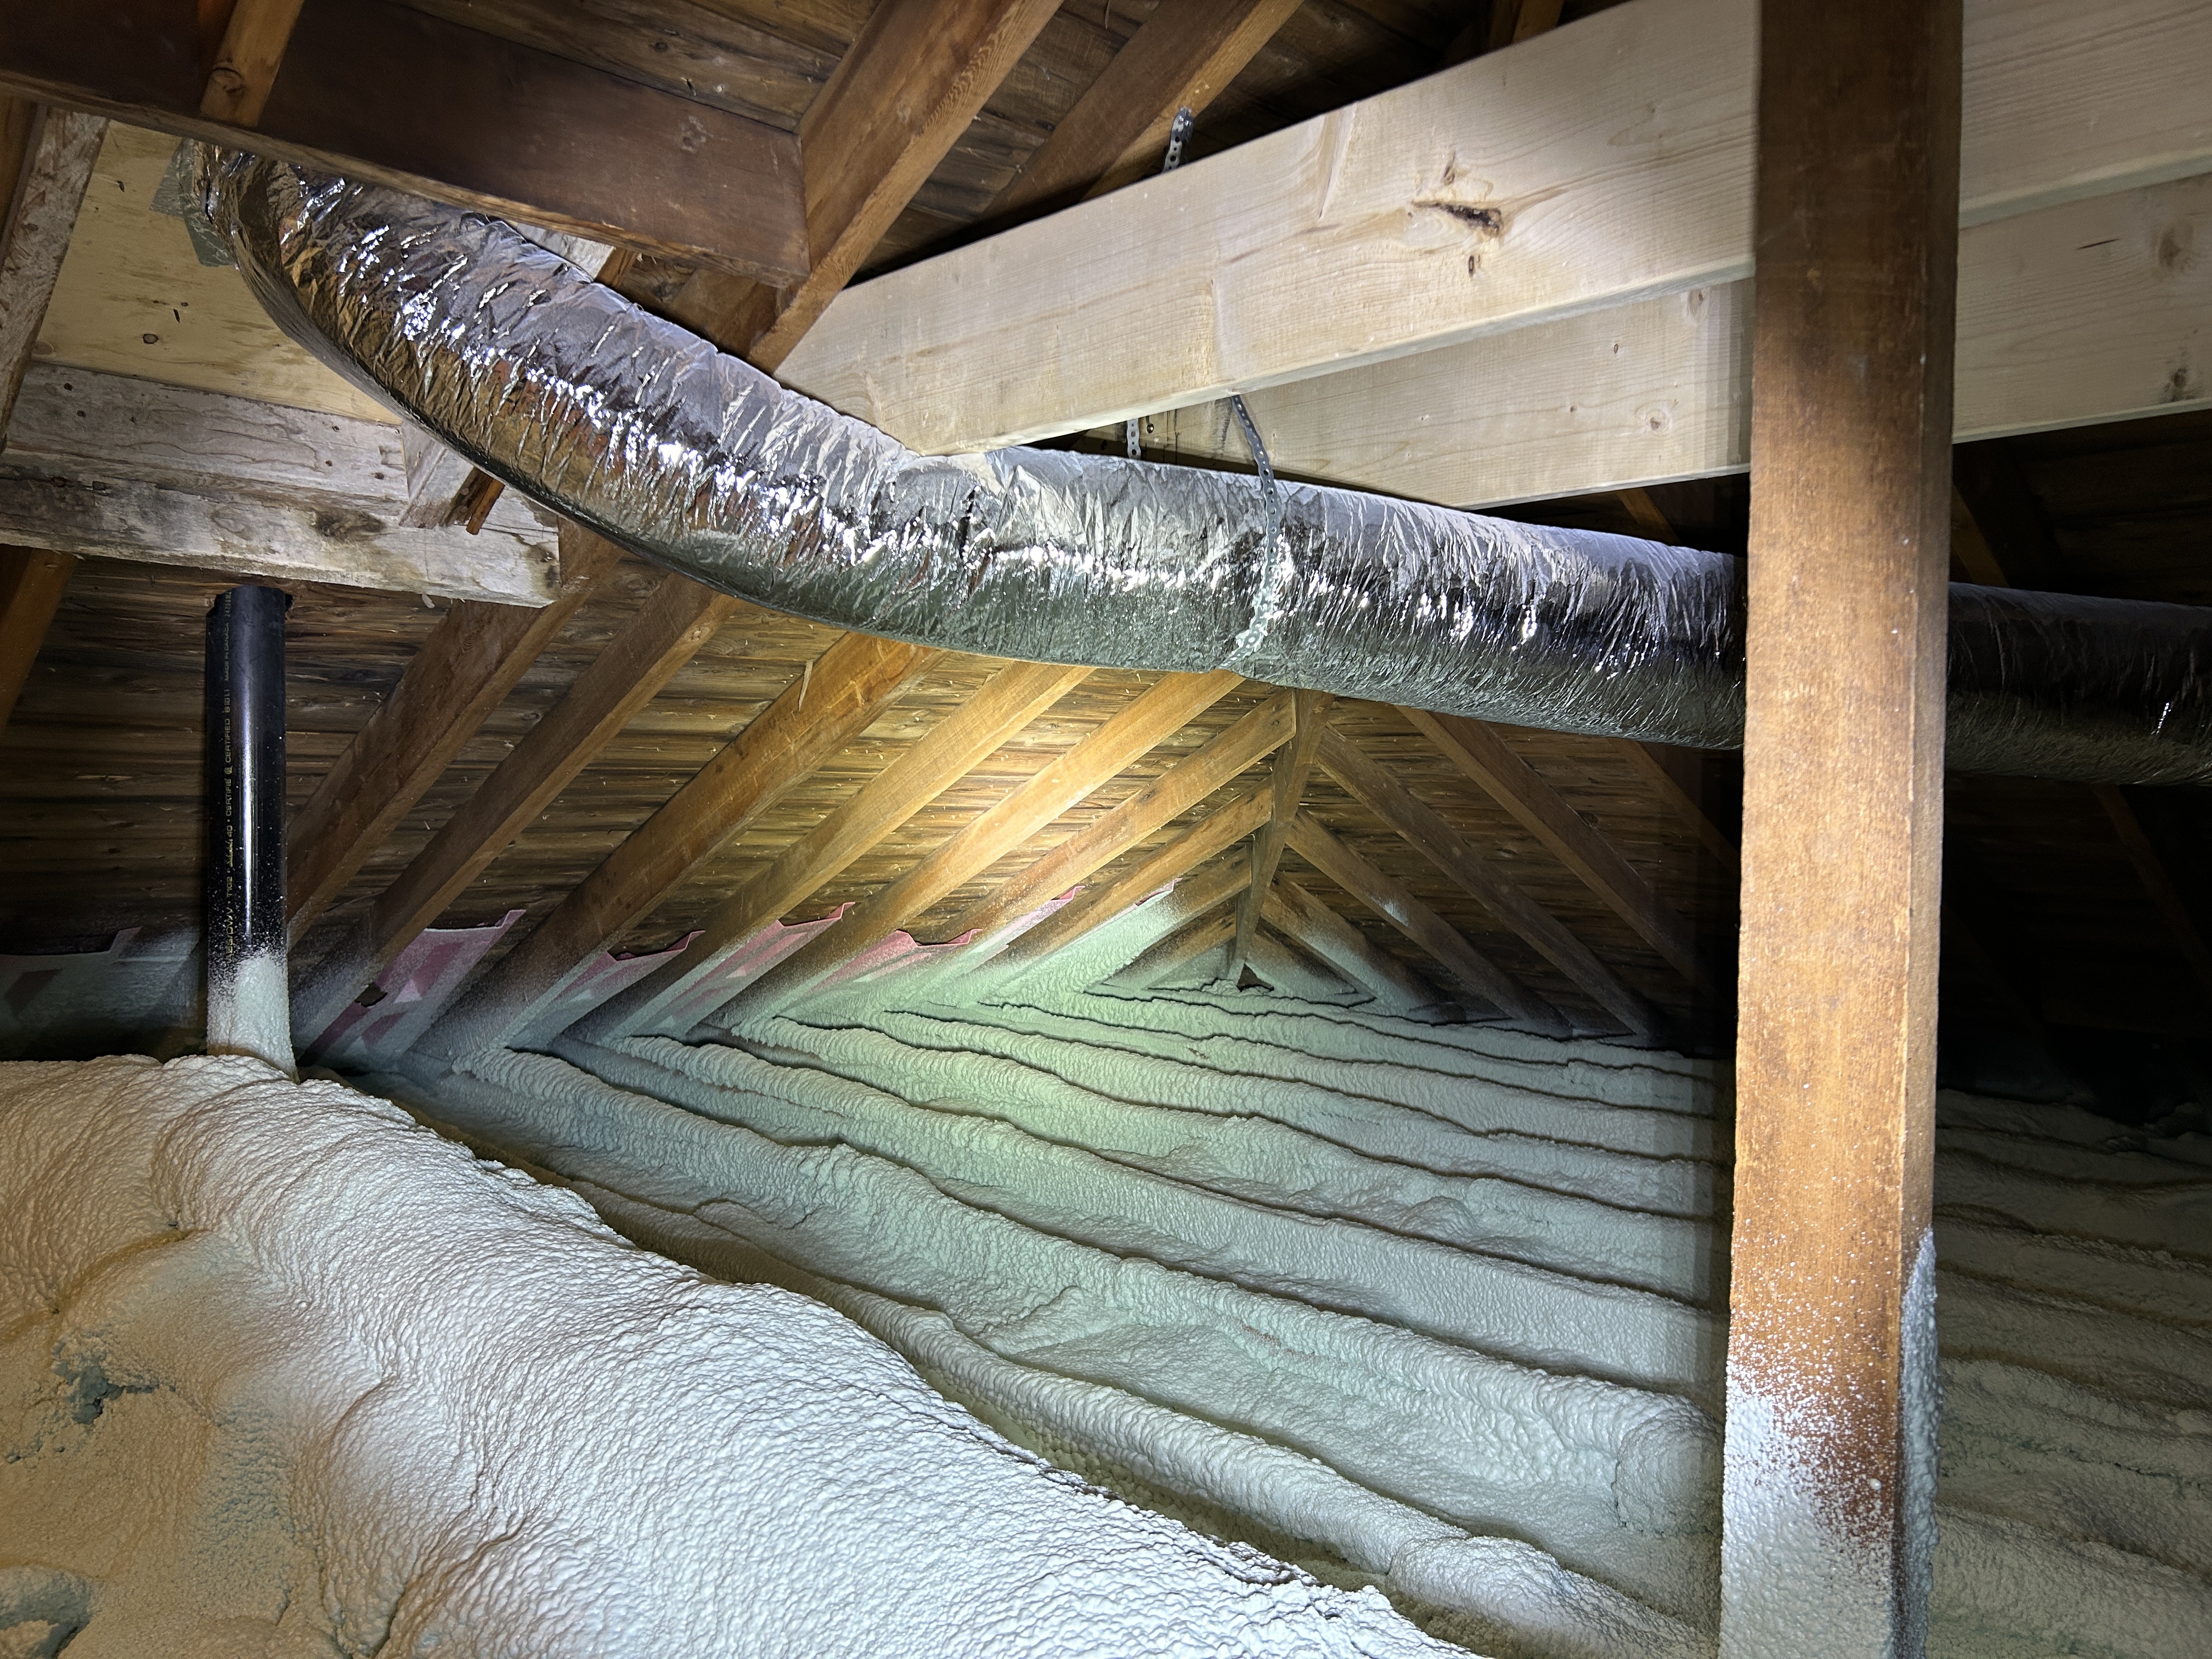
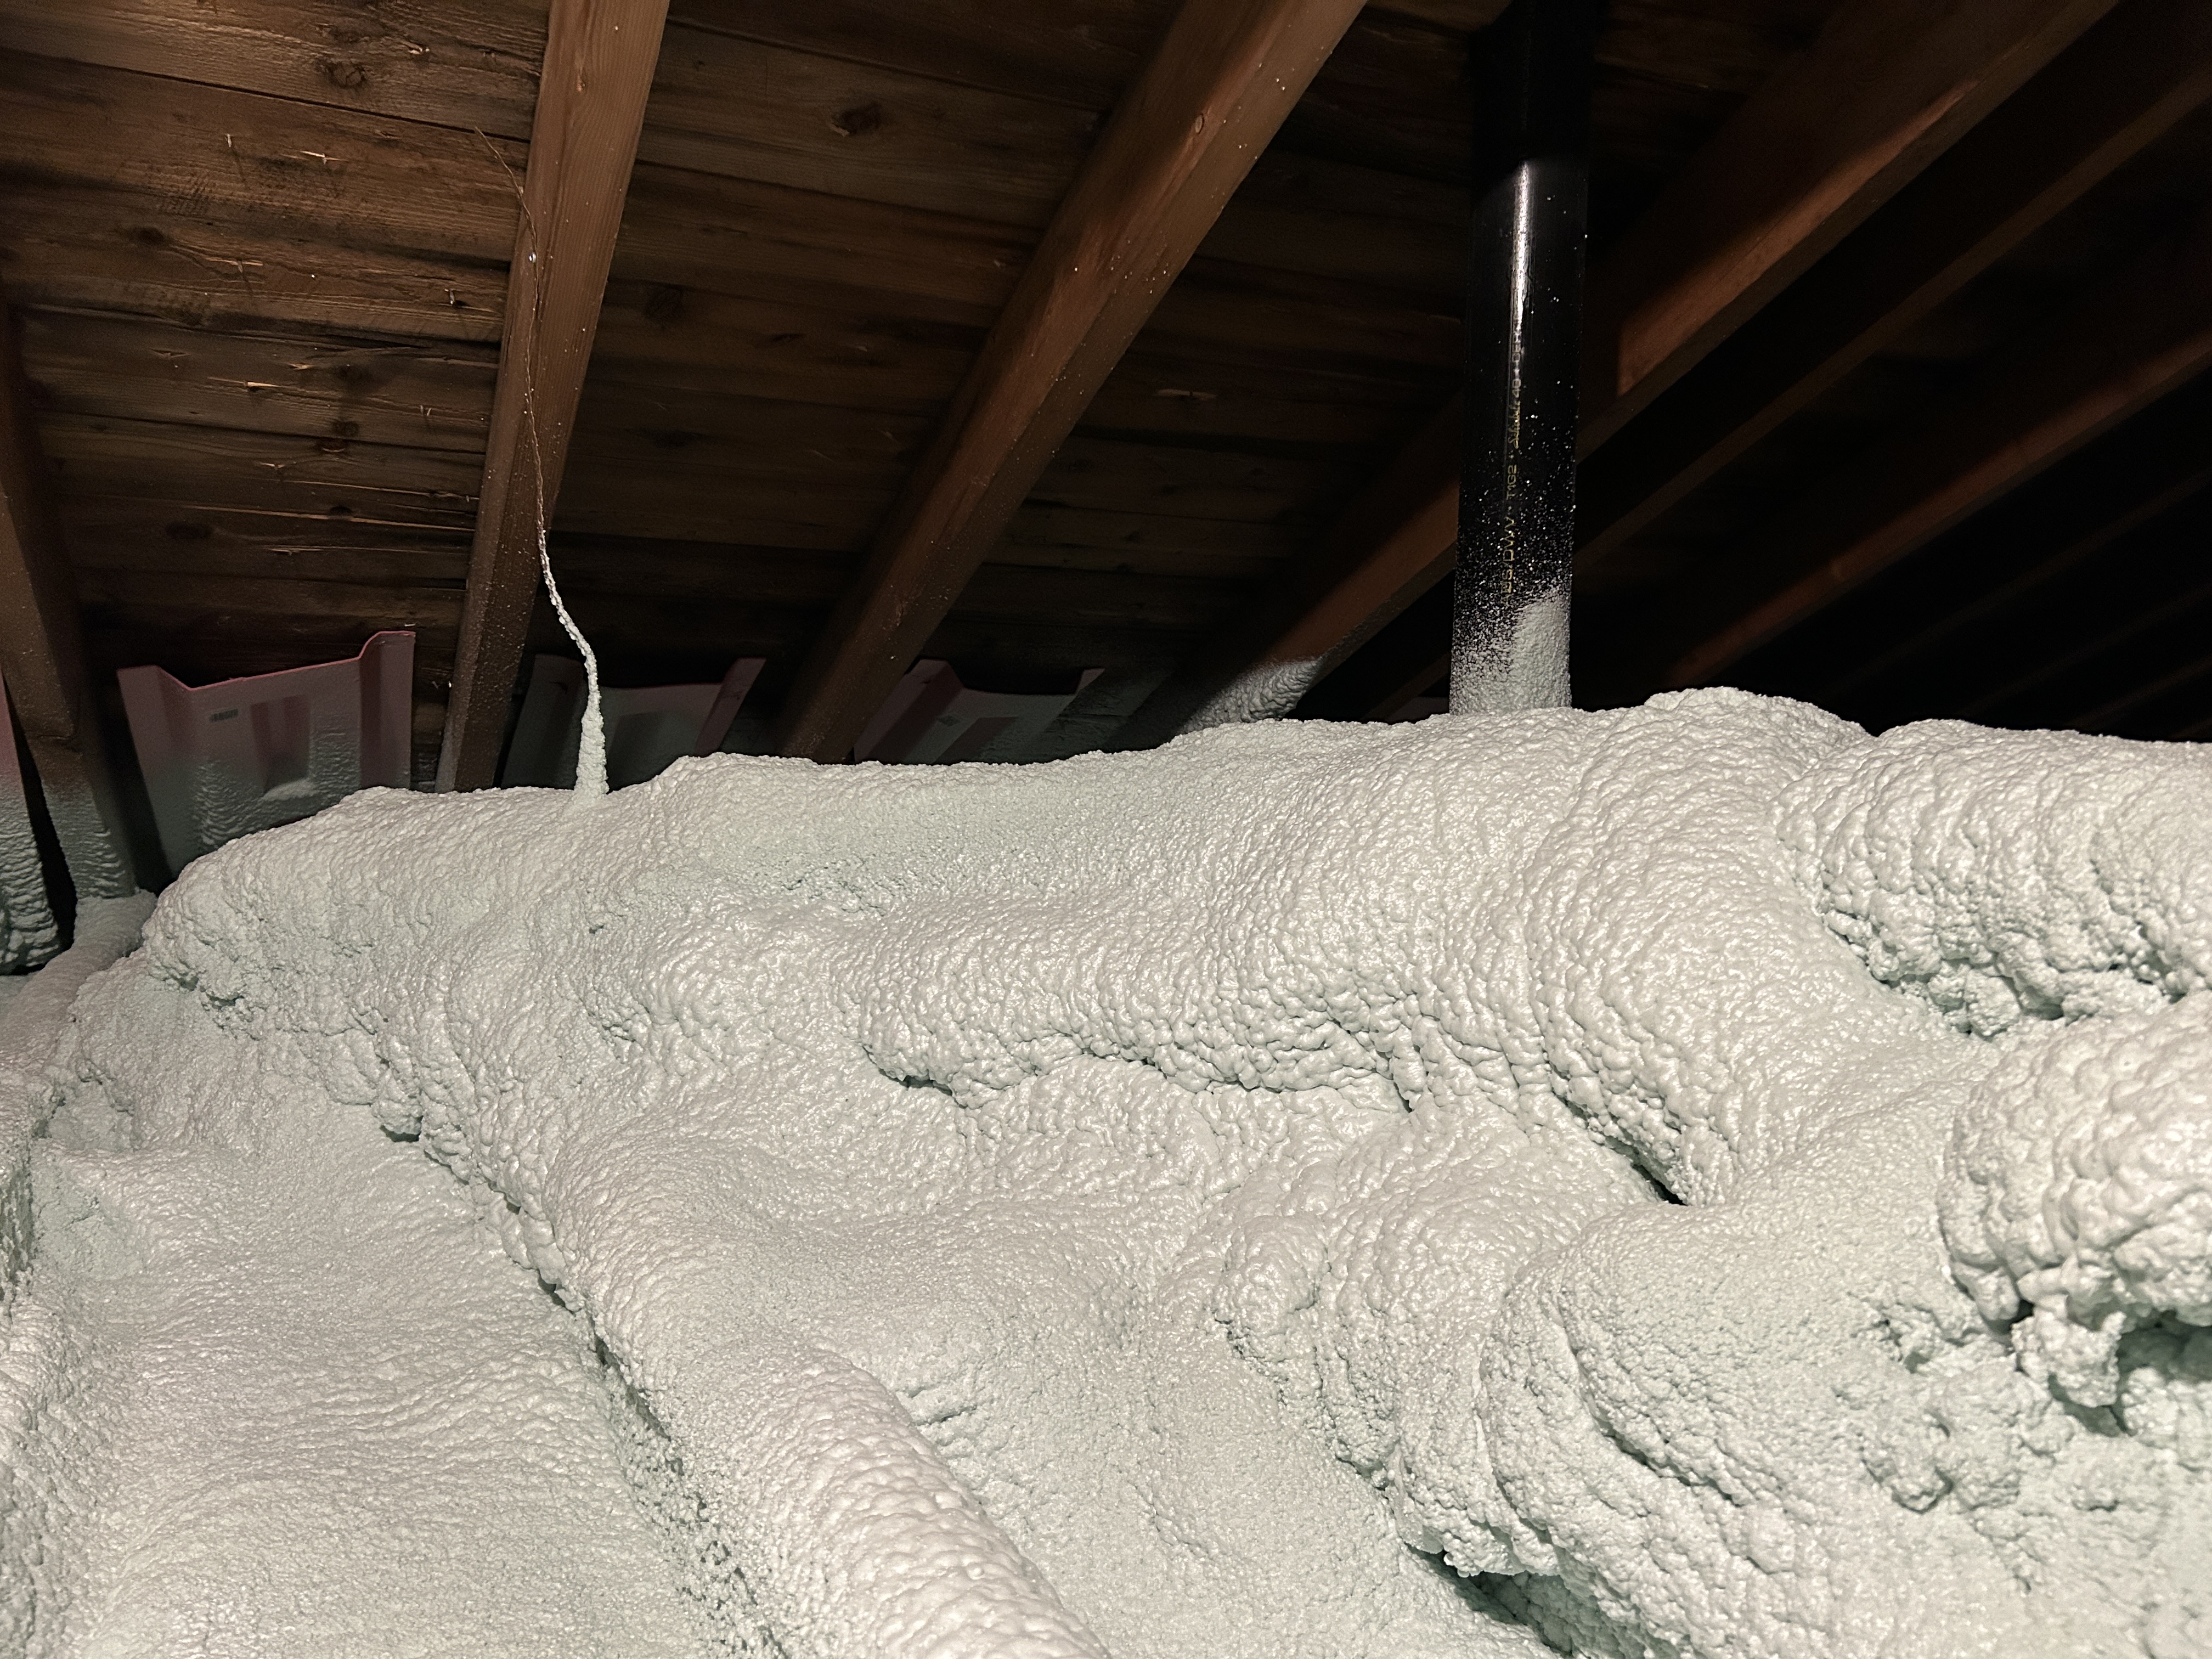
- Adding enough blown-in cellulose insulation to get to a total R-value of 60.
- Conducting a blower door test for a more accurate mid-project energy audit (and to move forward with government grants and loans)
Stage 3: Lessons
Get an engineer to inspect roof for solar PV before insulating attic We did not originally plan to install collar ties, but the electrician / solar contractor reminded us that we needed an engineer to inspect the roof and either greenlight it for a future PV installation or tell us what reinforcement measures to take. The engineer told us to install collar ties, and we’re glad we caught this before adding cellulose, but we should have done it before adding spray foam.
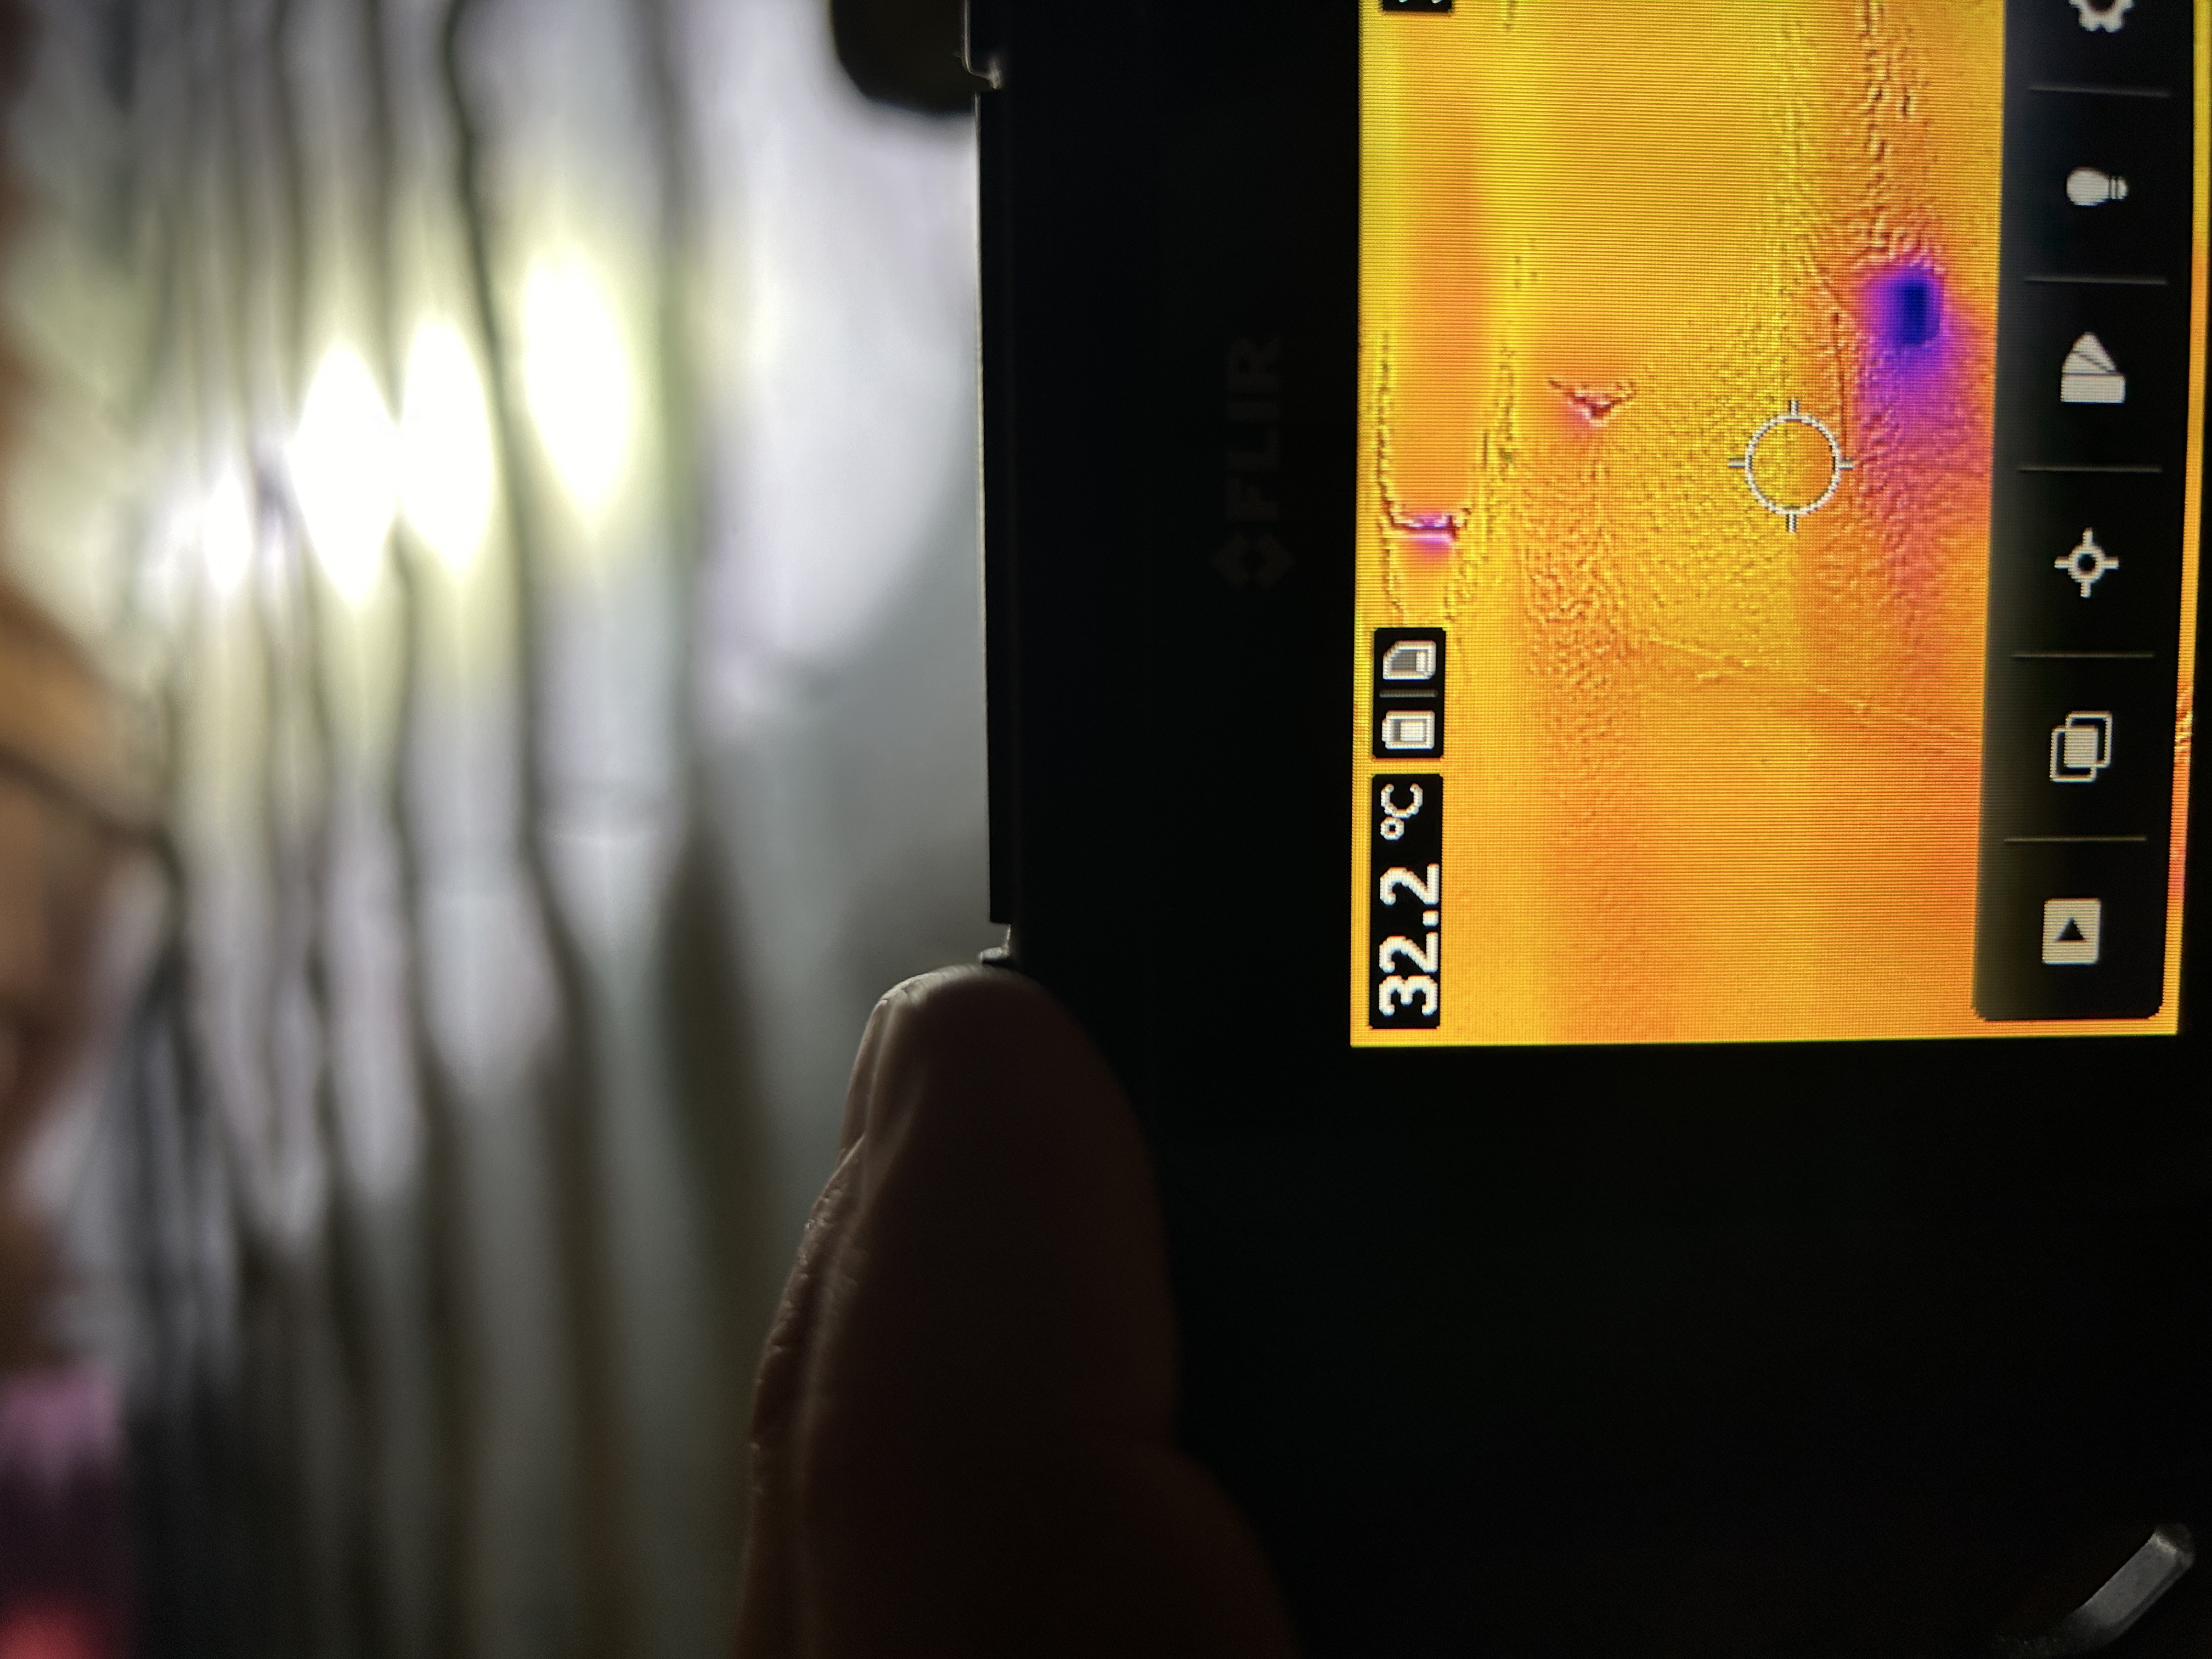
Insist that spray foam contractor does a really thorough job We found several leaks when we pressurised the house with a blower door and checked the attic spray foam with a thermal camera. We also found that, at the edges of the roof, the spray foam layer was not as thick as we had specified.
It’s challenging to work in the narrow space where the roof meets the ceiling, but it has to be done right. We patched small leaks ourselves and asked the contractor to come back and build up the perimeter before adding cellulose.
Taking the time to get this right paid off. For example, when we did the blower door test we found that there was no air leakage from the attic to the basement via the chimney.
Working in the attic in June was challenging The spray foam contractor had to start early in the morning and could only work in the attic for a few hours before the heat became unbearable. Try to do this work in spring or fall if possible.
The heat worked to our advantage when checking for leaks By pressurising the air-conditioned house in late June / early July while it was around 30C in the attic I was able to clearly see leaks with a thermal camera and could confirm them by touch. This made identifying and patching them easier, even though it was not comfortable to be in the attic for very long.
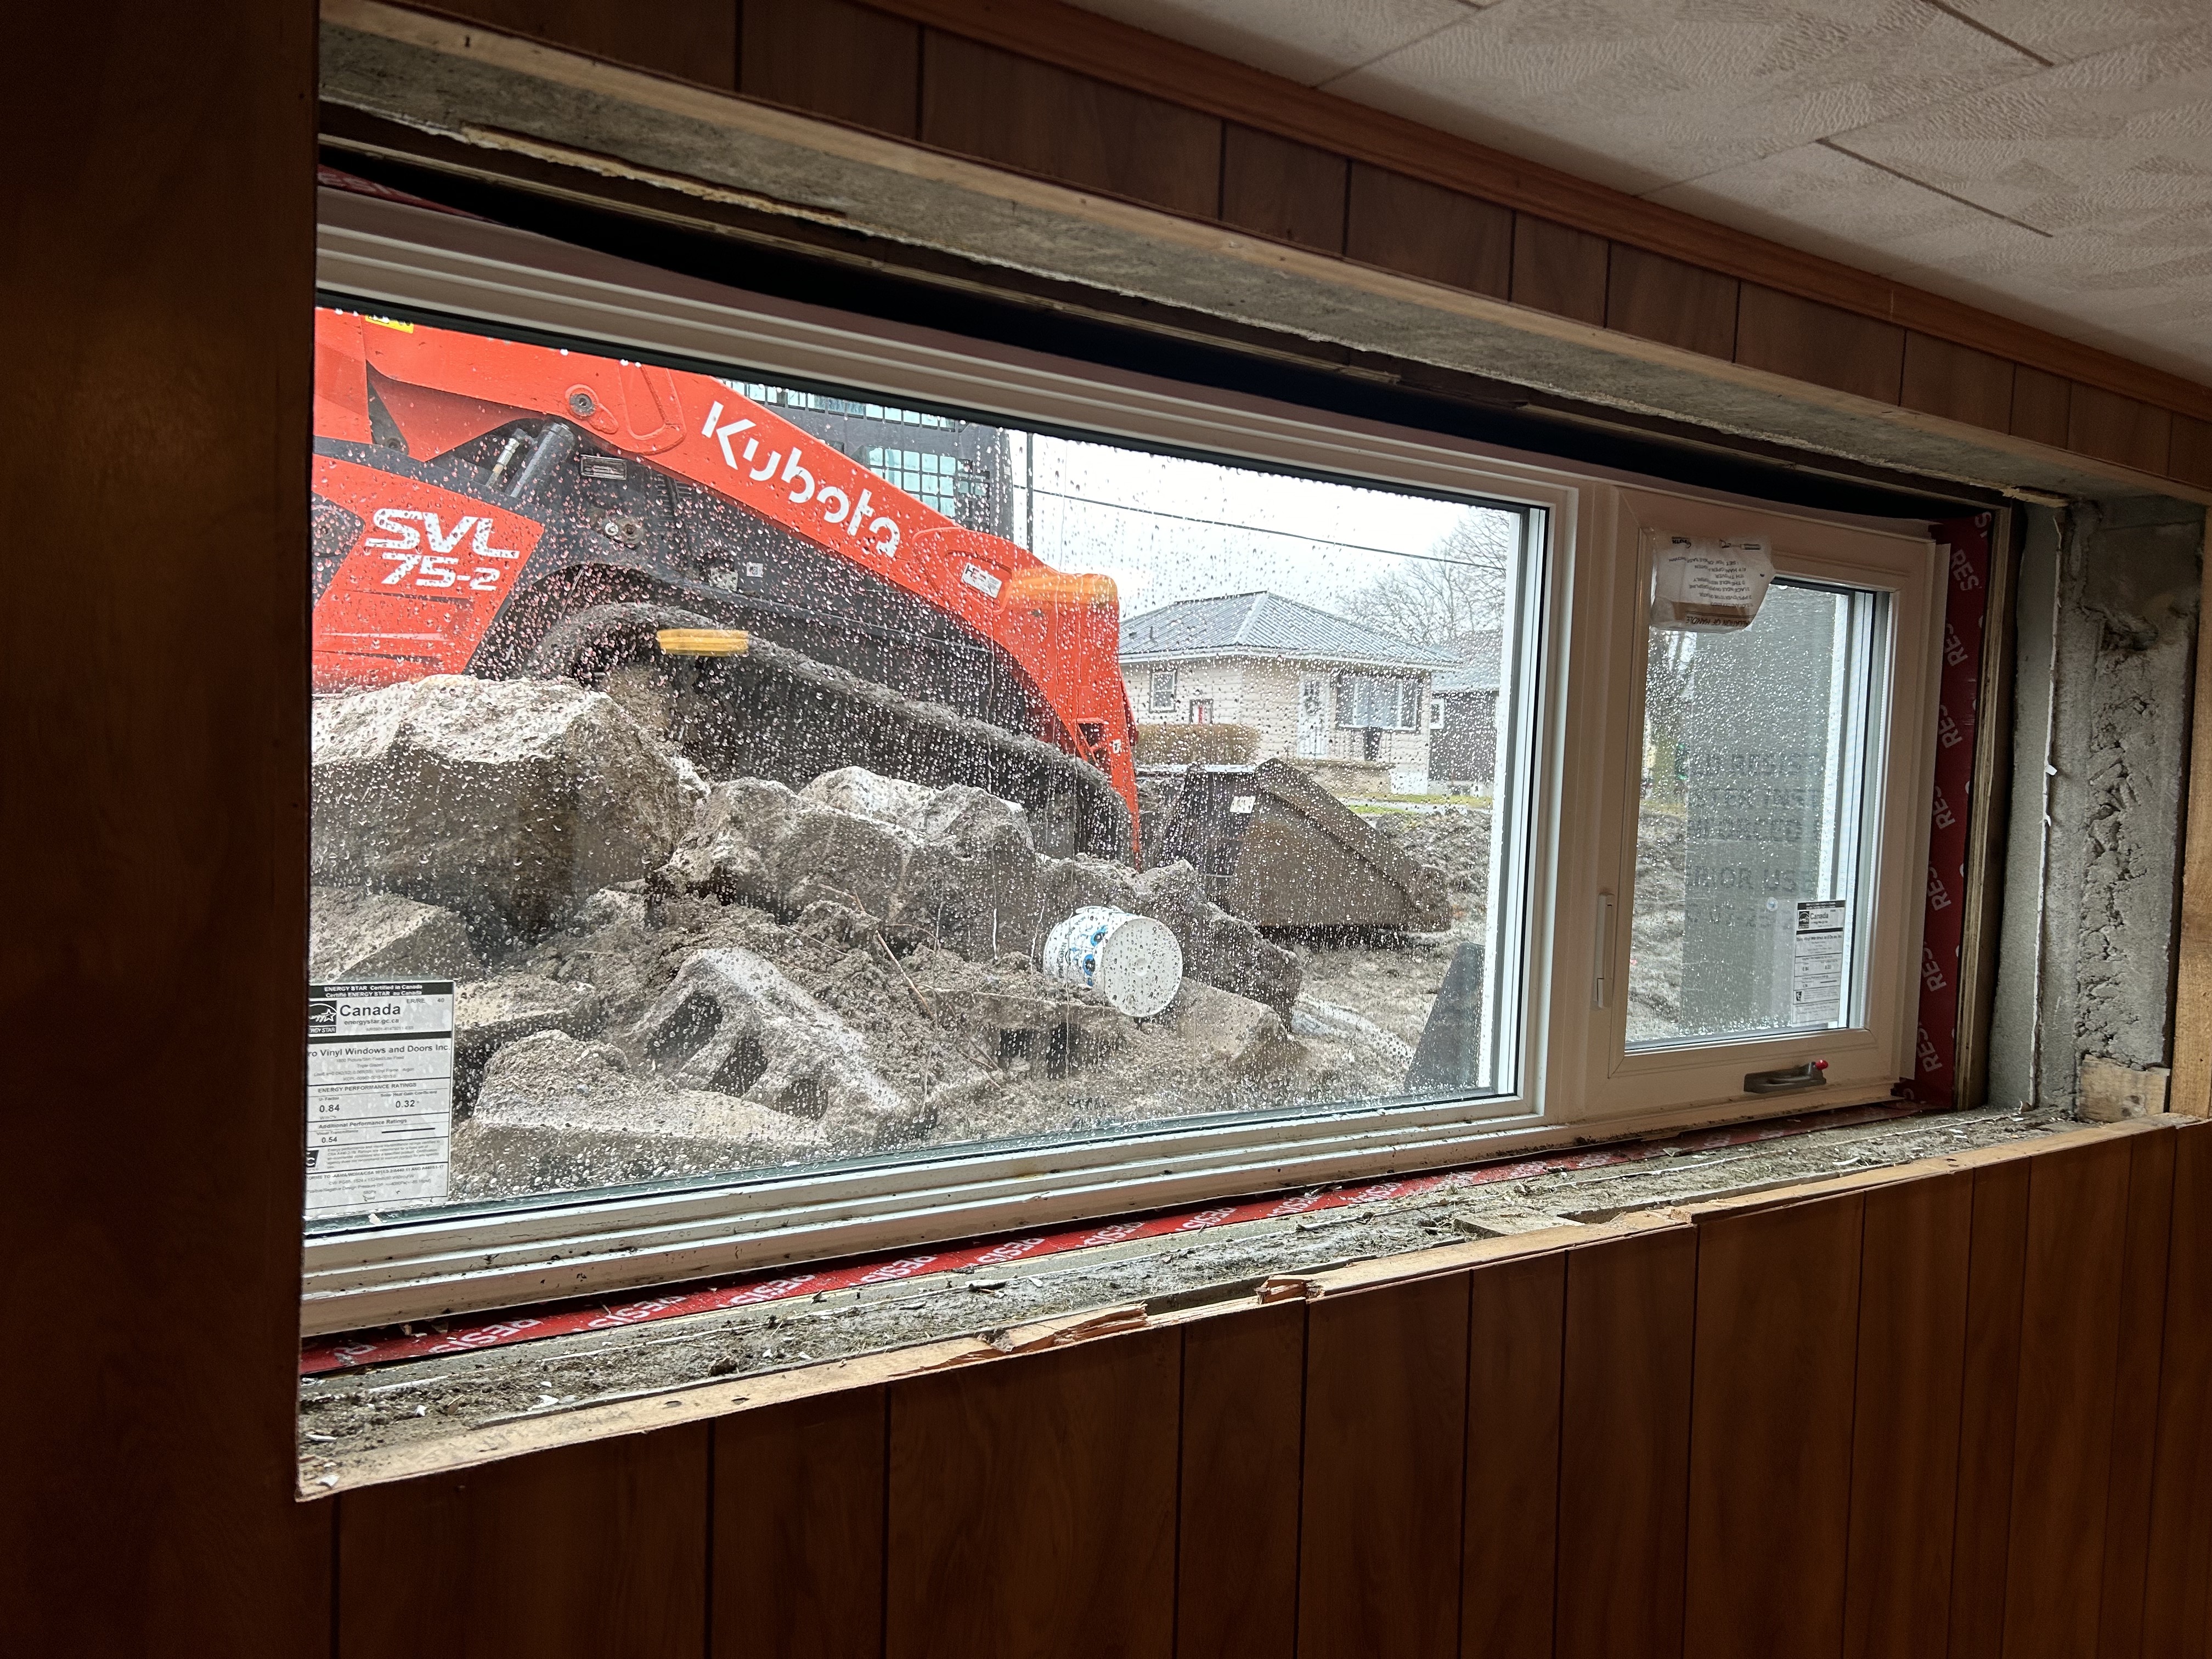
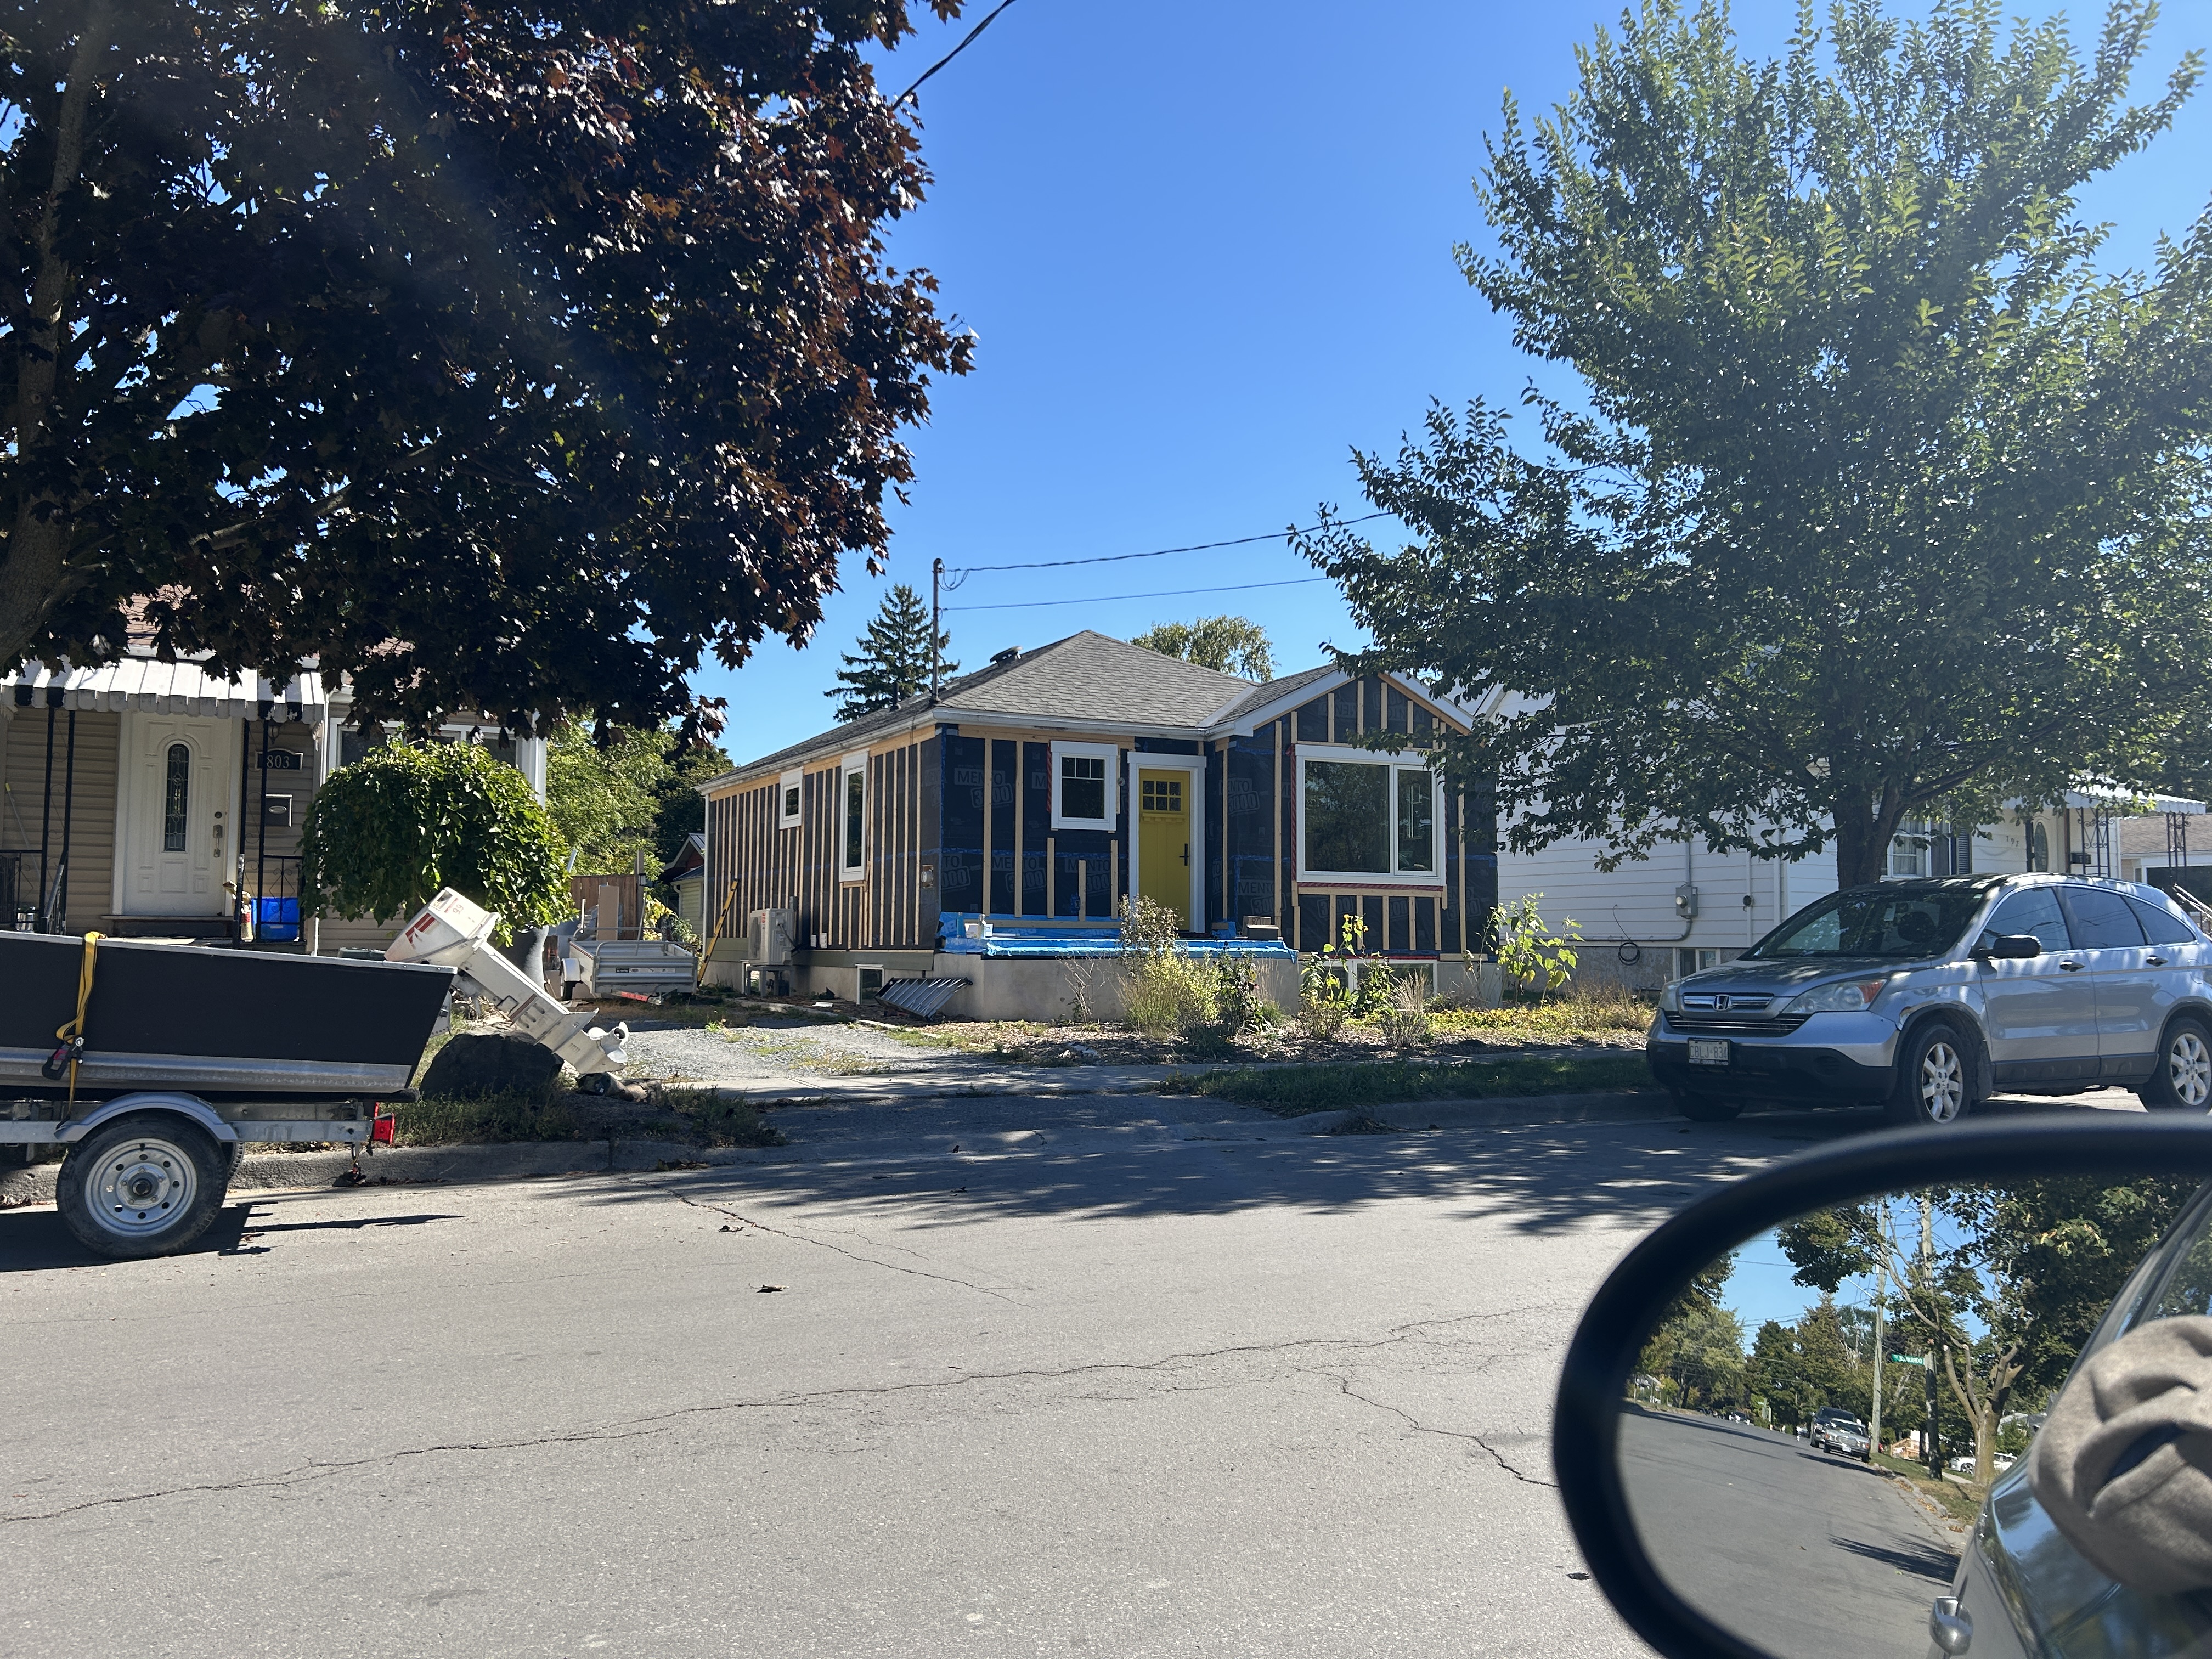
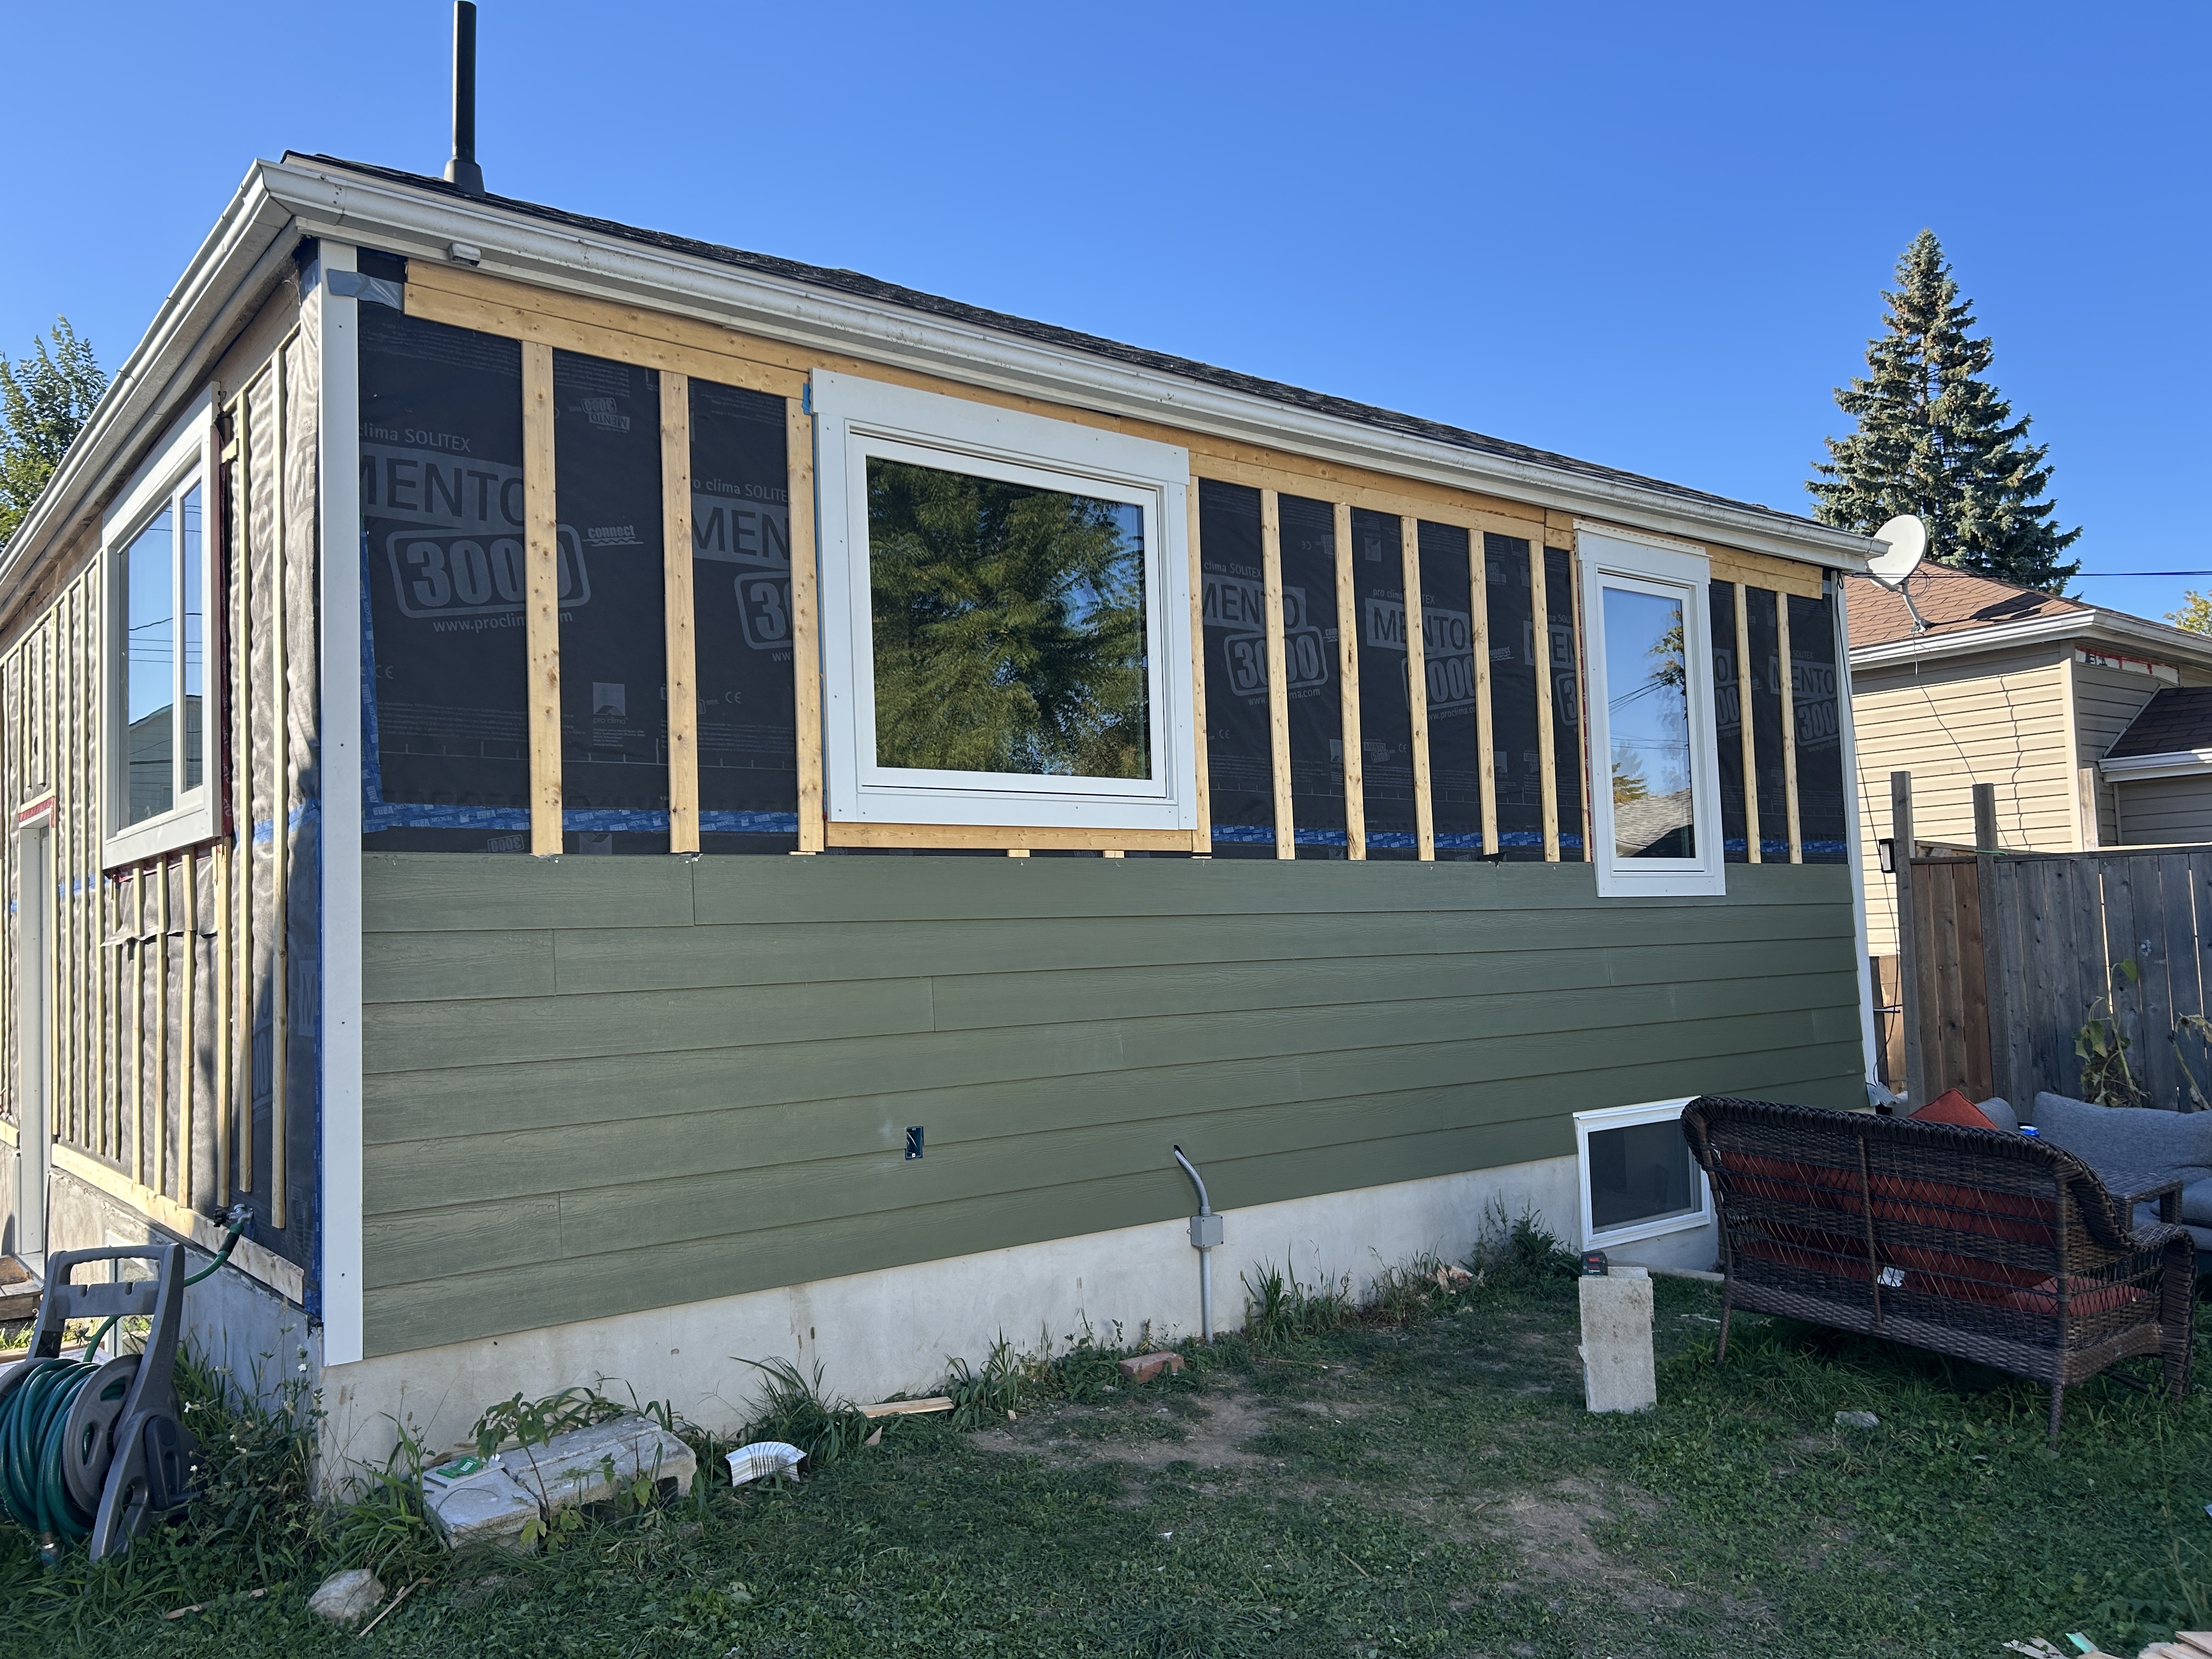
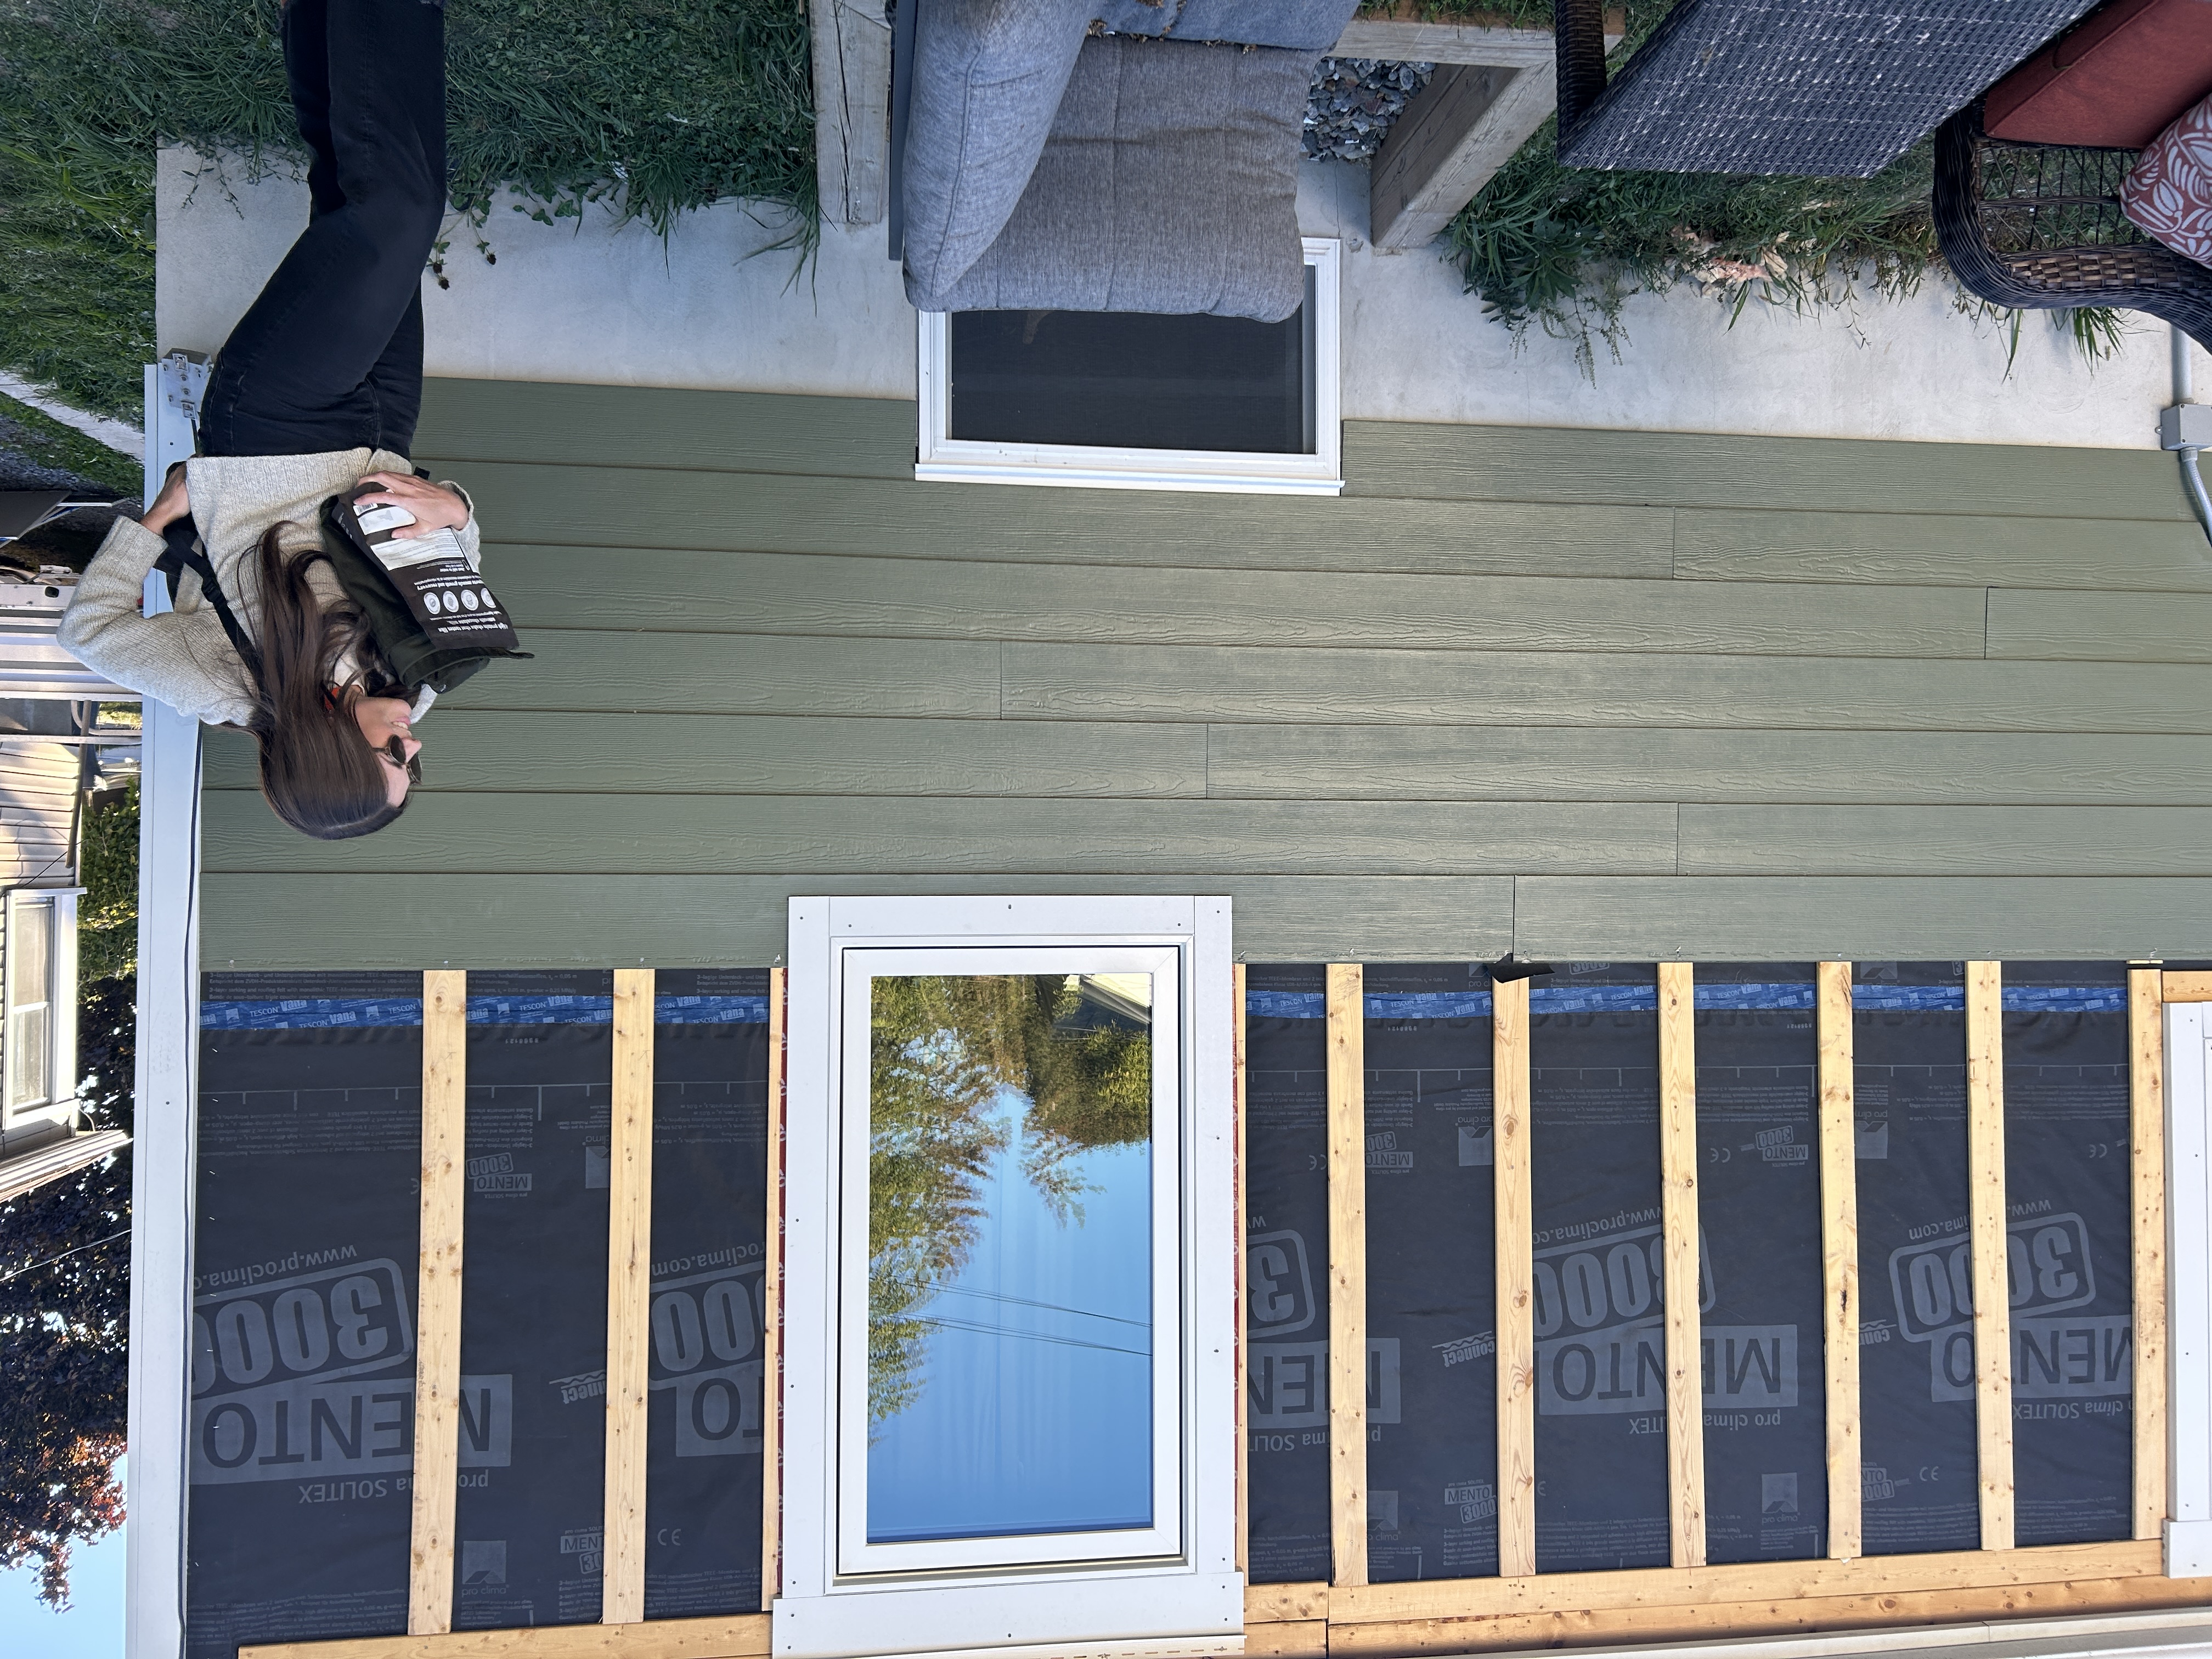
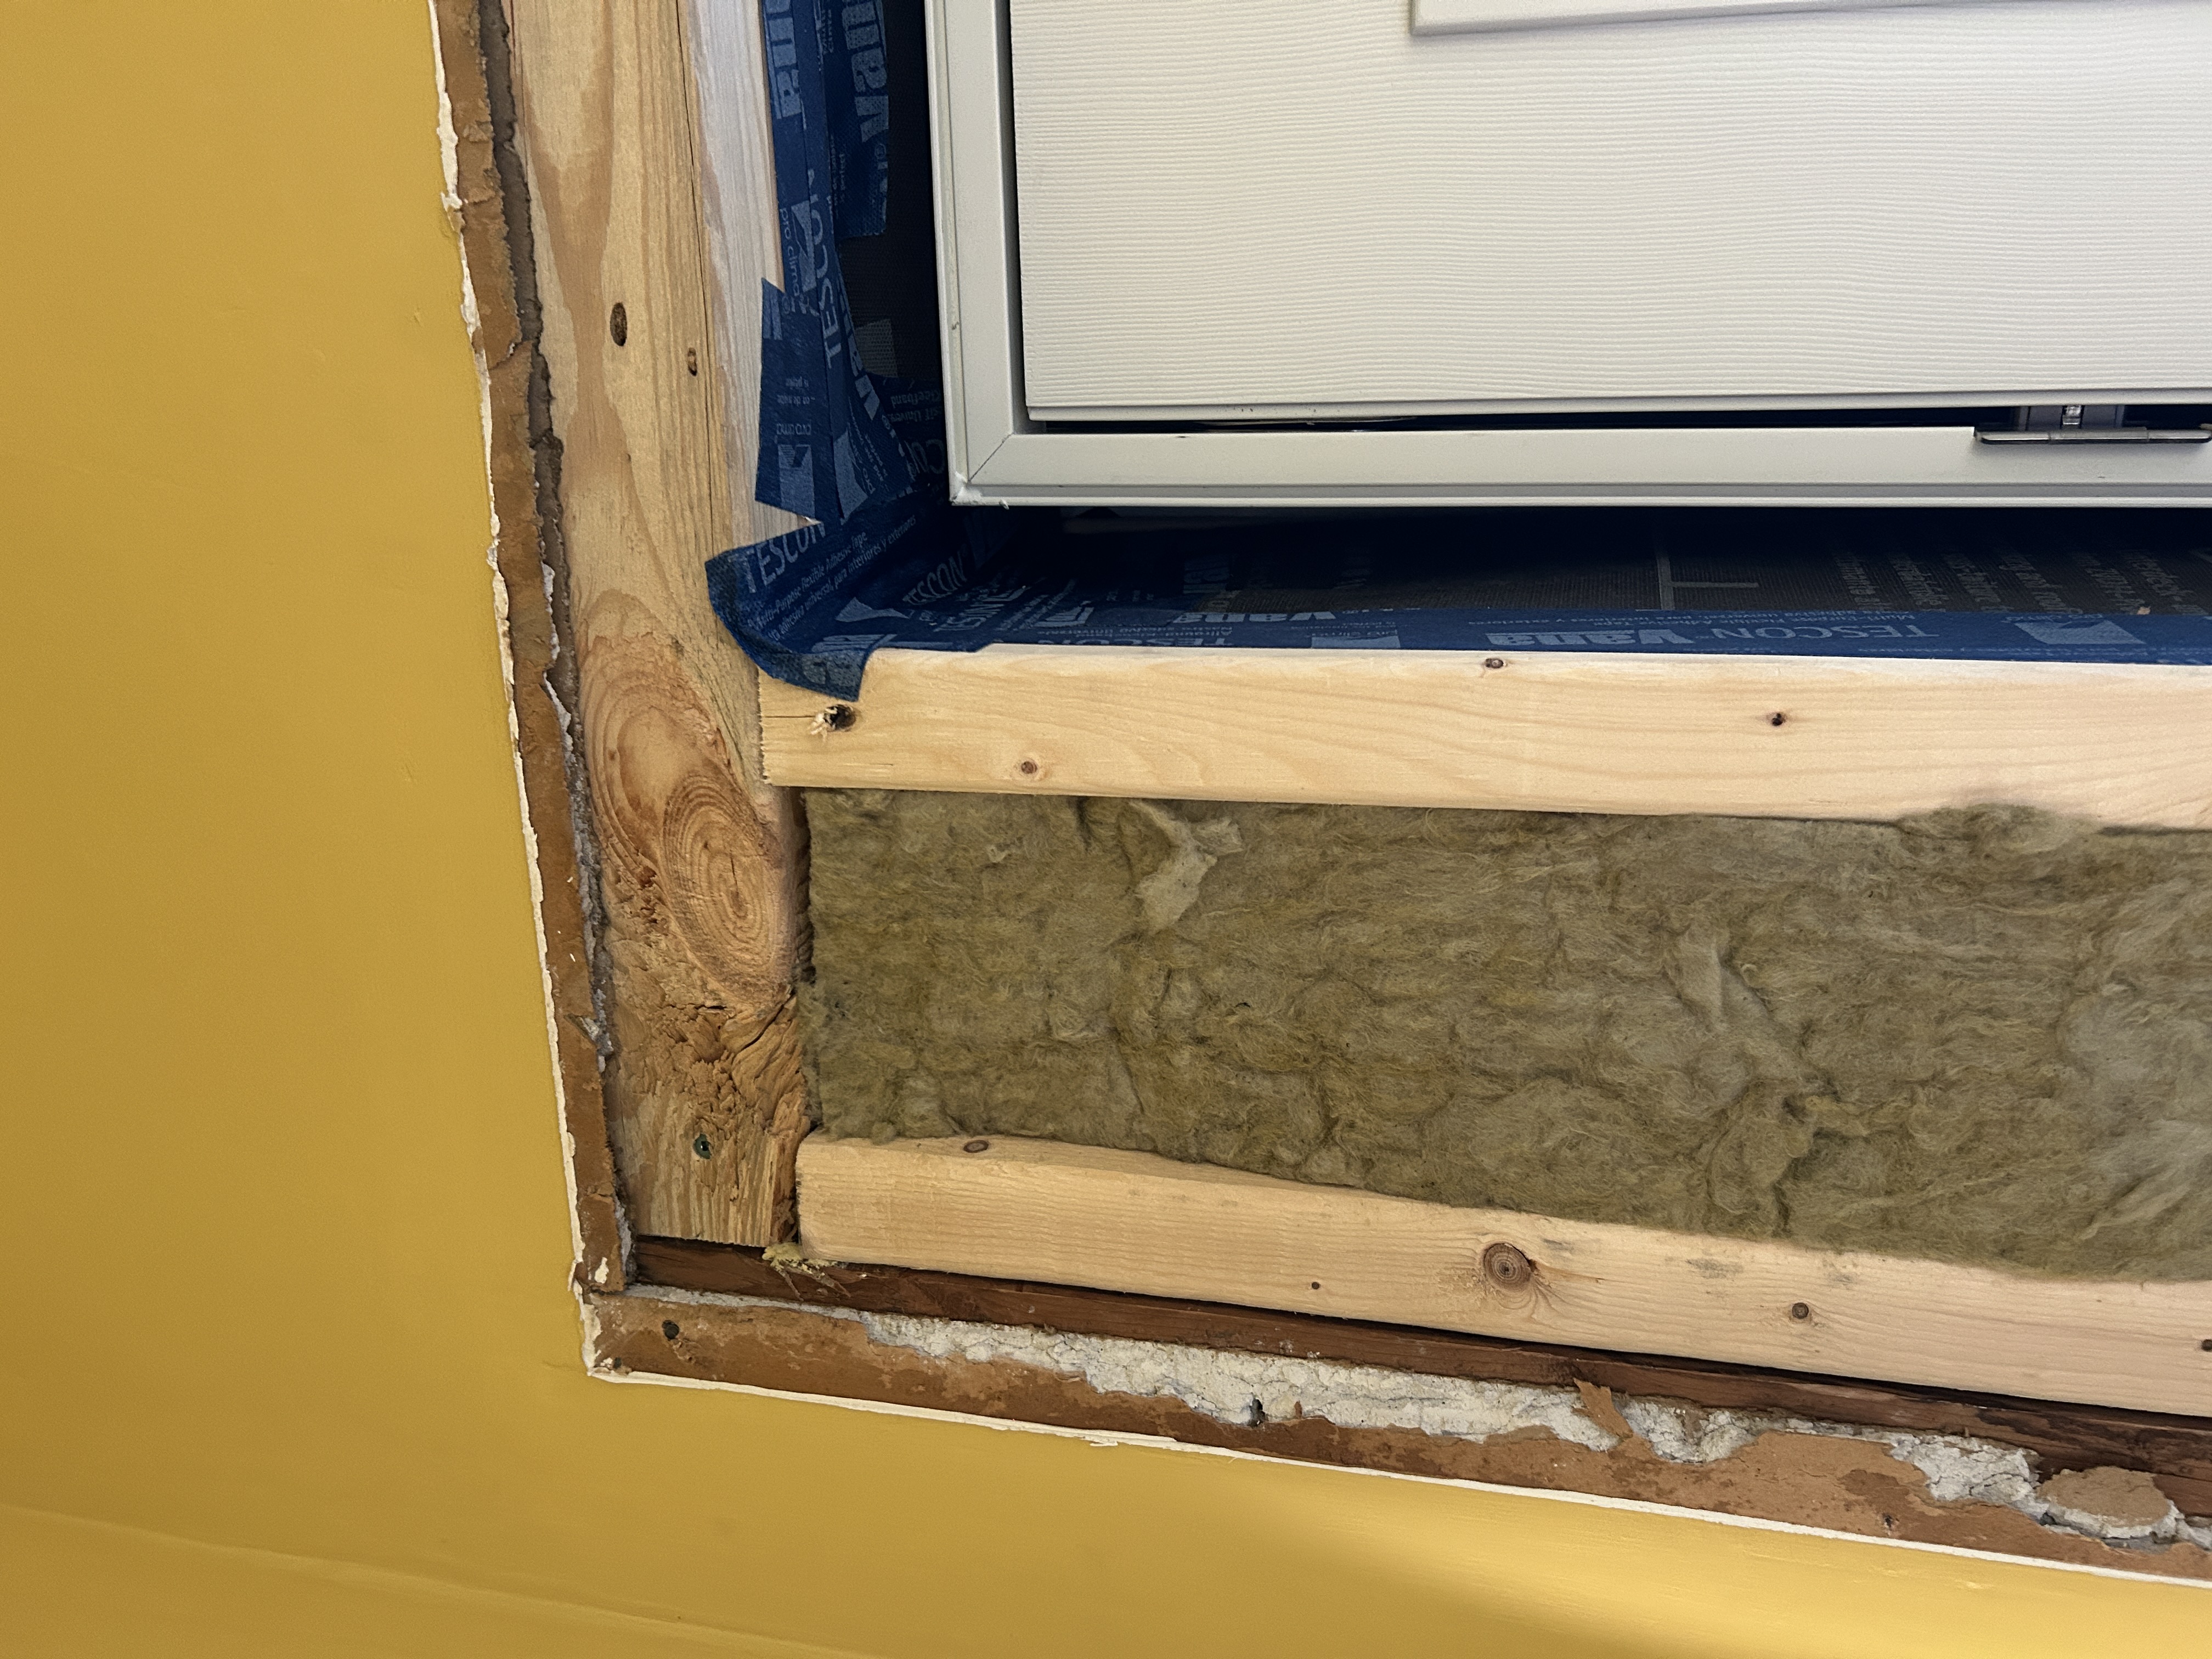
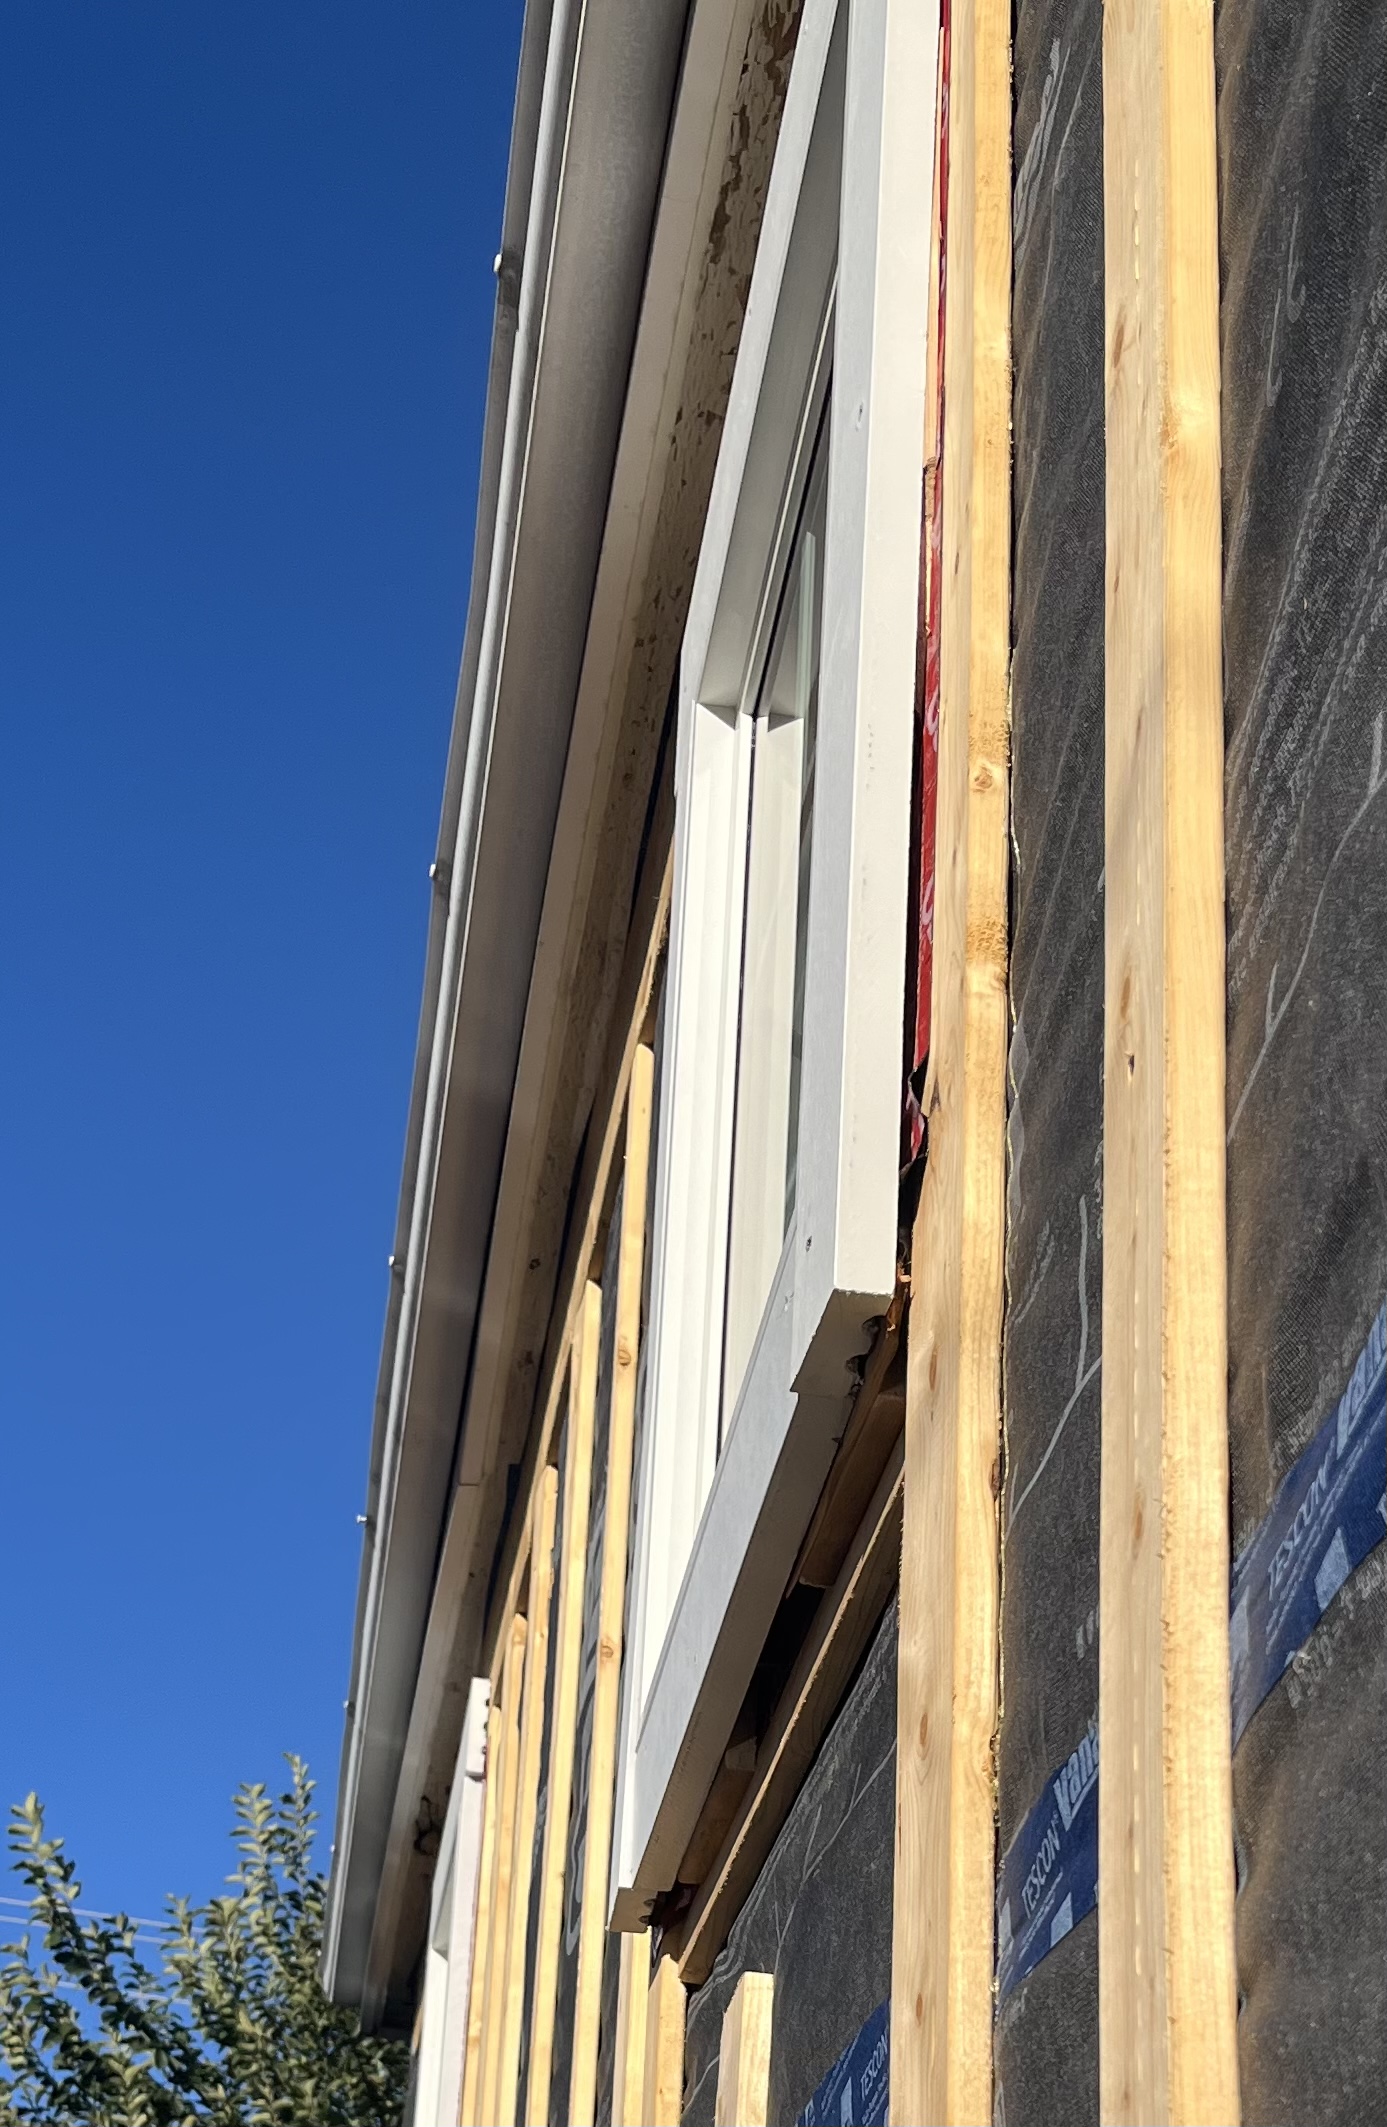
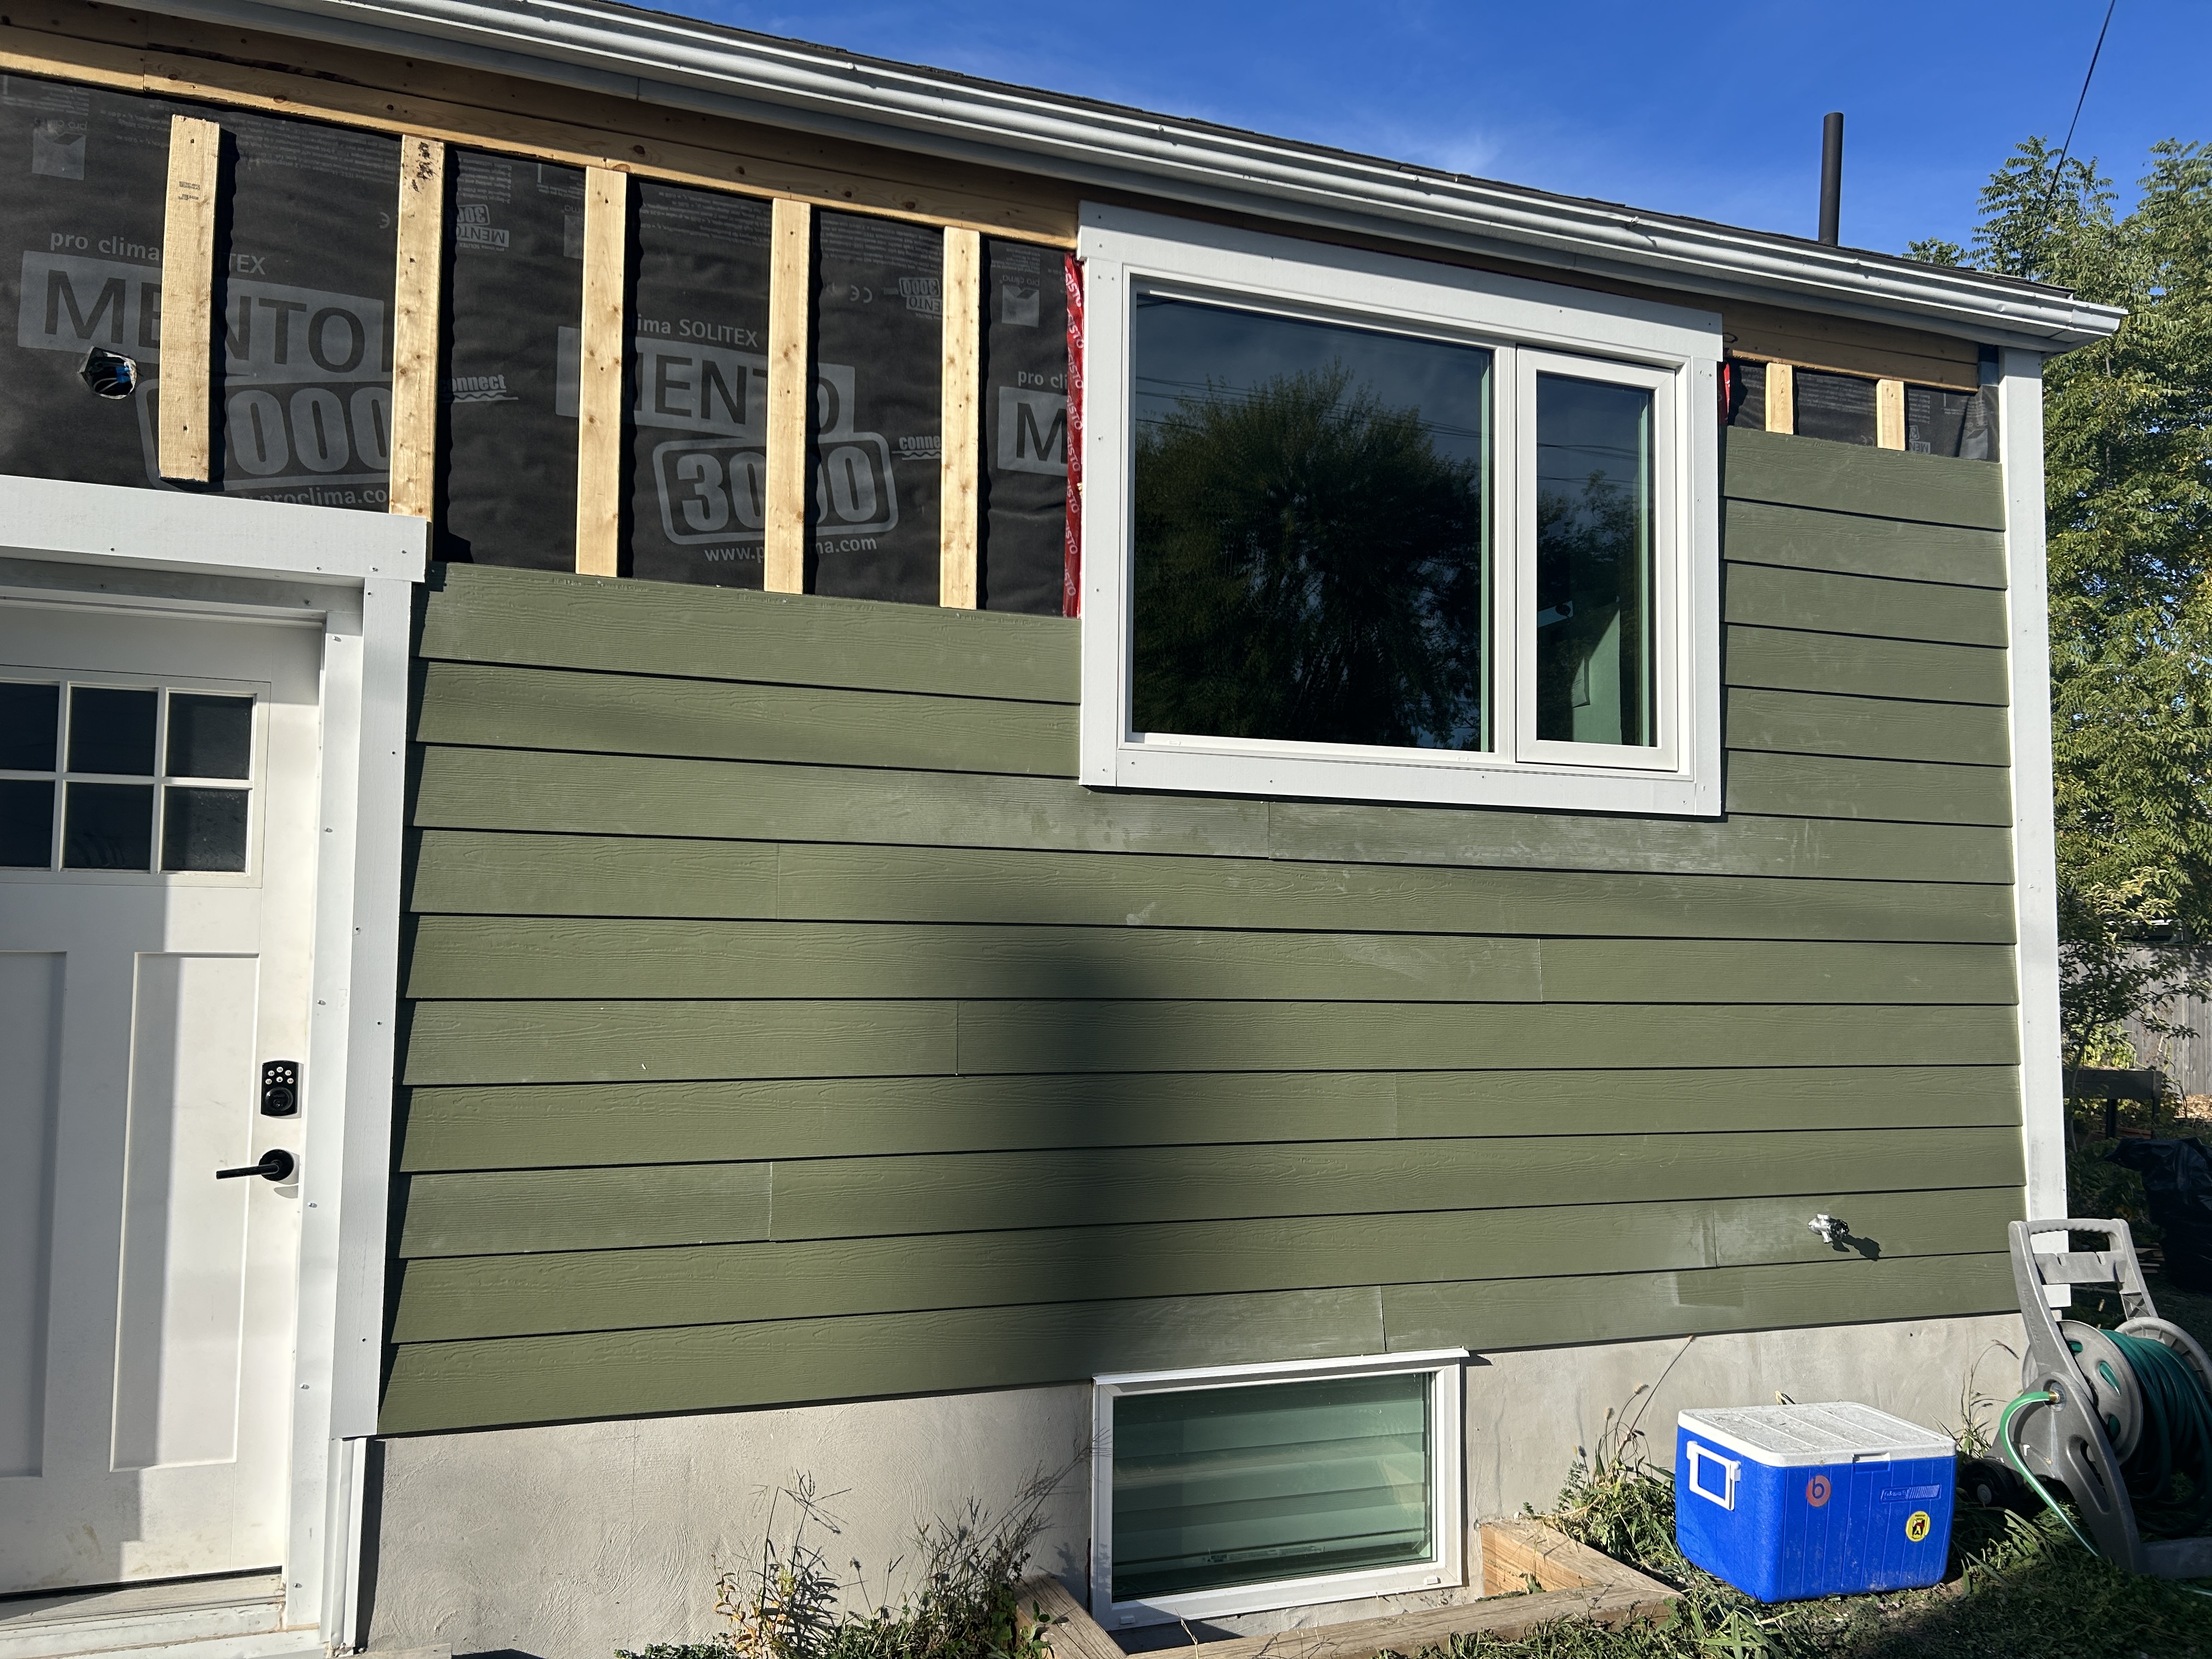
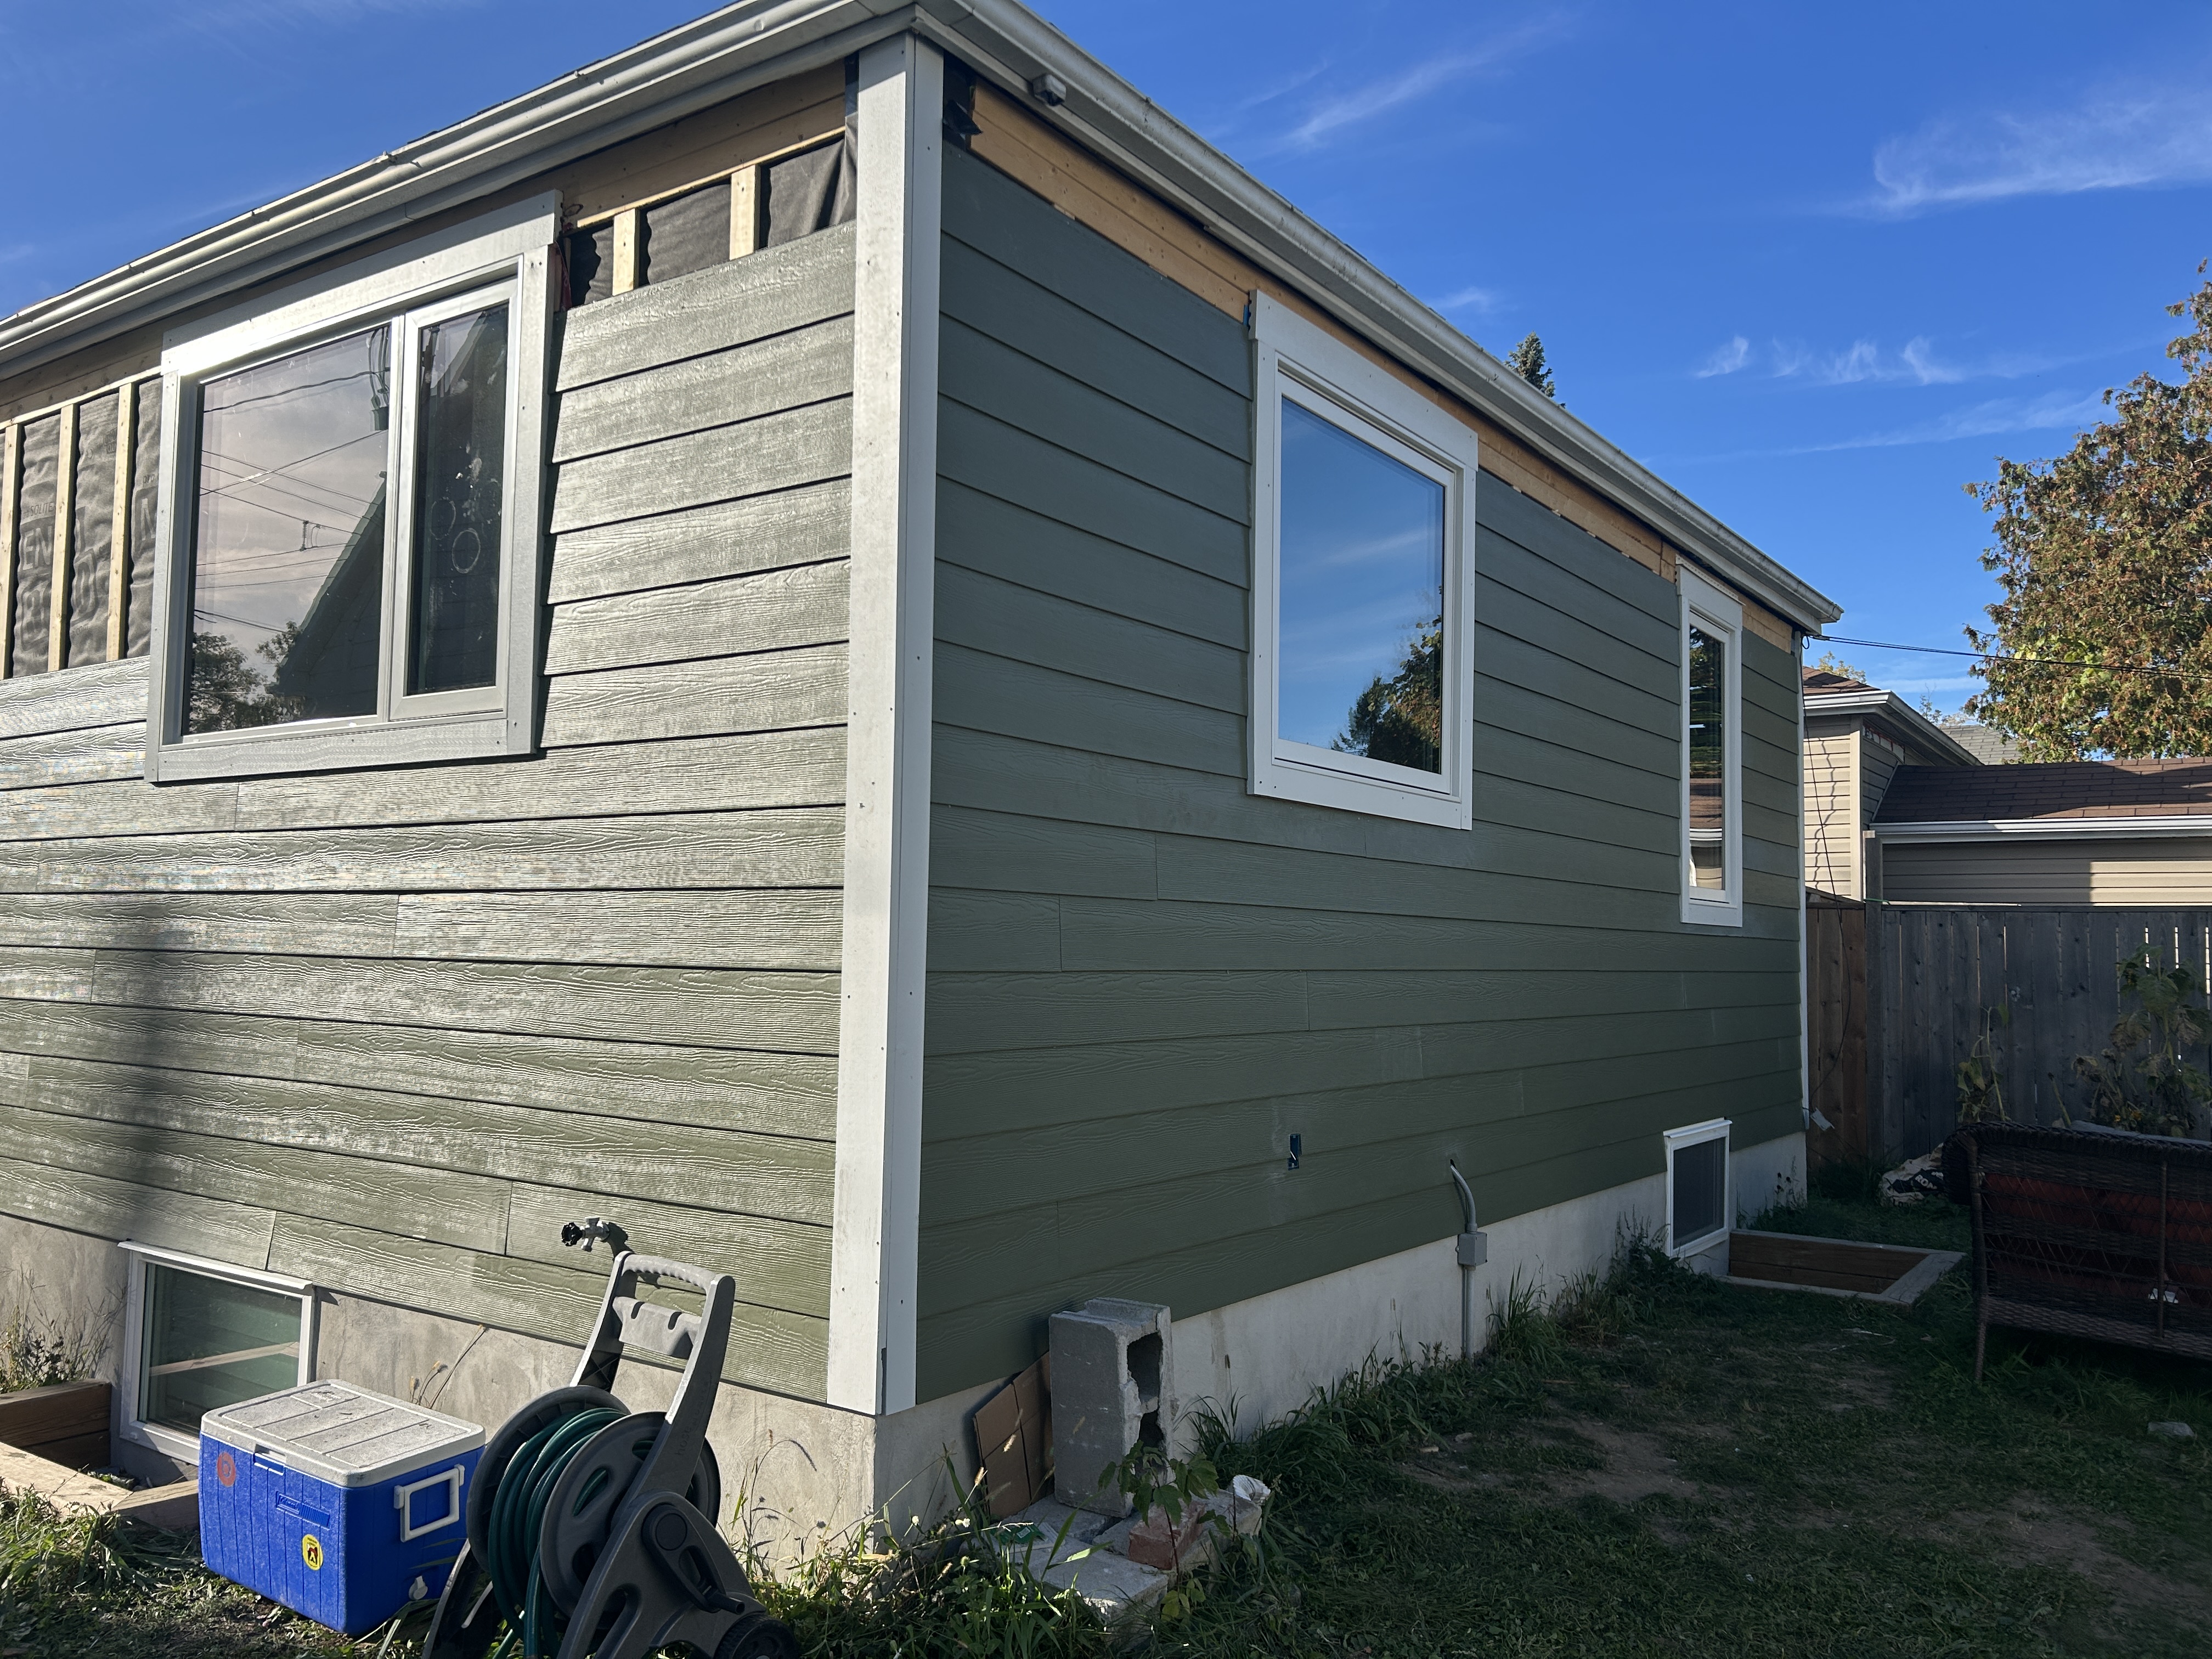
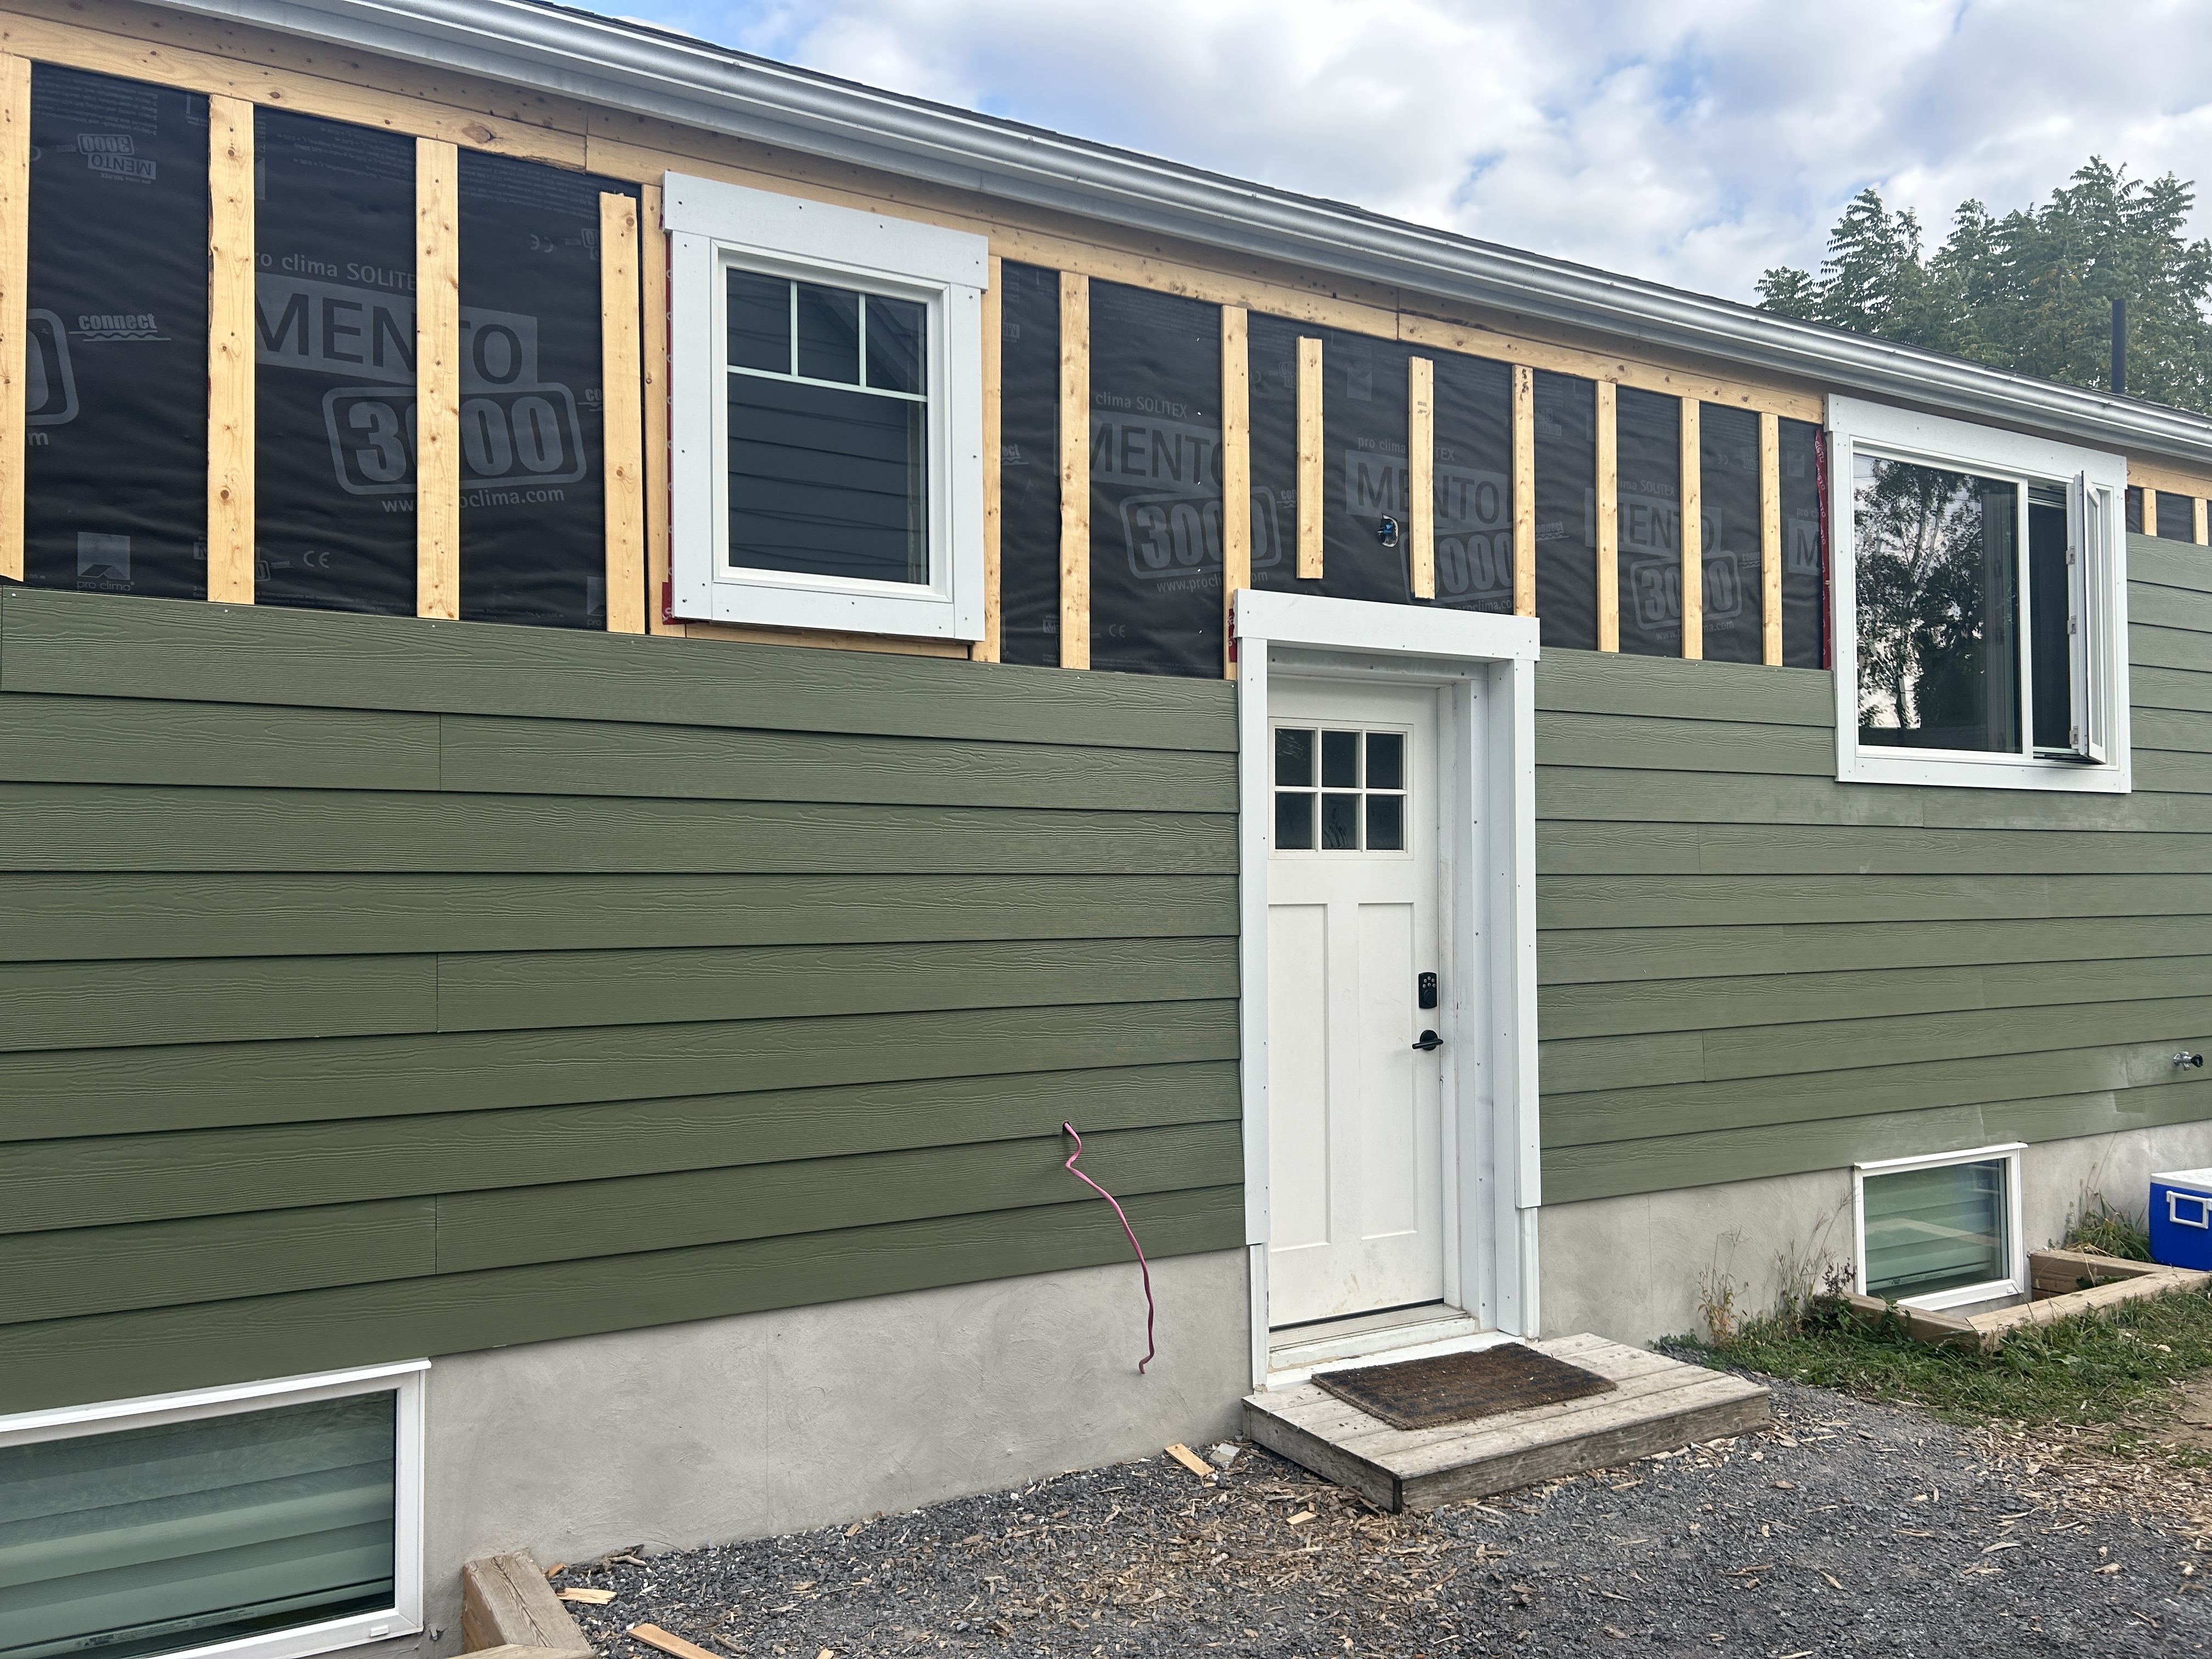
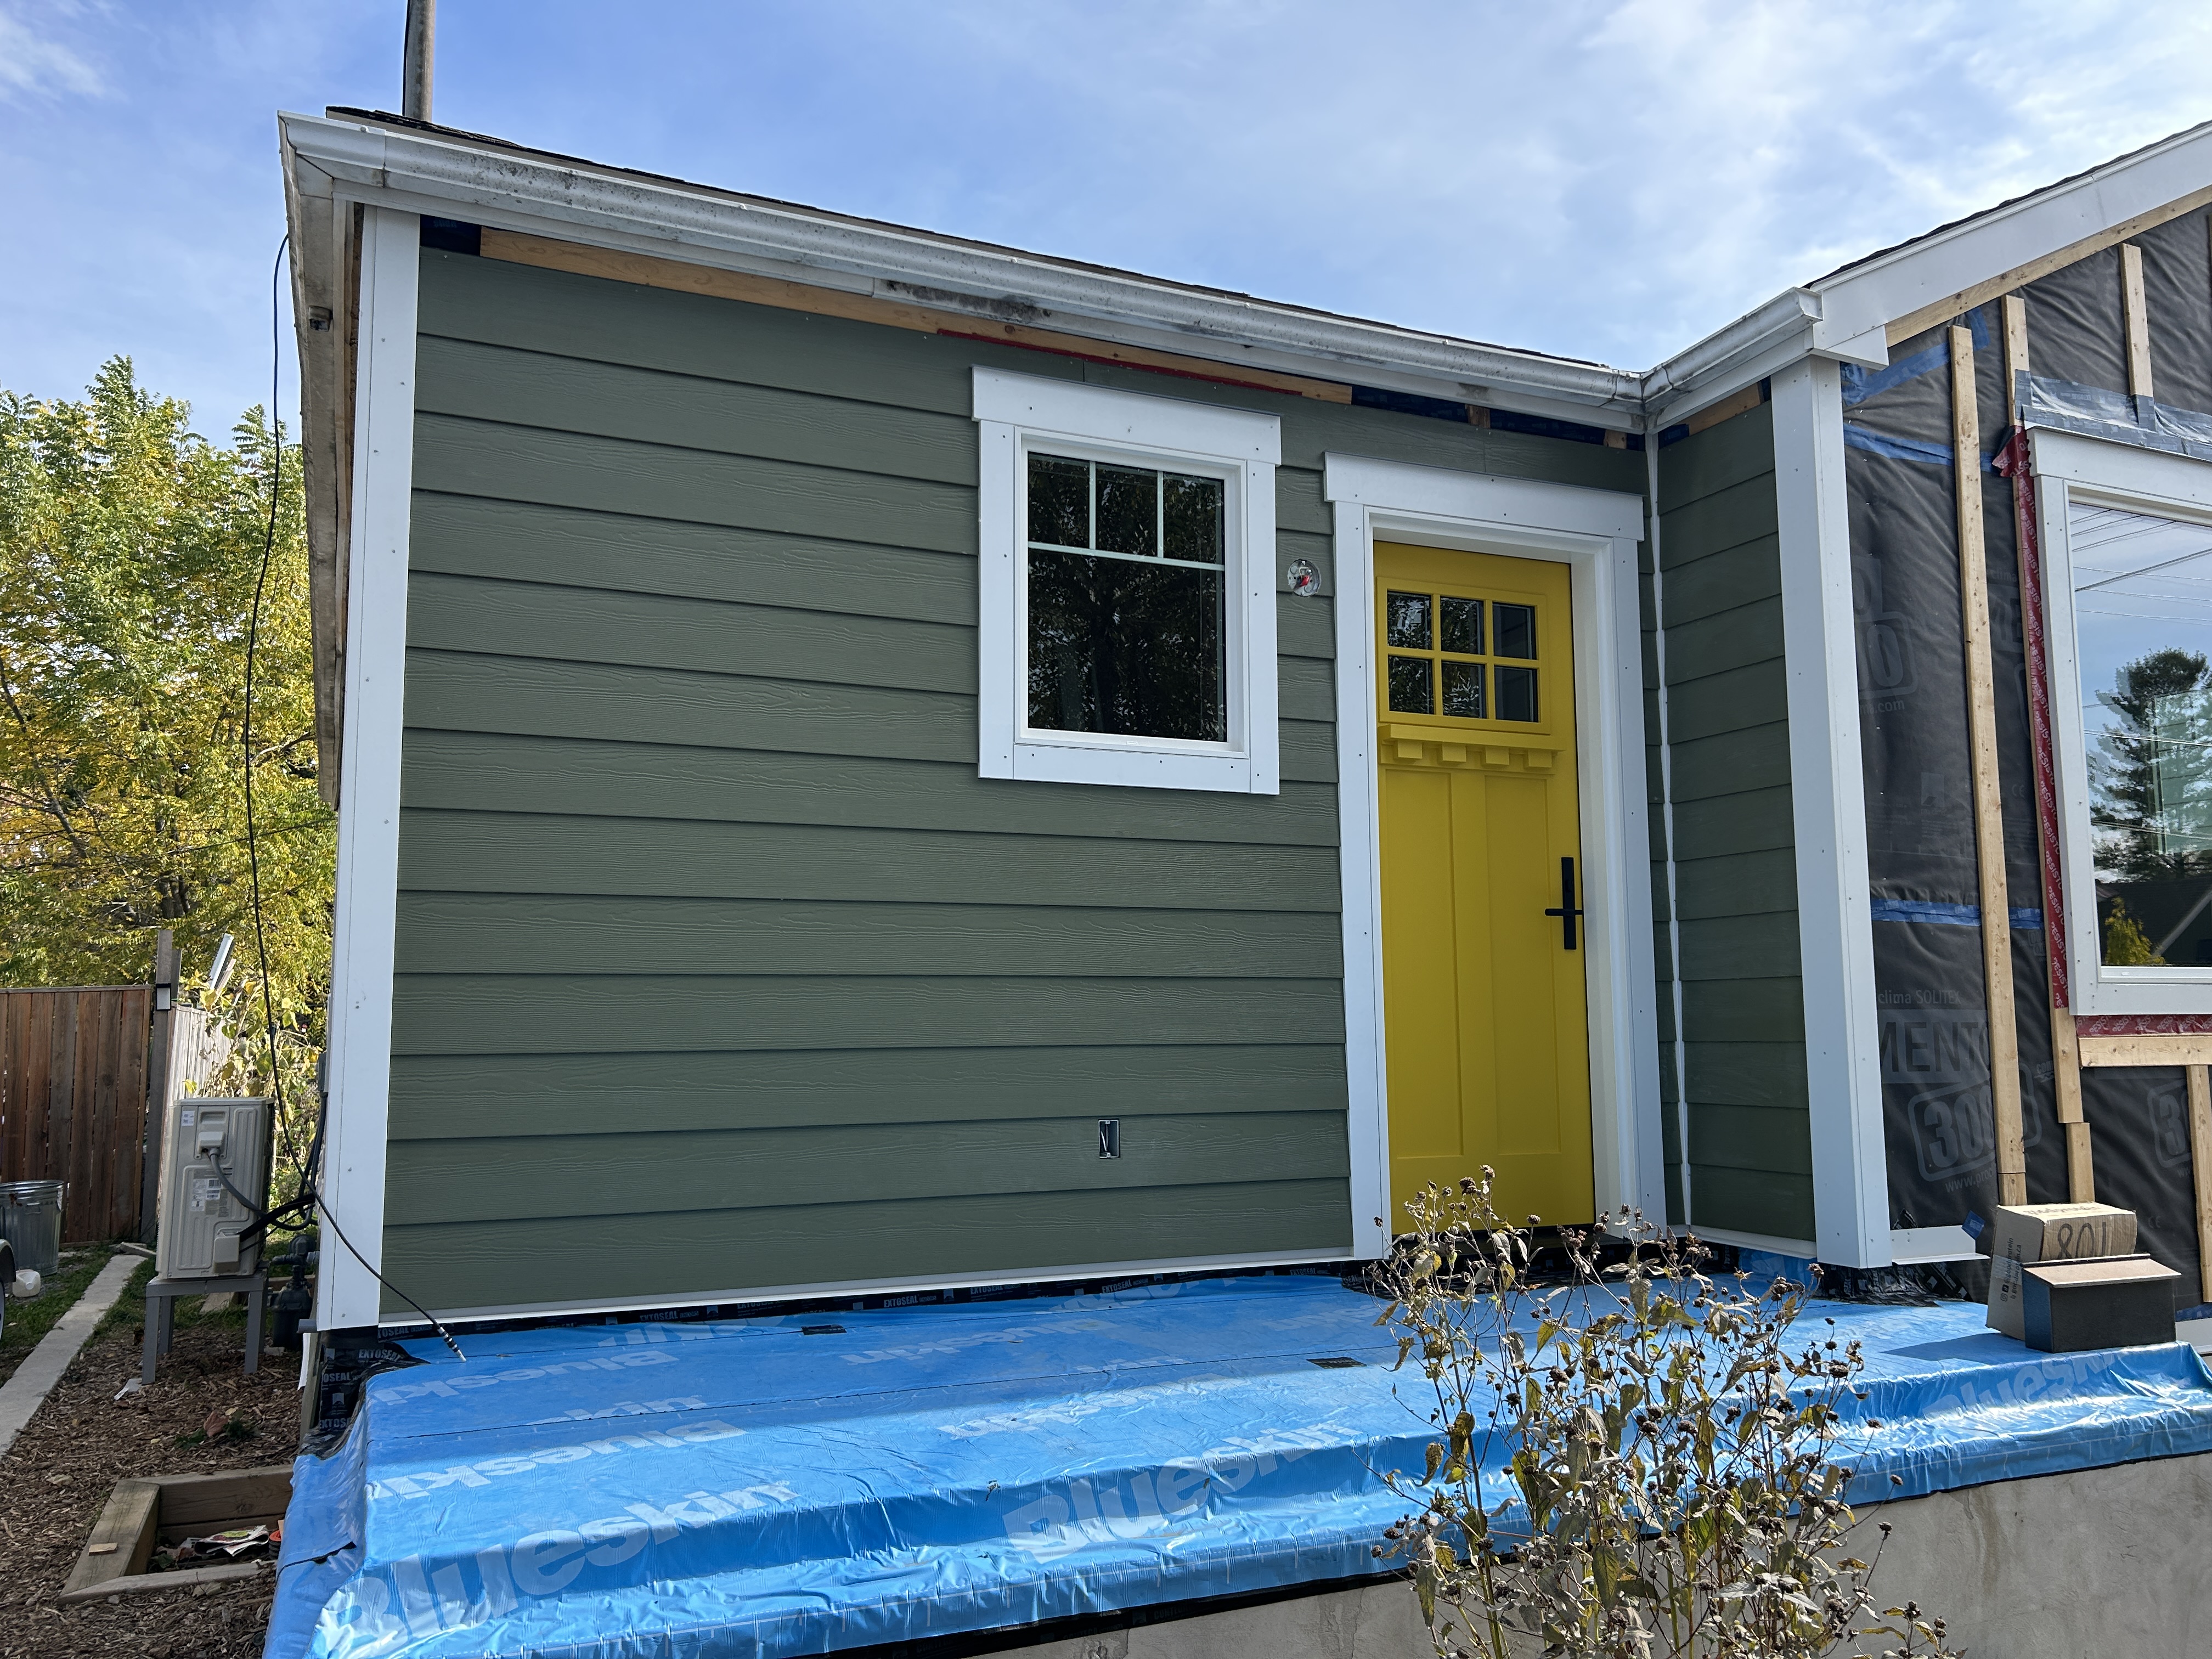
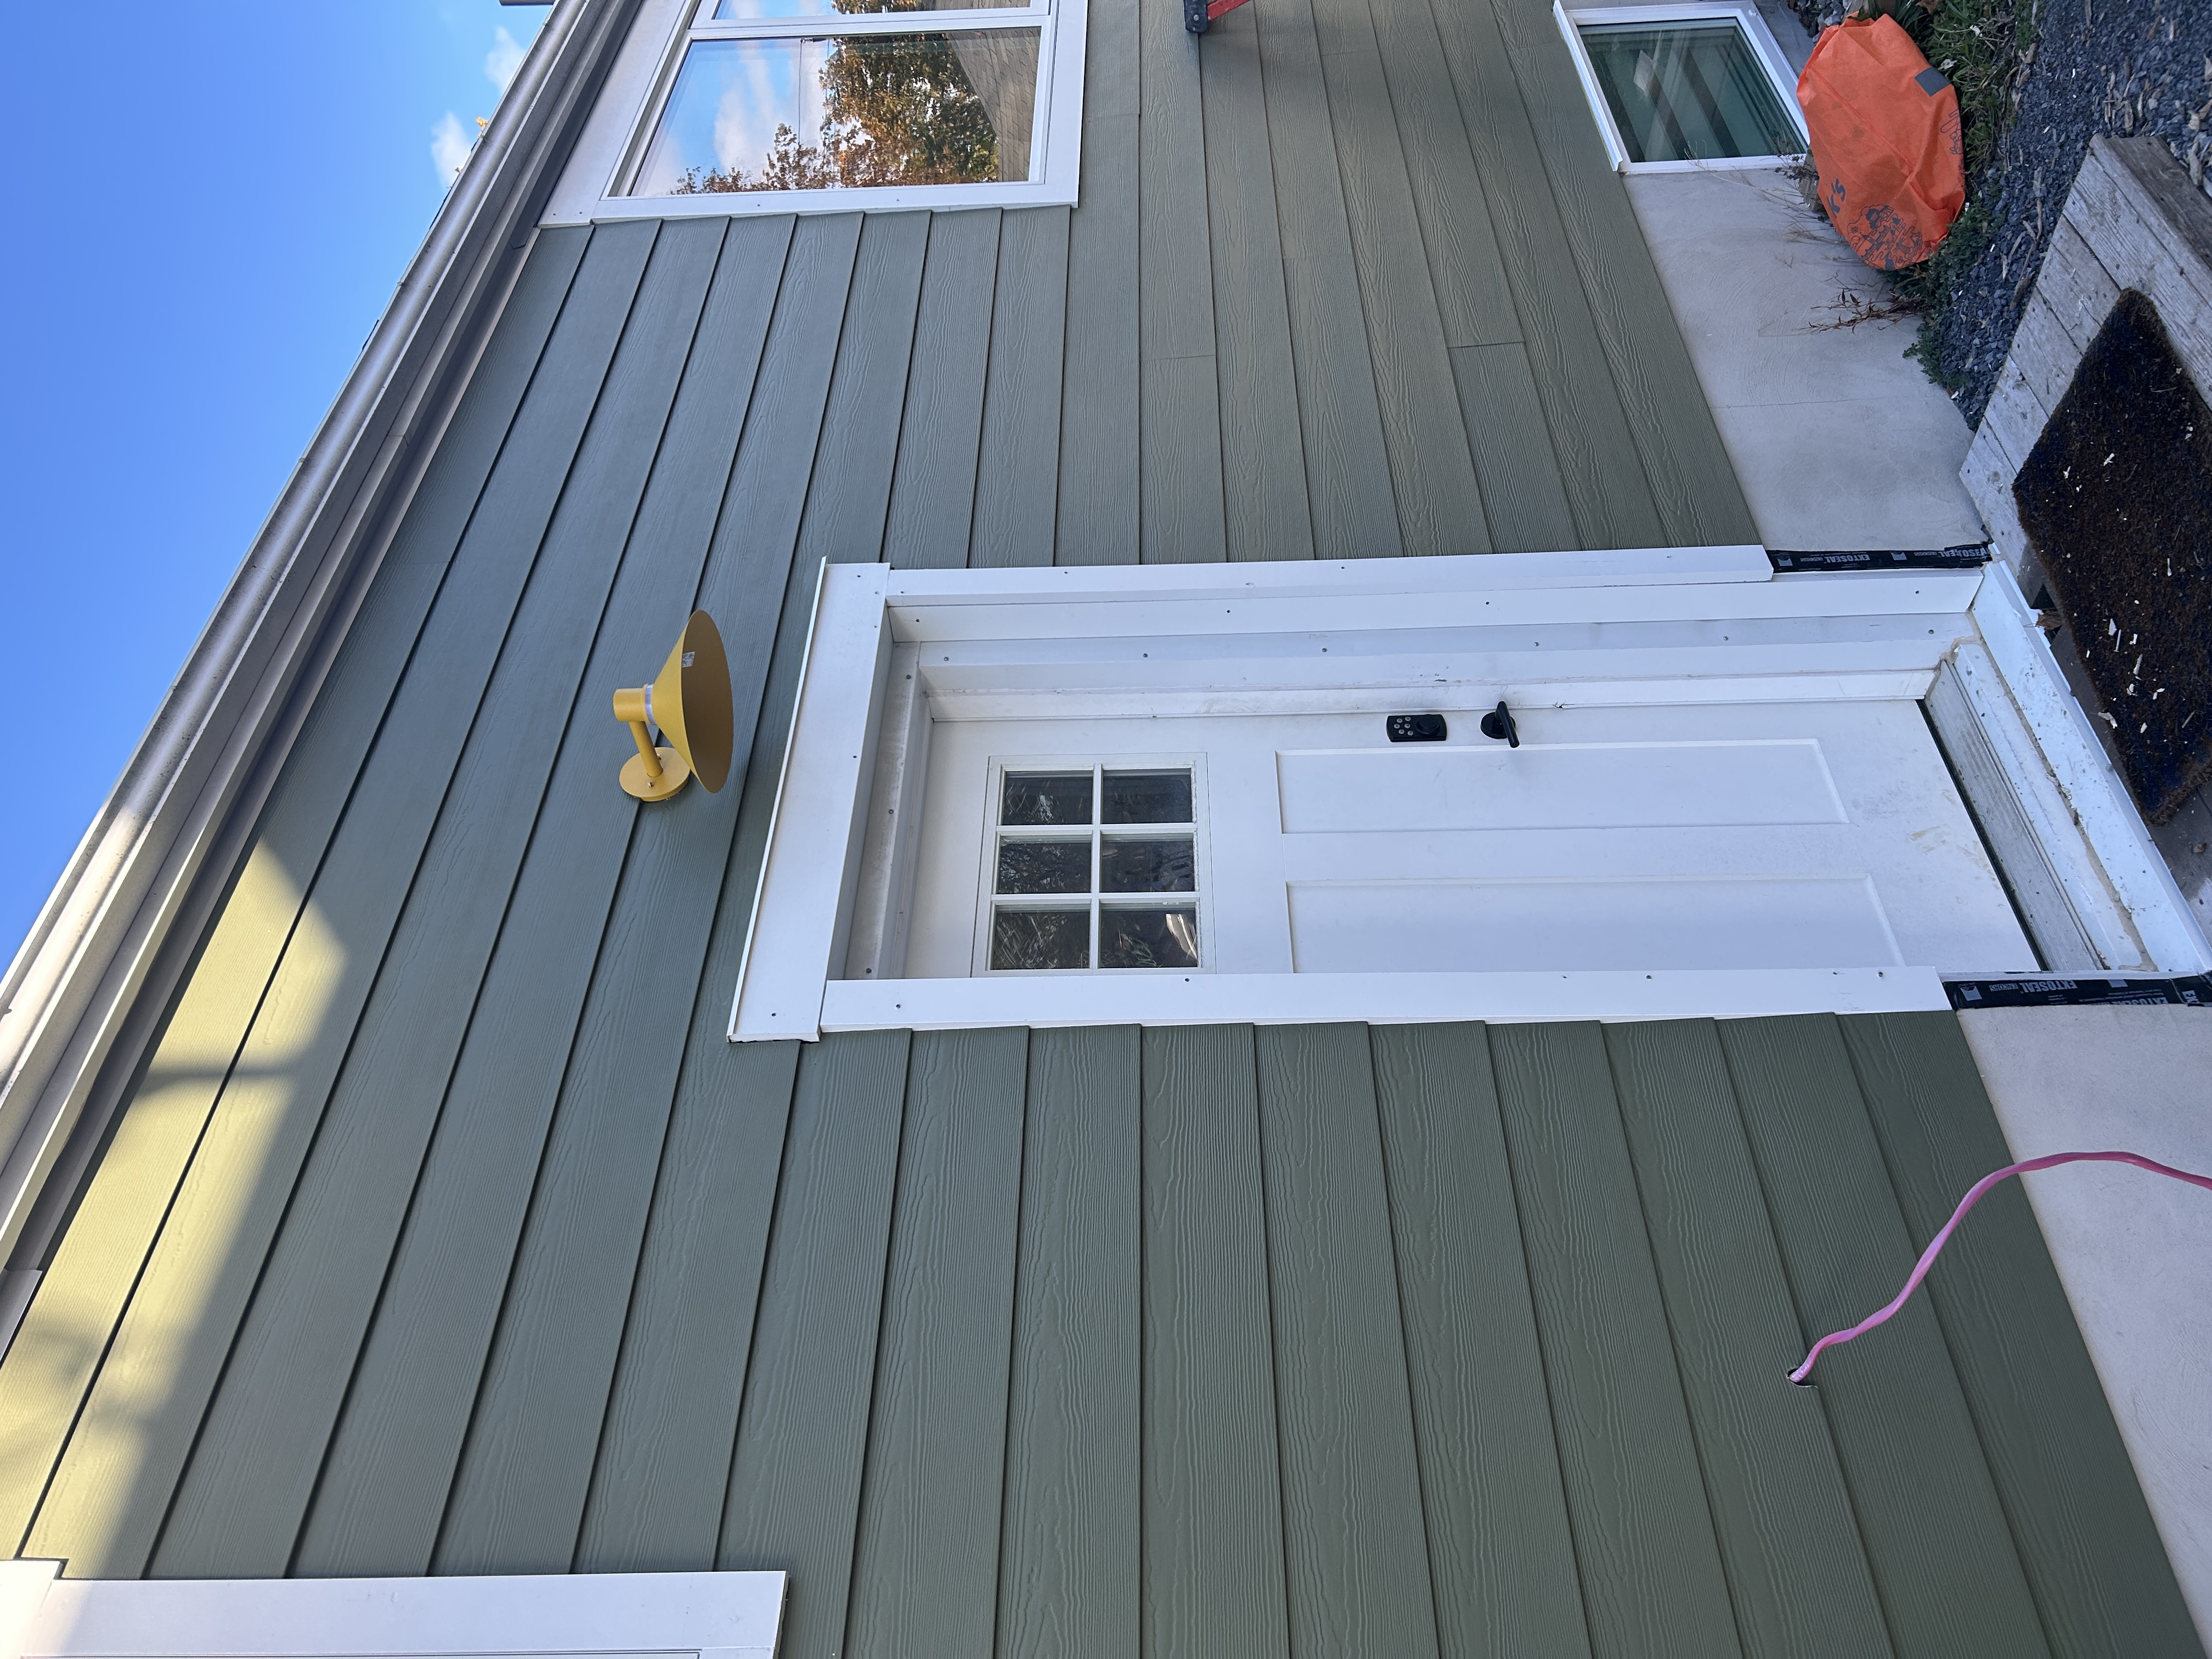
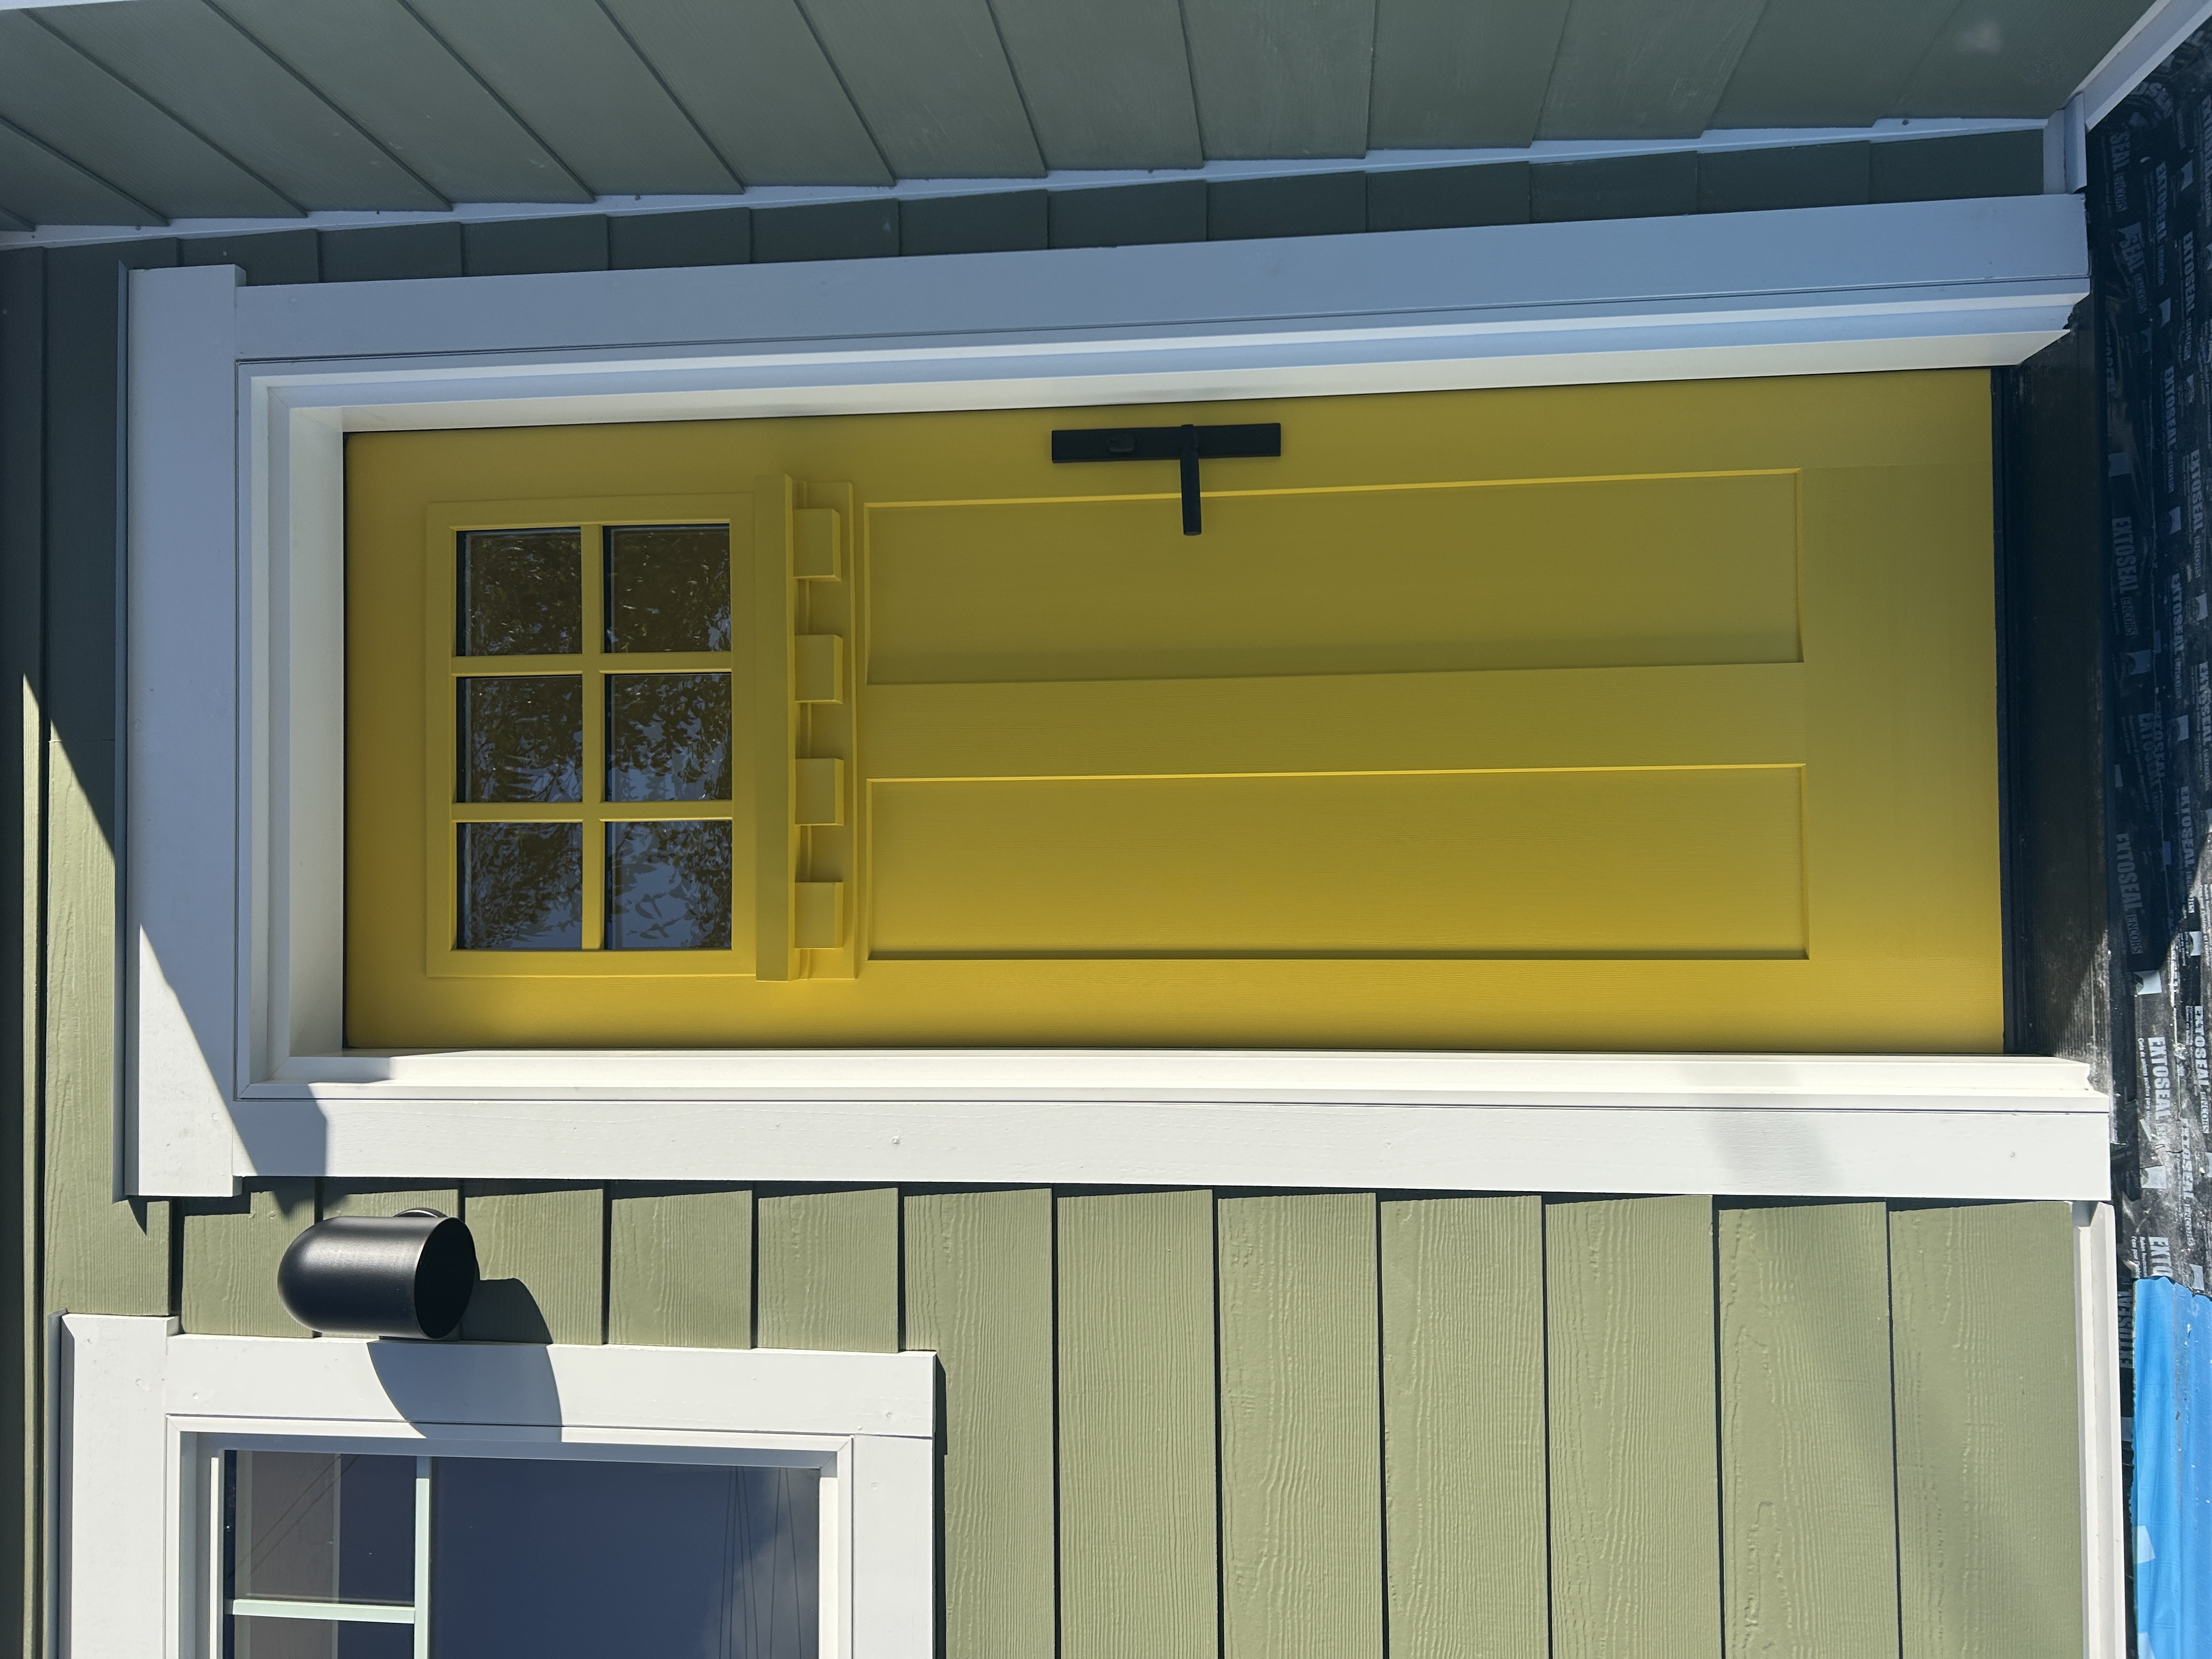
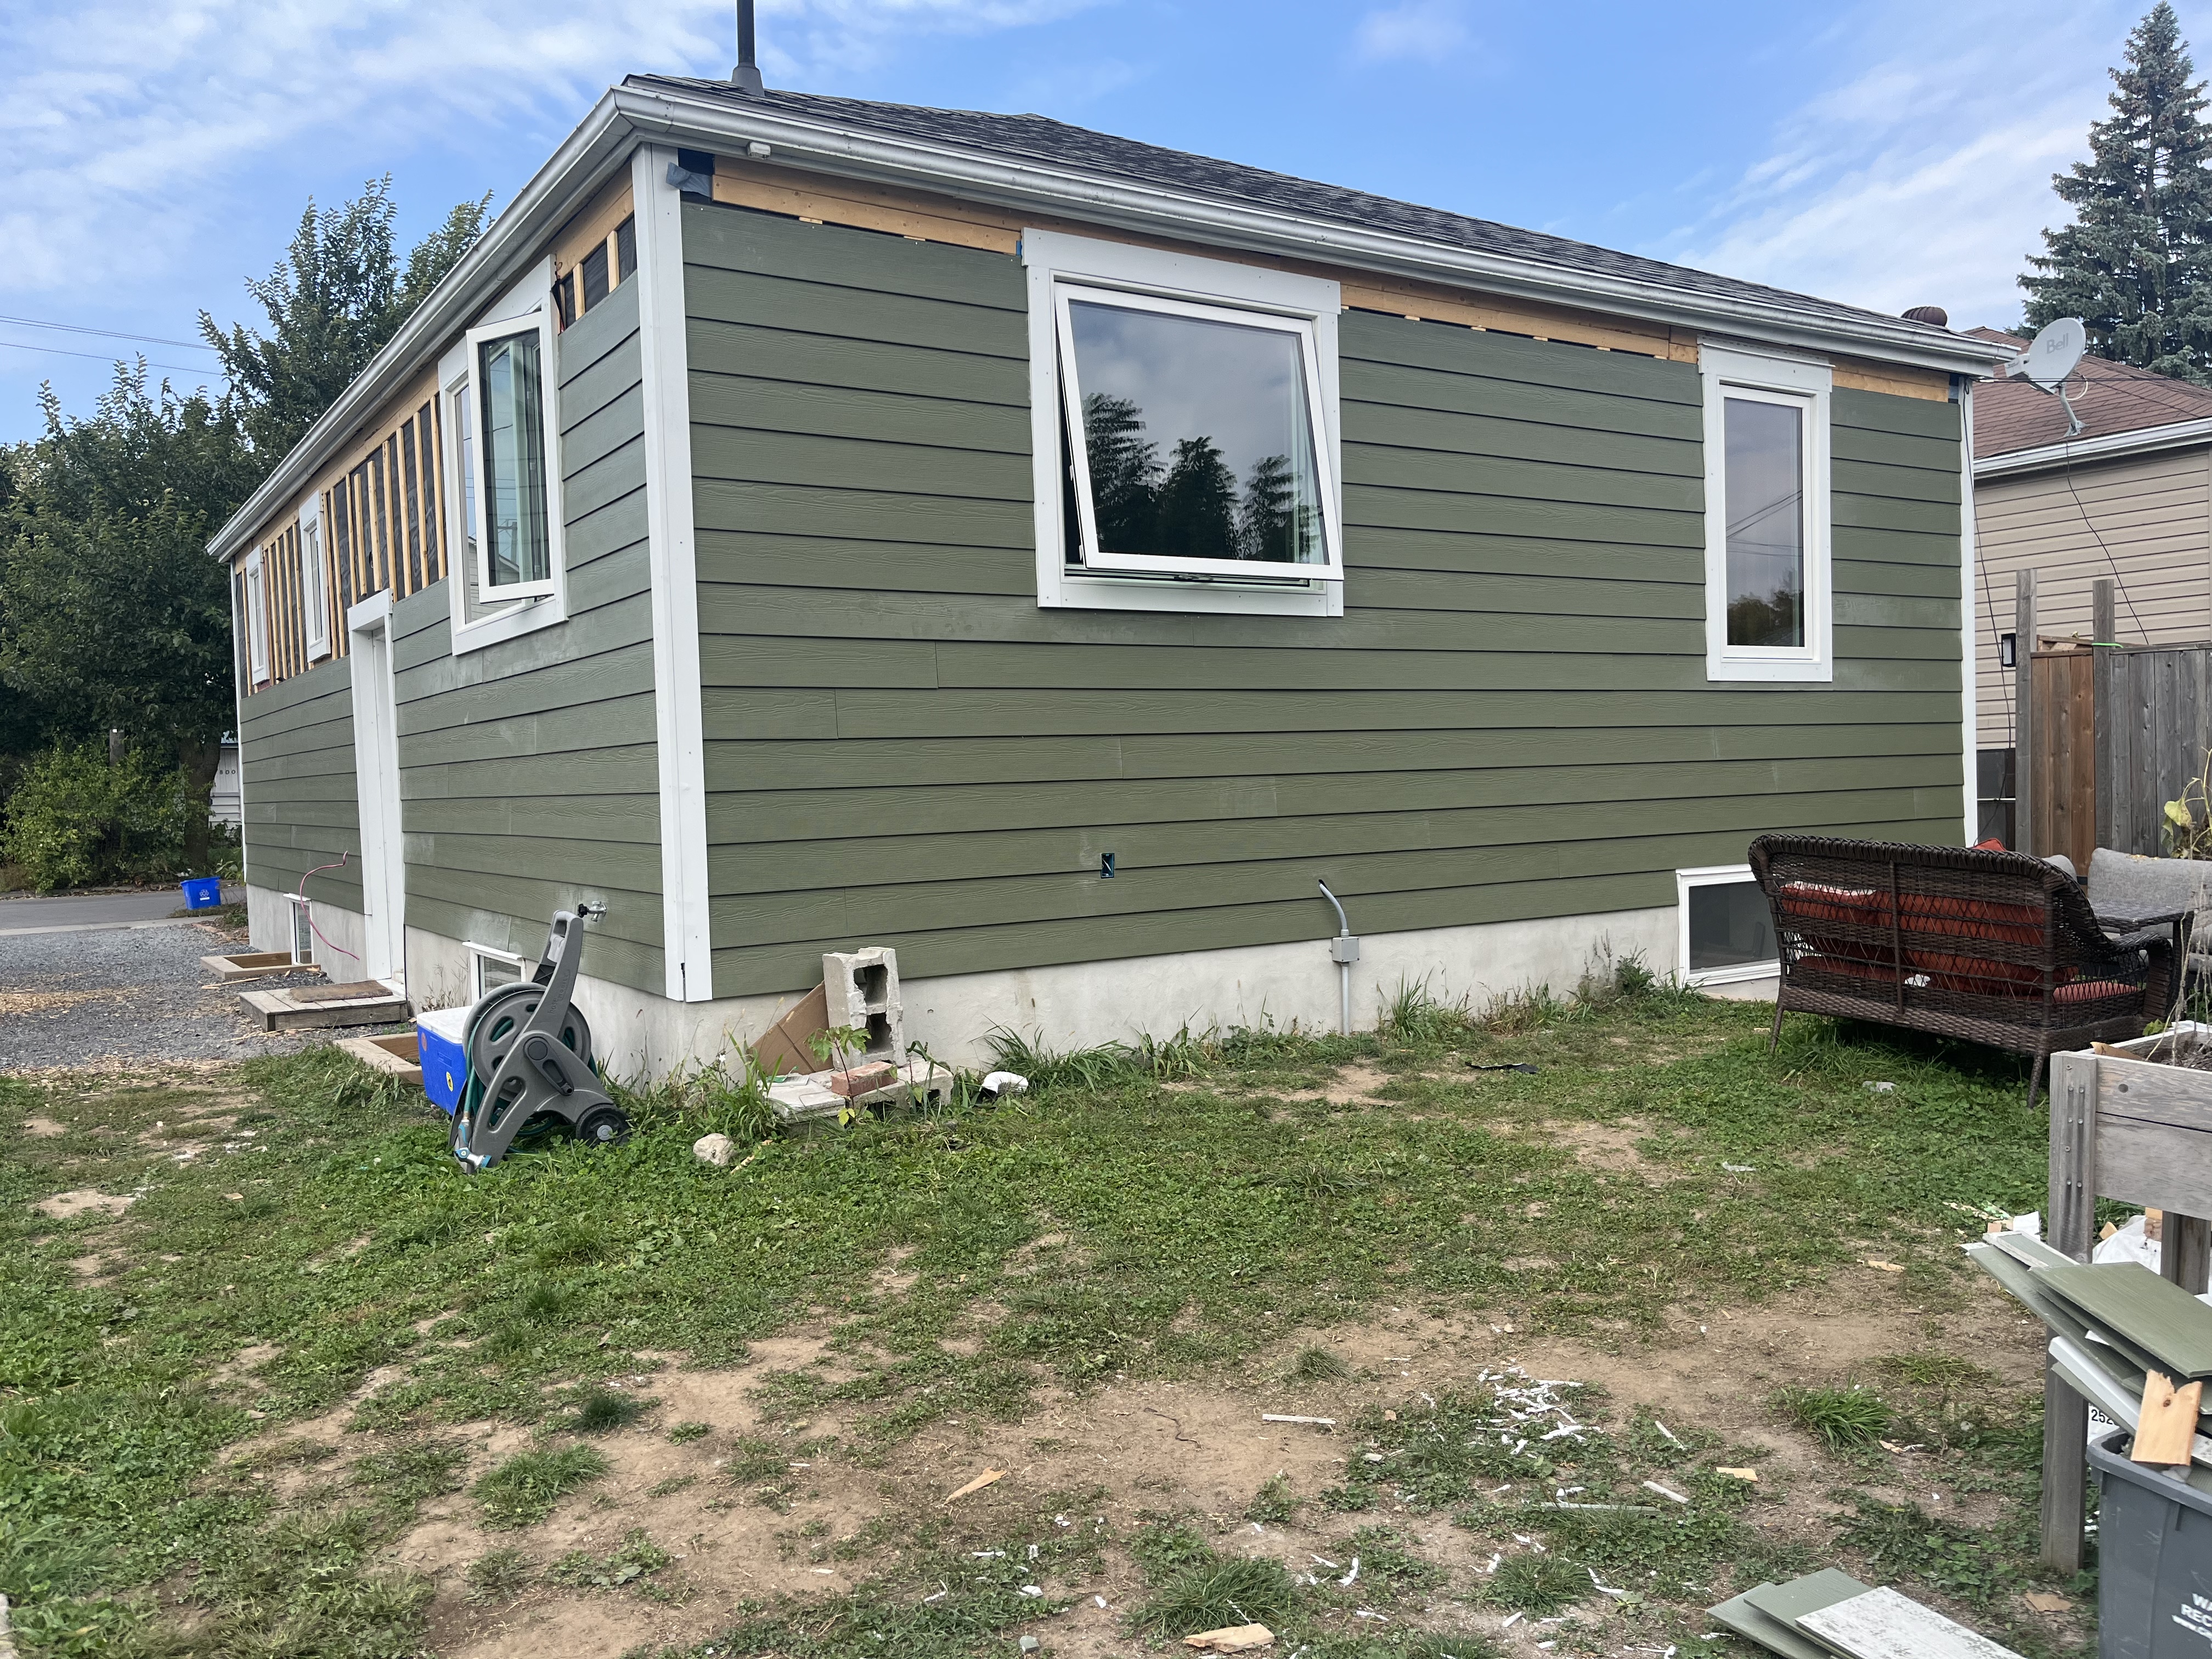
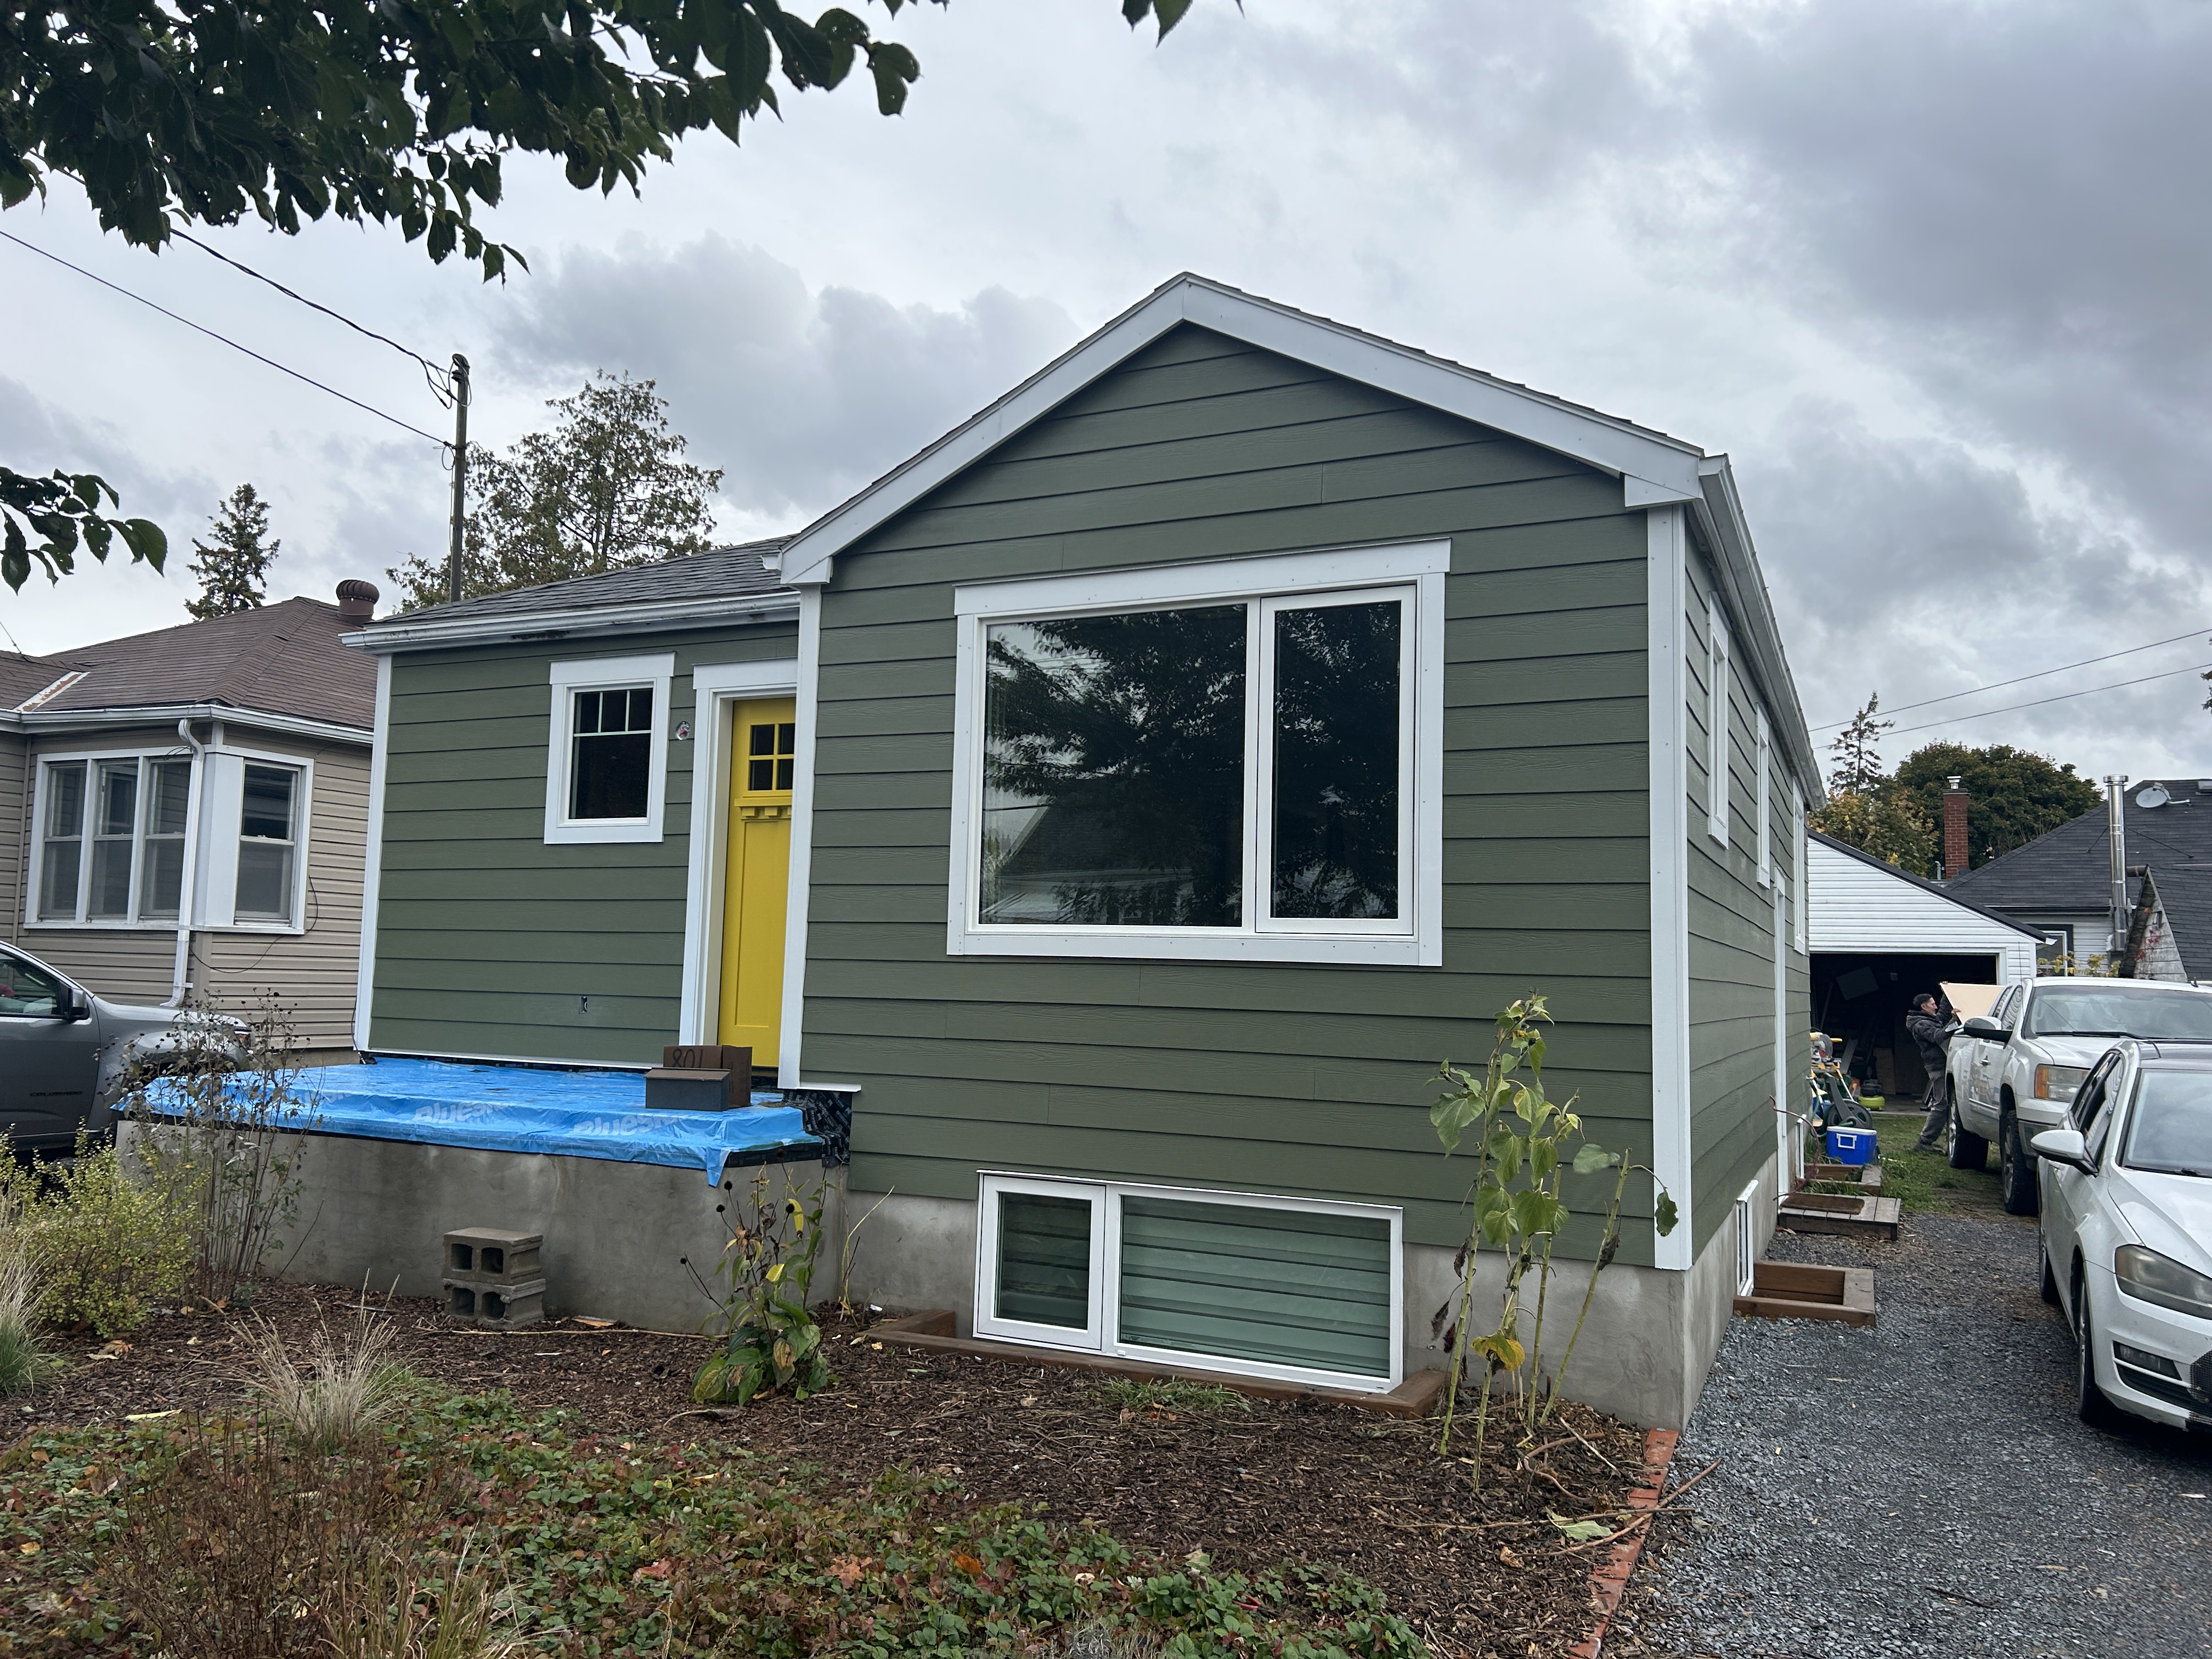
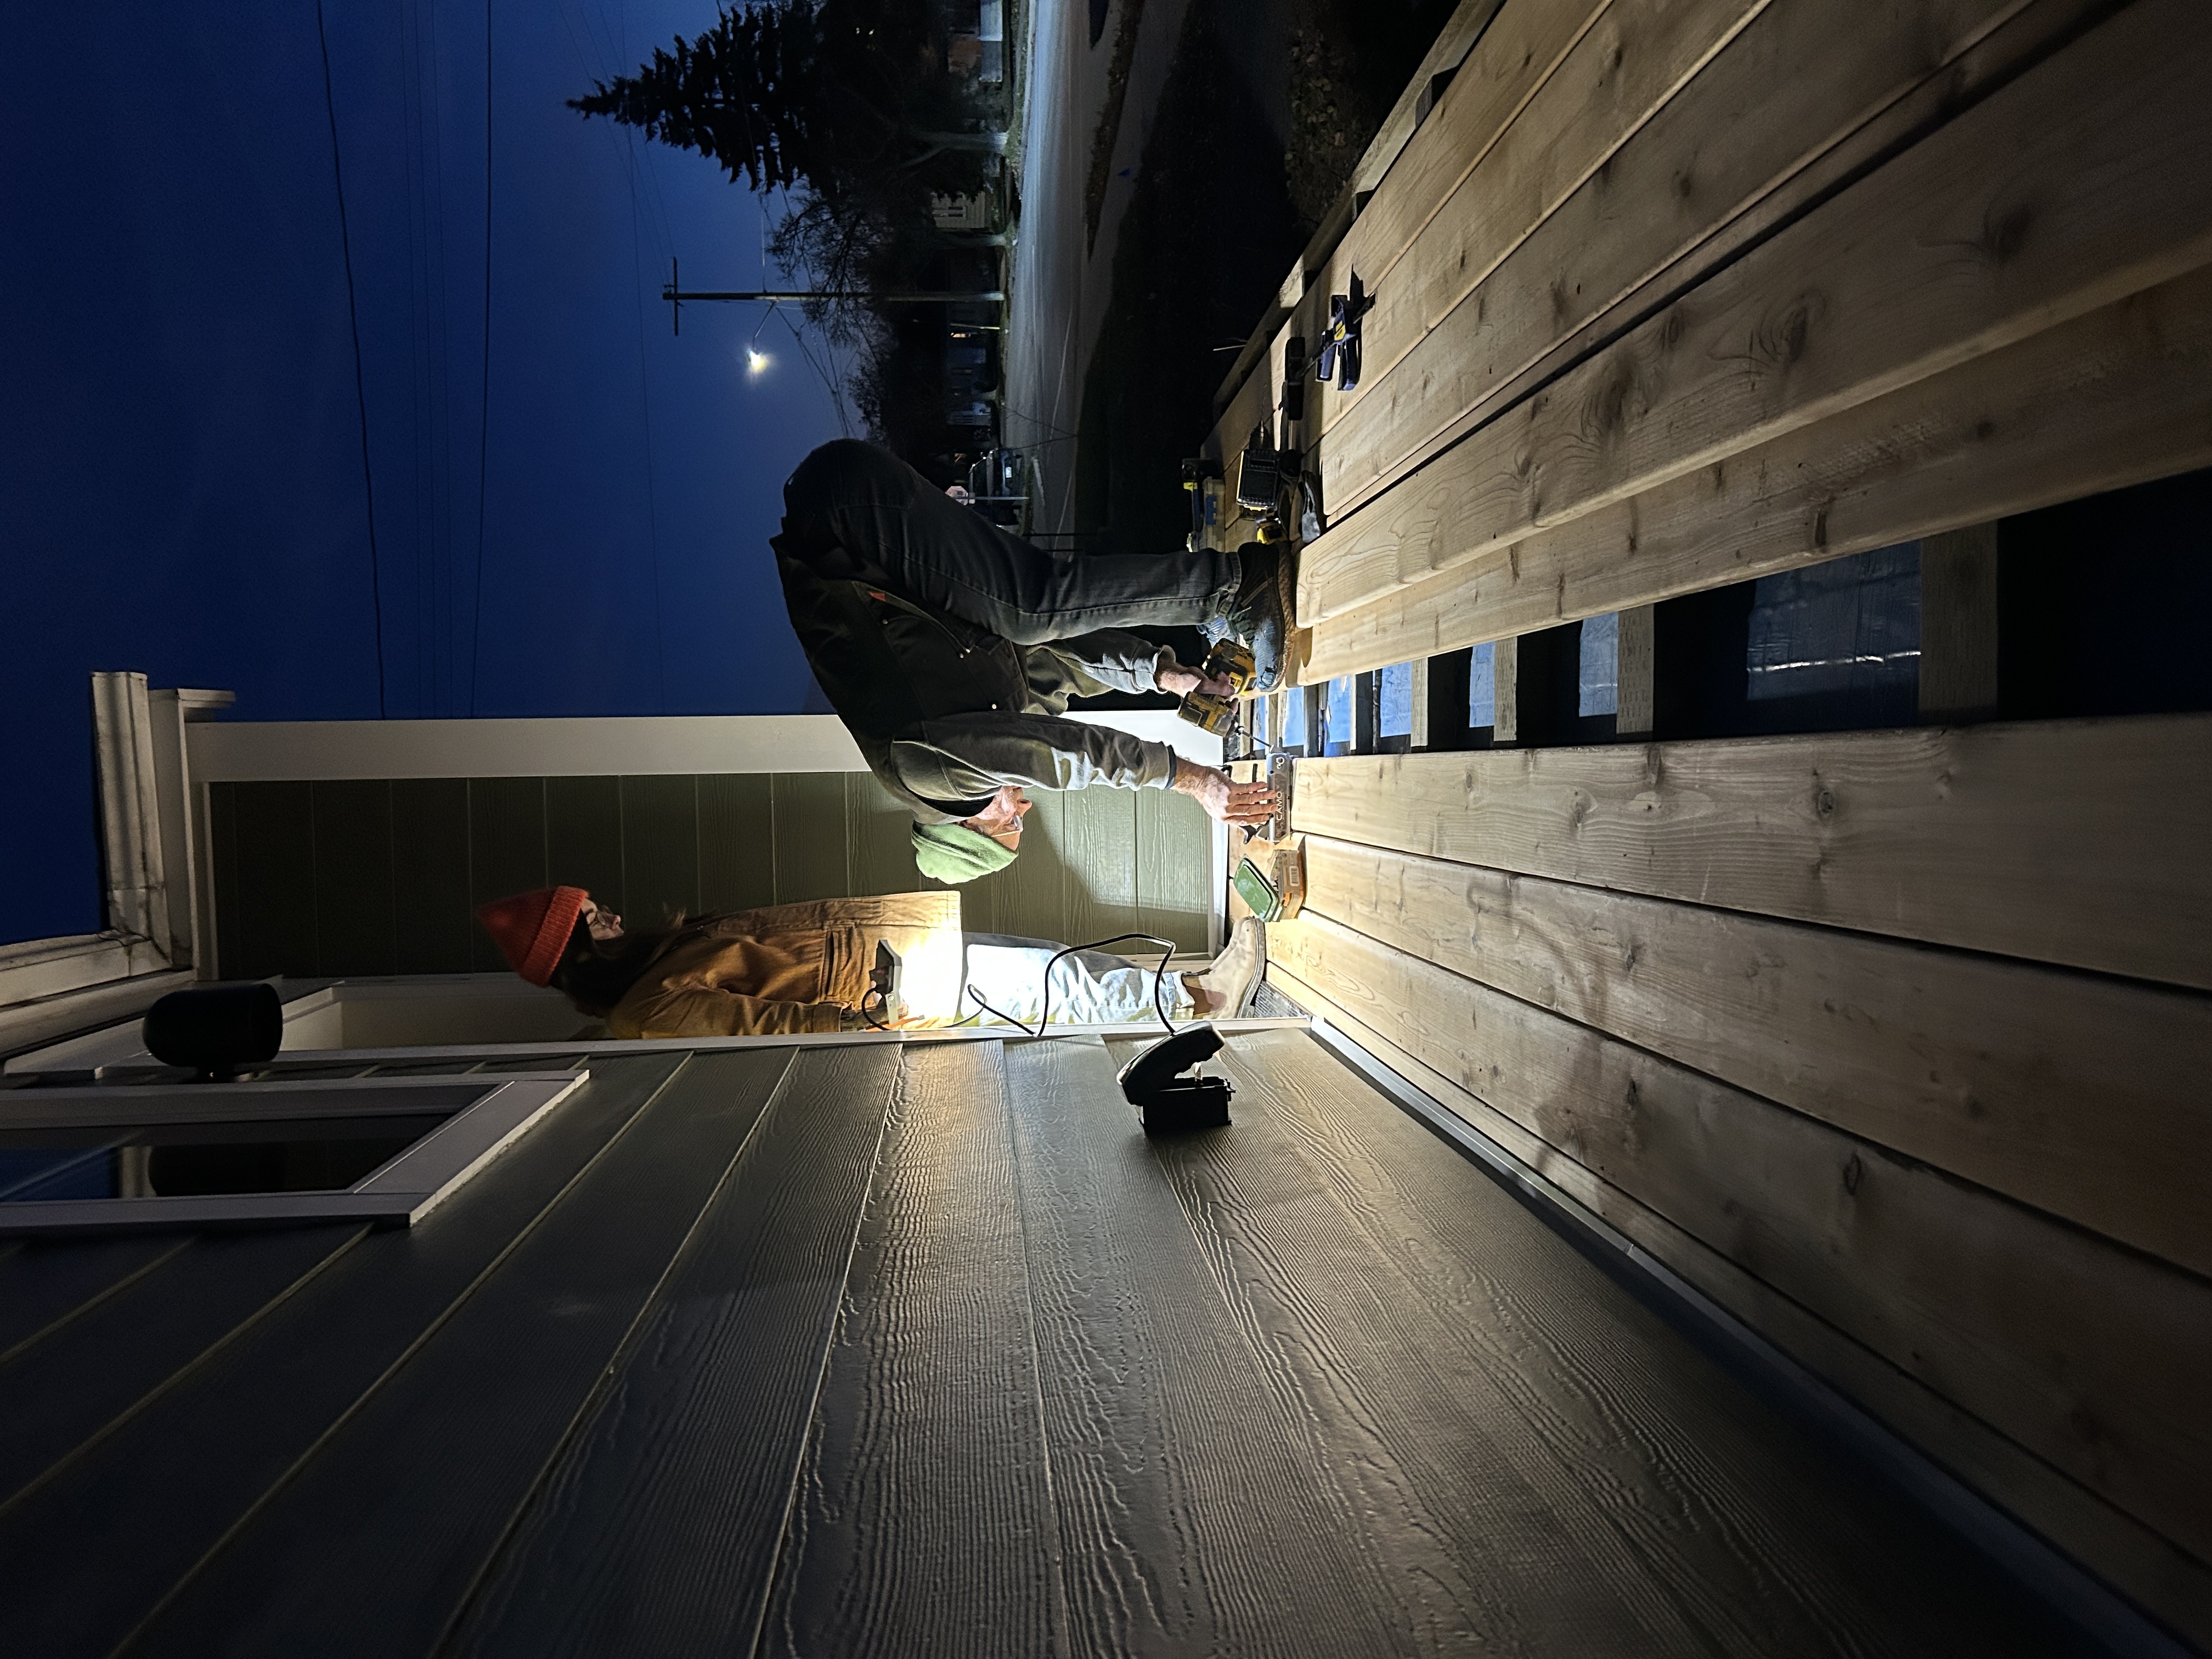
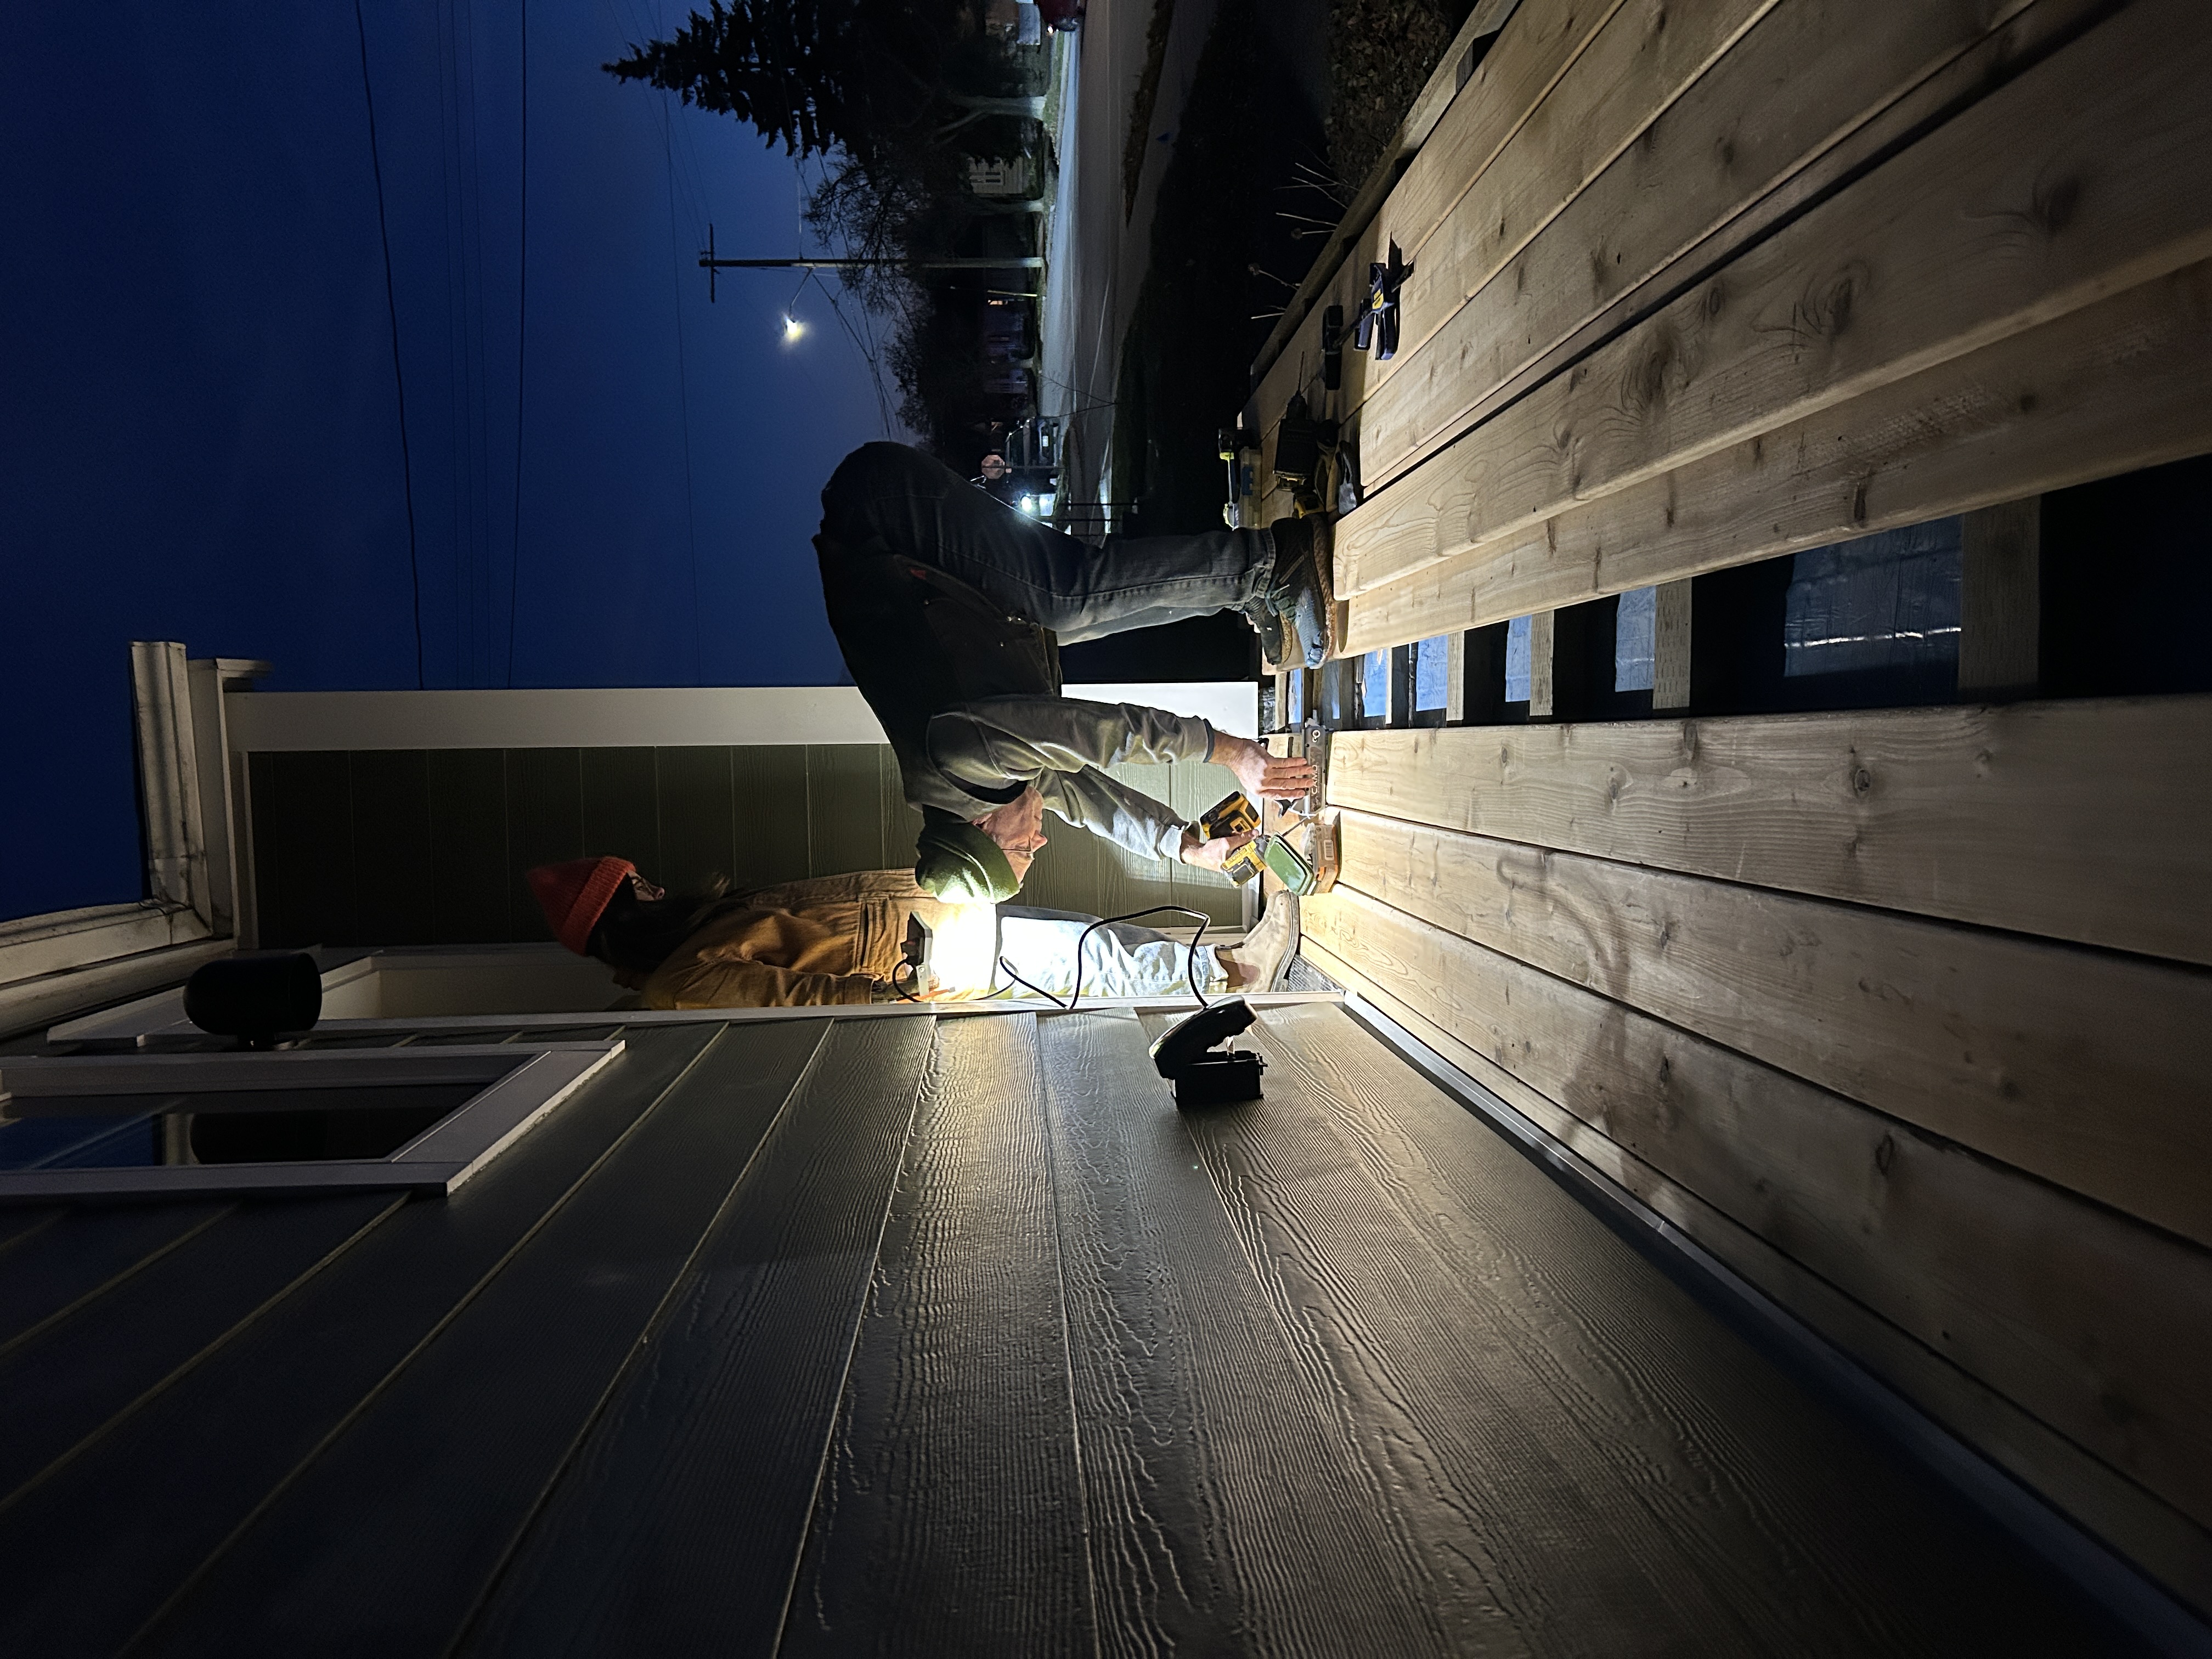
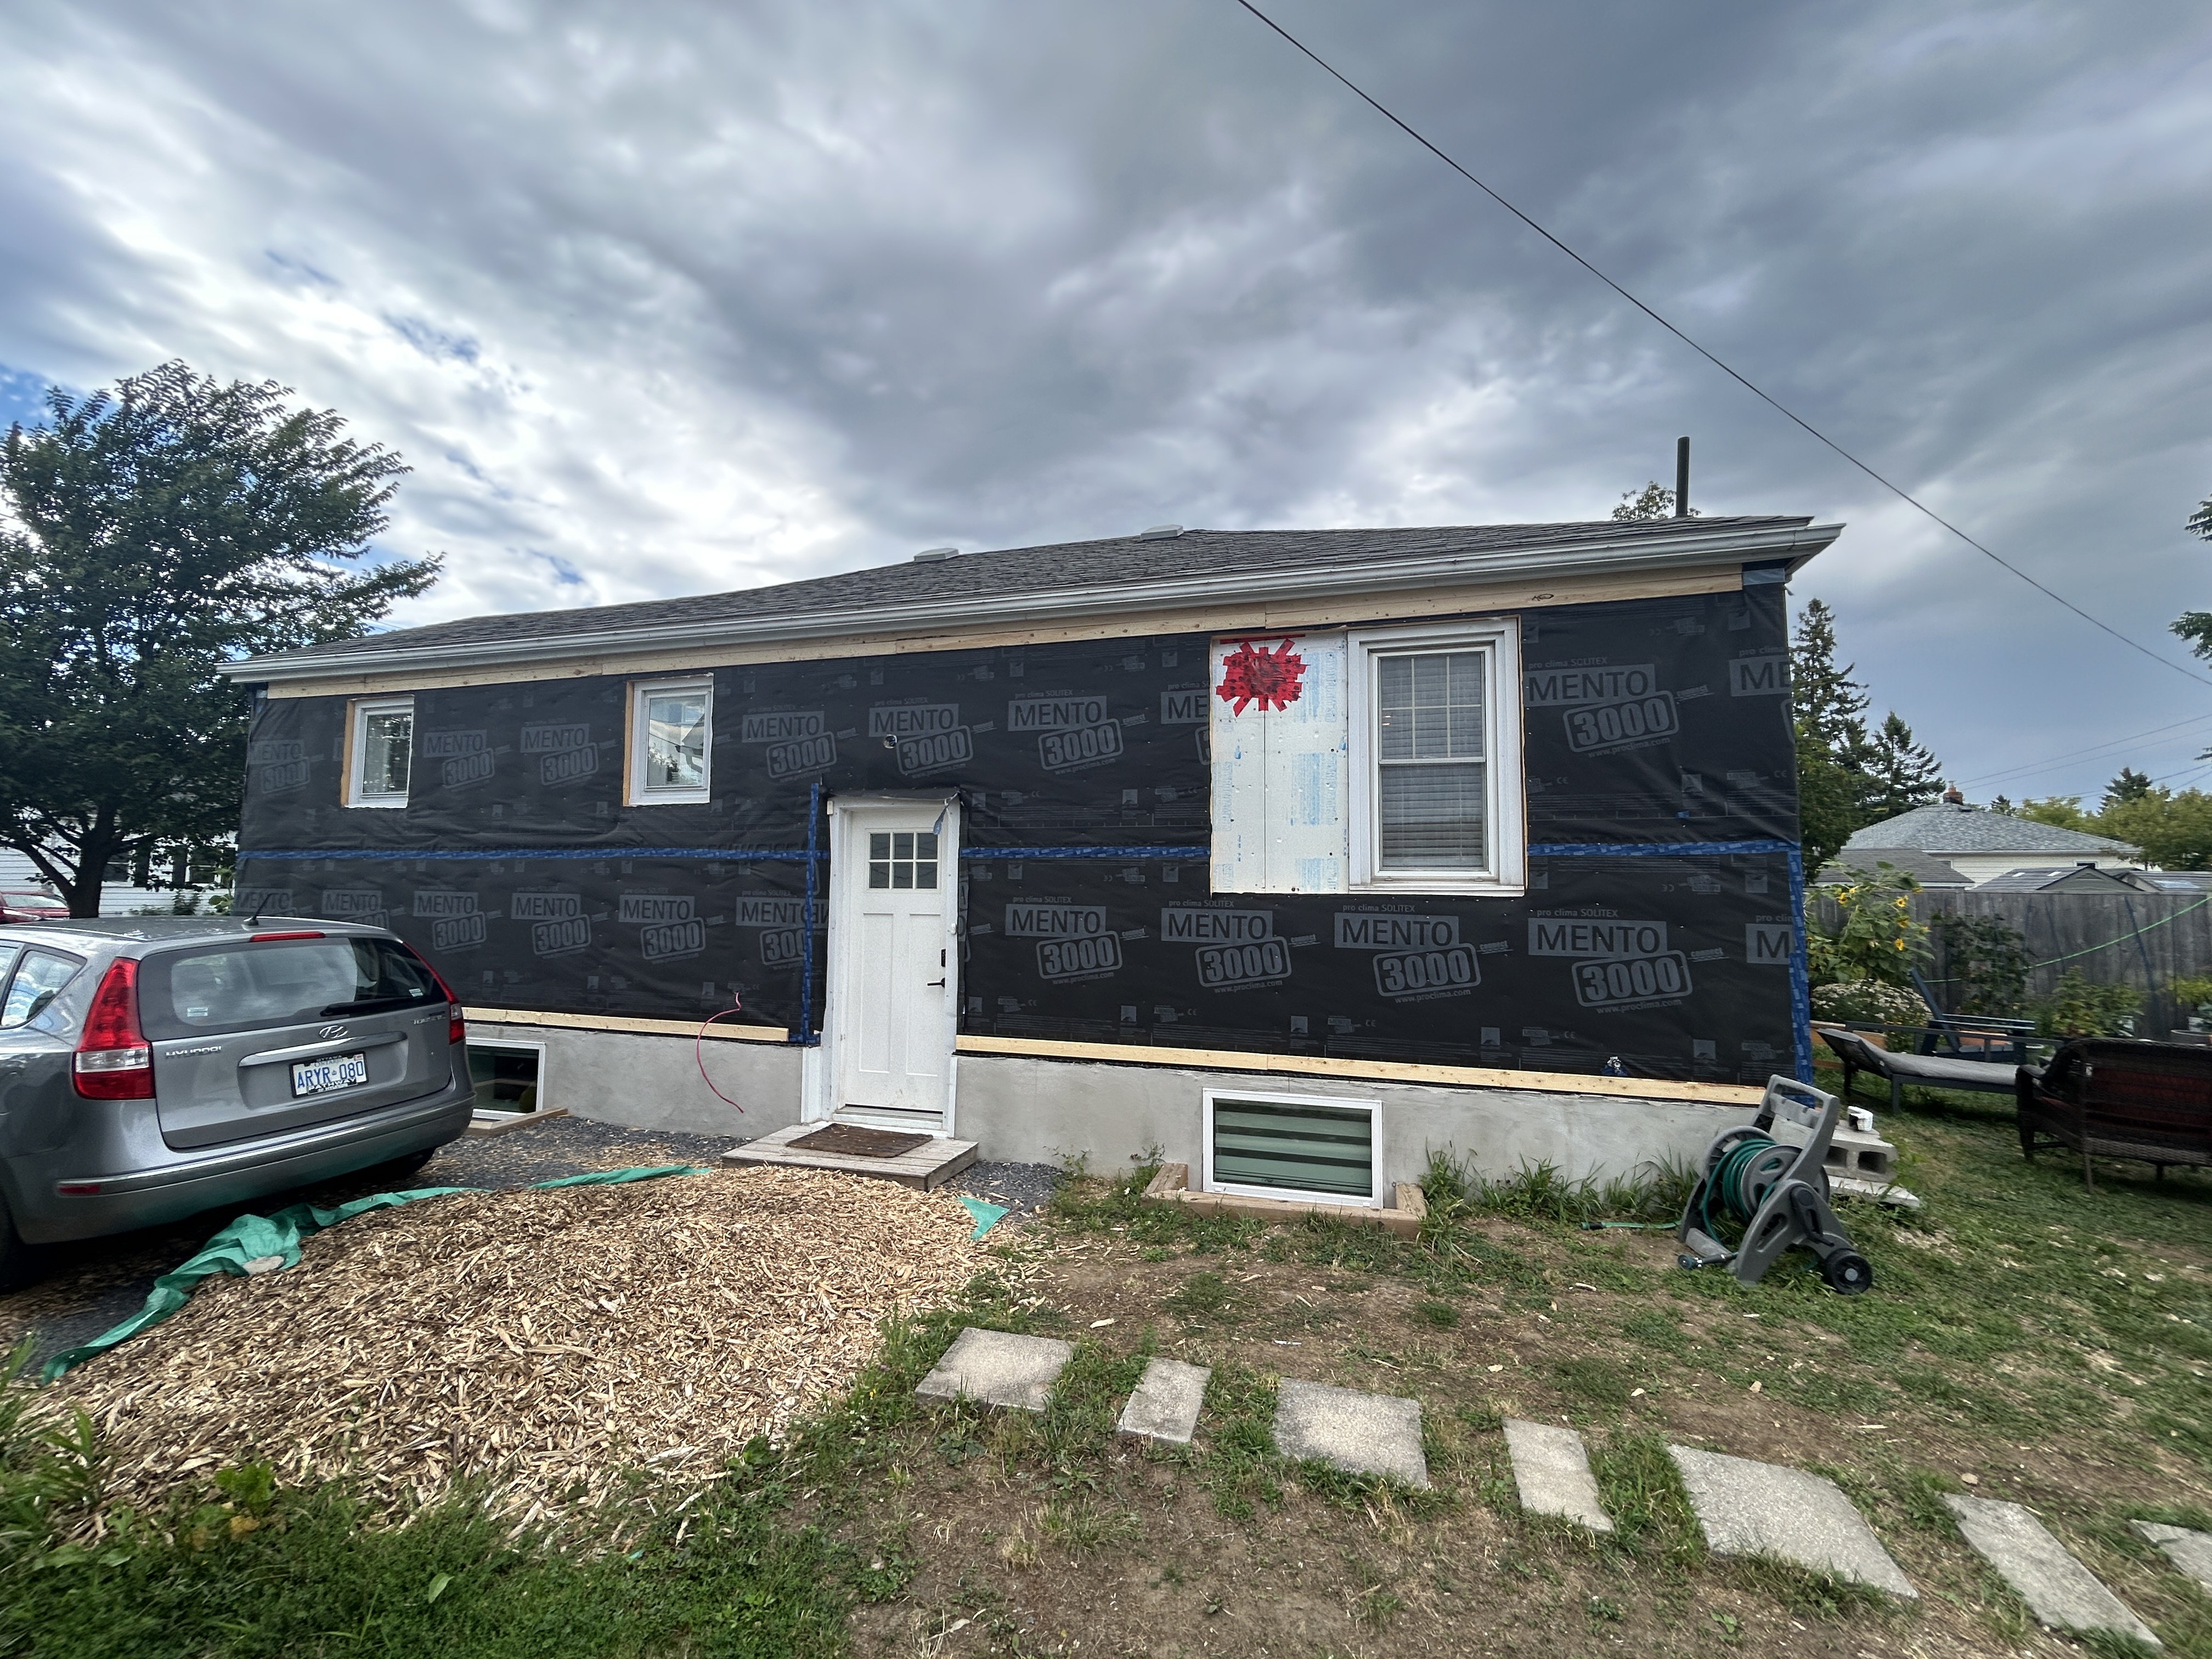
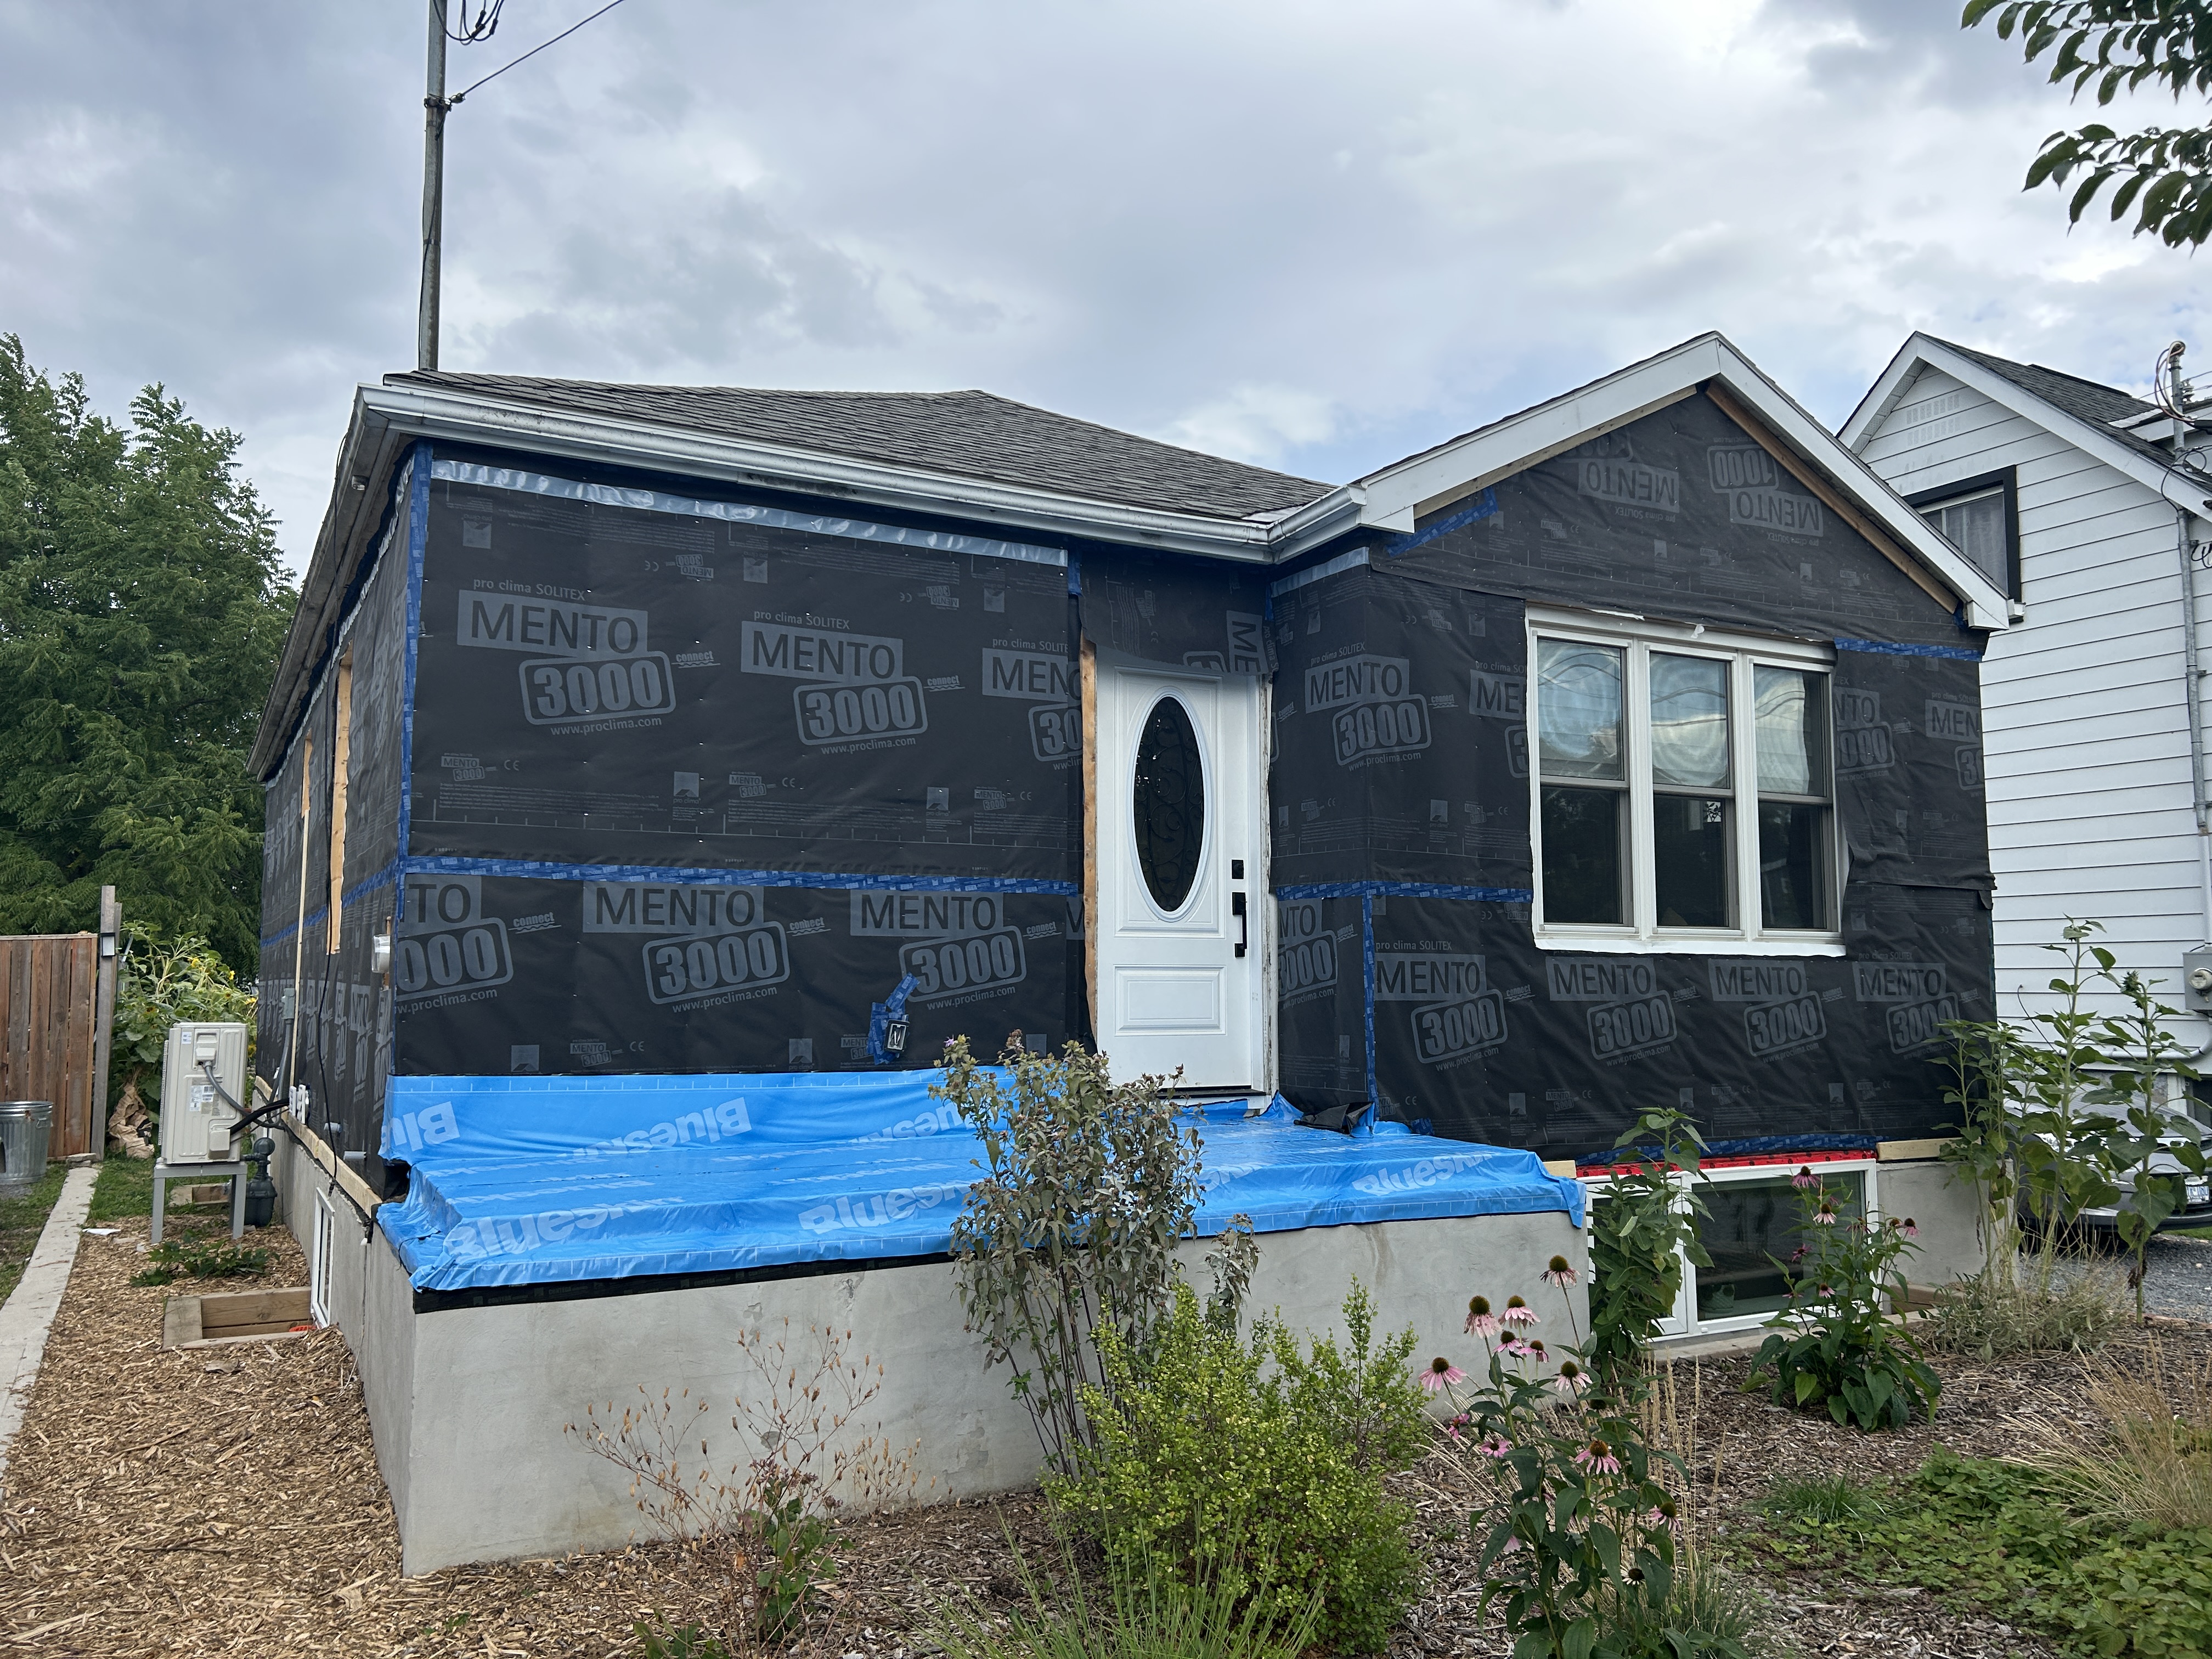
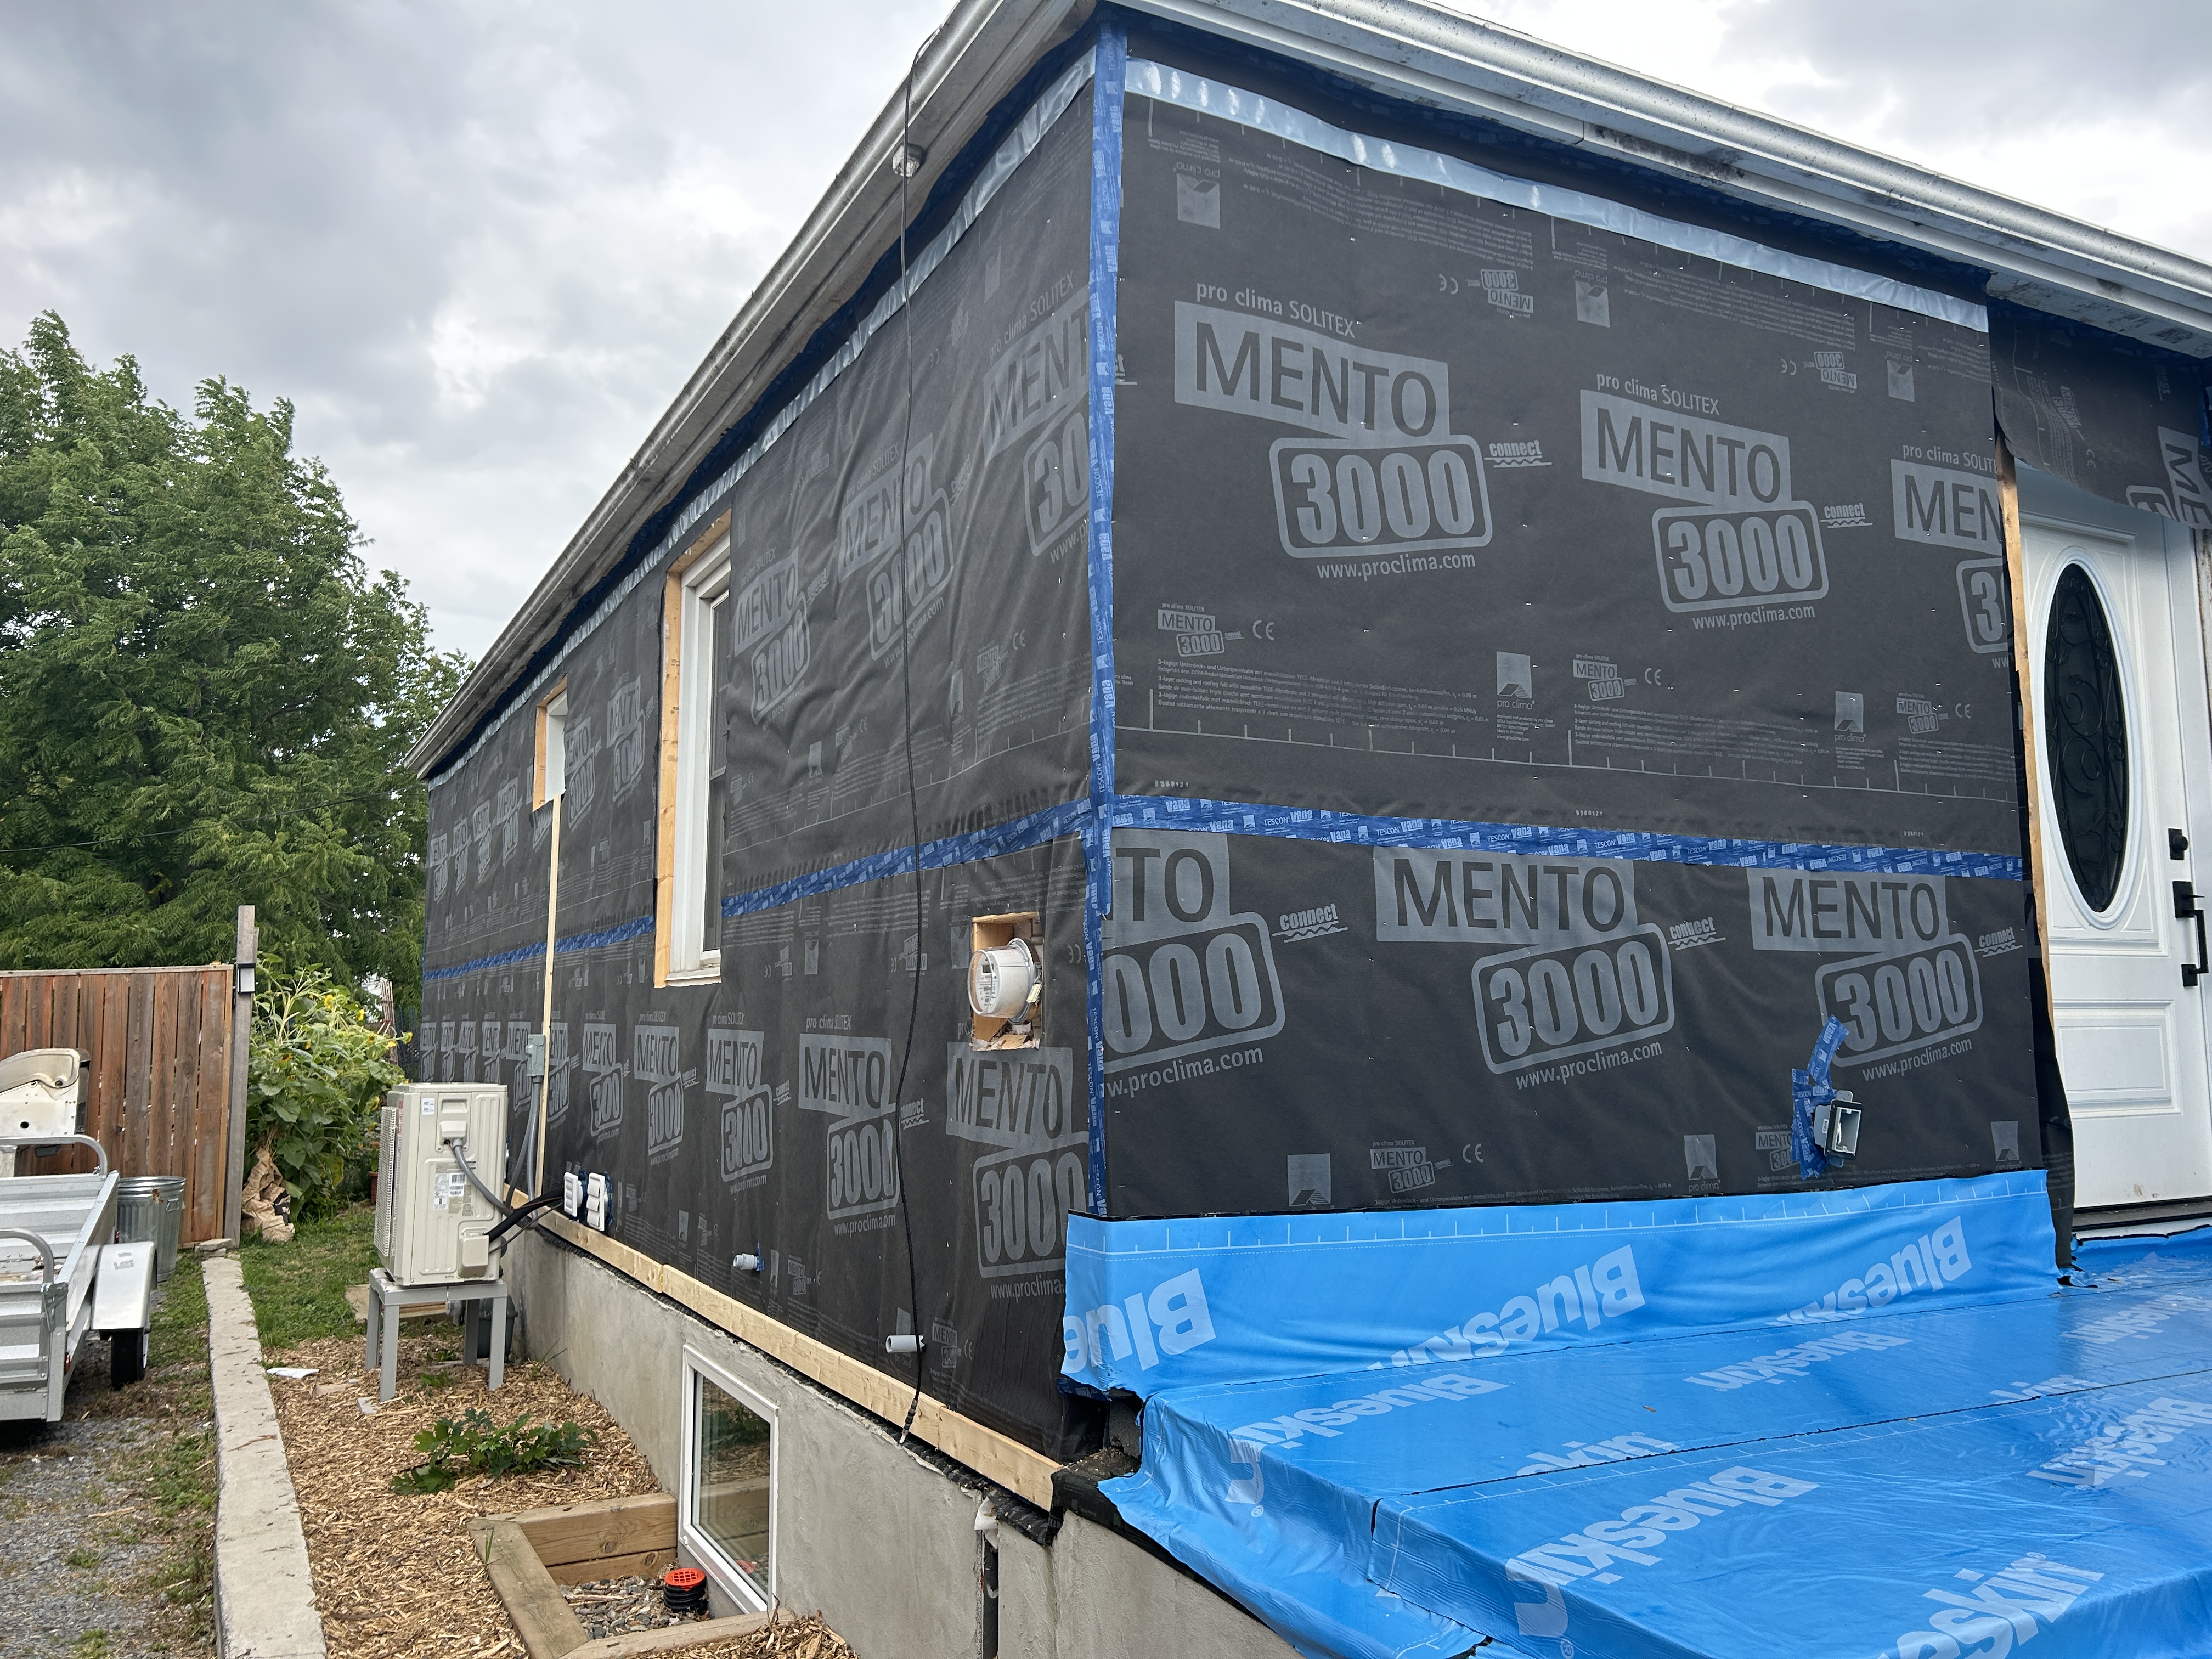
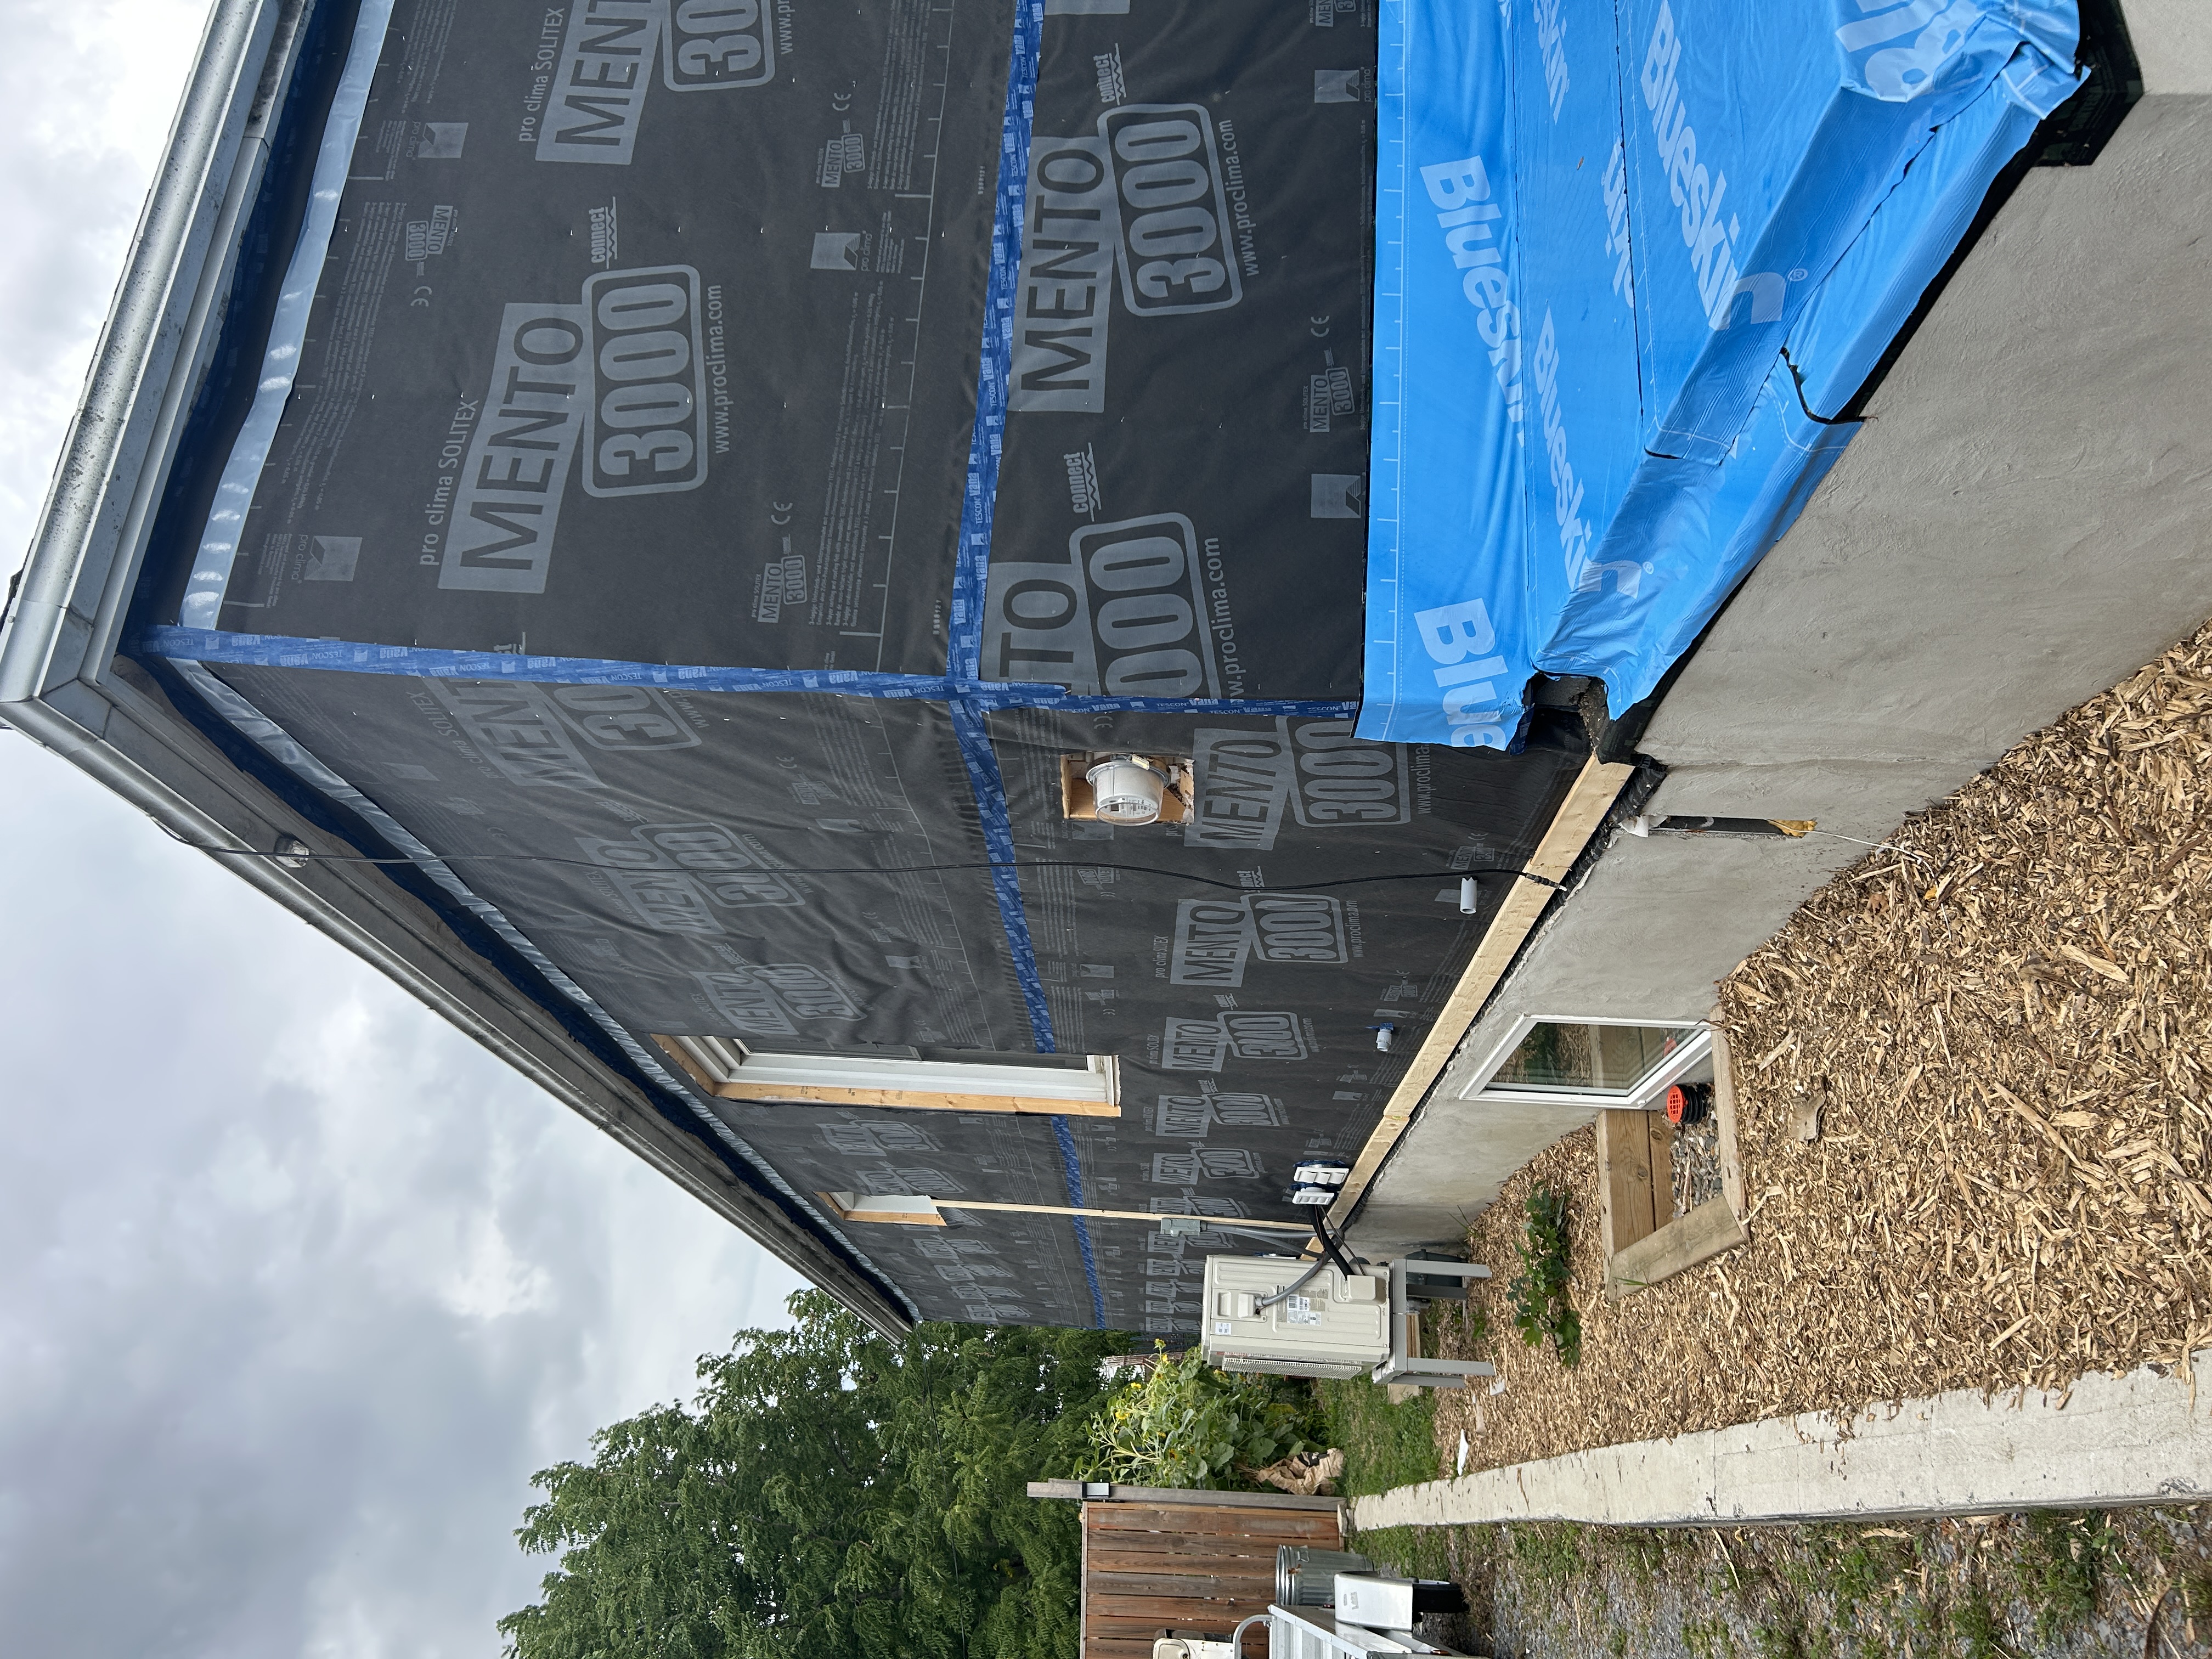
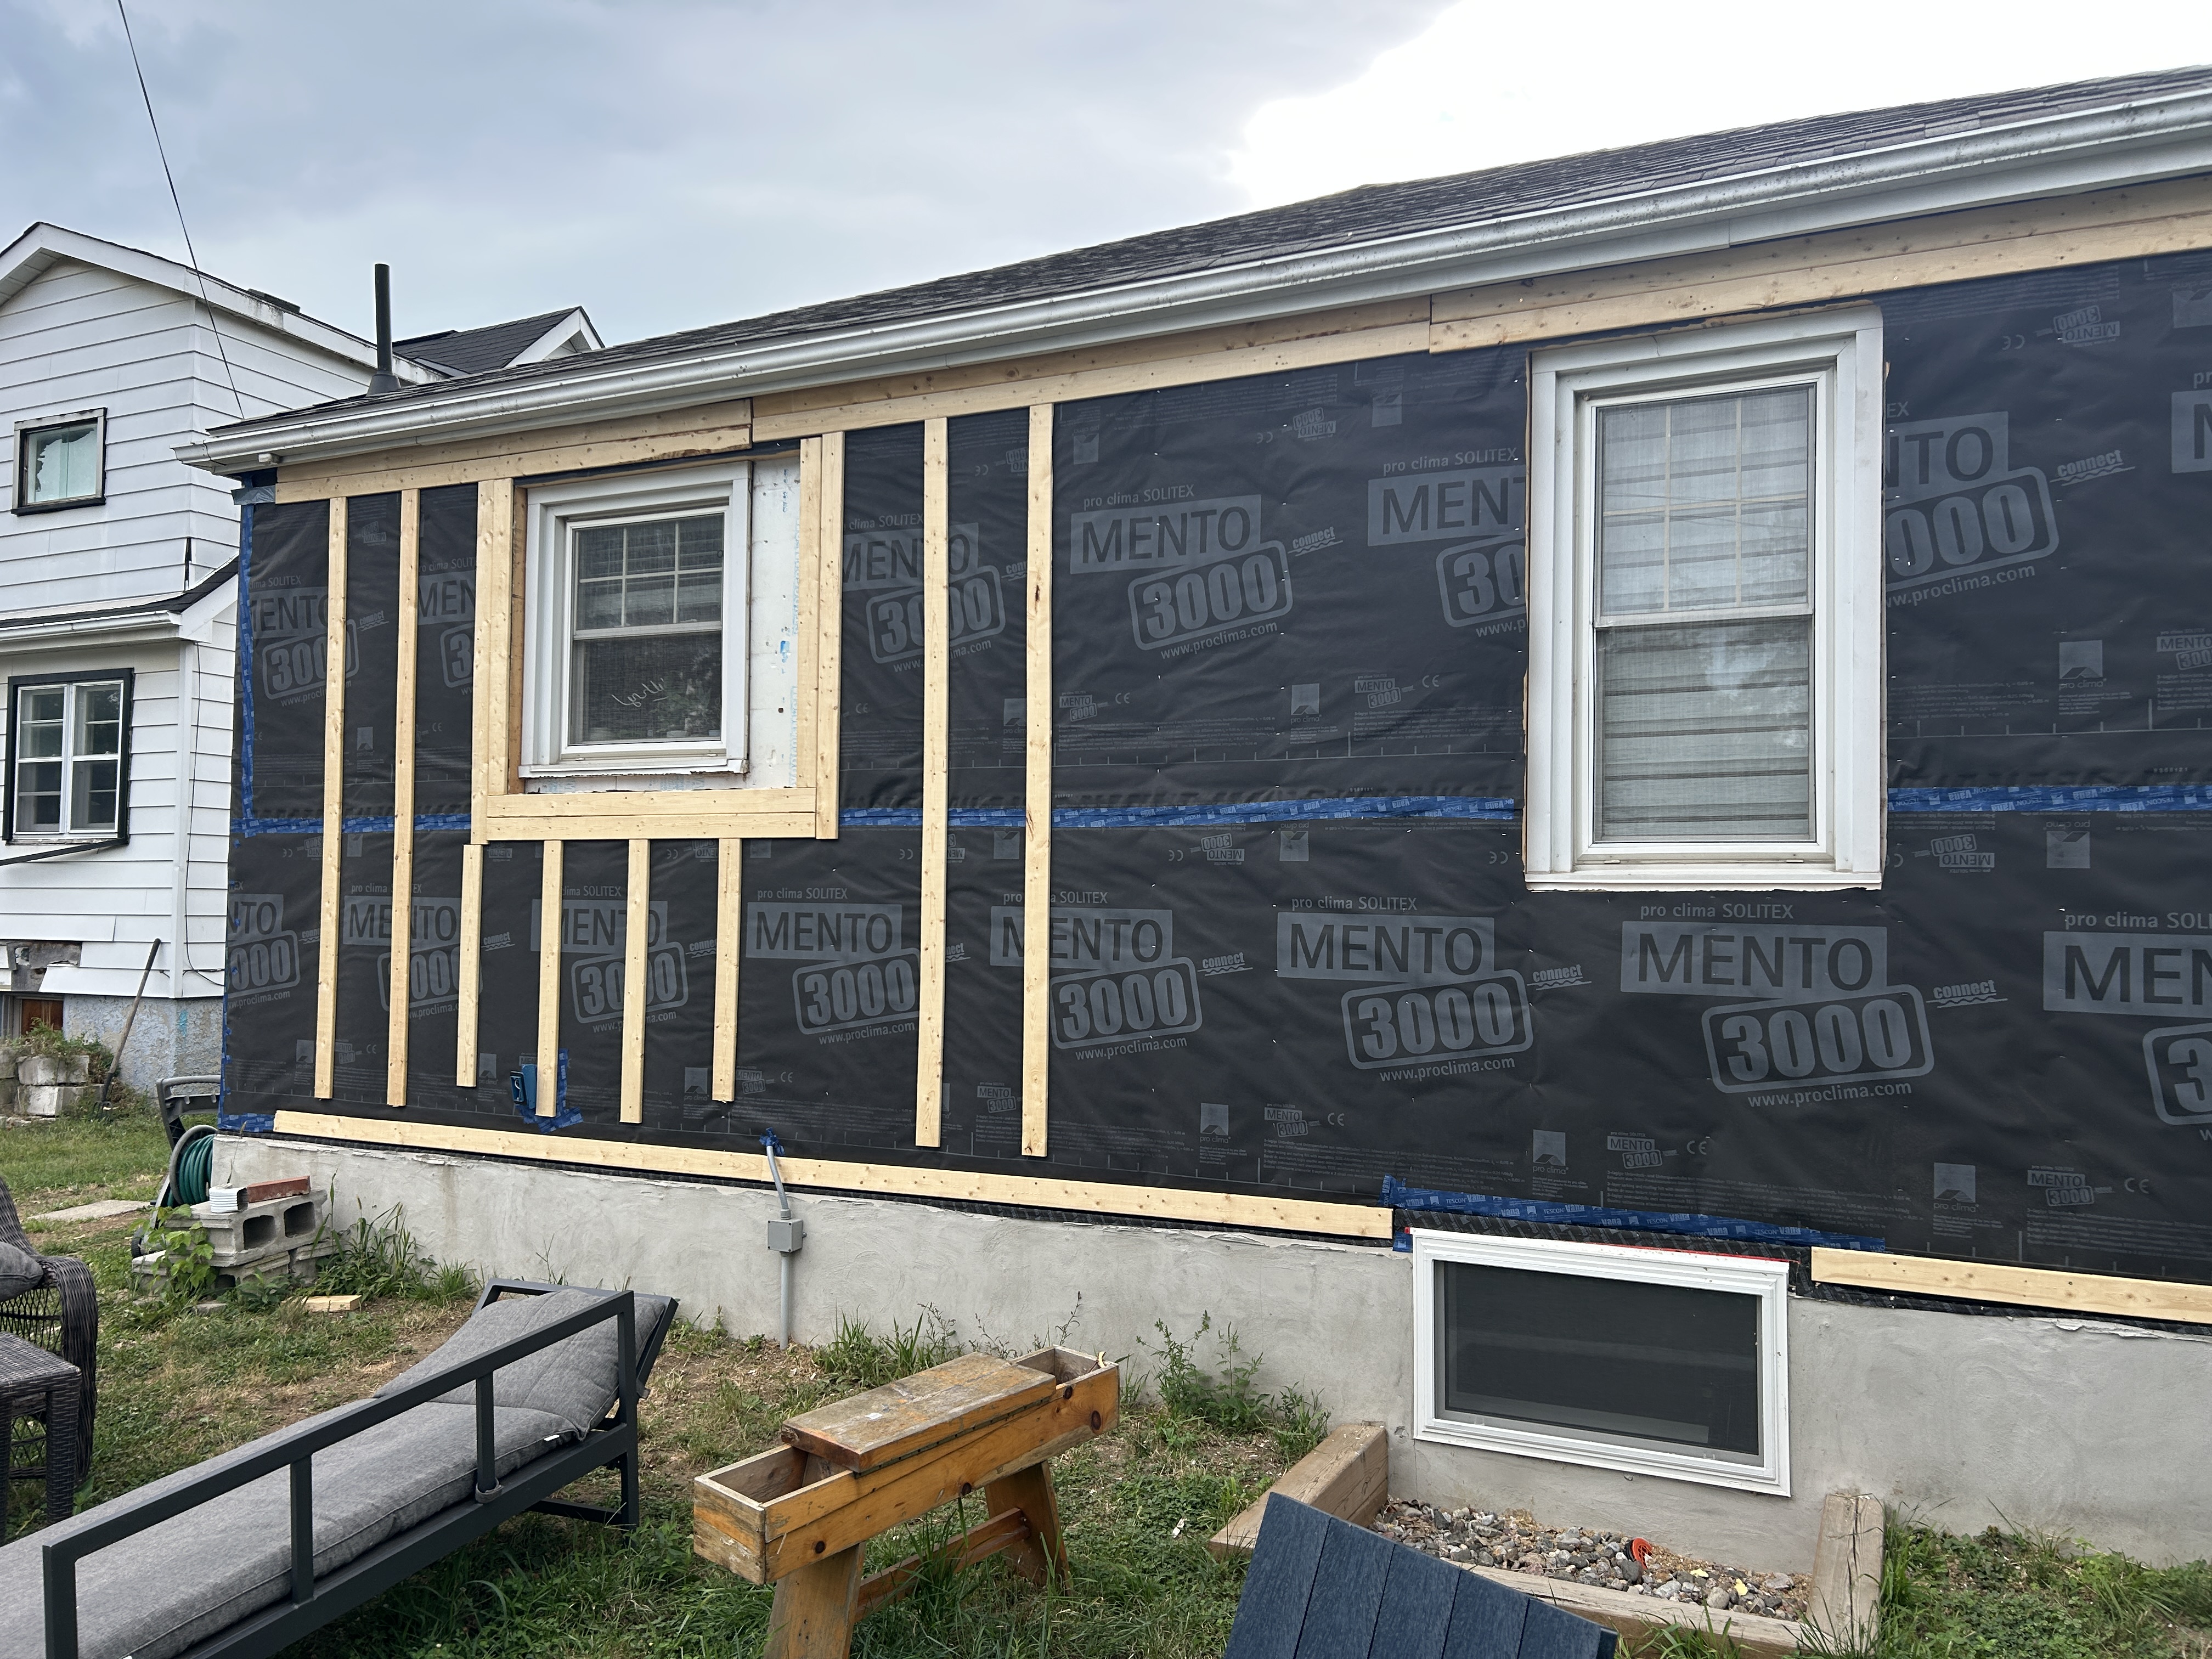
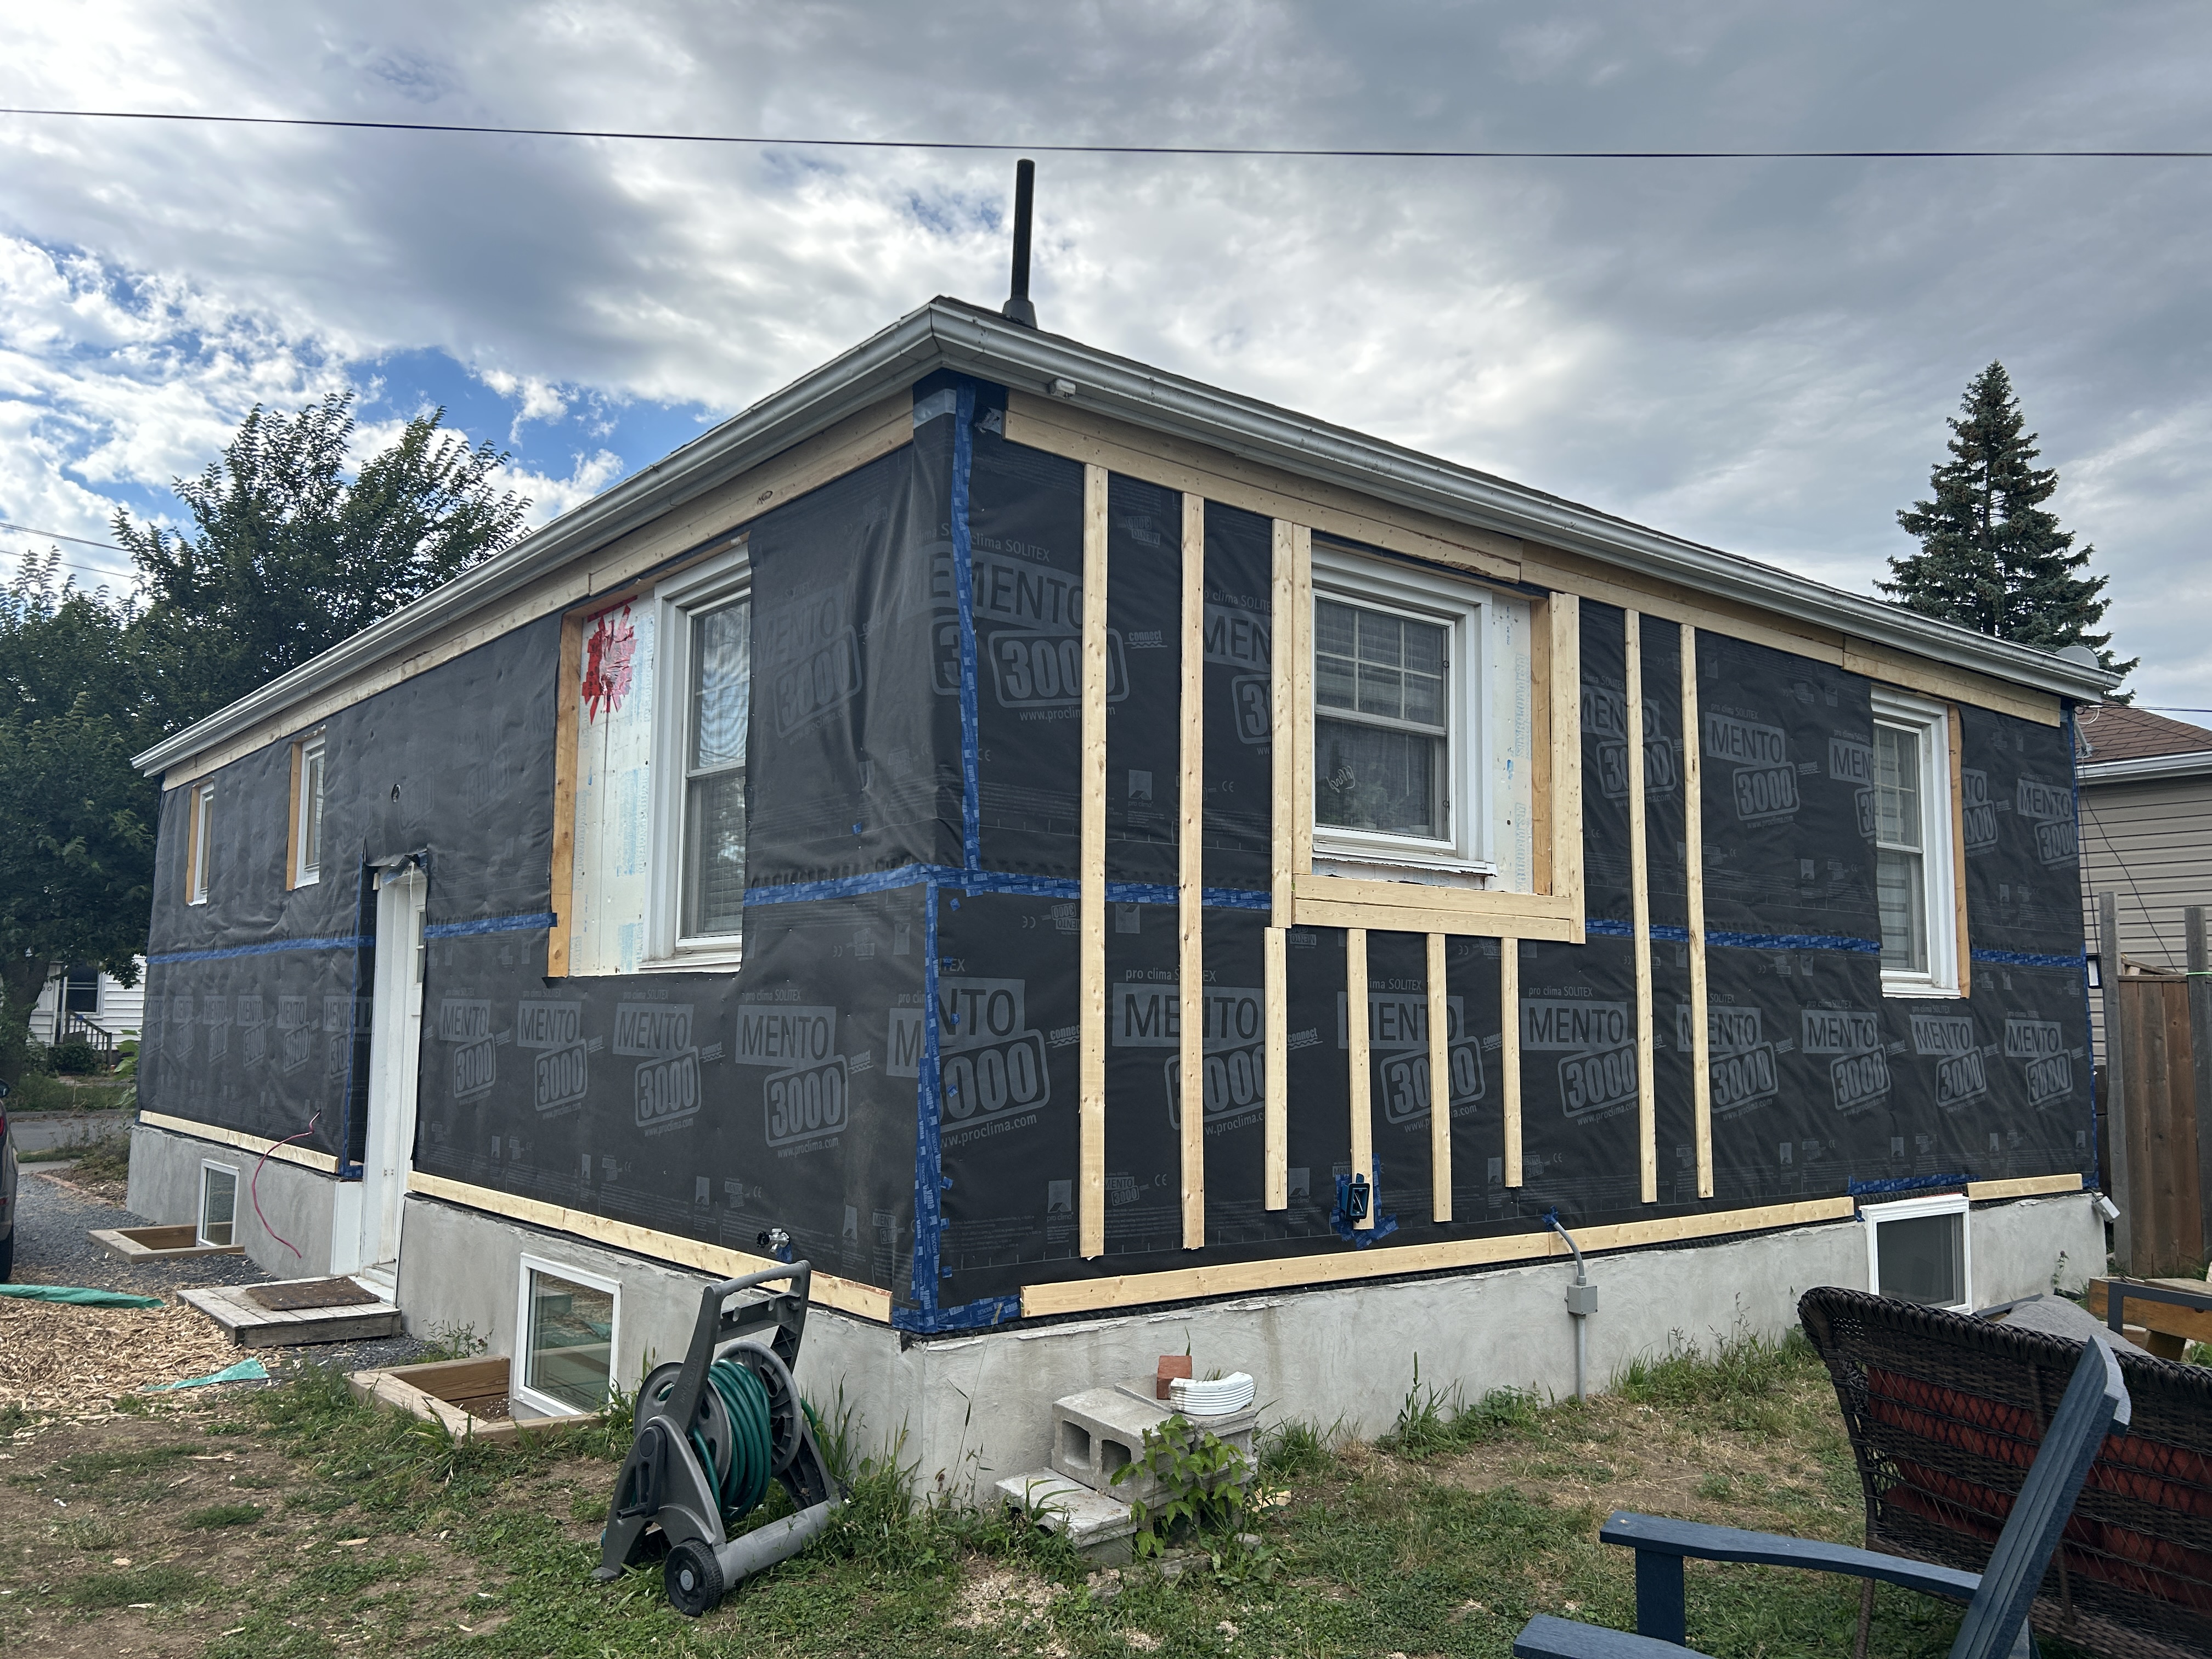
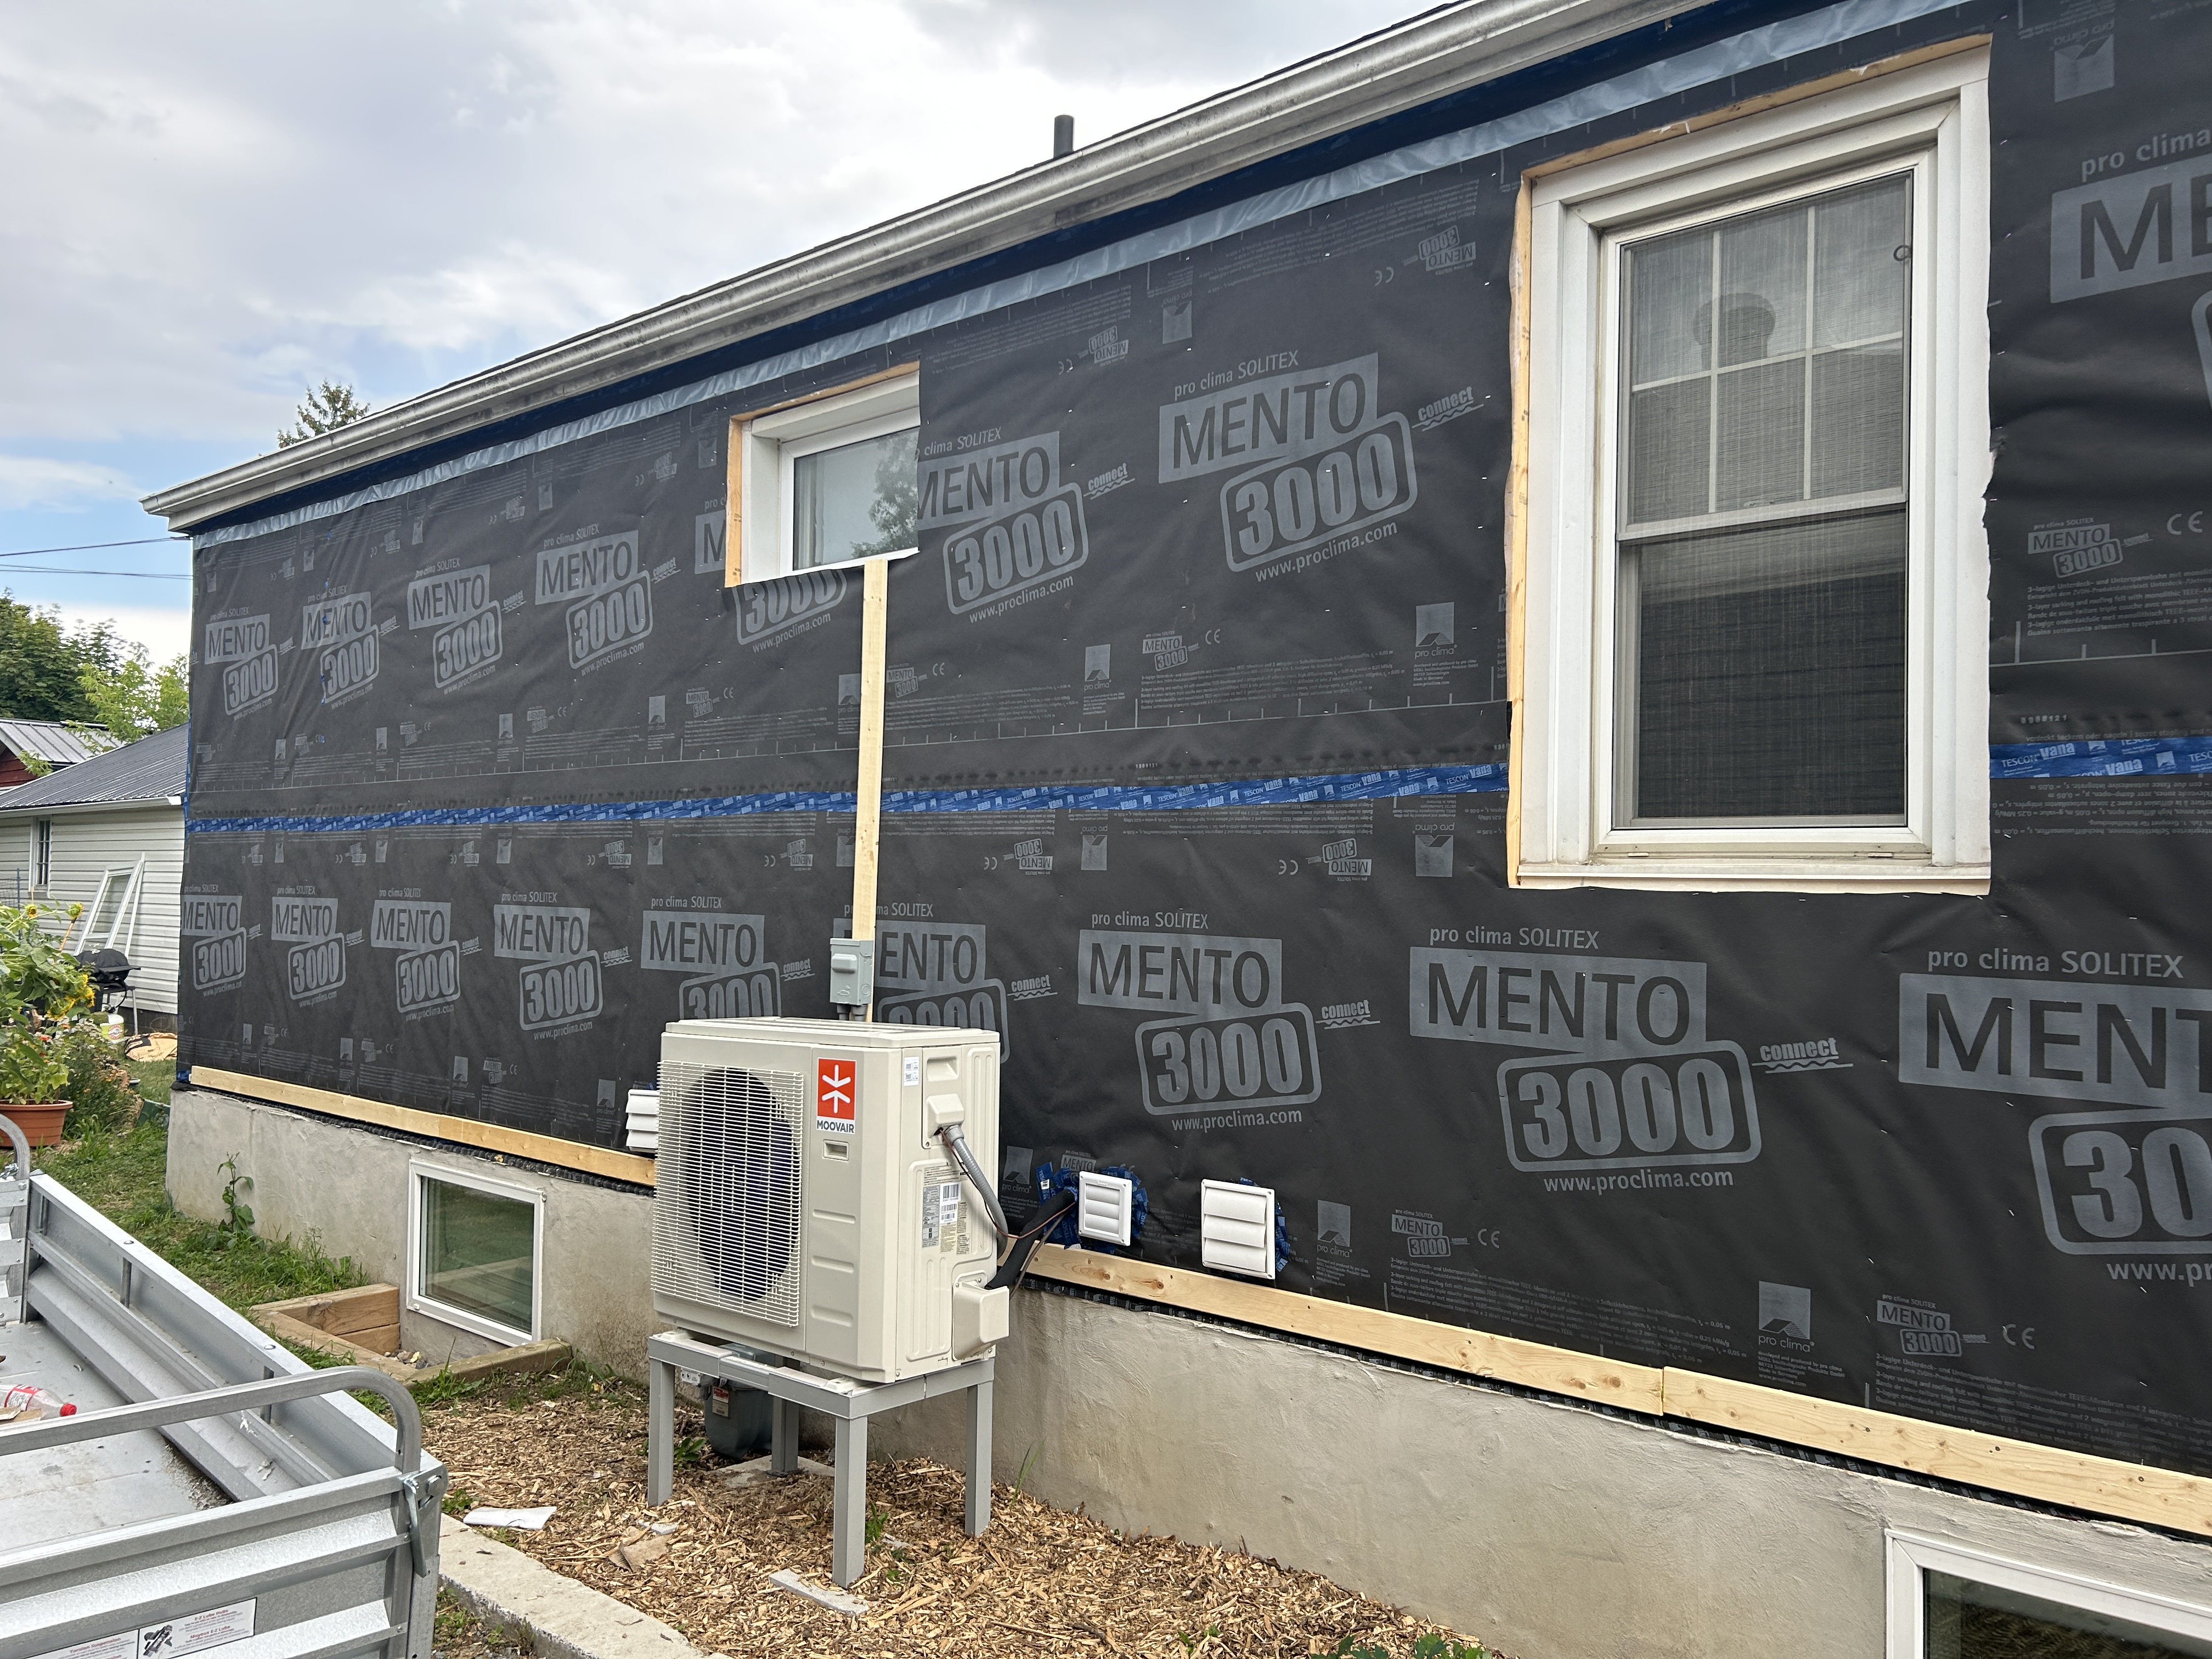
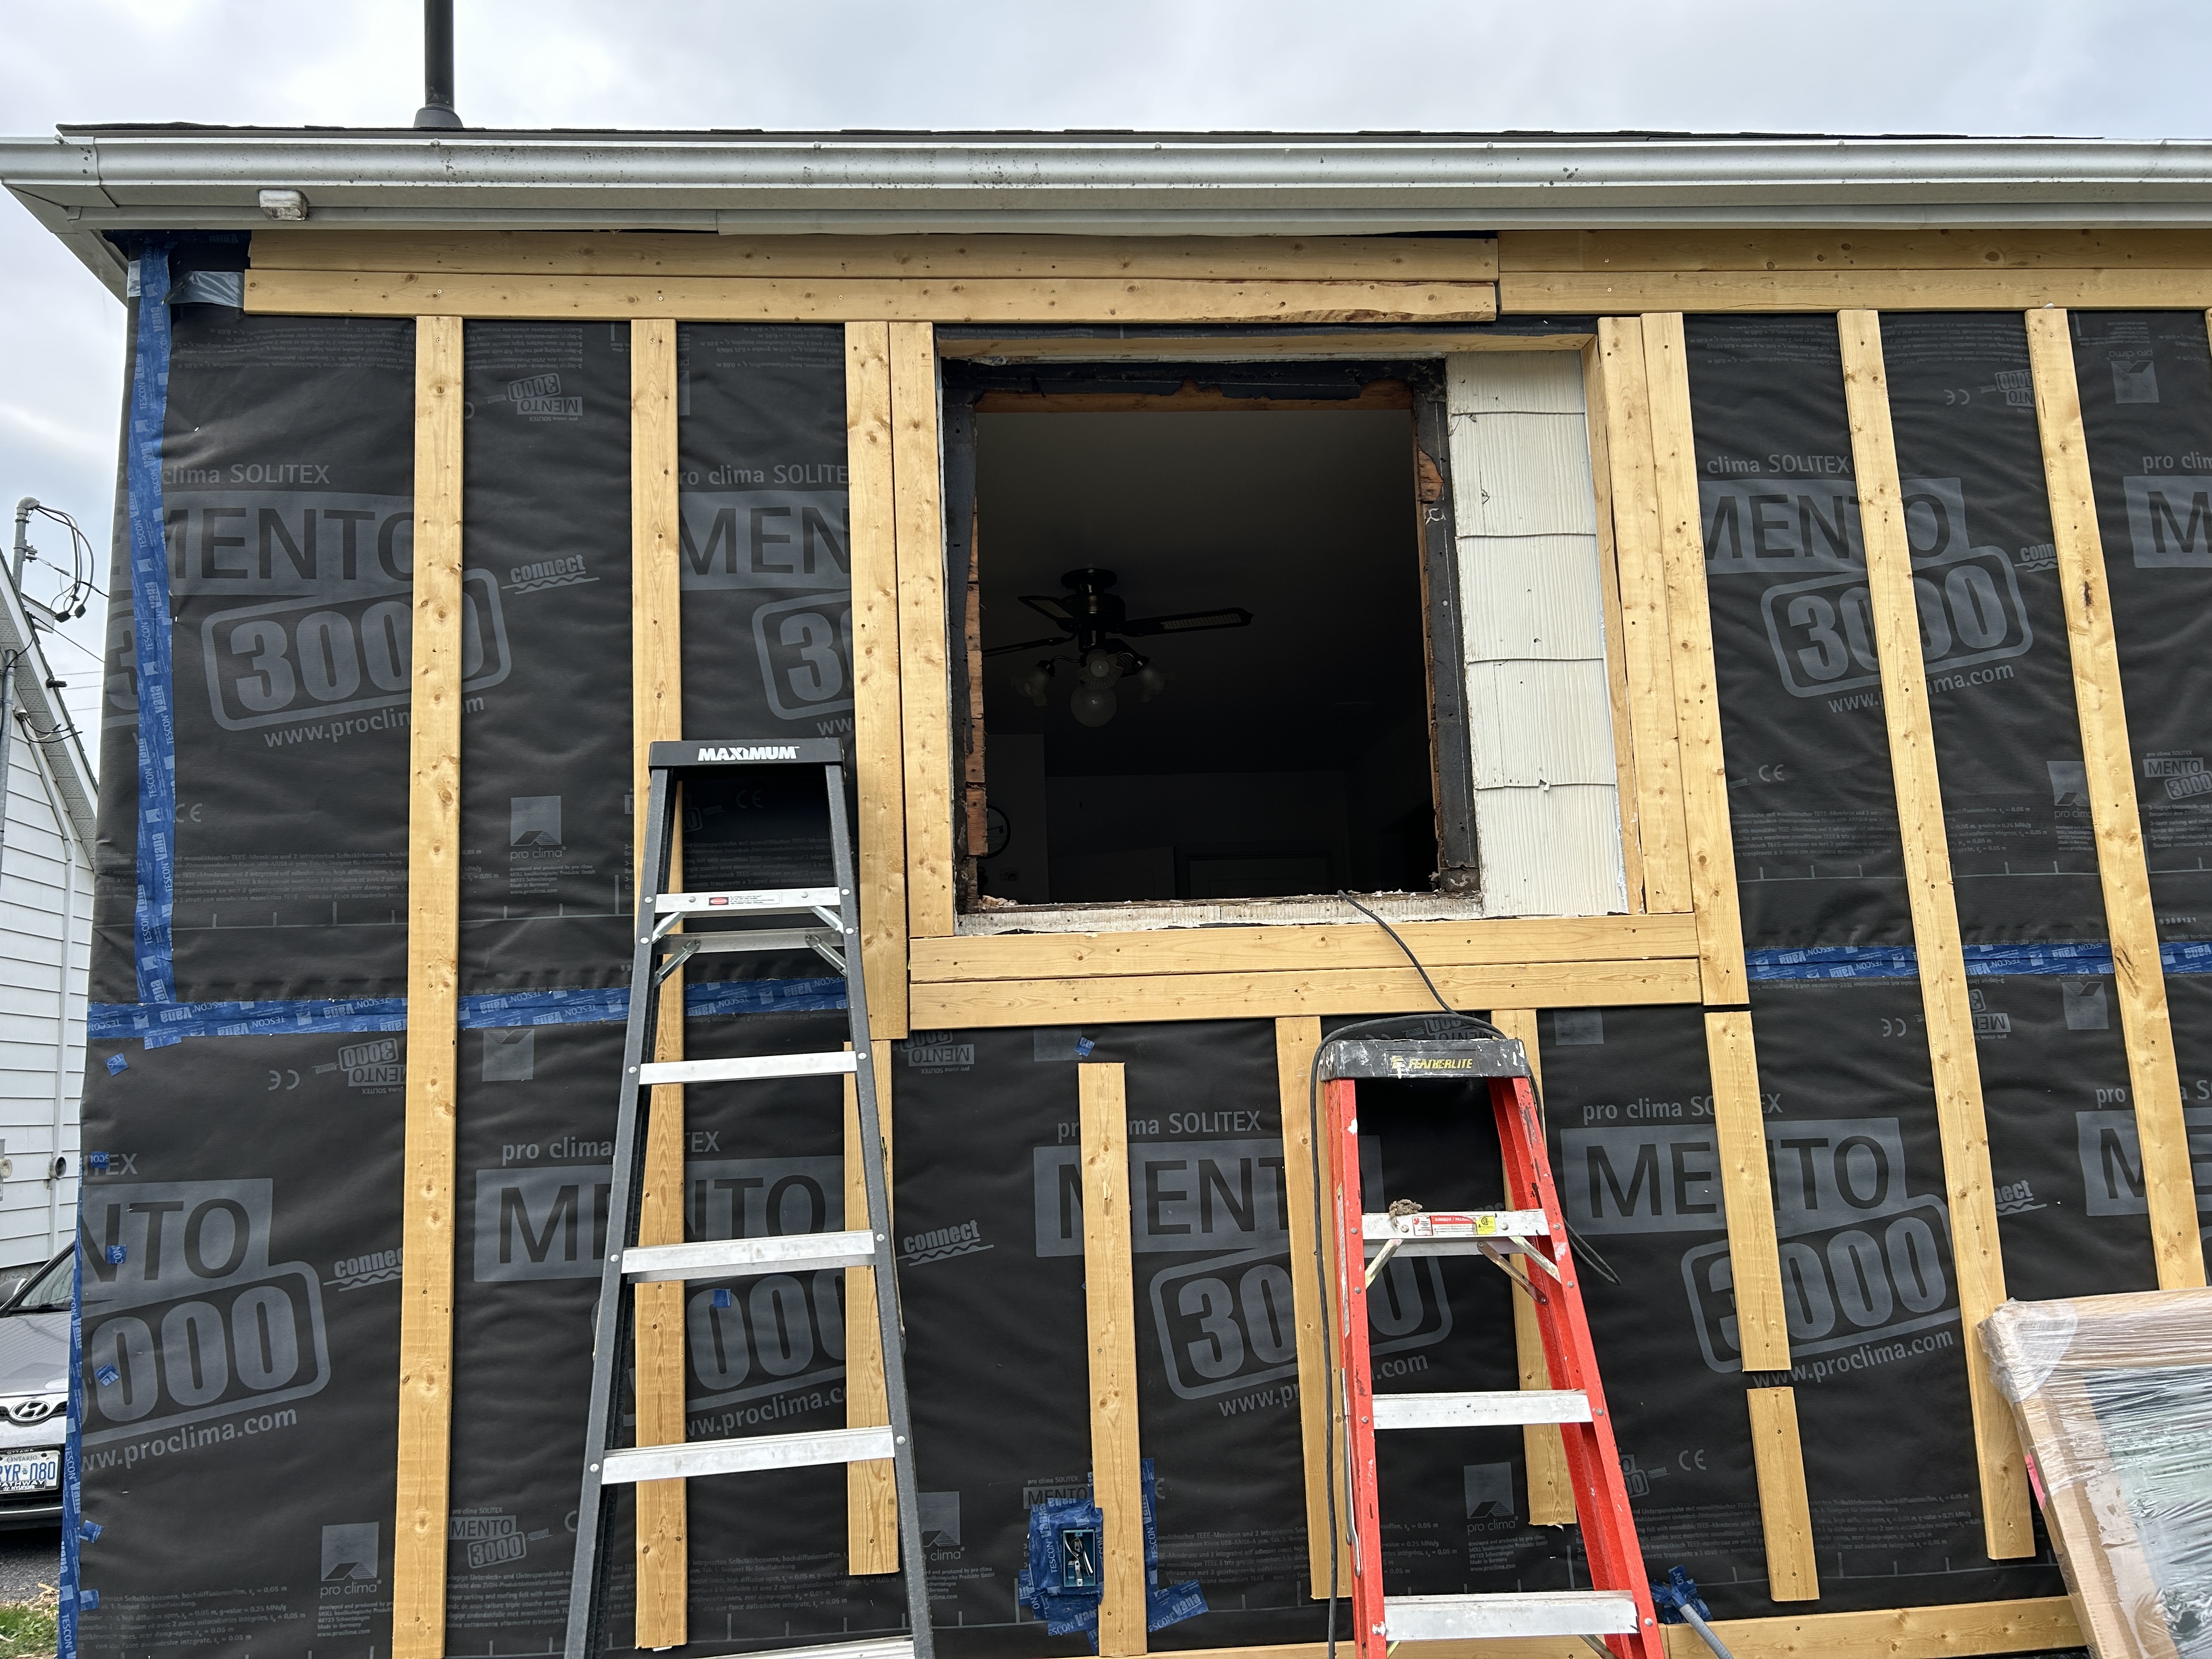
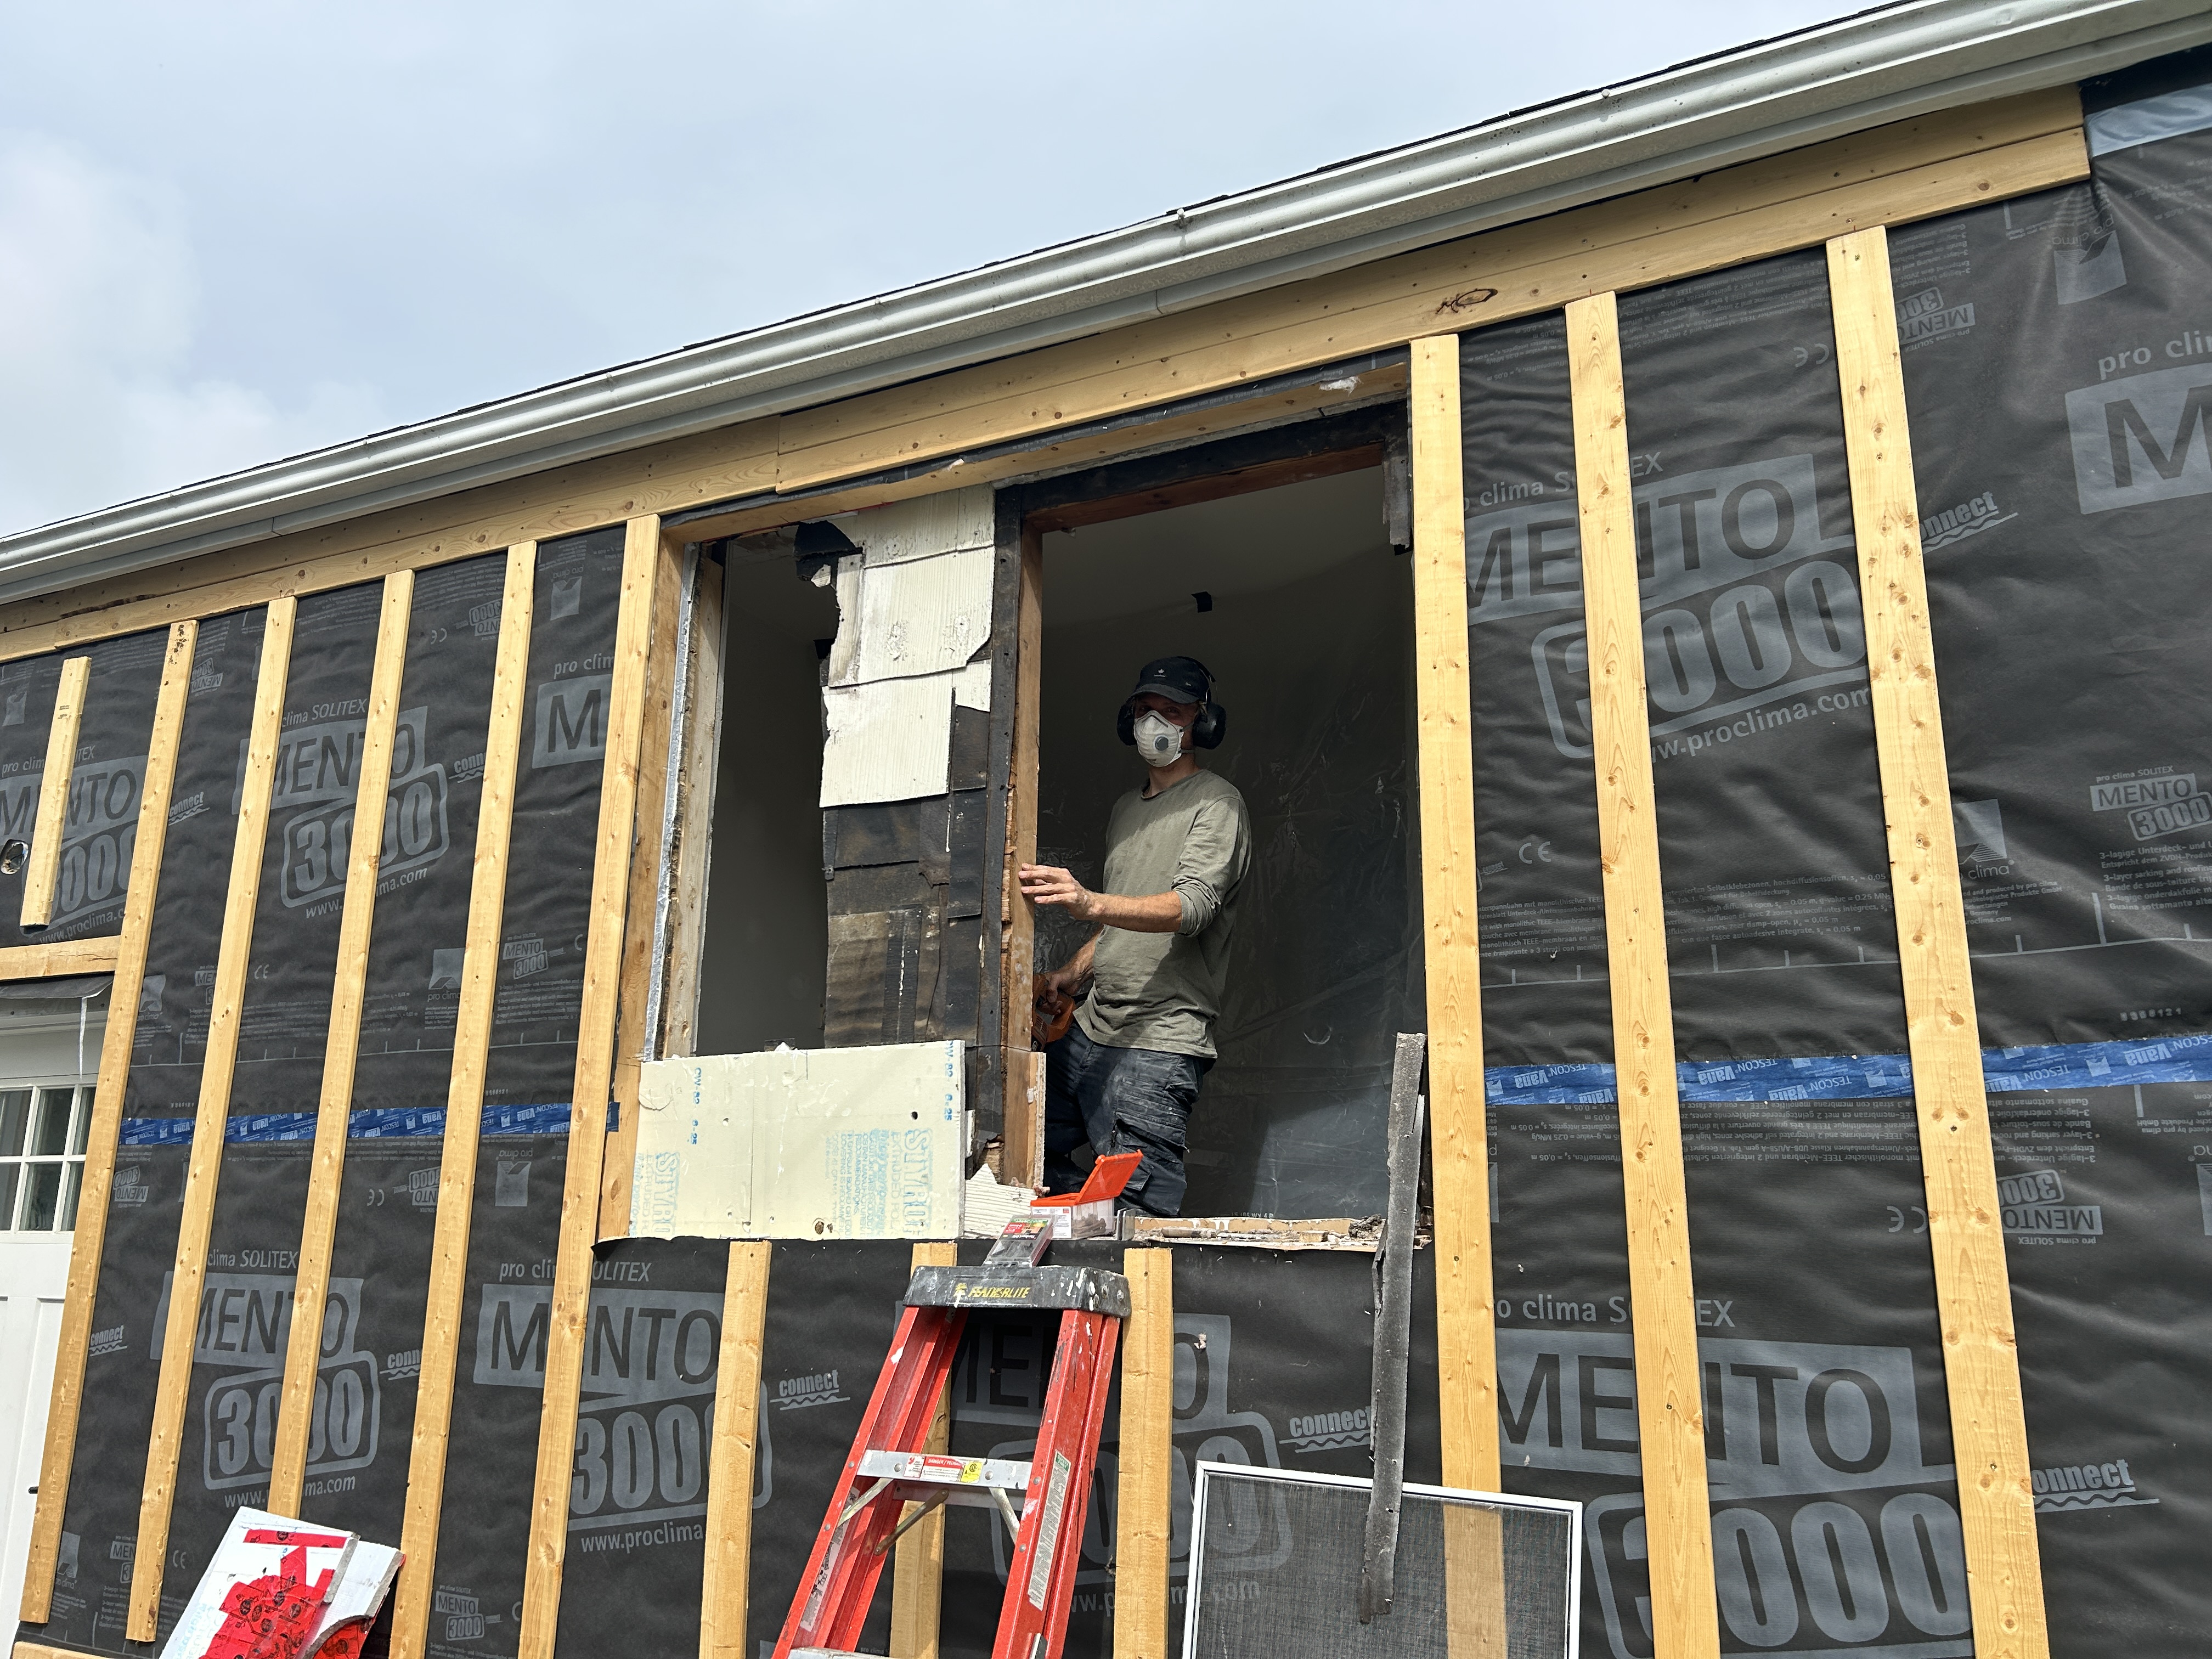
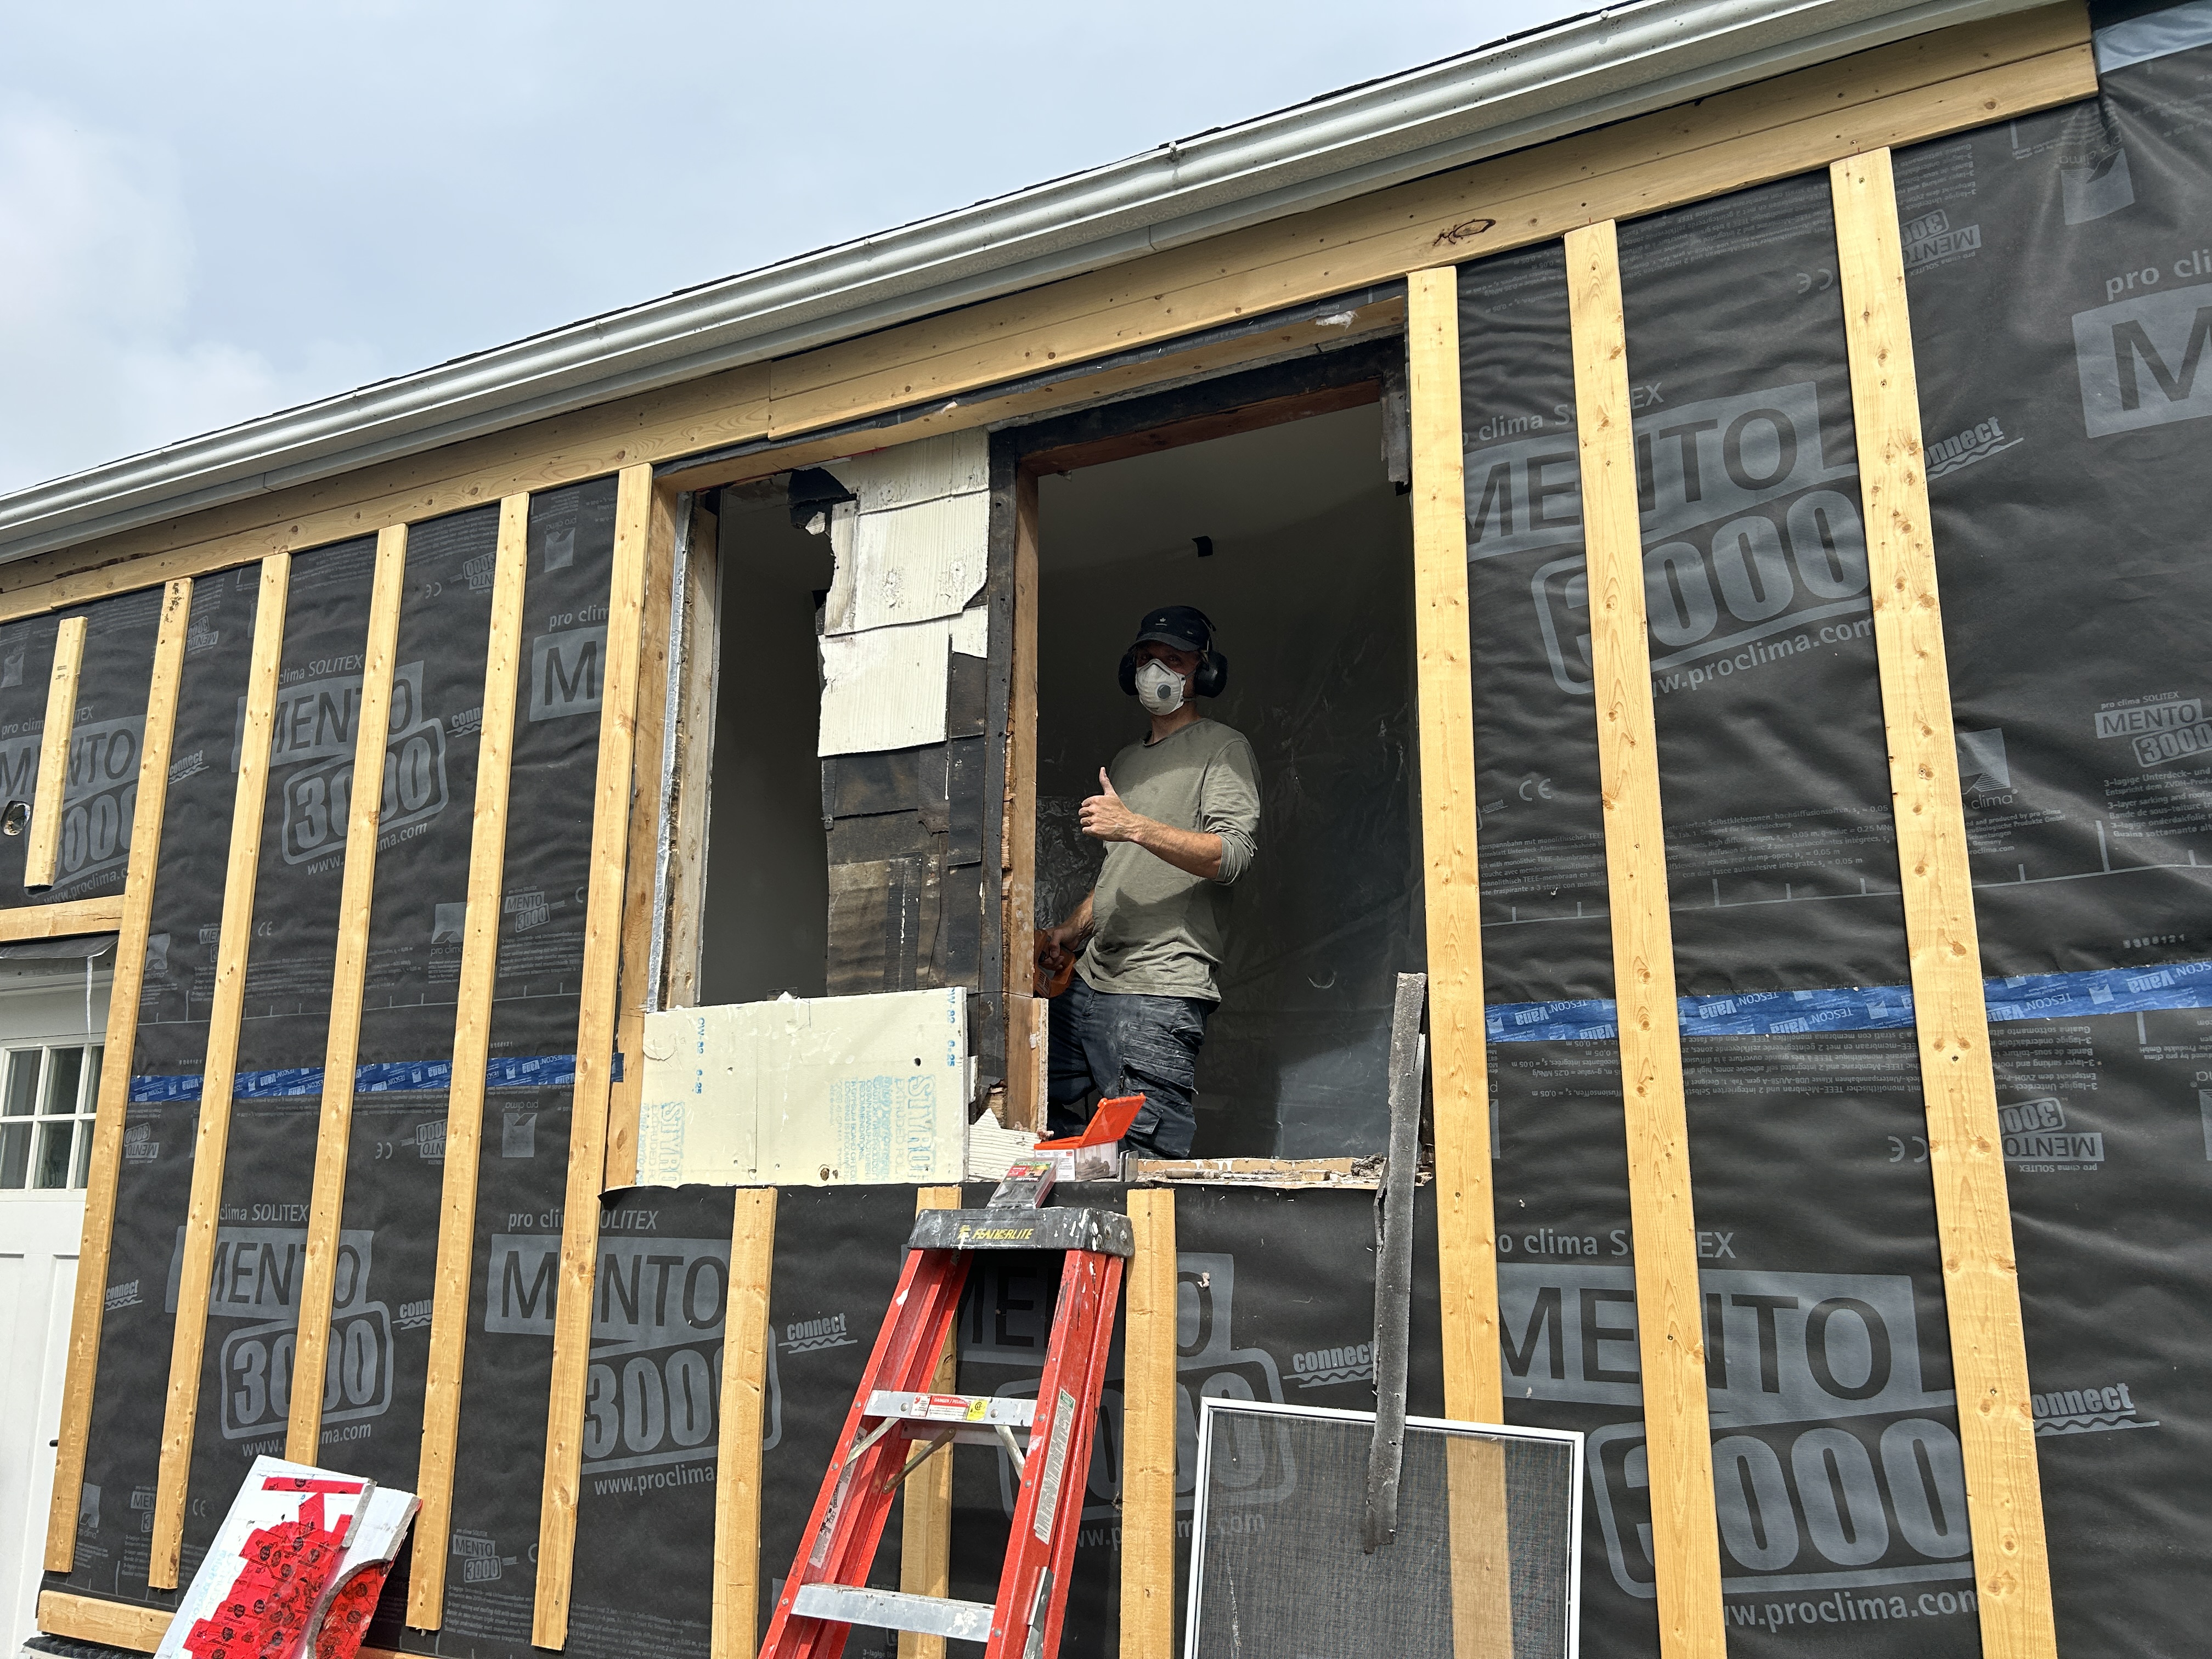
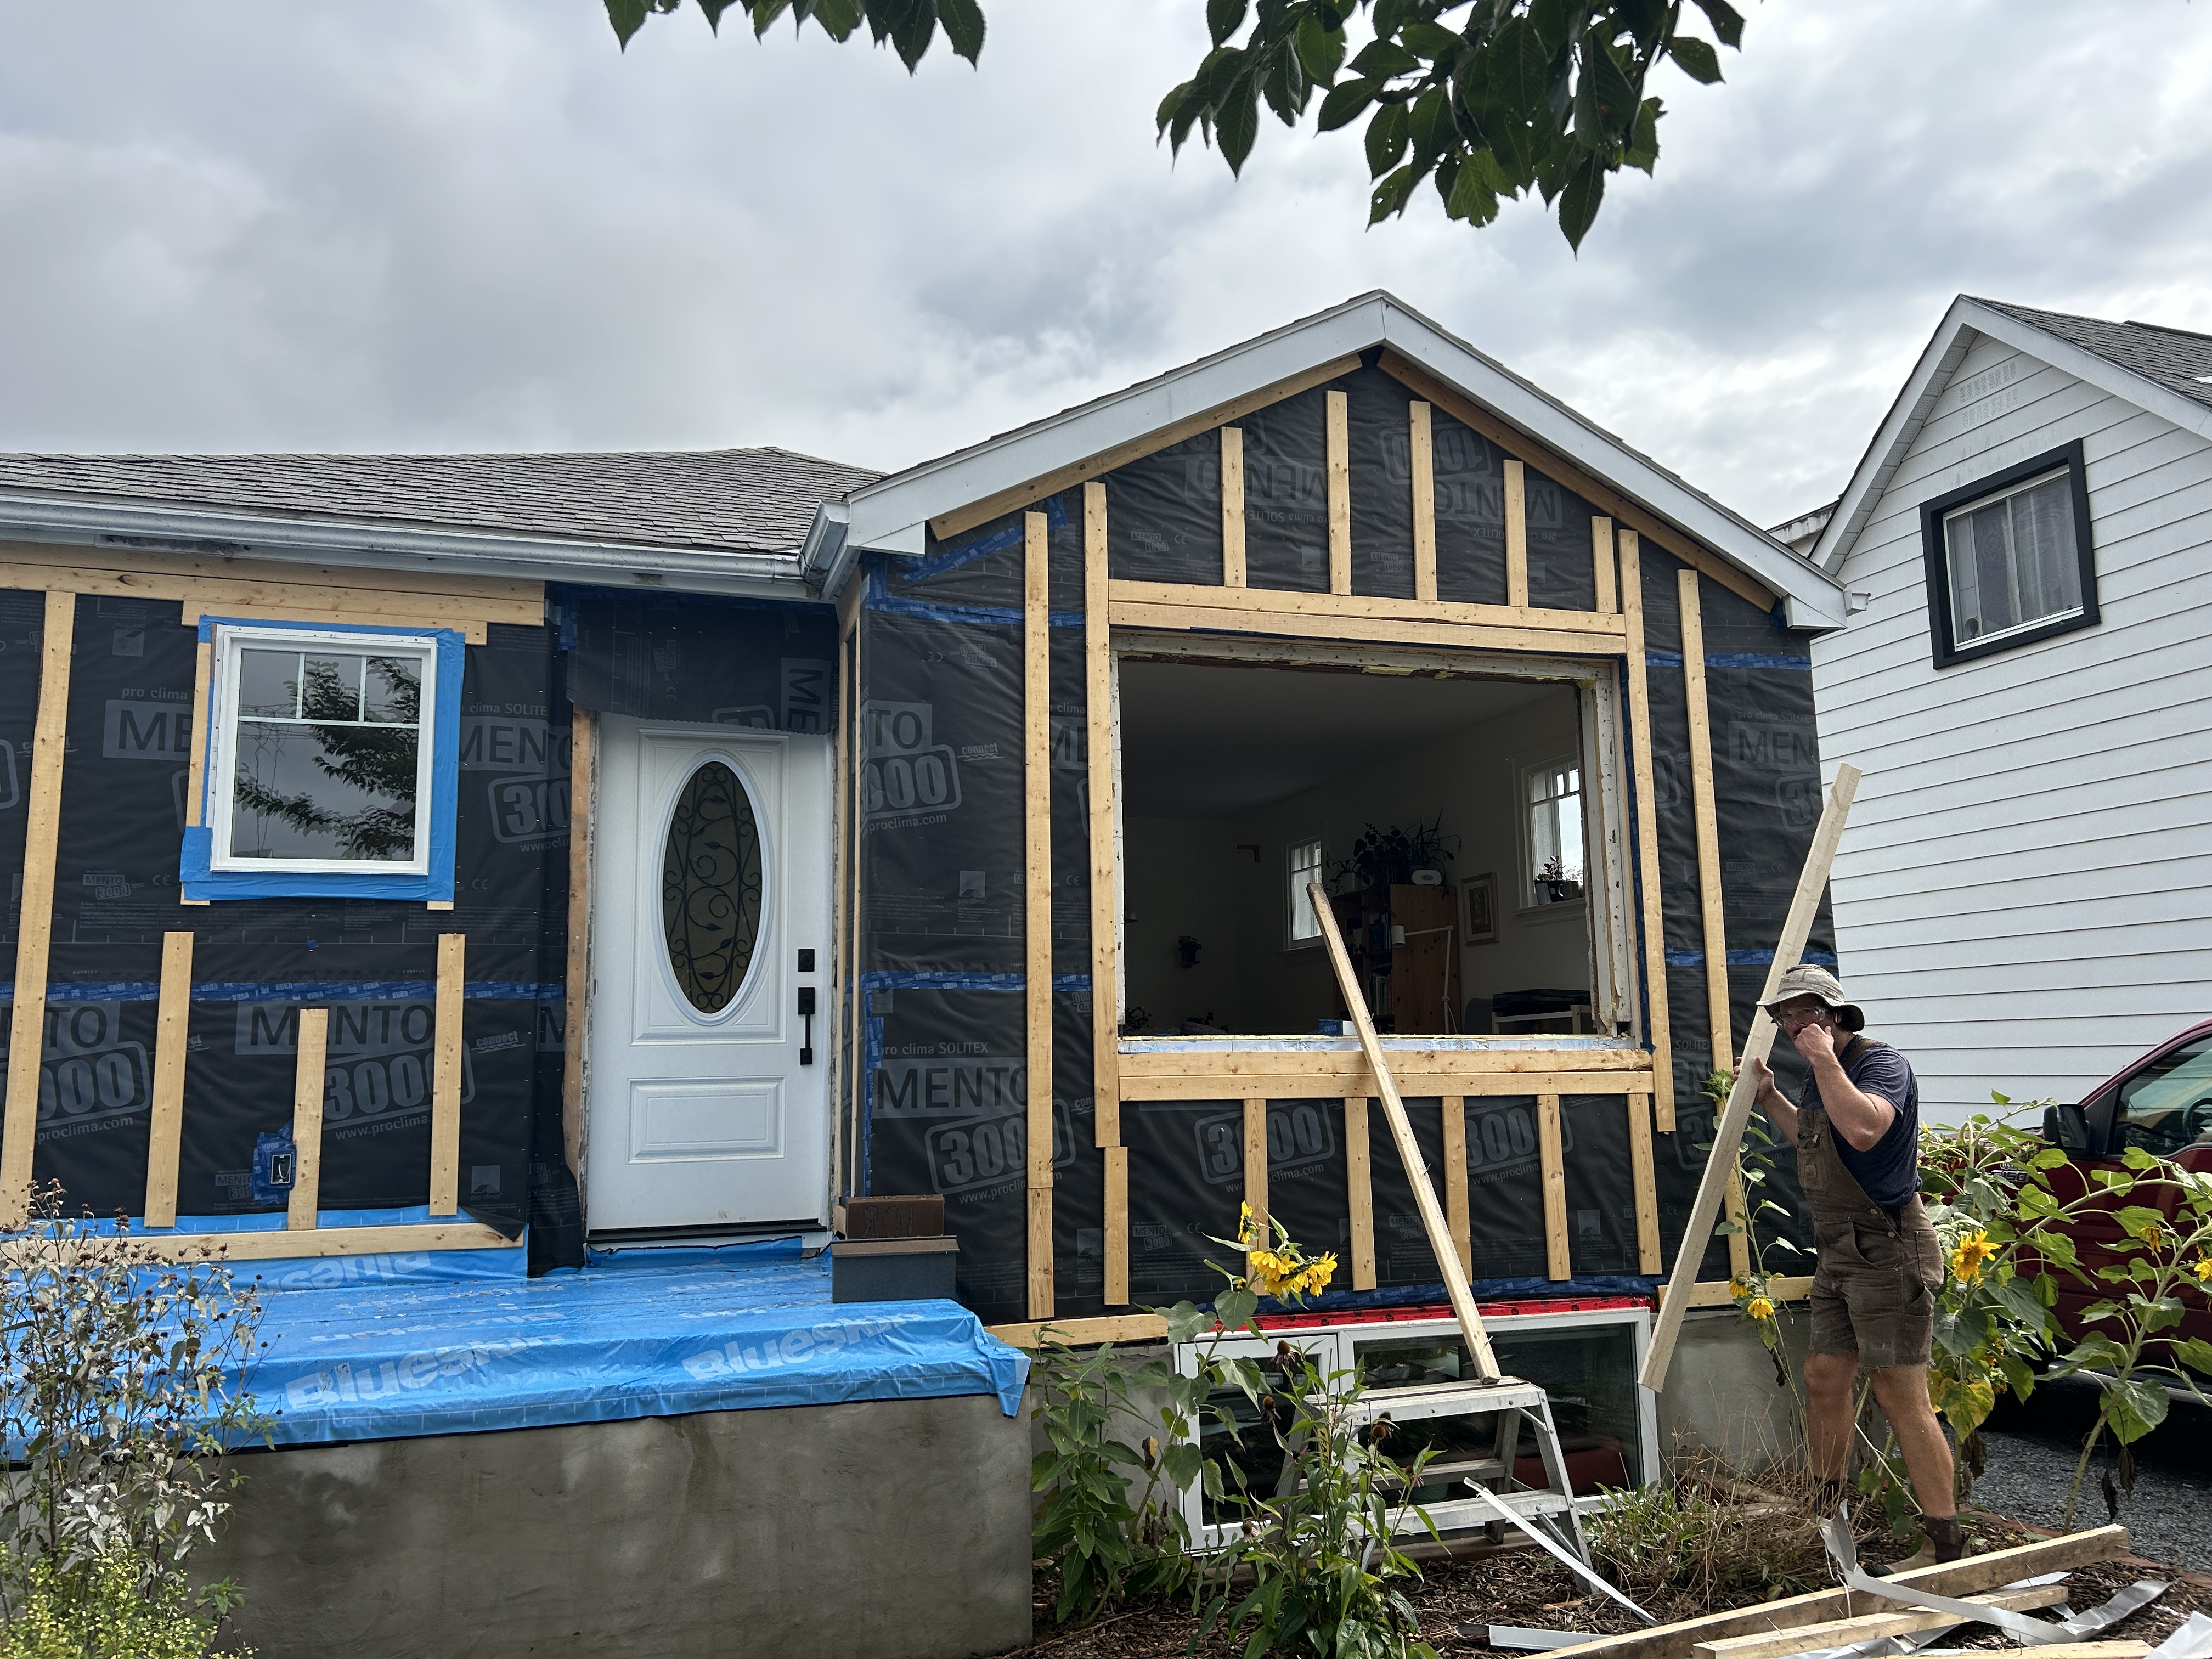
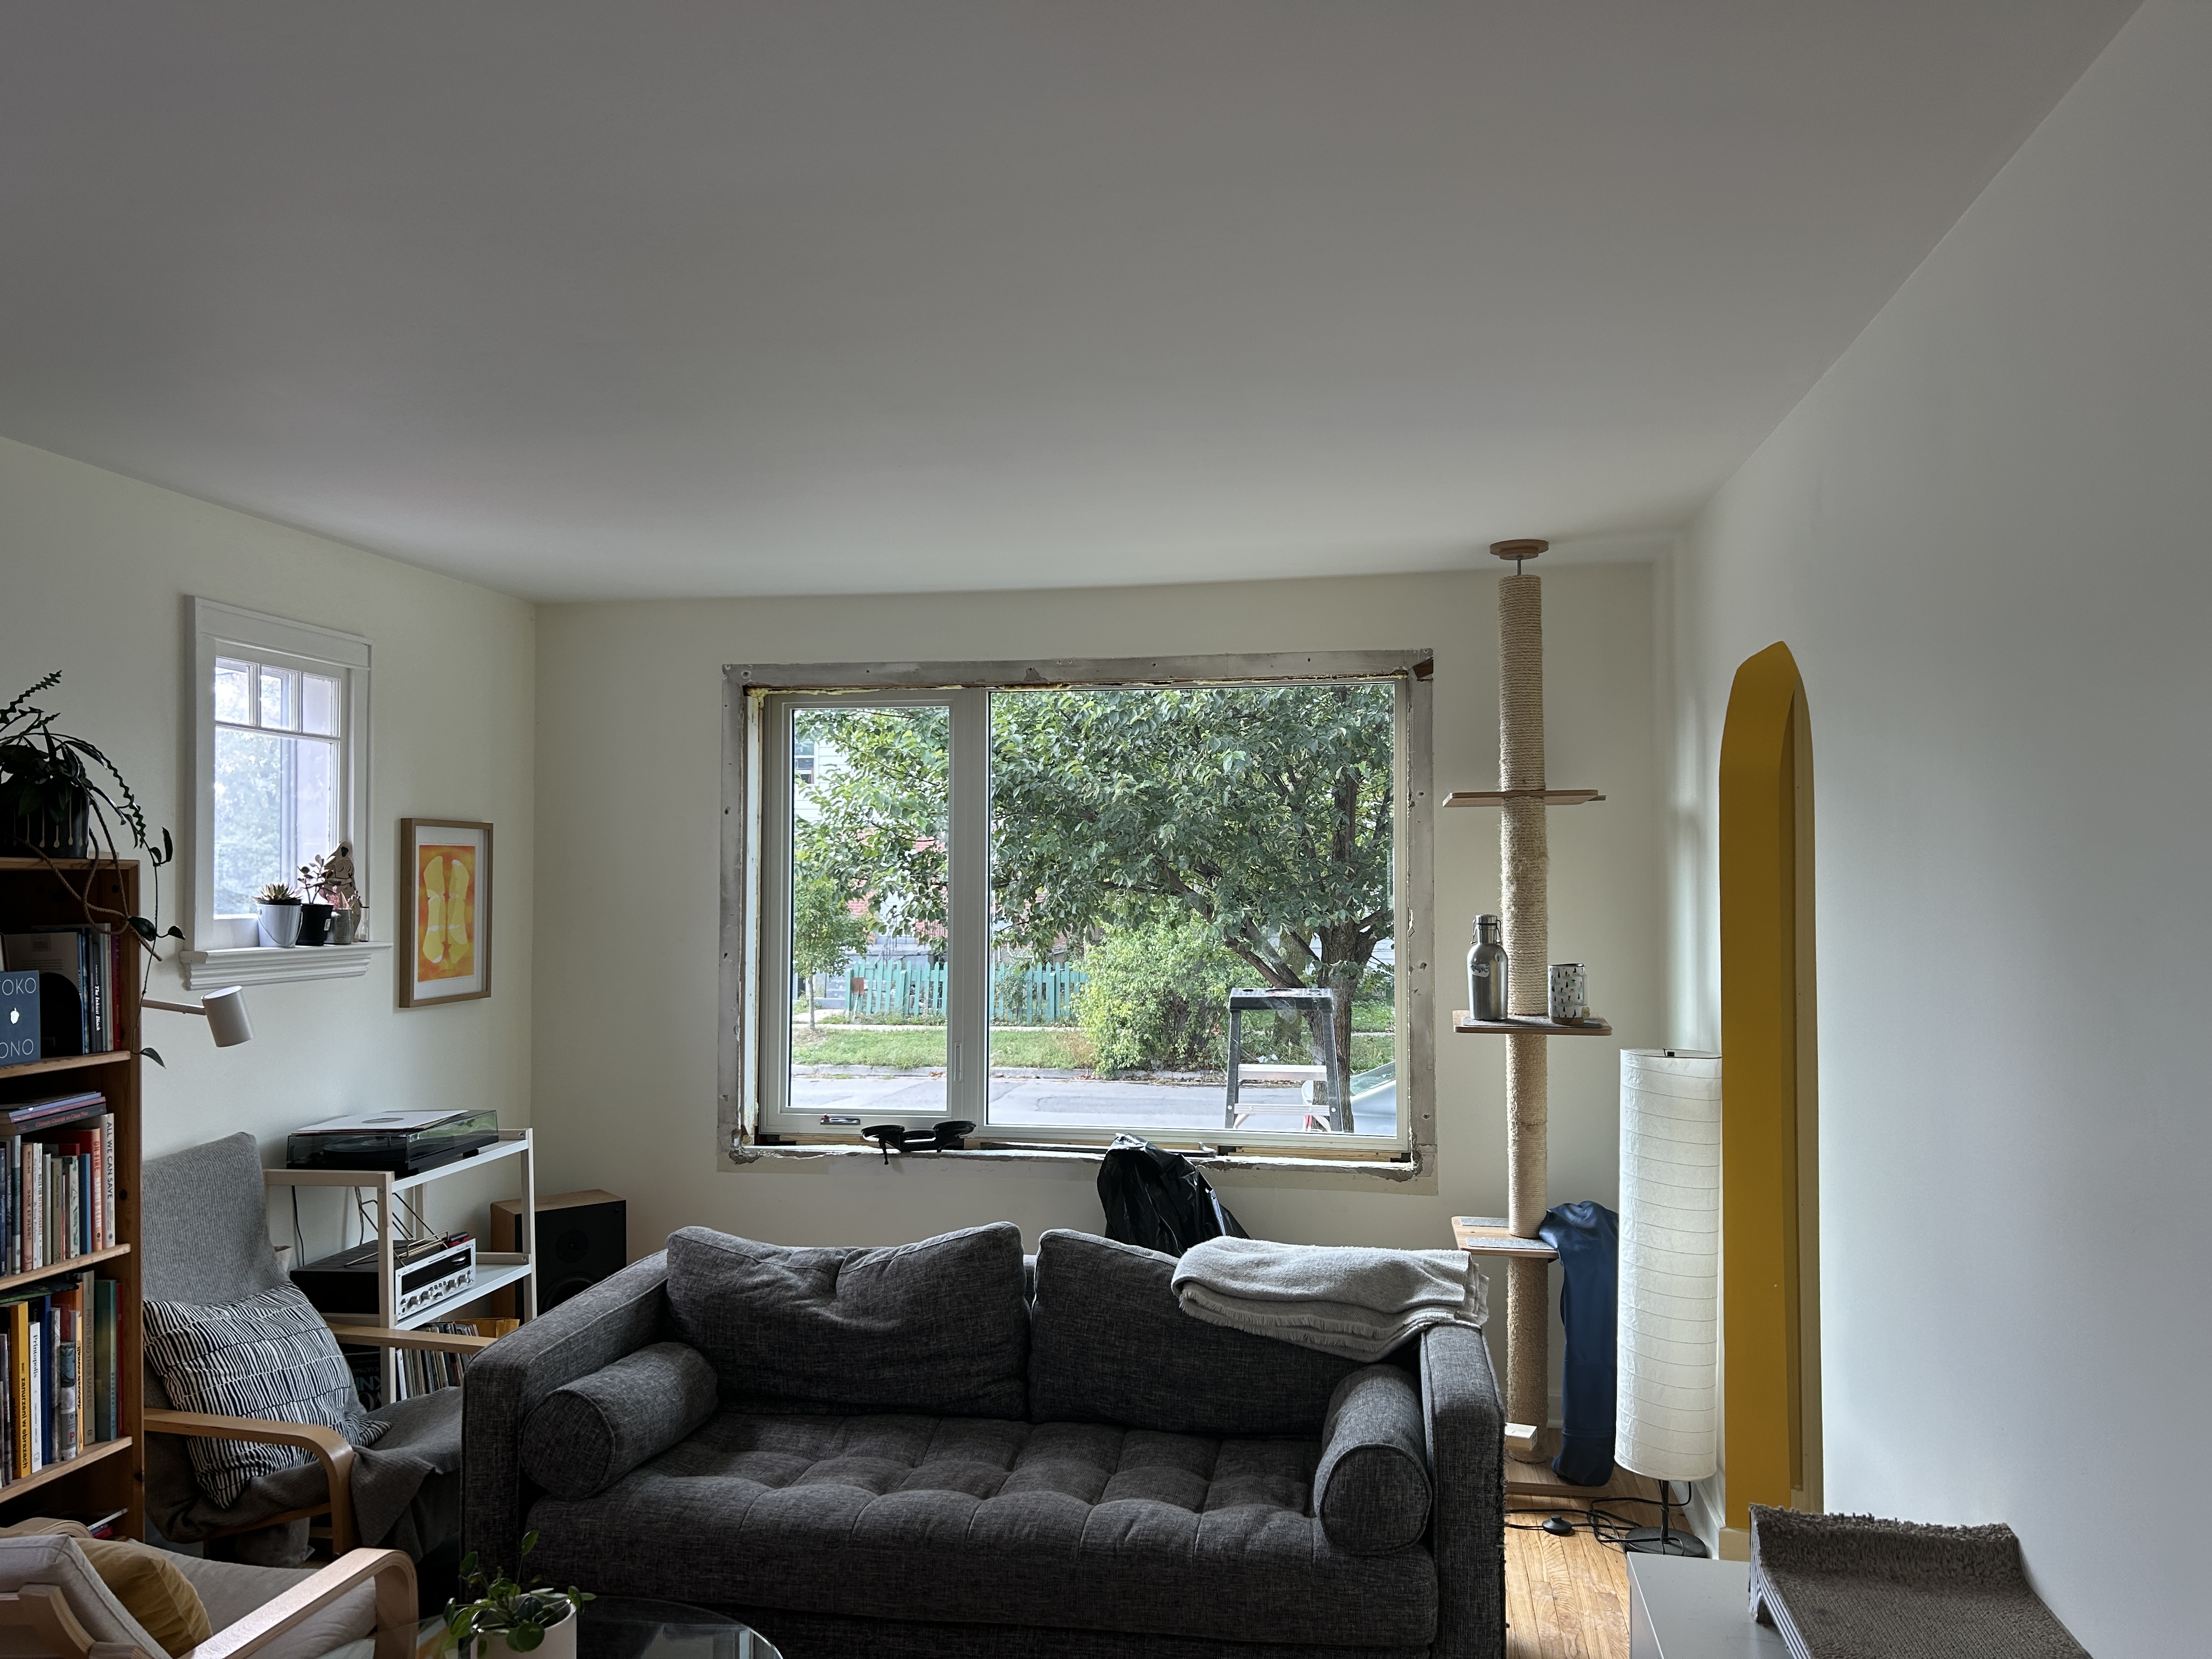
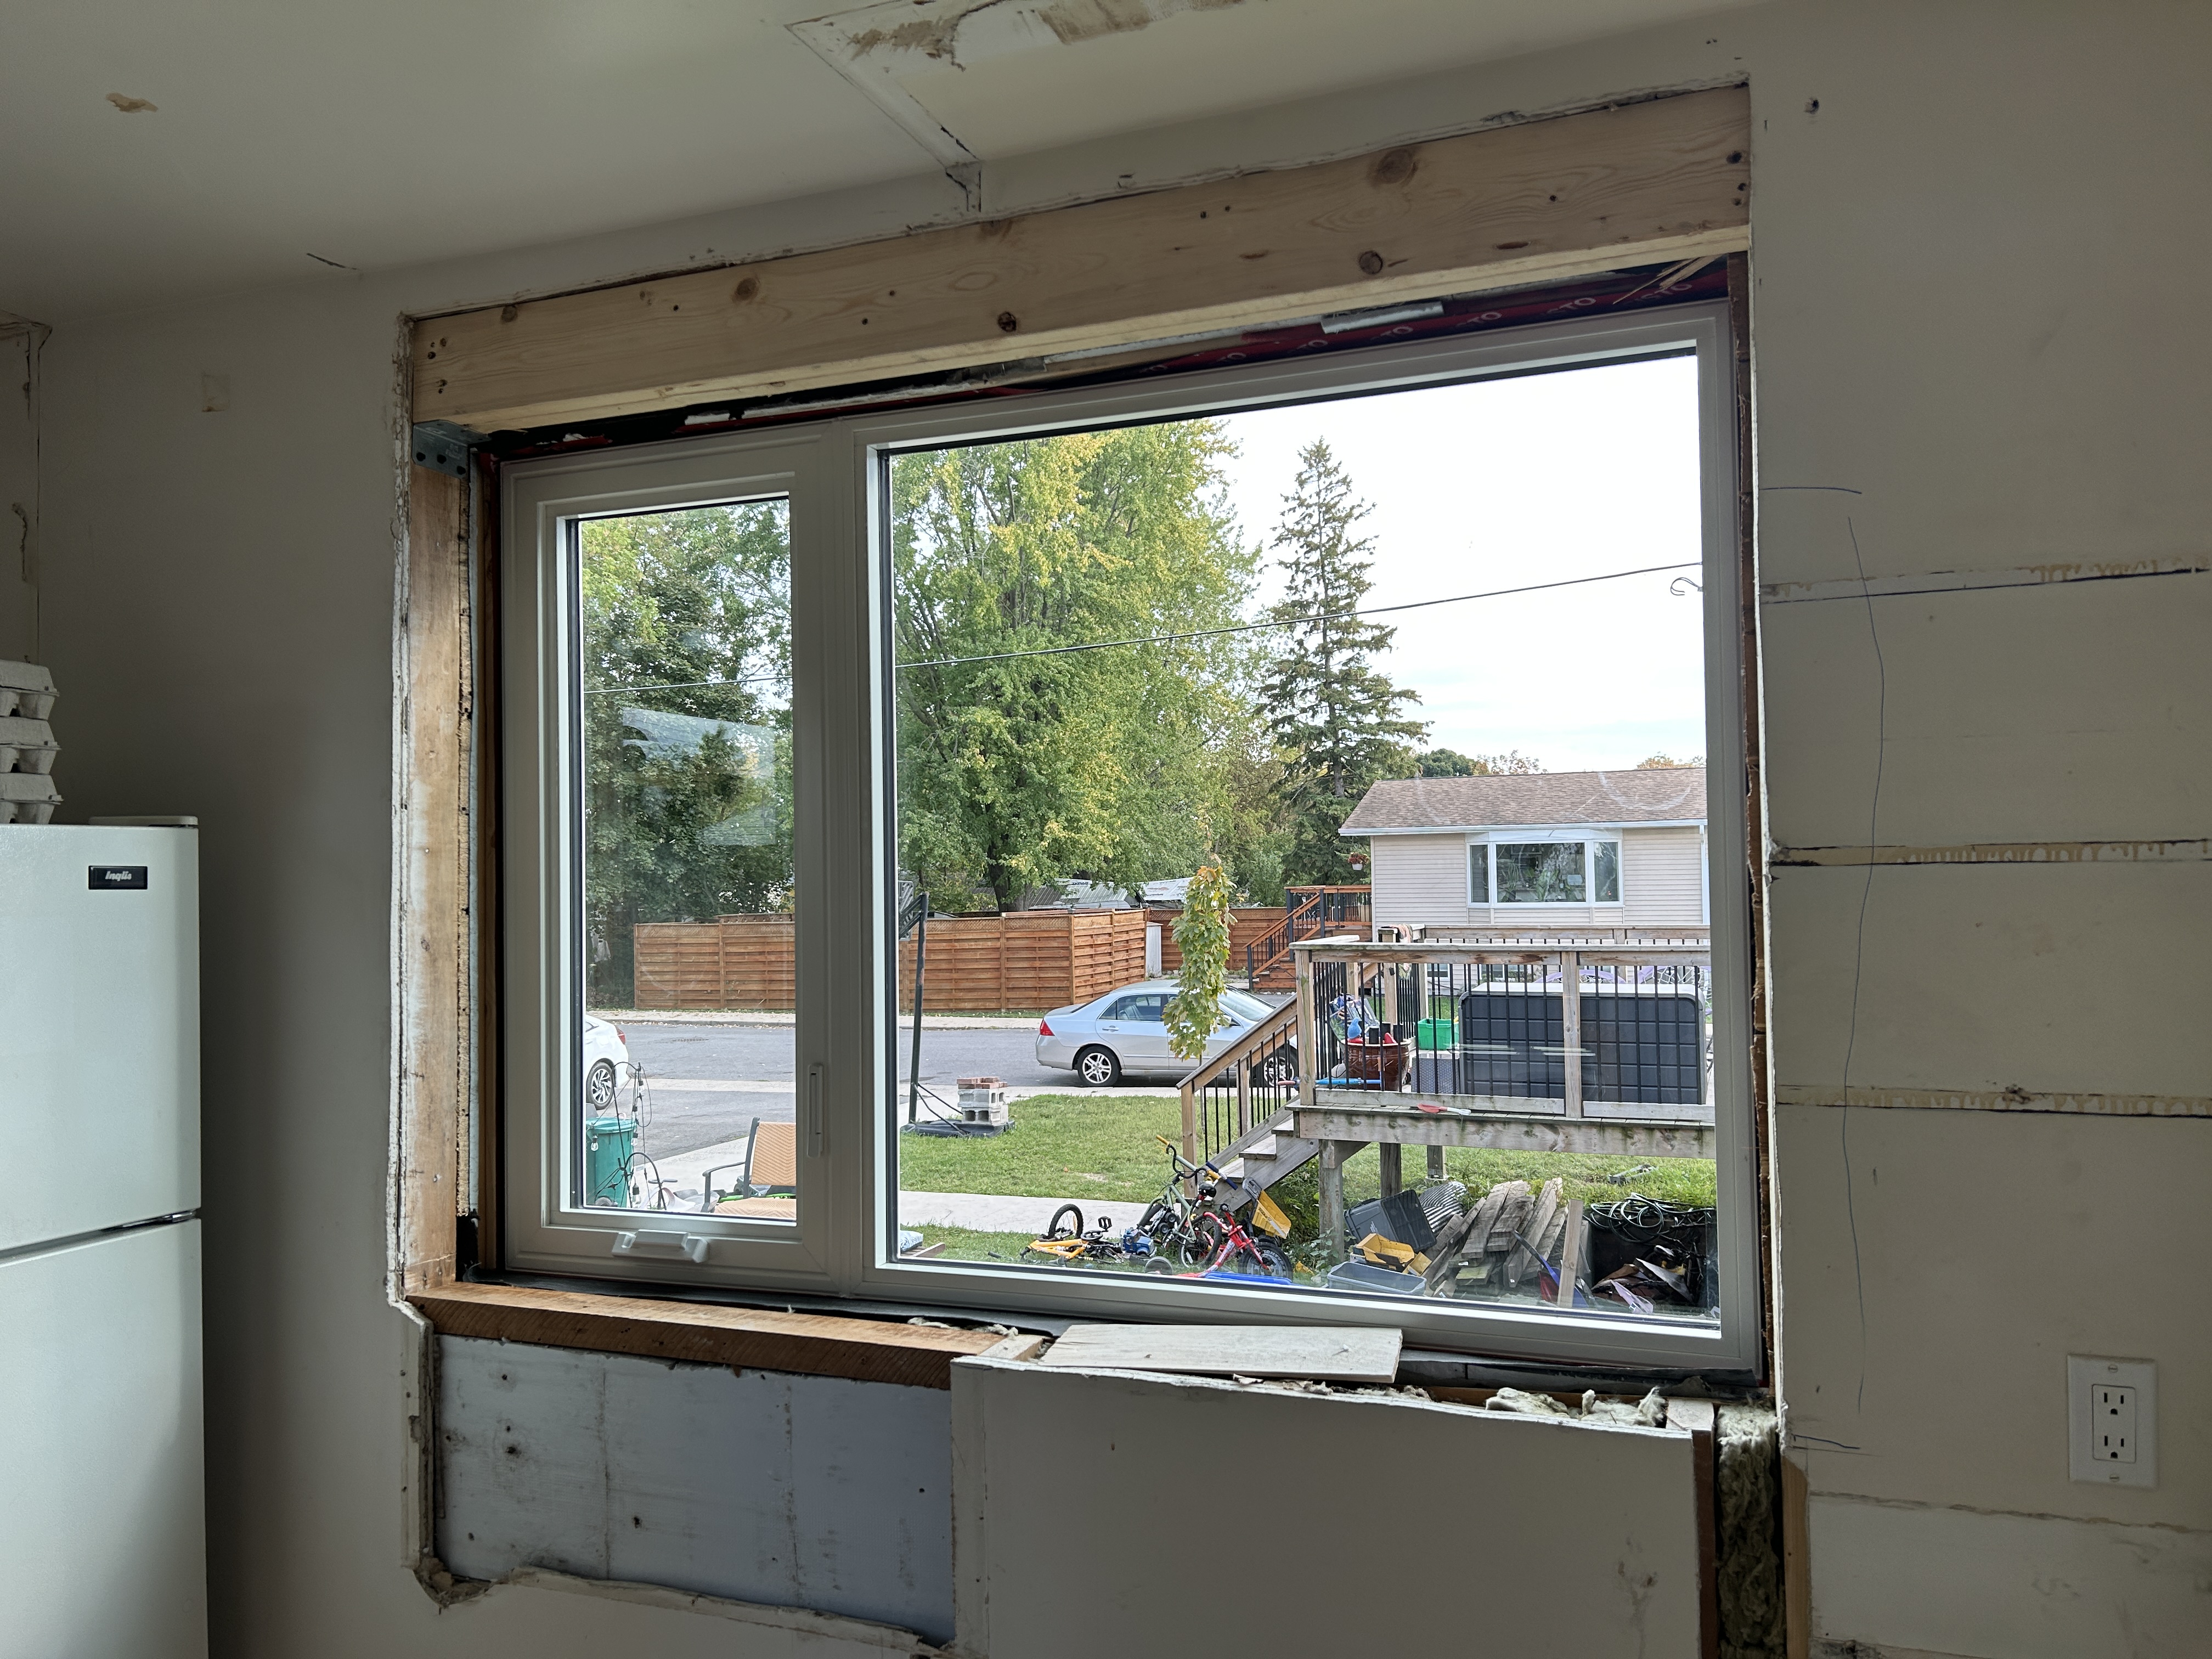
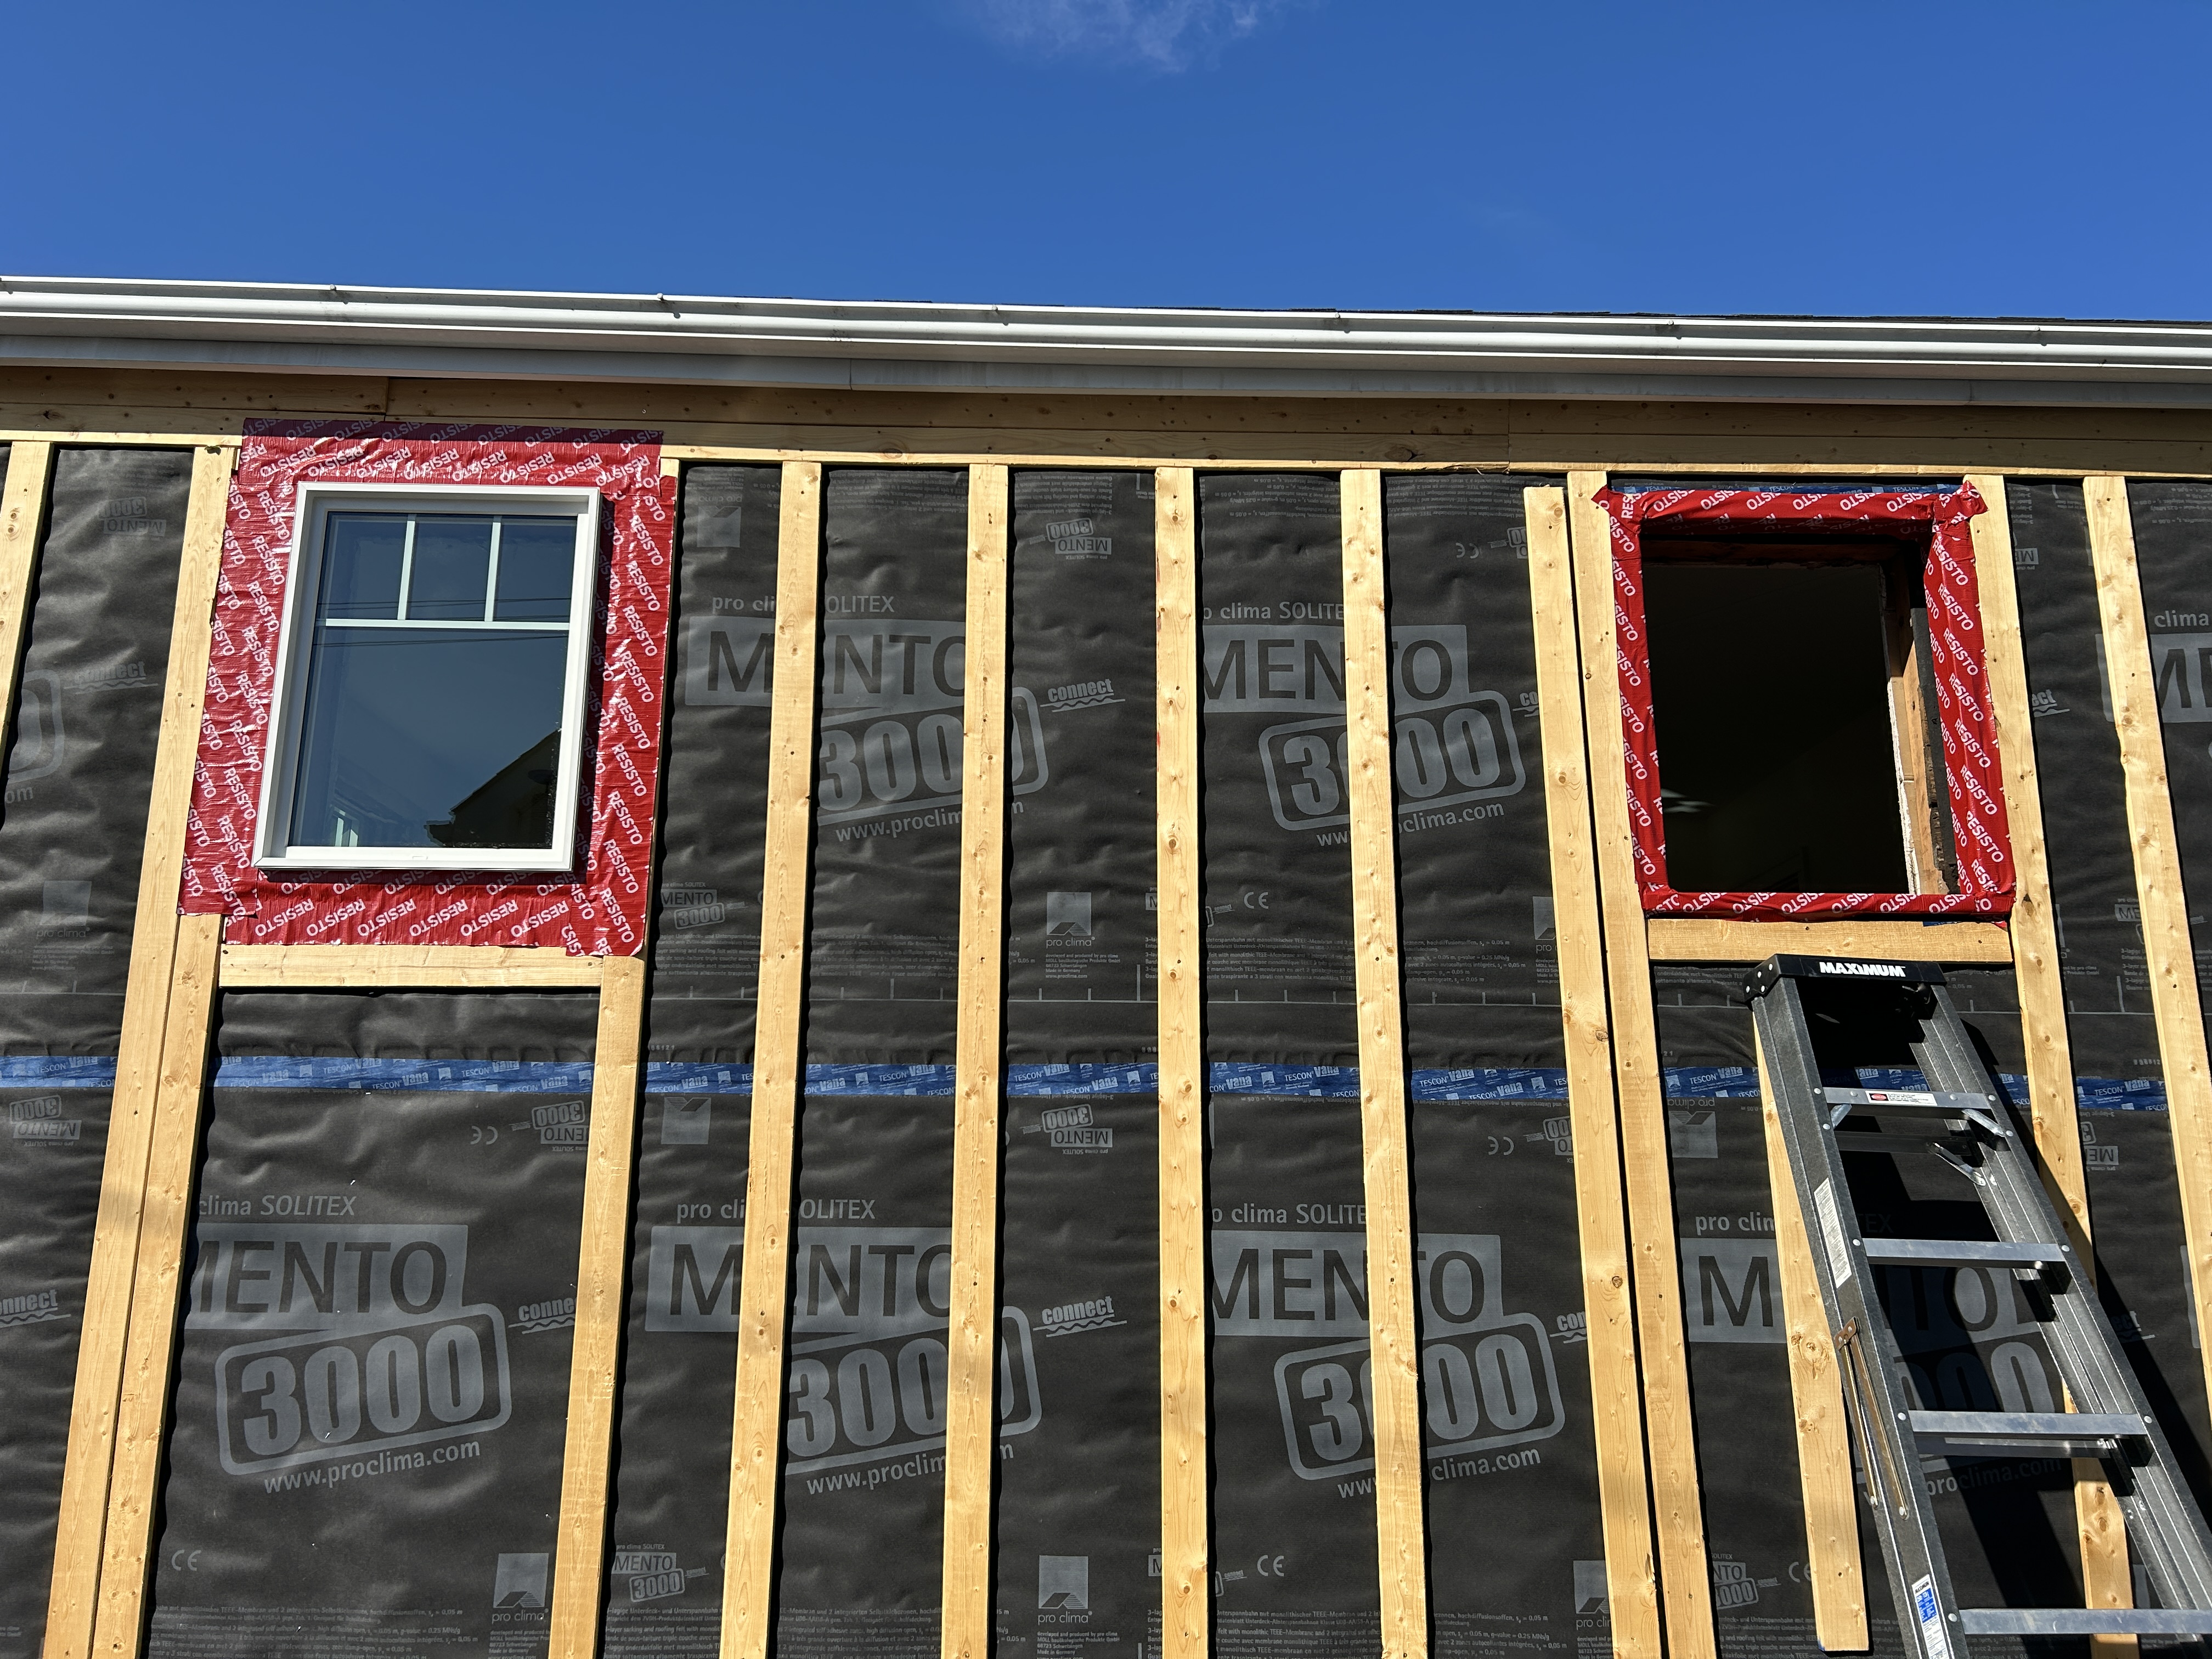
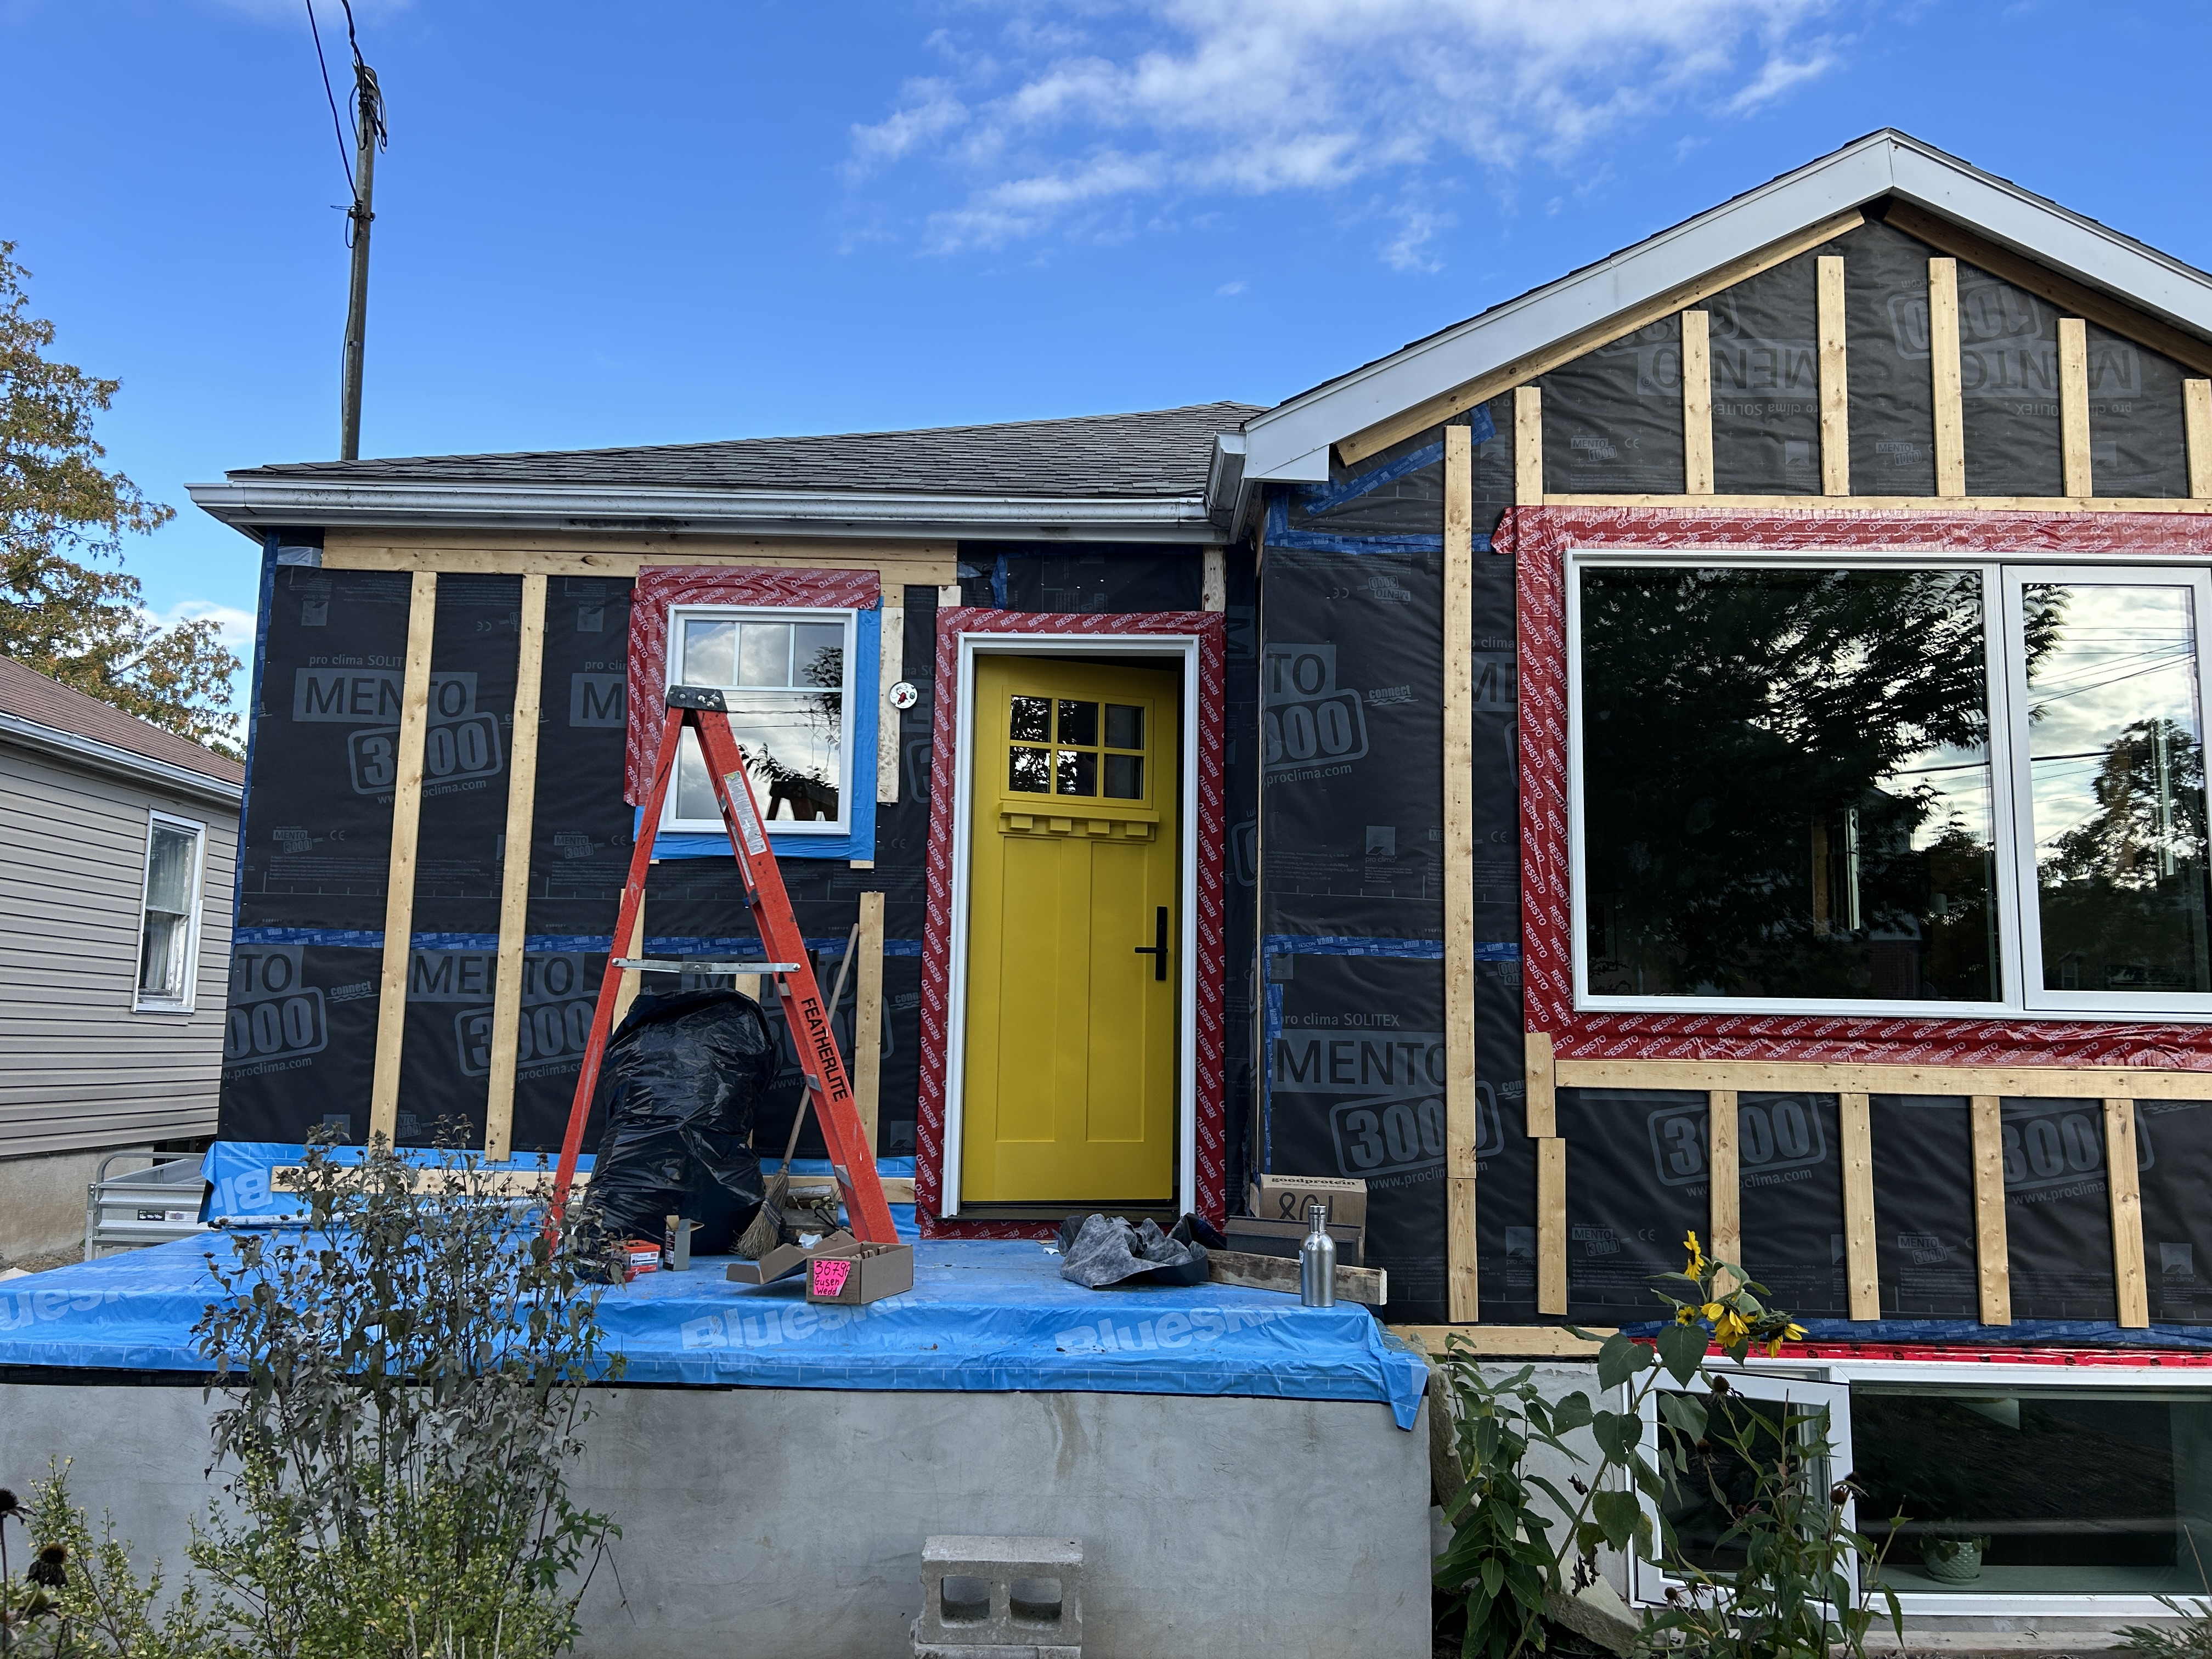
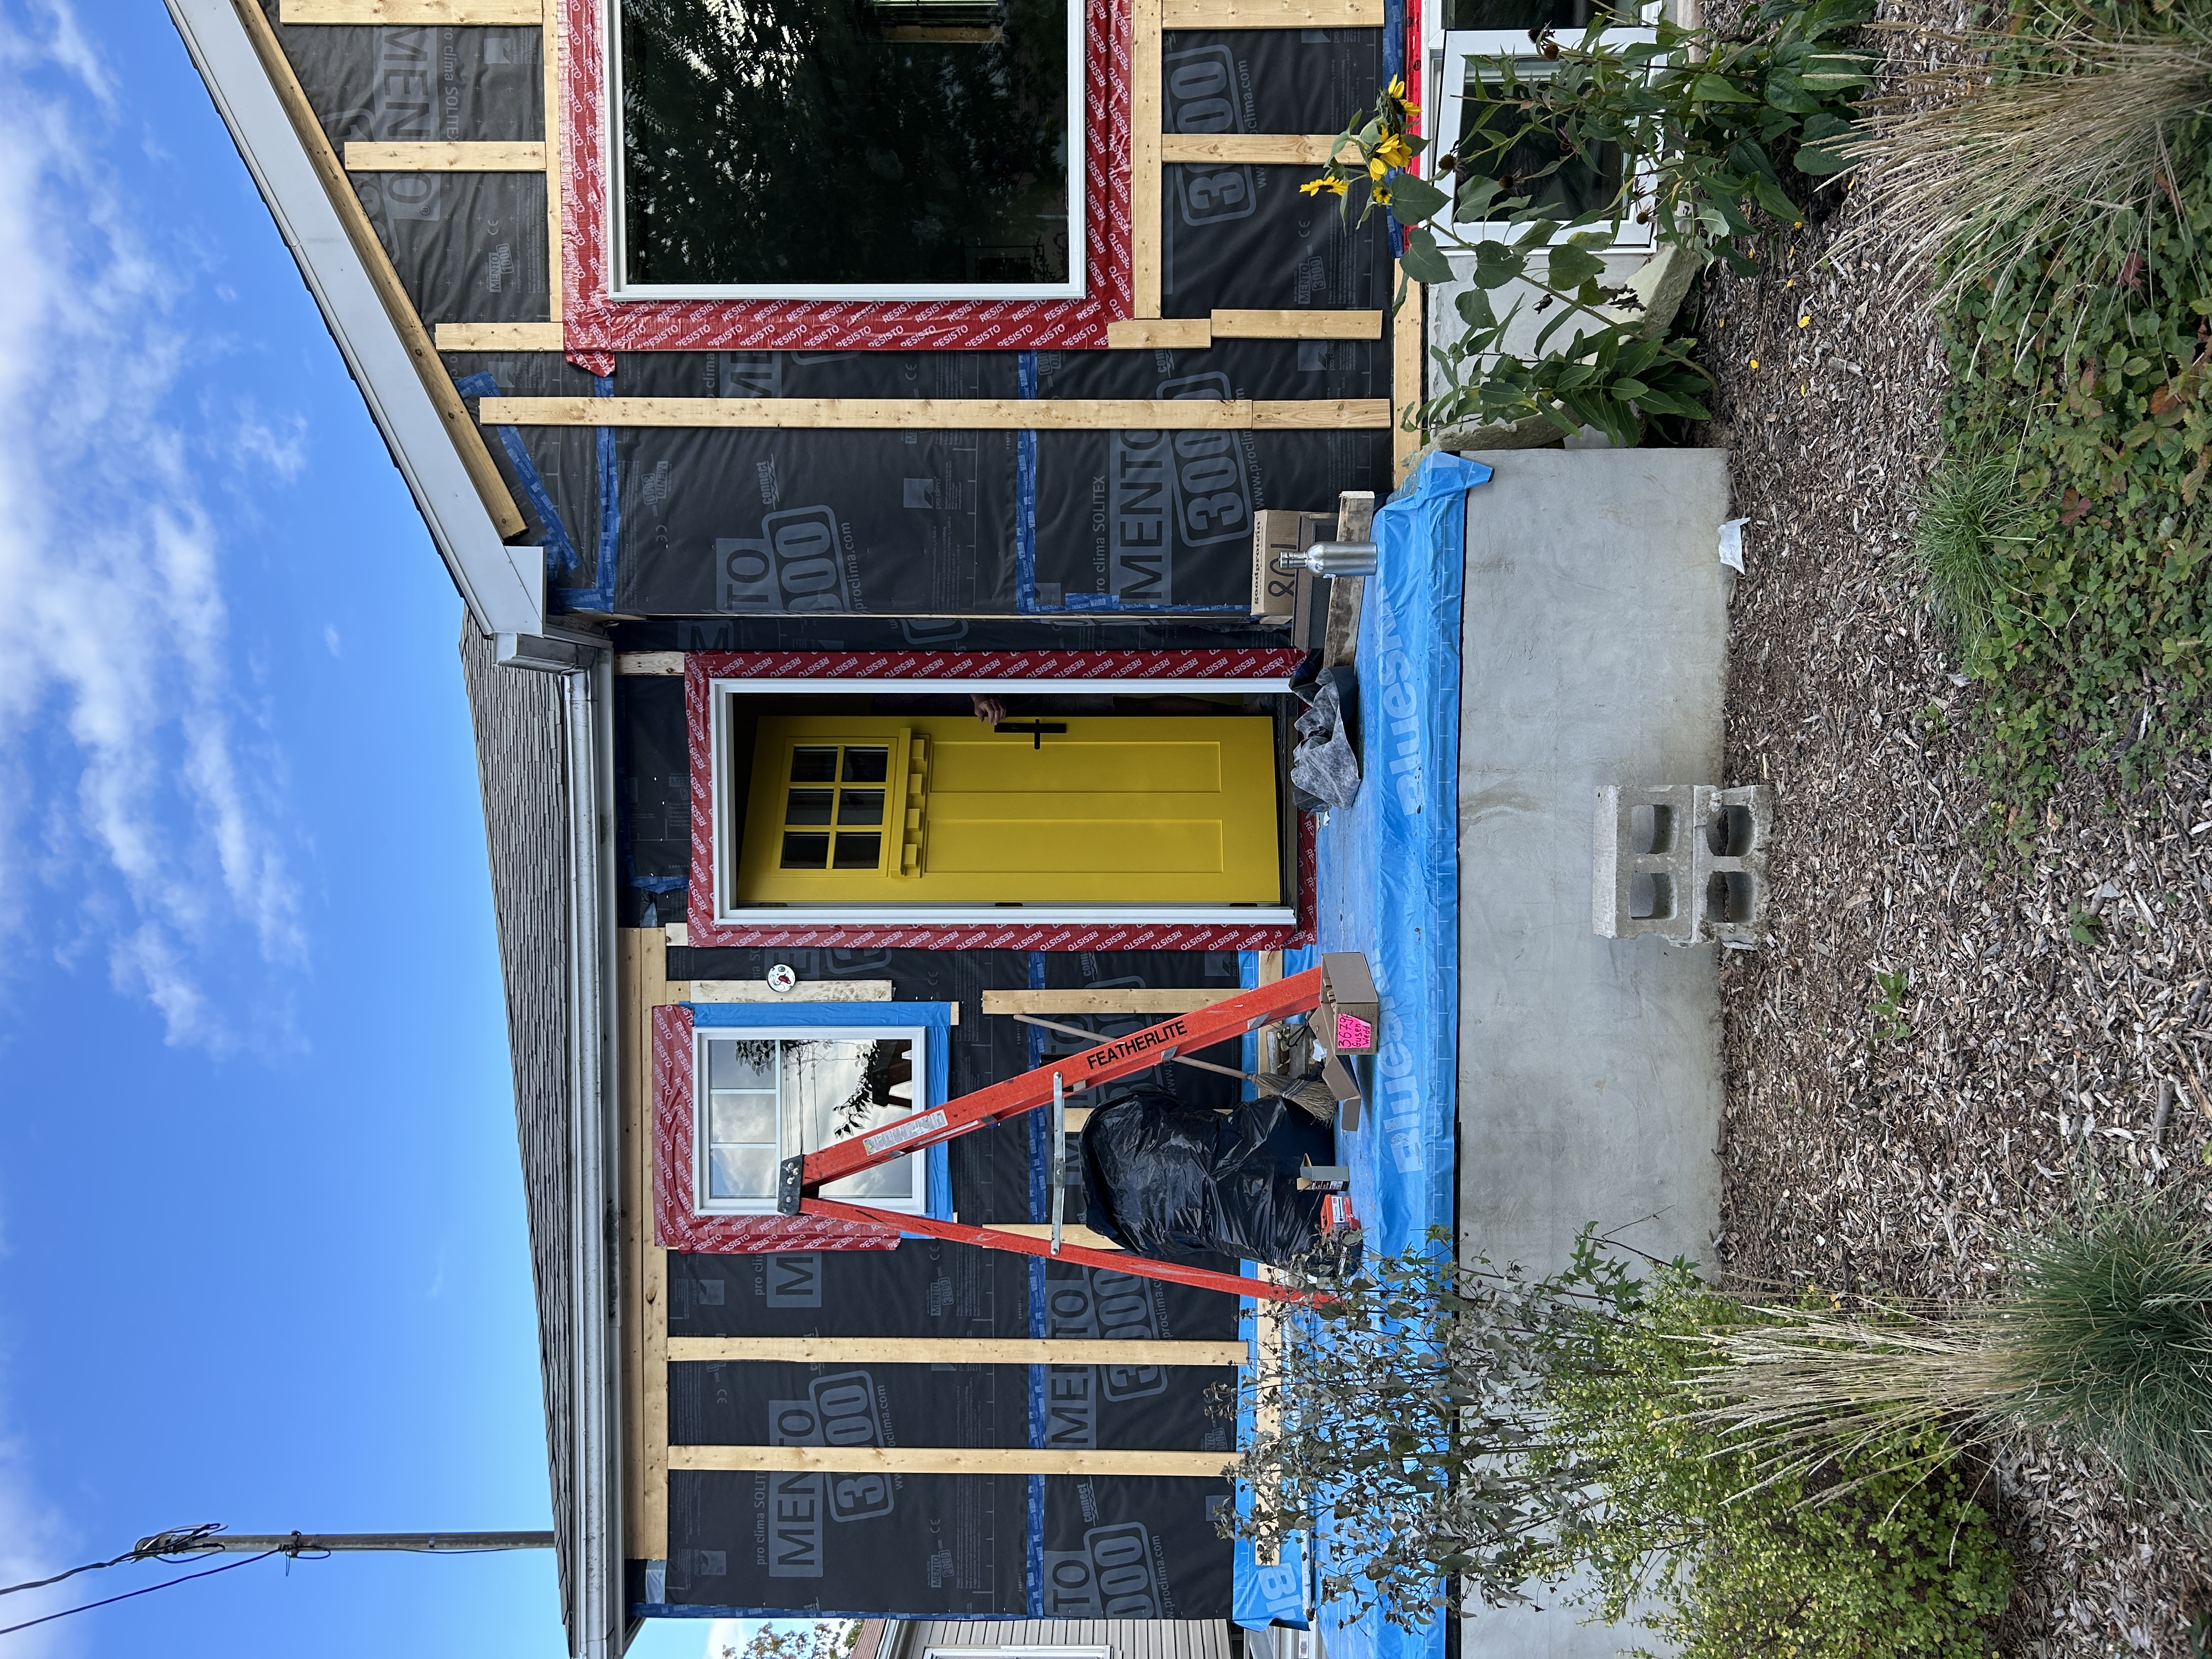
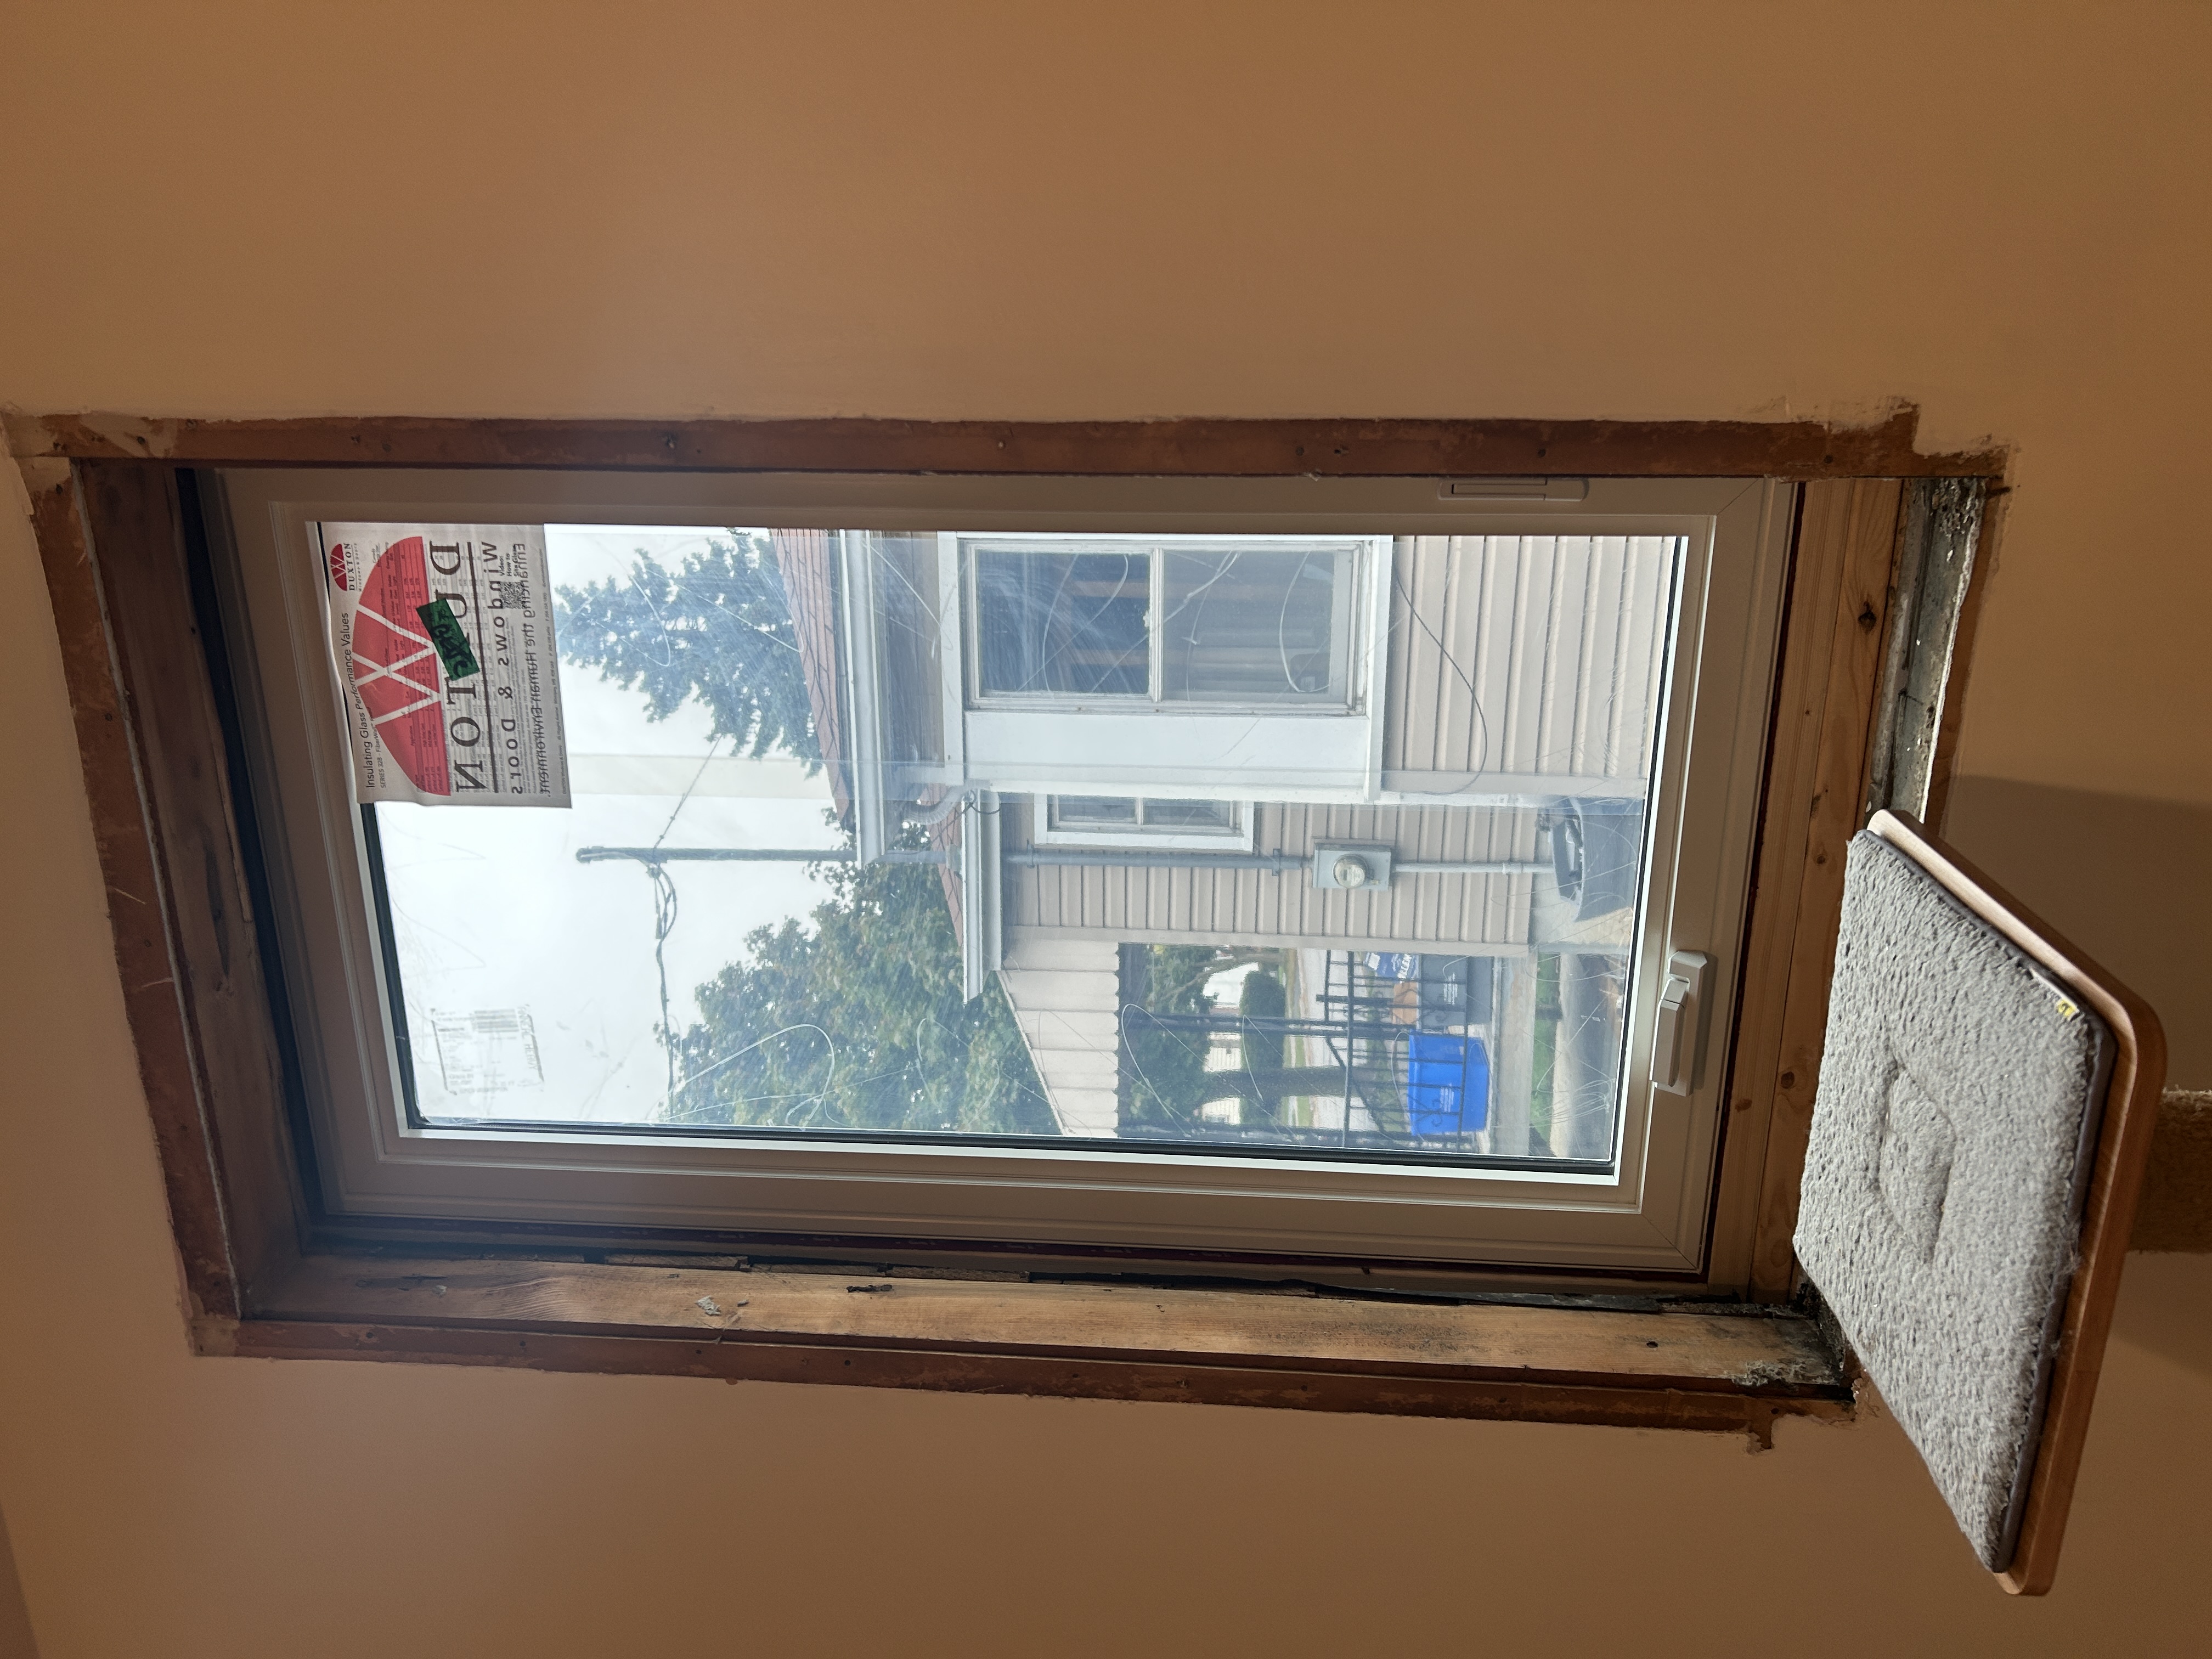
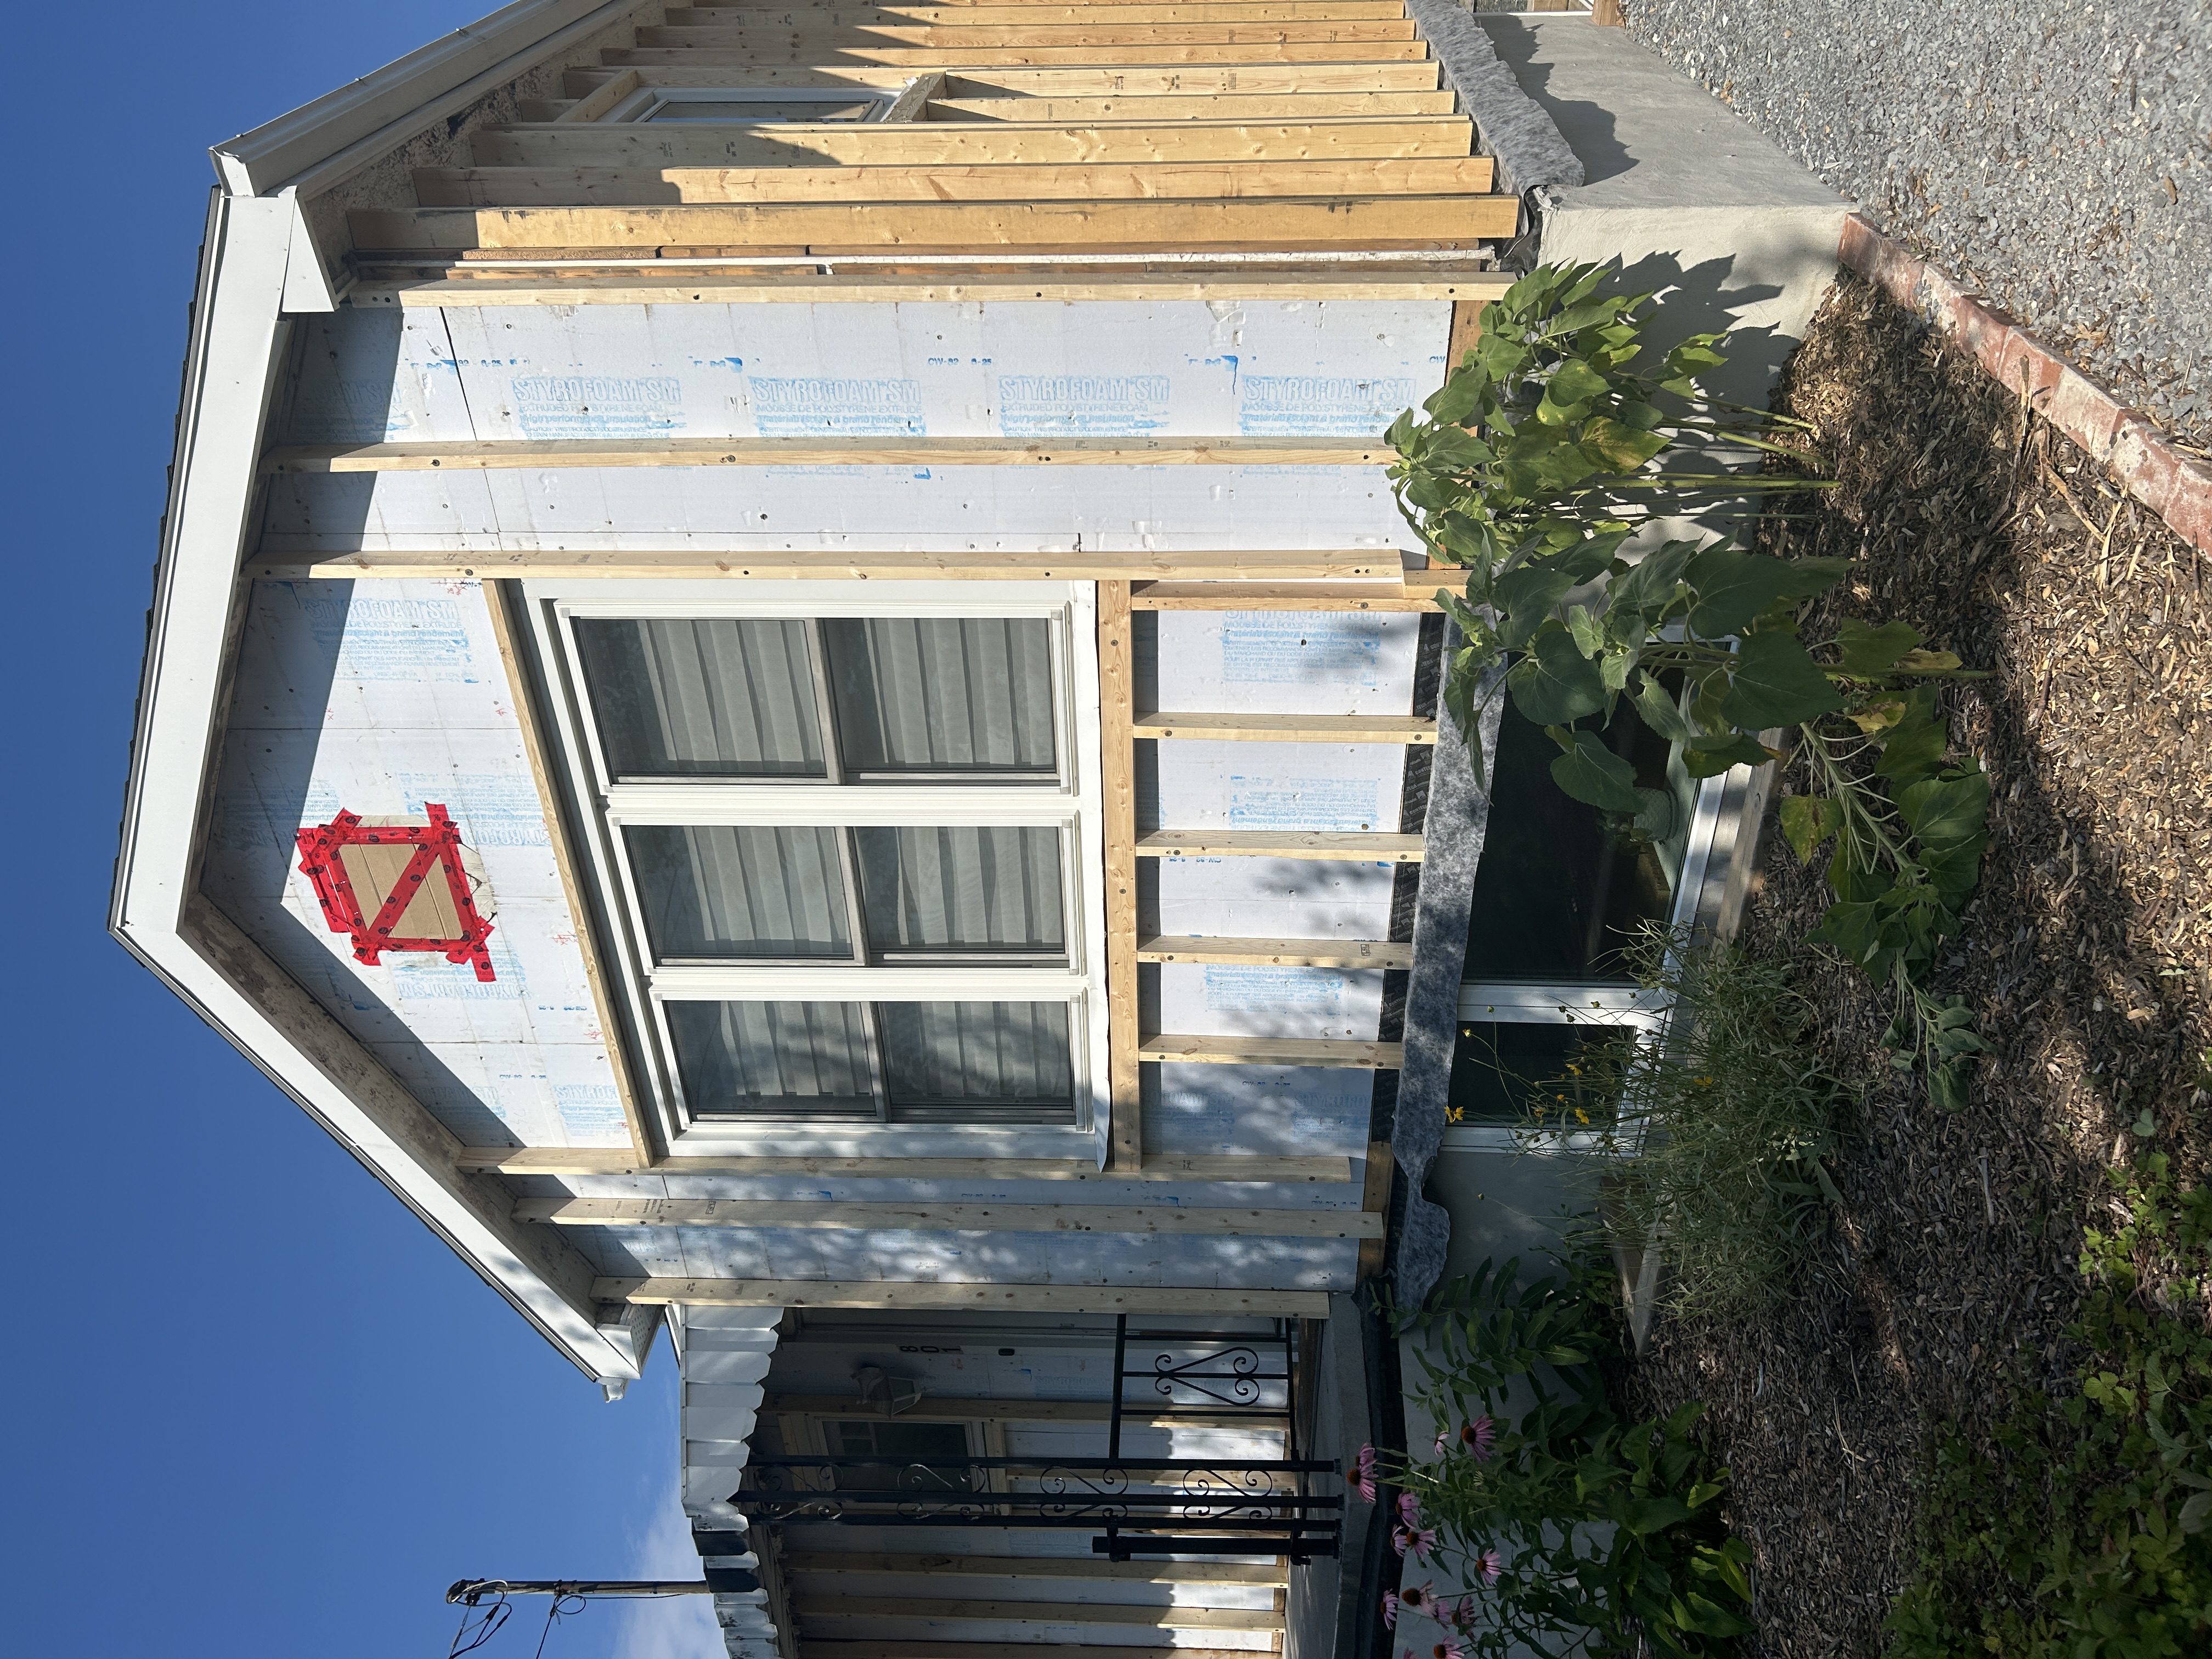
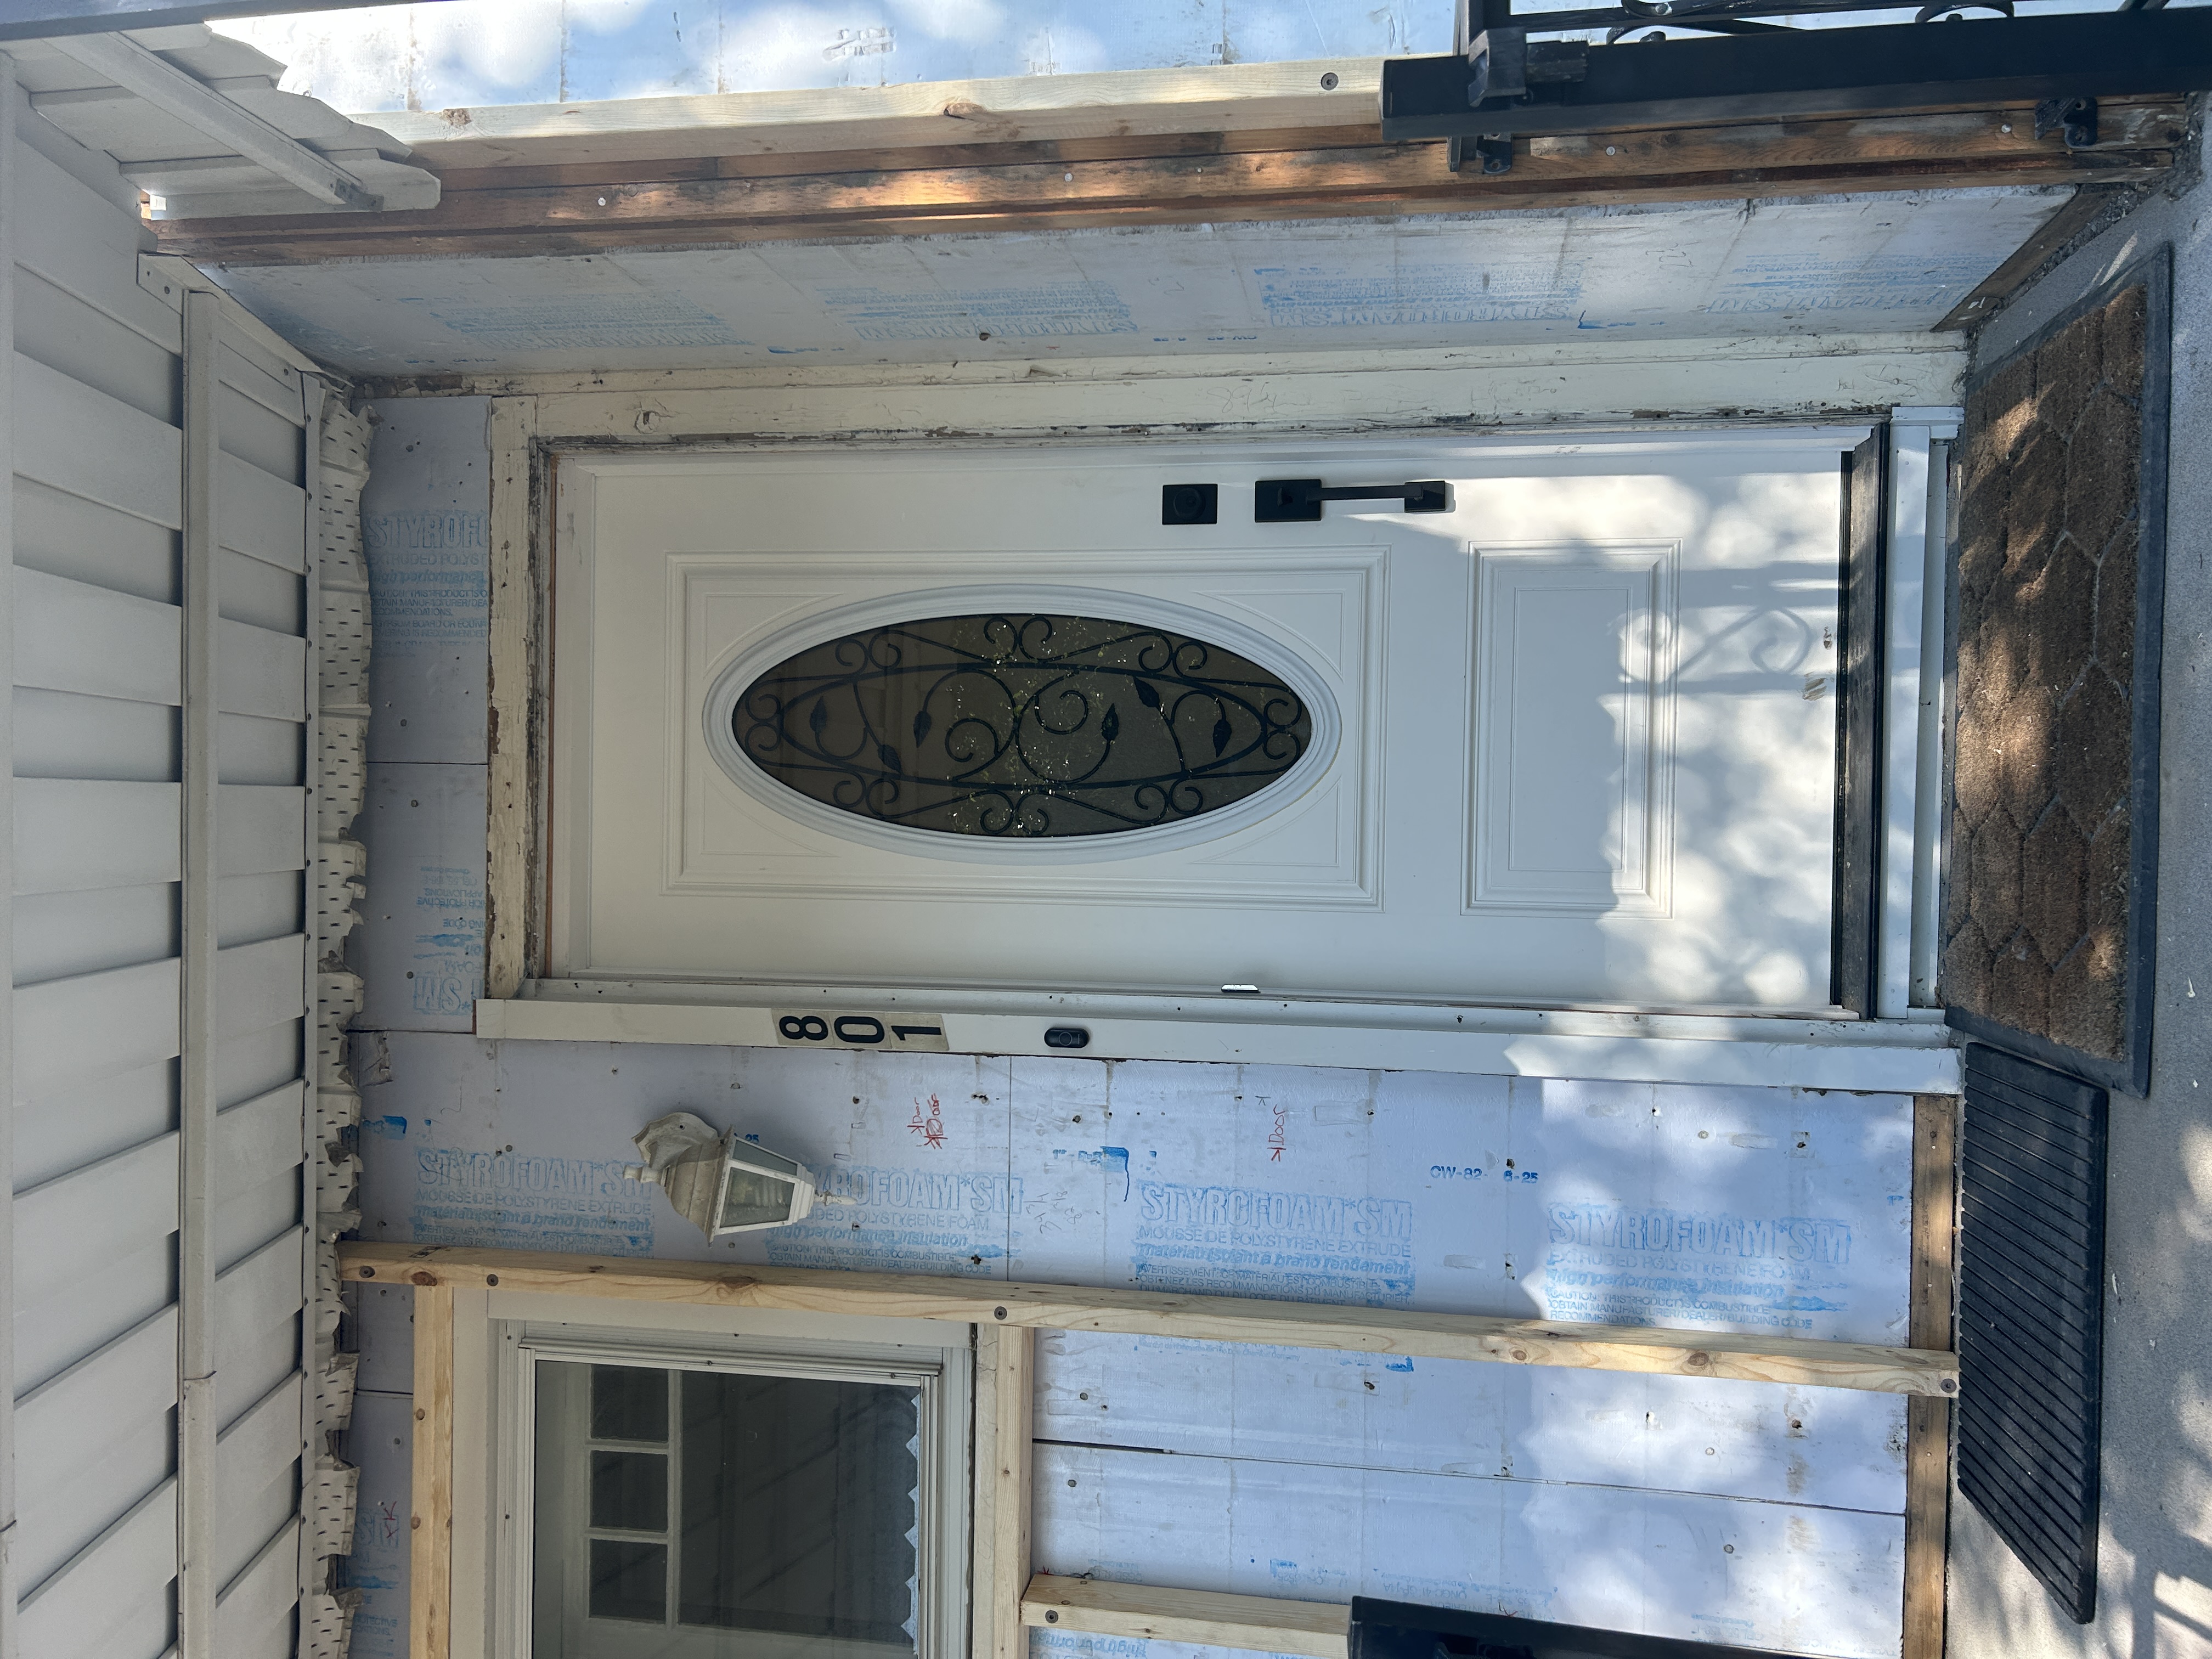
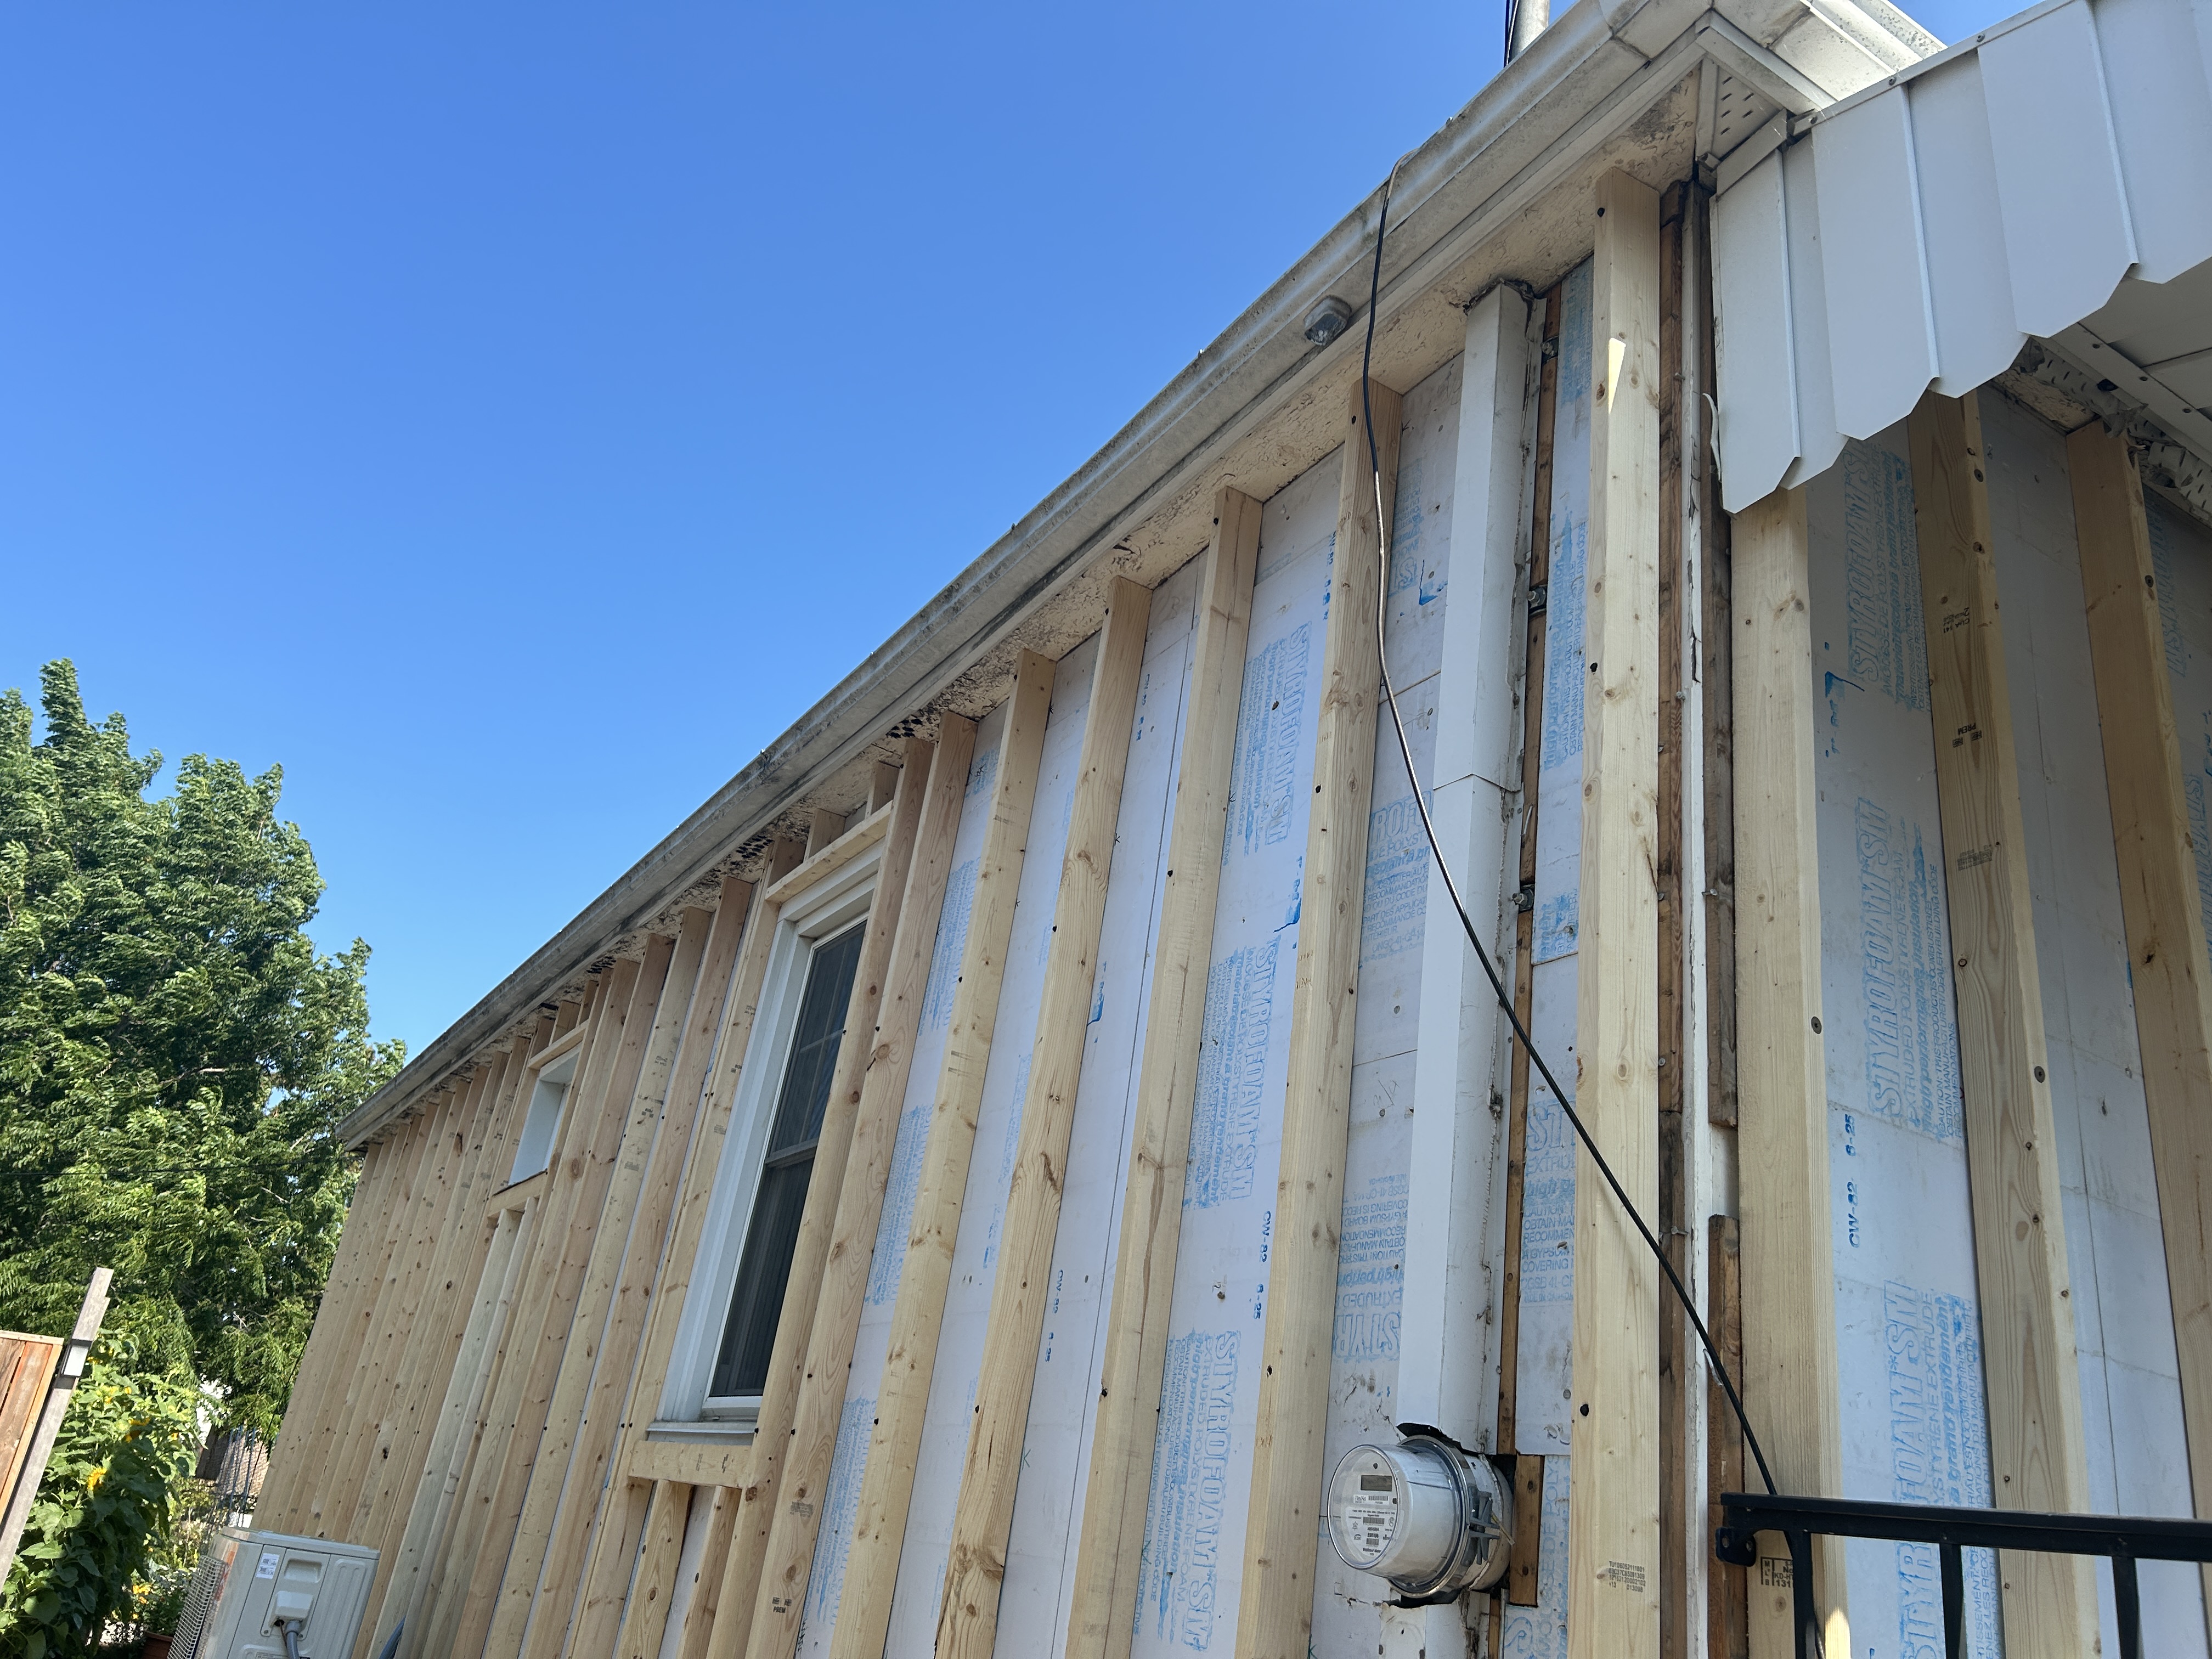
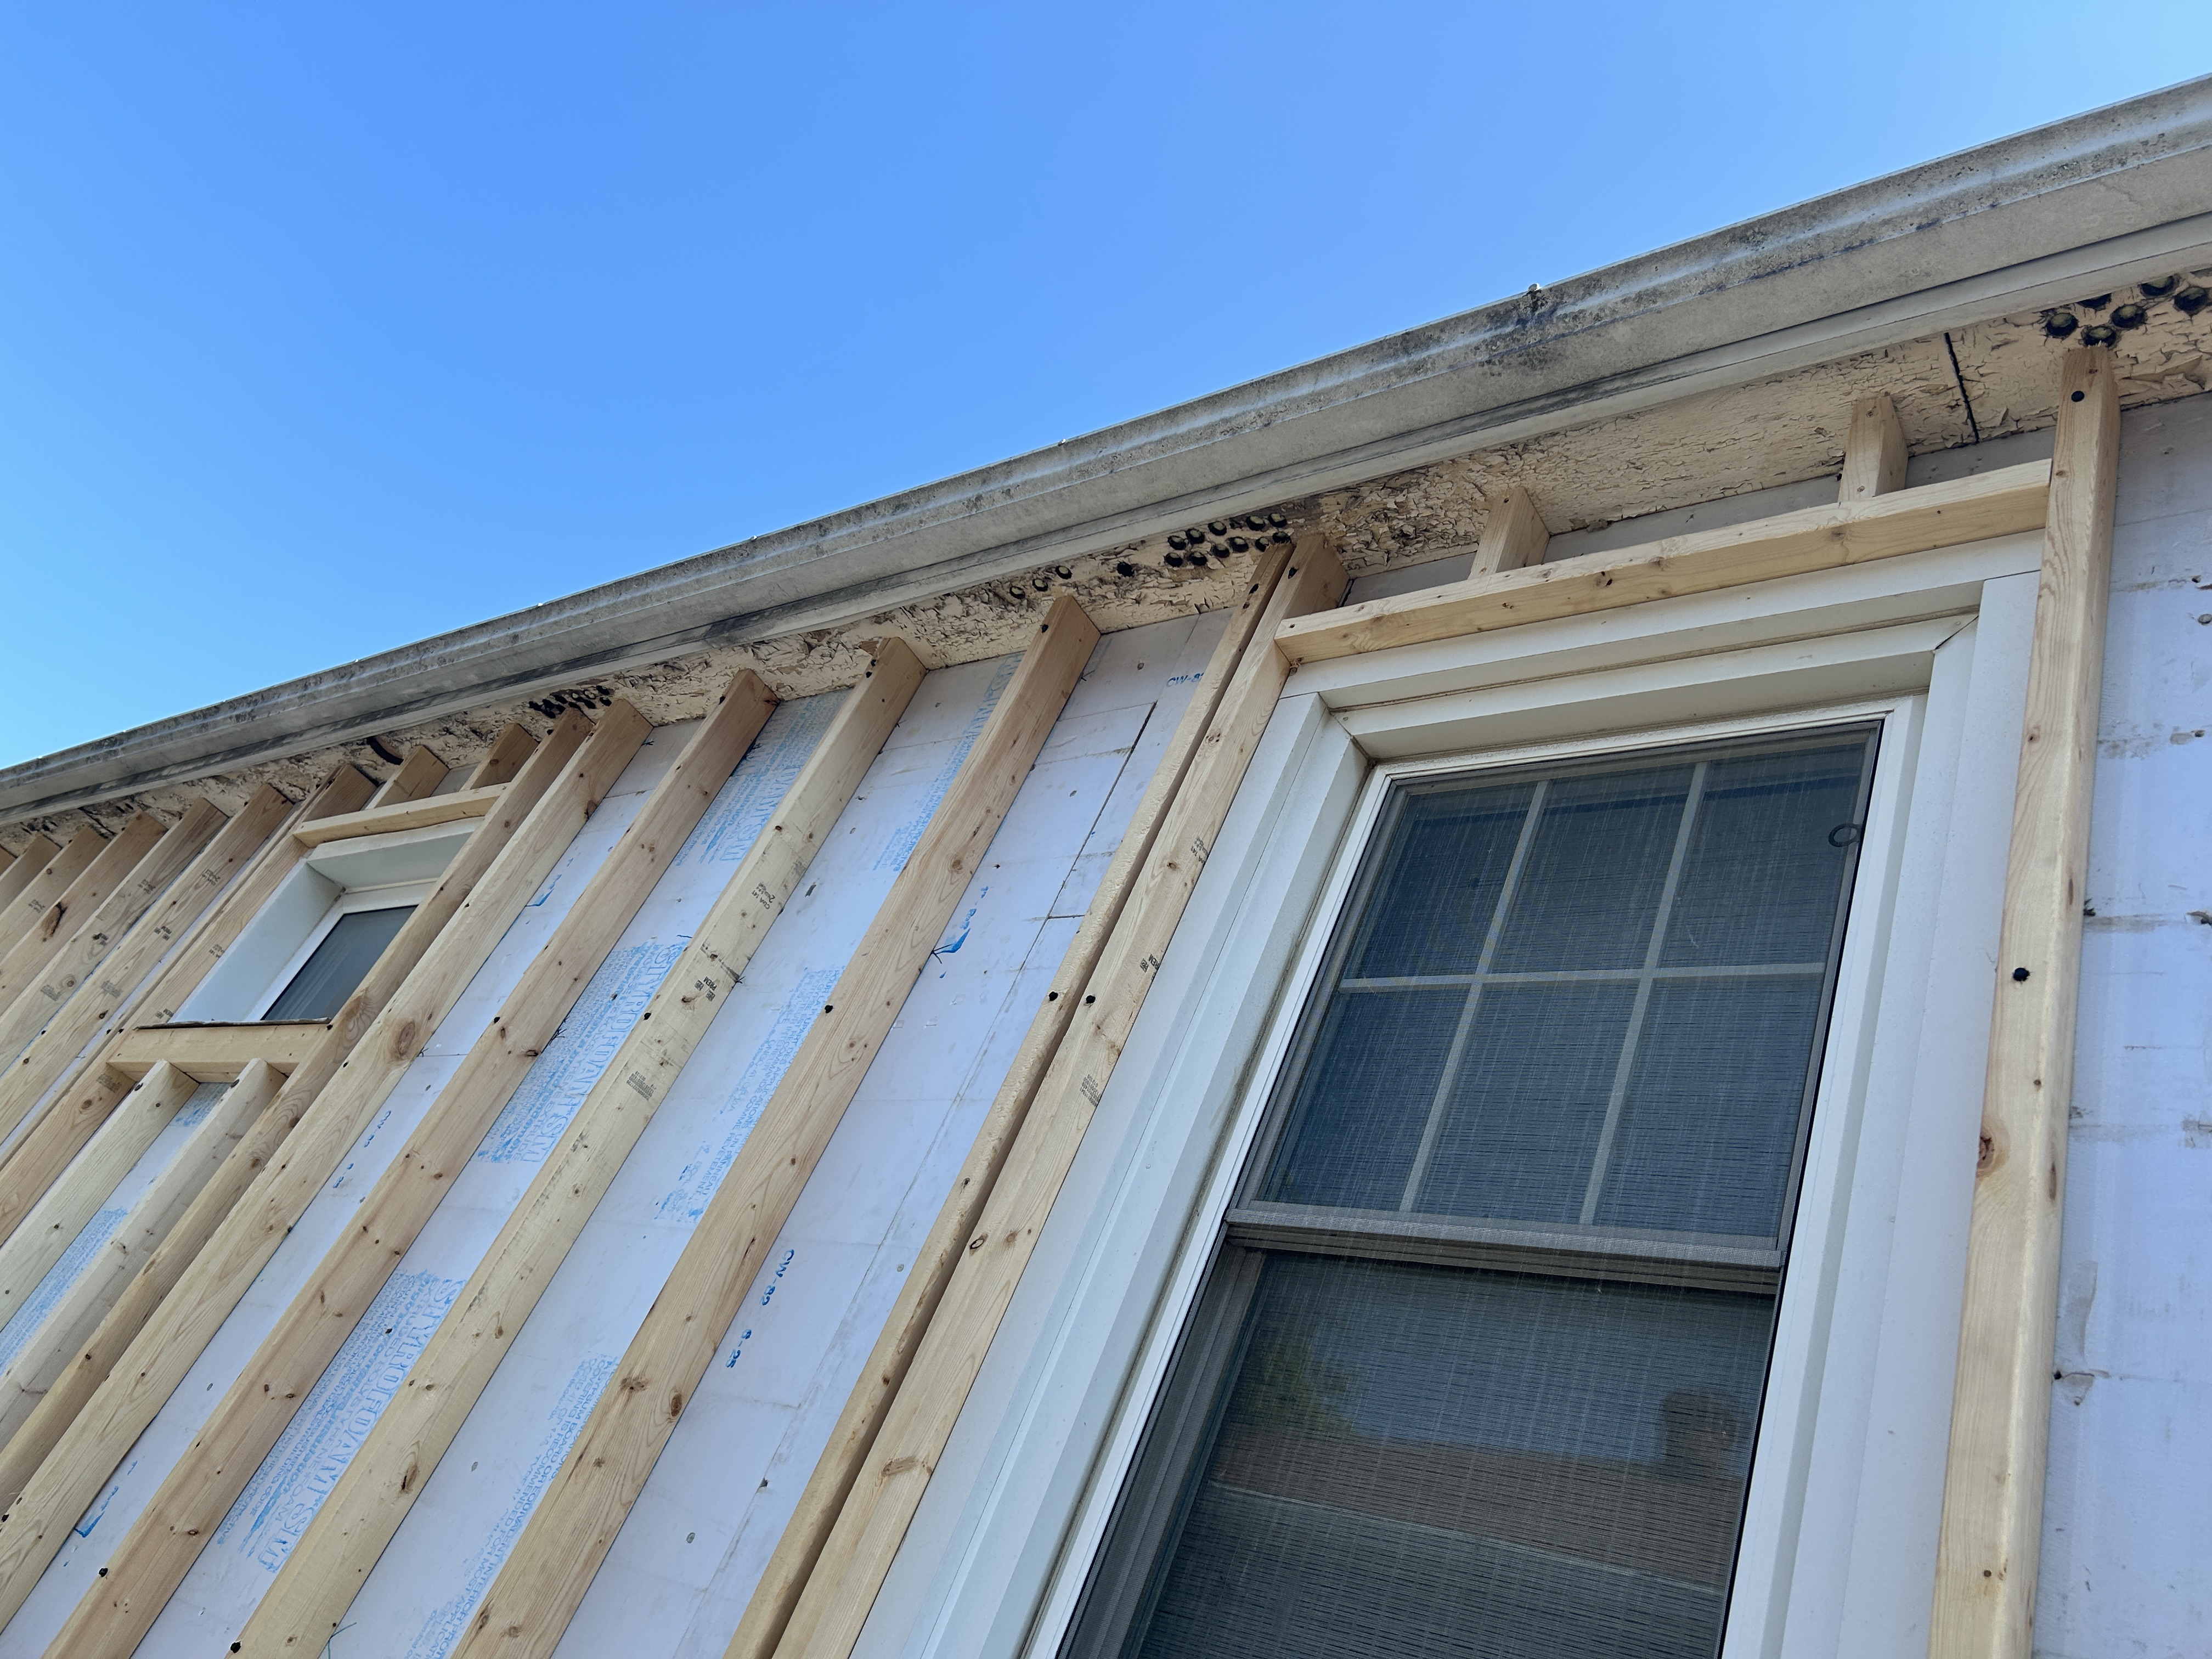
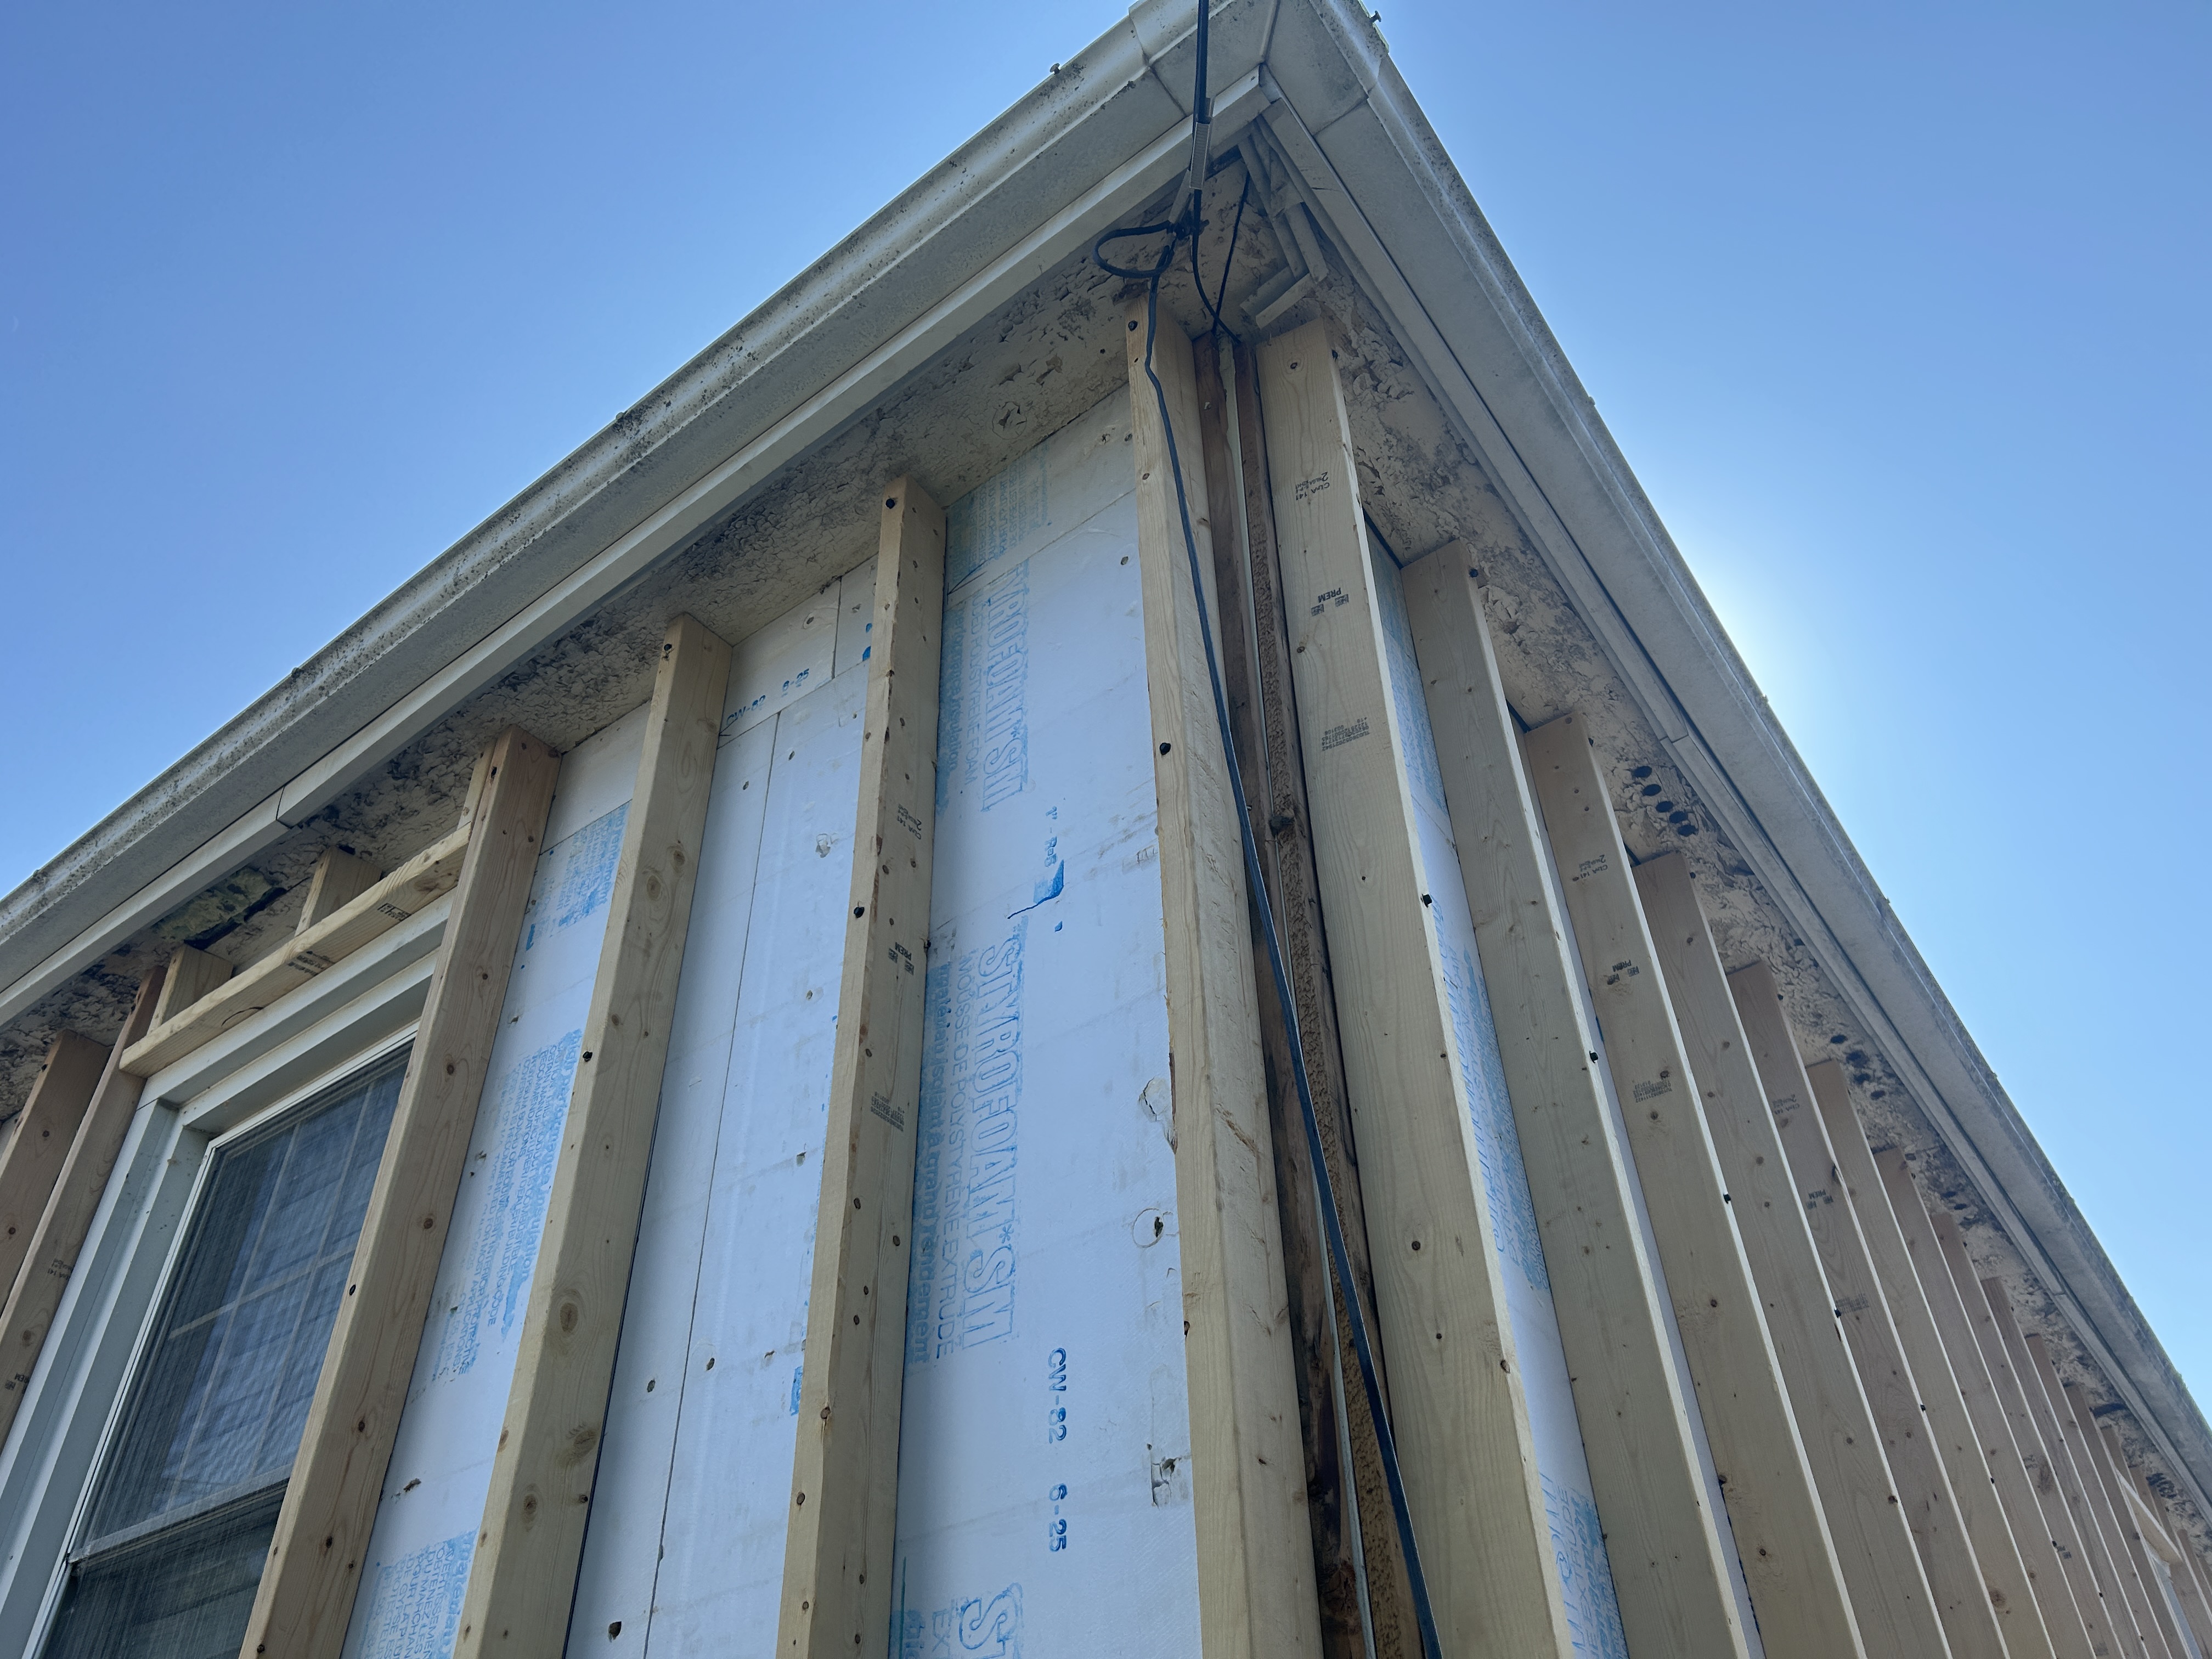
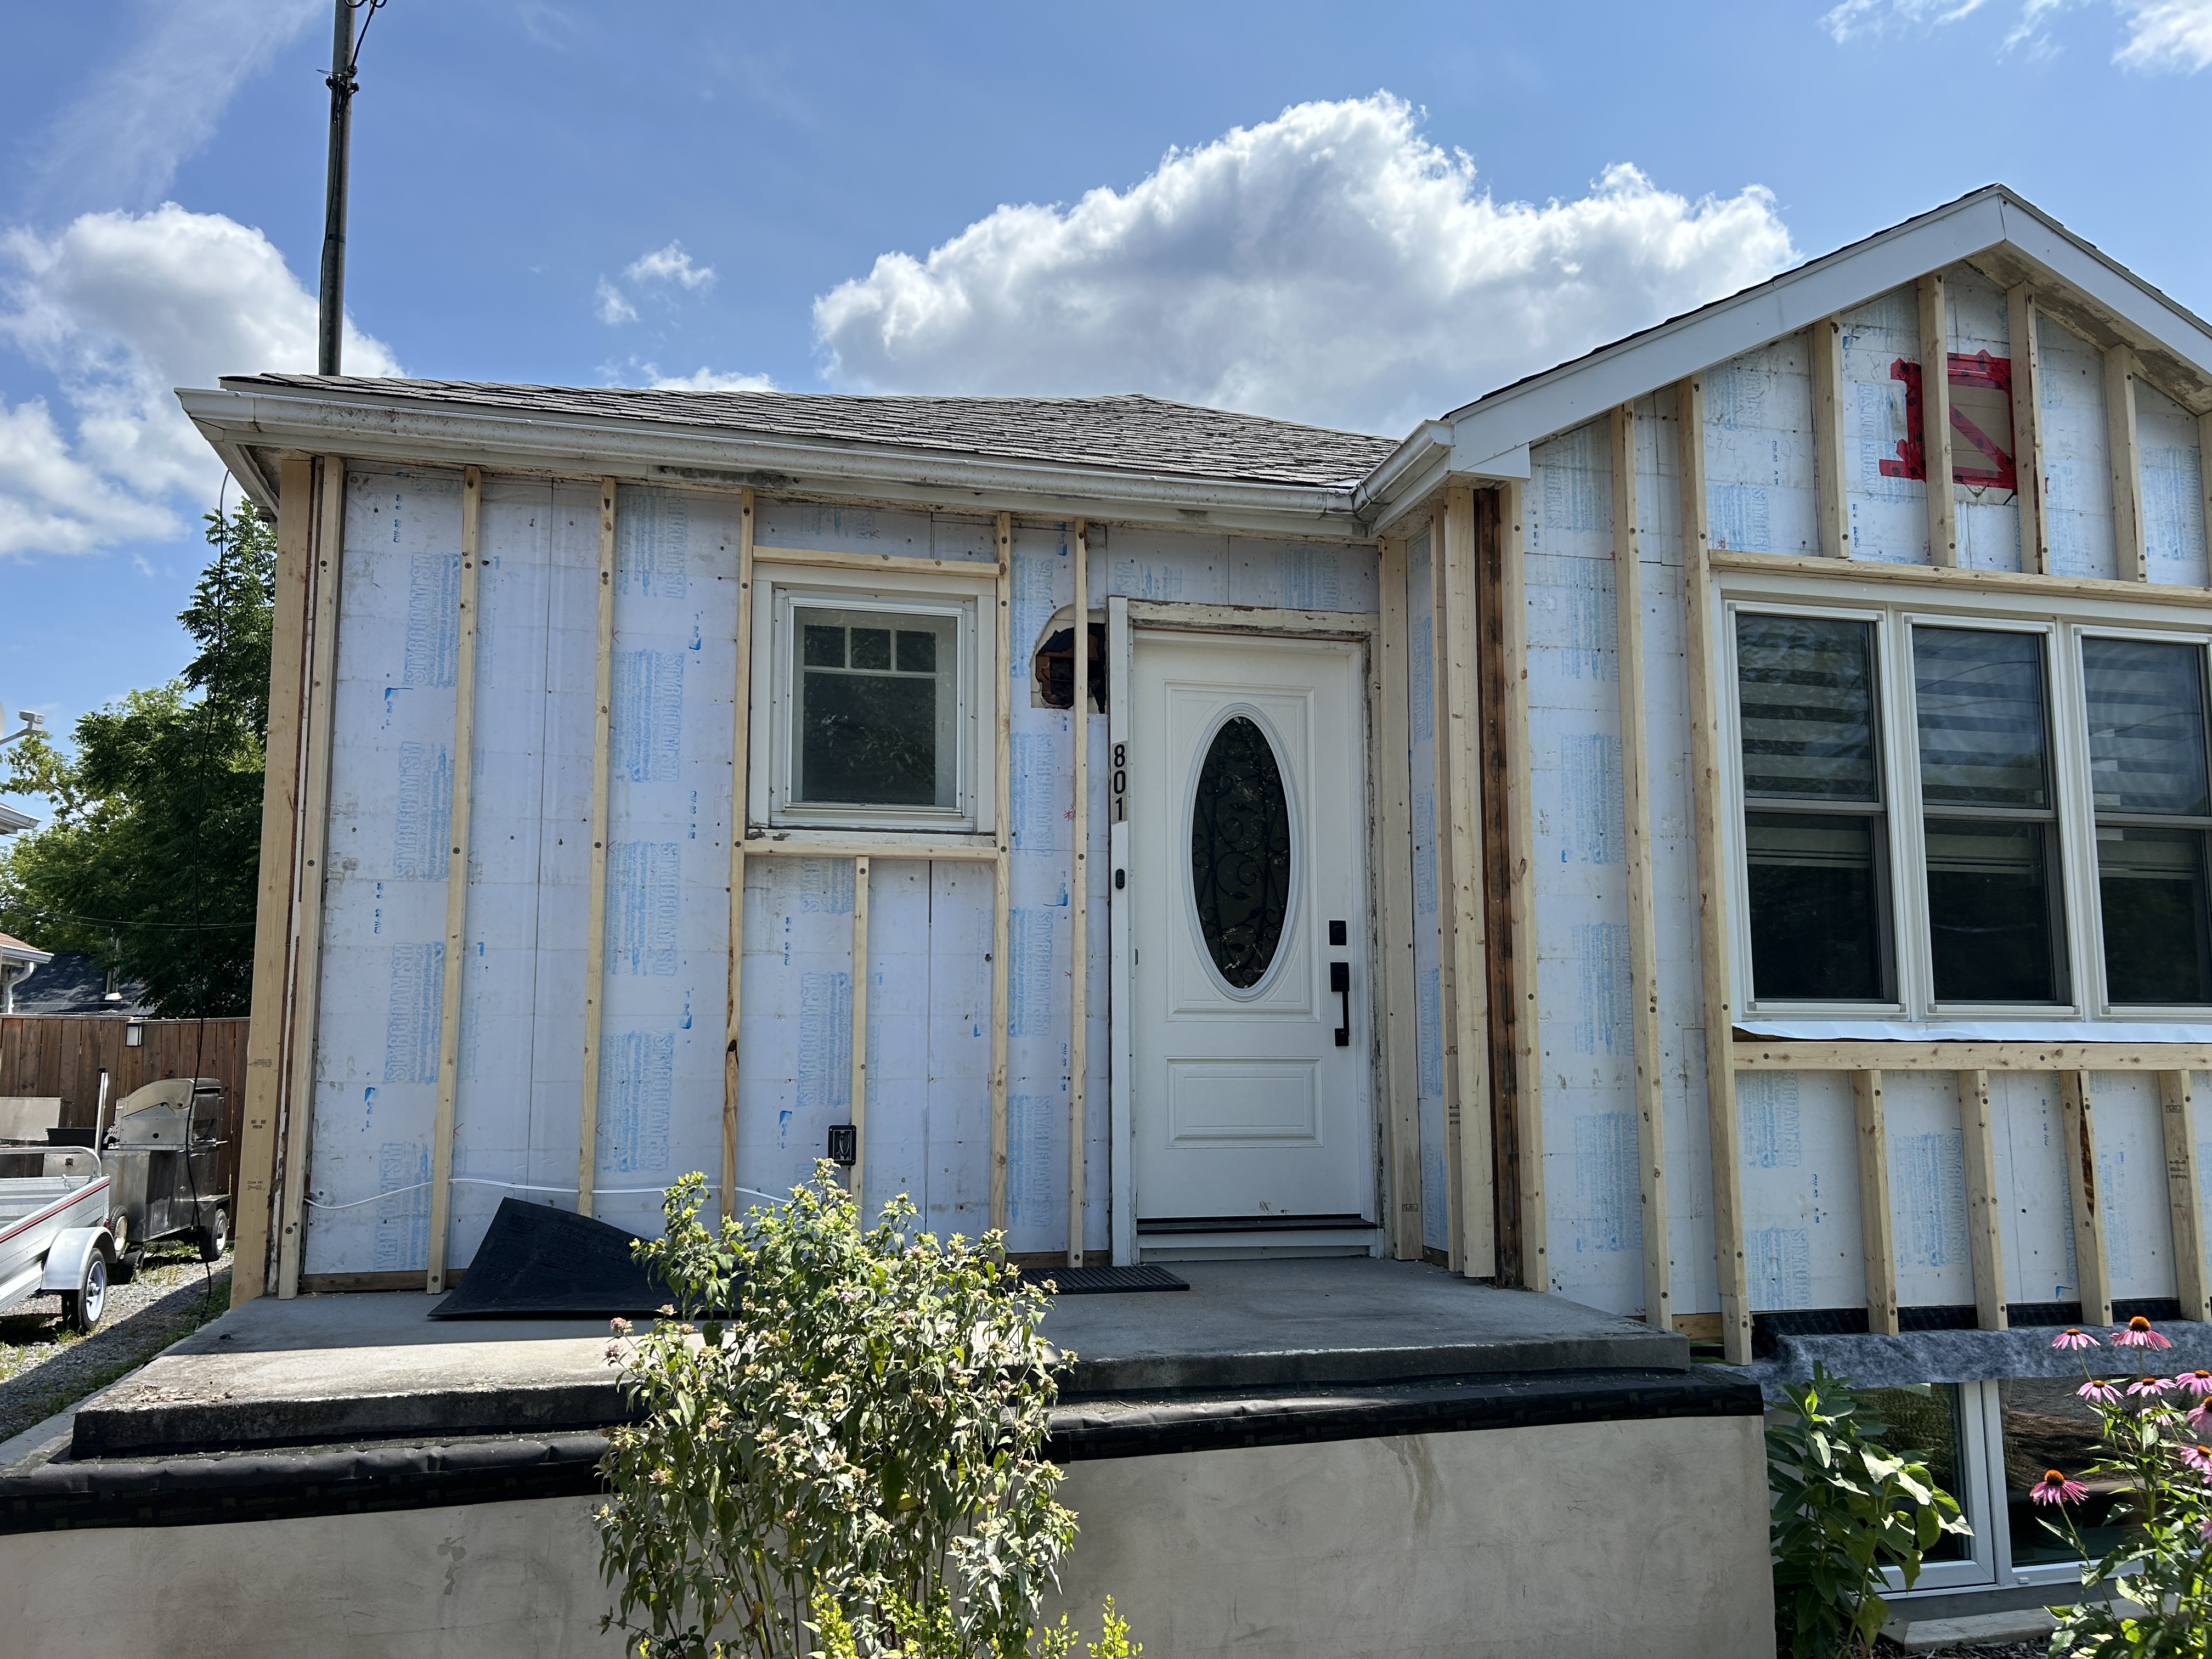
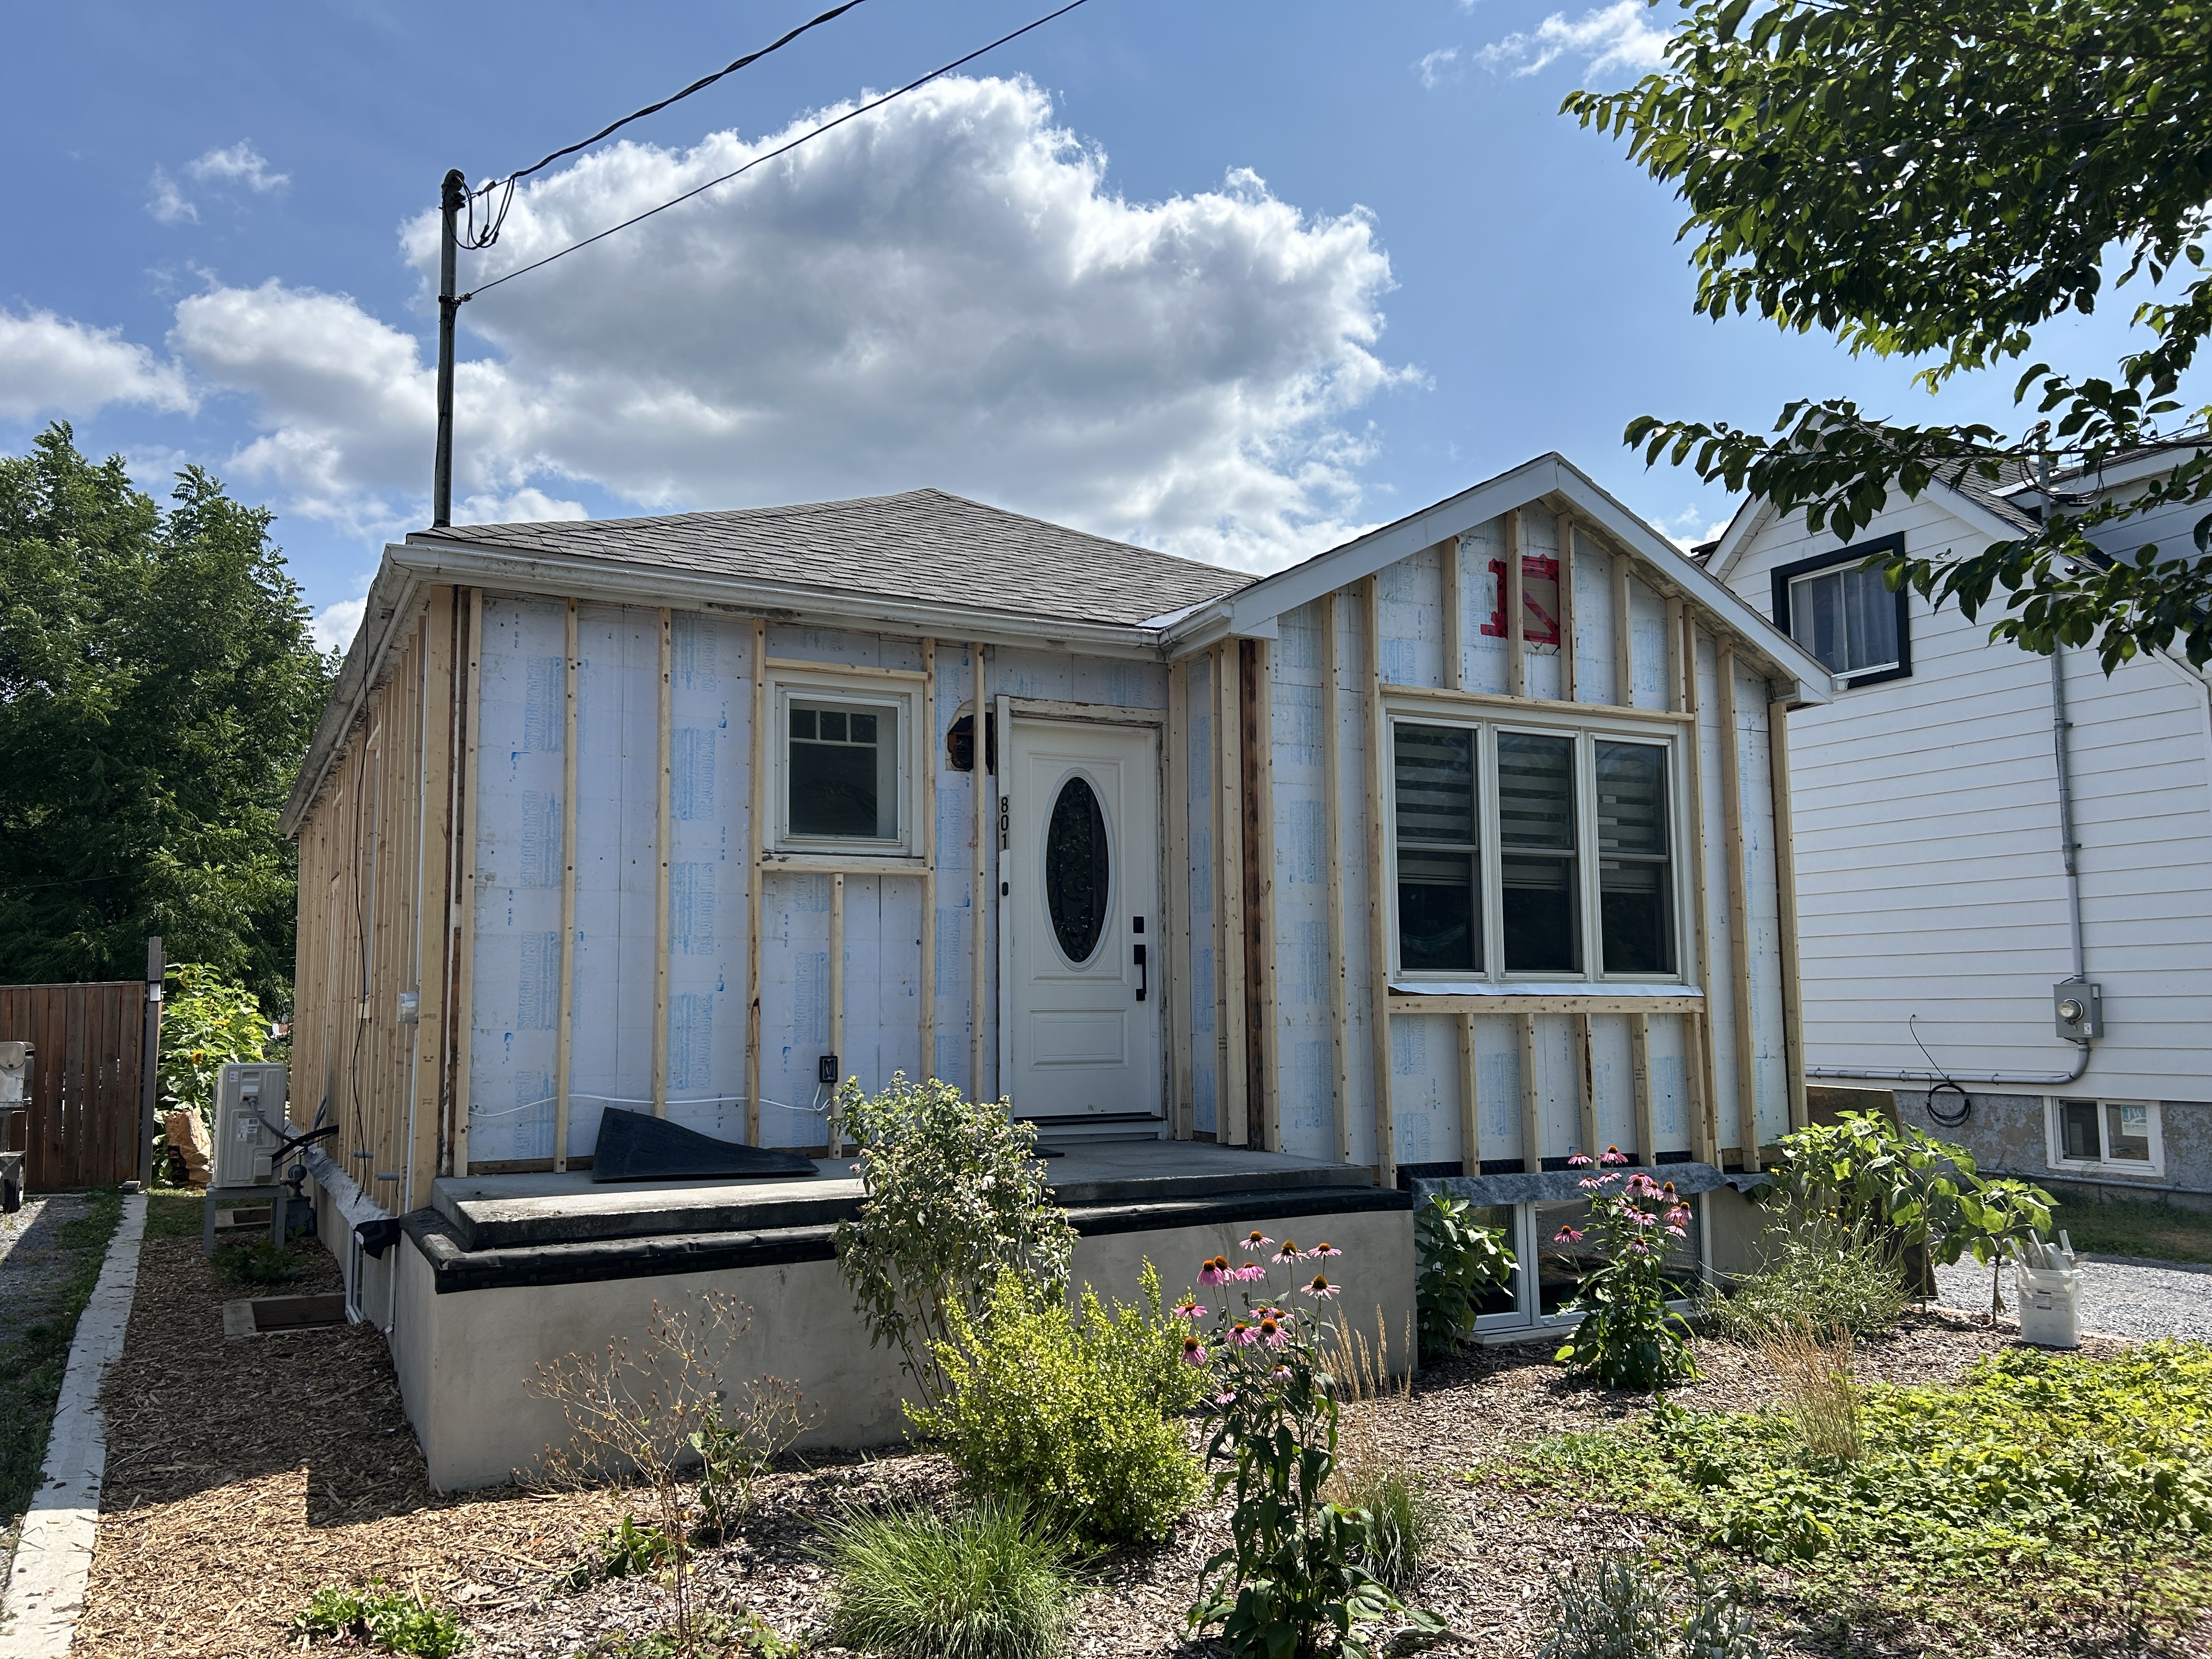
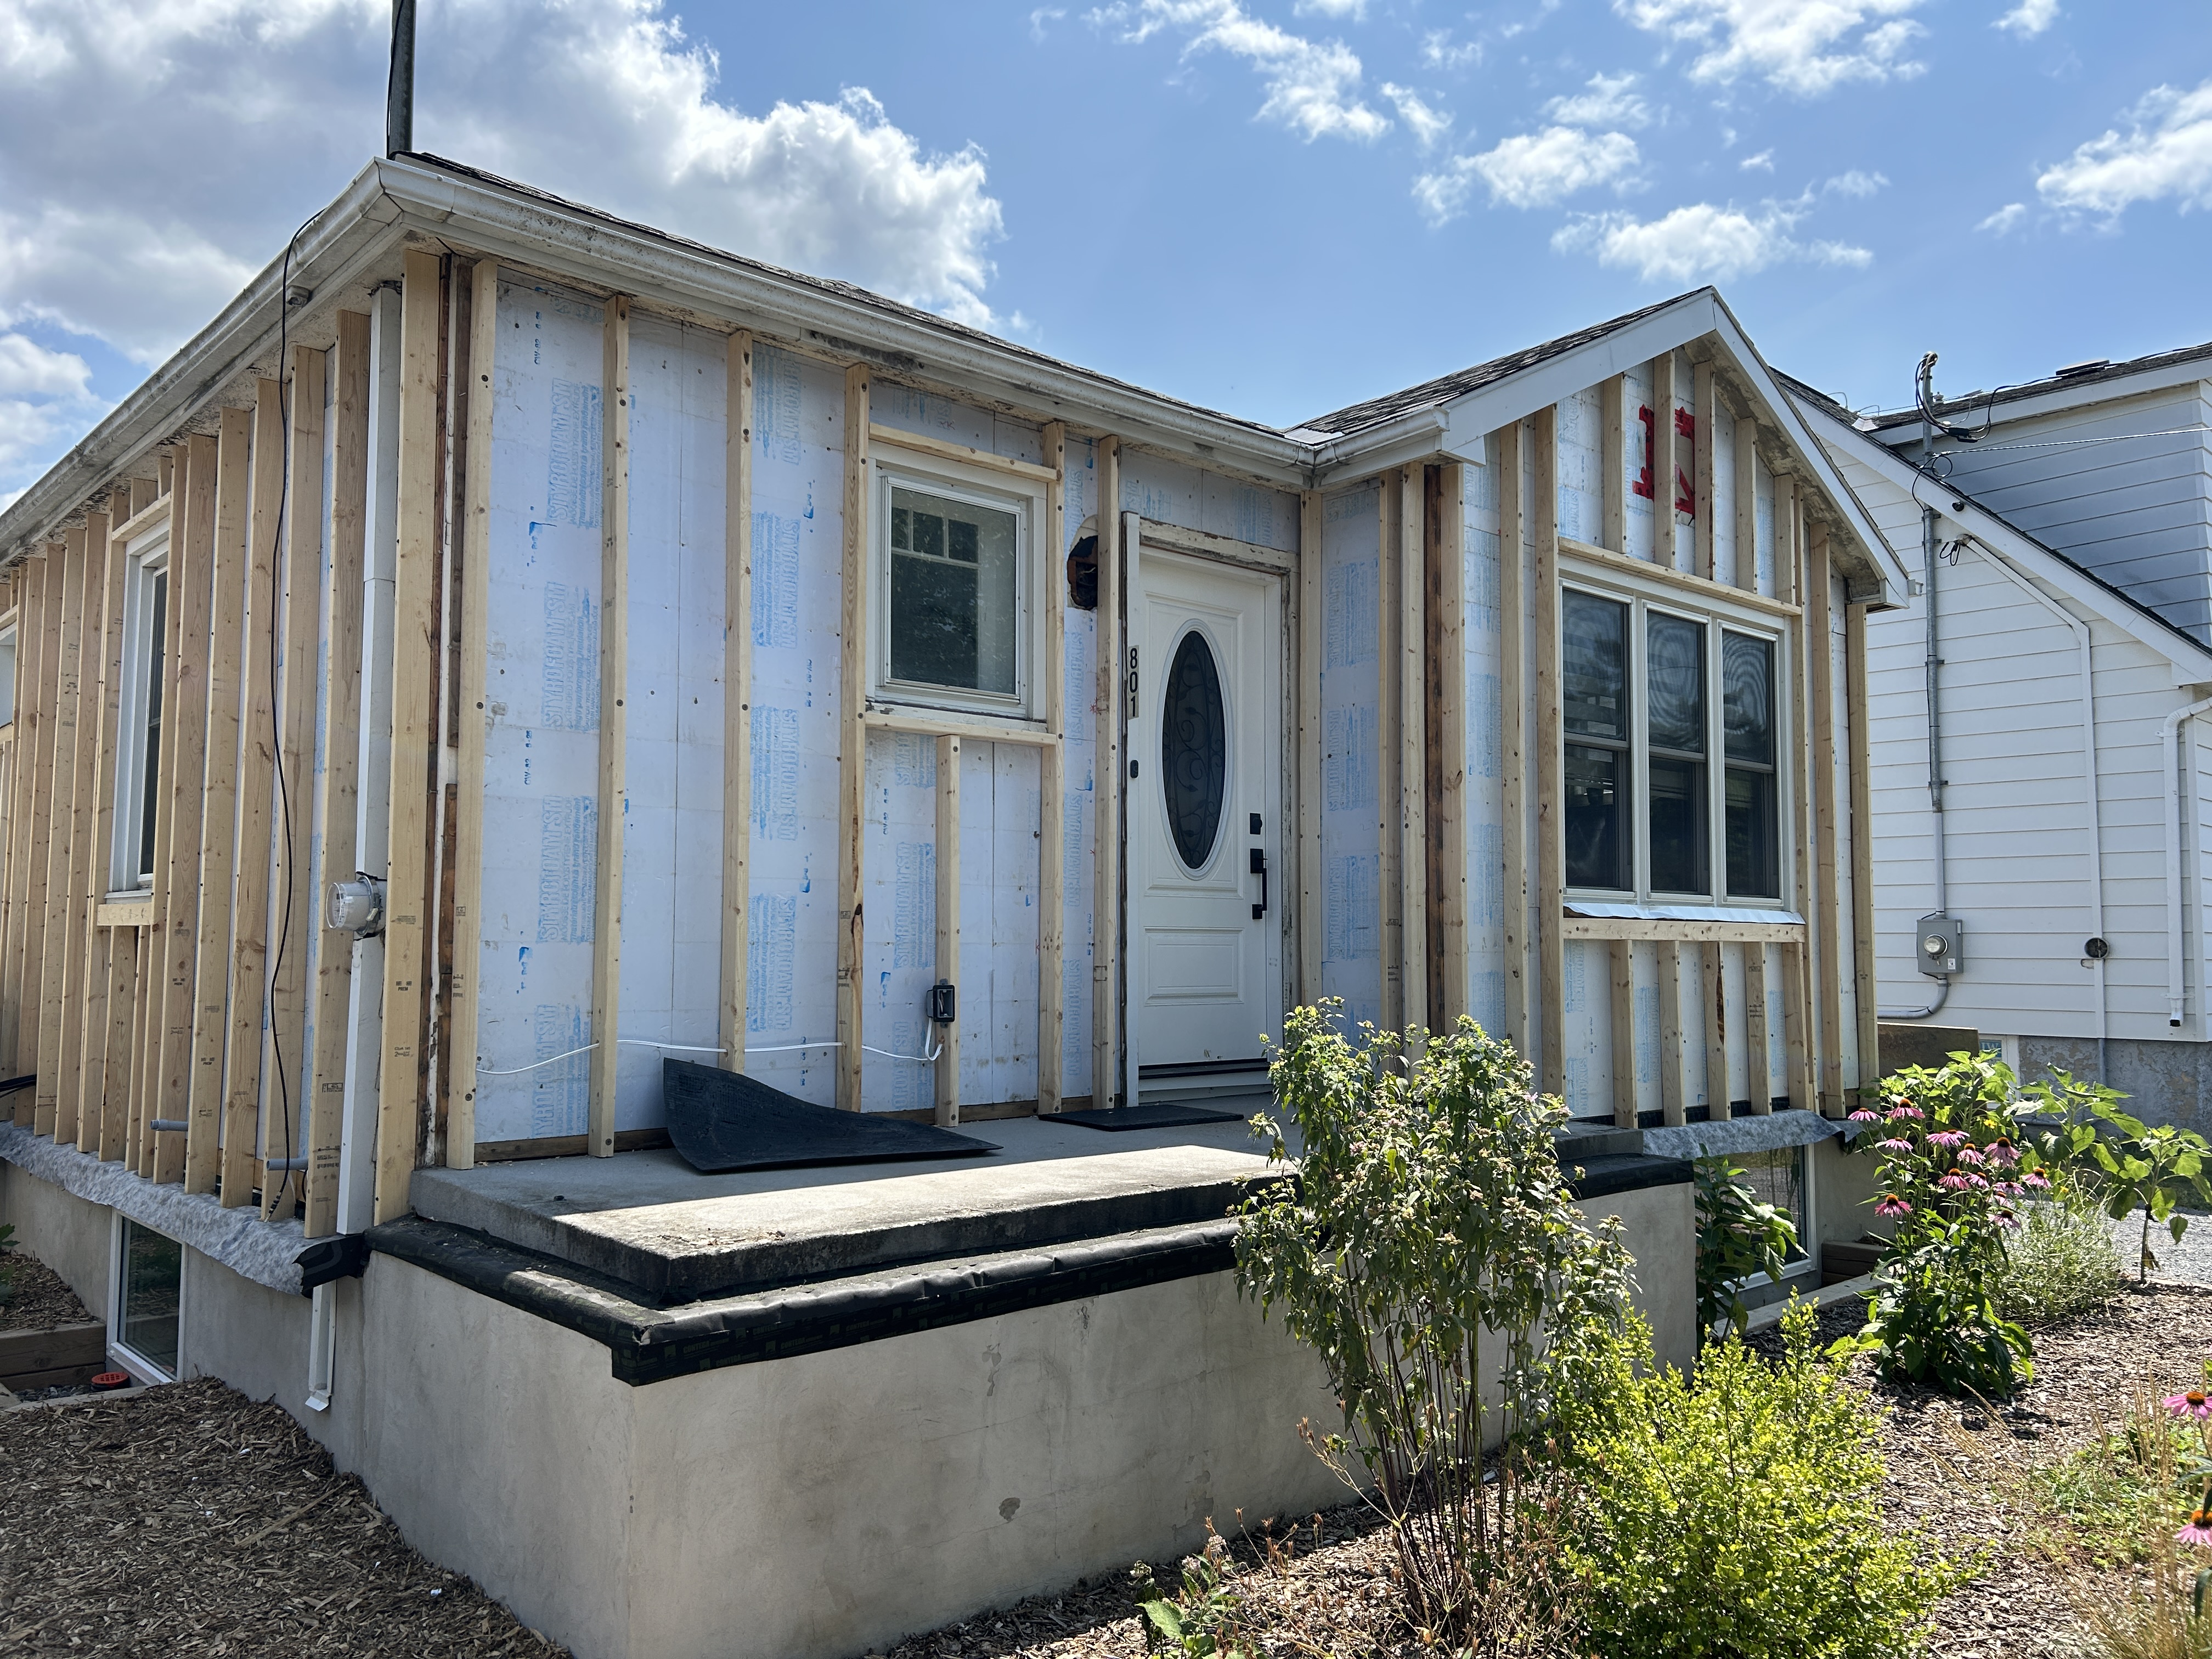
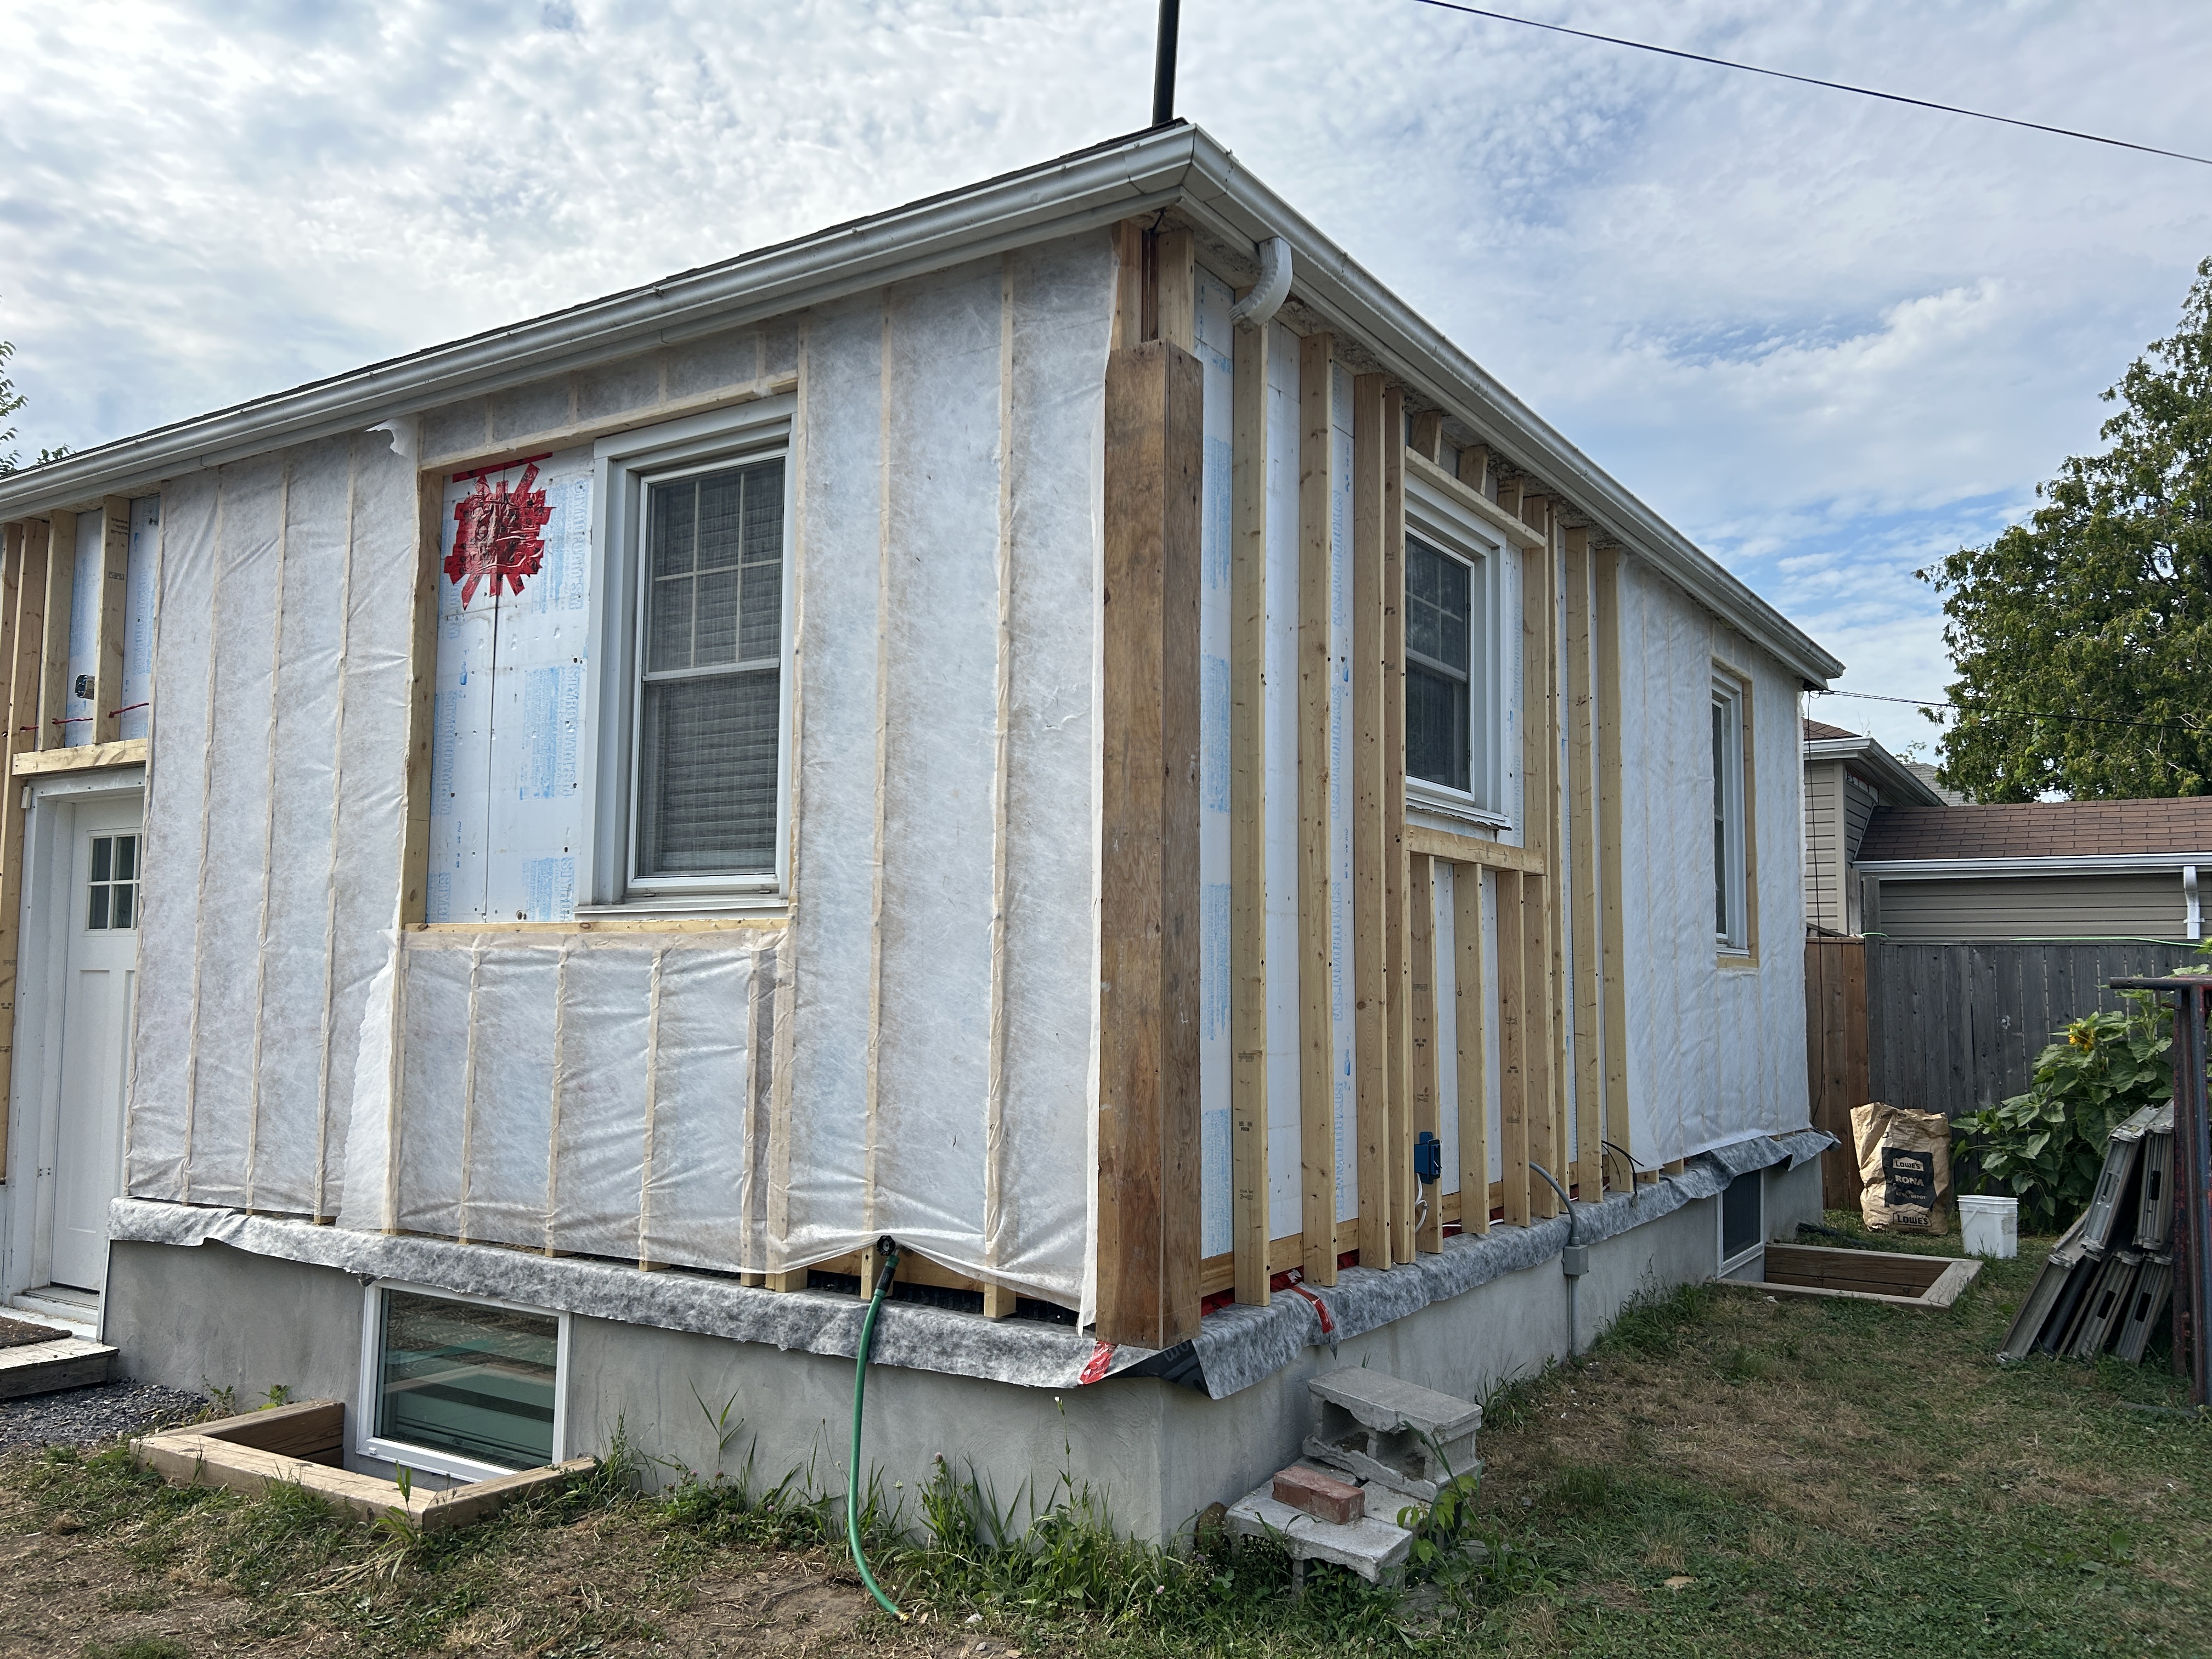
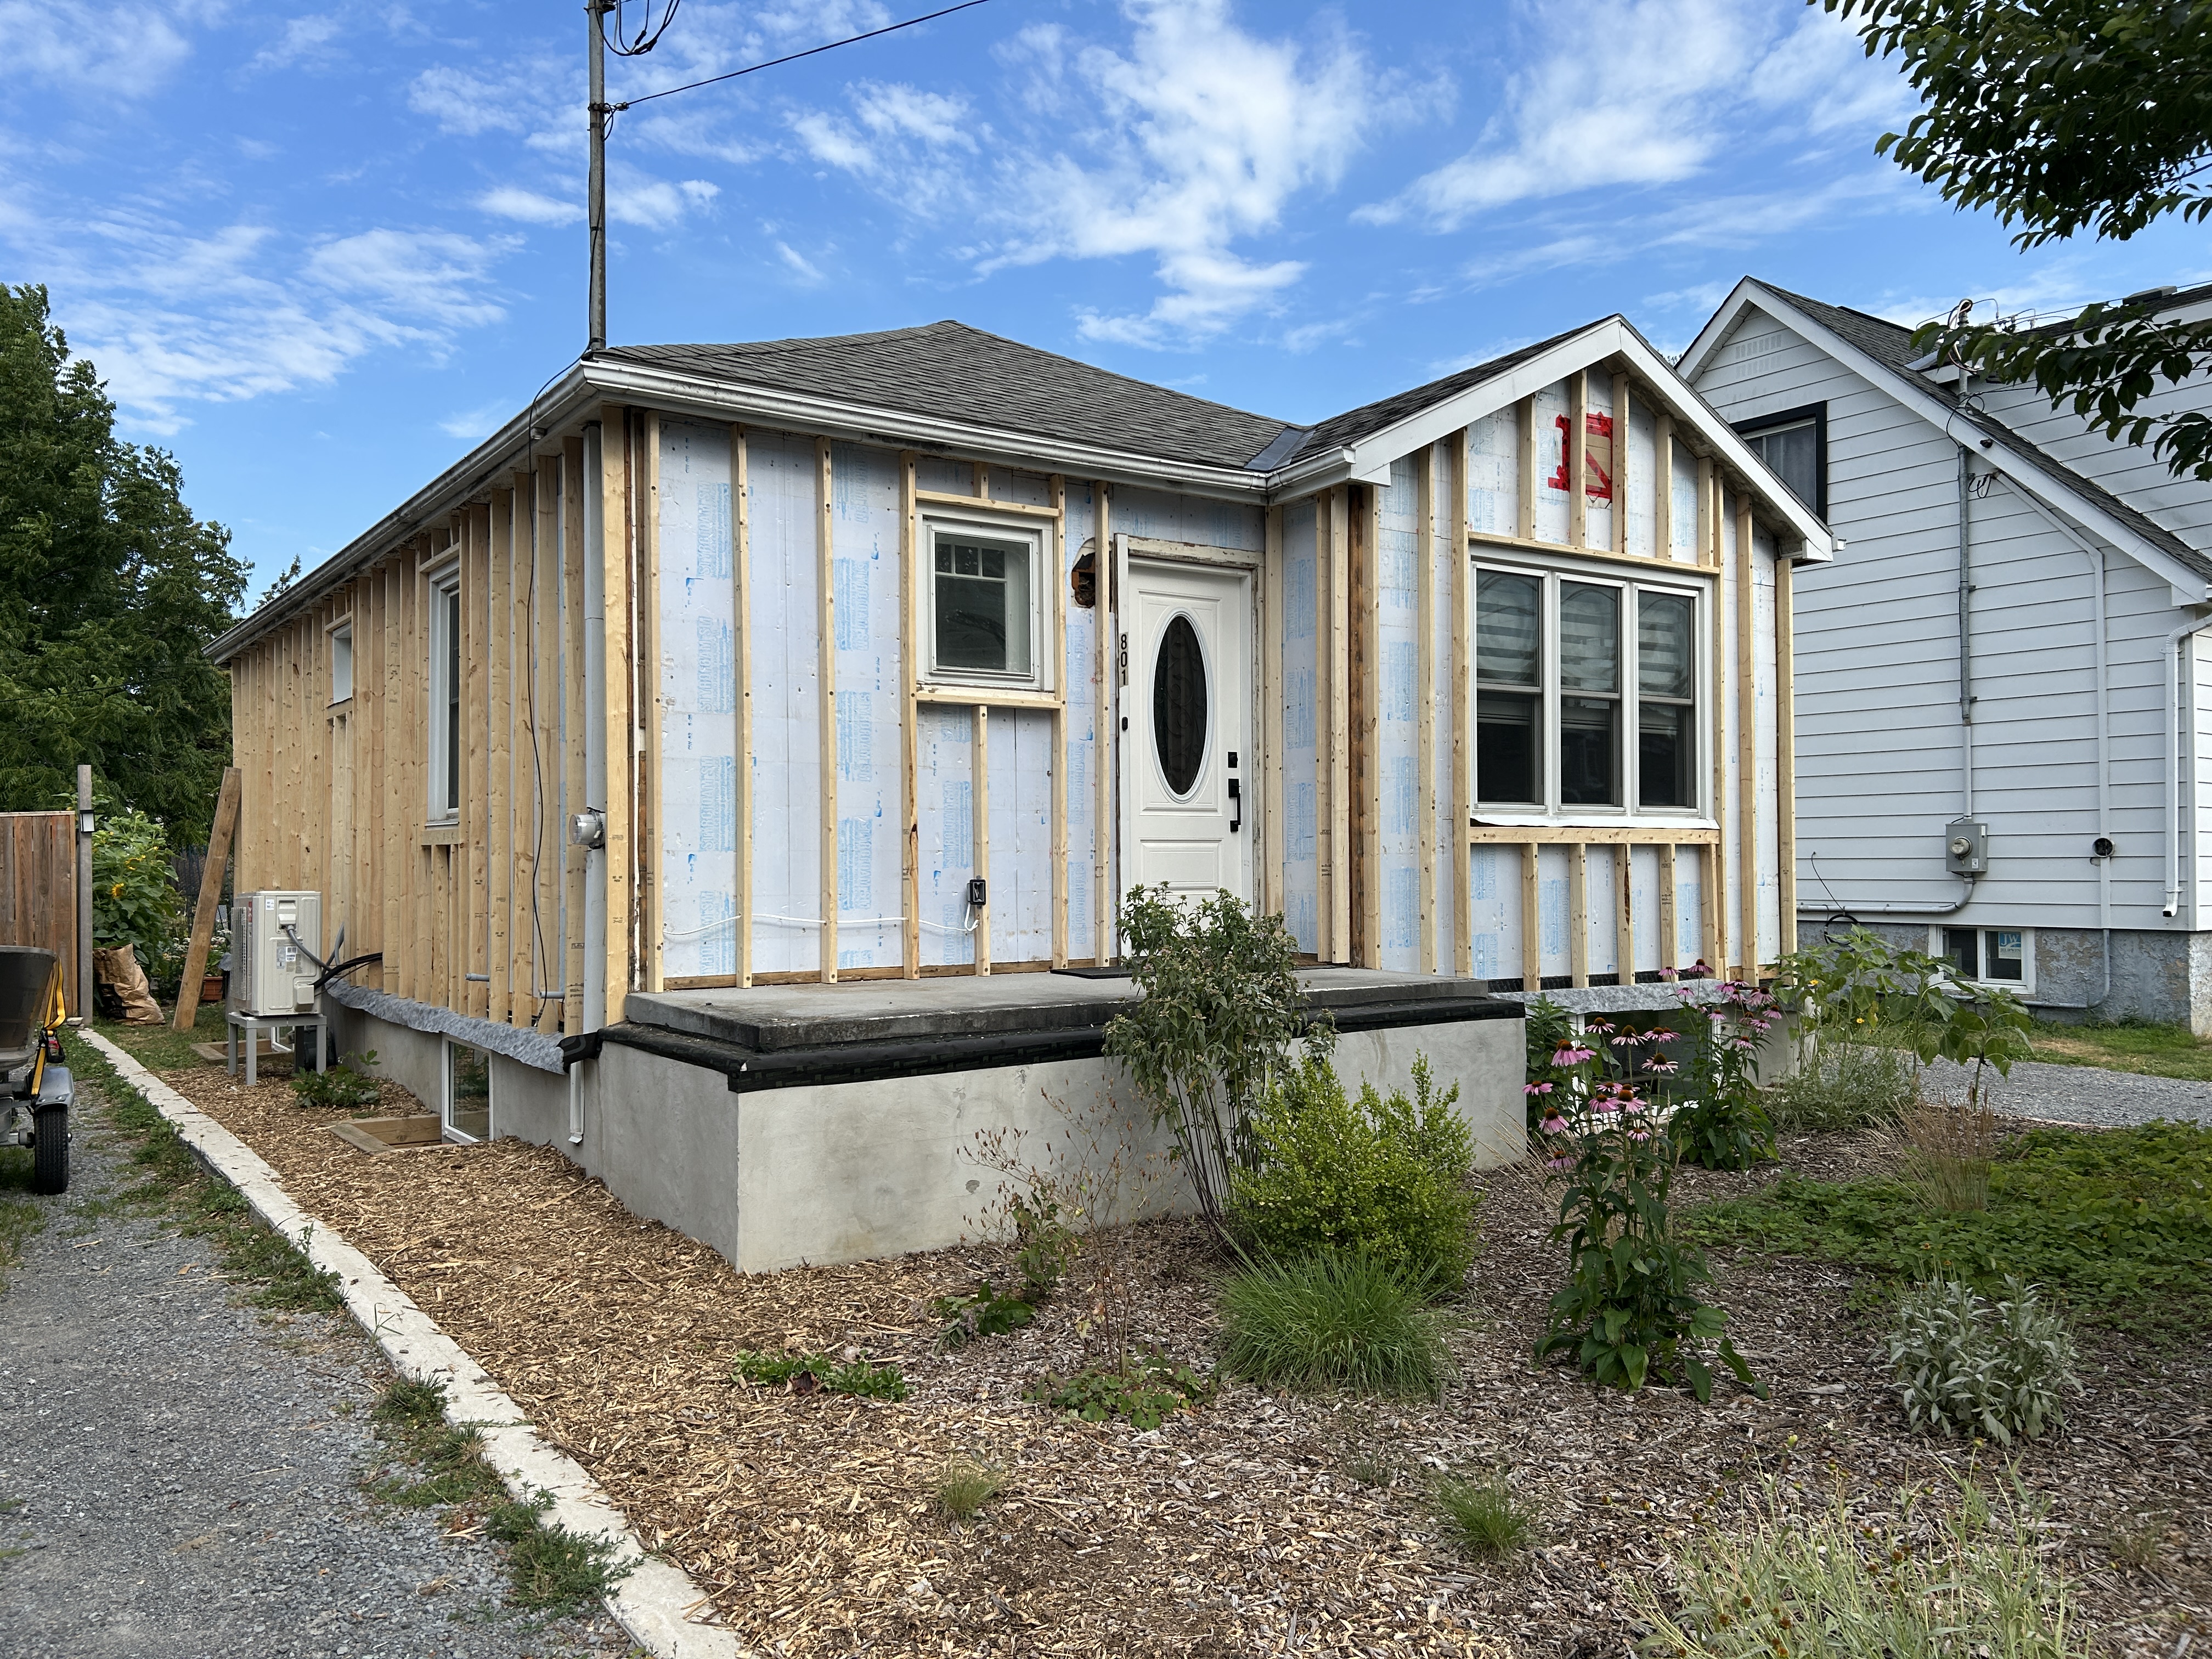
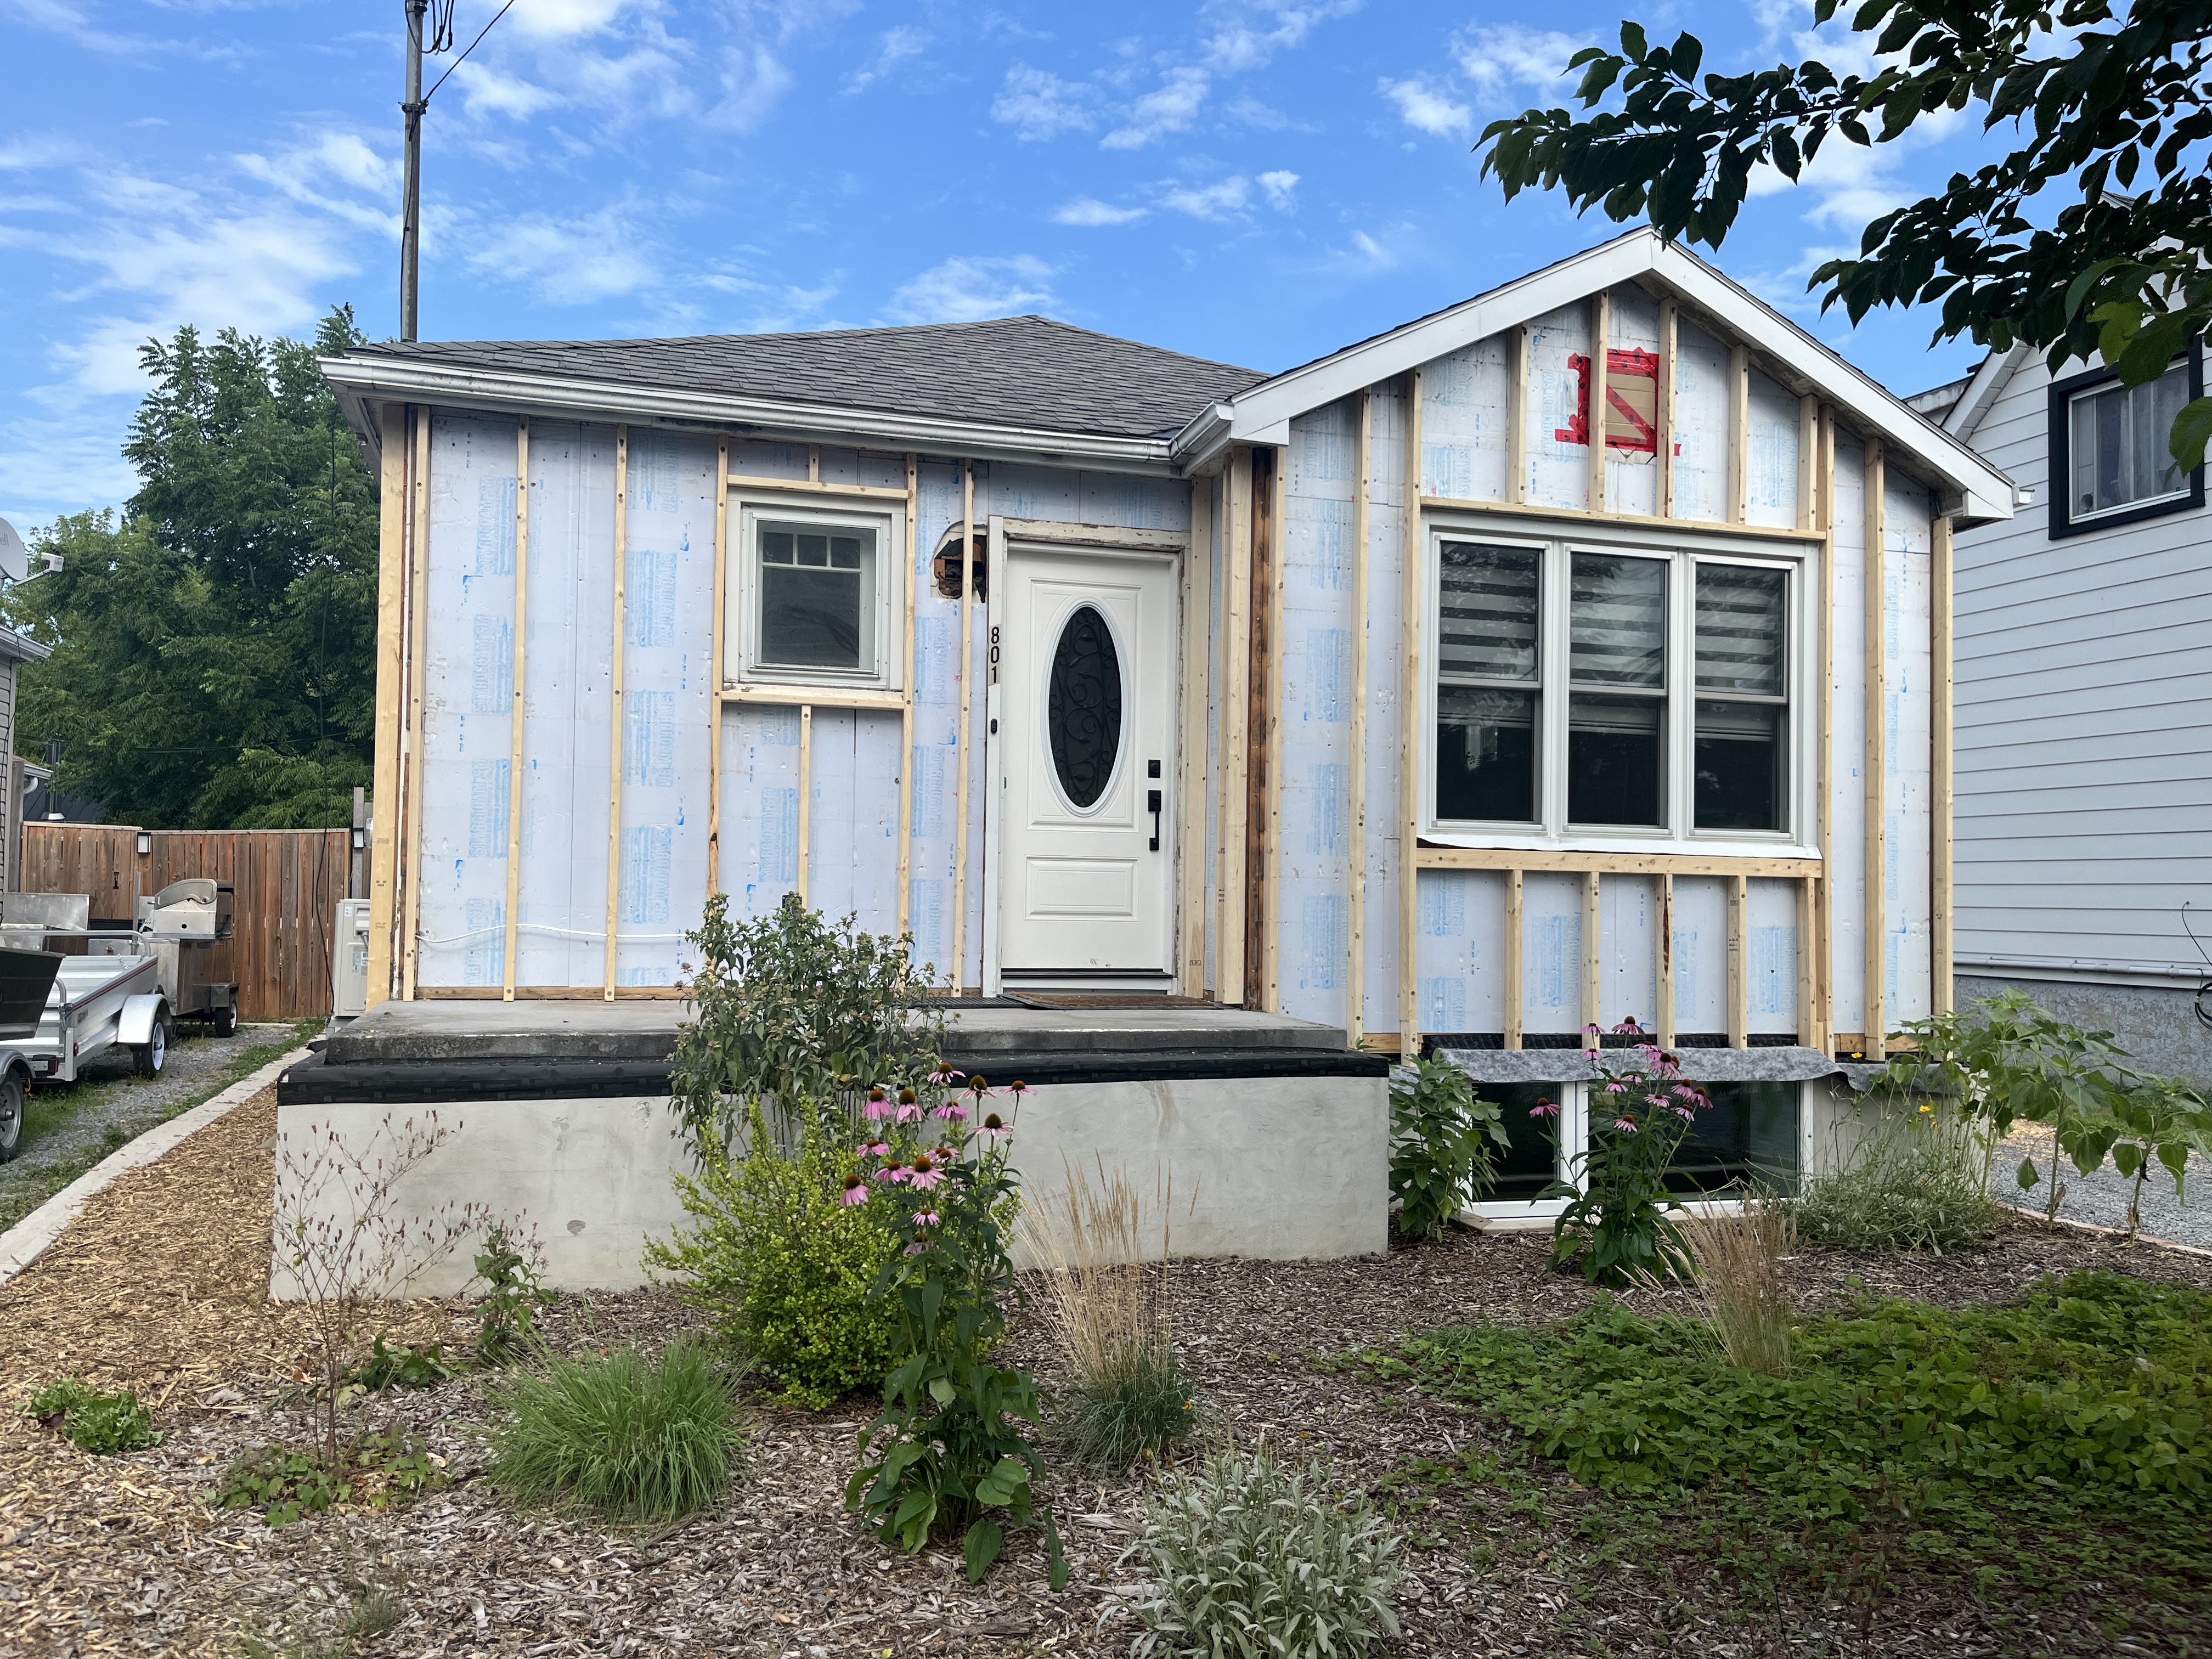
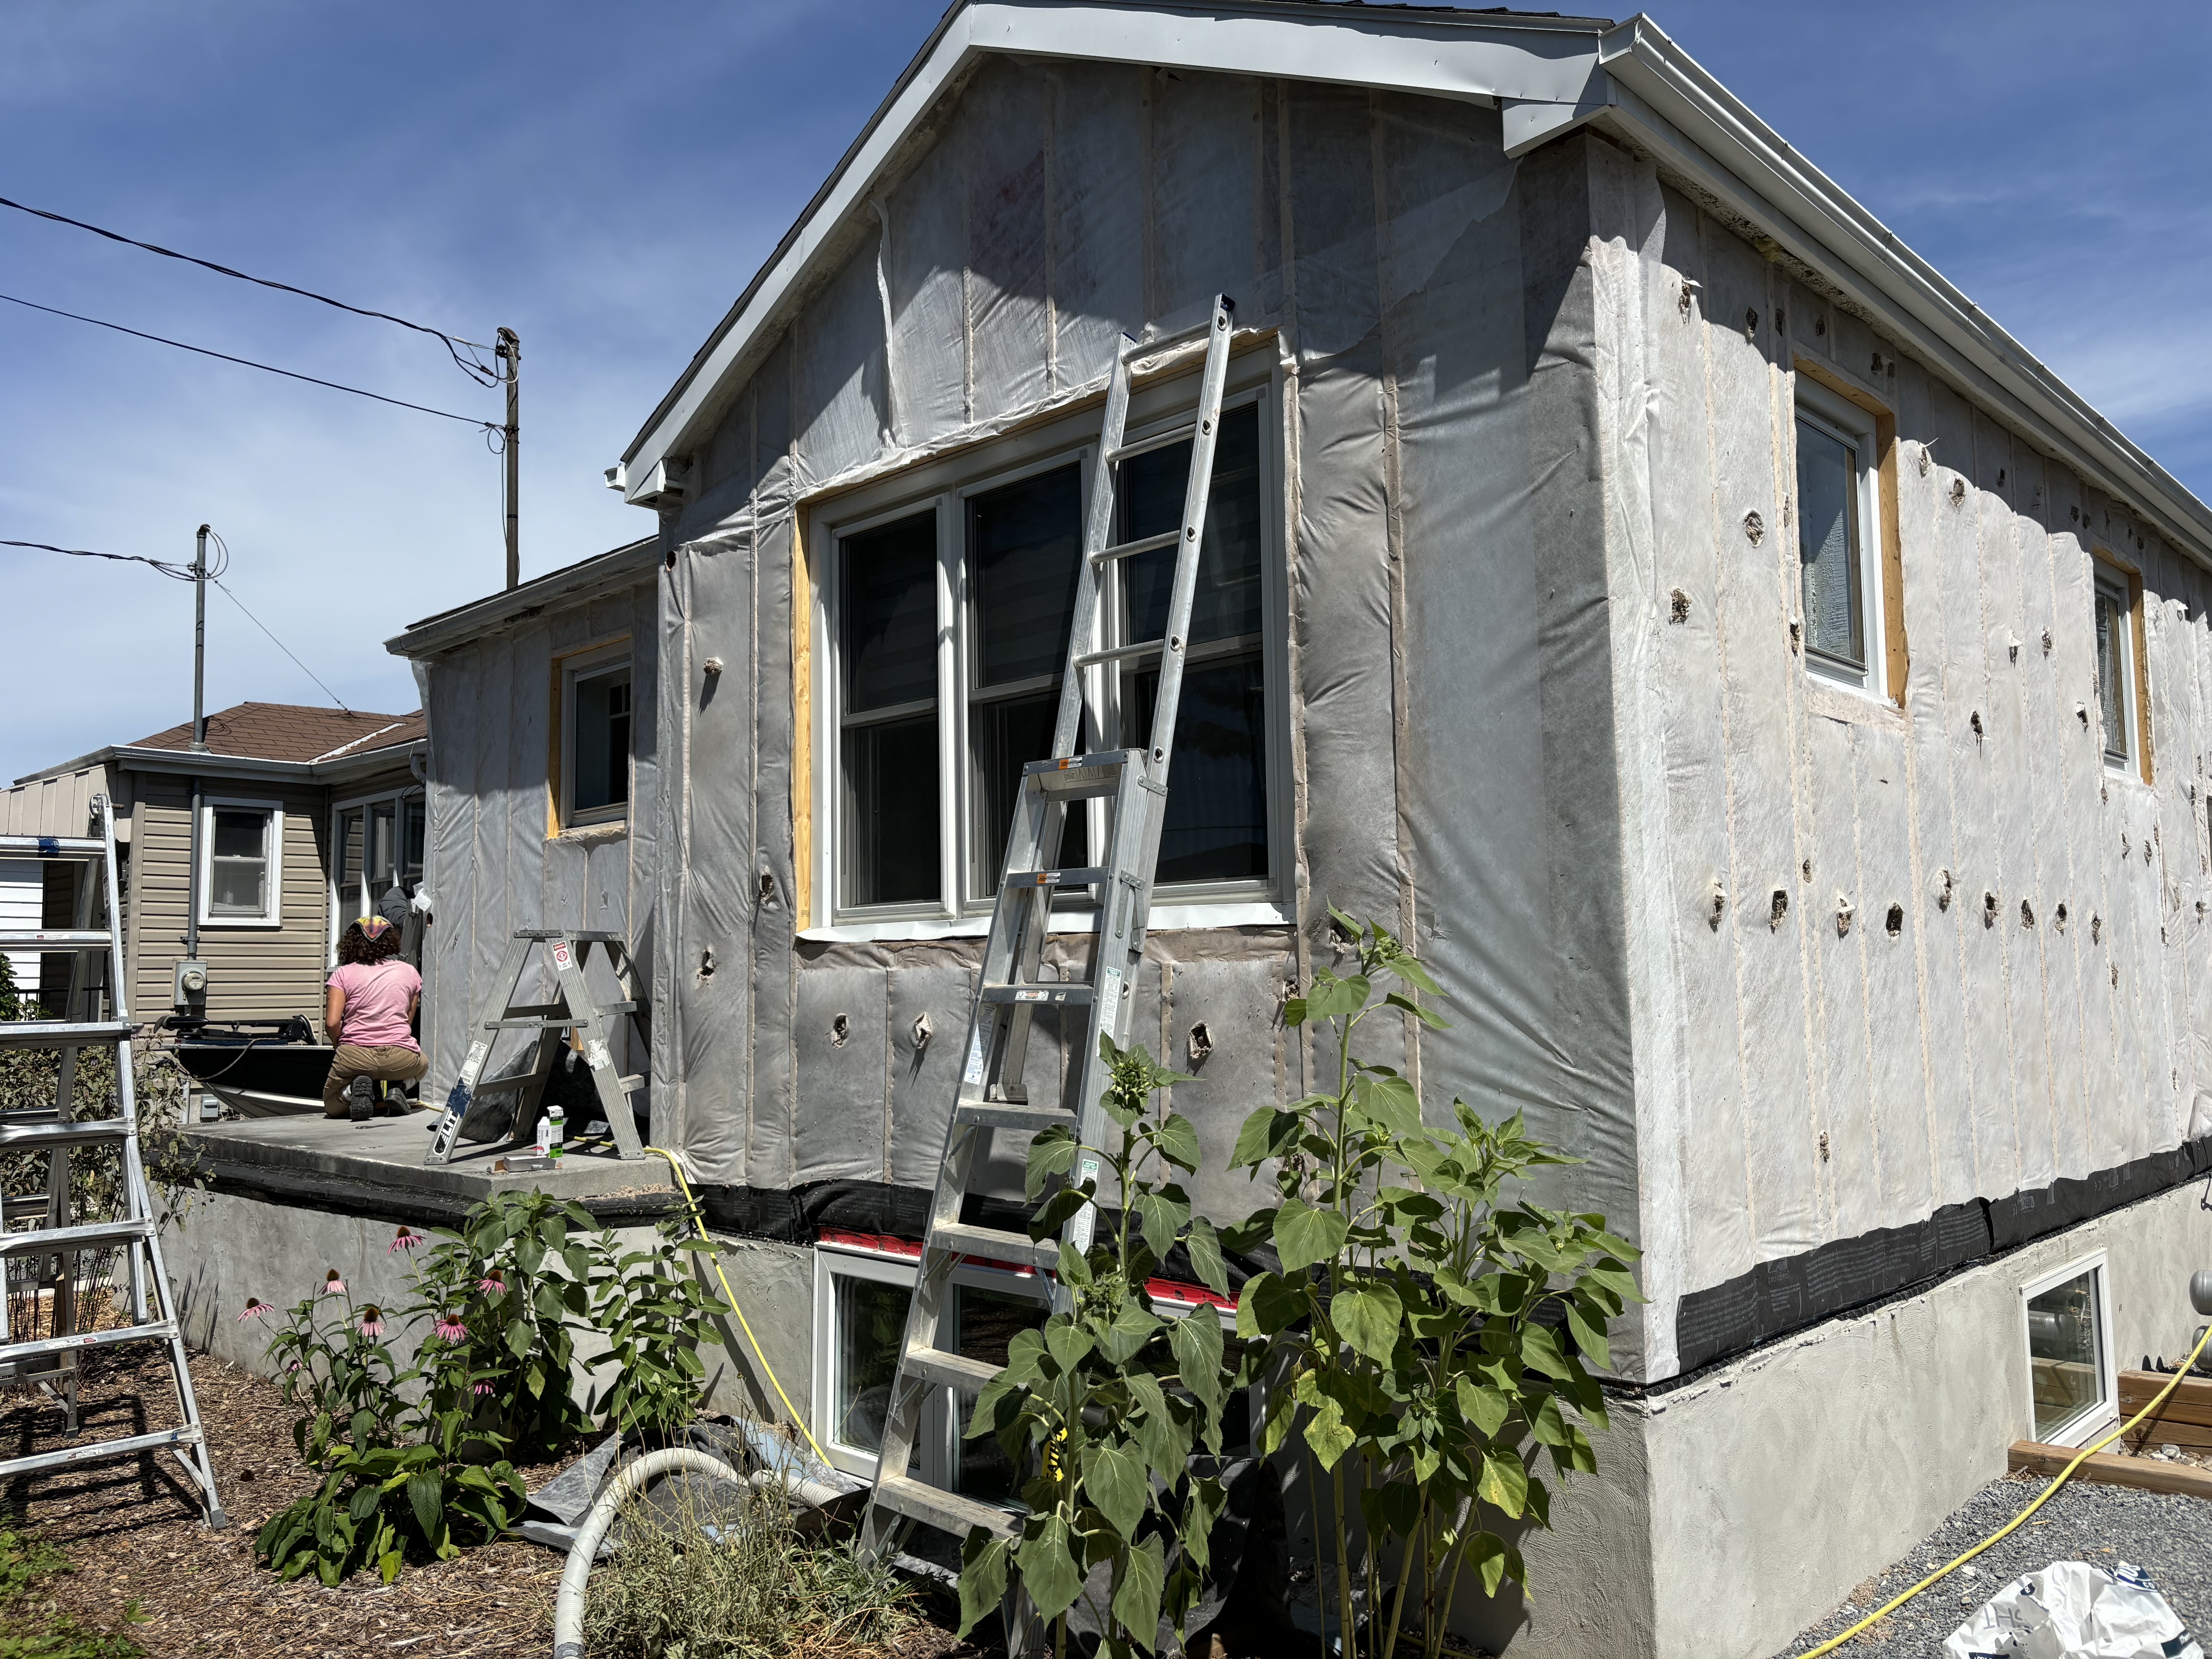
Stage 4: Main Floor Walls and Windows (Summer 2025)
Stage 4: Goals and priorities
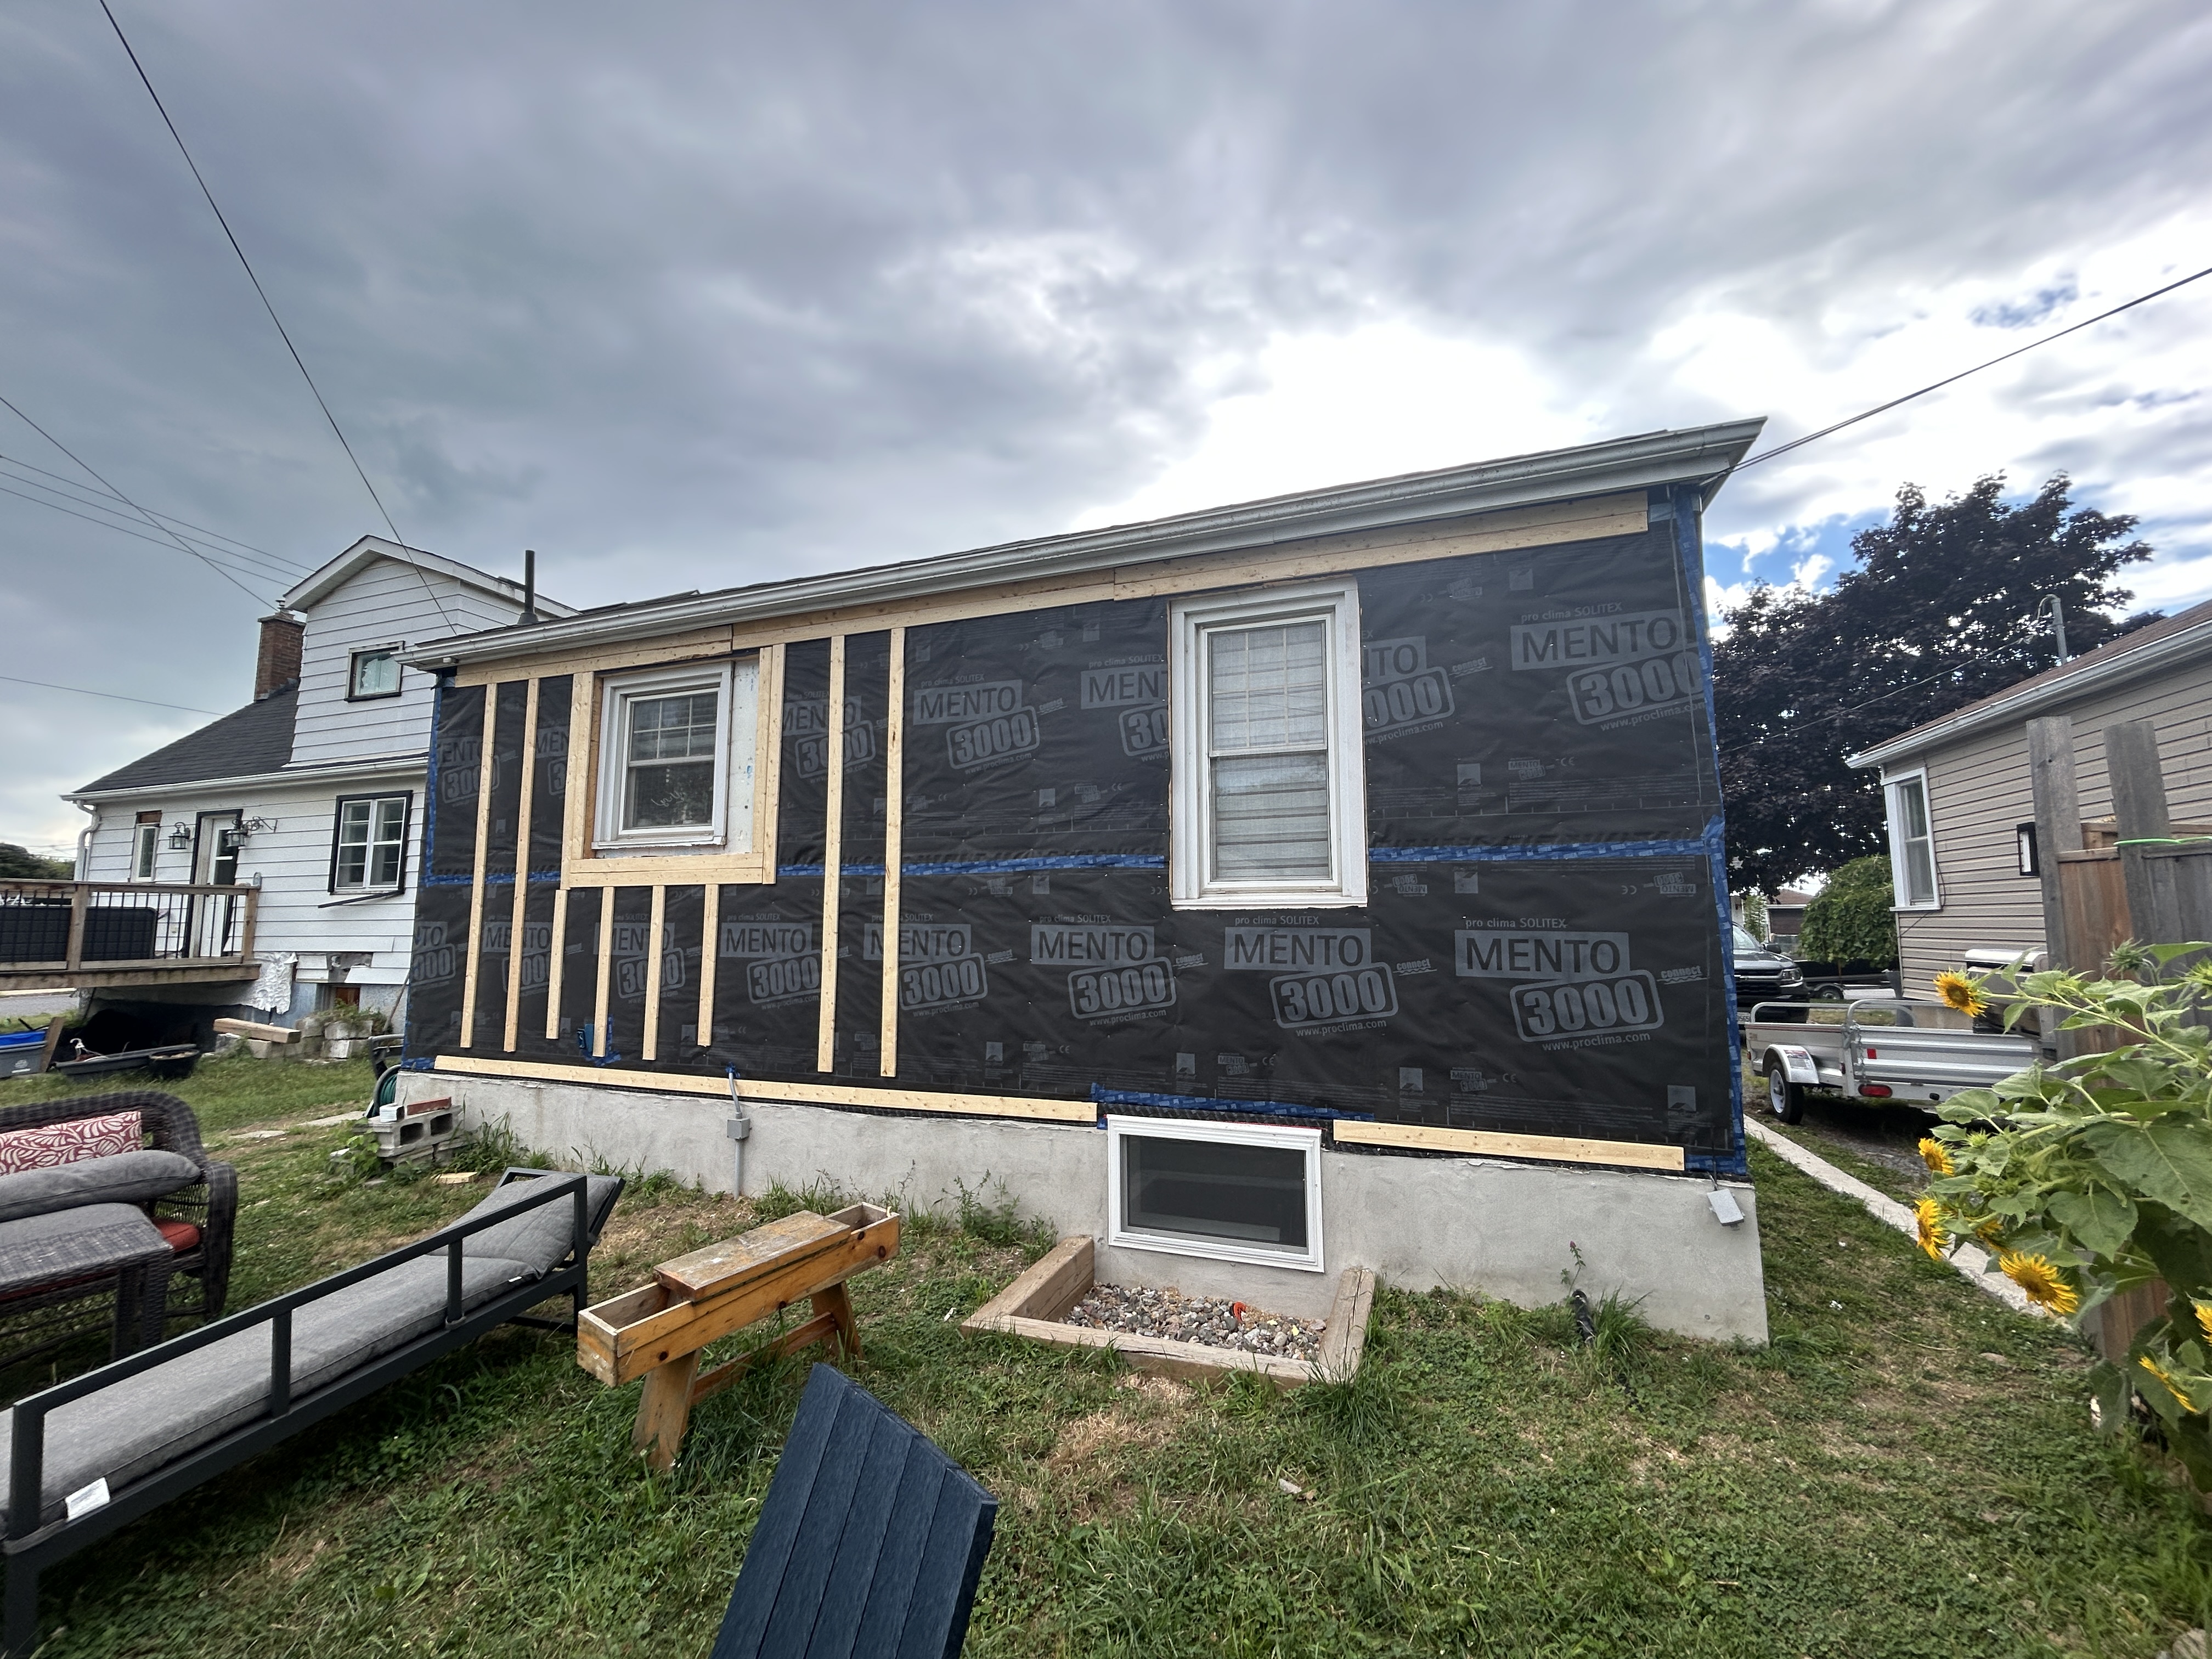
Our main goal with this phase was to complete the air sealing and insulation of the building envelope by tying into the attic and basement air sealing done in 2023 and 2024.
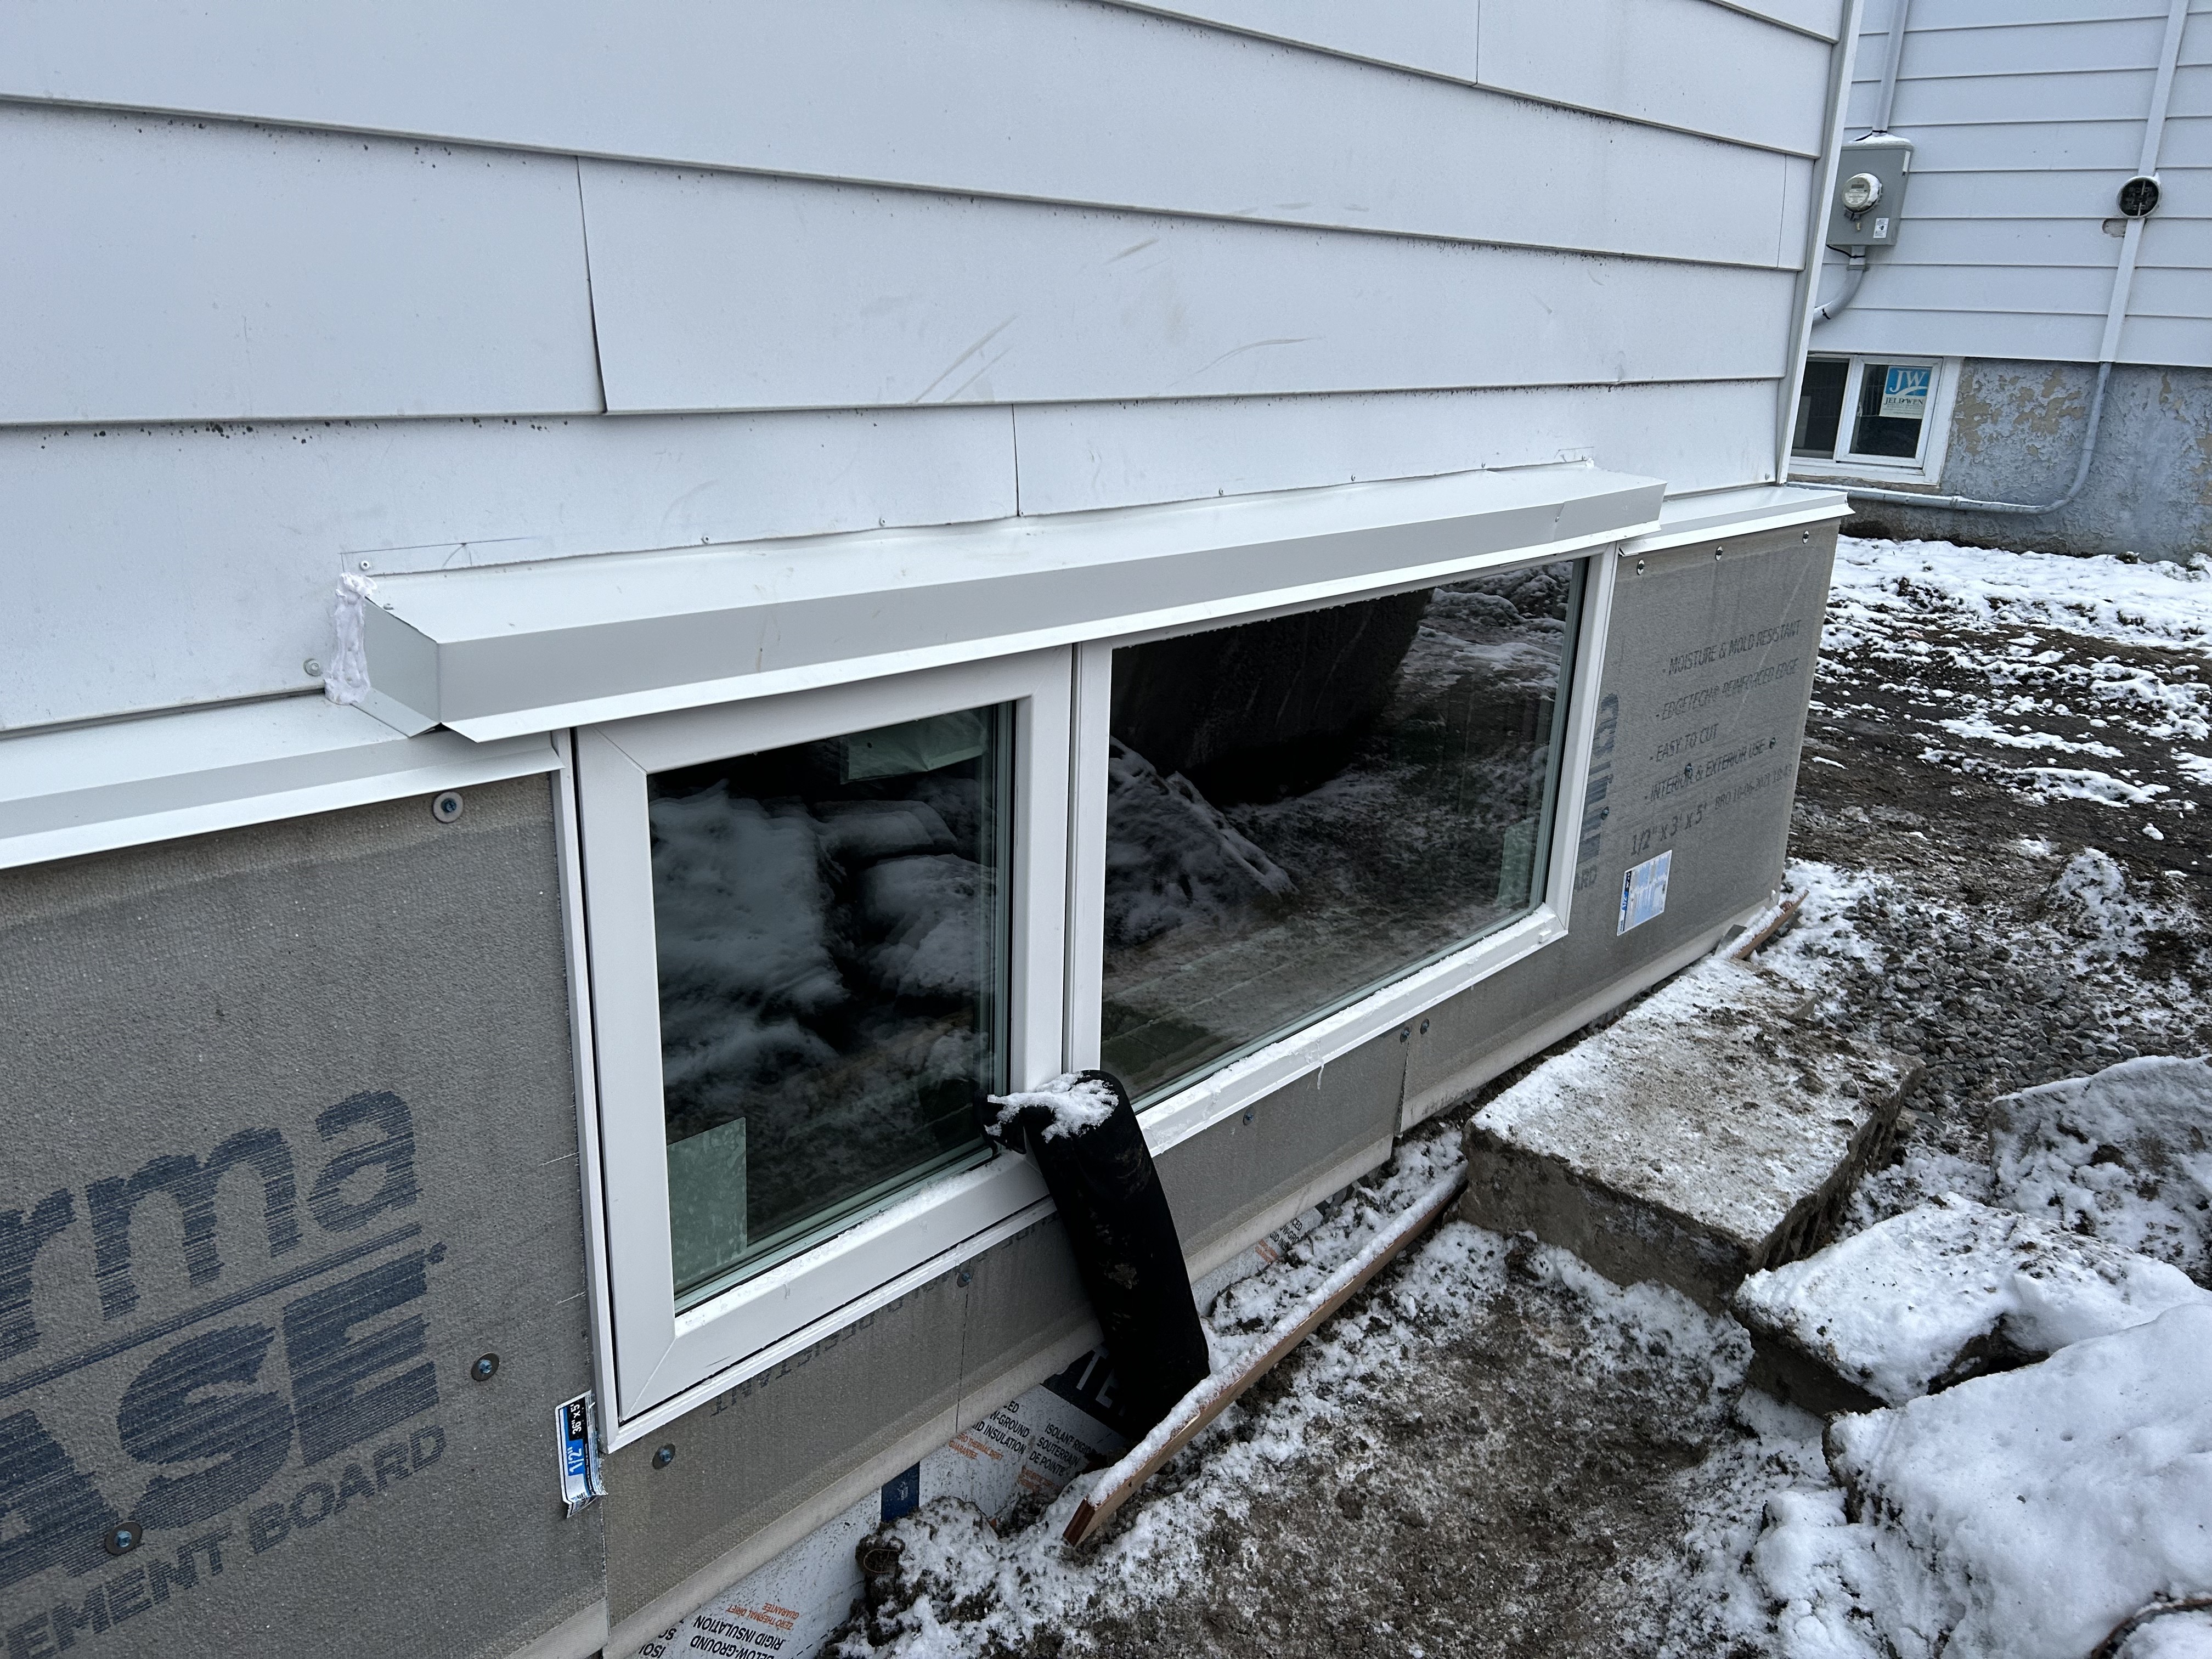
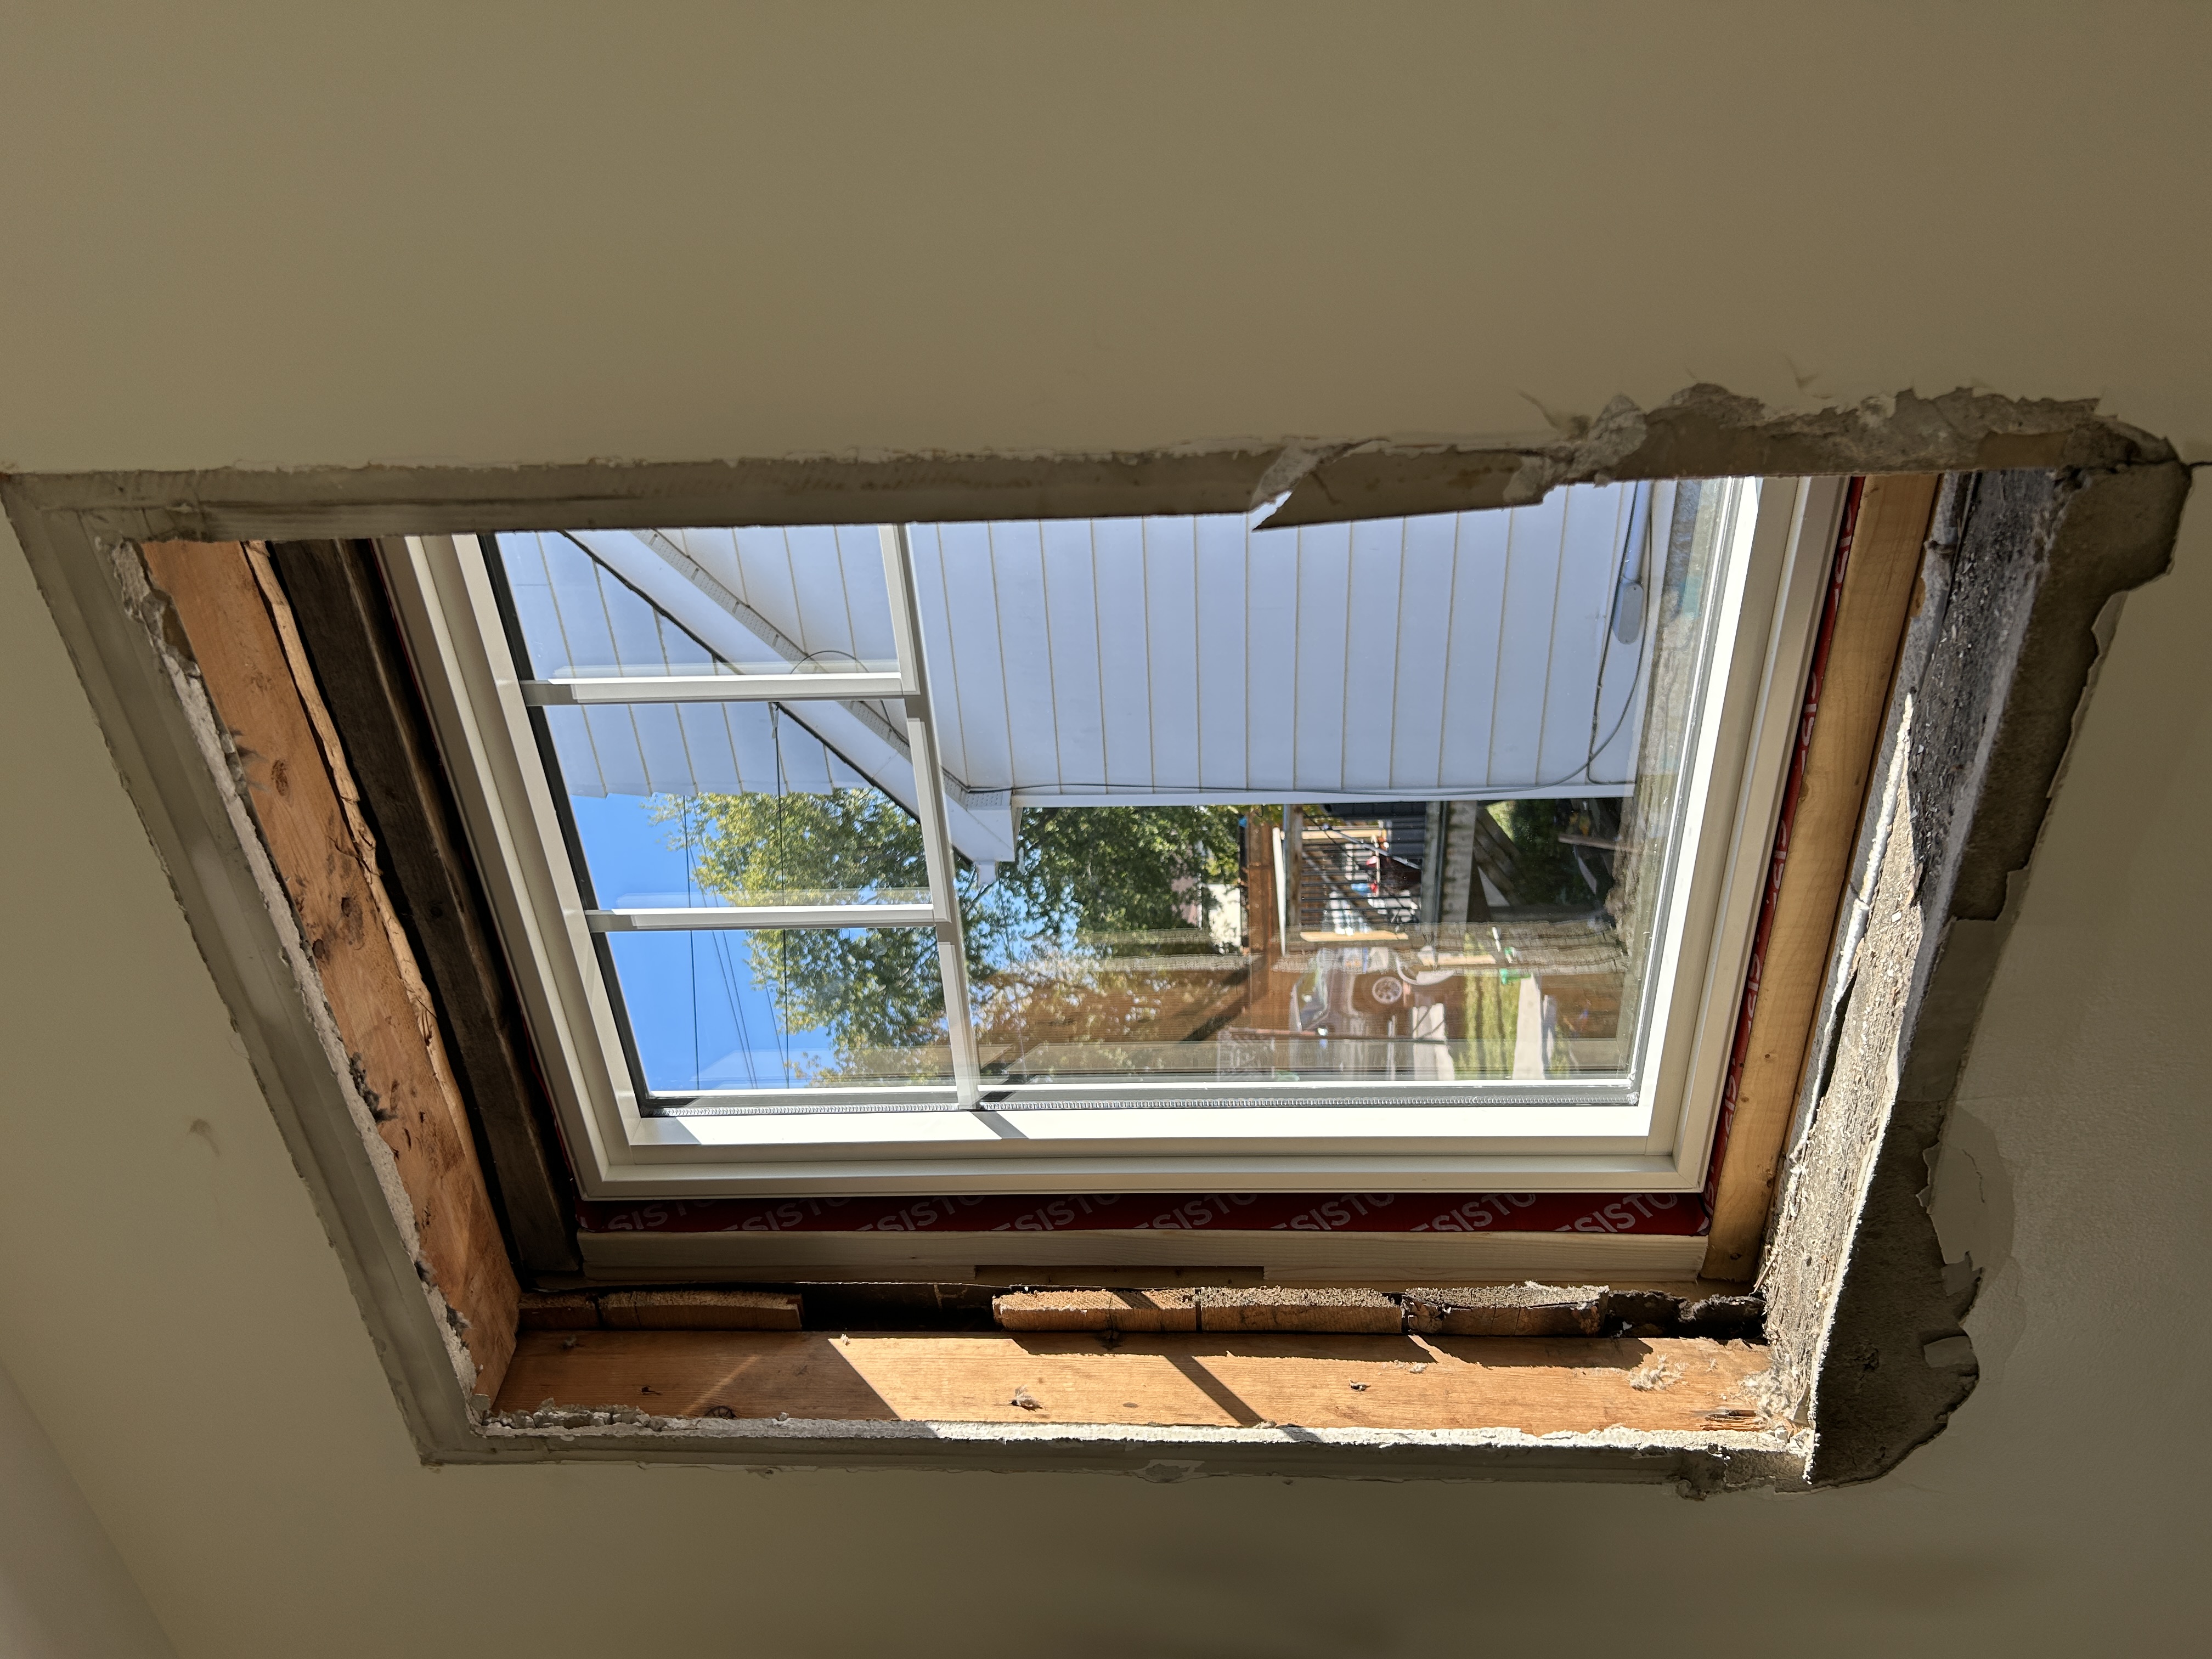
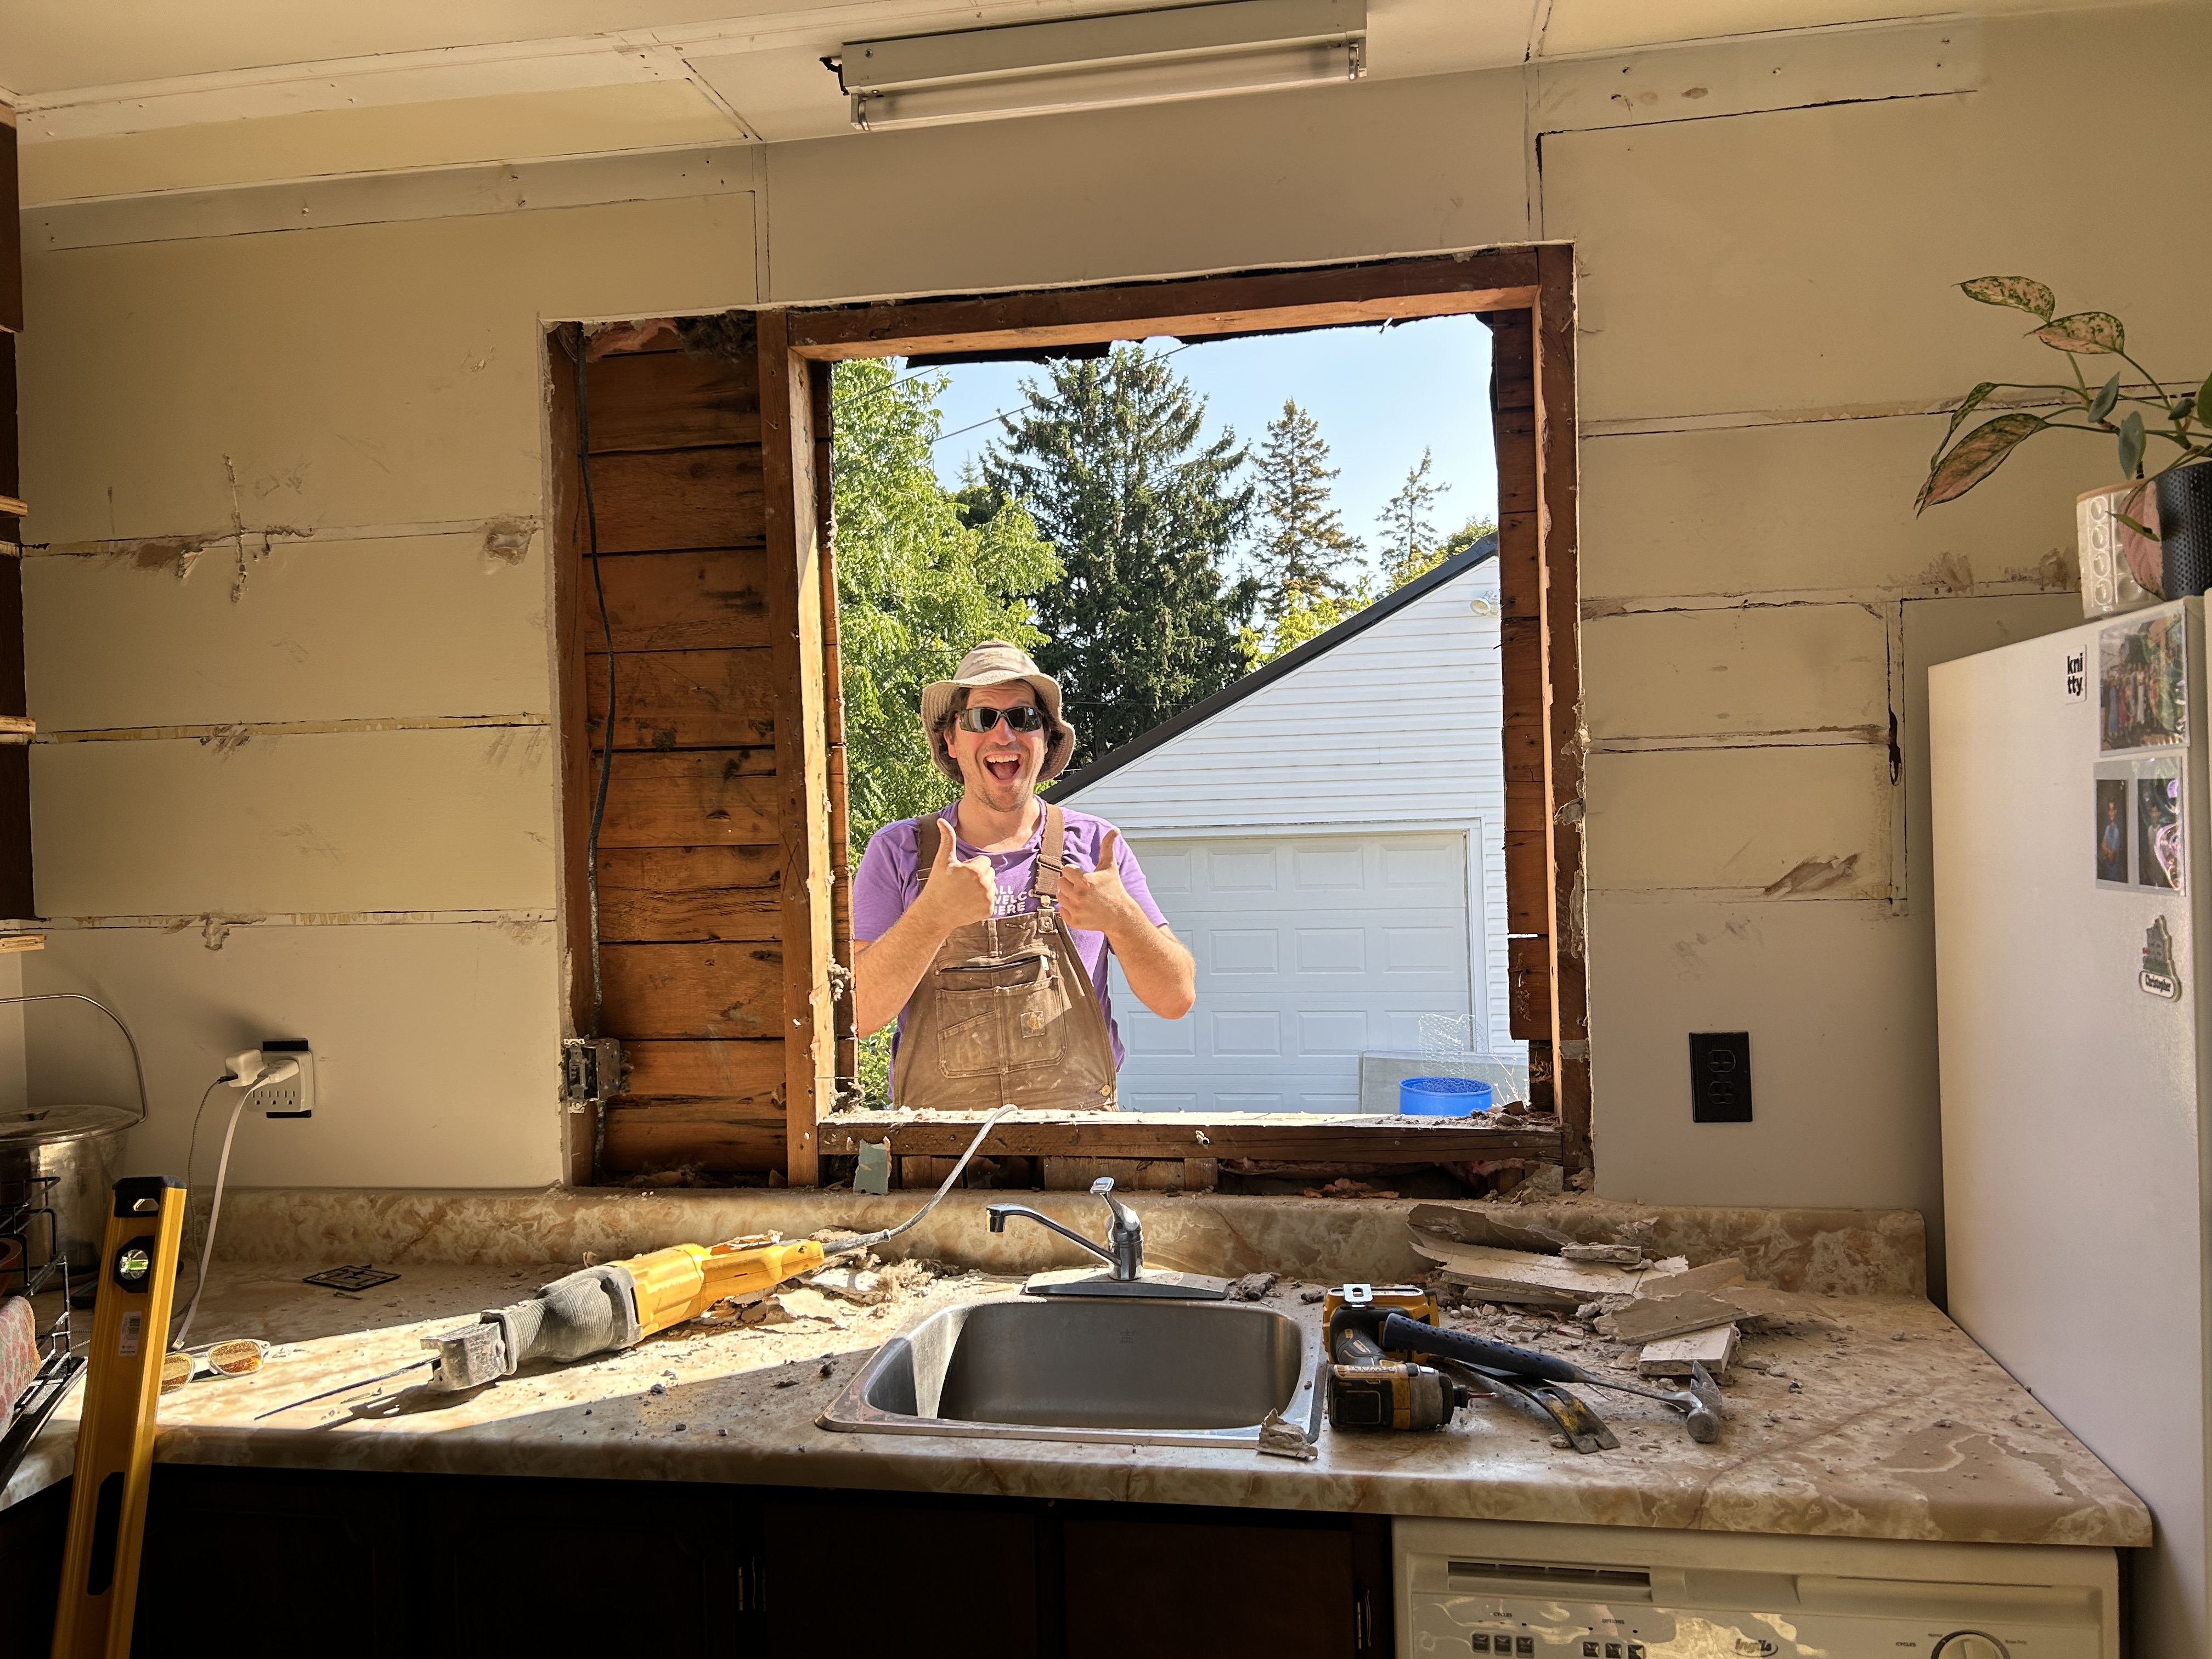
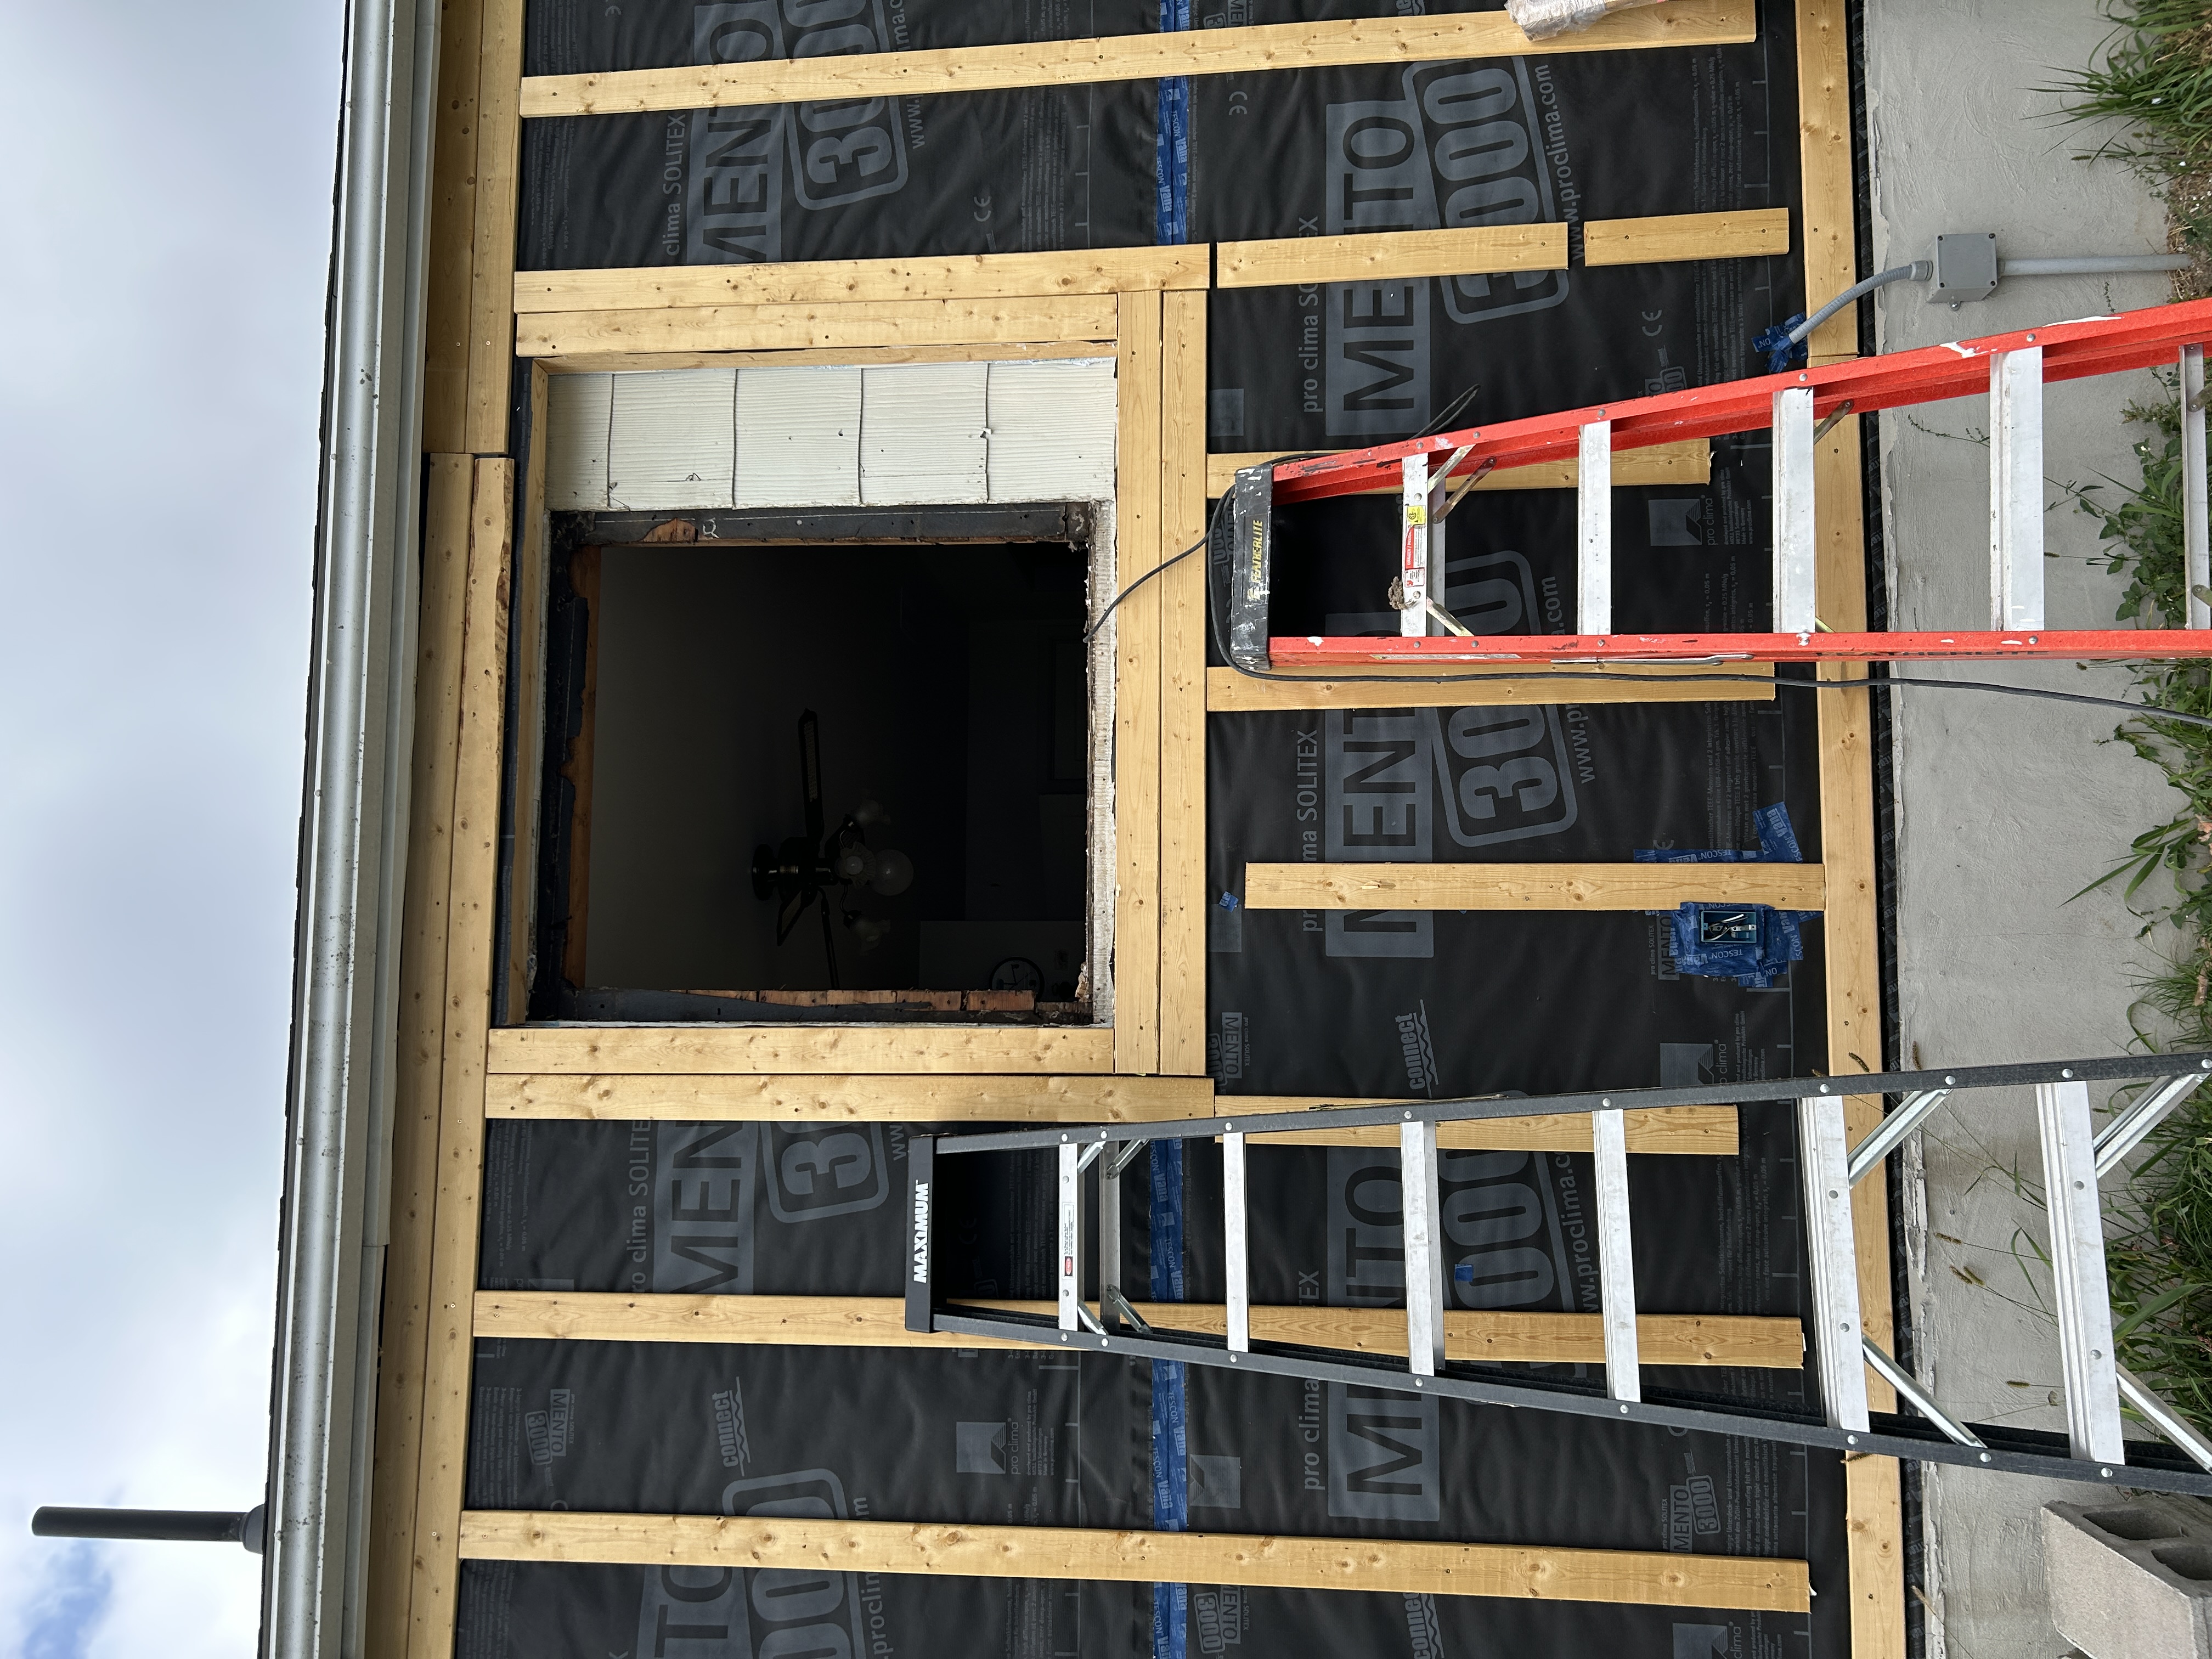
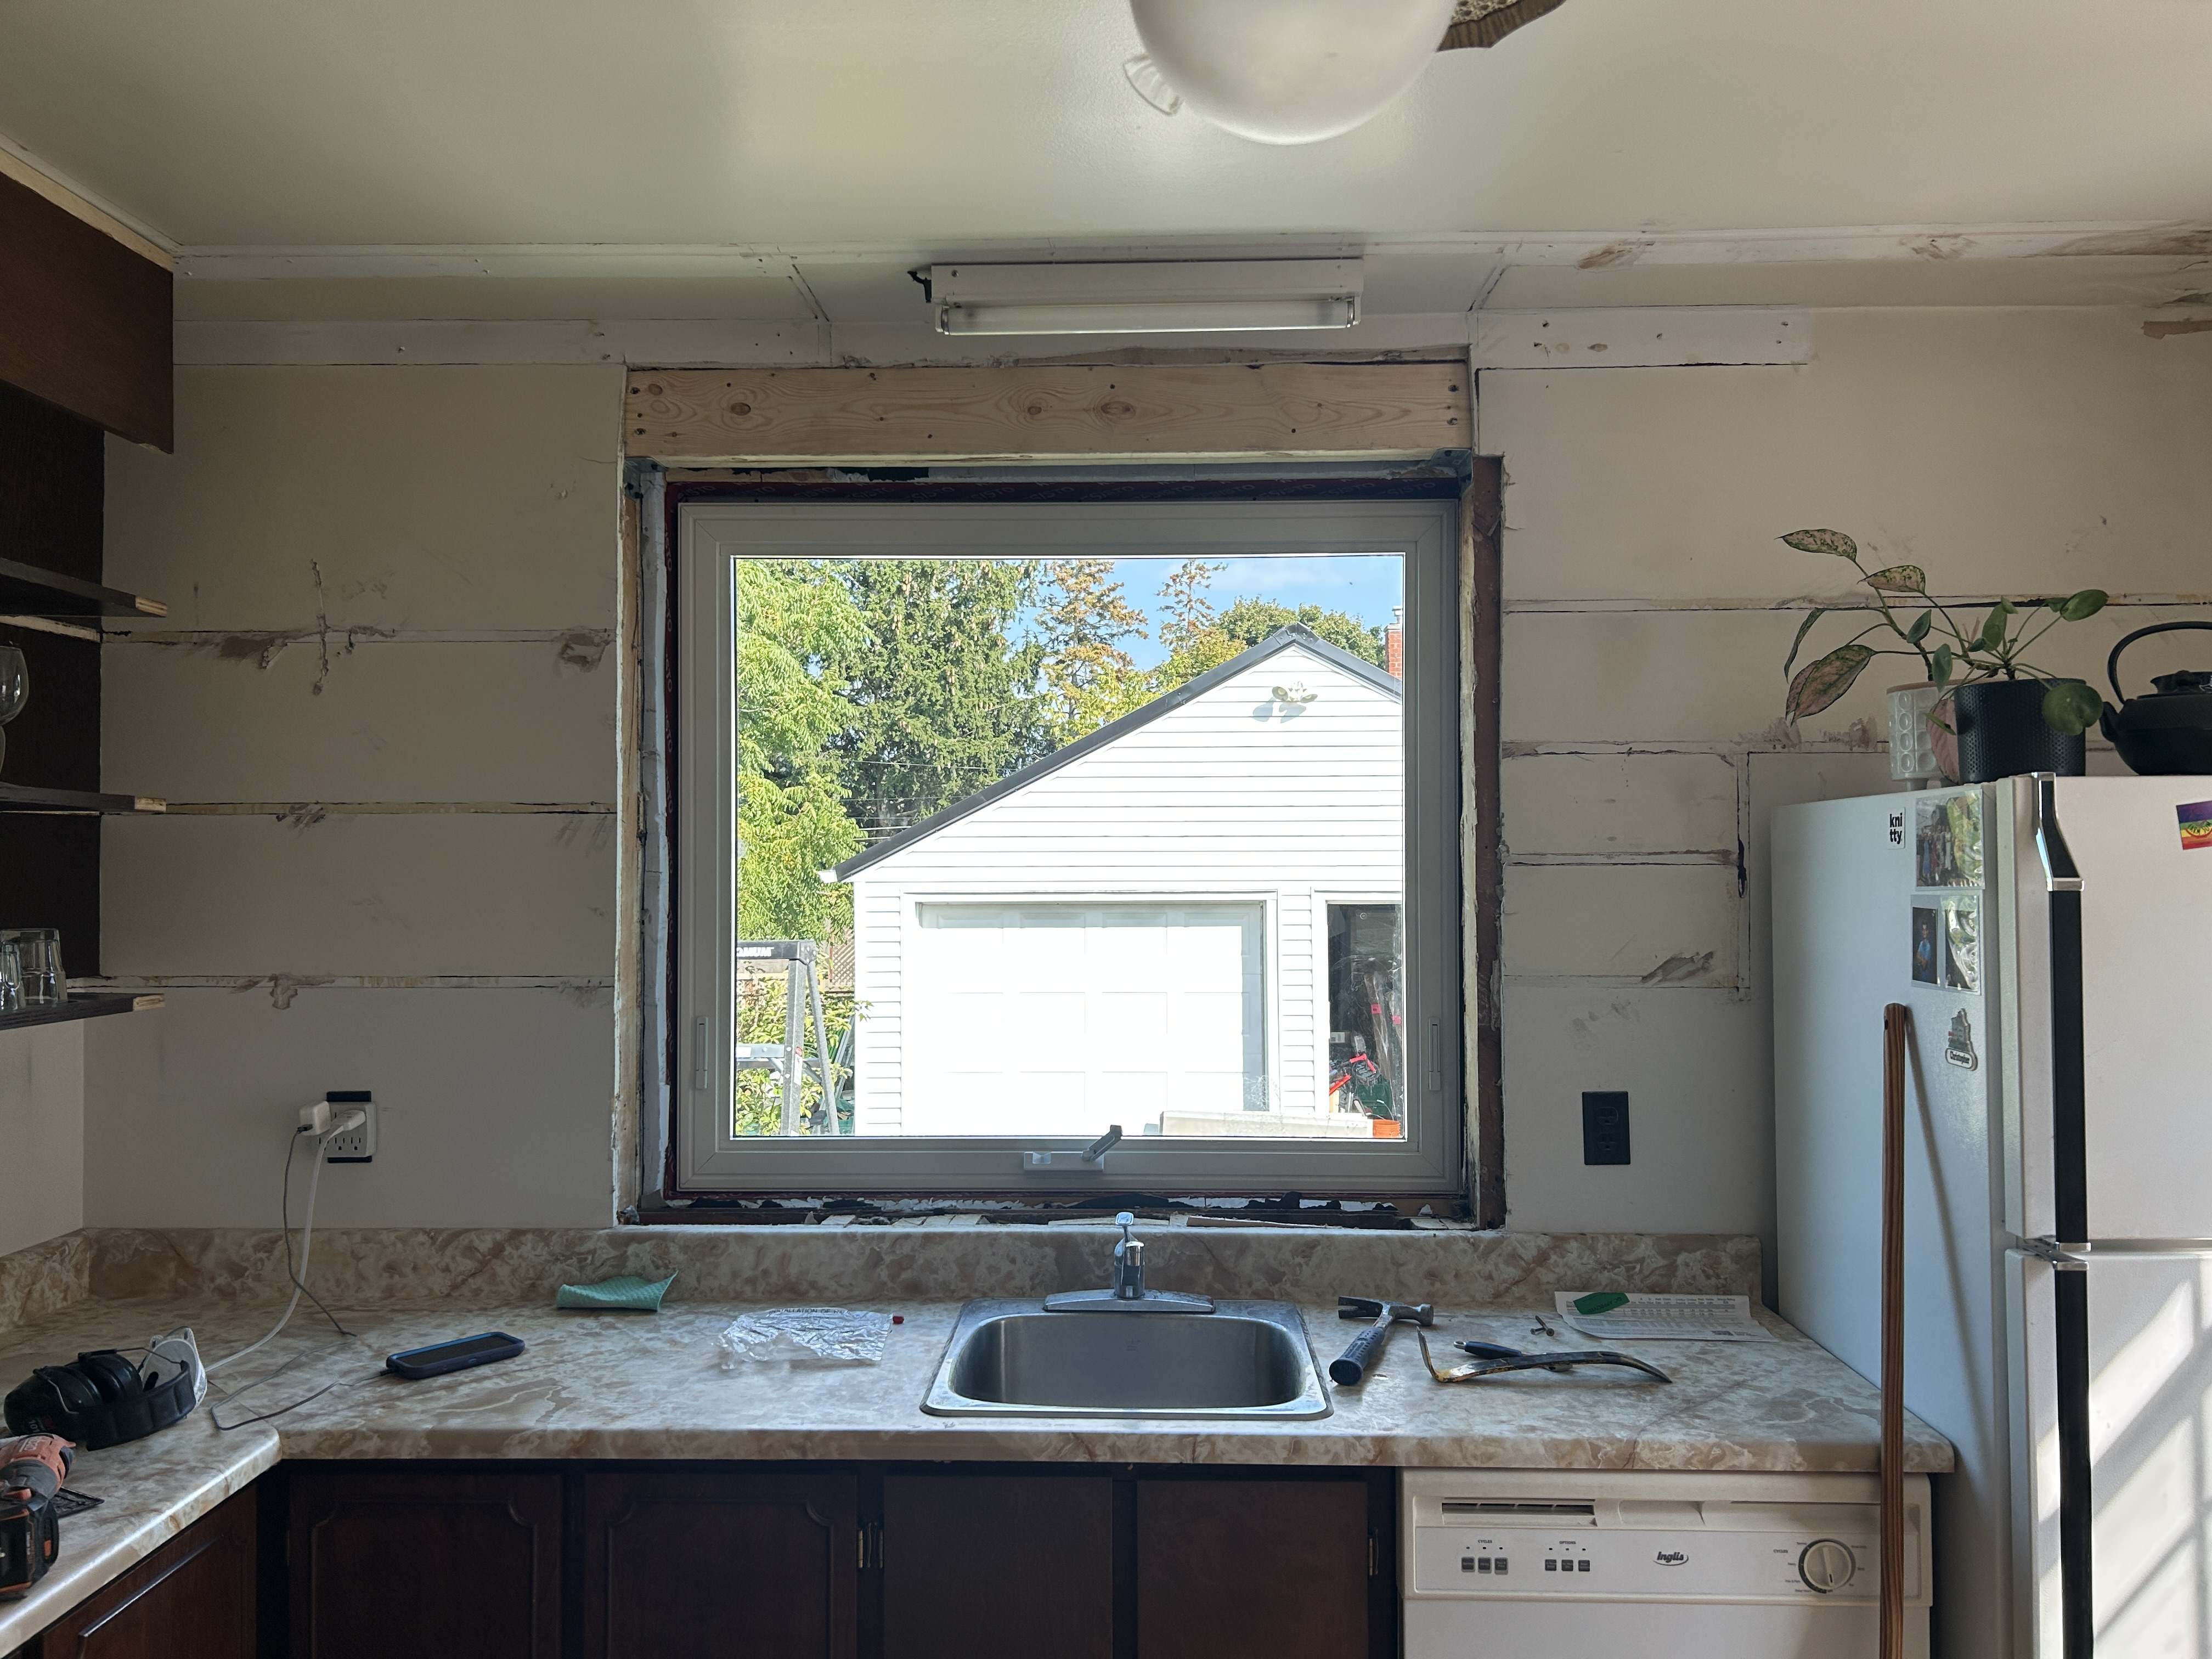
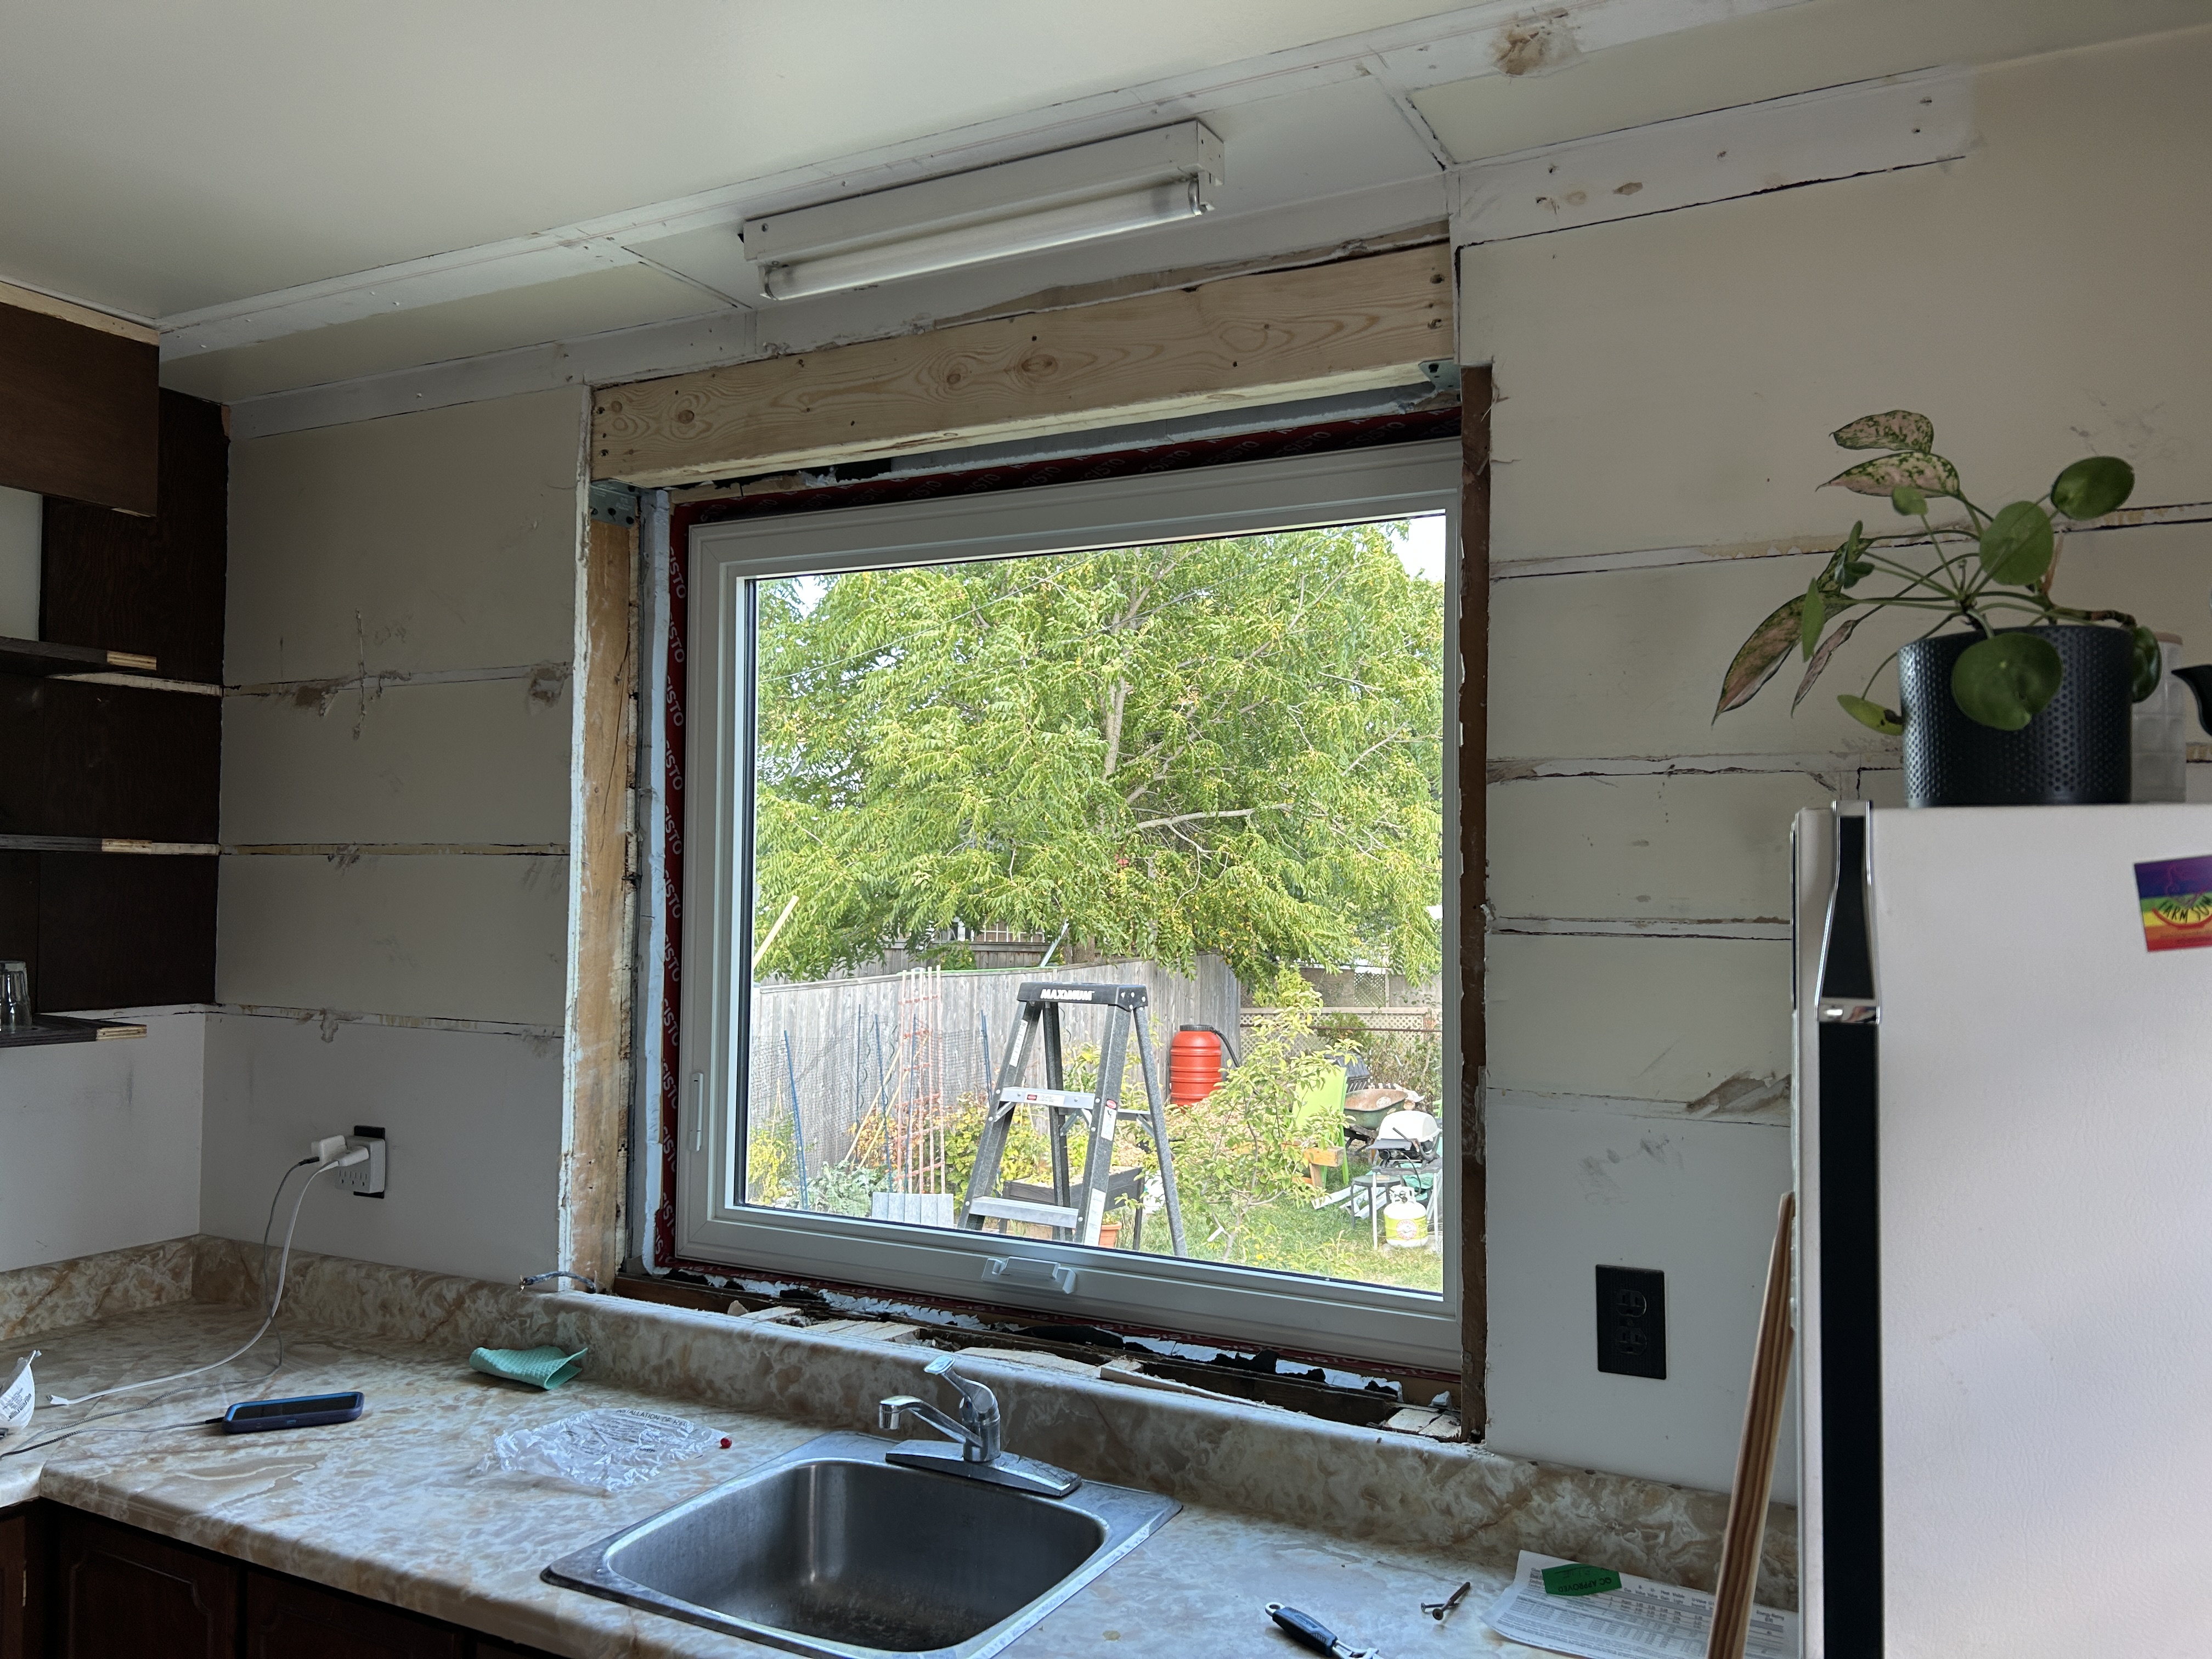
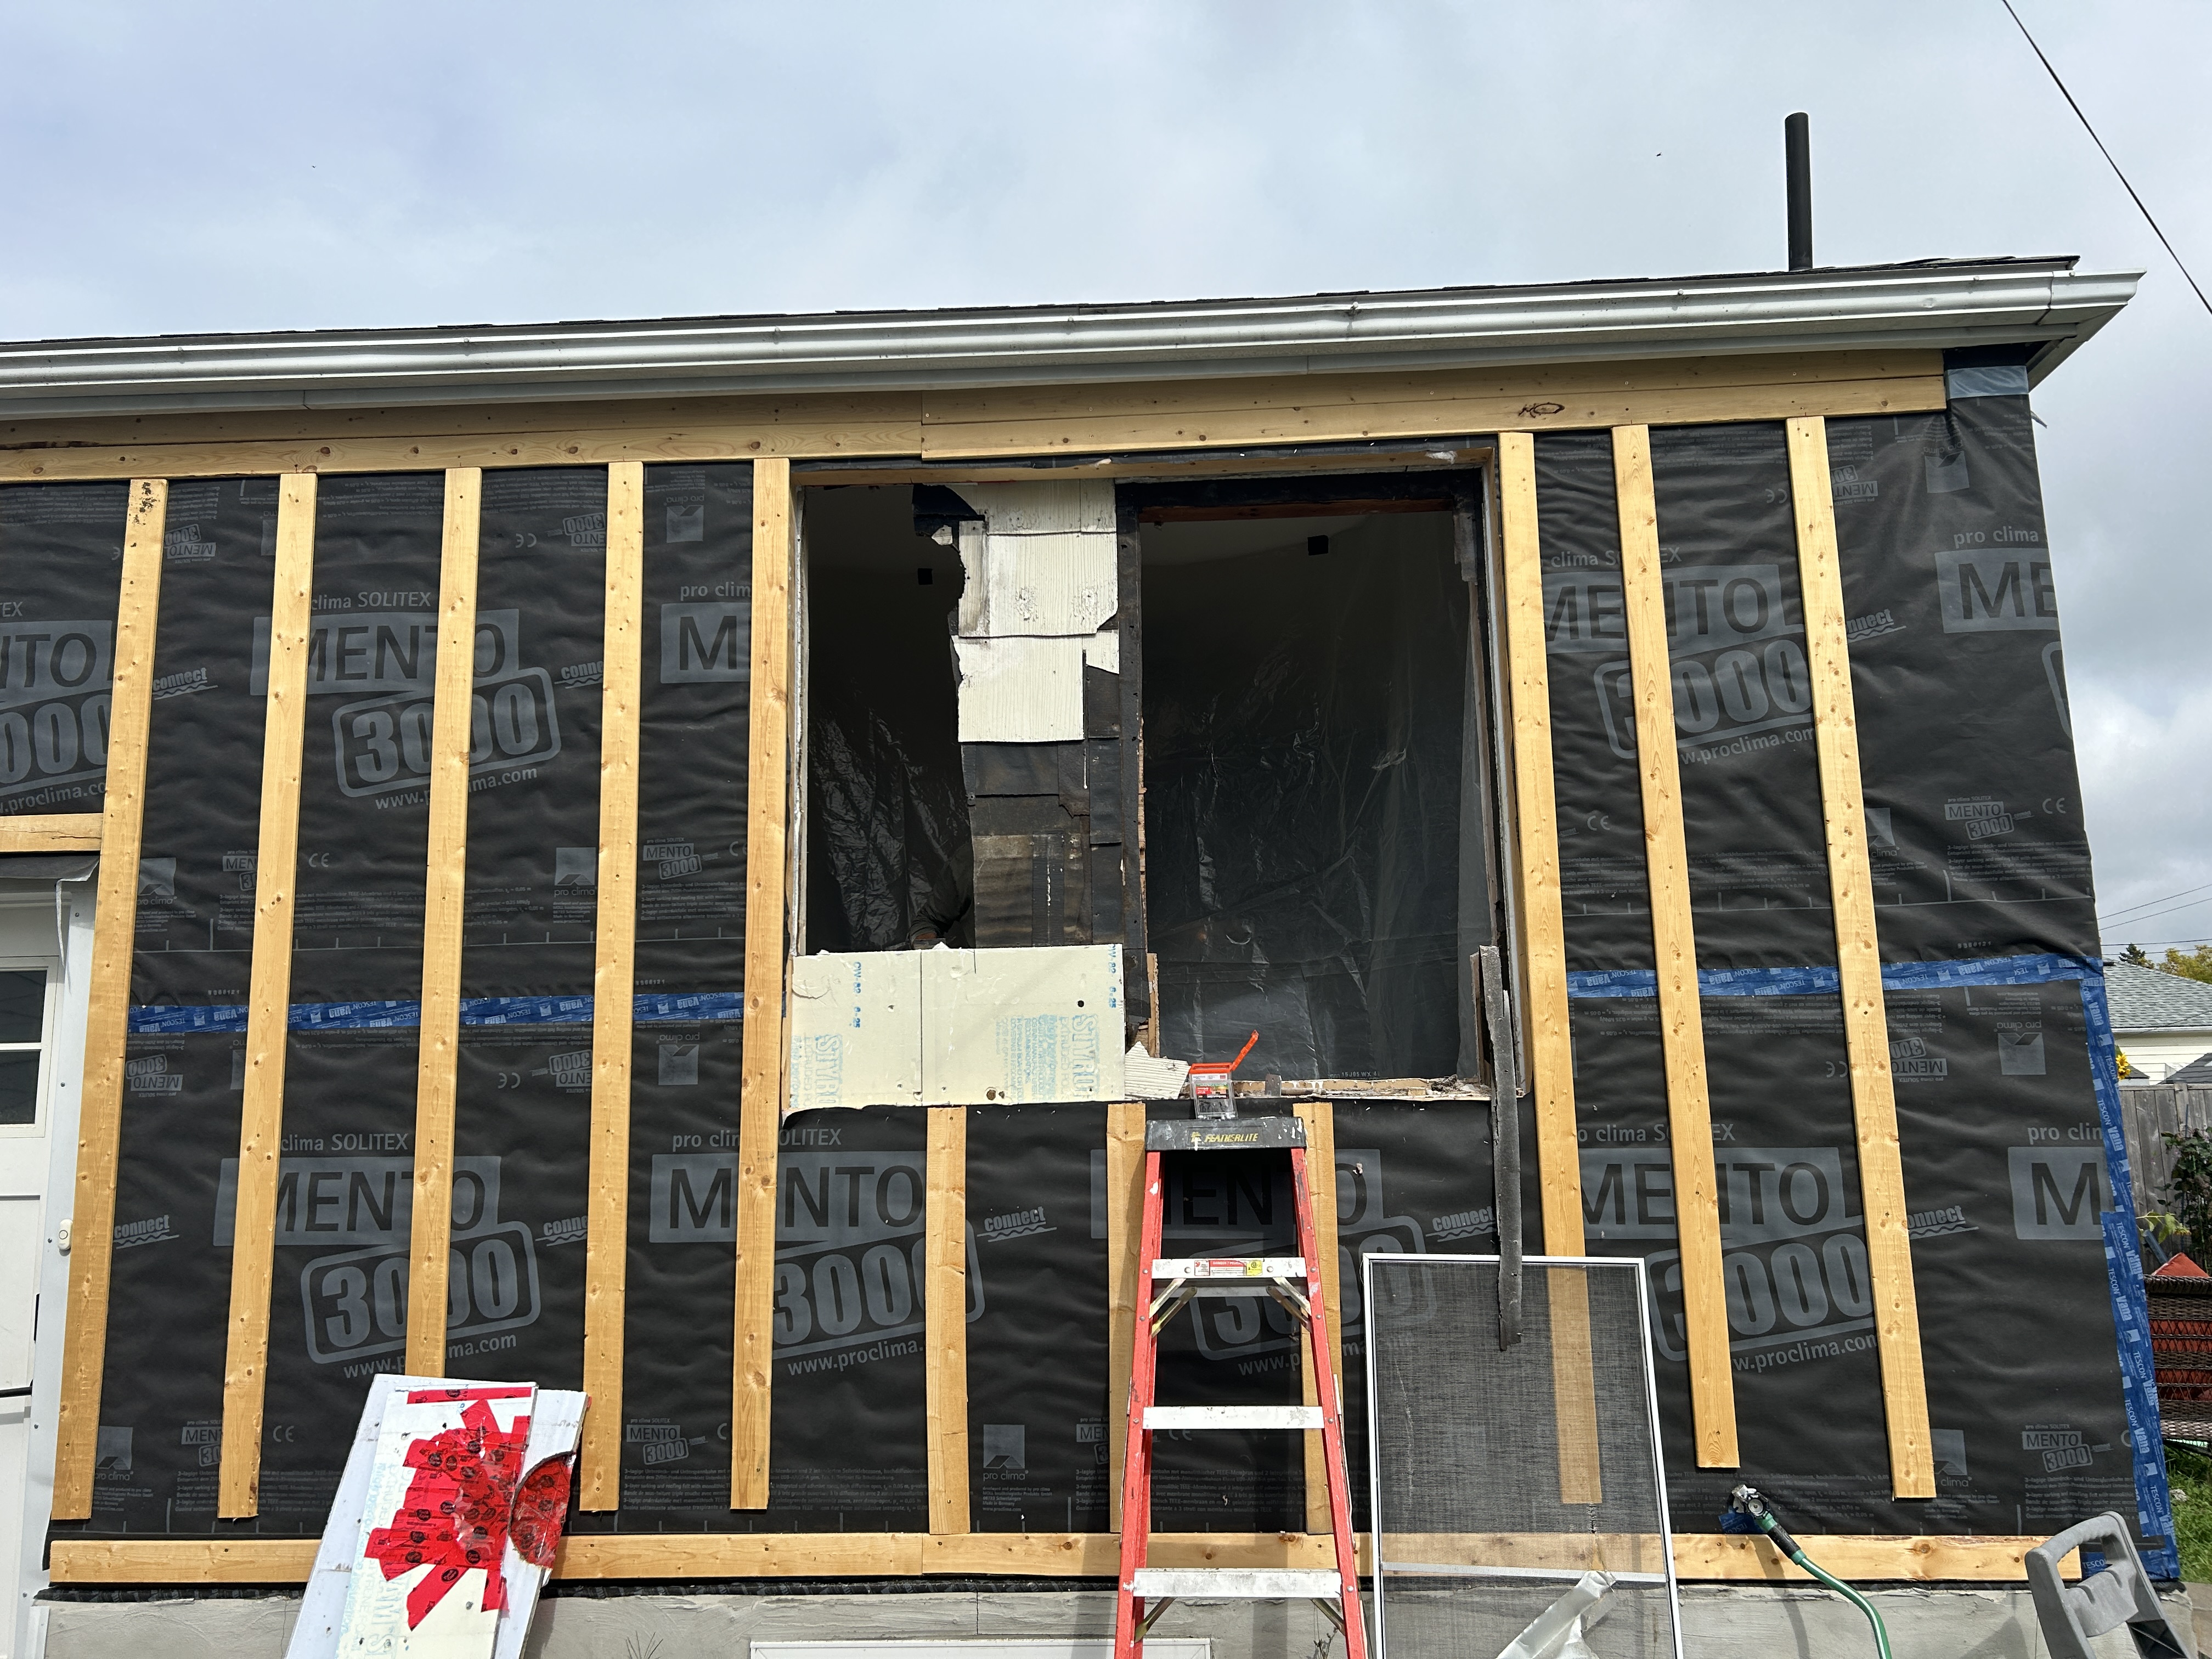
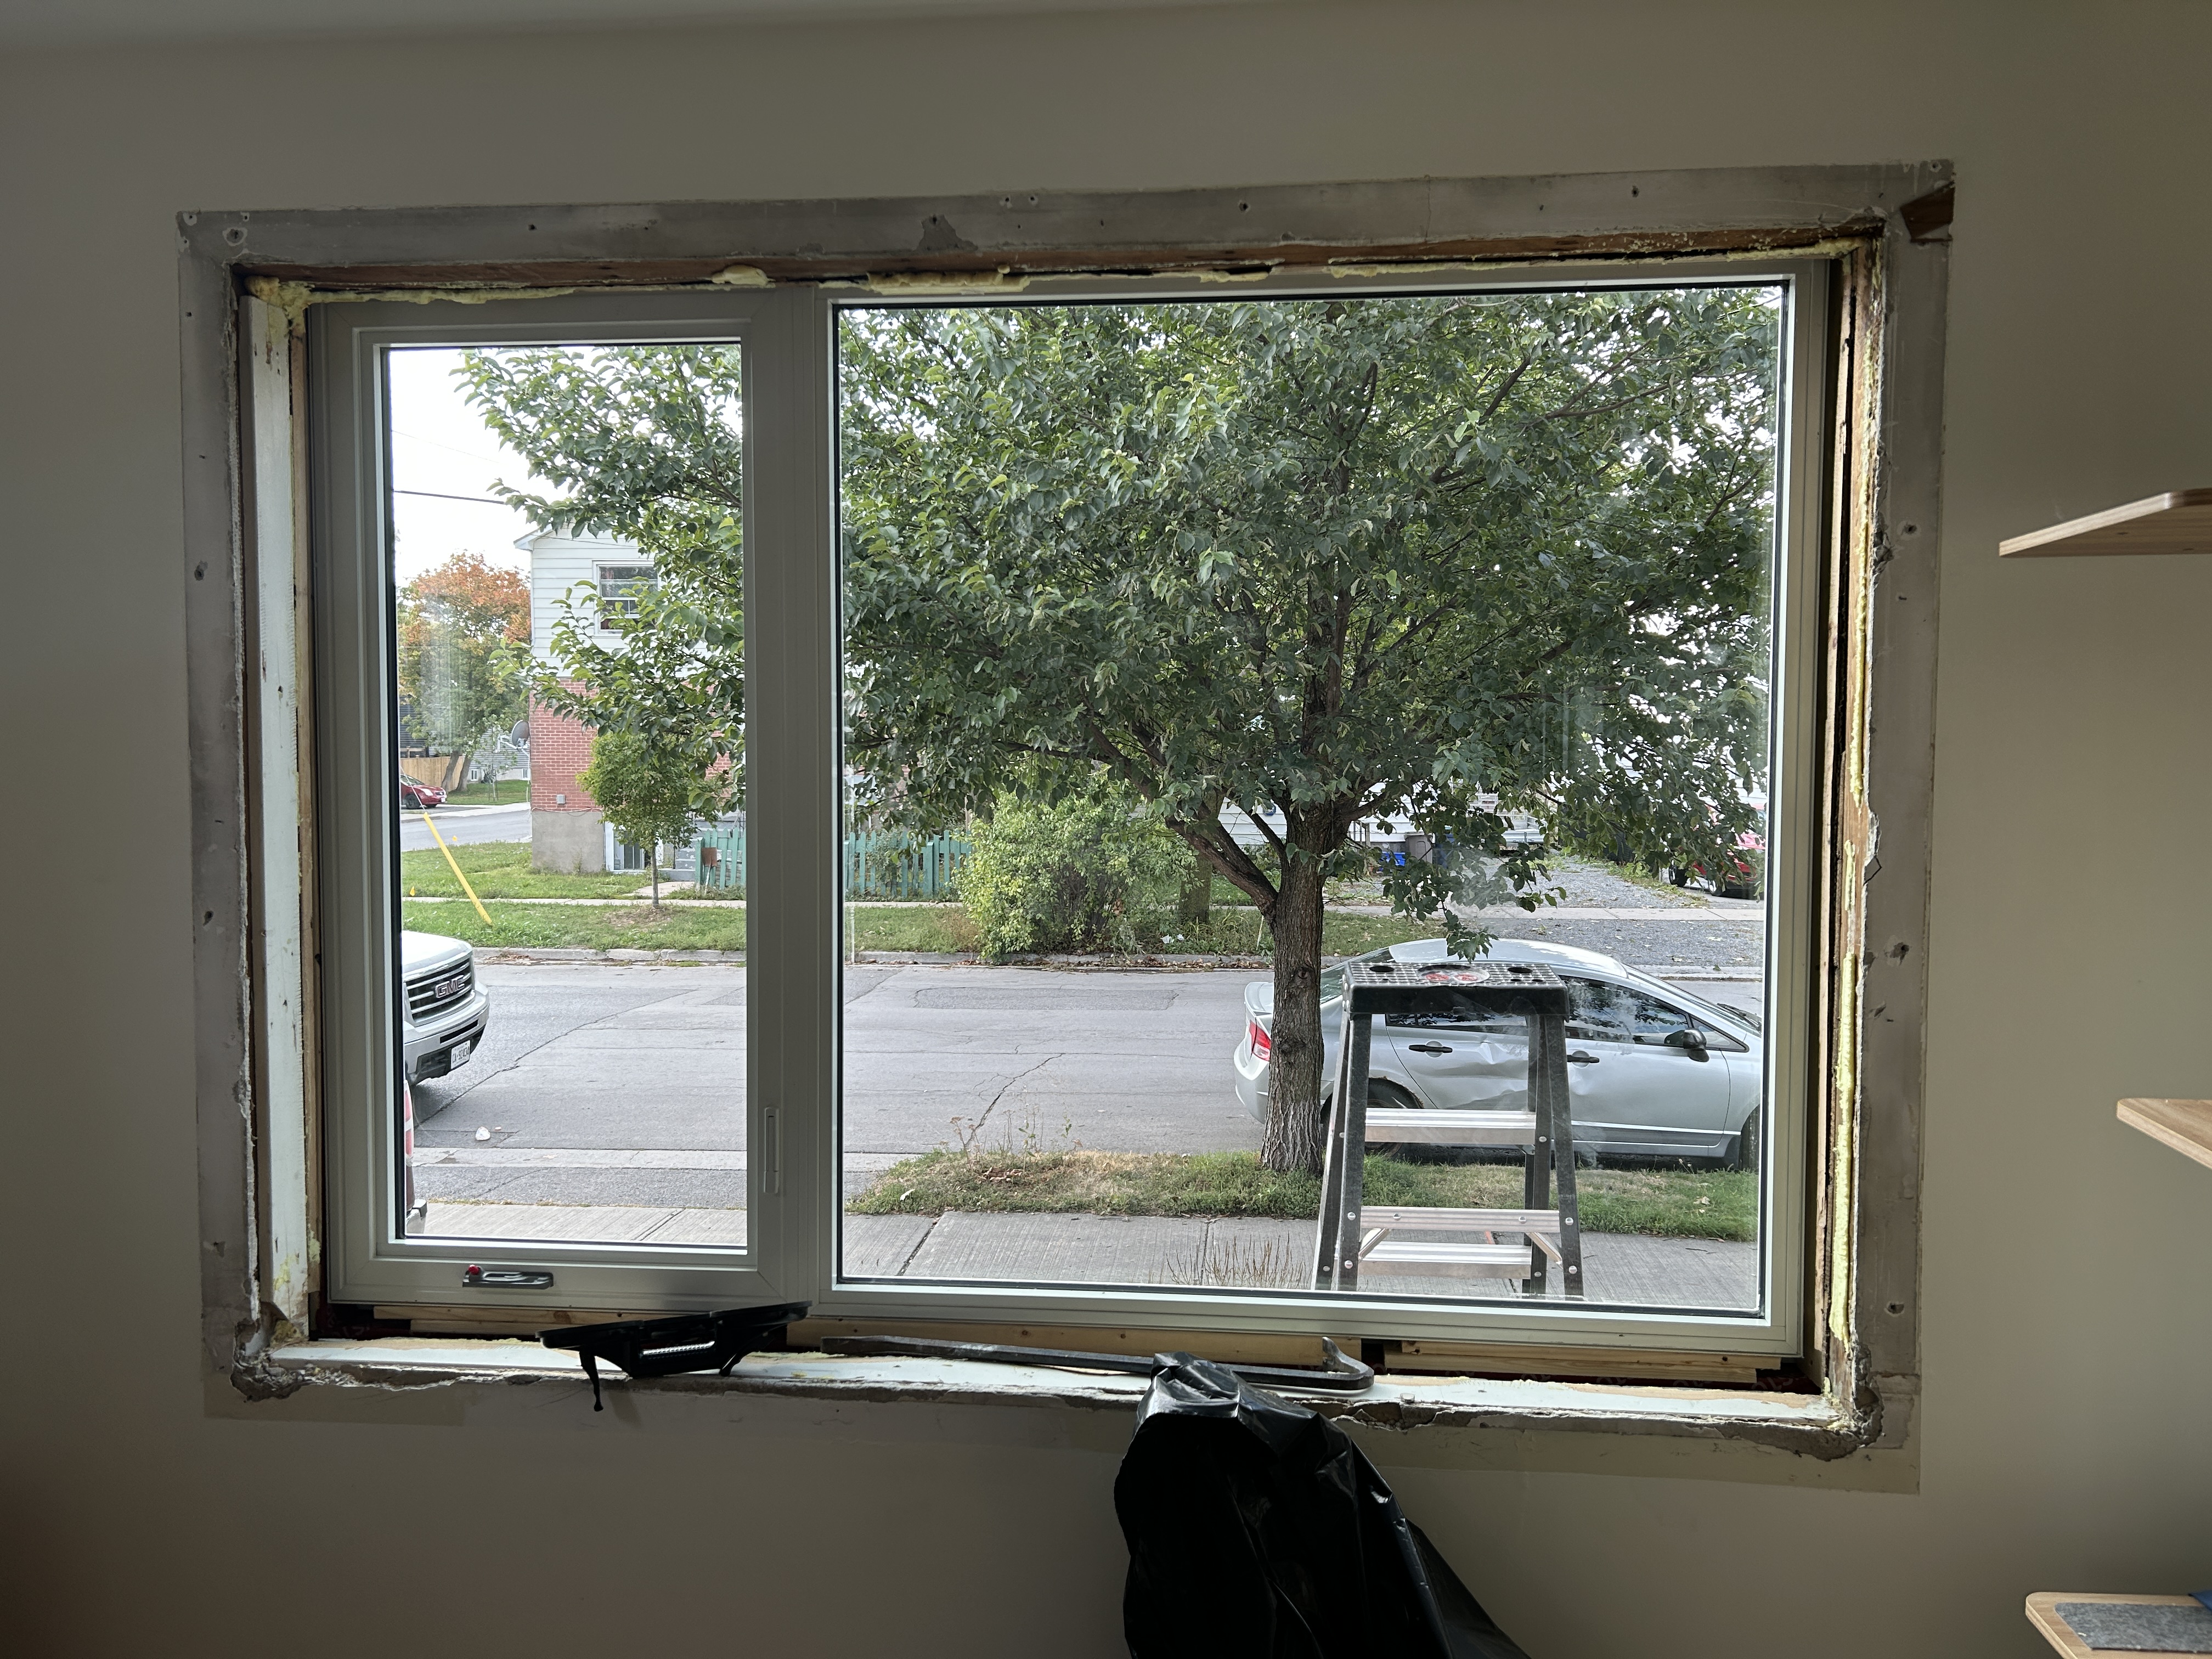
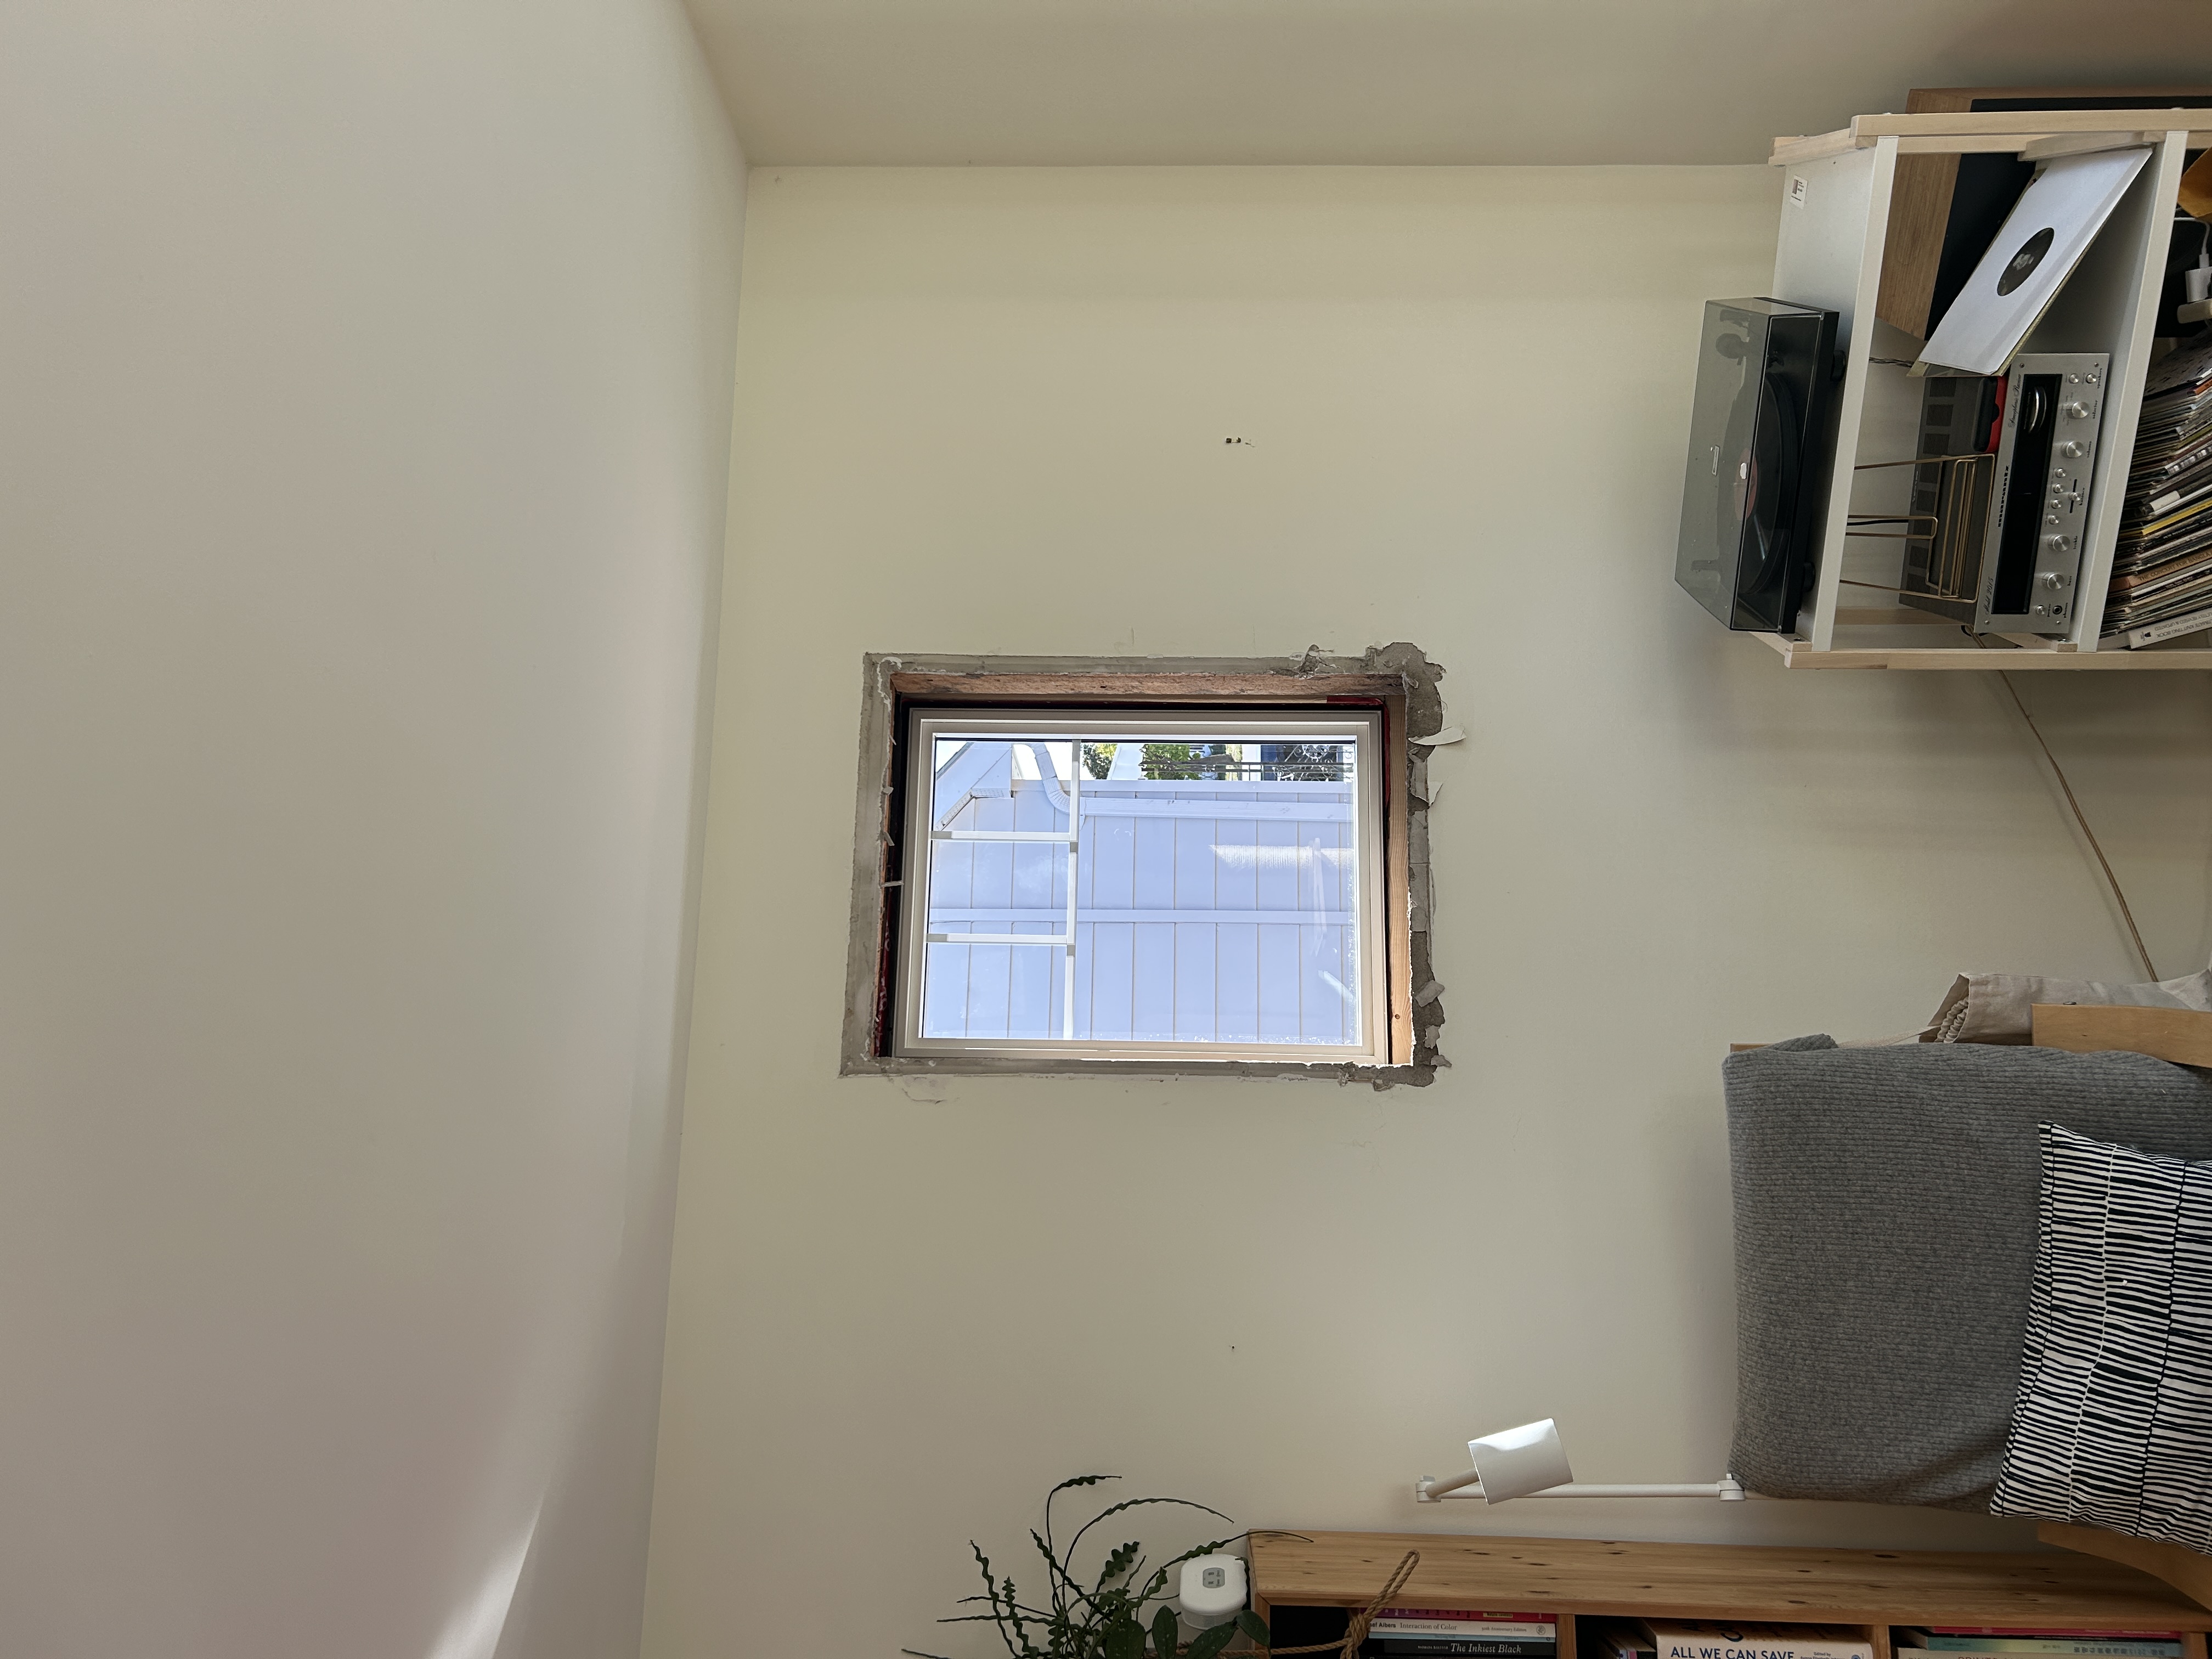
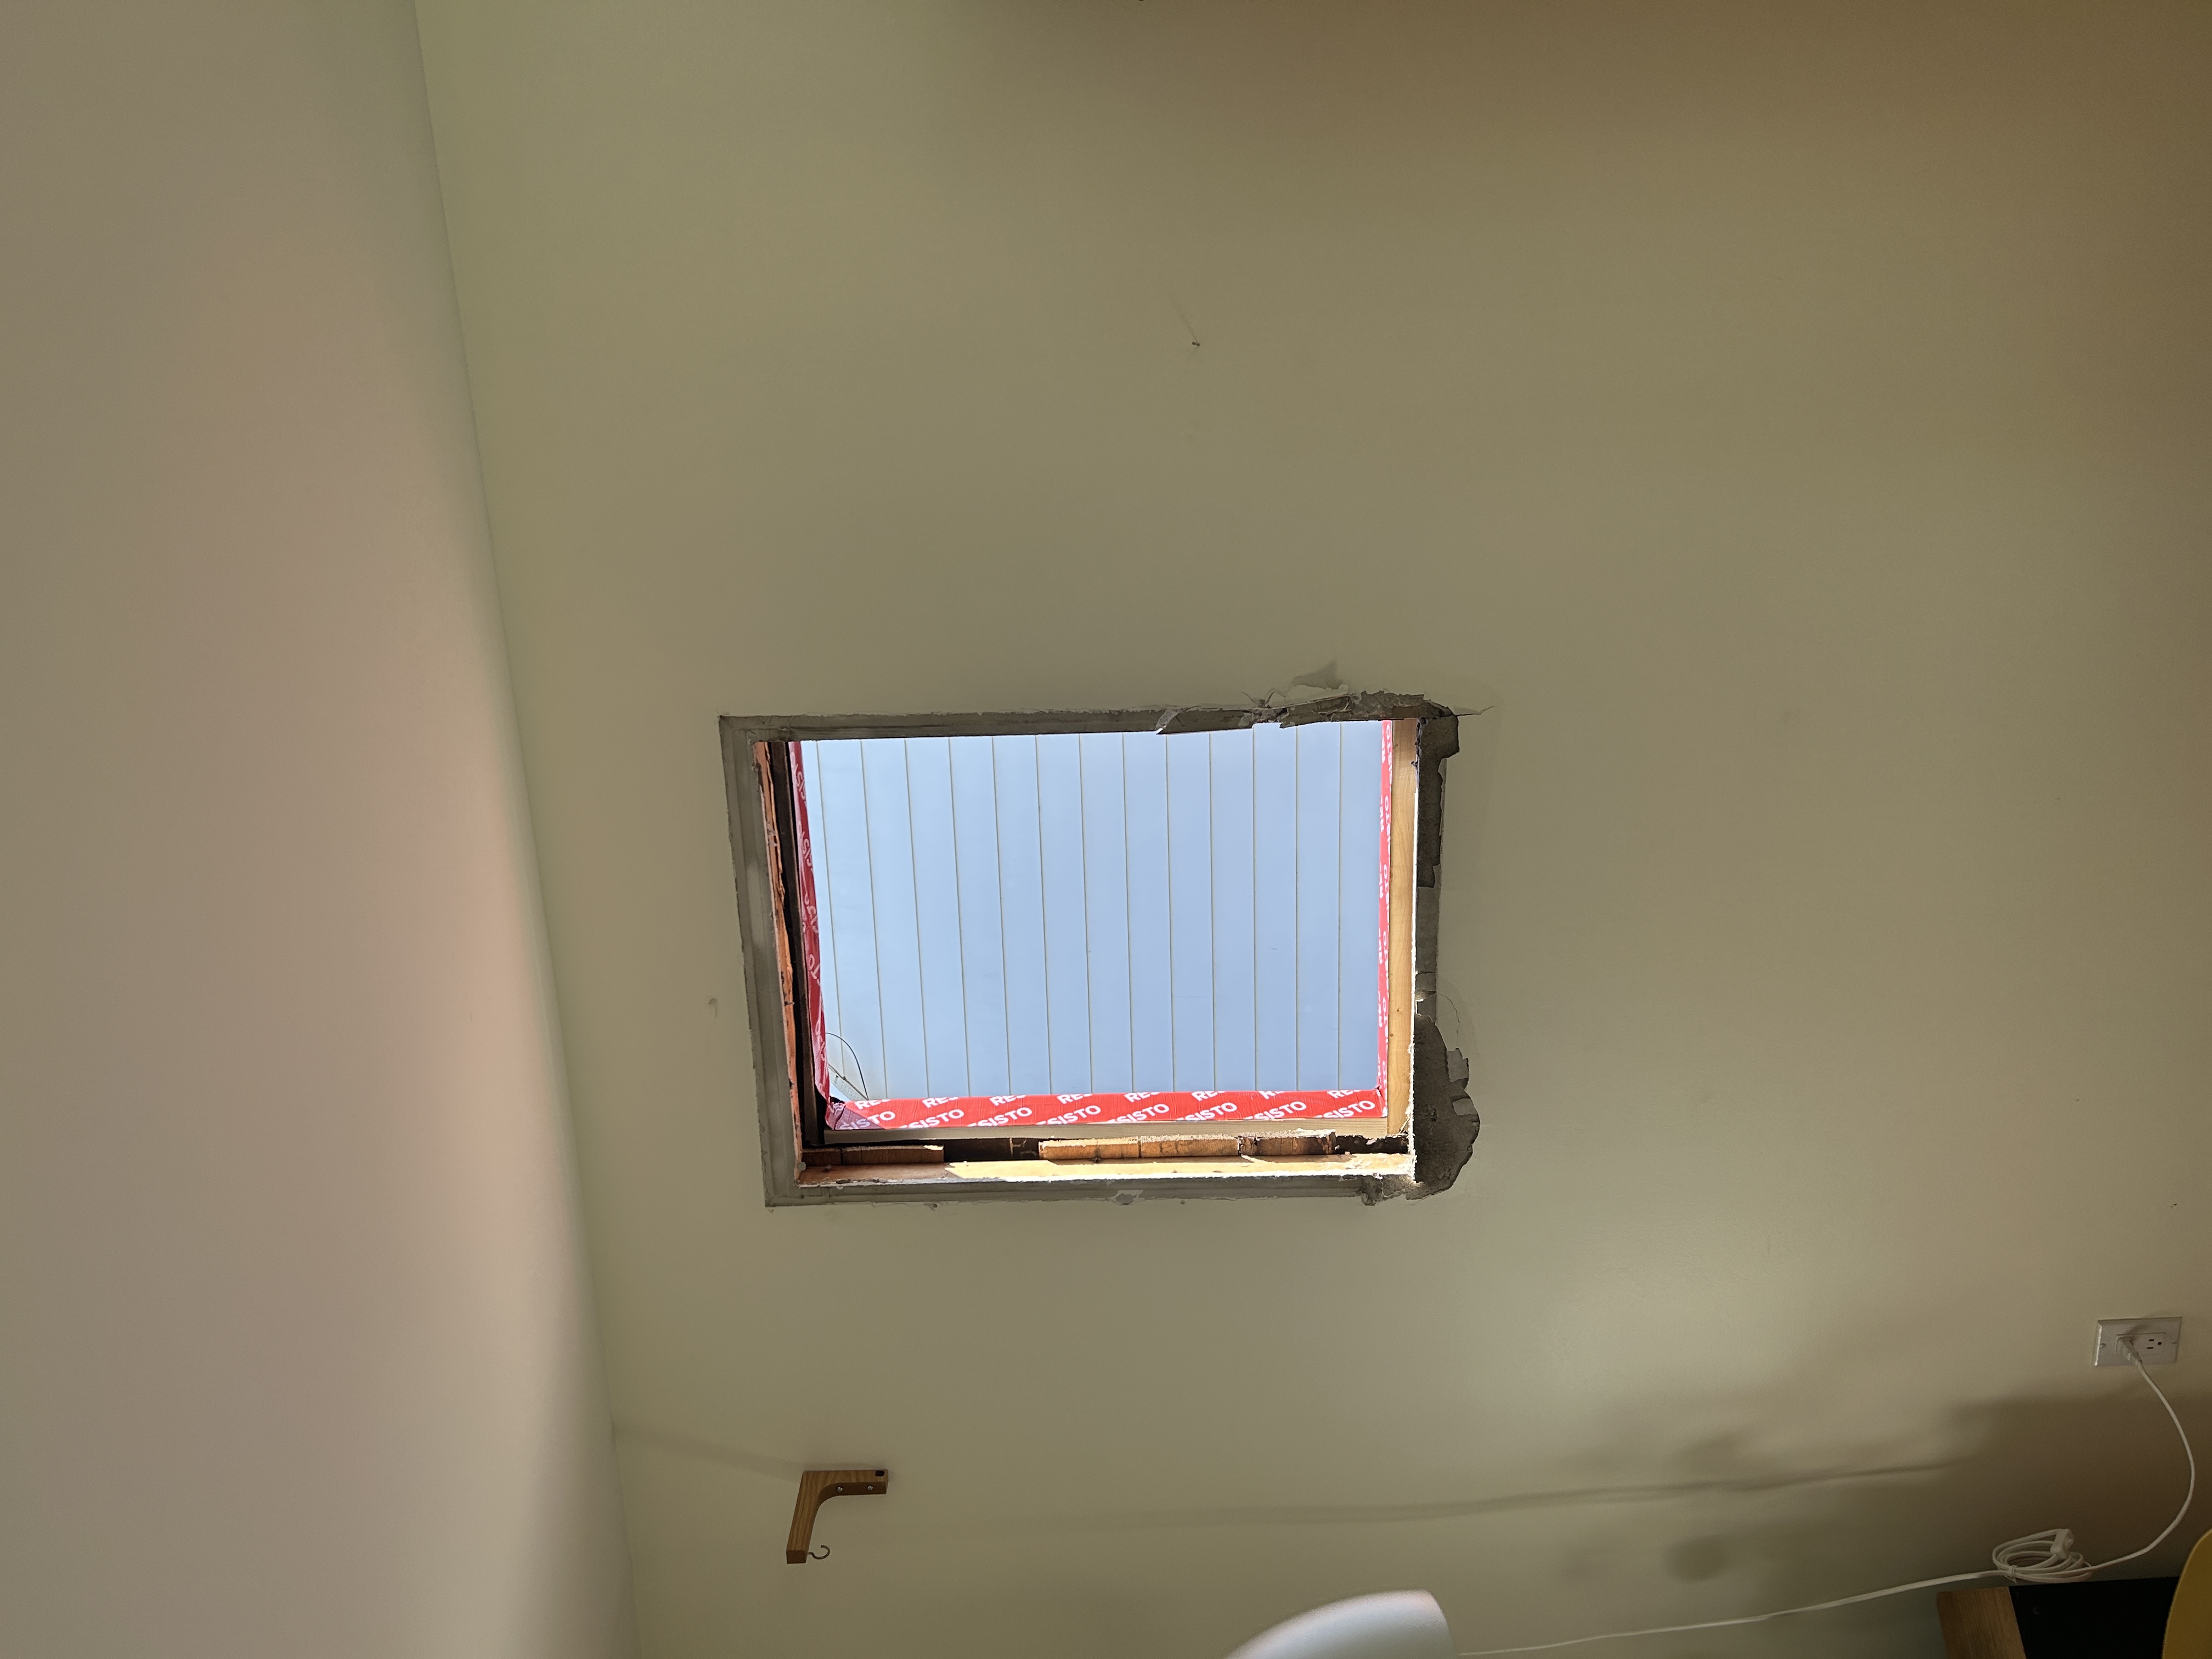
We also took this opportunity to upgrade all our upstairs windows and resize the two kitchen windows, bringing more light into the space and improving the layout.
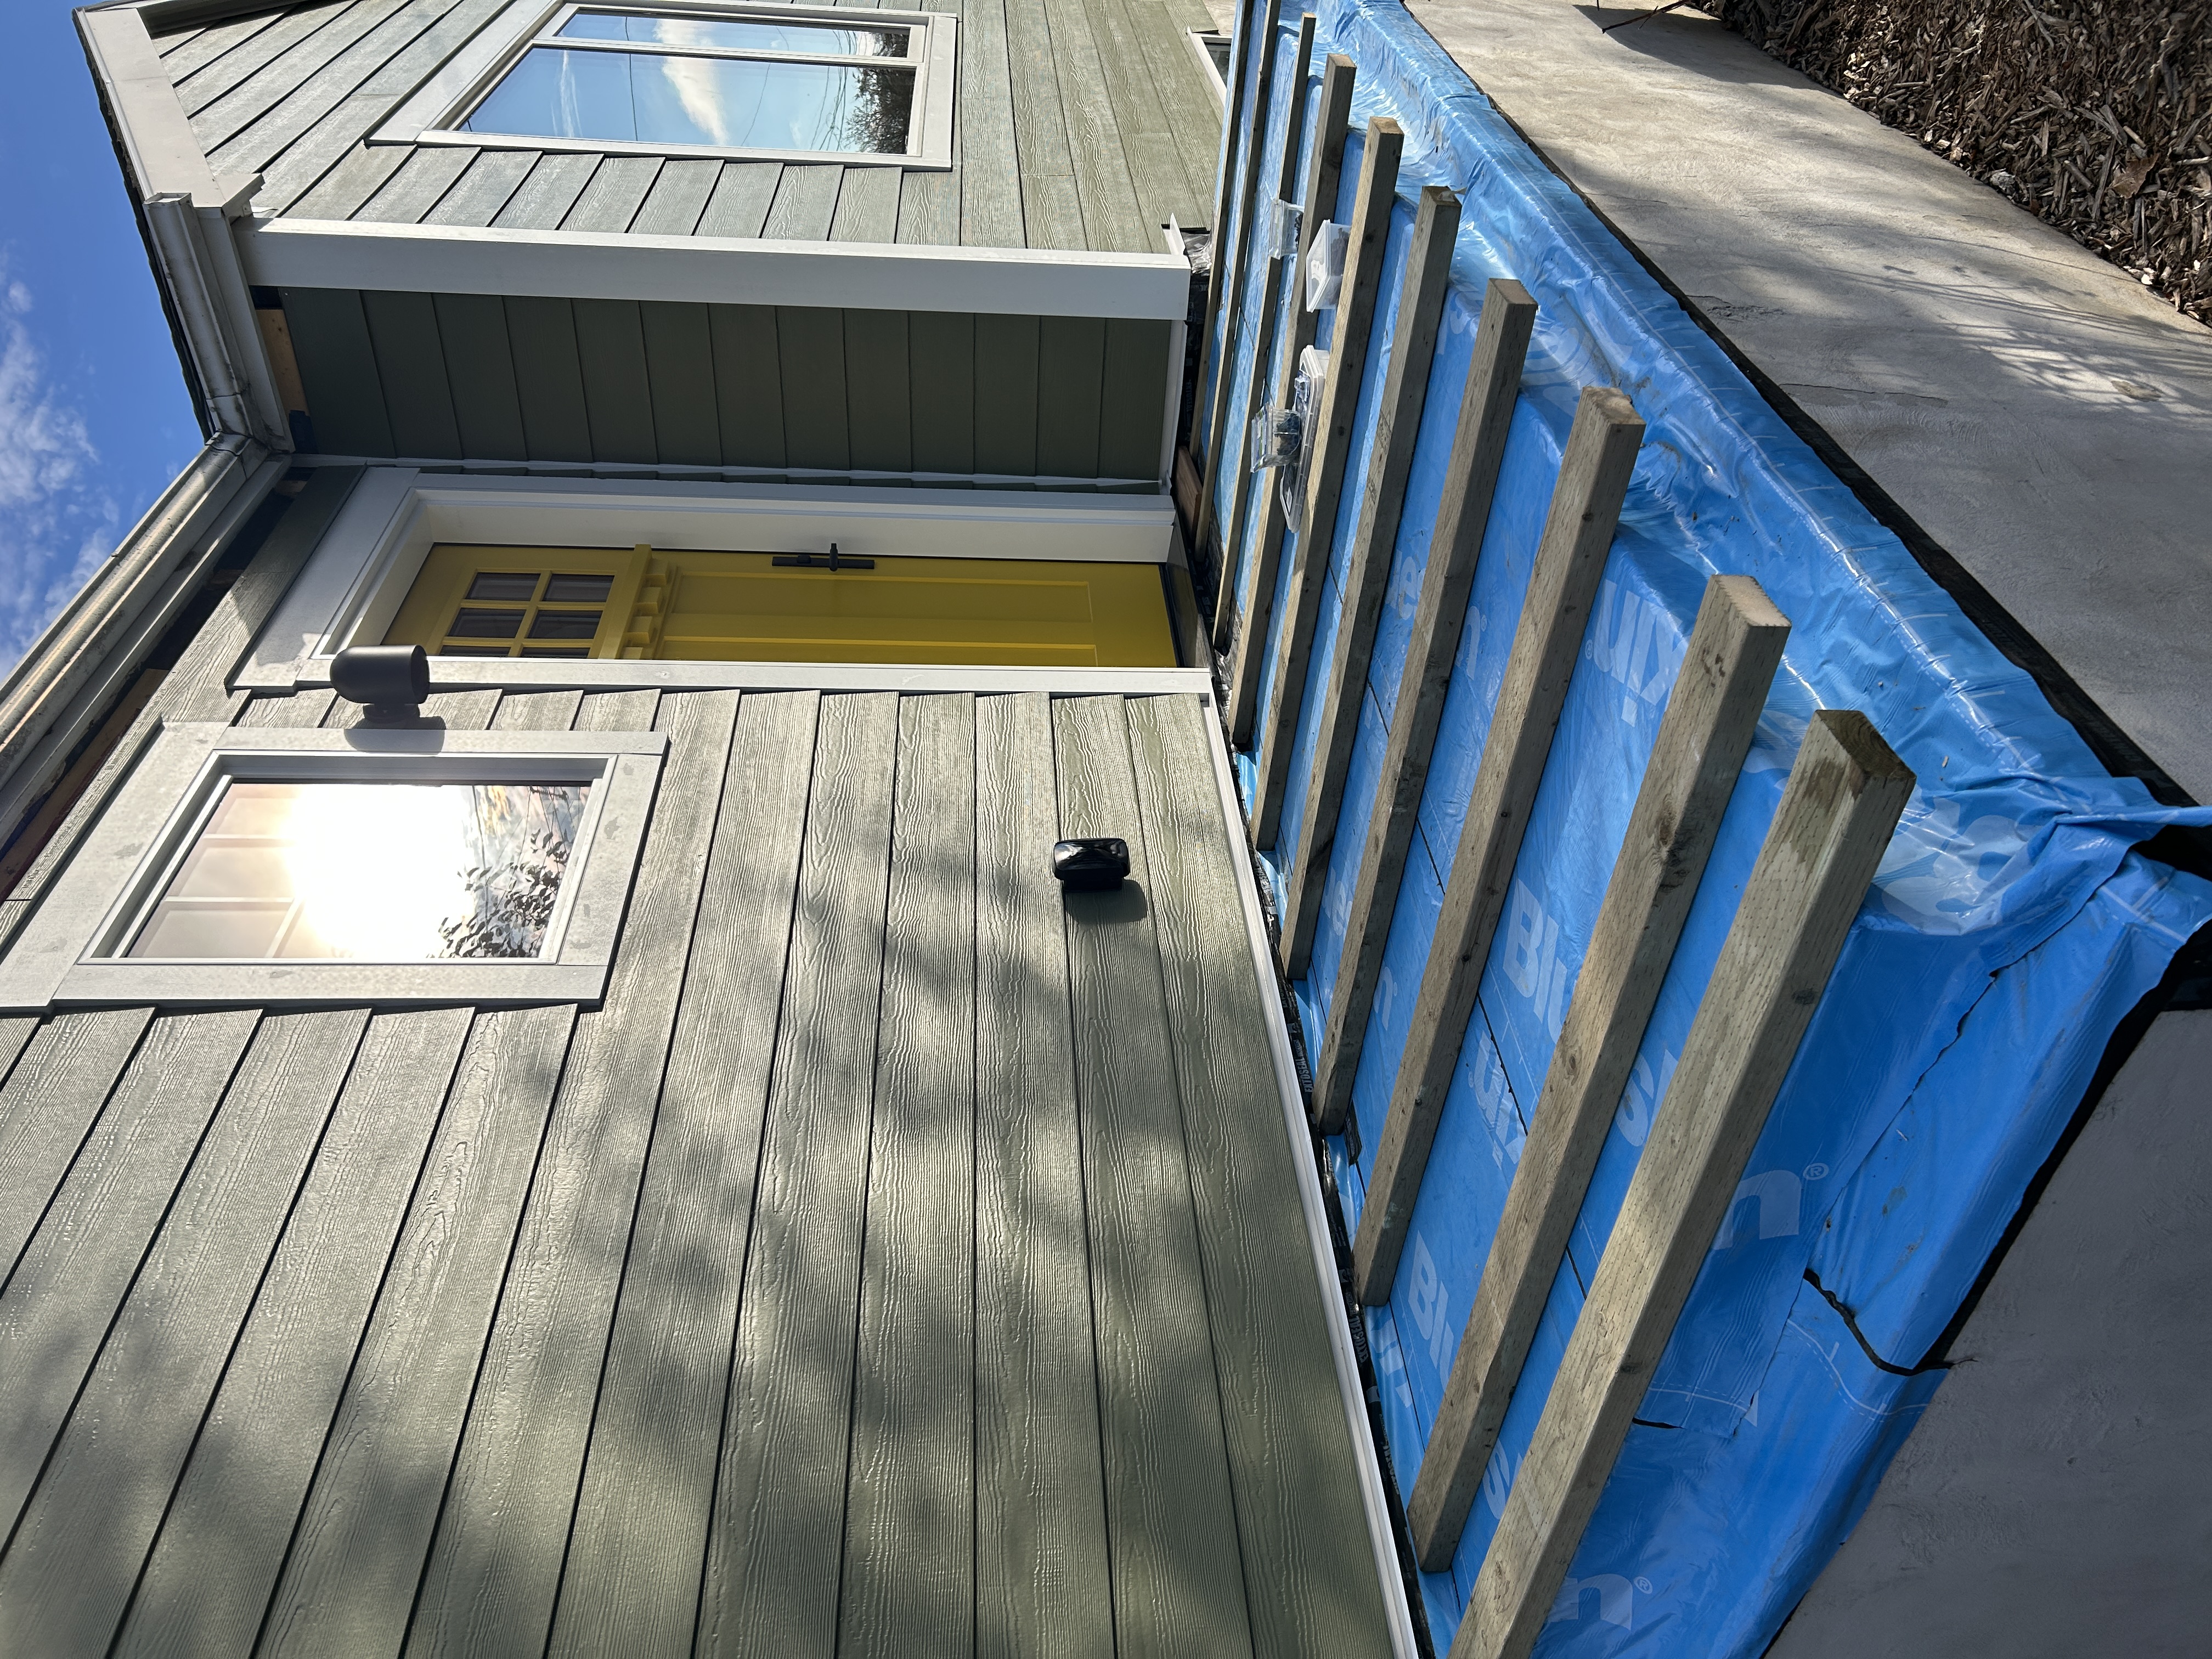
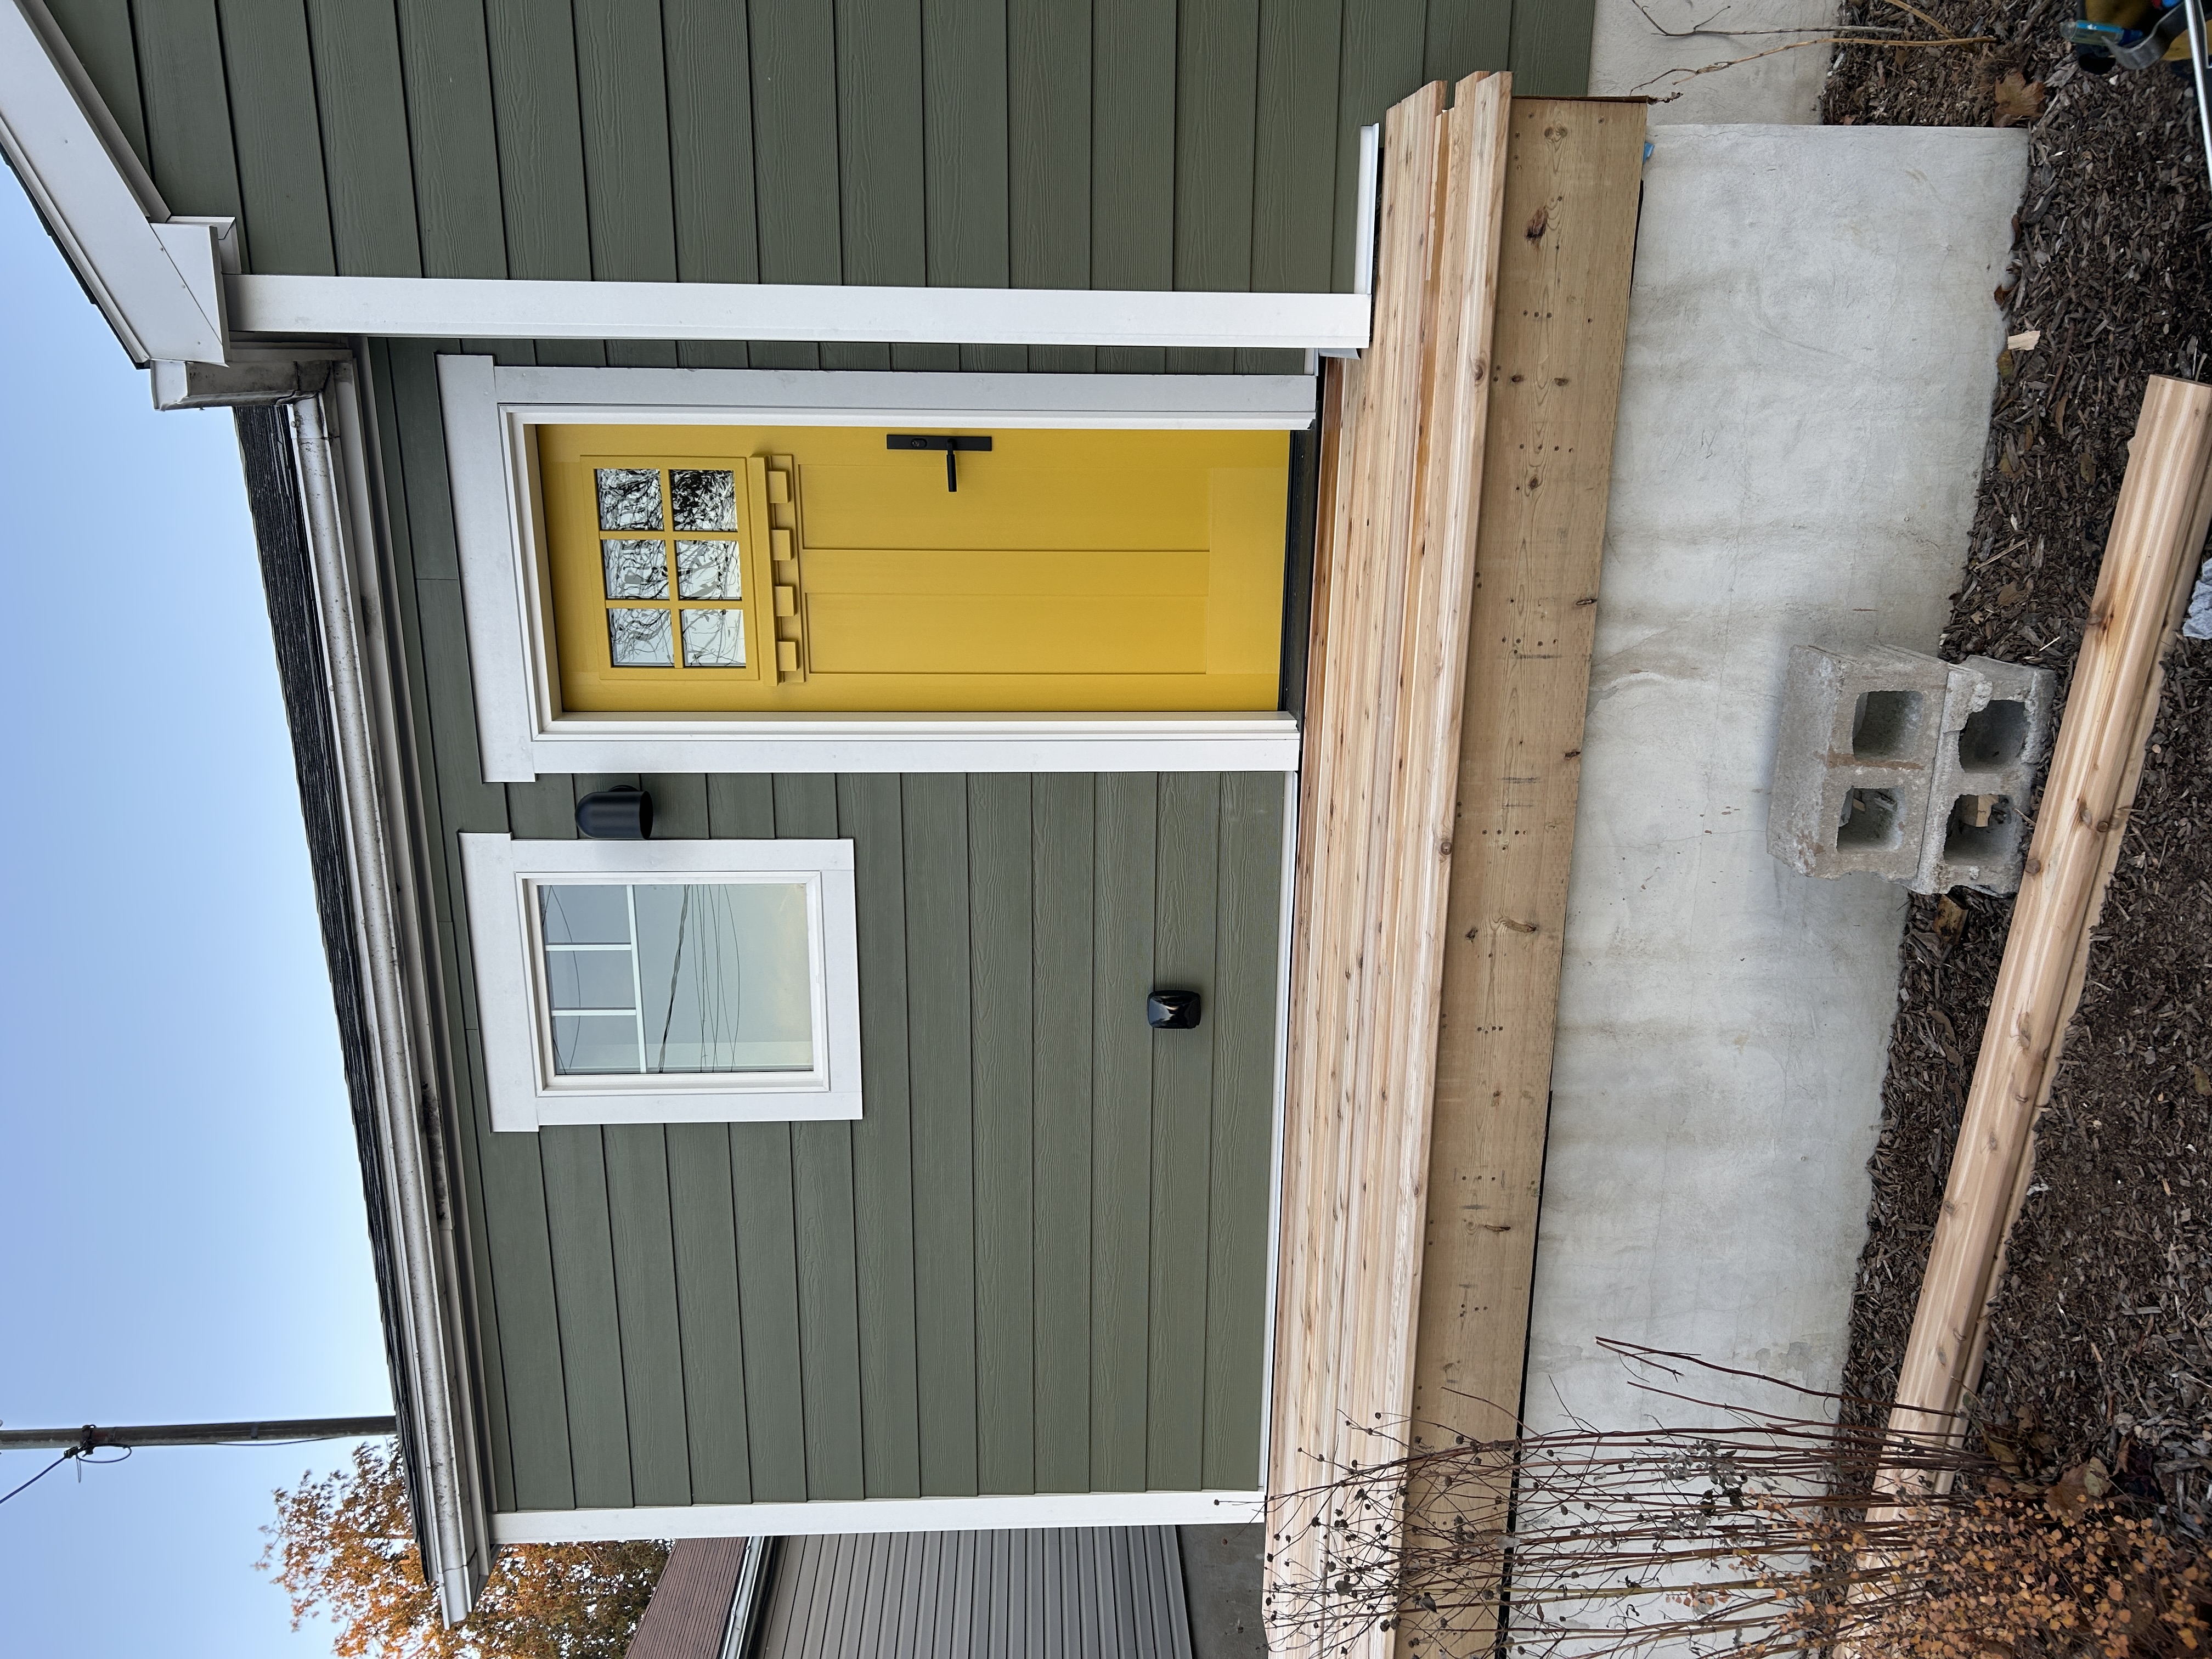
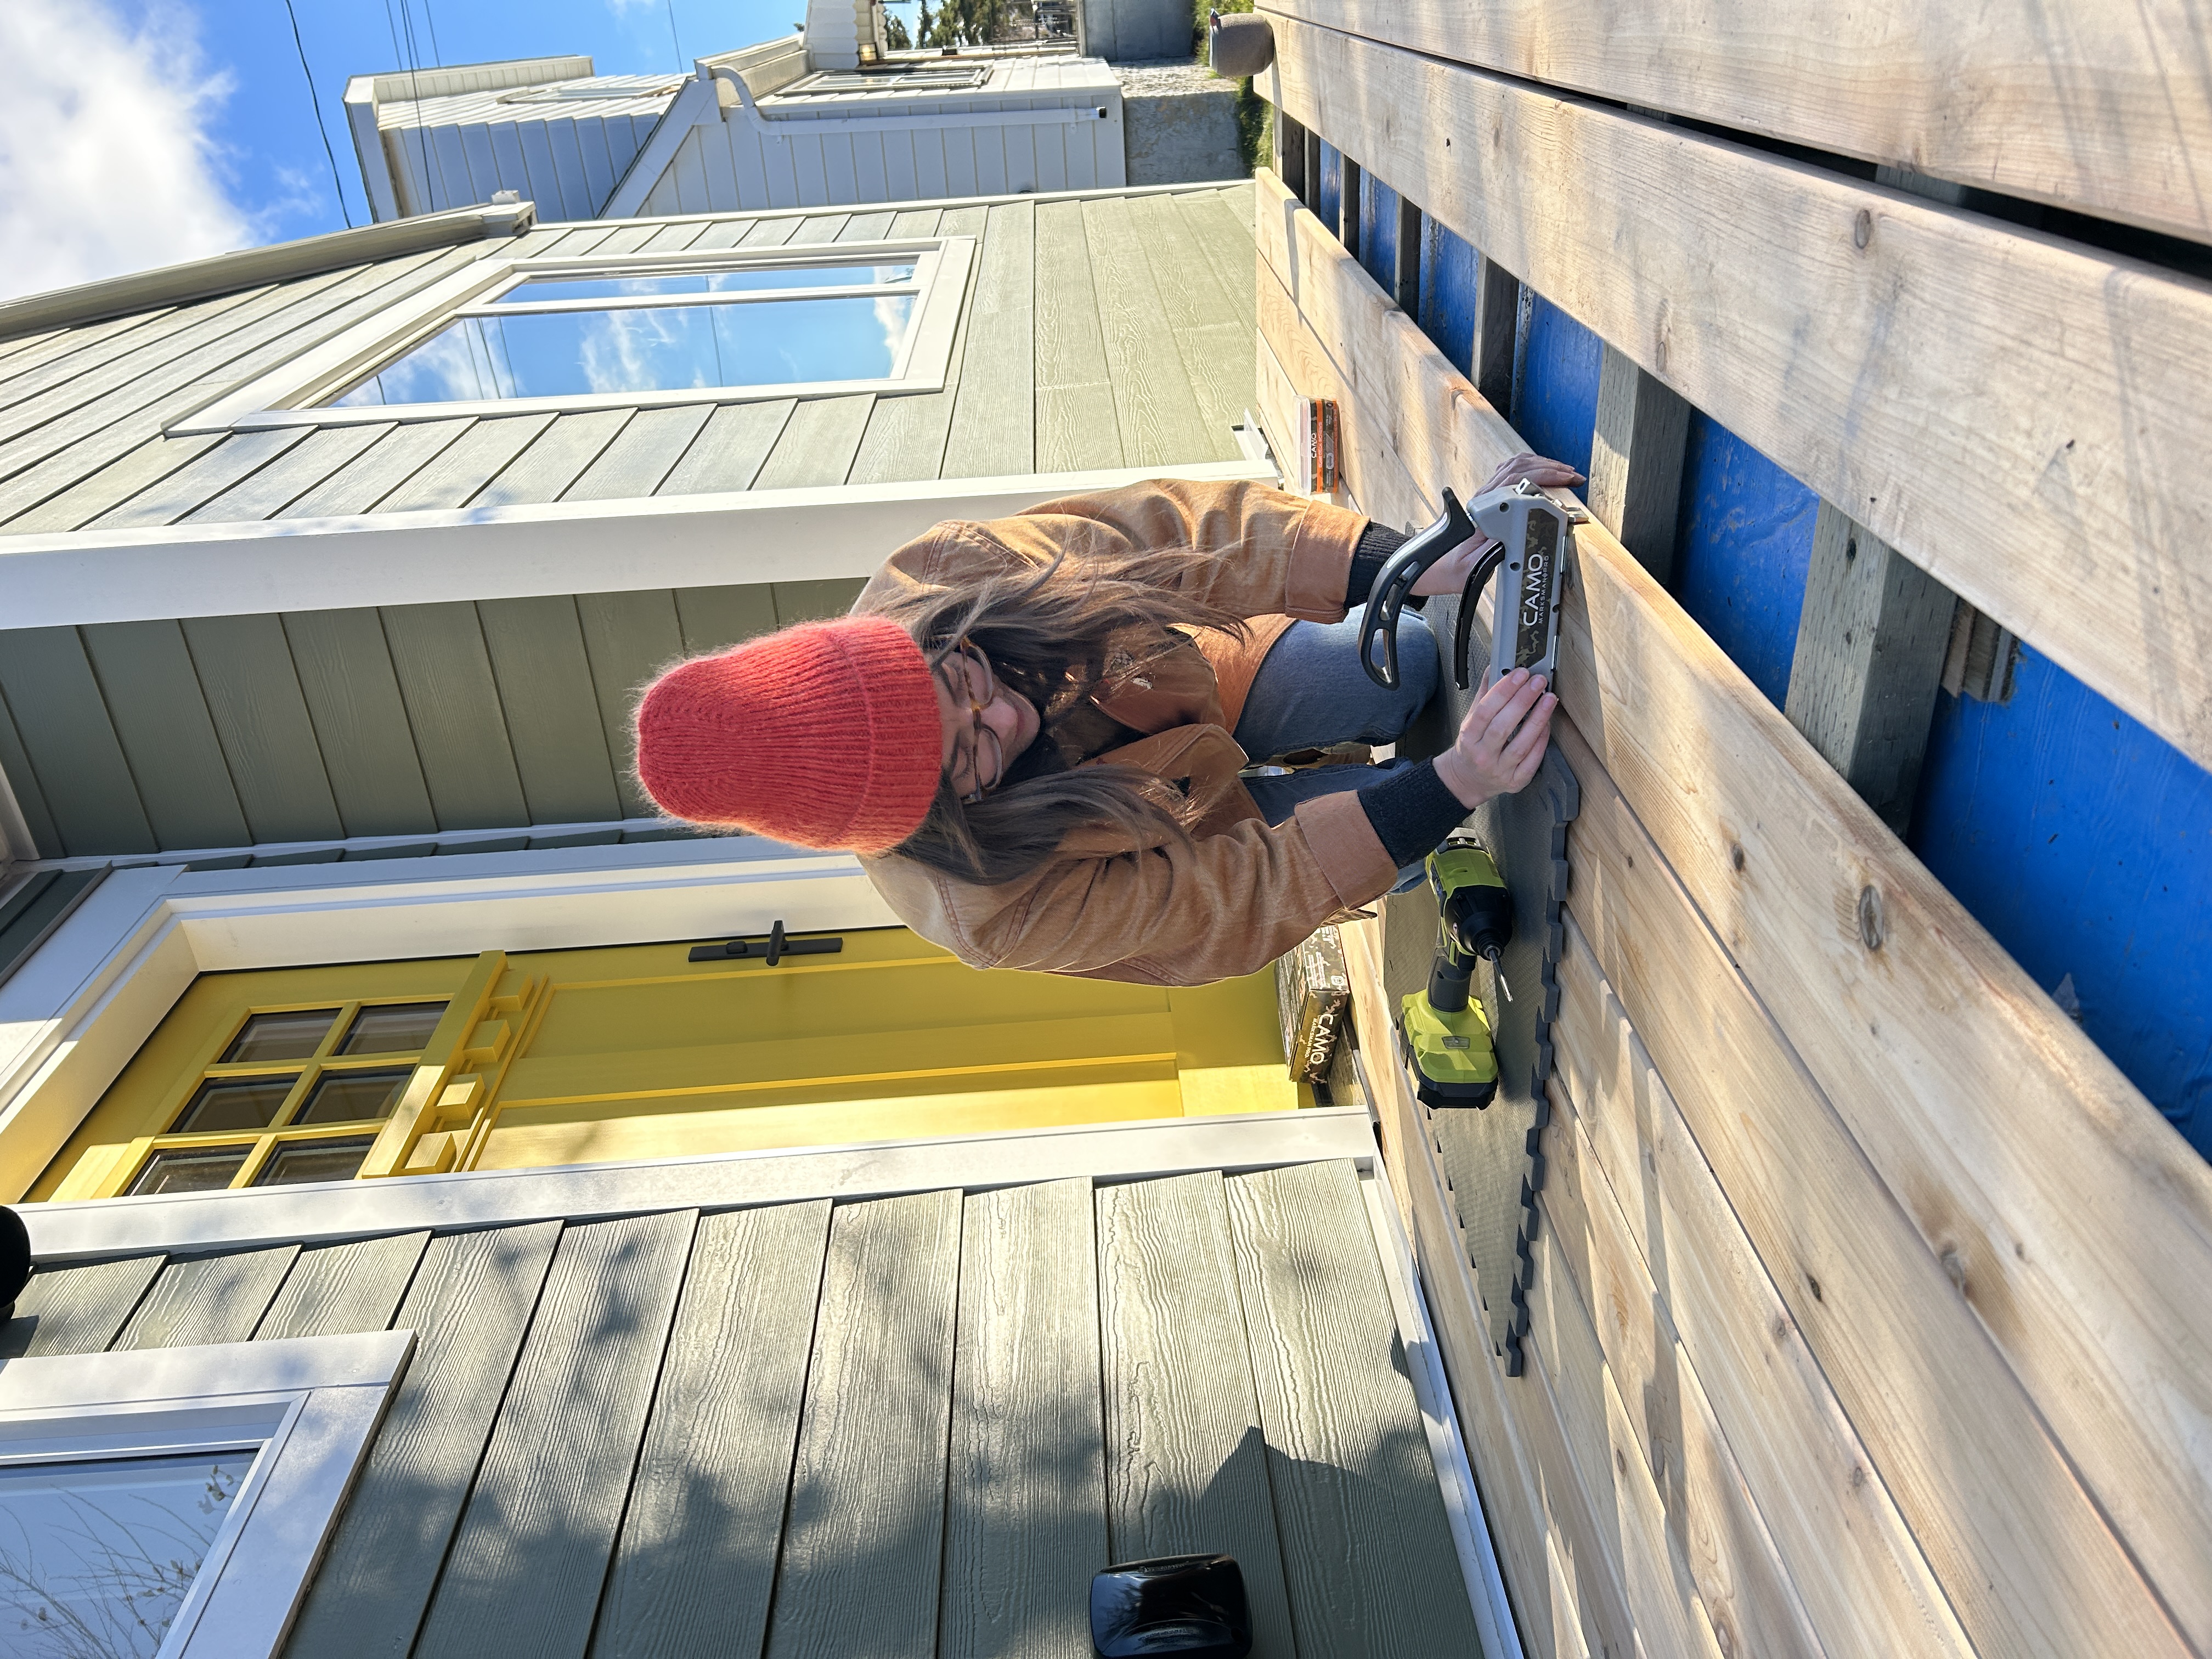
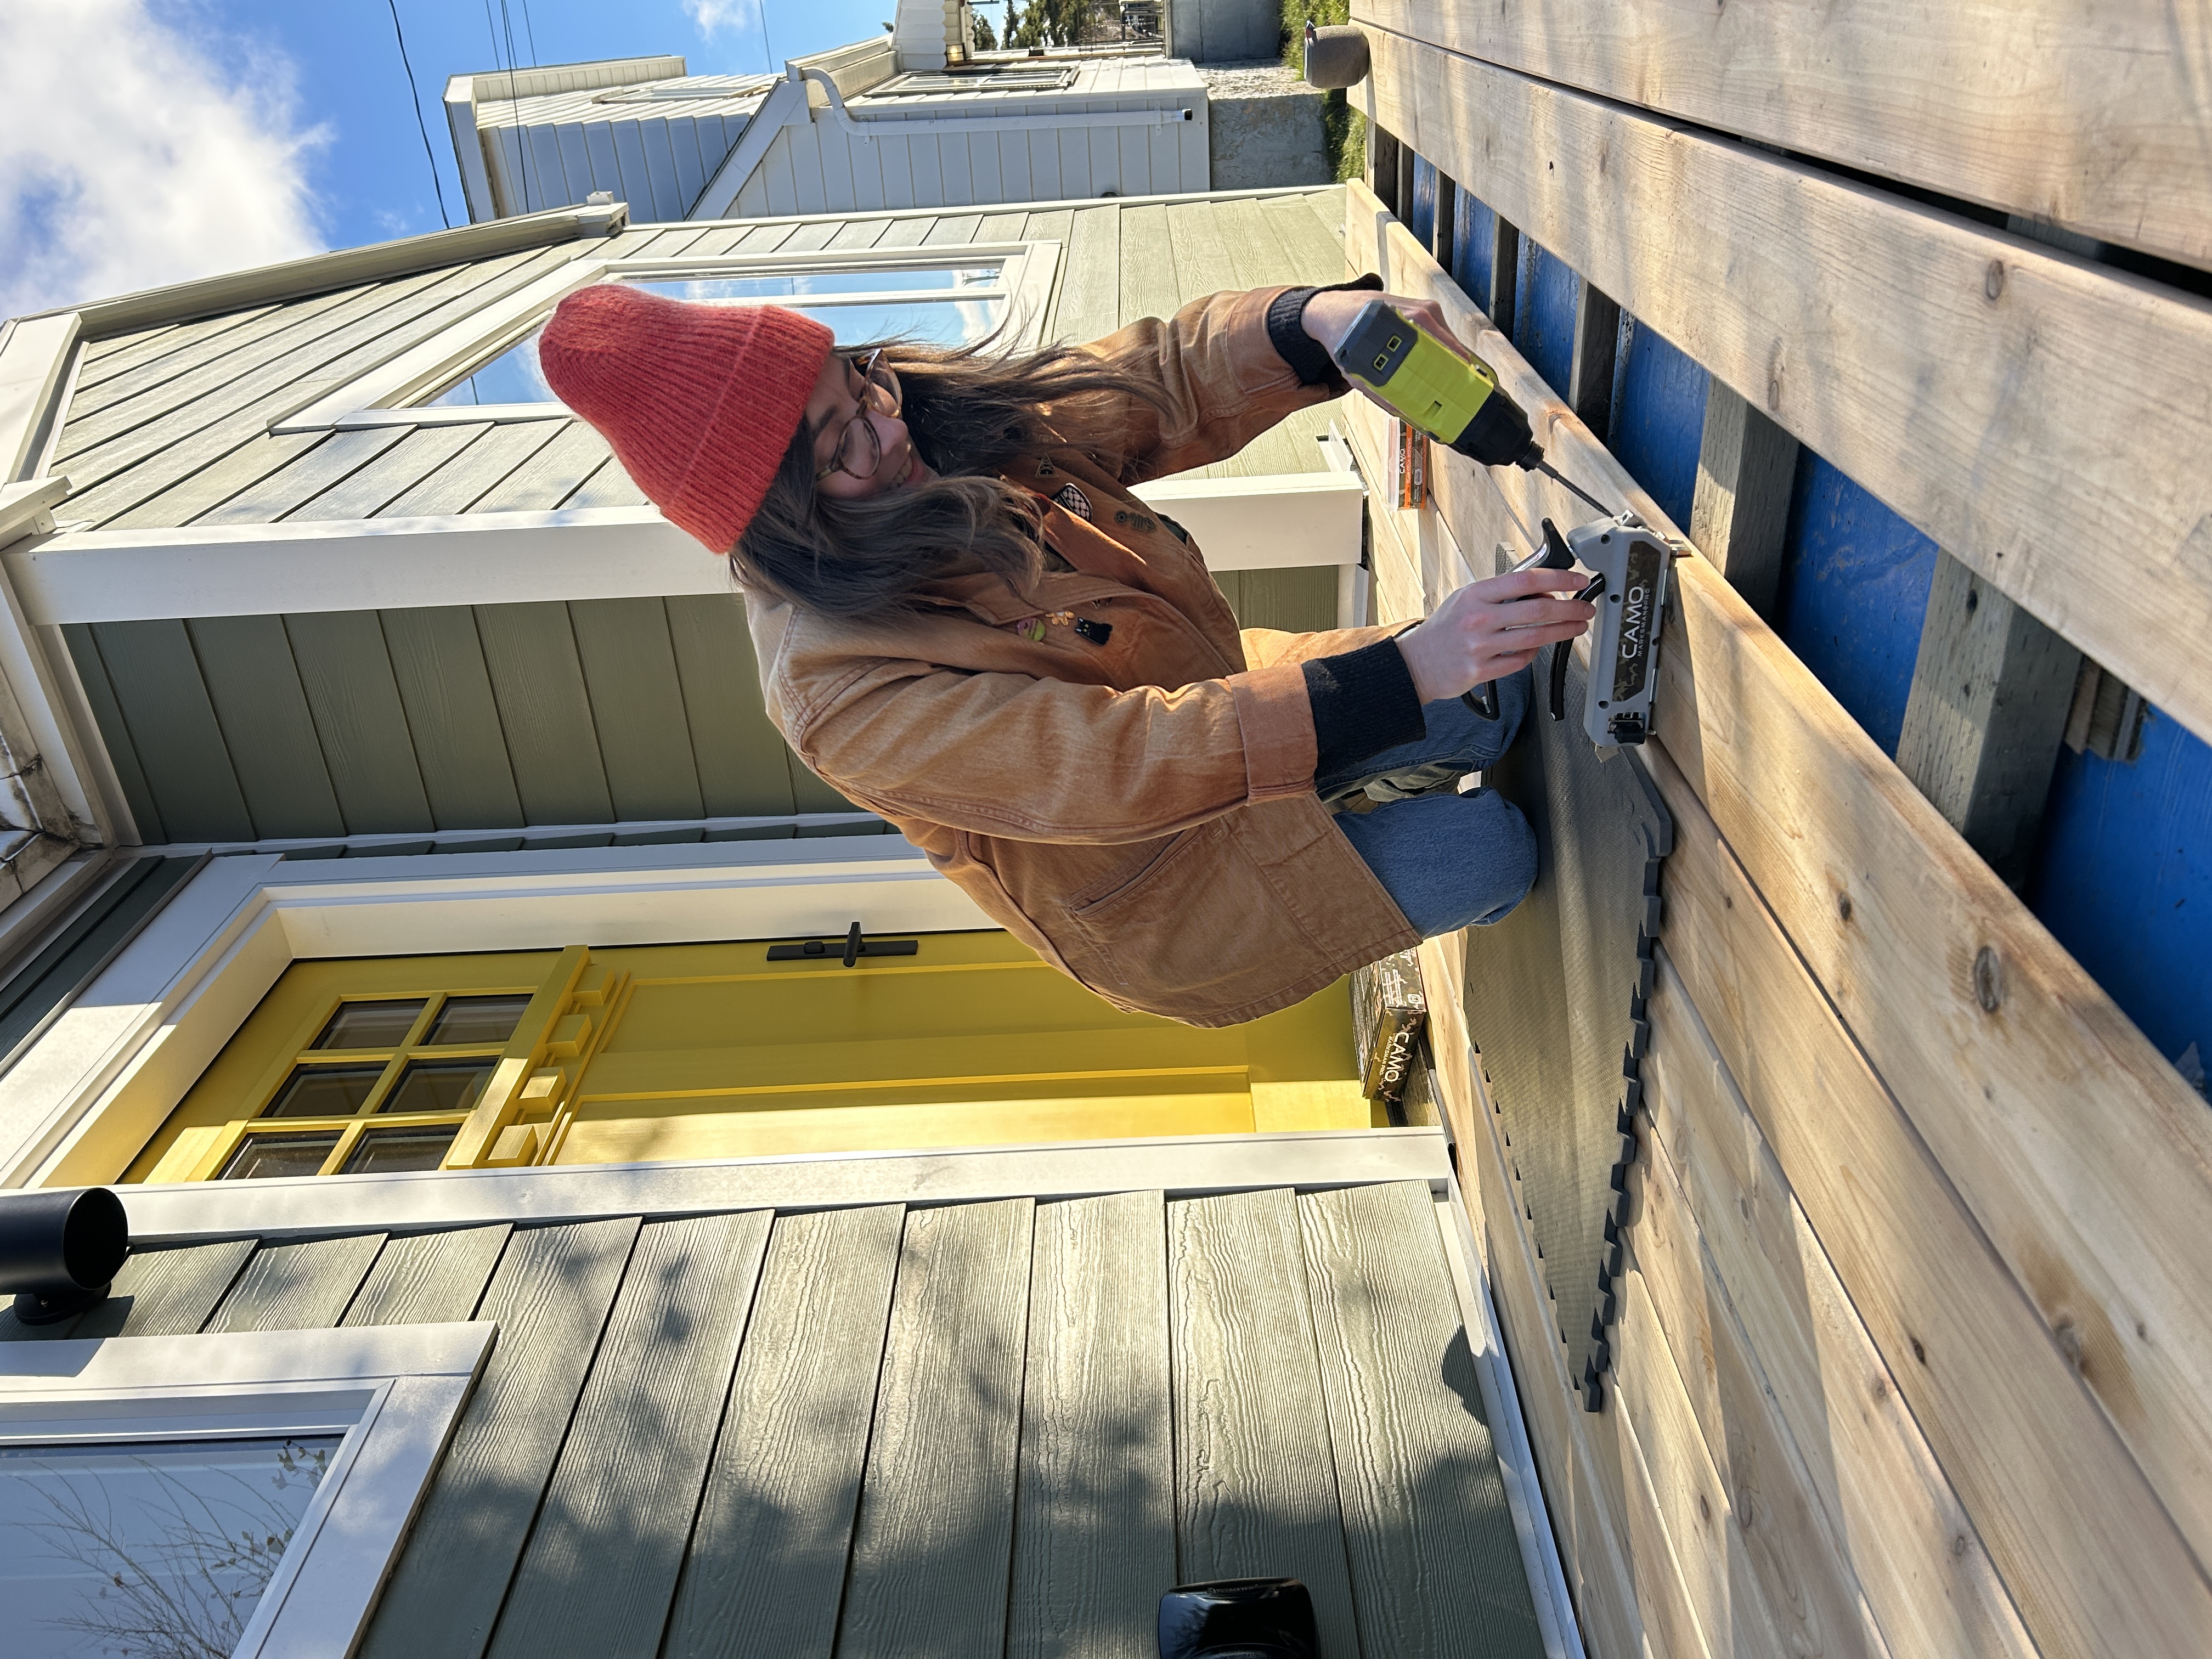
Finally, we aimed to enhance the aesthetic appeal and durability of the house with new fiber cement siding.
Stage 4: Steps
- The main walls account for over 20% of the building’s annual heat loss. The steps in this phase included:
- Removing and recycling existing aluminium siding
- Replacing windows with new triple-glazed high-performance windows and enlarging the two in the kitchen
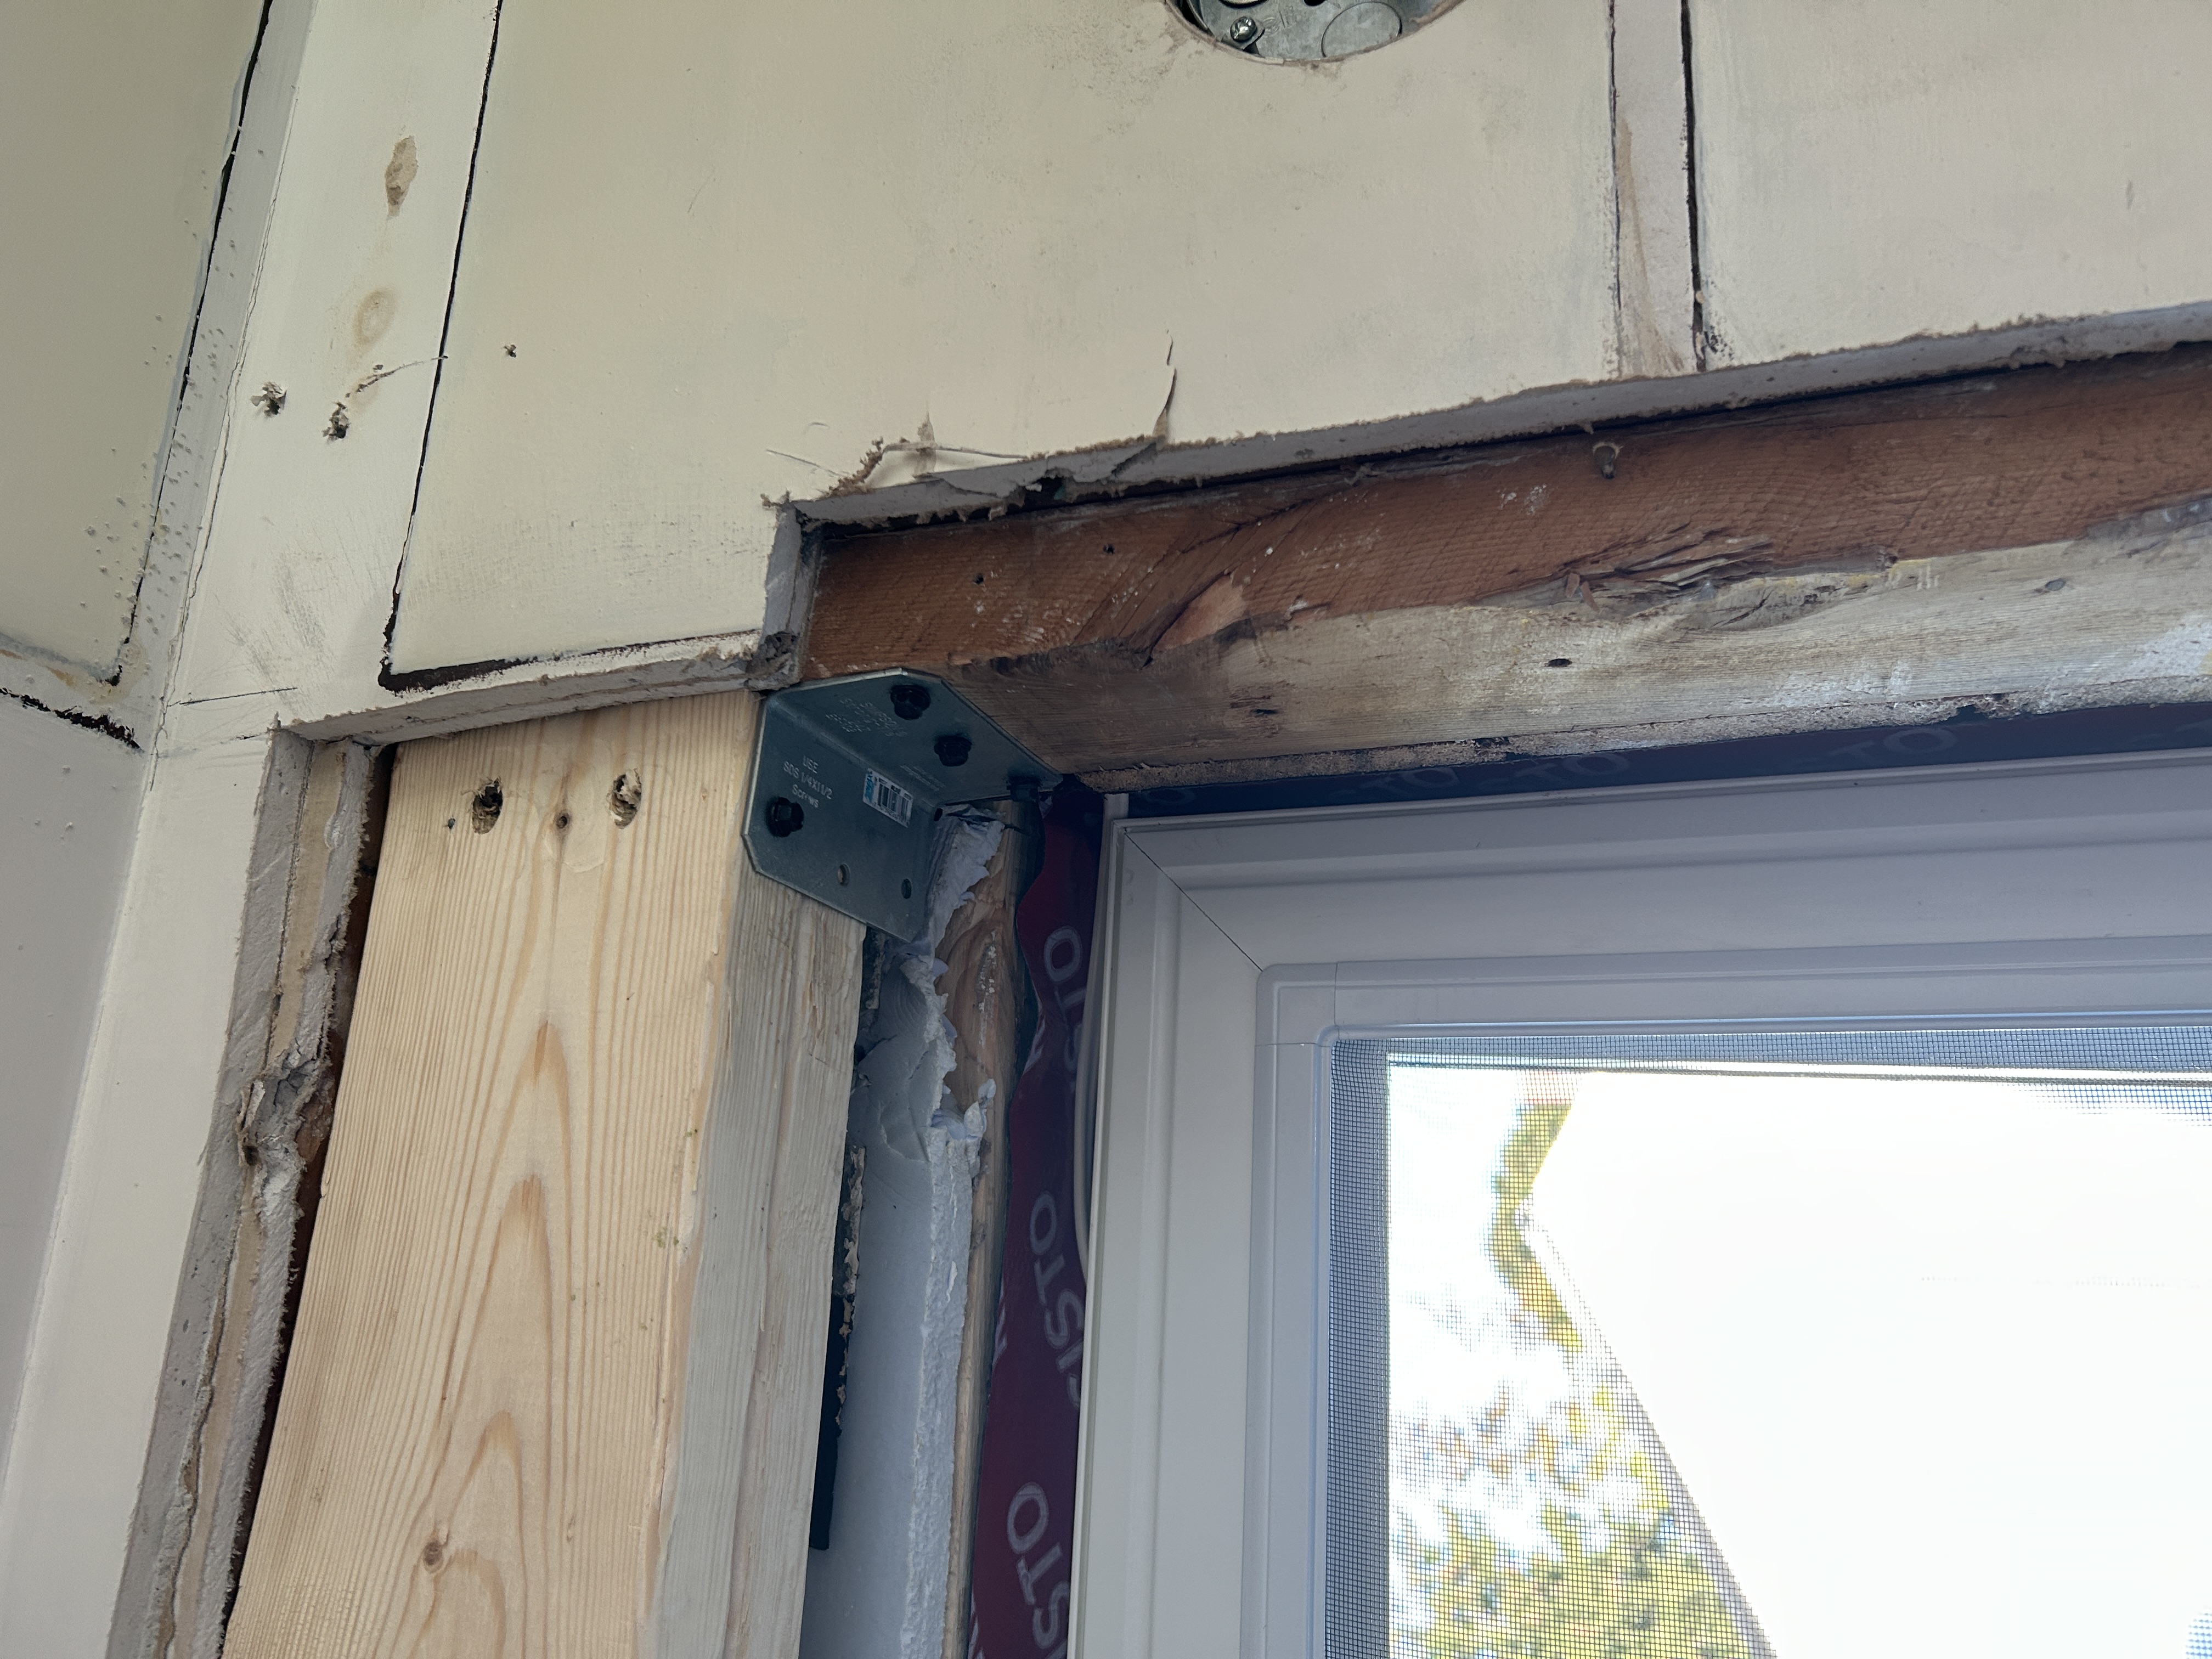
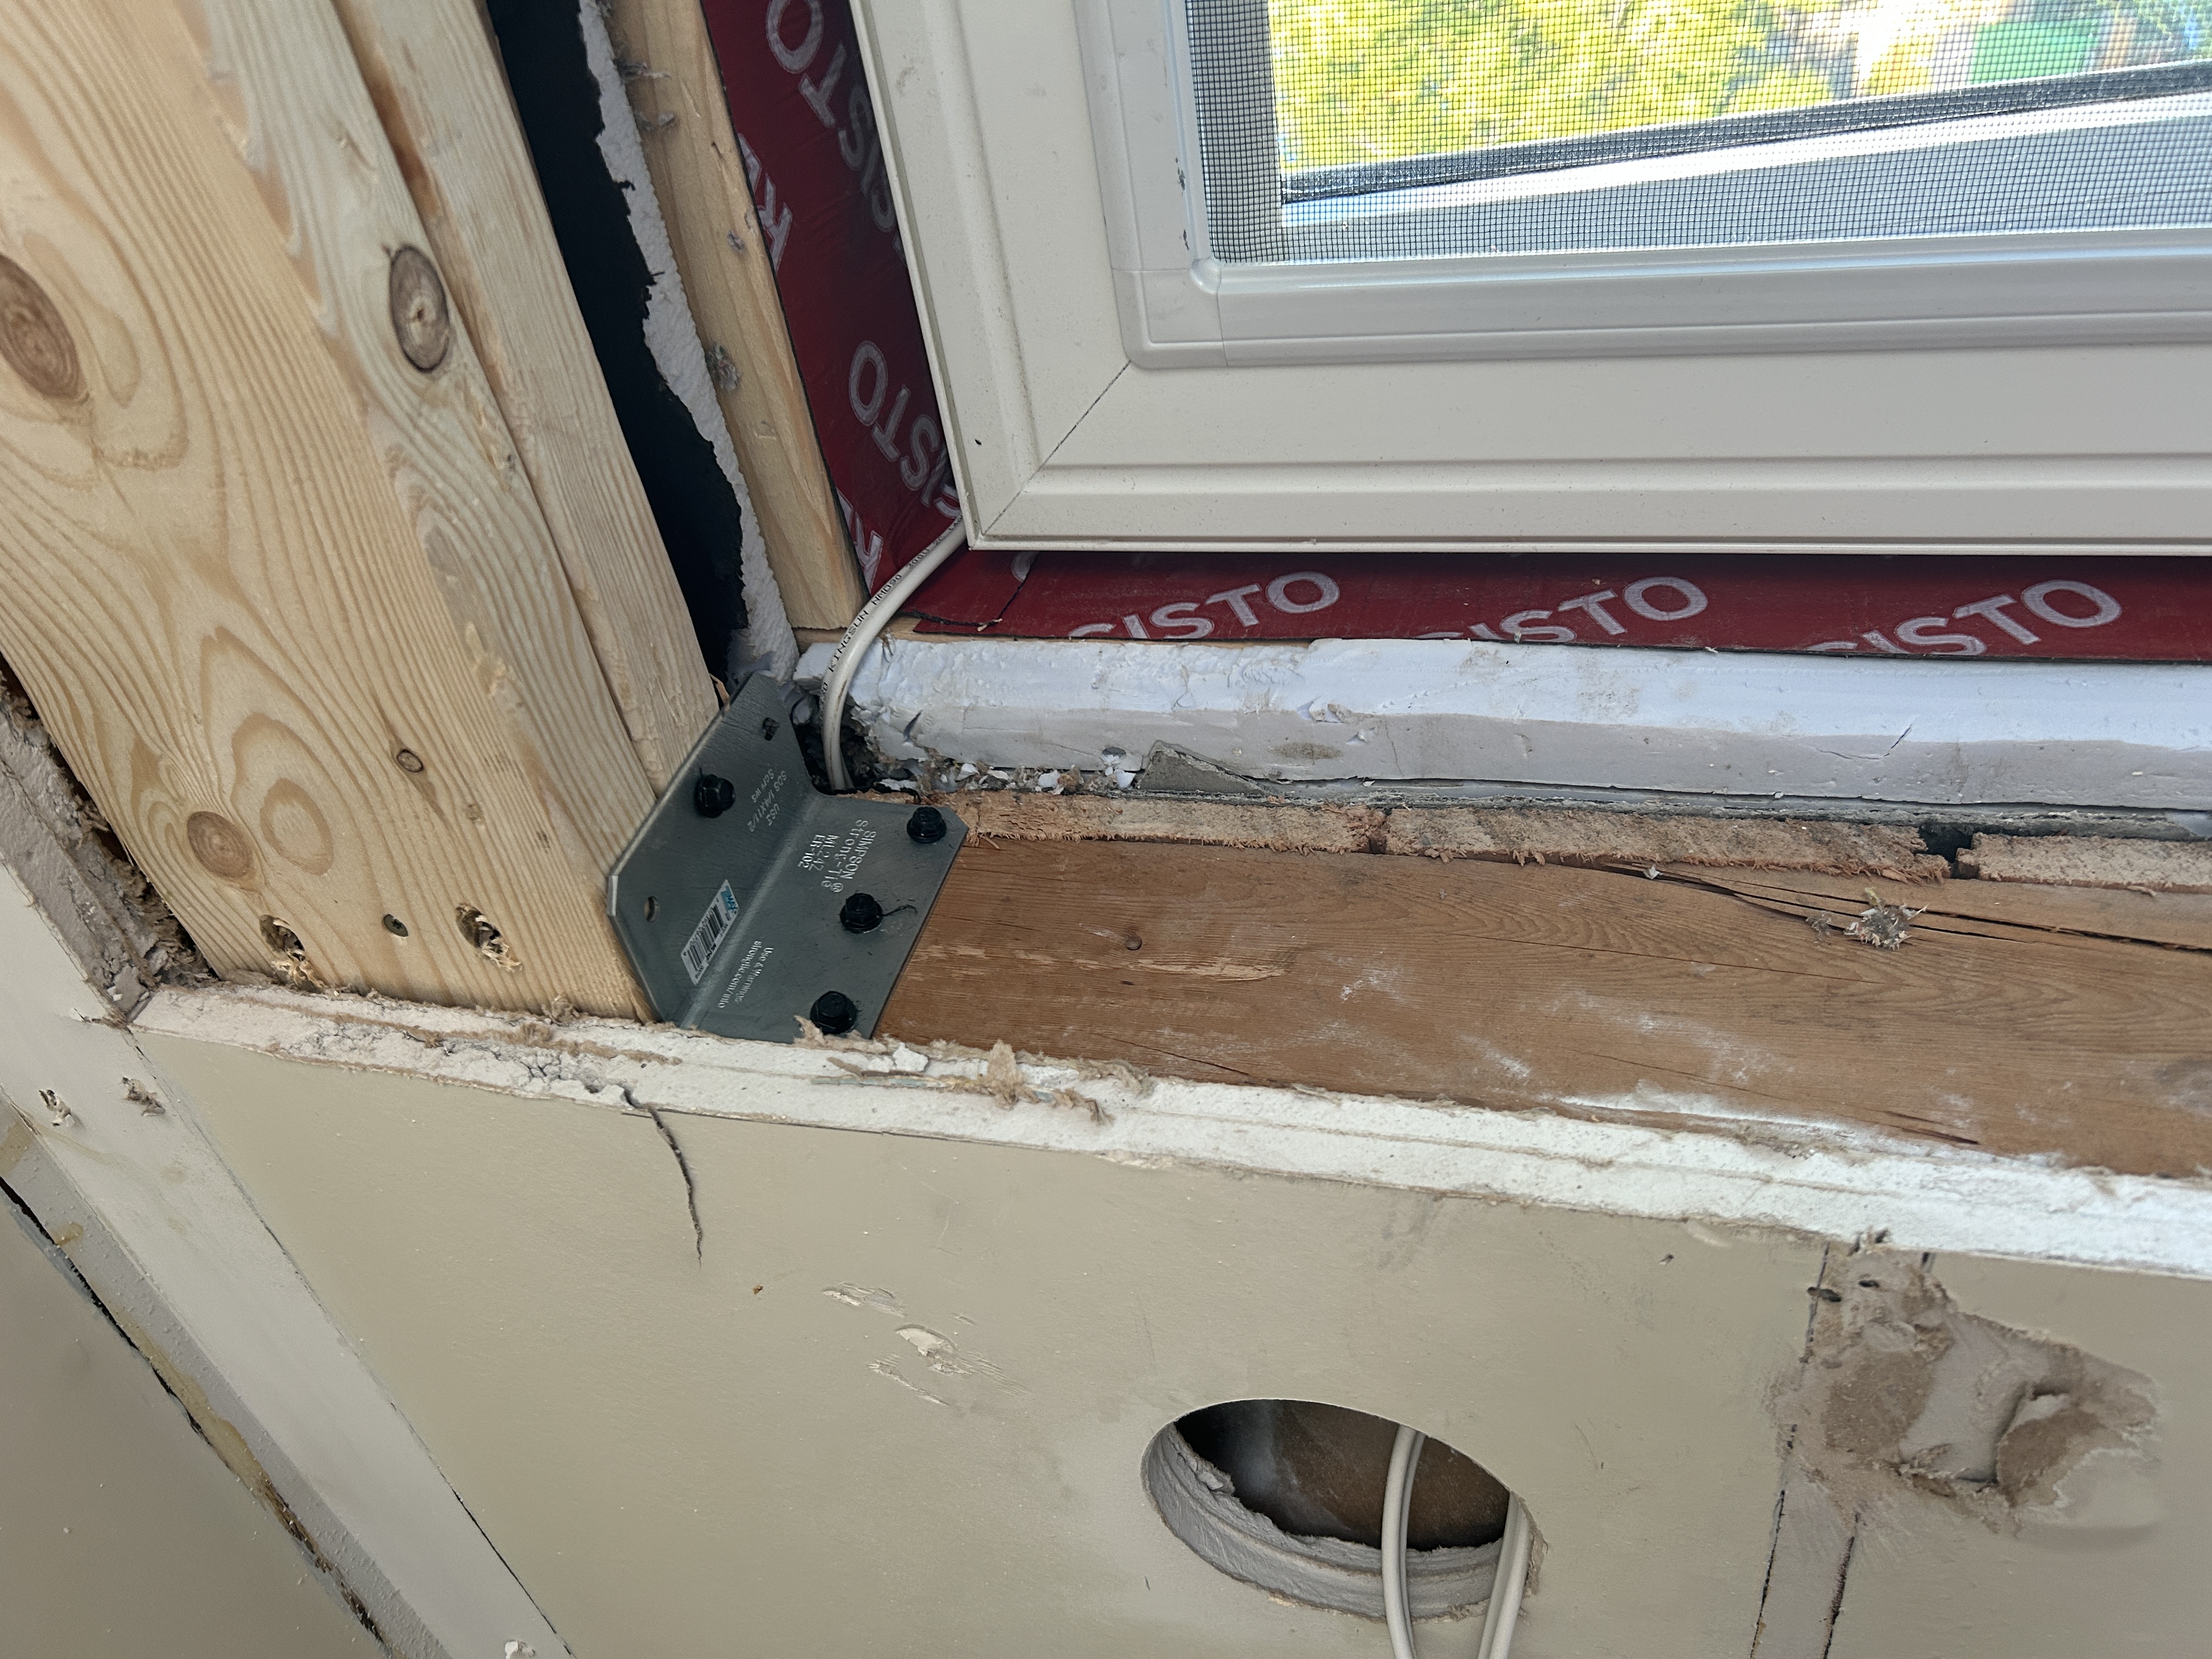
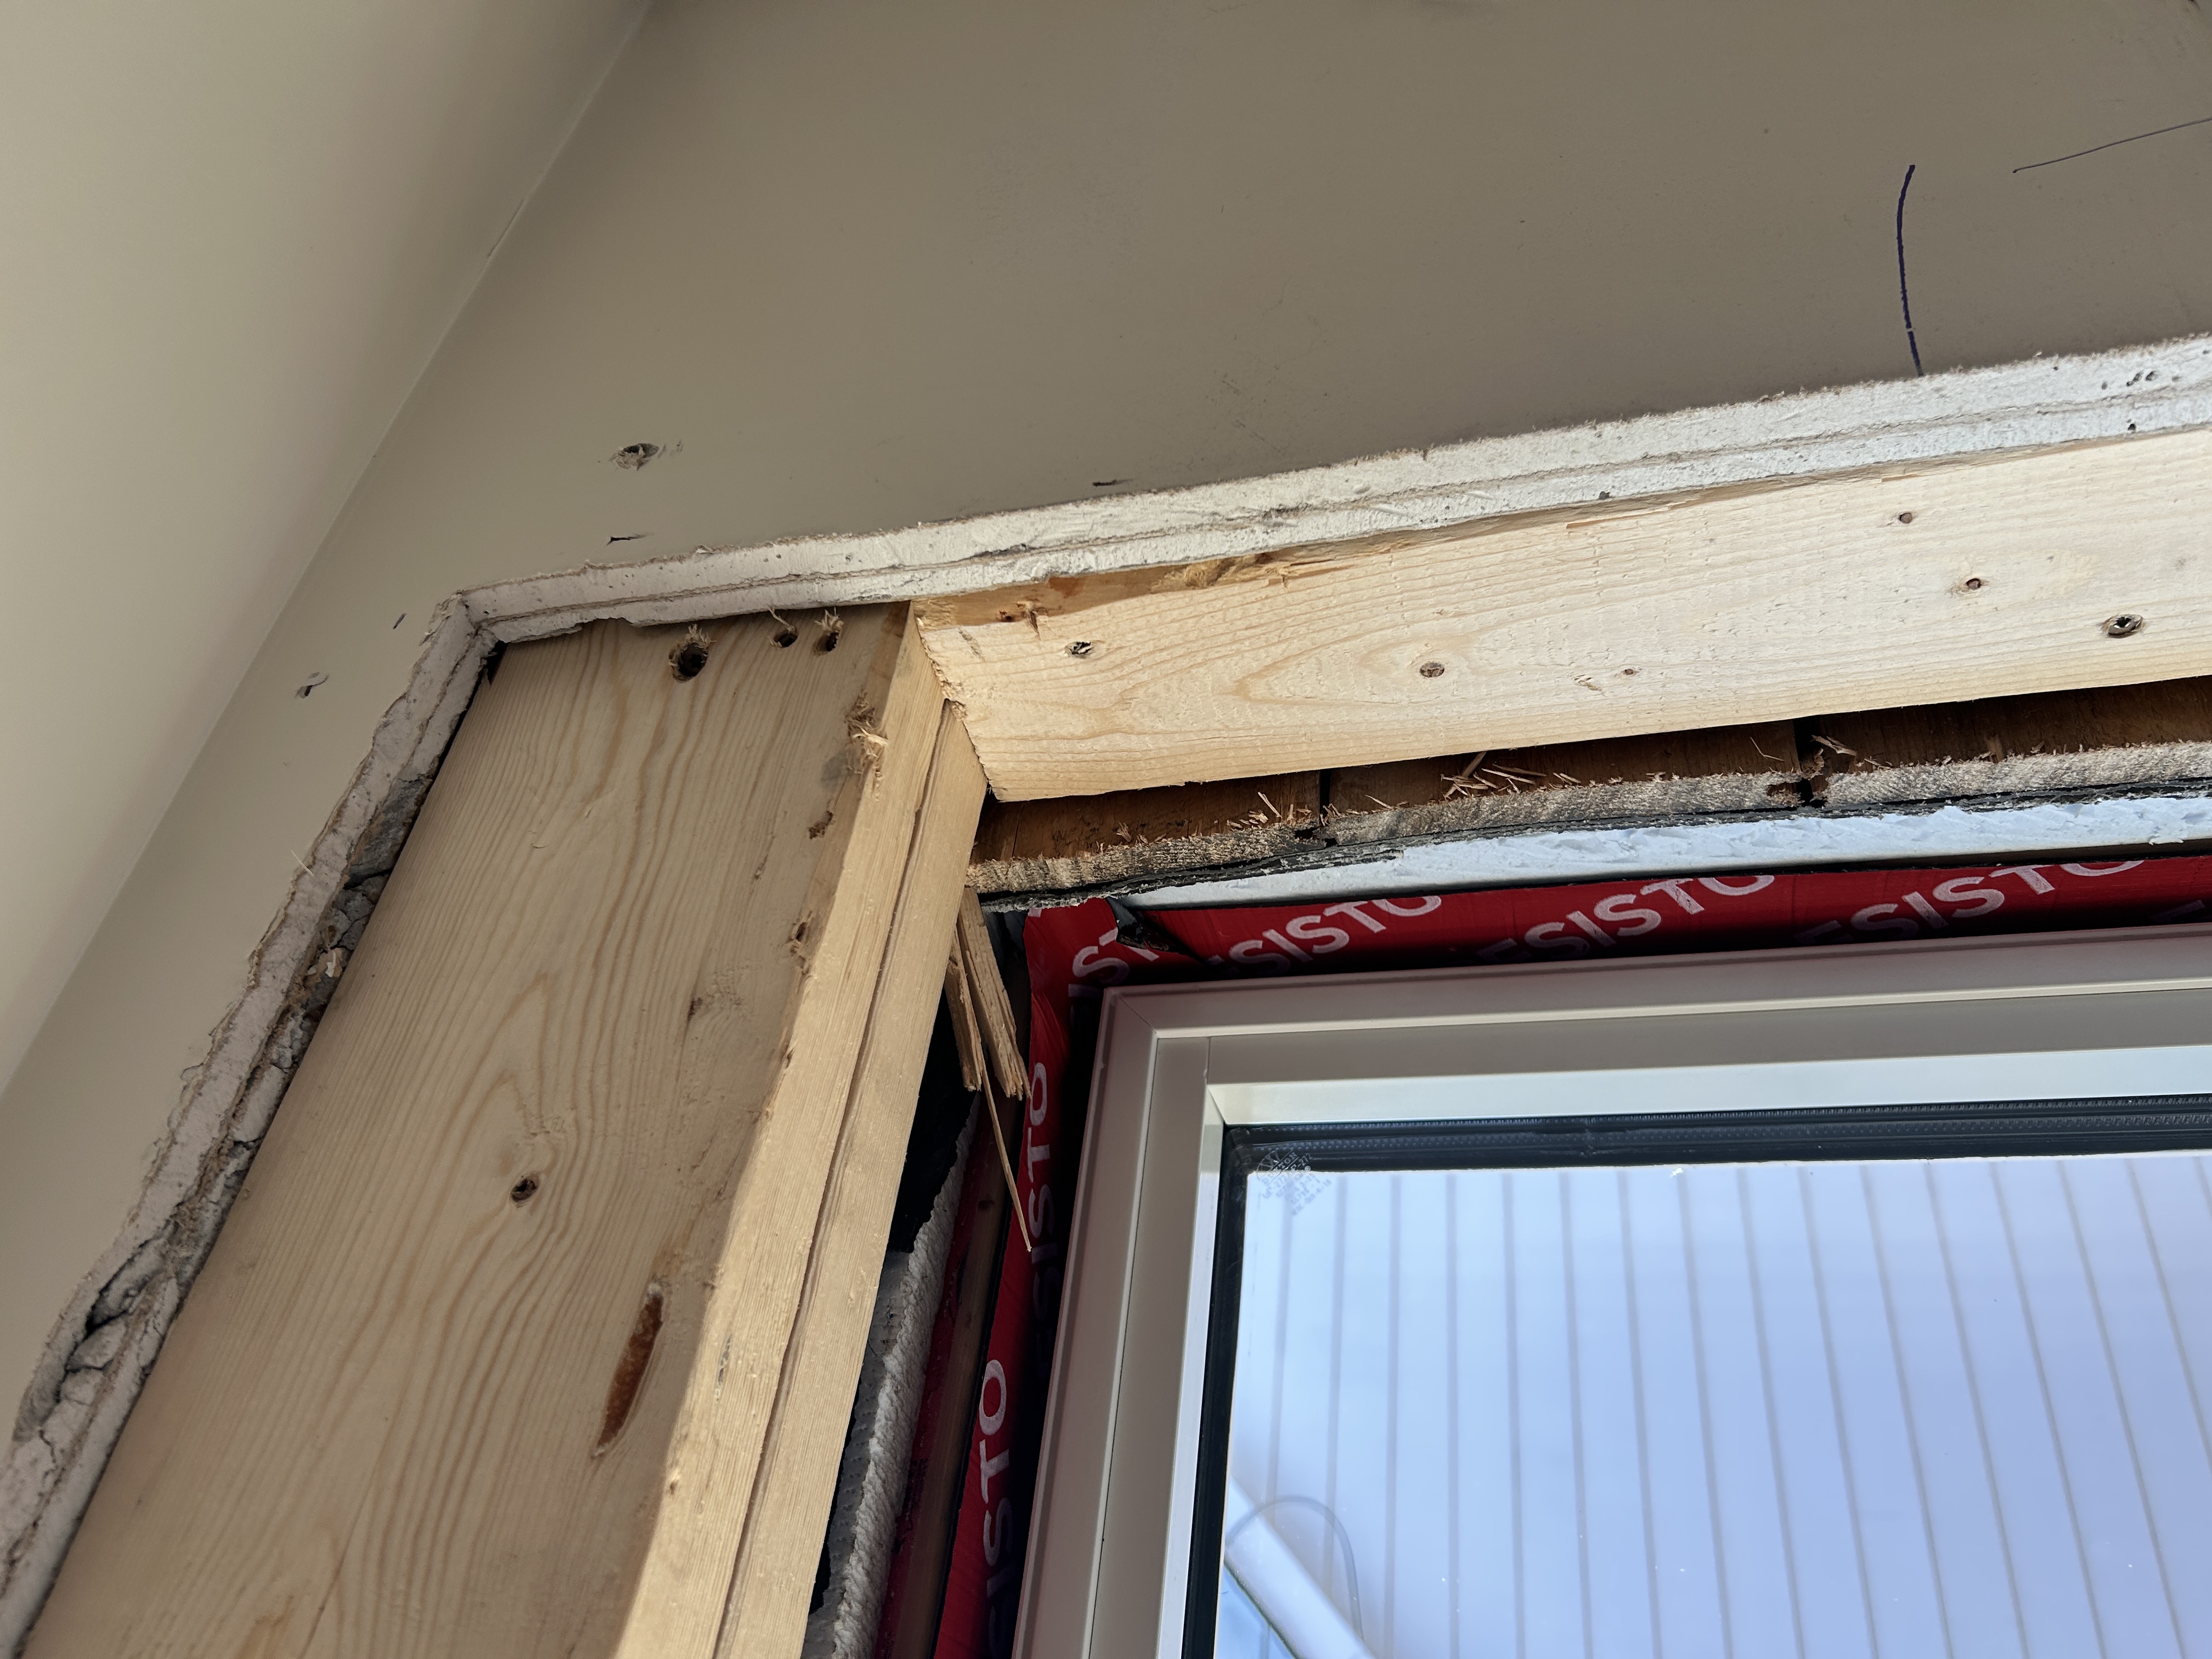
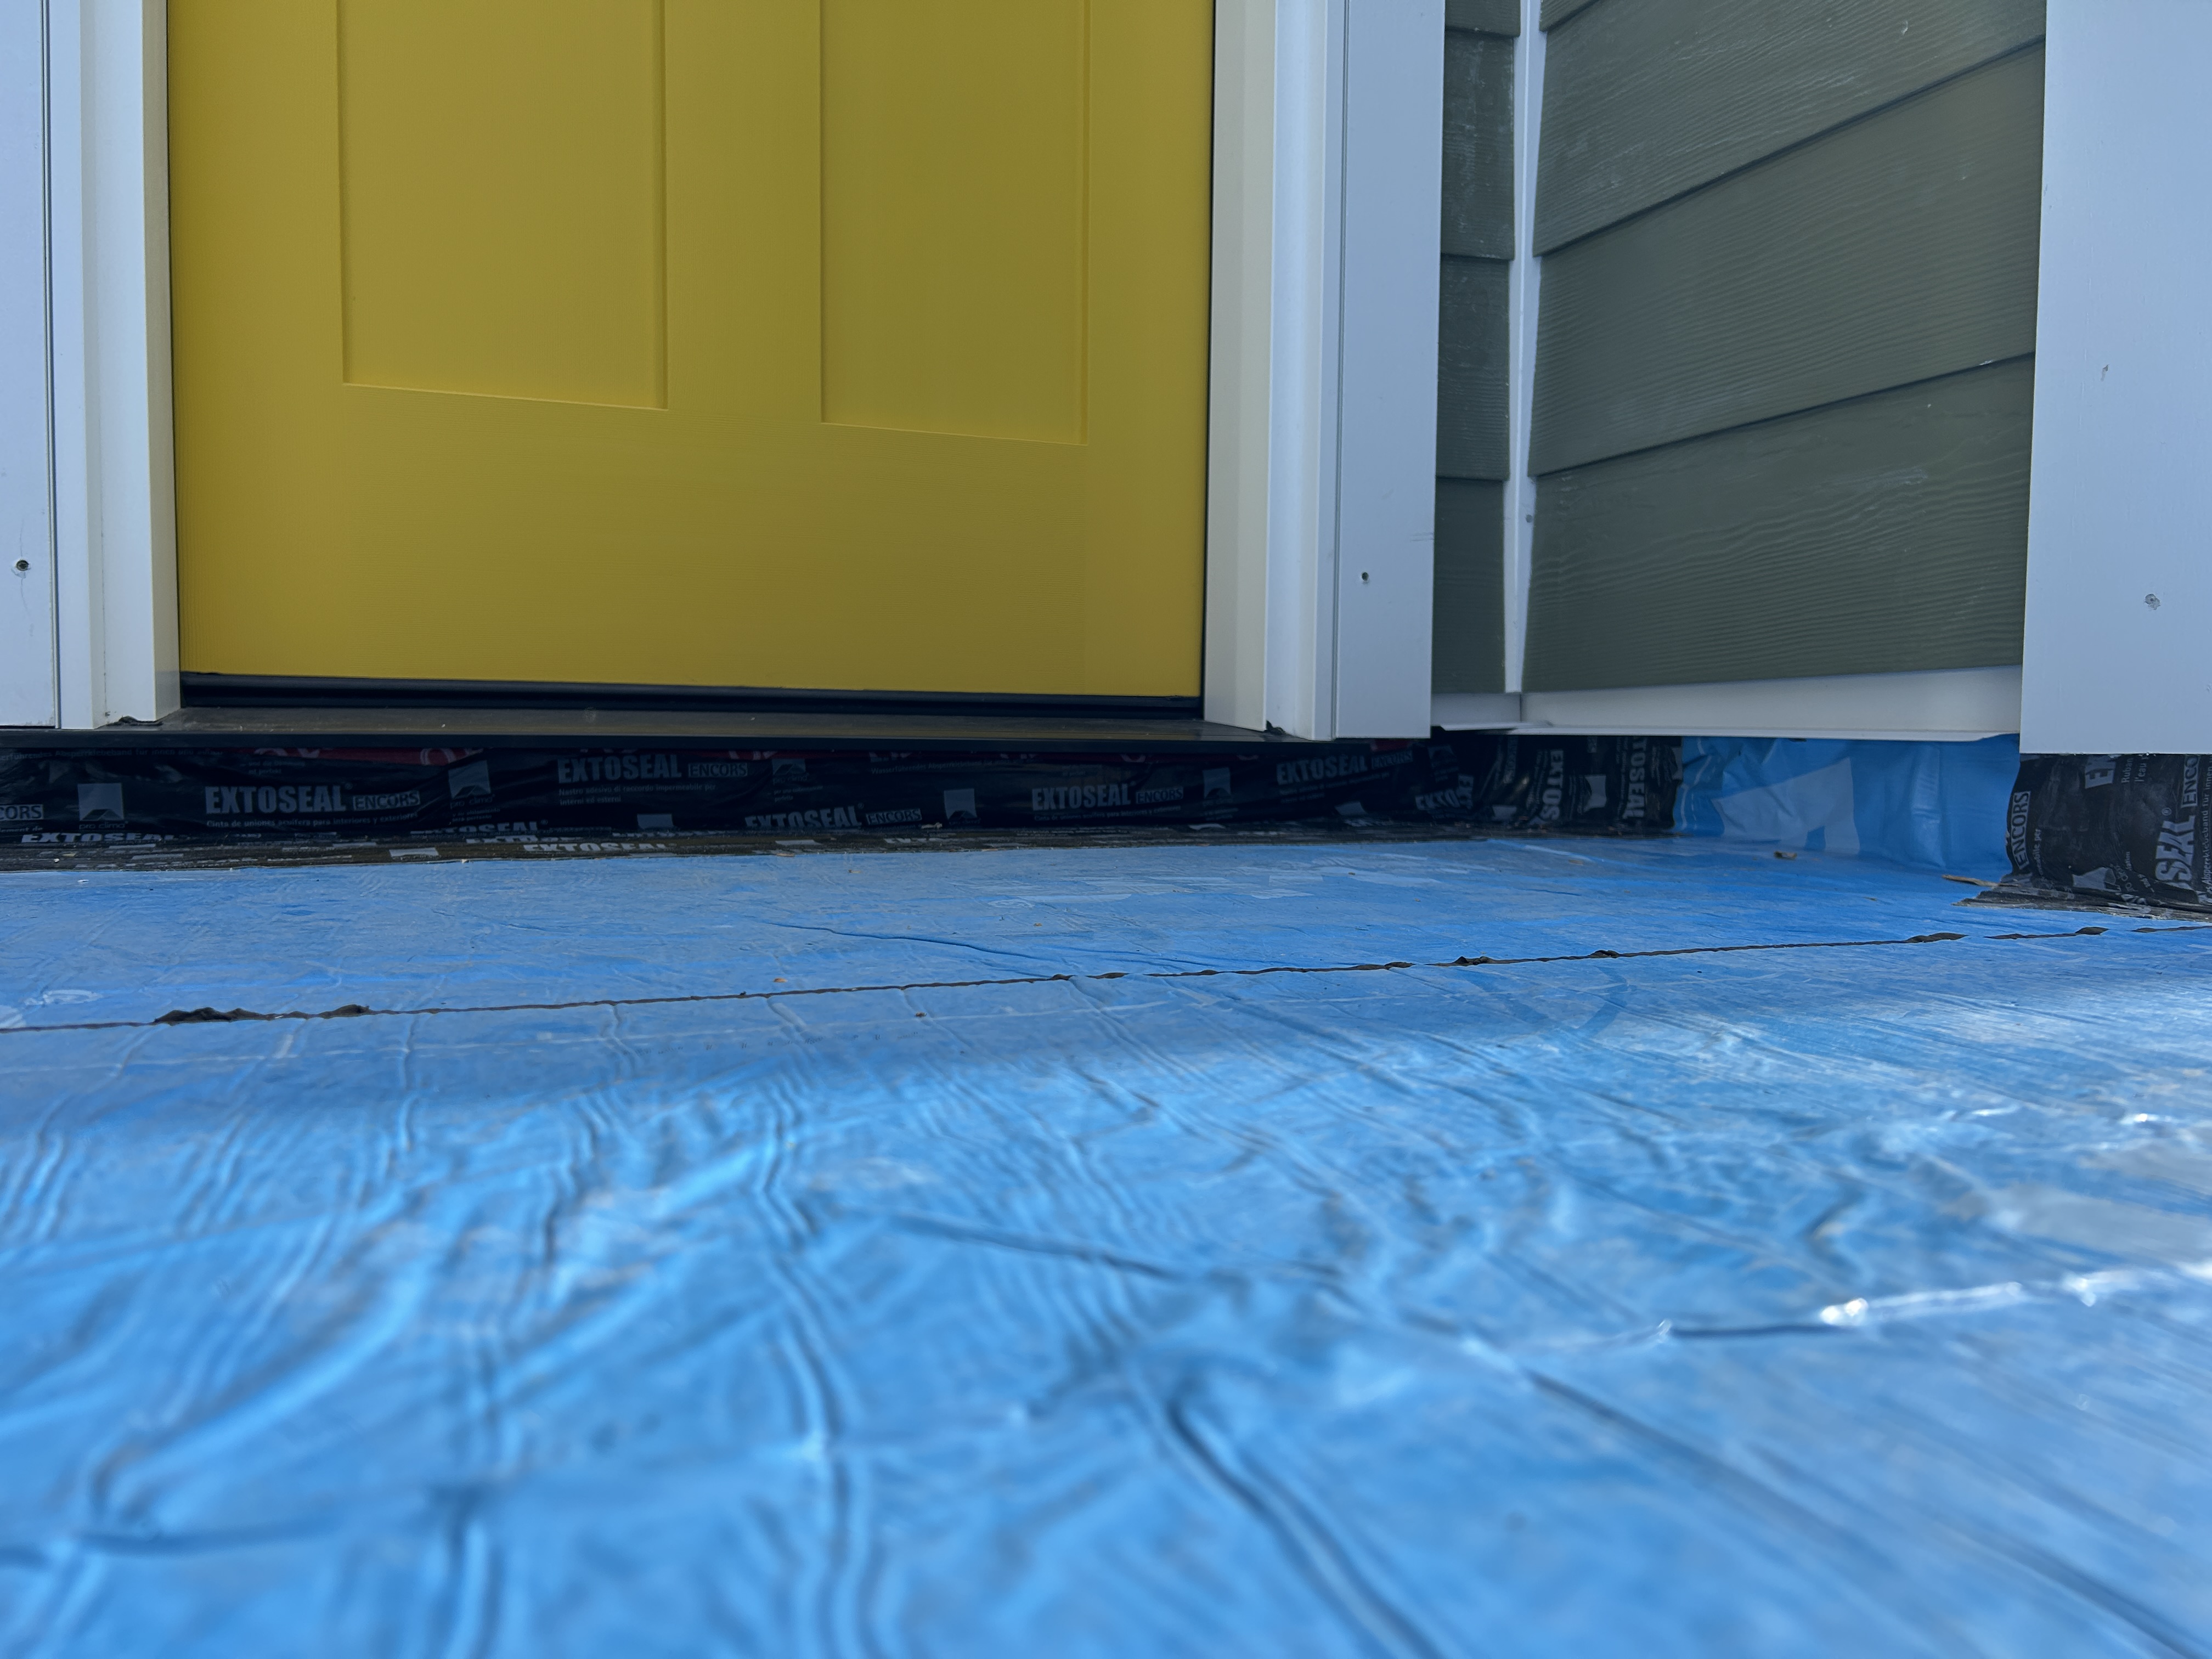
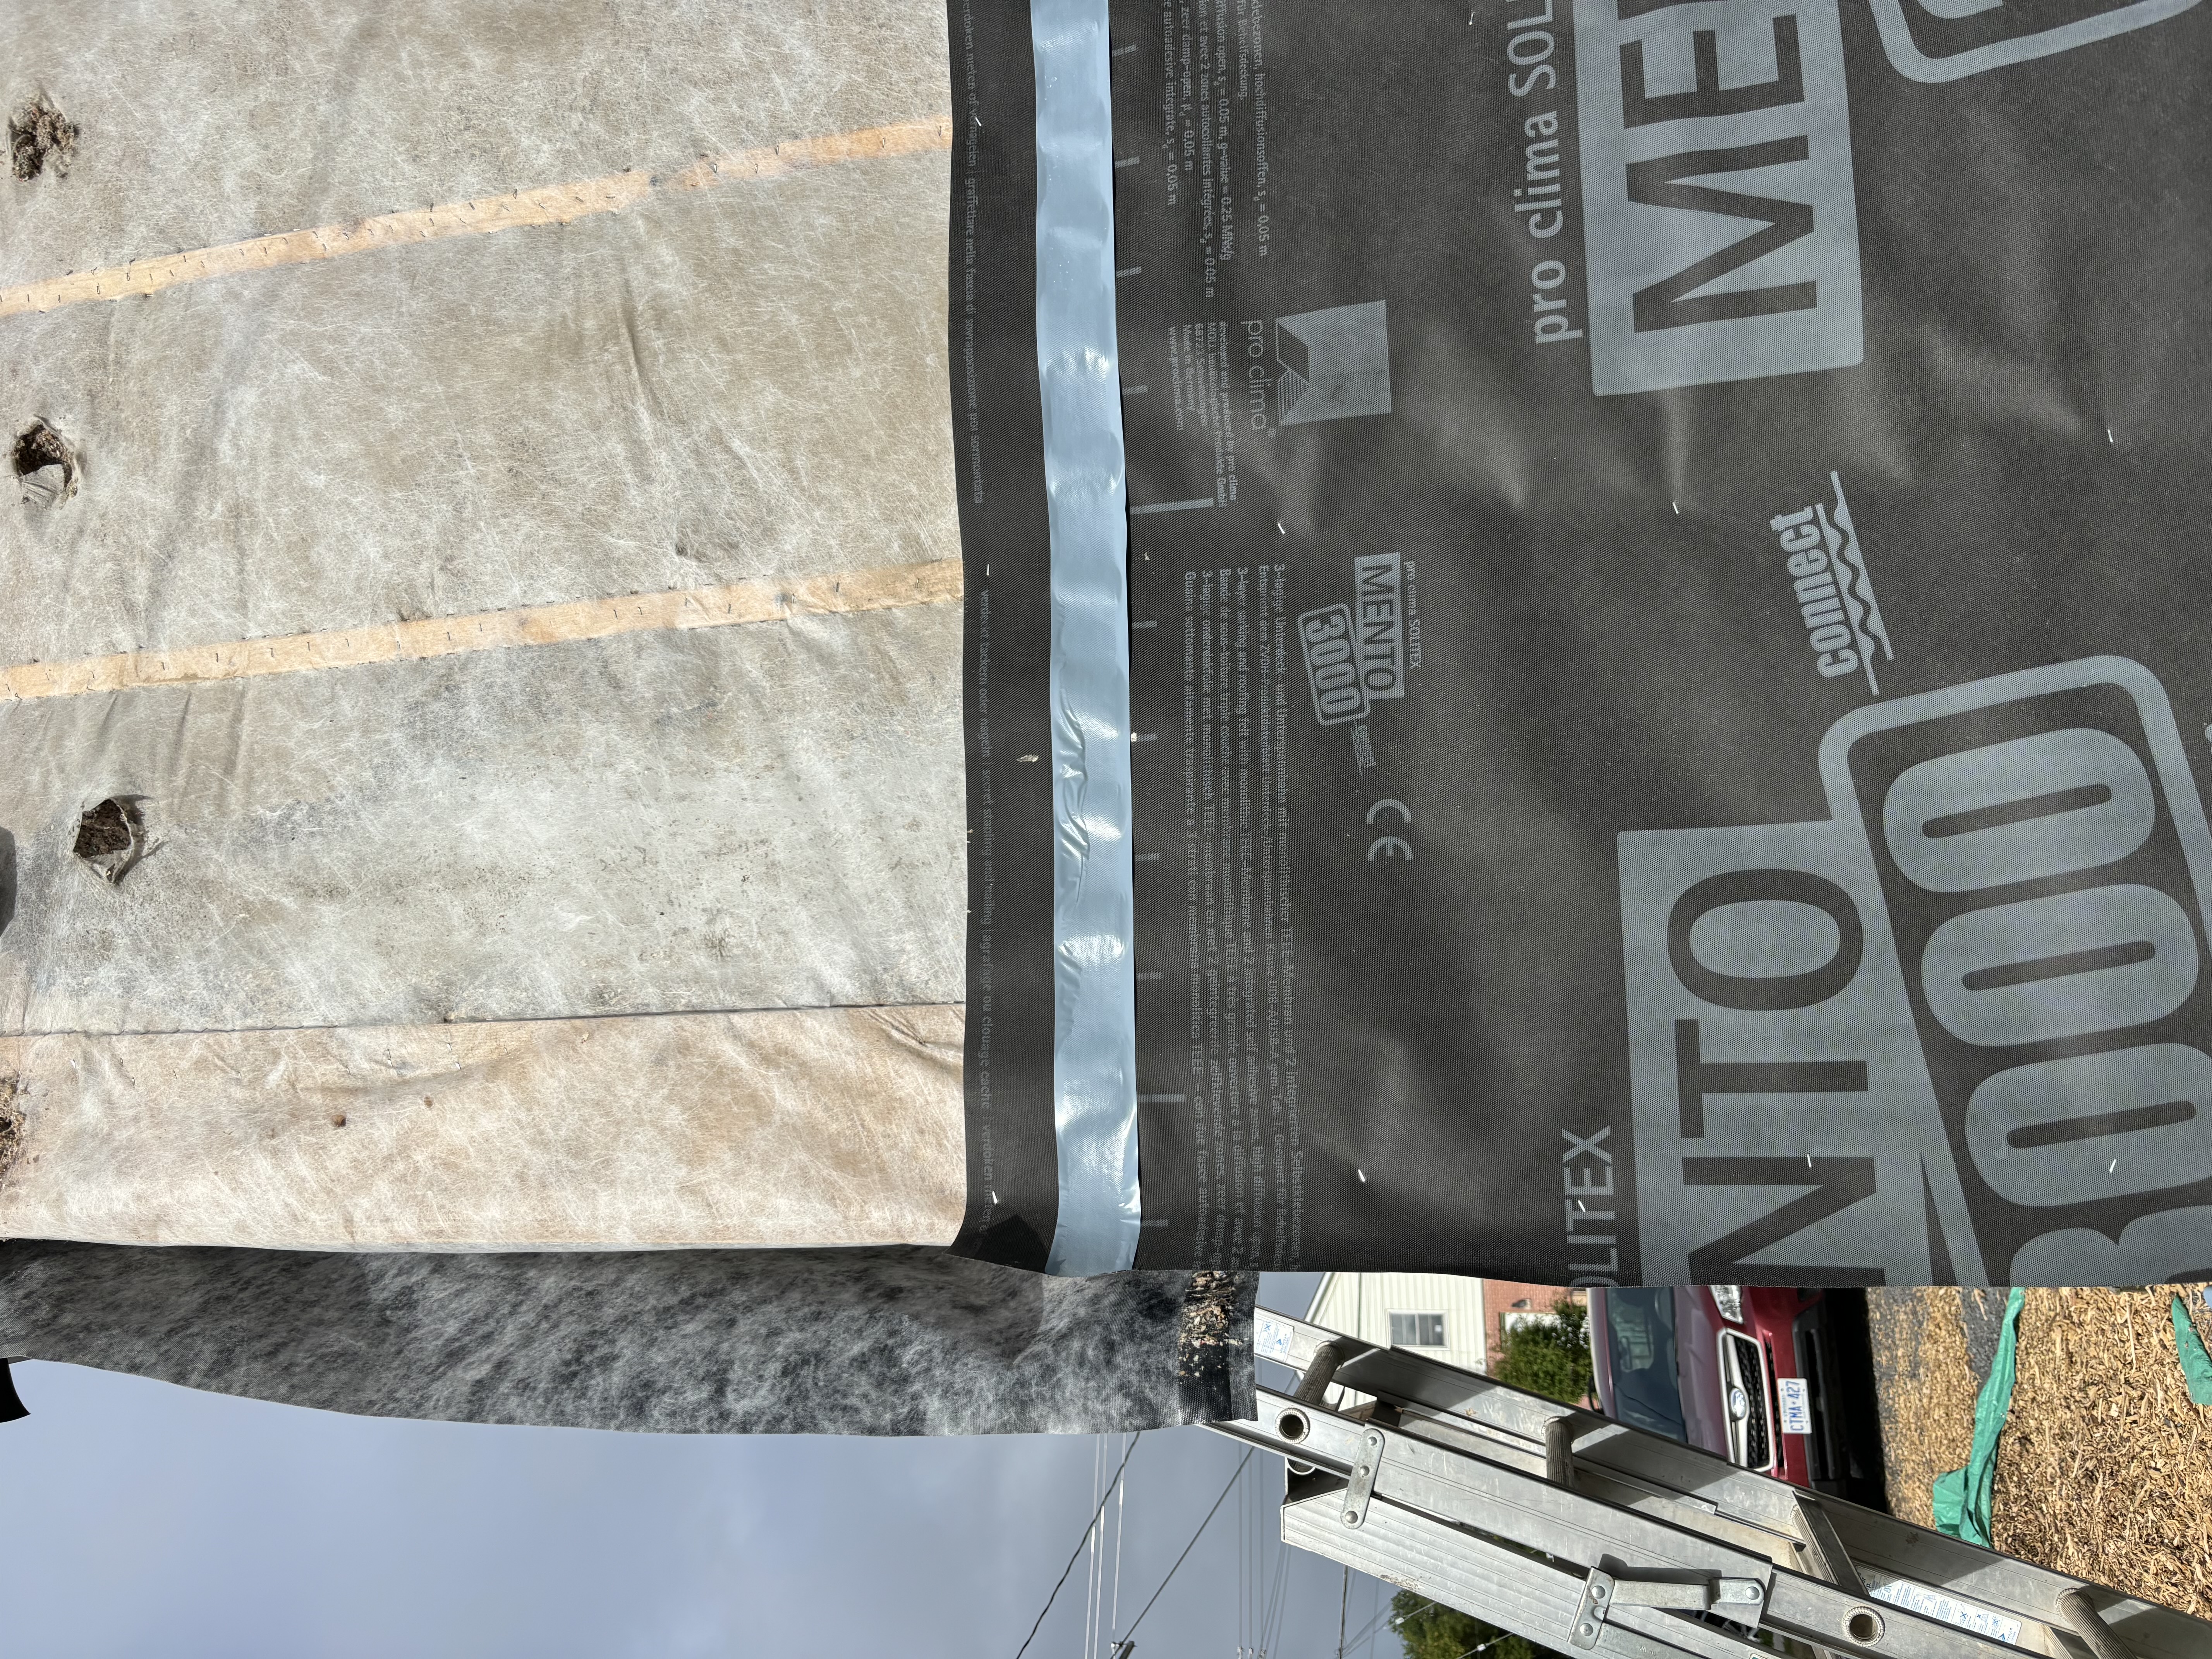
- Installing a new air barrier sealed to new windows, to the top of the foundation, to the attic spray foam and at all electrical and mechanical penetrations.
- Adding cellulose insulation to the exterior walls to R15, for a total of ~R26 (including the existing 2.5” – 3.5” in the interior wall cavities and 1” of blue XPS underneath old siding)
- Install new siding over a continuous vented rain screen.
Stage 4: Lessons Learned
- Insulation: We discovered that blown-in cellulose was a good solution, where we had originally planned to use rigid foam insulation. It was cheaper and easier to install, but achieved a similar R-value. We were lucky to find 1” of well-installed XPS already in place under the aluminium siding.
- There was a miscommunication about the spacing of the studs on the exterior and they were installed 16 on-centre. If we had spaced them further apart we could have included even more cellulose. It’s possible that this was unavoidable because the studs also supported the new siding.
- Water leak created during front door replacement: Thankfully we caught this because a heavy rainfall exposed that the replacement of the front door had created a path for water to infiltrate the basement cold room underneath the front porch. The builders were able to solve the problem by removing the door and adding more tape.
- Project delays led to exterior finishing work in less than ideal weather conditions. Things always take longer than you hope, but if we had started earlier in the summer we could have avoided problems like applying caulk in close to freezing temperatures.
- Good way to get the neighbours talking about energy efficiency! We generated a lot of curiosity with this project and had some great conversations about why we chose to do it.
Stage 5: Solar (Summer 2026 – tentative)
- Trenching power lines to the garage for connection
- Replacing asphalt tile roof with metal roofing
- Replacing old eavestroughs
- Installing solar panels
Before & After
General |
Envelope |
Mechanical & Electrical |
Annual Energy Usage |
Carbon Emissions |
Technical Documents
Videos
SE Ontario Deep Retrofit Webinar
Drawings or Details


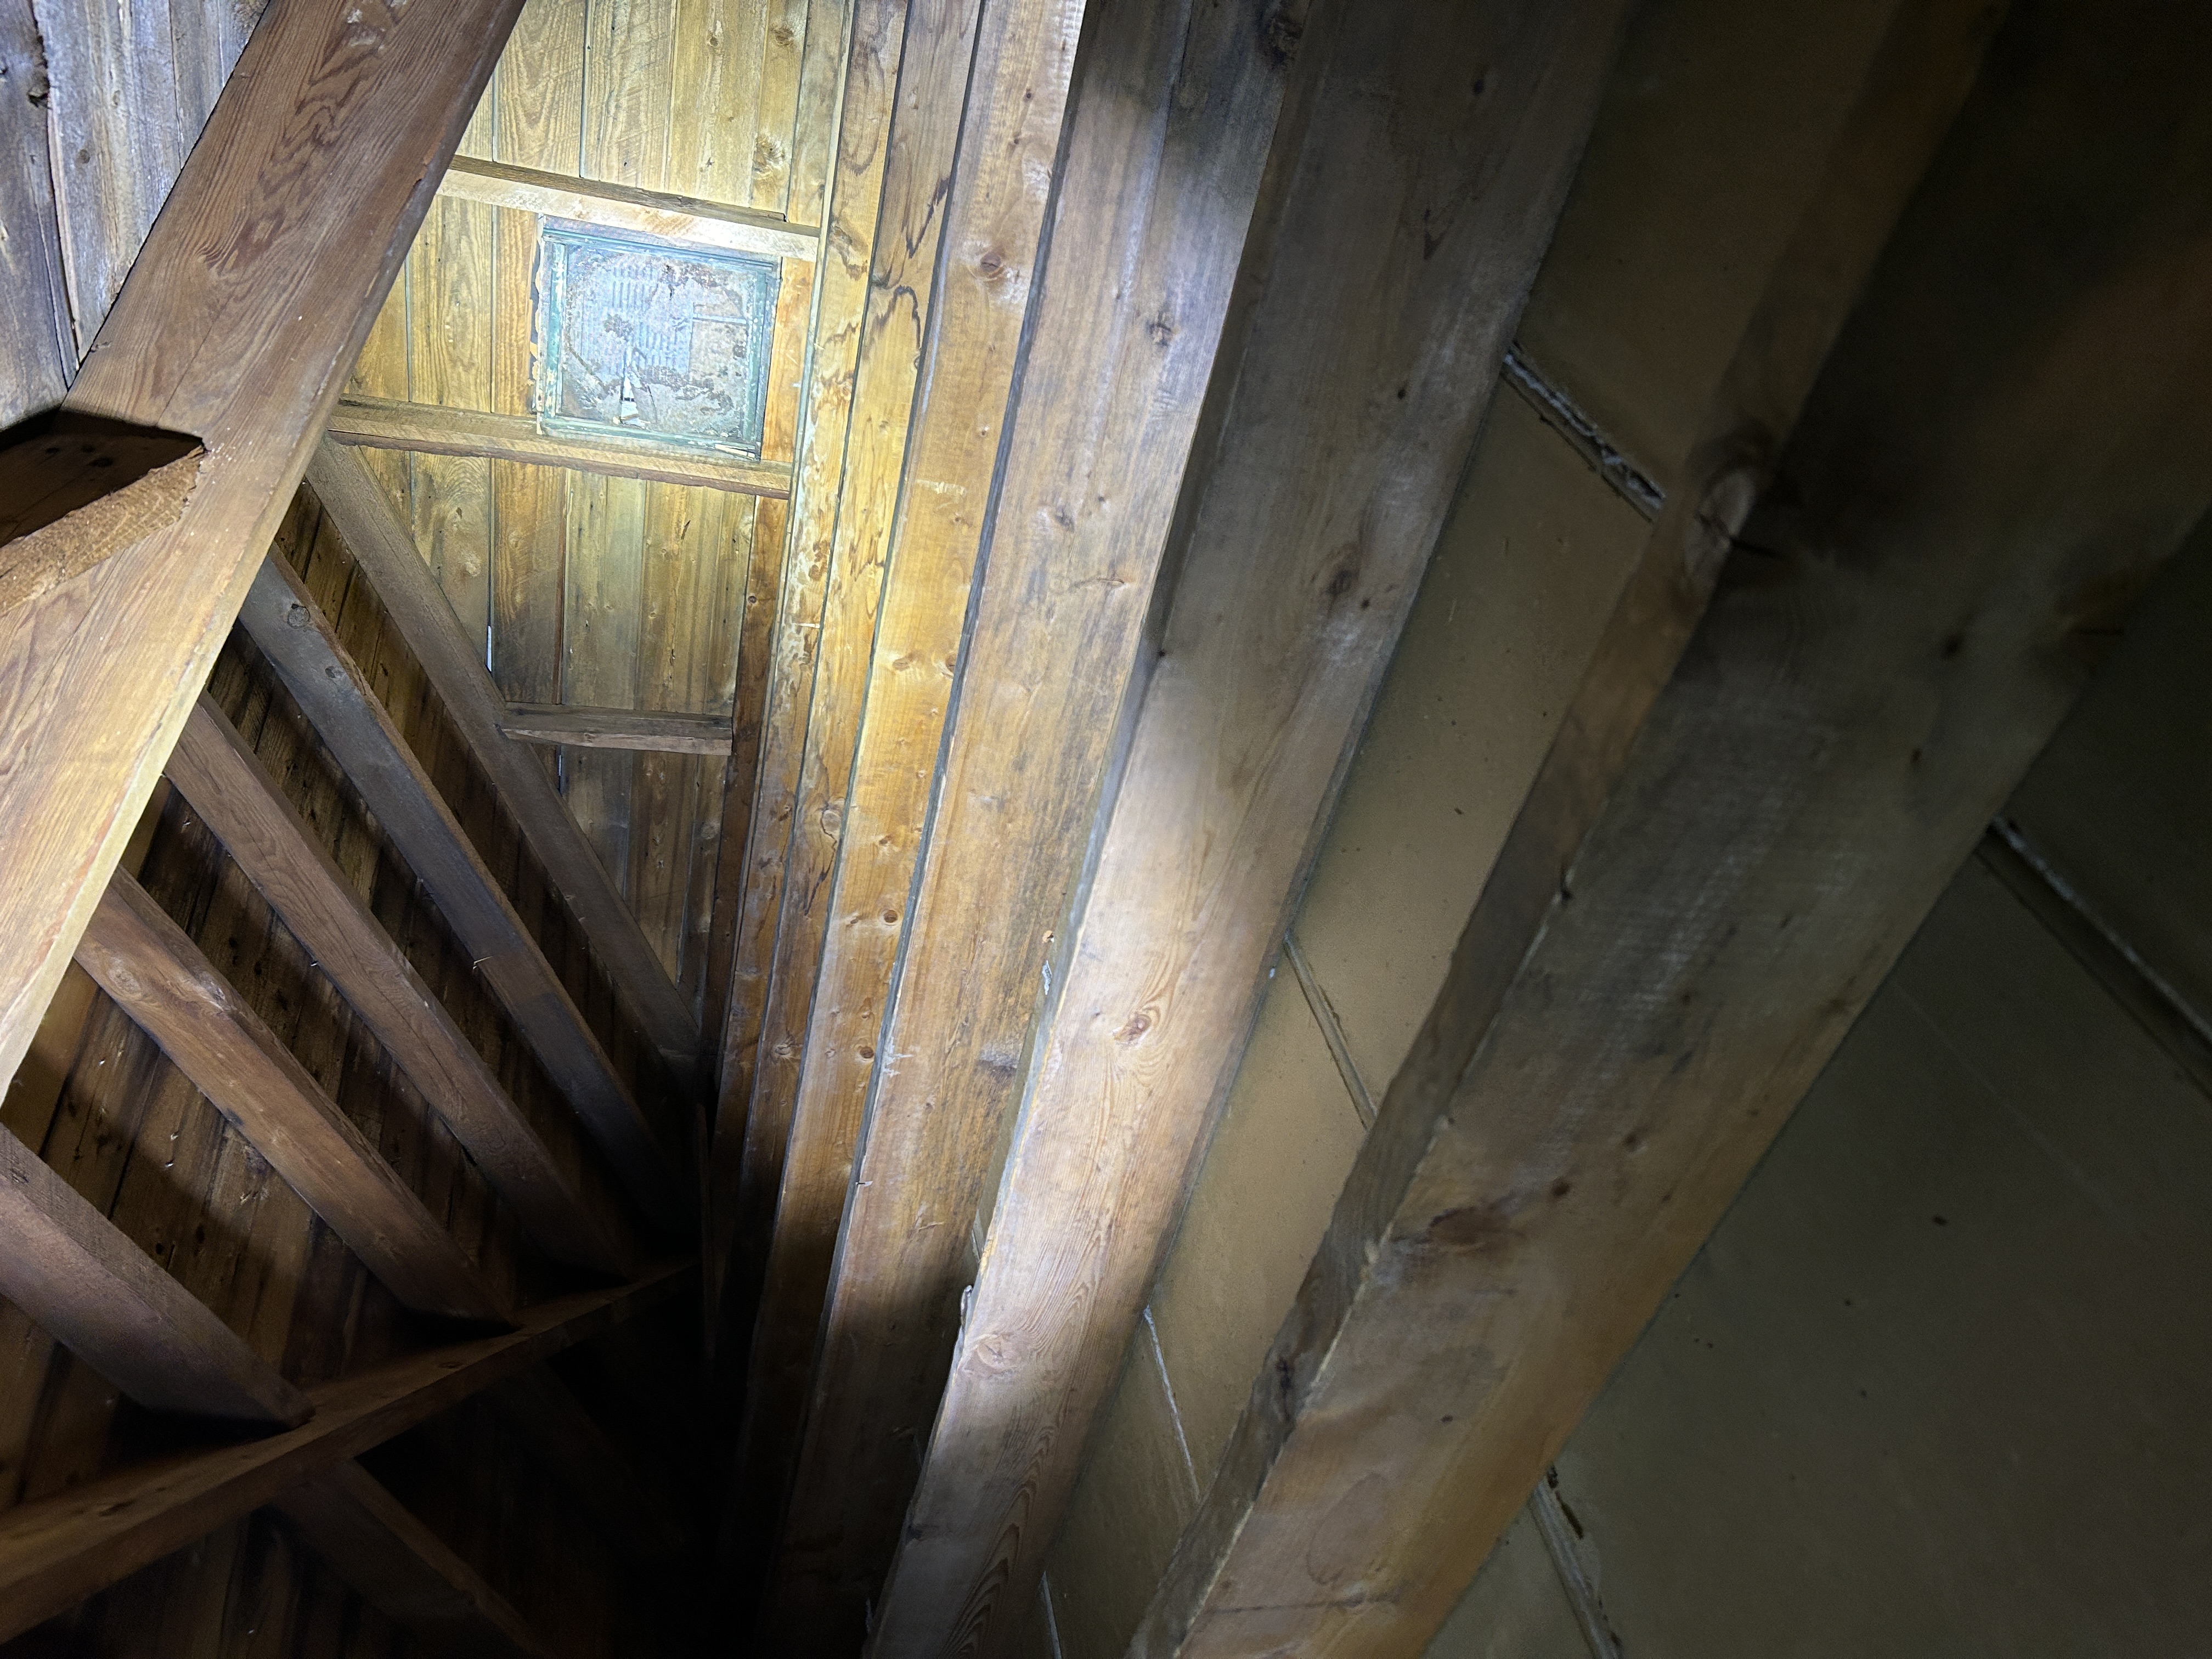
Photos
Pre Retrofit
During Construction


Post Retrofit